
Let's be honest. You've had that moment. You look at your cockatiel's nails and realize they're starting to curl.
Or you see them snag a claw on a cage toy and yank away in panic. Suddenly the question of how to groom a cockatiel stops being theoretical and becomes urgent.
The good news is that grooming a cockatiel isn't rocket science. It's a skill. It's a skill that requires patience, the right tools, and a solid understanding of bird anatomy.
As of 2026, the guidelines from the Association of Avian Veterinarians (AAV) remain the gold standard for safe home grooming practices. They emphasize that most grooming tasks happen because indoor birds lack natural surfaces to wear down their nails and beaks, so your job is to provide that maintenance safely. And we're here to walk you through exactly how to do that without turning it into a battle.
Quick Answer
Grooming a cockatiel includes nail trims, optional wing clips, beak checks, and bathing. Use guillotine-style clippers for nails. Cut tiny amounts to avoid the quick.
Never clip feathers past the shaft. Offer lukewarm baths regularly. Stop at signs of real distress.
Visit an avian vet for any beak issues or injuries.
Why Grooming Your Cockatiel Is About More Than Looks
Here's the thing most new owners miss. Grooming your cockatiel isn't about making them look pretty for Instagram. It's about health, safety, and comfort.
Overgrown nails are a genuine problem. They snag on cage bars, toys, and fabric. That snagging can cause broken nails, which bleed a lot and are painful.
Overgrown nails also force your bird to perch at an unnatural angle. That angle puts pressure on the joints in their feet and can lead to sores or arthritis over time.
Wing clipping is a safety decision. A bird that can't fly well in a home with ceiling fans, open doors, or unscreened windows is at risk. But a poorly done clip is also a risk.
The point of grooming here is harm reduction, not aesthetics.
Beak and feather care matters too. A healthy beak is used for eating, climbing, and playing. If it's overgrown or cracked, your bird can't do those things properly.
And feathers are your bird's insulation, their raincoat, and their flight equipment all in one. Regular bathing keeps them functioning correctly.
So yes, grooming looks like maintenance. But it's really preventive healthcare.
Core Grooming Tasks Explained
Grooming a cockatiel breaks down into four main tasks. Each one has its own tools, techniques, and safety rules. Let's go through them one by one so you know exactly what you're dealing with.
Nail Trimming: Anatomy, Tools, and Technique
Nail trimming is the task most owners dread. Here's what you need to understand first.
The anatomy that matters is the quick. That's the blood vessel and nerve bundle that runs through the center of the nail. On light-colored nails, you can see it as a pink line.
On dark nails, you can't see it at all. That visibility difference changes your whole approach.
If your cockatiel has light nails, you have an advantage. You can see exactly where to stop. If they have dark nails, you're working blind.
You need to take off tiny slivers at a time, or use a nail file to gradually reduce length.
The right tool is a guillotine-style bird nail clipper. Human nail clippers crush the nail before cutting it. That crushing sensation is uncomfortable for your bird and can cause splintering.
Guillotine clippers make a clean, single cut.
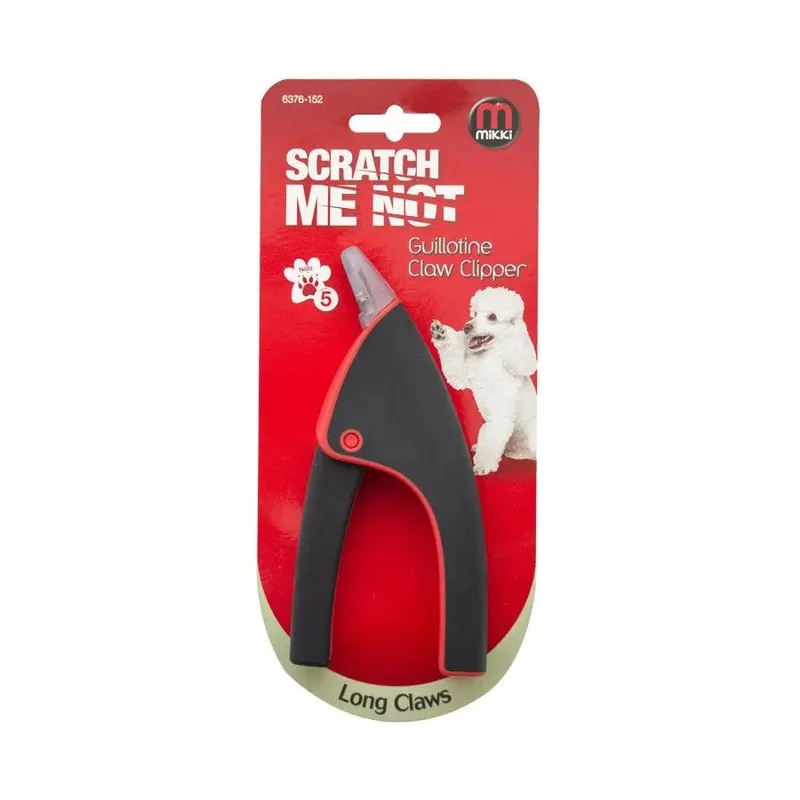
Image source: Bing (Web (fair-use with source credit))
The technique is simple, but it takes practice. Hold your bird securely in one hand, with their body supported. Extend one foot at a time.
Look at the nail from the side to find the quick. Then take a tiny cut at a 45-degree angle, just the very tip.
One nail at a time. Then the next. If you hit the quick, which happens to everyone eventually, apply styptic powder or cornstarch immediately.
It stops the bleeding fast. Then reassure your bird and finish the session.
Wing Clipping: The Controversy and What's Actually Safe
Wing clipping is the most debated topic in bird care. There are strong opinions on both sides.
Here's the balanced view. Wing clipping is not a medical necessity. A healthy cockatiel can live a long, happy life fully flighted.
But clipping can be a safety tool in specific situations.
The situations that call for clipping include homes with ceiling fans, open windows without screens, open doors to the outside, or very high ceilings with hard floors. It's also useful for birds that aren't yet trained to recall and might panic into a dangerous situation.
A safe clip removes only the first three to four primary flight feathers on each wing. These are the long outer feathers that provide lift and thrust. Removing them means the bird can flutter safely to the ground but cannot gain altitude.
A dangerous clip removes too many feathers, cuts past the feather shaft into the blood supply, or clips only one wing. Clipping one wing makes the bird spiral and crash. That can cause serious chest trauma.

Image source: Bing (Web (fair-use with source credit))
The safest route for a first clip is to have your avian vet show you. They'll demonstrate on your bird, point out exactly which feathers come off, and walk you through the proper technique. After that, you can decide if you're comfortable doing it yourself.
Beak Maintenance: When to Leave It Alone
Here's a surprising fact. You almost never need to trim a cockatiel's beak yourself.
A healthy cockatiel maintains their own beak through natural behaviors. They chew on toys, wood, cuttlebone, and mineral blocks. That chewing wears the beak down at the same rate it grows.
Your job is to provide those materials. A cage with a cuttlebone and some destructible toys is usually all your bird needs for beak maintenance.
What you should do is check the beak regularly. Look for cracks, asymmetry, flaking that seems excessive, or overgrowth that curls past the tip. If you notice any of those issues, that's a vet visit, not a grooming session.
Beak overgrowth can indicate liver disease, nutritional deficiencies, or mite infestations. None of those are DIY problems. And the beak itself is very sensitive.
Filing it wrong causes real pain.
Feather and Powder Down Care: Bathing and Molting
Cockatiels are dusty birds. They produce something called powder down, a fine white powder that coats their feathers. It's natural, but it means they need regular bathing to keep their skin and feathers healthy.
Bathing options include a shallow dish of lukewarm water in their cage, misting with a clean spray bottle, or a perch in the bathroom during a shower. The key is to offer the bath and let your bird decide. Never force it.
Molting happens every few months. Your bird will shed old feathers and grow new ones. During this time, you might see pin feathers, which look like spiky little shafts.
Those are new feathers growing in. They have a blood supply at the base.
Never pull or rub pin feathers. Let them open naturally. If you see blood in a feather shaft, that's a broken new feather.
Leave it alone and let it dry out. If it doesn't resolve in a couple of days, call your vet.
Step-by-Step: How to Trim Your Cockatiel's Nails Without the Drama
This is the moment of truth. You've got your tools. You've got your bird.
Now what?
Here's the step-by-step process that works, based on our research and verified owner experiences.
Step 1: Gather everything you need.
You don't want to be fumbling for tools with a wiggly bird on your hands. Have these within arm's reach:
- Guillotine-style bird nail clippers
- A nail file or emery board
- Styptic powder or cornstarch
- A clean towel
- Treats, like millet spray or sunflower seeds
Step 2: Set the scene.
Choose a quiet room with no distractions. Turn off the TV. Close the door.
If you're nervous, and that's completely normal, take a breath. Your bird picks up on your energy.
Step 3: Secure your bird.
The method depends on your bird's temperament. A calm, hand-tame bird might let you hold them in one hand and extend a foot with the other. A wiggly bird needs a gentle towel wrap.
The burrito method works well. Lay the towel flat, place your bird in the center, and fold the sides up around them. Leave their head exposed.
Support their body and let one foot poke out at a time.
Never squeeze. The wrap should provide enough restraint to prevent flapping, but it shouldn't compress their chest. A cockatiel needs room to breathe.
Step 4: Identify the quick.
Hold the foot up to the light. On light-colored nails, you'll see the pink quick running through the center. On dark nails, you won't see it.
In that case, be extra conservative with cuts.
Step 5: Cut tiny amounts.
Take a tiny slice off the very tip of the nail. Angle the cut slightly so the tip isn't sharp. If you see a small dark spot in the center of the cut surface, that's the quick getting close.
Stop.
Step 6: File the edge.
After each cut, gently file the tip smooth. Sharp edges catch on fabric and cage bars.
Step 7: Do one foot at a time.
If your bird is freaking out after the first foot, stop. Take a break. Coming back in a few hours or tomorrow is fine.
Forcing through a terrified bird only makes future trims harder.
Step 8: Reward immediately.
Right after the last nail, offer that millet spray. Your bird needs to learn that nail trims lead to delicious outcomes. This is the most important step for building long-term cooperation.
Step 9: Handle accidents calmly.
If you hit the quick and blood appears, don't panic. Apply styptic powder or cornstarch to the tip with light pressure. The bleeding stops in a few seconds.
Your bird is okay. Stay calm, offer a treat, and end the session.
Here's a truth that helps. Even experienced bird owners hit the quick sometimes. It happens.
It's not a disaster. It's just a signal to be more careful next time.
Wing Clipping: To Clip or Not to Clip?
This is the question that divides bird owners. Let's break it down fairly.
The case for keeping your bird flighted.
Flight is what a bird's body is designed to do. It's their primary form of exercise. It keeps their flight muscles strong, their cardiovascular system healthy, and their mind engaged.
A flighted cockatiel is a physically fit cockatiel.
The case for clipping.
Safety is the main reason. A bird that can't gain altitude can't reach a ceiling fan. A bird that can only flutter to the ground can't escape through an open door.
That's meaningful for households with real flight risks.
Who each option is best for:
| Situation | Recommendation |
|---|---|
| Bird-proofed home (screens, fans off, doors closed) | Keep flighted |
| New bird still learning recall training | Light clip for safety |
| Home with ceiling fans in active use | Light clip |
| Home with open windows without screens | Light clip |
| Elderly or mobility-limited owner | Light clip |
| Bird with coordination issues | Consult vet |
Here's the reality of a light clip. It removes the first three to four primary feathers on each wing. The bird can flutter down safely but can't lift off.
It's reversible. When the bird molts, the feathers grow back.
A full clip removes more feathers. It's riskier. A bird with too many feathers cut can drop like a stone and injure their chest.
Here's the non-negotiable rule. Never clip only one wing. That creates an aerodynamic imbalance that makes the bird spiral and crash.
If you're going to clip, and we want to be honest here, have your avian vet do it the first time. They'll show you the exact feathers to remove. They'll demonstrate the right technique.
After you've watched a professional, you can decide if DIY is right for you.
And if you're not sure? The safe choice is to keep your bird flighted until you've had a professional show you how to do it properly. An unclipped bird is safer than a badly clipped one.
Bathing Your Cockatiel: Methods That Work
Bathing is the grooming task most owners get wrong, usually by skipping it entirely. Cockatiels produce powder down, that fine white dust you see on your furniture and clothes. That powder needs regular washing off to keep their skin and feathers healthy.
Here's the part that surprises people. You don't need to scrub your bird. You need to offer them the chance to bathe and let them decide how it happens.
The three bath methods, ranked by ease:
Method 1: Misting
This is the easiest and most reliable option. Fill a clean spray bottle with lukewarm water. Adjust the nozzle to a fine mist.
Spray from above your bird, so the water falls like gentle rain. Most cockatiels actually enjoy this. They'll spread their wings and tilt their heads up to catch the droplets.
If your bird is nervous about the spray bottle, start by misting the air near their cage. Let them get used to the sound. Then gradually move closer over a few sessions.
Method 2: Shallow dish bath
Place a shallow dish or bowl of lukewarm water in the cage or on a play stand. Some birds will hop right in and splash around. Others will look at you like you've lost your mind.
That's normal.
The key is the depth. Water should be no deeper than about one inch. A cockatiel can bathe comfortably in shallow water.
Too deep and they'll be nervous.
Method 3: Shower perch
This option is great for birds that bond closely with their owners. Get a bird-safe shower perch and attach it to the shower wall, away from the direct spray. The steam and gentle mist from the shower creates a humid environment.
Many cockatiels love this. Just make sure the water isn't too hot and there's no direct spray hitting them.
The schedule that works:
Most cockatiels benefit from bathing two to three times per week. Some need more, especially in dry climates or during winter when indoor heating dries the air. Some need less.
Watch your bird's behavior and feather condition. If their feathers look dusty or they're scratching excessively, up the frequency.
The one rule you can't break:
Always bathe in the morning or early afternoon. Your bird needs time to dry completely before their evening sleep. A wet bird that goes to bed is a bird at risk for getting cold.
That's a genuine health concern.
Lukewarm only. Never hot, never cold. Test the water on your wrist, like you would for a baby.
If it doesn't feel comfortable on your skin, it's not right for your bird.
The Molting Cycle: What to Expect and How to Help
Molting is the natural process where your cockatiel sheds old feathers and grows new ones. It happens every few months, and it's completely normal. But it's also the time when your bird needs the most understanding.
Here's what's happening under those feathers. Each new feather starts as a pin feather, which is a shaft filled with blood and keratin. As the feather matures, the blood recedes and the keratin casing splits open, allowing the feather to unfurl.
That's why you see those spiky white or dark shafts on your bird's head and neck.
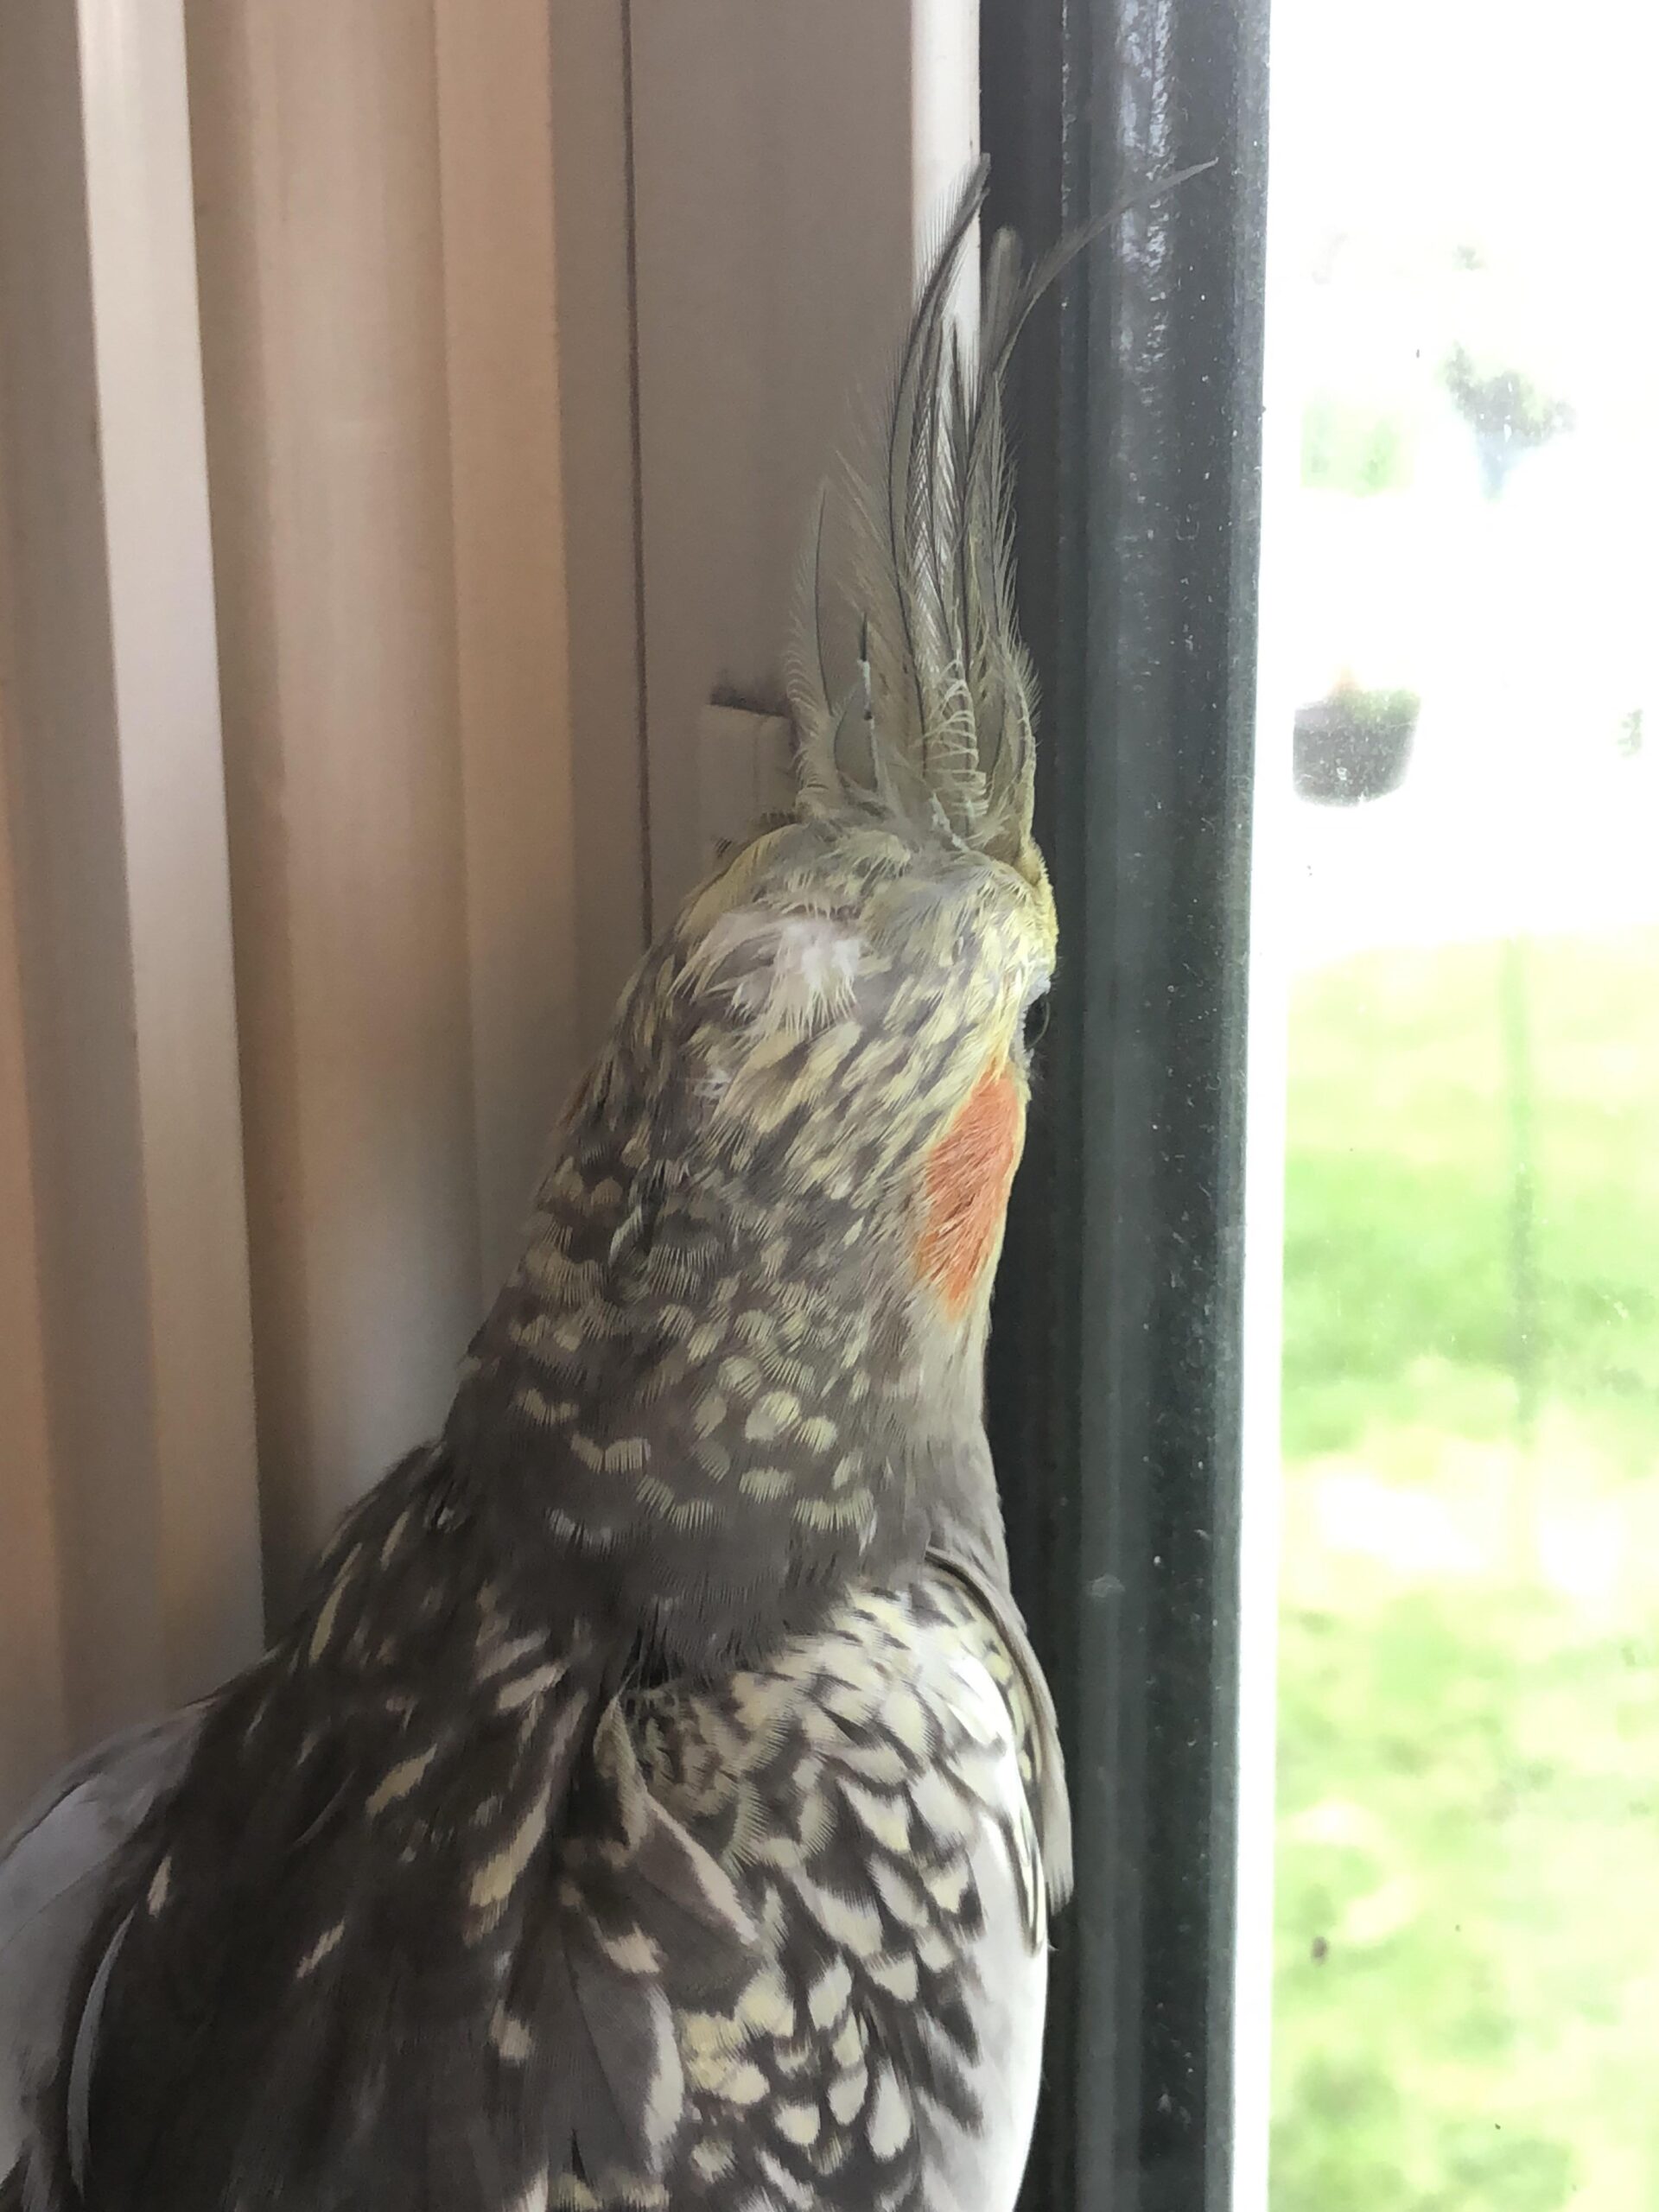
Image source: Bing (Web (fair-use with source credit))
During molt, your cockatiel might seem grumpy. That's not bad behavior. New feathers are sensitive.
Imagine having a headache across your entire body, or the feeling of a limb falling asleep. That's what your bird is experiencing.
How long does molt last?
Typically, a full molt takes four to six weeks. Some birds power through in three weeks. Others take eight weeks.
Young birds may have more frequent molts as they go through developmental feather replacements.
What you'll notice:
- Increased scratching and preening
- Pin feathers on the head and neck
- More feather debris in the cage
- A quieter, less active bird
- Possible decrease in appetite
How to help during molt:
Don't pick at pin feathers. This is the biggest mistake owners make. Those casings will open naturally. Rubbing or picking them before they're ready causes pain and bleeding.
The beak is the bird's natural tool for this. Let your bird handle it.
Increase humidity. A humid environment helps the keratin casings soften and open more easily. You can run a humidifier near the cage, or offer extra baths during this period.
Provide extra protein. Feathers are made of keratin, which is protein. Offering a small amount of cooked egg, a quality pellet mix, or a nutritional supplement designed for molting birds helps support feather growth. Check with your avian vet for specific recommendations.
Be patient with mood changes. Your bird might not want to be handled as much during molt. That's fine. Give them space.
Keep interactions short and positive. Offer treats but don't force cuddling.
Watch for signs of trouble:
A little dryness in the pin feather casings is normal. But if you see broken pin feathers that are bleeding, that's a problem. A broken blood feather needs immediate attention.
If the bleeding doesn't stop within a few minutes, or if your bird seems lethargic or in obvious distress, that's a vet visit. Don't wait. Blood feathers are a legitimate emergency.
The Association of Avian Veterinarians (AAV) recommends checking your bird's feather condition during molt. If you notice bald patches, excessive feather loss, or skin irritation, that could indicate something beyond normal molt. Feather plucking, for example, is a behavioral issue that needs professional help.
Mistakes to Avoid: What Most Owners Get Wrong
We've covered the right way to do things. Now let's talk about what goes wrong. Based on our research into avian veterinary forums and verified owner experiences, these are the most common grooming mistakes.
Mistake 1: Using the wrong nail clippers.
Human nail clippers crush the cockatiel's nail before cutting. That crushing sensation is painful and causes splintering. Guillotine-style bird clippers make a clean cut.
If you don't have them, file the nails instead of clipping.
Mistake 2: Cutting too much nail at once.
The quick follows the shape of the nail. A long nail has a long quick. If you take off a big chunk, you'll hit it.
Take tiny slices. The quick recedes over time, but only if you consistently trim small amounts.
Mistake 3: Clipping both wings differently.
One wing clipped and the other not is a danger. The bird spirals in the air and crashes. Always clip the same number of feathers on both sides.
Better yet, have a vet show you first.
Mistake 4: Skipping the styptic powder.
You will hit the quick eventually. Everyone does. Having styptic powder or cornstarch ready stops the bleeding in seconds.
Searching for it with a bleeding bird in your hands is a nightmare you want to avoid.
Mistake 5: Bathing at night.
Wet birds need time to dry. A bird that goes to bed damp can get cold, which opens the door to illness. Always bathe in the morning or early afternoon.
Mistake 6: Picking at pin feathers.
It's tempting to help your bird get those crusty casings off. Don't. The casings protect developing feathers that still have a blood supply.
Pulling them early causes pain and bleeding.
Mistake 7: Grooming a sick bird.
If your bird is lethargic, not eating, or showing signs of illness, grooming is the last thing you should do. Handling a sick bird adds stress. In that situation, call your vet before picking up any grooming tools.
Mistake 8: Forcing a frightened bird.
A bird that's screaming, biting, or flapping frantically isn't learning anything except that grooming is terrifying. Stop. Walk away.
Try again later or have your vet do it. Forcing through fear damages your bond and makes future sessions worse.
Mistake 9: Ignoring beak problems.
Cracks, overgrowth, or asymmetry in the beak are not grooming issues. They're medical symptoms. Liver disease, nutritional deficiencies, and mites can all affect beak health.
Get it checked by a professional.
Mistake 10: Using sandpaper perches.
Many owners think rough perches will naturally file their bird's nails. Sandpaper perches can cause painful sores on the bottom of your bird's feet. They're not recommended by avian vets.
Stick to regular perches and regular nail trims.
When to Skip DIY Grooming and Call the Avian Vet
There's a line between safe home grooming and needing professional help. Knowing where that line is can save your bird from serious harm.
Call your vet immediately if:
- Your bird has a broken blood feather that won't stop bleeding
- You see beak overgrowth, cracks, or asymmetry
- Your bird is lethargic, not eating, or fluffed up for more than a day
- Your bird has visible skin irritation or bald patches
- You're unsure whether a growth or bump is normal
Schedule a vet visit for:
- First-time wing clipping, so you can learn from a professional
- Any nail trim if your bird is aggressive or untamed
- A grooming session combined with an annual health check
Here's a scenario that happens more often than you'd think. An owner tries a wing clip at home based on a video they saw online. They clip too many feathers, or they miss the feather shaft and cut into the blood supply.
Now they have a bleeding bird, a panicking family, and a serious emergency on their hands.
That's not a grooming failure. That's a safety failure. And that's why we say this every time.
If you've never done it before, have a professional show you first.
The list of professionals who can help:
- Avian veterinarians (the safest option)
- Certified bird groomers (found at many exotic pet stores)
- Veterinary technicians at an avian practice
What to expect at a vet grooming appointment:
Most avian vets charge between $40 and $80 for a nail trim and wing clip combo. That's a small price for watching a professional handle your bird safely. You'll also have the chance to ask questions about technique and aftercare.
Some owners decide after one vet visit that they'll never do it themselves. That's completely valid. Regular vet grooming appointments are a perfectly good option.
There's no rule that says you must groom your bird at home.
Tools and Supplies: What's Worth Buying
You don't need a giant shopping cart of gear. But the right tools make grooming safer and easier. Here's what actually matters, based on manufacturer specifications and aggregate verified owner reviews.
The essential kit:
| Tool | Why It Matters | Approximate Price |
|---|---|---|
| Guillotine-style bird nail clippers | Clean cuts, no crushing | $8 to $15 |
| Styptic powder or cornstarch | Stops bleeding instantly | $5 to $10 |
| Nail file or emery board | Smooths sharp edges after cutting | $2 to $5 |
| Clean towel | For gentle restraint wraps | $3 to $10 |
| Spray bottle with fine mist setting | For regular bathing | $5 to $12 |
| Shallow dish or bowl | For dish bathing | $2 to $8 |
| Cuttlebone | Natural beak maintenance | $3 to $6 |
| Mineral block | Beak and nutritional support | $4 to $8 |
What you can skip:
- Sandpaper perches (causes foot sores)
- Human nail clippers (crushes nails)
- Electric nail grinders (too aggressive for small birds)
- Any tool with sharp scissor blades (too easy to cut too much)
What's worth an upgrade:
Choose a styptic powder specifically formulated for birds. Some human versions contain ingredients that aren't ideal for birds. A bird-specific formula is worth the few extra dollars.
For spray bottles, pick one with an adjustable nozzle. The fine mist setting is what you want. A harsh jet of water will terrify your bird.
If you're going the dish bath route, skip plastic bowls. Ceramic or stainless steel is easier to clean and doesn't harbor bacteria.
A note on quality:
Cheap nail clippers dull quickly. A dull blade crushes the nail instead of cutting it. That defeats the entire purpose.
You don't need top-of-the-line, but avoid the absolute cheapest option. A mid-range pair from a reputable bird supply brand will last years.
Check the blade condition periodically. If you notice the cut isn't clean or you're having to press harder, it's time for a replacement.
Where to buy:
Local pet stores with bird sections, avian vet offices, and specialty bird supply retailers online. Skip the generic big-box pet stores that carry hamster-grade tools. Look for brands specifically designed for birds.
Your avian vet can also recommend specific brands and may even sell the tools they use. That's a good starting point.
Building a Grooming Routine That Works Long-Term
A single successful grooming session is great. A routine that keeps your bird healthy for years is better. Consistency matters more than perfection.
The goal is simple. You want grooming to become a predictable, low-stress part of your bird's life. That means a schedule, a predictable pattern, and a positive association.
The frequency guide that works:
| Task | Recommended Schedule |
|---|---|
| Nail trimming | Every 4 to 8 weeks, depending on growth rate |
| Wing clipping | Only when feathers grow back (every 6 to 12 months) |
| Beak check | Weekly, during handling |
| Bathing | 2 to 3 times per week |
| Full health check | Annually at the avian vet |
Here's the trick about nail trims. The quick recedes when nails are kept short. If you trim every month, you only need to take off a tiny sliver each time.
If you wait four months, you're cutting more and risking the quick. Regular small trims are far safer than occasional big ones.
Building the positive association:
Cockatiels learn by pattern. If grooming always ends with millet spray, they'll tolerate grooming. If grooming sometimes means pain or stress, they'll fight it.
Make training a separate step. Spend a week just handling your bird's feet. Touch each toe gently.
Offer a treat. Let them learn that foot handling isn't scary. Then introduce the clippers, letting them inspect the tool.
Only after they're comfortable with feet touching and tool presence should you attempt a trim.
For bathing, consistency matters too. Offer a bath at the same time every other day. Your bird will start anticipating it.
Many cockatiels actively enjoy bath time once they realize it's regular and predictable.
Adapting to your bird's temperament:
Every cockatiel has a personality. Some are bold and love hands-on interaction. Others are shy and prefer their space.
If your bird is naturally nervous, keep sessions extremely short. Two minutes of nail trimming is plenty. End before your bird gets distressed.
Over time, you'll build tolerance.
If your bird is aggressive during grooming, don't push through. That's a recipe for bites and broken trust. Step back and consult your avian vet or a certified bird behaviorist.
The seasonal adjustments:
Winter with indoor heating makes the air dry. Your bird's skin and feathers will suffer. Increase misting frequency to every other day.
Consider a room humidifier near the cage.
During breeding season, which usually falls in spring, hormones change your bird's behavior. They may be more territorial and less tolerant of handling. Until breeding season passes, keep grooming to necessary tasks only.
Keeping records:
Here's a tip that sounds overly organized but genuinely helps. Keep a small grooming log. Note the date of each nail trim, wing clip, and bath.
Track your bird's molt cycles. Write down any concerns you notice.
A simple notebook works. A notes app on your phone works too. The point is to spot patterns.
If your bird's nails grow unusually fast, or their molt seems longer than usual, your notes give your avian vet a clear picture during checkups.
Real Scenarios: What Grooming Looks Like in Practice
Let's walk through some realistic situations. These are based on patterns from owner communities and avian vet forums. They'll show you how the theory plays out in real life.
Scenario 1: The first-time owner with a wiggly cockatiel.
Maria brings home a young cockatiel named Kiwi. Kiwi is sweet but doesn't like being held. Its nails are already getting long.
Maria watches three videos on nail trimming and feels ready.
The first attempt is chaotic. Kiwi squirms and flutters. Maria gets through two nails before Kiwi escapes the towel.
No one gets hurt, but everyone is stressed.
What Maria does right: she stops. She doesn't force the rest. She puts Kiwi back in the cage and offers a treat.
What Maria does next: she books an appointment at the avian vet. The vet trims all four toenails in five minutes while Maria watches. The vet also shows Maria the right way to hold Kiwi for future trims.
Lesson learned: if your bird is too wiggly, get professional help the first time. And never feel bad about it. Every expert owner started somewhere.
Scenario 2: The dark-nailed cockatiel.
James has a cockatiel named Pepper. Pepper has dark gray nails, which makes the quick impossible to see. James has been putting off the trim for two weeks because he's afraid of hitting the quick.
The solution isn't to avoid trimming. It's to change the method.
James switches to filing instead of clipping. A regular emery board does the job. He sits with Pepper on a towel, lets Pepper chew on a millet spray, and files each nail gently.
It takes longer but eliminates the risk of cutting the quick.
Aggregate owner reviews confirm this works well for dark-nailed birds. Filing is slower but safer. And because there's no sudden pressure, many birds tolerate it better.
Scenario 3: The rescue bird with a fear of towels.
Sarah adopts a three-year-old cockatiel named Noodle. Noodle was previously owned by someone who used towel restraint aggressively. Now Noodle screams and bites at the sight of any towel.
Forcing a towel wrap is not an option here. That would confirm Noodle's fear and destroy the trust Sarah is building.
Sarah's approach: she spends a month building trust without any grooming. She teaches Noodle to step up onto her hand. She touches Noodle's feet gently during bonding time.
She leaves the towel visible in the room but never uses it.
After six weeks, Noodle tolerates a loose towel draped over one wing at a time. Sarah completes the first nail trim without a full wrap. It takes twice as long, but Noodle stays calm.
The lesson: previous trauma requires extra patience. Grooming timelines are flexible. Your bird's emotional wellbeing matters more than getting the trim done on schedule.
Scenario 4: The over-eager wing clip.
Mike clips his cockatiel's wings at home after watching a tutorial. He gets nervous and cuts more feathers than he intended. The bird tries to fly and drops straight to the floor, landing hard on its chest.
Luckily, there's no injury beyond minor bruising. But the bird is now wary of being handled. Mike realizes he took off too many feathers.
The fix: no quick fix exists. The feathers will grow back at the next molt, which could be several months away. In the meantime, Mike must manage the environment so the bird doesn't try risky flights.
What Mike should have done: had the vet clip the first time and demonstrated the exact number of feathers to remove. A safe light clip removes only three to four primary feathers per wing.
Frequently Asked Questions
How often should I trim my cockatiel's nails?
Most cockatiels need a nail trim every 4 to 8 weeks. The exact interval depends on growth rate and surfaces in the cage. Check nails weekly.
When the tips start curving or snagging on fabrics, it's time for a trim.
Is wing clipping painful for a cockatiel?
No, a properly performed wing clip is not painful. Feathers are made of keratin and have no nerve endings. Pain only occurs when the clip goes too deep and cuts into a blood feather.
That's why having a professional show you first is so important.
Can I use human nail clippers on my cockatiel?
You can, but you shouldn't. Human nail clippers crush the nail before cutting, which causes splintering and discomfort. Guillotine-style bird clippers make one clean cut.
If you don't have them, use a nail file on dark nails.
How do I stop bleeding if I cut the quick?
Apply styptic powder or plain cornstarch directly to the nail tip with light pressure. The bleeding usually stops in seconds. Stay calm and reassure your bird.
A small amount of blood loss isn't dangerous, but heavy continuing bleeding requires a vet.
Do I need to trim my cockatiel's beak?
Almost never. A healthy cockatiel wears its beak down naturally by chewing on toys, cuttlebone, and mineral blocks. Only trim a beak if your avian vet confirms it's overgrown.
Beak issues often signal underlying health problems like liver disease or nutritional deficiency.
What should I do if my cockatiel hates being toweled?
Skip the towel entirely. Build trust gradually through hand-taming and foot touching. Use a nail file instead of clippers for dark nails.
If grooming becomes impossible, let your avian vet handle it. Never force restraint on a traumatized bird.
The Bottom Line: Your Grooming Checklist and Go-Forward Plan
You've now got the full picture. Grooming a cockatiel isn't a mystery. It's a set of learnable skills that keep your bird healthy and comfortable.
Here's your go-forward checklist. Use it every time you groom your bird.
Before you start:
- Confirm your bird is healthy and not showing signs of illness
- Gather all tools: guillotine clippers, file, styptic powder, towel, treats
- Choose a quiet room with zero distractions
- Check the time. Morning or early afternoon is best
During grooming:
- Start with the least stressful task to build cooperation
- Use the towel wrap only if your bird tolerates it
- Trim nails in tiny increments, one foot at a time
- Stop at the first sign of real distress (screaming, heavy breathing, frantic flapping)
- Reward with millet spray or a favorite treat after every session
After grooming:
- Inspect each nail for sharp edges and file them smooth
- Check the beak for cracks, asymmetry, or overgrowth
- Provide a fresh bath so your bird can preen without dust
- Note the date in your grooming log
When to call your vet:
- Your bird has a broken blood feather that won't stop bleeding
- You see beak overgrowth, cracks, or changes in shape
- Your bird shows signs of illness during or after grooming
- You're unsure about any step of the process
The one sentence to remember:
Grooming is healthcare, not aesthetics. Do it safely, do it regularly, and when in doubt, let a professional handle it.
Your cockatiel trusts you. That trust is more valuable than a perfectly trimmed wing or a shiny nail. Protect it by approaching every grooming session with patience, preparation, and respect for your bird's limits.