
If you've just brought home a Soft Coated Wheaten Terrier, you've probably realized something pretty fast: that gorgeous, silky coat is a full-time job. It doesn't shed like a regular dog's fur, which is great for your floors, but it mats like crazy if you ignore it for even a few days. Learning how to groom a Wheaten Terrier isn't just about keeping them cute.
It's about keeping their skin healthy and pain-free.
The good news? You don't need to be a professional groomer to keep your Wheaten looking fantastic between salon visits. You just need the right tools, a solid routine, and a clear picture of what the final result should look like.
As of 2026, the breed standard from the Soft Coated Wheaten Terrier Club of America still calls for that distinct, square silhouette with a soft, silky, gently waving coat. That look is achievable at home, but only if you understand the process from start to finish.
Quick Answer
Groom a Wheaten Terrier every four to six weeks. Brush two to three times weekly to prevent matting. Bathe every two to four weeks.
Dry with a high-velocity dryer to keep the coat flat. Trim with clippers and shears to maintain a square silhouette. Never brush a dry, dirty coat.
Always line brush down to the skin.
Why Grooming a Wheaten Terrier Is Different (and Why Visuals Matter)
Here's the thing that trips up almost every new Wheaten owner: this breed doesn't have an undercoat. Most double-coated dogs shed a soft underlayer seasonally, which naturally removes dead hair. Wheatens don't do that.
They have a single layer of hair that grows continuously, just like human hair. That means every single hair that dies stays right there in the coat, tangled up with the living hair around it.
That's why "just brushing" doesn't cut it. A quick once-over with a slicker brush on the surface does absolutely nothing for the dense, matted mess hiding near the skin. If you've ever tried to brush out a matted Wheaten, you know the struggle.
The hair twists into tight clumps, especially behind the ears, in the armpits, and around the collar area. These mats pull at the skin with every movement. Over time, they can cause painful bruising, hot spots, and even skin infections.
So why do visuals matter so much for this breed? Because the end goal, the "Wheaten trim," is a specific silhouette. It's a square, rectangular body shape with legs that look like columns, a neatly rounded beard, and a fall of hair over the eyes.
You can read a thousand descriptions of that look, but without seeing it, you'll end up with a scruffy, uneven mess. The single best way to learn is by looking at groomed Wheatens, comparing your work to a clear reference, and understanding what the coat should feel like at every stage of the process.
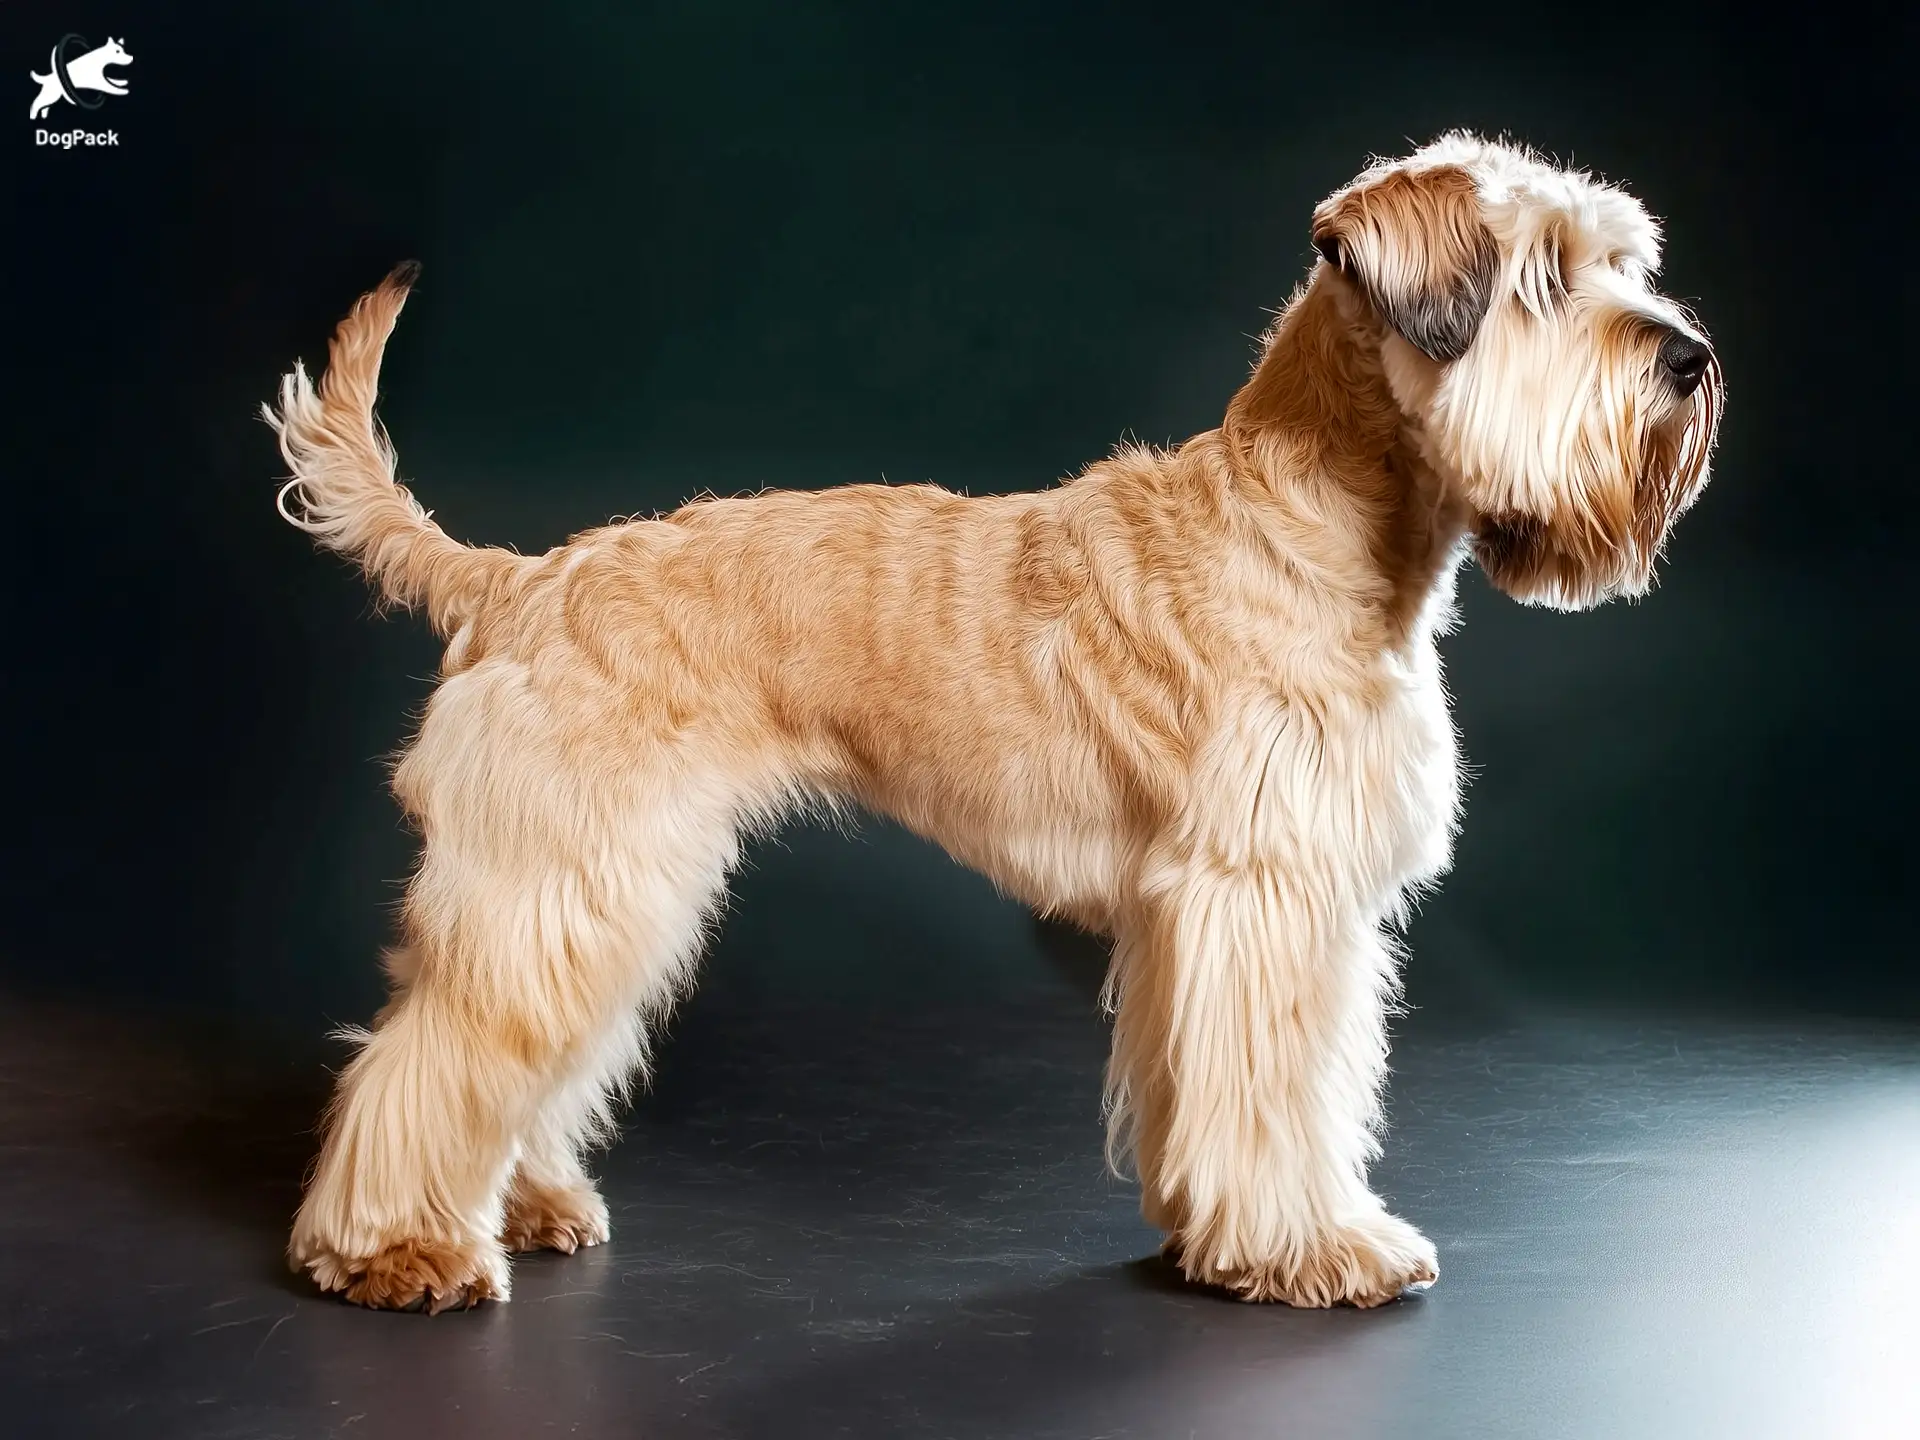
Image source: Bing (Web (fair-use with source credit))
The Wheaten Coat Anatomy: What You're Actually Working With
Understanding what you're dealing with is half the battle. The Wheaten Terrier coat has a specific texture and structure that demands a particular approach. Once you know why the coat behaves the way it does, the grooming steps make infinitely more sense.
Texture and Structure
A proper Wheaten coat is soft and silky. It should feel like human hair, not wool and not wiry like other terriers. The individual strands are fine, which is exactly why they tangle so easily.
The coat is also typically wavy, with loose curls that give the breed its characteristic fluffy look. If the coat feels harsh, brittle, or woolly, that's often a sign of over-bathing, using the wrong shampoo, or damage from heat tools.
The texture changes as the dog grows. Puppies have a soft, fluffy puppy coat that's even easier to mat than the adult coat. Around 12 to 18 months, the adult coat starts coming in.
This transition is affectionately (and accurately) called the "puppy uglies." For several months, the dog looks patchy and scruffy as patches of puppy fluff mix with the longer adult hair. This is normal. It's also the period when matting gets the worst, because the coat is uneven and catches on itself constantly.
The Signature Square Silhouette
Per the breed standard, the Wheaten should have a square appearance. From the side, the depth of the body from withers to elbow is roughly equal to the distance from withers to ground. The topline is level, and the body is neatly rectangular.
Grooming exists to enhance this natural shape, not create it artificially.
The visual goal breaks down into a few key sections:
- The body: Clipped short (around 1/8 to 1/4 inch) to keep the rectangular outline crisp and clean.
- The legs: Scissored into straight, columnar shapes. They should look like columns supporting the body, not fluffy balloons.
- The feet: Rounded into a compact "cat foot" shape, with hair trimmed short between the pads.
- The head: The beard is shaped into a rounded, slightly rectangular frame. The fall (the hair over the eyes) is trimmed to just above the eye line, never so short that the eyes look completely exposed.
- The tail: Trimmed to blend with the body, tapering towards the tip but never appearing rat-like or bare.
The Fall and Furnishings
Two specific features define the Wheaten face. The "fall" is the long hair that hangs down over the eyes, giving the breed that gentle, inquisitive expression. The "furnishings" are the longer hair on the muzzle (the beard) and the eyebrows.
Both require regular scissoring to maintain shape and to keep hair out of the dog's eyes.
Here's a quick reference table for the coat sections you'll be working with:
| Coat Section | Hair Length/Type | Grooming Goal |
|---|---|---|
| Body | Clipped short, ~1/8-1/4 inch | Crisp, rectangular outline |
| Legs | Long, silky | Straight, columnar shape |
| Feet | Moderate | Rounded, cat-paw appearance |
| Beard (Muzzle) | Long, prominent | Rounded, neatly blended frame |
| Fall (Eyes) | Long, hangs down | Trimmed just above eye level |
| Tail | Blends with body | Tapered, natural finish |
The Grooming Toolkit: Must-Have Tools and Why
You can't groom a Wheaten Terrier with a random brush from the pet store and kitchen scissors. The coat is too fine, too dense, and too easily damaged. Building the right toolkit is an investment, but the right tools make the job faster, easier, and safer for your dog.
Brushes and Combs
You'll use three main tools for brushing:
- Pin brush: This is your everyday maintenance brush. The pins are spaced out enough to work through the silky coat without snapping the hair. Look for one with smooth, rounded pins to avoid scratching the skin.
- Slicker brush: This has finer, bent wires packed closely together. It's excellent for fluffing, removing loose dead hair, and working through light tangles. Be gentle. Slickers can scratch the skin if you press too hard.
- Greyhound comb: This is a wide-toothed comb on one end and a fine-toothed comb on the other. It's your finishing tool and your mat detector. After brushing, you run the comb through to the skin. If it snags, you've missed a tangle.
Clippers and Blades
For the body, you need a good pair of electric clippers. Professional groomers use brands like Andis, Oster, or Wahl, but a reliable pet clipper with replaceable blades works fine for home use.
Blade selection matters:
- #10 blade: Used for sanitary areas (genitals, belly, and around the anus). It's very short, about 1/16th of an inch.
- #7F blade: Leave the coat about 1/8th of an inch long. Good for a slightly longer body trim.
- #5F blade: Leaves about 1/4 inch of coat. This is a popular choice for a softer, more forgiving pet trim that hides minor flaws.
Shears
Scissors for grooming come in several styles:
- Straight shears: Used for the main shaping, like the rectangular body outline and the leg columns.
- Thinning shears: These have teeth on one or both blades. They remove bulk and blend lines without leaving obvious cut marks. Perfect for smoothing transitions.
- Curved shears: Optional but handy for rounding the feet and beard.
Drying Equipment
This is the non-negotiable tool you probably haven't thought about. A high-velocity dryer is essential for a Wheaten Terrier. It uses high-pressure air, not heat, to blow water off the coat.
More importantly, it lets you stretch the coat straight while drying, which sets the hair flat and silky. Without one, the coat dries wavy, curly, and much harder to manage.
Setting Up Your Space
You'll also want a grooming table or a sturdy non-slip surface. A grooming loop (a clip attached to a stand) keeps your dog safe and in position. Good lighting is crucial.
You need to see what you're doing, especially around the eyes and feet.
Here's a complete toolkit checklist:
| Tool | Purpose | Essential or Optional |
|---|---|---|
| Pin brush | Daily brushing, line brushing | Essential |
| Slicker brush | Fluffing, removing dead hair | Essential |
| Greyhound comb | Detecting tangles, finishing | Essential |
| Clippers with blades (#10, #7F, #5F) | Body and sanitary trimming | Essential |
| Straight shears | Shaping body and legs | Essential |
| Thinning shears | Blending and de-bulking | Highly recommended |
| High-velocity dryer | Drying, stretching coat flat | Essential |
| Grooming table and loop | Safety and control | Highly recommended |
| Hypoallergenic dog shampoo and conditioner | Bathing, coat health | Essential |
Step 1: The Pre-Bath Brush-Out (Line Brushing Basics)
This is the single most important step in the entire grooming process. Skipping it, or doing it poorly, is the #1 reason people end up with a shaved dog at the vet's office. You absolutely cannot bathe a matted Wheaten Terrier.
Water and shampoo will tighten every tangle into a felted, concrete-like mass that cannot be brushed out. The only solution at that point is to shave the coat off.
So before your dog gets anywhere near the water, you're going to completely brush out the entire coat.
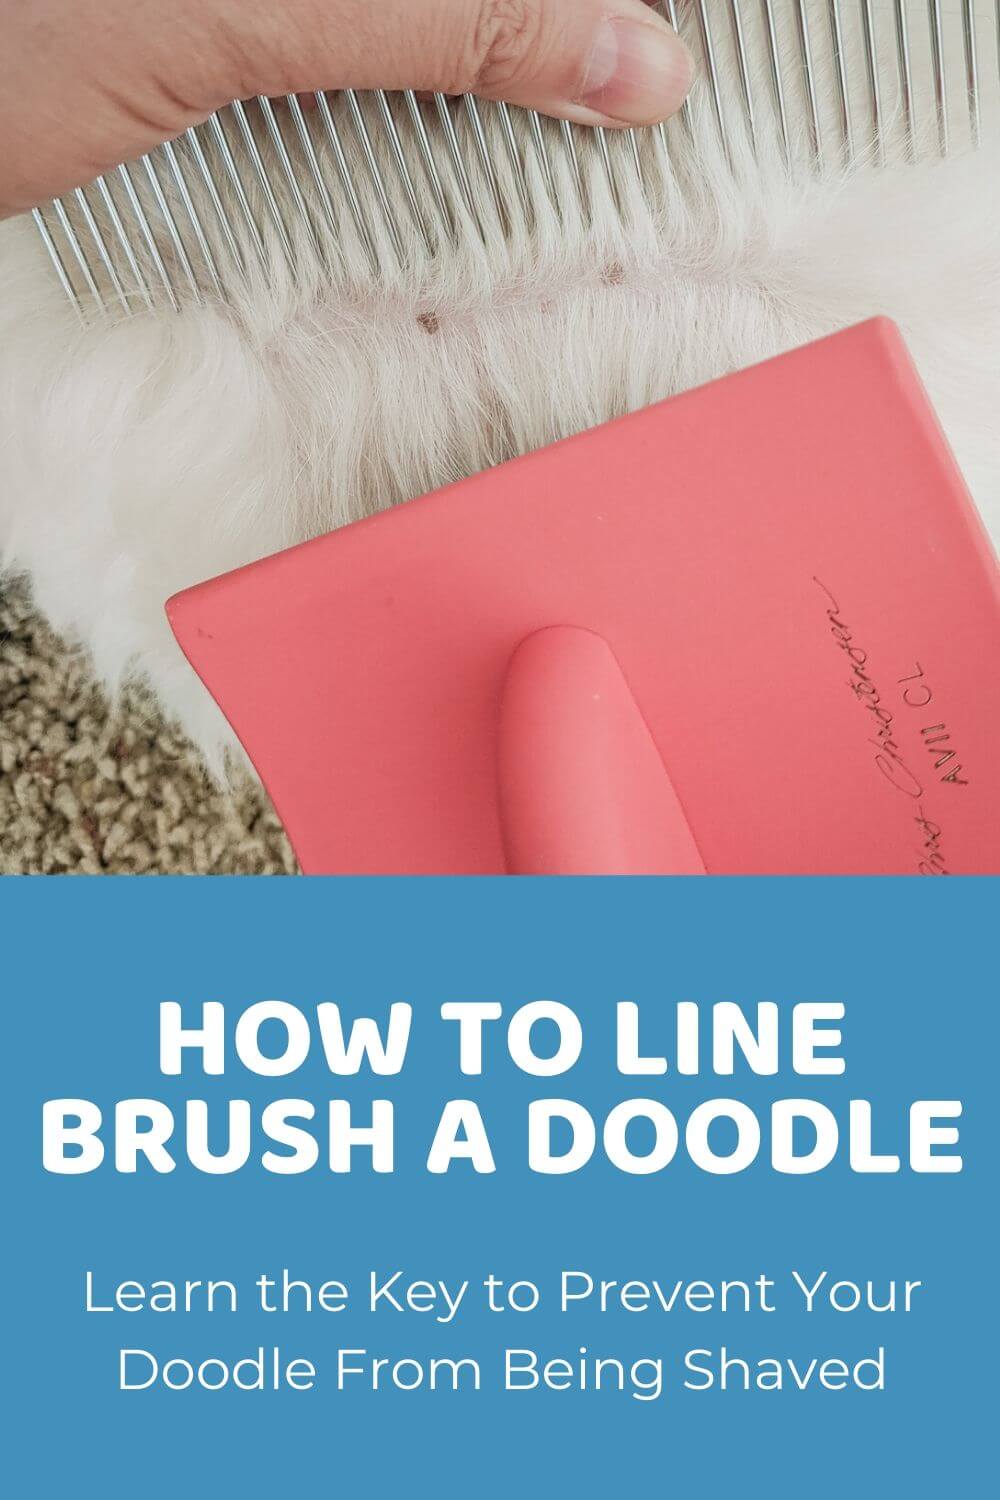
Image source: Bing (Web (fair-use with source credit))
What Is Line Brushing?
Line brushing is a specific technique that parts the hair in sections, like a grid, and brushes each section completely from skin to tip. Surface brushing does nothing for the underneath layer. Line brushing guarantees that you've reached every single hair on the dog's body.
Here's the step-by-step process:
- Spritz the coat lightly with a leave-in conditioner or a detangling spray. Never brush a completely dry Wheaten coat. It's too fragile and will break.
- Start at the rear end. Part the hair with your fingers so you can see the skin. Take a small section, about an inch wide.
- Hold the section up with one hand and brush from the skin outward with your pin brush in the other hand.
- Work outwards, section by section, moving forward towards the head.
- Follow up with the greyhound comb. Run it through the same section, from skin to tip. If it snags, slow down and work out that tangle before moving on.
Where Mats Hide
Certain spots on a Wheaten are mat magnets. Pay special attention to these high-risk zones:
- Behind the ears: Friction from the ears rubbing against the neck twists the hair.
- Under the armpits: The front legs rubbing against the body create constant tangles.
- In the groin area: High friction, delicate skin.
- Around the collar line: The collar rubs and snags the hair constantly.
- Behind the elbows: Another friction point.
- On the tail: Mats there are painful and hard to spot.
When a Mat Won't Brush Out
Sometimes, you'll hit a mat that won't move. The hair is too tightly tangled, or it's felted against the skin. In our research, the consensus from veterinarians and professional groomers is unanimous: stop pulling.
Trying to force a brush through a tight mat hurts the dog and can pull the skin hard enough to cause bruising or cuts.
If the mat is small and close to the skin, gently slide a mat splitter or a slicker brush under the edge and carefully work the mat apart. If it's large, or if the skin underneath looks red, irritated, or damp, don't fight it. Take the clippers with a #10 blade and shave it out.
Leaving a slightly uneven patch is fine. It will grow back. Forcing a painful mat out is not.
Step 2: Bathing Like a Pro
Once the coat is completely tangle-free, it's time for the bath. This step is about more than just getting the dirt off. A proper bath, followed by the right drying technique, sets the foundation for a smooth, silky, manageable coat.
Get this wrong, and your brushing efforts from Step 1 were wasted.

Image source: Bing (Web (fair-use with source credit))
Choosing the Right Shampoo and Conditioner
Wheaten Terriers have sensitive skin. A harsh shampoo strips the natural oils, leaving the coat dry, brittle, and prone to breakage. Look for a hypoallergenic, pH-balanced dog shampoo.
Oatmeal-based formulas are gentle and soothing. Avoid anything with artificial fragrances or dyes.
The conditioner is not optional for this breed. It's a vital step that adds moisture back into the coat, reduces static, and makes brushing easier. A good conditioner also helps the hair lie flat after drying.
Per manufacturer guidelines, leave the conditioner on for two to three minutes before rinsing thoroughly. Residual product will make the coat greasy and attract dirt.
The Washing Process
Here's a step-by-step breakdown of a proper Wheaten bath:
- Wet the coat thoroughly with lukewarm water. Hot water dries out the skin. Cold water won't clean as effectively. Get all the way down to the skin, especially in the dense leg furnishings.
- Dilute the shampoo in a cup of water before applying. Concentrated shampoo is hard to rinse out and can irritate the skin.
- Work the shampoo into the coat with your fingers, down to the skin. Don't scrub, that will tangle the hair. Use a gentle, kneading motion.
- Rinse completely. Shampoo residue is a major cause of skin irritation. Rinse until the water runs completely clear.
- Apply the conditioner and work it through the coat from mid-length to tips.
- Rinse again thoroughly.
Towel Drying: The First Pass
Don't rub the coat with a towel. Rubbing creates friction, which causes tangles and frizz. Instead, use a large microfiber towel and gently squeeze the coat in sections.
Press the towel against the body to absorb water, then move to a dry section. Repeat until the coat is no longer dripping, but still damp.
The High-Velocity Dryer: The Game Changer
This is the step that separates a good home groom from a professional finish. A high-velocity dryer uses high-pressure air to blow water out of the coat. It also stretches the hair straight as it dries.
This is what gives the Wheaten that flat, silky, flowing look.
Here's how to use it properly:
- Start low and slow. Introduce the dryer at a low speed, holding it at a distance, so your dog gets used to the noise and sensation.
- Work section by section. Use the nozzle to push the coat in the direction you want it to lie. Stretch each section with your free hand as you dry it.
- Keep the nozzle moving. Never hold it in one spot for more than a few seconds. The air can heat up and burn the skin.
- Brush while drying. Use a slicker brush in one hand and the dryer in the other. This fluffs and separates the hair while the air stretches it flat.
The goal is a completely dry coat. Any lingering dampness at the skin will cause the hair to curl and matt overnight. For a full coat, expect this process to take 30 to 40 minutes.
The Never-Do List
- Never brush a dry, dirty coat. Always spritz with water or detangler first.
- Never use a human hair dryer. It's too hot and will damage the coat.
- Never let your dog air dry. A Wheaten's coat will shrink, curl, and matt beyond repair when air dried.
Step 3: The Clipper Work (Body, Neck, and Tail)
With a clean, completely dry, and tangle-free coat, you can finally start cutting. This step focuses on the body work with clippers. The goal is to create a clean, short, rectangular base that the scissored leg furnishings will pop against.
Preparing the Dog
Place your dog on the grooming table and secure the grooming loop. Keep it snug, but not tight. The dog should feel supported but not restrained.
Have your clippers clean, oiled, and fitted with the correct blade.
Blade Selection
For most pet trims, the #7F or #5F blade works best for the body. The #10 blade is reserved for the sanitary areas and very matted spots.
| Blade | Length | Best For |
|---|---|---|
| #10 | ~1/16 inch | Sanitary areas, mat removal |
| #7F | ~1/8 inch | Short, clean body trim |
| #5F | ~1/4 inch | Softer, more forgiving pet trim |
Clipping the Body
Start at the neck, just behind the ears. Working backwards, clip in the direction of hair growth. Clipping against the grain on a wavy coat can create a choppy, uneven look.
Follow the natural contours of the dog's body:
- The neck: Blend smoothly into the shoulders. Don't create a step or a line.
- The back: Clip straight back along the topline.
- The sides: Clip from the top down toward the belly.
- The belly: Clip with a #10 blade, from the ribcage back to the groin.
- The tail: Clip the base of the tail with the body blade, leaving the longer hair towards the tip for scissoring.
Where to Stop
The clipper work should stop at the "trim lines." These are the natural boundaries where the short body hair meets the longer leg furnishings:
- The front legs: Stop at the shoulder blade, creating a smooth line.
- The hind legs: Stop at the top of the thigh, blending into the hip.
- The chest: Leave the longer hair on the chest and blend it into the neckline.
Sanitary Trim
The sanitary area, around the genitals and anus, needs a #10 blade. This keeps the area clean and free of urine and feces buildup. Clip carefully in this sensitive zone.
A steady hand is essential.
Common Clipping Mistakes
- Clipping too high on the shoulders: This ruins the square outline and makes the dog look hunched.
- Creating "steps": Uneven transitions between the short body and long legs.
- Clipping against the grain: Results in a choppy, uneven finish.
- Going too short: Leaving less than a 1/4 inch can expose the skin to sunburn and irritation.
Step 4: Scissoring the Silhouette (The "Square" Trims)
This is the step where the Wheaten truly starts to look like a Wheaten. Scissoring is the art of shaping the longer hair into the breed's signature silhouette. It's also the most visual part of the whole process.
You'll need a clear reference in your mind, or a photo of a well-groomed Wheaten, to guide your hands.
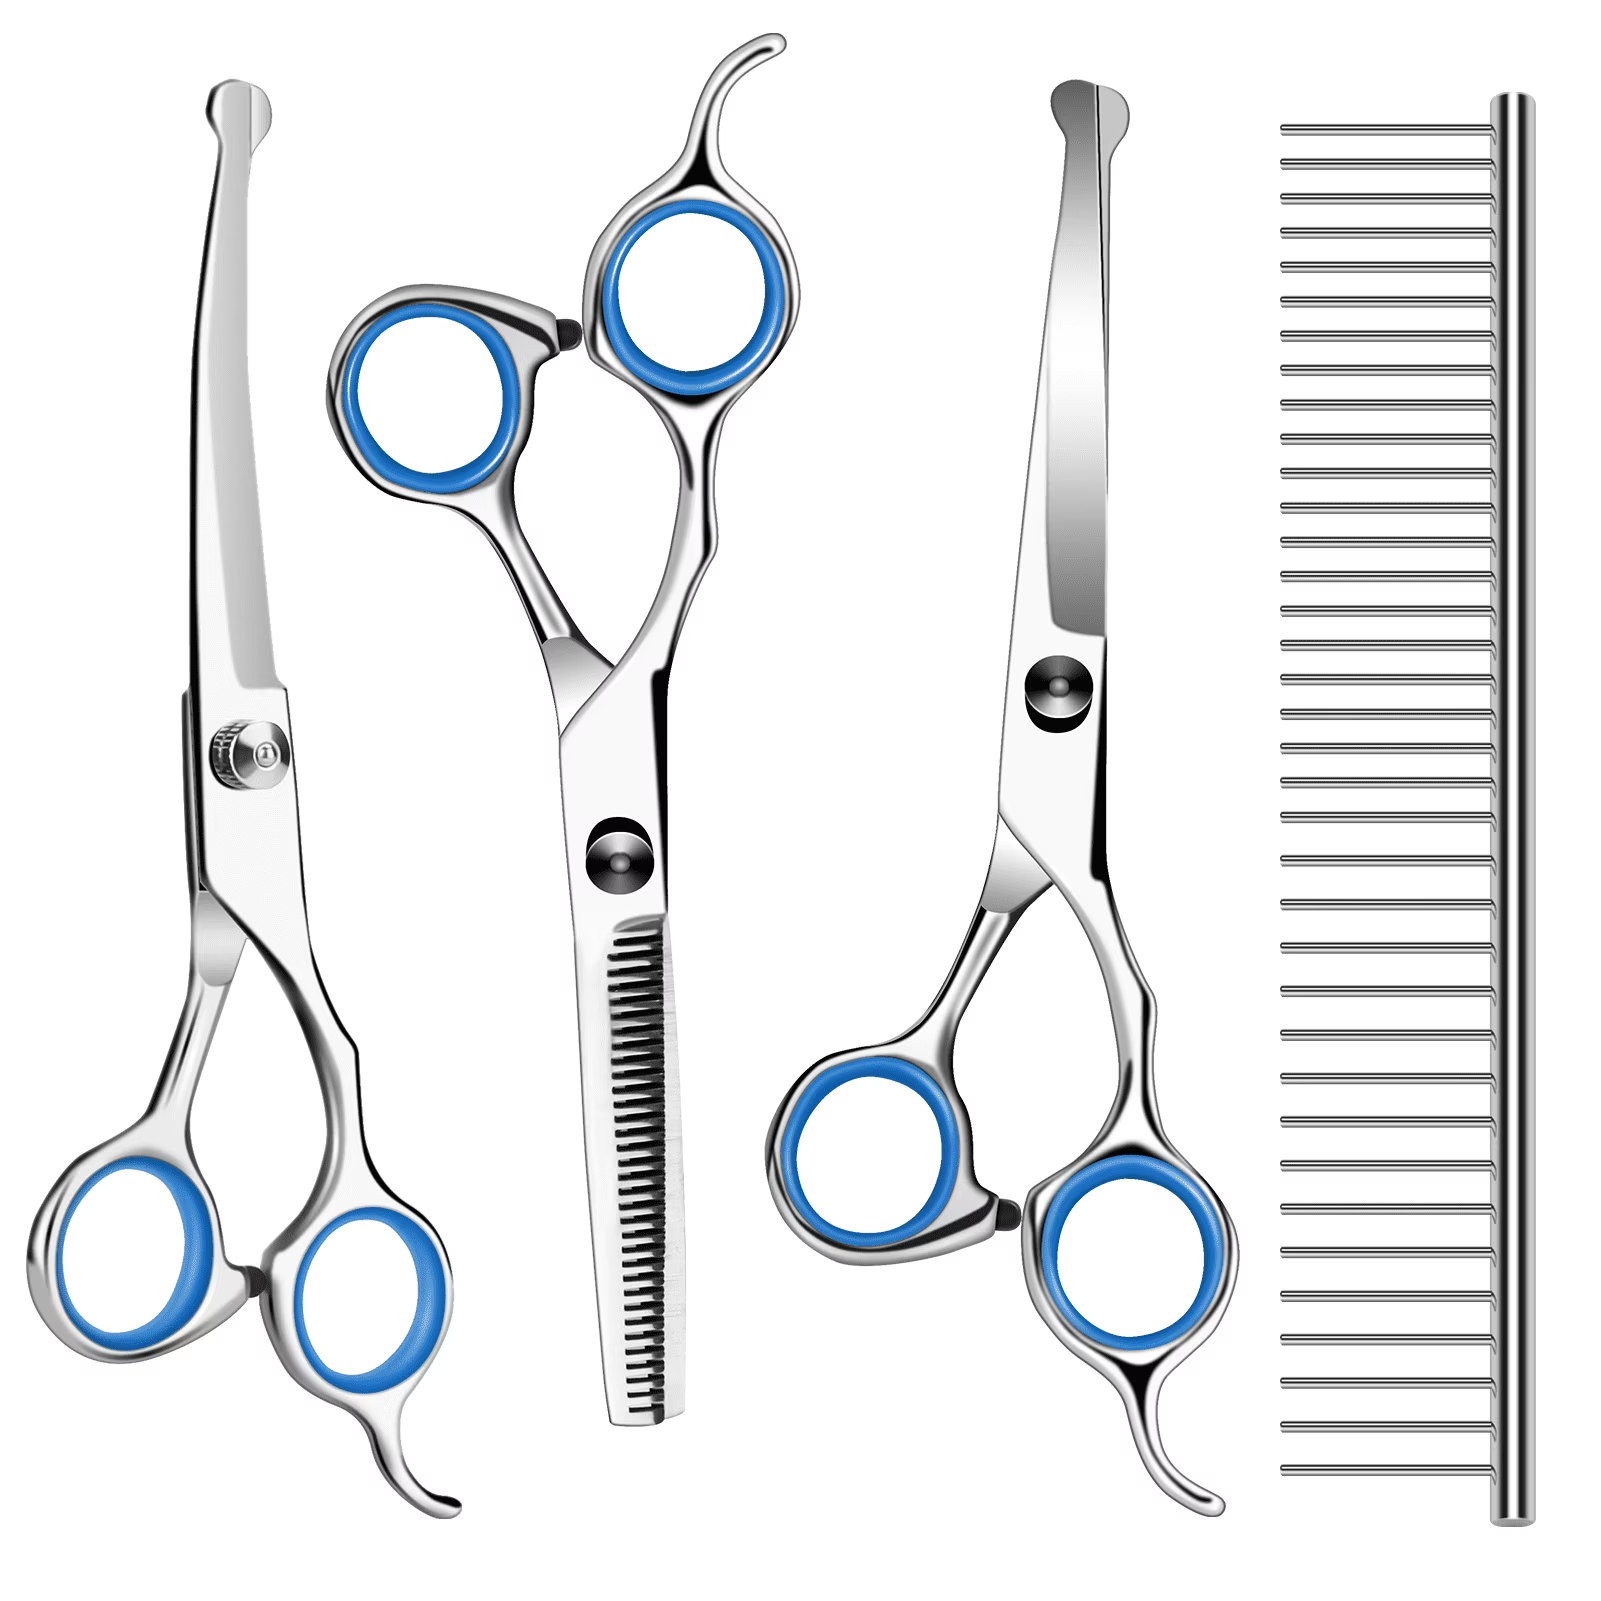
Image source: Bing (Web (fair-use with source credit))
The Leg Columns
The front and hind legs should look like straight, solid columns. The hair should hang flat and straight, not fluffed out like a Poodle.
Here's how to achieve the column look:
- Brush the leg hair straight down with a pin brush.
- Use straight shears to trim the hair straight down the leg, following the natural line of the bone.
- Trim the hair at the bottom of the foot so it's level with the ground.
- Use thinning shears to blend the top of the column into the body, removing any bulk or bumps.
The goal is a leg that looks straight from the front and from the side.
The Cat Foot
The feet should be neat, compact, and rounded, like a cat's paw. Overly hairy feet look sloppy and collect debris.
- Trim the hair around the foot with straight shears, following the natural oval shape of the paw.
- Trim the hair between the toes from underneath with the tips of your shears.
- Round the hair on the top of the foot to blend with the leg column.
The Beard and Fall
The face is the finishing touch. The goal is a neat, rounded, friendly expression.
- The beard: Hold the chin hair between your fingers and trim it to a rounded, slightly rectangular shape. Use thinning shears to soften any blunt lines.
- The fall: The hair over the eyes should be trimmed straight across, just above the eye line. Never trim it so short that the eyes appear exposed or surprised.
- The eyebrows: The furnishings on the brow should be blended into the fall, creating a smooth line.
Using Thinning Shears
Thinning shears are your best friend for blending. Whenever you have a harsh line, a bump, or a blunt edge, reach for them. They remove bulk and soften transitions.
They work well on the underside of the ear flap, around the neck, and at the transition points between short and long hair.
The Final Check
Step back and look at your work from all sides. The profile should be a crisp rectangle. The front should show two straight columns.
The dog should look neat, balanced, and recognizable as a Wheaten.
Step 5: Maintenance Between Full Grooms
A full groom every four to six weeks is the baseline. But the work doesn't stop there. The in-between weeks are where you prevent the next groom from becoming a shave-down.
A few minutes of maintenance a few times a week makes a massive difference.
Brushing Schedule
Brush your Wheaten two to three times per week. A daily five-minute brush is even better. Always start the session with a quick line brush on the high-risk zones.
Pay attention to the areas where mats form: behind the ears, under the armpits, and around the collar.
Ear Plucking and Cleaning
Wheaten Terriers have hair that grows deep inside the ear canal. This hair traps wax, debris, and moisture, creating the perfect environment for ear infections. You'll need to pluck this hair on a regular basis.
Here's how:
- Apply ear powder to the inside of the ear flap. This gives you a better grip on the hair.
- Gently pull out the hair in small amounts, using your fingers or a pair of hemostats.
- Stop if the dog shows any sign of pain or if you see any bleeding.
- Wipe the ear with a dog-safe ear cleaner on a cotton ball.
Tear Stain Management
The fall of hair over the eyes can cause tearing, which leads to reddish-brown stains on the face. This is particularly noticeable on light-colored coats. Regular trimming of the fall helps reduce eye irritation.
You can also wipe under the eyes daily with a damp cloth to remove discharge.
Checking for Debris
Wheaten Terriers love to explore outdoors. They pick up burrs, foxtails, twigs, and other debris in their coats. After every walk, do a quick check of the paws, legs, and tail.
Remove anything you find before it works its way into the coat and causes a tangle or an injury.
Step 6: Common Visual Mistakes (and How to Avoid Them)
Even with the right tools and a good understanding of the breed, it's easy to get tripped up by a few common visual errors. These are the mistakes that separate a tidy home groom from a professional-looking one.
The "Stair-Step" Neck
This happens when you clip the body but don't blend the transition into the longer neck and chest hair. The result is an obvious ledge or step. To fix it, use thinning shears to soften the line between the clipped and unclipped hair.
The "Poodle" Legs
Wheaten legs should be straight, flat columns of hair. When you scissor them into round, fluffy shapes, they start to look like Poodle pom-poms. The problem usually comes from filling the leg out with too much bulk.
Keep the line clean and tight to the bone.
The Overly Round Feet
Feet should be compact and oval-shaped, not perfectly spherical. A round "cabbage" foot is a classic tell of an amateur groomer. Trim the hair close to the pads and keep the top of the foot flat.
The Surprised Expression
If you trim the fall of hair too short, the dog looks permanently startled. The eyes are completely exposed, which is not the Wheaten look. The fall should sit just above the eyelid, leaving a soft frame around the eye.
Ignoring the "Puppy Uglies"
The adult coat transition between 12 and 18 months is rough. The coat looks patchy and uneven no matter what you do. Many owners panic and shave the whole dog down.
Patience is the answer. Keep the coat brushed and give it time. The adult coat will come in.
Professional vs. Home Grooming: The Real Cost and Time Breakdown
You can absolutely groom your Wheaten at home. But it's worth understanding exactly what you're signing up for in terms of time, cost, and skill. Some owners prefer the convenience of a professional.
Others enjoy the bonding time and the cost savings.
The Time Investment
A complete home groom, from line brushing to final scissoring, takes a beginner about two to three hours. With practice, that drops to about 90 minutes. A professional groomer typically takes 60 to 90 minutes for a full groom.
Remember to factor in drying time, which takes about 30 to 40 minutes alone.
The Cost Breakdown
Here's a rough comparison based on current market rates:
| Expense | Home Grooming | Professional Grooming |
|---|---|---|
| Initial toolkit | $200-$400 | $0 |
| Per-groom supplies (shampoo, blades, etc.) | $5-$15 | $0 |
| Professional groom (per visit) | $0 | $70-$110 |
| Annual cost (assume 10 grooms) | $50-$150 | $700-$1,100 |
The numbers make home grooming look attractive. But they don't account for the learning curve and the physical effort. If you're not confident in your scissoring skills, a professional trim every few months is a reasonable compromise.
When a Professional Is the Right Call
A professional groomer is the right choice if:
- Your dog is heavily matted. Shaving out mats is stressful for the dog and easy to get wrong.
- Your dog is anxious or aggressive. A professional has the experience and equipment to handle difficult dogs safely.
- You're preparing for a dog show. The exacting standards of a show trim require professional expertise.
- You don't have the time. Is a three-hour home groom realistic for you every month?
Frequently Asked Questions
Can I use human clippers on my Wheaten Terrier?
No. Human clippers are not powerful enough for a thick dog coat. The motor will overheat and stall, and the blade will snag and pull the hair.
You need clippers designed specifically for pets, with more powerful motors and the ability to swap blades.
Do I need to hand-strip my pet Wheaten?
Hand stripping is required for the show ring. It preserves the harsh, wiry texture that the breed standard calls for. For a pet Wheaten, clipping is perfectly fine and much more practical.
Clipping softens the coat over time, but that's not a problem for a dog that's not being shown.
How do I stop my puppy from wiggling on the grooming table?
Start with short sessions. Reward calm behavior with treats and praise. Use a grooming loop for safety, but don't rely on it to hold the dog still.
Build up gradually. A puppy that learns the table is a calm, positive place will be easier to groom for life.
What should I do about mats during the adult coat transition?
The transition coat is fragile and mats easily. Keep up a consistent brushing routine. If you find a mat that won't brush out, carefully shave it with a #10 blade.
Never pull or tug. The coat will grow back, but the skin damage from a forced mat removal can last.
How often should I bathe my Wheaten Terrier?
Bathe every two to four weeks. Bathing too frequently strips the coat's natural oils and dries out the skin. If your dog gets dirty between baths, spot-clean the affected areas instead of doing a full wash.
Always follow with a conditioner to keep the coat soft and manageable.