
If you've ever tried to trim a cat's nails and ended up with scratches up your arms, a cat hiding under the couch, and a half-finished job, you're not alone. Learning how to hold a cat to trim nails is the single biggest hurdle for most owners, and honestly, it's the reason so many people give up and pay a groomer instead. The good news?
With the right hold, the right tools, and a little patience, you can do this at home without turning it into a wrestling match.
In our research, feline behaviorists and veterinary organizations consistently point to one key fact: cats don't resist nail trims because they're in pain. They resist because they feel restrained. A 2019 study on feline handling techniques published in the Journal of Feline Medicine and Surgery found that cats showed significantly lower stress levels when owners used minimal restraint and allowed the cat to feel in control.
That's the secret. We're not going to wrestle your cat. We're going to outsmart them.
Quick Answer
Hold your cat securely but gently, never tightly. The three safest methods are the towel wrap, the lap hold, and the two-person hold. The towel wrap works best for anxious cats.
The lap hold works for calm cats. The two-person hold is for strong or resistant cats. Always check your cat's body language first.
Stop if they hiss, growl, or flatten their ears. Cut only the white tip of the nail, never the pink quick.
Why Nail Trimming Feels Impossible (and Why It Doesn't Have to Be)
Here's the thing most people get wrong: they focus on the clipping, not the holding. They chase the paw, grab it, and clip as fast as possible before the cat can escape. That approach backfires every time because it triggers your cat's survival instincts.
When a cat feels trapped, their natural response is to fight, flee, or freeze. You're seeing the fight part.
The real reason nail trimming feels impossible is that you're skipping the setup phase. Cats need to feel safe before they'll let you touch their paws. Their paws are packed with nerve endings, which makes them incredibly sensitive.
Think about it: would you let someone grab your hand and start snipping at your fingers without warning? Probably not.
So what actually matters? Three things: timing, positioning, and predictability. If you approach your cat when they're sleepy, hold them in a way that feels supportive rather than trapping, and move in a calm, steady rhythm, the whole process changes.
You're not fighting instinct. You're working with it.
Another overlooked piece is your own energy. Cats are masters at reading human stress. If you're anxious, they know.
They pick up on tense muscles, quick movements, and shallow breathing. The calmer you are, the calmer they are. That's not wishful thinking.
It's physiology. A relaxed human means a relaxed cat, and a relaxed cat is far easier to handle.
The Quick Answer: Three Safe Holds That Work
Let's cut straight to it. There are three main holds that work for the vast majority of cats. Each one serves a different personality type, and you'll likely use all three at different points depending on your cat's mood and trust level.
The first is the Purrito, also called the towel wrap. It involves wrapping your cat snugly in a towel or blanket with one paw exposed at a time. This method works best for anxious cats, cats with a history of biting, or cats that panic the moment they see clippers.
The snug wrap mimics the feeling of being held by their mother, which has a calming effect on many cats.
The second is the Lap Hold. This one works for calm, trusting cats that don't mind being handled. You sit down, place your cat on your lap facing away from you, and gently press their body against yours with your forearm.
This keeps their front paws accessible while your other hand does the clipping. It's simple, effective, and doesn't require any extra equipment.
The third is the Two-Person Hold. This is your go-to for strong, resistant cats that absolutely refuse to sit still. One person holds the cat while the other clips.
The holder wraps one hand around the cat's shoulders and the other around their hindquarters, keeping the cat securely but gently pinned against their body. The clipper person works quickly but calmly, one paw at a time.
Which one should you use? That depends on your cat. A laid-back senior cat will do fine with the lap hold.
A rescue cat with trust issues needs the purrito. A young, energetic cat that's never had its nails trimmed? You're looking at the two-person hold until they learn to tolerate the process.
A quick note on scruffing, since you'll probably see it suggested online. Scruffing, which means gripping the loose skin on the back of a cat's neck, is controversial. Some veterinarians still use it for medical procedures, but the American Veterinary Medical Association and many feline behaviorists now advise against it for routine grooming.
It can actually increase stress and anxiety in adult cats, especially if they're not used to it. Stick with the three holds above instead.
Reading Your Cat's Body Language Before You Start
Before you even pick up the clippers, you need to check in with your cat. This step is non-negotiable, and it's where most people make their first mistake. They jump straight into the trim without assessing whether their cat is actually in the right headspace.
Cats communicate through their body language constantly, but you have to know what to look for. Let's break it down into three clear categories: green lights, yellow flags, and red lights.
Green lights mean you're good to go. Your cat is relaxed, maybe even a little sleepy. Their tail is wrapped loosely around their body or hanging still.
Their ears are forward or slightly to the side, not flattened against their head. Their pupils are normal-sized, not dilated. They might even be purring or kneading.
This is the ideal state for a nail trim.
Yellow flags mean proceed with caution. Your cat is showing early signs of discomfort or irritation. Their tail is flicking rapidly from side to side.
Their ears are rotating or twitching. Their body is tense and stiff. They might be growling softly or letting out short, sharp meows.
If you see any of these, pause. Take a breath. Try to calm your cat down before continuing.
If they don't settle within a minute or two, reschedule the trim for later.
Red lights mean stop immediately. Your cat is in full panic mode. Their ears are pinned flat against their head.
Their pupils are huge and dilated. They're hissing, growling, or yowling. Their fur is puffed up, and they're trying to get away or swatting at you.
If you see any of these, put the clippers down. Attempting to trim a cat in this state is dangerous for both of you. You'll get scratched, and your cat will associate nail trims with fear for a long time.
Here's a helpful rule of thumb: if you're not sure whether your cat is calm enough, they probably aren't. When in doubt, wait. It's much easier to trim a relaxed cat's nails in five minutes than to wrestle a terrified cat for twenty.

Image source: Bing (Web (fair-use with source credit))
What You'll Need Before You Touch a Single Paw
You don't need a lot of gear to trim your cat's nails, but the few things you do need matter. Let's go through them one by one so you're fully prepared before your cat is wrapped up and ready.
First, you need nail clippers designed for cats. Human nail clippers are too small and can crush or split cat nails. You have three main options: guillotine-style, scissors-style, and plier-style.
Guillotine clippers have a small hole where you slide the nail through, and a blade that slices down. They work well for cats but can be tricky to position correctly. Scissors-style clippers look like tiny pruning shears and are great for precision.
Plier-style clippers are spring-loaded and offer more leverage, which is helpful for thick nails on bigger cats.
Whatever style you choose, make sure the blade is sharp. Dull blades crush the nail instead of cutting cleanly, which is painful and can cause splitting. If you've had your clippers for a while and they're not cutting smoothly, replace them.
They're cheap enough that there's no reason to struggle.
Next, you need styptic powder. This is a clotting agent that stops bleeding instantly if you accidentally cut into the quick, the pink area inside the nail that contains blood vessels and nerves. You can find styptic powder at any pet store or pharmacy.
It comes in a small container, and you'll only need a tiny pinch if something goes wrong. But trust me, you want it on hand before you start. You do not want to be scrambling for it while your cat is bleeding.
Beyond the tools, you need high-value treats. The kind your cat only gets during nail trims. This could be small pieces of chicken, tuna, or commercial cat treats they love.
The treat is your best training tool. It tells your cat that nail trims lead to good things. Use it liberally, after every nail if you have to.
You might also want a towel or blanket for the purrito method. A standard bath towel works fine, but something soft and slightly stretchy is even better. Some cats respond well to a blanket with their scent on it.
It feels like home.
Finally, consider your workspace. You want a stable, non-slip surface. A table or counter works well, or even the floor if your cat prefers to stay low.
Some cats feel more secure on the ground, while others are easier to manage on a raised surface. Experiment to see what your cat prefers.
Here's a quick checklist of everything you need:
| Item | Purpose | Notes |
|---|---|---|
| Cat nail clippers | Cutting the nail | Guillotine, scissor, or plier style |
| Styptic powder | Stopping bleeding | Essential for accidents |
| High-value treats | Positive reinforcement | Chicken, tuna, or favorite treats |
| Towel or blanket | Restraint for purrito method | Soft, slightly stretchy |
| Stable surface | Safe workspace | Table, counter, or floor |
That's it. No special lighting. No expensive grooming table.
No muzzles. Just the basics and a little patience.
Step-by-Step: The Purrito Method for Anxious Cats
The purrito method is your secret weapon for anxious, nervous, or outright panicked cats. It's simple in theory, a little trickier in practice, but once you get the hang of it, it'll change the entire nail trimming experience for both of you.
Start by laying your towel flat on a table or the floor. Fold it in half lengthwise so you have a long, narrow rectangle. That's your wrap.
The idea is to create a snug cocoon around your cat's body, leaving one paw exposed at a time.
Place your cat in the center of the towel, facing away from you. Gently but firmly pull the left side of the towel across your cat's body, tucking it under their chin. Then pull the right side over the top, overlapping the left.
Your cat should now be a burrito with their head peeking out the top and their body completely enveloped.
Here's the critical part: you want the wrap to be snug but not tight. Think about how a baby feels in a swaddle. It should be comforting, not constricting.
If the towel is too loose, your cat will wriggle free. If it's too tight, they'll panic. You're aiming for a pressure that says "you're safe" without restricting their breathing.
Now, hold your cat in your lap or against your chest, with their head tucked in the crook of your arm. This is your working position. From here, you can gently push one paw out from under the towel.
Not both. Just one. You'll work on one paw at a time, then re-tuck it before moving to the next.

Image source: Bing (Web (fair-use with source credit))
When you pull out a paw, hold it gently but firmly. Use your thumb to press on the top of the paw and your index finger on the pad underneath. This will extend the claws naturally.
If your cat is particularly tense, you can try pressing on the pad first to expose the claws before you even pick up the clippers.
Now, look at the nail. You'll see a pink area near the base called the quick. It contains blood vessels and nerves.
Below that, the nail is white or translucent, and that's where you cut. For cats with dark or black nails, the quick is harder to see, so you'll need to cut very small slices and stop as soon as you see a gray or pink dot in the center of the nail.
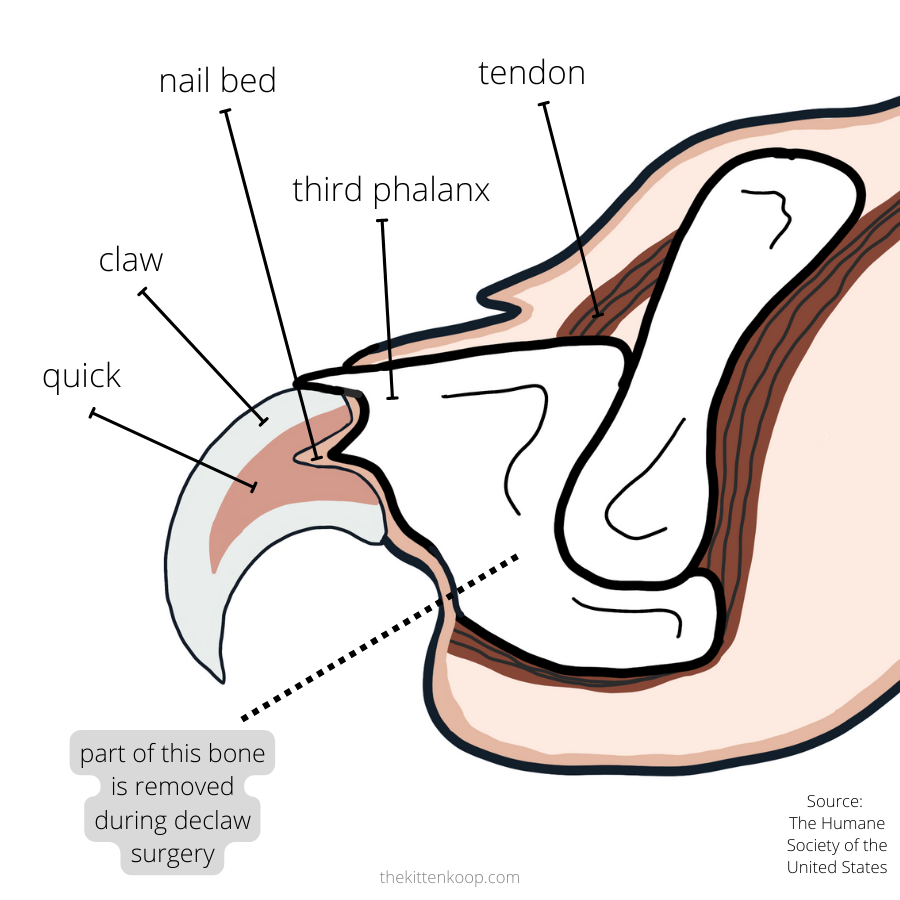
Image source: Bing (Web (fair-use with source credit))
Position the clippers so they're perpendicular to the nail, and cut at a 45-degree angle, straight across. Don't cut from the side. A clean, straight cut is less likely to split or fray.
One smooth squeeze is all it takes. If the nail resists, don't twist or force it. Your clippers might be dull.
After each nail, give your cat a tiny treat. Yes, after every single nail. This builds a positive association fast.
Ask most professional groomers, and they'll tell you the same thing: treat, clip, treat, clip. The rhythm matters.
Work your way through all the front claws, then re-tuck that paw and pull out the other one. Front claws are usually easier because they're more accessible. Back claws are smaller and less sharp, but they still need trimming.
Here's a pro tip: you don't have to do all four paws in one go. If your cat gets restless after two paws, that's okay. Stop there and try again tomorrow.
Half a trim is infinitely better than no trim, and it's much better than pushing your cat past their limit and damaging their trust.
If your cat absolutely refuses to stay in the purrito, don't fight it. Take a break and try the lap hold instead. Some cats prefer the freedom of having their body unencumbered, even if it means their owner has to work a little harder to keep them still.
Step-by-Step: The Lap Hold for Calm Cats
The lap hold is the simplest method, and it's perfect for cats that are already comfortable being handled. If your cat lets you pick them up without fuss, sleeps on your lap, and doesn't mind you touching their paws, this is your go-to.
Start by sitting in a comfortable chair or on the floor. Your cat should be facing away from you, with their back against your chest. This position keeps their legs pointing forward, which makes their paws naturally accessible.
It also prevents them from seeing the clippers coming, which reduces anxiety for some cats.
Let's look at the anatomy first so you know exactly where to cut. The quick is the pink area inside the nail that contains blood vessels and nerves. If you cut into it, it bleeds and hurts.
On clear or white nails, the quick is easy to see. On dark or black nails, you'll need to shine a light through the nail or cut in tiny increments, stopping as soon as you see a dark dot in the center of the cut surface.
Now, position your cat on your lap with their body lengthwise against yours. Use your forearm to gently press their body against your chest. This isn't about squeezing them.
It's about creating a stable, secure base so they don't feel like they're going to fall. Your other hand does the clipping.
Here's how the paw hold works: place your thumb on top of your cat's paw and your index finger on the pad underneath. Gently press down on the pad. This naturally extends the claws.
You'll see each claw pop out, ready for trimming. Some cats need a little more pressure than others. Find what works for your cat without causing discomfort.
When you clip, follow the same rules as the purrito method. Cut at a 45-degree angle, straight across the nail, staying well below the quick. For front paws, aim to remove just the sharp tip.
For back paws, which are thinner and less likely to get caught in things, you can be a little more conservative.
Here's a rhythm that works for most cats:
- Pick up one paw
- Press on the pad to extend the claws
- Clip one nail
- Give a treat
- Repeat for each nail on that paw
- Switch to the next paw
The treat after each nail is critical. It keeps your cat focused on the reward rather than the clipping. If your cat is food-motivated, this method works wonders.
If they're not, try praising them with a gentle voice or giving them a good chin scratch instead.
One thing to watch for: your cat's back legs. In the lap hold, your cat's back paws are resting against your thighs. If they decide to kick, you'll feel it.
Keep your legs together so your cat has nowhere to push off from. If your cat starts to tense up their back legs, that's a warning sign. Pause, give them a moment, and reassess.
The lap hold works best when you're calm and your cat is relaxed. If your cat starts wiggling or trying to escape, don't force it. Let them go, take a break, and come back later.
The goal is to make nail trimming a neutral or even positive experience, not a battle.
The Two-Person Hold: When You Need Backup
Some cats are simply too strong, too wiggly, or too determined to escape for one person to handle alone. That's where the two-person hold comes in. One person focuses entirely on keeping the cat still while the other focuses entirely on clipping.
It's efficient, it's safer, and it's often the only method that works for large or particularly stubborn cats.
Here's how to set it up. Person A, the holder, positions the cat on a table or counter. The cat should be facing away from Person A, with their body pressed gently but firmly against Person A's chest.
Person A wraps one arm around the cat's chest, just behind the front legs, and the other arm around the cat's hindquarters. This creates a secure C-shape that prevents the cat from backing up, lunging forward, or twisting around.
Person B, the clipper, stands on the opposite side of the table. Person B picks up one of the cat's front paws, extends the claws by pressing on the pad, and clips. Person B should work steadily but calmly, moving through each nail without hesitation.
Communication is key. Person A should tell Person B when the cat is starting to squirm or tense up. Person B should tell Person A when they're switching paws.
A simple "holding steady" or "switching now" keeps the process smooth and prevents accidents.
Here are some additional tips for the two-person hold:
- Use a non-slip surface. A towel or yoga mat on the table gives the cat traction and prevents slipping.
- Keep the cat's head tucked. If you can, have Person A gently tuck the cat's head against their chest or under their chin. This limits head movement and reduces biting risk.
- Work quickly. The longer the trim takes, the more likely the cat is to lose patience. Aim for under five minutes total.
- Switch roles if needed. Sometimes the holder and clipper need to swap to maintain the right energy. Don't be afraid to change things up.
A common mistake with the two-person hold is that Person A holds the cat too tightly. This actually makes things worse. When a cat feels too restricted, they panic and fight harder.
Instead, Person A should aim for a firm but gentle pressure that feels supportive rather than trapping. Think of it like a hug. A good hug makes you feel safe.
A crushing hug makes you want to escape.
If your cat is extremely resistant, consider a compromise: clip just the front paws during the two-person hold, then let the back paws go for now. Back claws are less likely to cause damage to your furniture or skin, so they can wait until your cat is more comfortable with the process.
The two-person hold is also great for transitioning cats that are new to nail trims. Once your cat learns the routine and realizes that trims aren't painful, they often become calm enough to handle with just the lap hold. Give it time.
Patience and consistency are your best tools.
Mistakes That Lead to Bites, Bleeding, and Broken Trust
Even with the right hold, things can go wrong. Most nail trimming accidents fall into a few common categories, and knowing what they are helps you avoid them.
Cutting too close to the quick. This is the number one mistake. It's painful, it bleeds, and it teaches your cat to fear the clippers. The quick is the pink area inside the nail that contains blood vessels and nerves.
On clear nails, you can see it easily. On dark nails, you have to be more careful. When in doubt, cut less.
You can always take off more, but you can't put the nail back.
Using dull clippers. Dull blades crush the nail instead of cutting it cleanly. This causes pain and can split the nail, which is worse than not trimming at all. If your clippers are more than a year old or if they're not cutting smoothly, replace them.
It's a small investment for a much better experience.
Holding the paw too tightly. When you squeeze a cat's paw, you're compressing their toes. This is uncomfortable and makes them want to pull away. Instead, hold the paw gently but firmly.
Press on the pad to extend the claws, then keep your grip steady without crushing.
Holding the paw too loosely. The opposite problem. If your grip is too loose, the cat will pull their paw away mid-clip. This can lead to a cut at the wrong angle or a nick on the quick.
You want a grip that's secure enough to keep the paw still but gentle enough to not cause discomfort.
Trimming when your cat is overstimulated. Cats have a limit. If they've been playing, if there's noise in the house, or if they're already on edge, a nail trim is not the right activity. Check your cat's body language first.
If they're anxious or agitated, wait until they've calmed down.
Skipping the treats. Treats aren't optional. They're the bridge between "this is scary" and "this is okay." If you skip the treats, you're missing your biggest training tool.
Trimming too many nails at once. For a first-time trim, aim for just a few nails. Maybe one paw. Let your cat process the experience.
Then do another paw tomorrow. Building up gradually is far more effective than forcing a full trim and dealing with the aftermath.
Ignoring the back paws. Back claws can grow long, curl into the paw pad, and cause pain. They also get caught in carpets and furniture. Don't neglect them just because they're harder to reach.
If you do make a mistake, remember this: the way you recover matters more than the mistake itself. Stay calm. Stop trimming.
Comfort your cat. Offer a treat. The goal is to end the session on a positive note so your cat doesn't associate nail trims with pain and fear.
What to Do If You Cut the Quick
Cutting the quick happens to every cat owner at least once. Even experienced groomers do it. It's not a disaster.
It's just a small wound that needs quick, calm attention. Here's exactly what to do.
First, stay calm. Your cat will pick up on your energy. If you panic, they'll panic.
Keep your voice low and soothing. Say something like "It's okay, you're fine" in a soft tone. This helps your cat understand that nothing catastrophic is happening.
Second, apply immediate pressure. Grab a clean cloth or paper towel and press it gently against the nail tip. Hold it there for 30 to 60 seconds.
This helps slow the bleeding and allows the blood to start clotting.
Third, apply styptic powder. Dip the bleeding nail tip into the powder, or use a cotton swab to press it onto the tip. The powder constricts blood vessels and stops the bleeding fast.
If you don't have styptic powder, you can use cornstarch or baking flour as a temporary substitute. They work similarly, though not quite as quickly.
Important: Do not use any pain-relieving products that contain benzocaine or similar ingredients unless your vet recommends them. Some topical numbing agents can be toxic to cats if ingested, and cats tend to lick their paws.
Let your cat calm down. Give them a treat and some gentle affection. Don't immediately try to continue the trim.
The session is over for today. Your cat needs time to recover and refocus.
Watch the nail over the next day or two. The bleeding should stop quickly, and the nail should look normal within a week. If the bleeding doesn't stop after 10 minutes of pressure, or if the area looks swollen, red, or infected, call your veterinarian.
This is rare, but it's worth monitoring.
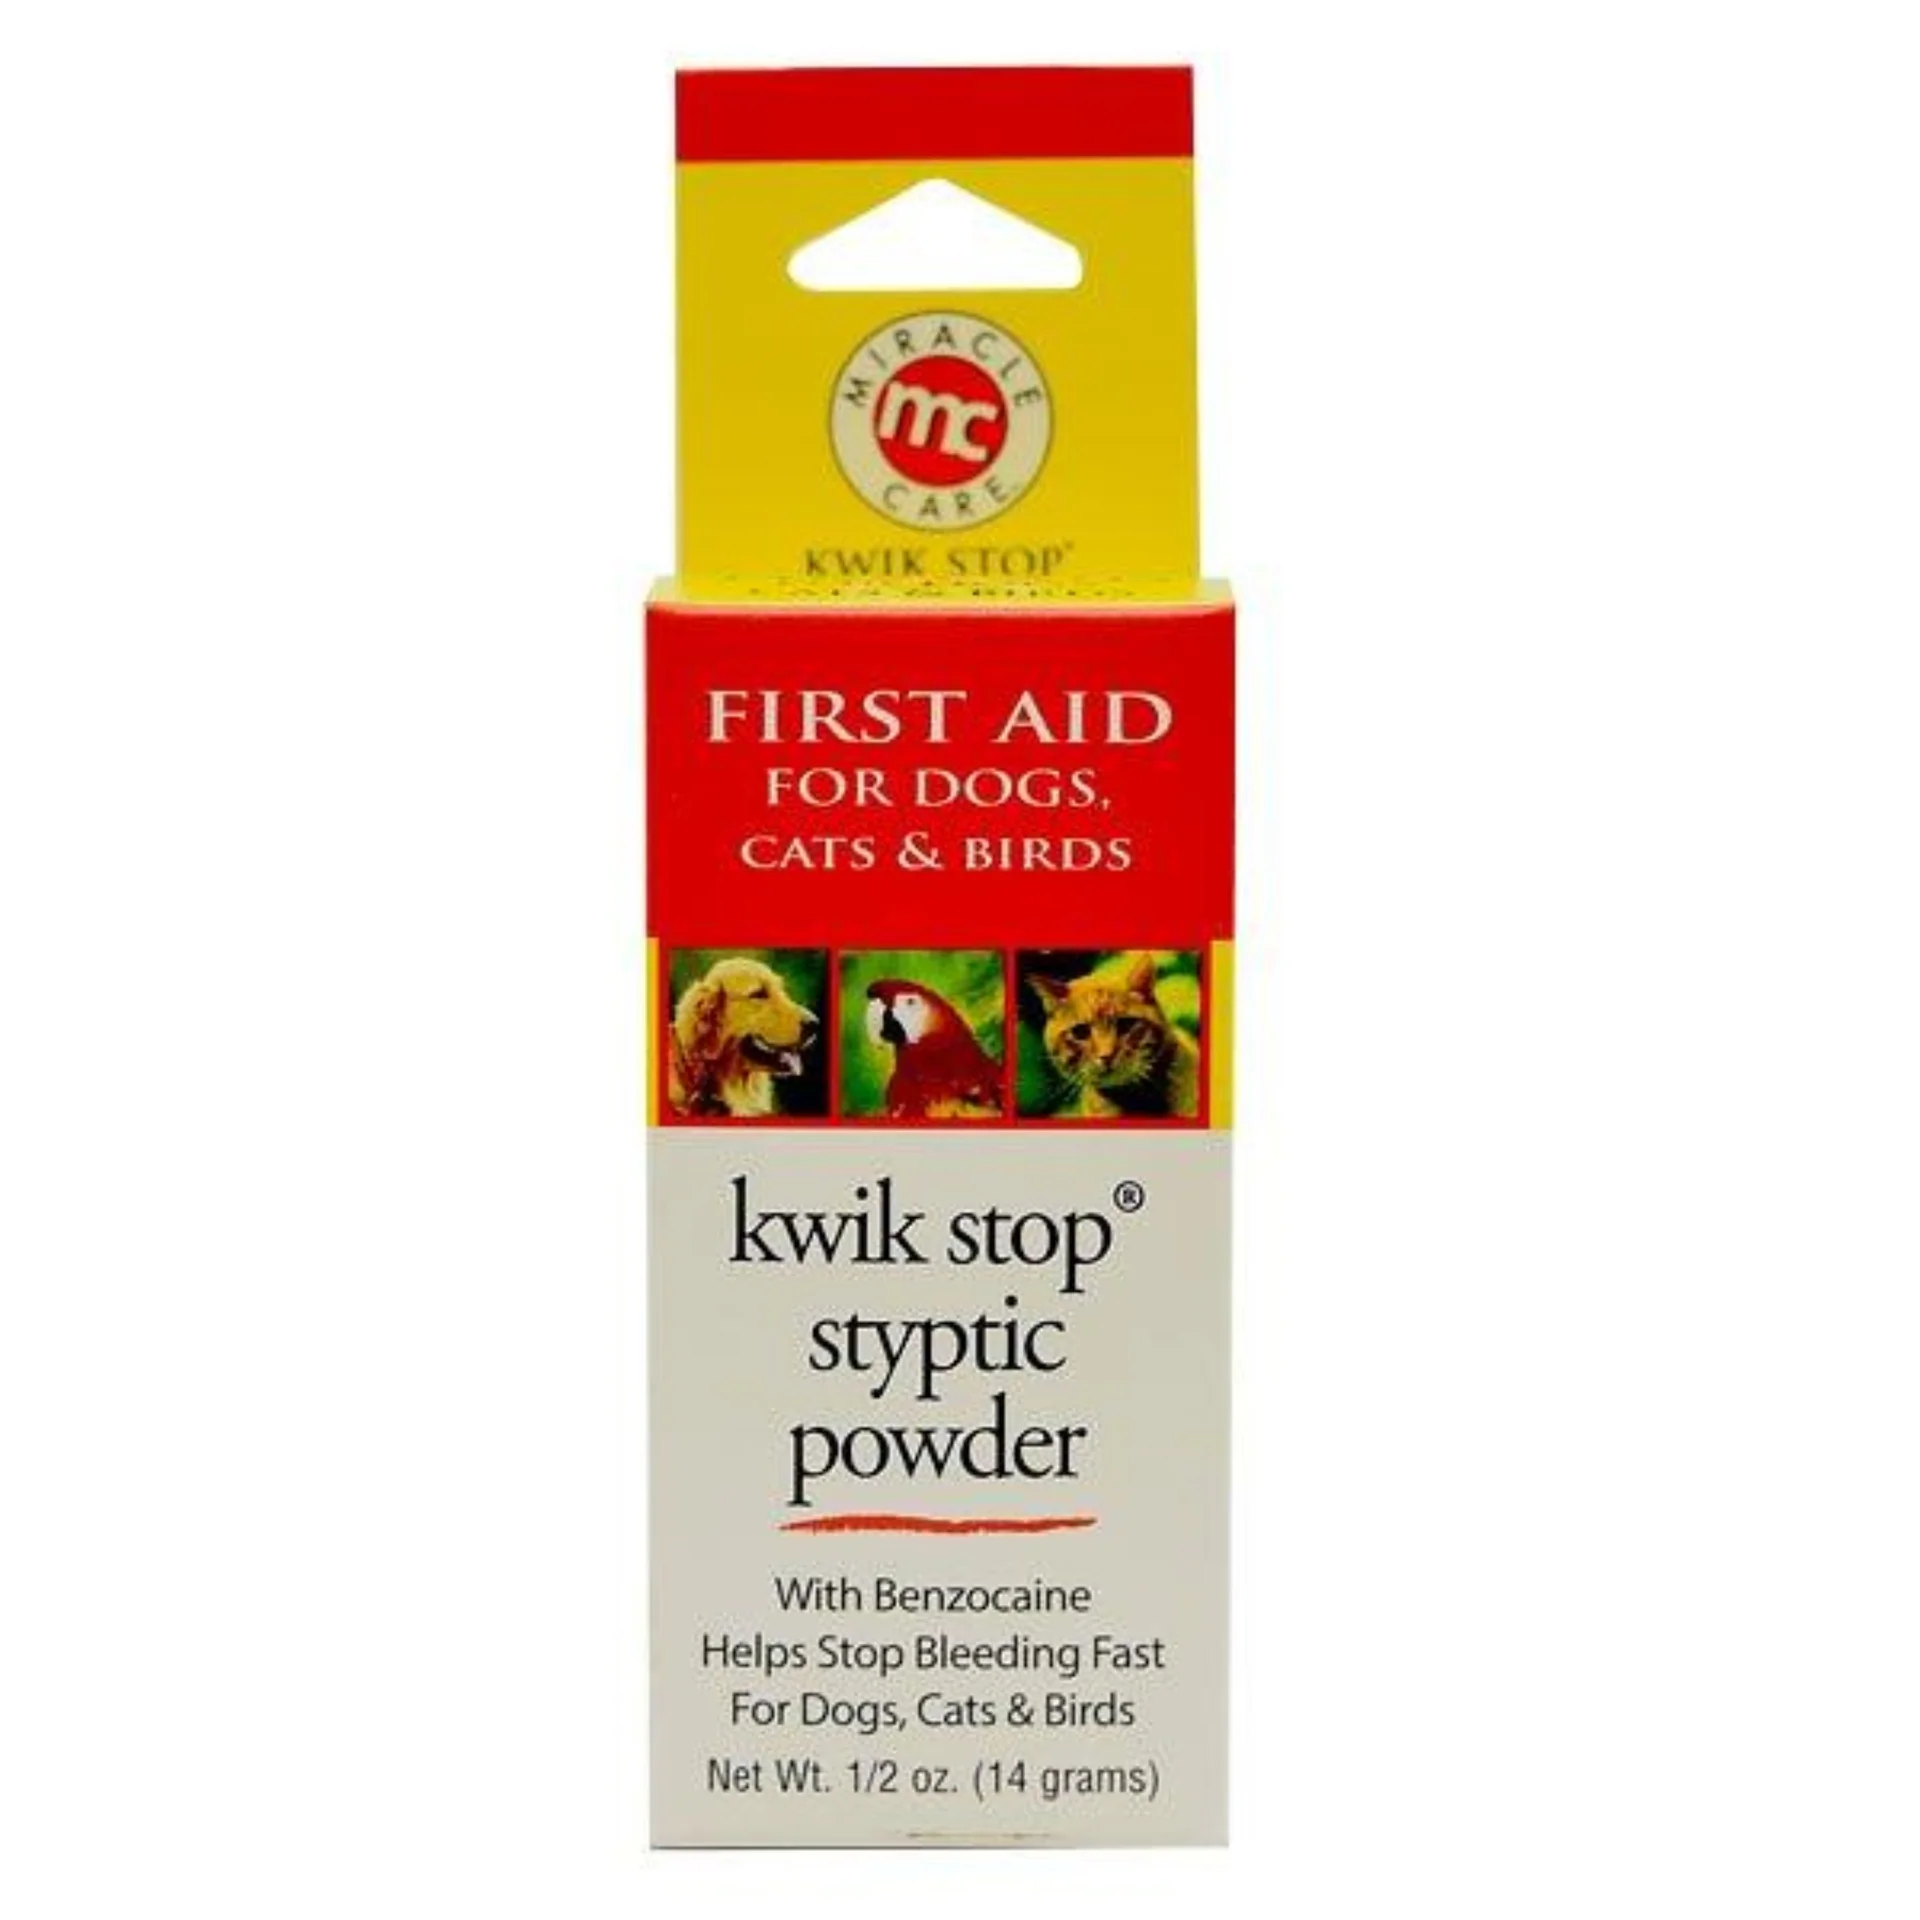
Image source: Bing (Web (fair-use with source credit))
A quick note on prevention: if you're trimming a cat with dark nails, you can use a flashlight to help you see the quick. Shine the light through the nail from below. The quick will appear as a shadowy area near the base.
This trick takes practice, but it works well for many owners.
Remember, cutting the quick once is a learning experience. Doing it repeatedly means you're cutting too aggressively. Slow down.
Cut less. Your cat's trust is worth more than perfectly short nails.
How to Make Future Trims Easier (Desensitization That Actually Works)
The best way to make nail trims easier is to make them routine. Cats thrive on predictability. If your cat knows exactly what's going to happen, they'll be far less stressed.
Here's how to build that routine.
Start with paw handling. Spend a few minutes each day touching and gently squeezing your cat's paws. Do this during calm moments, like when they're relaxing on the couch or lying in the sun. Press on the pads to extend the claws, just like you would during a trim.
Give a treat every time. Your cat will learn that paw handling leads to good things.
Introduce the clippers without using them. Let your cat sniff the clippers. Touch the clippers to their paws. Click them open and closed nearby so they get used to the sound.
Reward them throughout. This desensitizes your cat to the tool itself, which is often half the battle.
Do mock trims. Hold your cat in the lap hold. Press on a paw to extend a claw. Place the clippers near the nail but don't clip.
Give a treat. Repeat for several nails. This gets your cat used to the full routine without any actual cutting.
Gradually introduce real trims. Once your cat is comfortable with mock trims, start clipping one or two nails per session. Pair each clip with a treat. Slowly build up to a full trim over several weeks.
Use high-value treats consistently. The treats you use during nail trims should be special. Don't give them at any other time. This makes the reward more meaningful and your cat more motivated.
Keep sessions short and sweet. A nail trim shouldn't take more than 10 minutes. If your cat is getting restless, stop. The goal is to create a positive experience, not to push through a full trim under duress.
Pair trims with something your cat loves. Trim nails right before feeding time. Or right after a play session when your cat is tired and relaxed. The positive association makes the process less stressful.
Stay consistent. The more regularly you trim your cat's nails, the more normal it becomes. Once a week is ideal for most cats. At minimum, aim for every two to three weeks.
Regular trims also prevent the quick from growing too long, which makes each trim easier and safer.
Kittens are much easier to desensitize than adult cats. If you have a kitten, start these exercises as early as 3 to 4 weeks old. Handle their paws daily, introduce the clippers early, and make everything positive.
By the time they're adults, nail trims will feel completely normal.
For adult cats that are already nervous, this process takes longer. That's okay. Go at your cat's pace.
A few minutes of paw handling each day, followed by treats, will eventually change how your cat feels about the whole experience.
When to Stop Trying at Home and See a Pro
There are times when professional help is the right call. Not because you're failing, but because your cat's safety and your safety are more important than a DIY success story.
You should consider a professional groomer or veterinarian if:
- Your cat consistently becomes aggressive during nail trims, even with the correct holds
- Your cat has a medical condition that makes restraint risky, such as arthritis, a recent injury, or a respiratory issue
- Your cat's nails are severely overgrown, especially if they've curled into the paw pad
- Your cat has a dark or infected nail that needs veterinary attention
- You feel anxious or physically unable to hold your cat safely
A professional groomer or vet tech has years of experience handling cats. They know how to read body language, apply the right restraint, and work quickly. They also have tools that make the process easier, like grooming bags and muzzles, though these are used only when necessary.
Your veterinarian can also provide guidance on nail care for cats with special needs. Senior cats often develop thickened nails that are harder to trim. Cats with arthritis may need a more supportive hold.
A vet can recommend the best approach for your specific situation.
One more thing: if you're in the US, your veterinarian can also discuss the risks and benefits of nail caps, soft plastic covers that glue onto your cat's claws. These are controversial. Some cats tolerate them well, others don't.
They're not a substitute for trimming, but they can be a useful temporary solution for cats that scratch furniture or people.
The bottom line is simple: if your at-home nail trims consistently end in stress, fear, or blood, stop. You're not hurting your cat's feelings by taking them to a pro. You're making a smart decision to keep everyone safe and calm.
You can always try again later, using the desensitization techniques we covered above.
Frequently Asked Questions
How often should I trim my cat's nails?
Most cats need their nails trimmed every 2 to 4 weeks. Indoor cats typically need trims more often because they don't wear their nails down naturally. Outdoor cats and cats that use scratching posts frequently may need less frequent trims.
Check your cat's nails at least once a week. If you can hear them clicking on the floor, they're overdue.
Do indoor cats need nail trims if they use a scratching post?
Yes. Scratching posts help maintain nail health, but they don't fully replace trimming. Scratching removes the outer dead layers of the nail and helps keep them sharp.
It doesn't shorten the overall length. Indoor cats, especially those that live primarily on carpets and soft surfaces, still need regular trims to prevent overgrowth and ingrown nails.
Are nail grinders better than clippers for cats?
It depends on your cat. Grinders use a sanding disc to gradually file the nail down instead of cutting it. They're quieter than they used to be, and they don't create the "snip" sensation that some cats dislike.
However, they take longer, and some cats are scared of the vibration. Clippers are faster and simpler for most owners. Try both and see which your cat tolerates better.
Can I use human nail clippers on a cat?
No. Human nail clippers are too small and can crush or split cat nails. Cat nails are shaped differently, and they're thicker and harder than human nails.
Using improper tools increases the risk of pain, injury, and broken nails. Invest in cat-specific clippers. They're inexpensive, and they make the job much easier and safer.
What if my cat bites or scratches during nail trims?
If your cat becomes aggressive, stop the session immediately. Do not punish your cat. Punishment increases fear and makes future trims worse.
Instead, assess the situation. Is the hold too tight? Are the clippers dull?
Is your cat simply not in the mood? Take a break, try again later with a different approach, or consider a professional. A bite or scratch wound should be cleaned thoroughly.
If it's deep or shows signs of infection, seek medical attention.
How do I know where the quick is on black nails?
The quick is harder to see on black nails, but there's a trick. Shine a bright flashlight through the nail from below. The quick will appear as a shadowy or slightly pink area near the base.
When in doubt, cut tiny slivers at a time. Stop as soon as you see a small dark dot in the center of the cut surface. That means you're reaching the quick, and you should stop cutting.
The Bottom Line: A Calm You Means a Calm Cat
Nail trimming doesn't have to be a battle. The secret is to slow down, read your cat's signals, and use a hold that matches their personality. The purrito works for anxious cats.
The lap hold works for calm cats. The two-person hold works for strong cats. Pick the one that fits your situation, and practice it until it feels natural.
Every nail trim is a chance to build trust. A treat after each nail, a calm voice, a gentle touch. These small things add up.
Over time, your cat will learn that nail trims aren't scary. They're just another part of life, and they come with snacks.
If you're struggling, take a step back. Desensitize your cat first. Let them get used to paw handling and the clippers before you attempt a full trim.
Go slowly. Celebrate small wins. And never push your cat further than they're willing to go.
You've got this. One paw at a time.