
You're holding a trembling dog that hasn't let you touch its paws in three weeks, and the coat is starting to mat. You know it needs grooming, but every time you reach for the brush, those eyes go wide and the body tenses. Learning how to groom a scared rescue pet isn't really about technique.
It's about understanding that every session is a conversation where your pet's fear response is the loudest voice in the room.
The stakes are higher than just a tidy coat. Research on shelter dog behavior indicates that forced handling creates lasting psychological setbacks, with some animals requiring weeks to recover from a single traumatic grooming session. As of 2026, veterinary behaviorists consistently emphasize that cooperative care, where the animal has agency and choice, is the gold standard for building trust with rescued pets.
The good news is that with the right approach, patience, and a willingness to work at your pet's pace, grooming can actually become one of the strongest bonding experiences you share.
Quick Answer
Groom a scared rescue pet by starting with desensitization, not grooming. Let them sniff tools. Reward calm behavior.
Touch for three seconds, then release. Keep sessions under five minutes. Use one tool per session.
Build trust measured in millimeters, not hours. When fear signals appear, stop and retreat. Never force restraint.
Professional Fear Free Certified groomers exist for tough cases.
Why Grooming a Rescue Pet Is Different
Standard grooming advice assumes a pet that trusts you. Rescue pets come with luggage. Their history is often unknown, but the fear is real.
A dog that was brushed too hard in a shelter might associate any brush with pain. A cat that was bathed roughly might see water as a threat.
Rescue pets are also in a constant state of physiological alert. Their nervous systems are primed for danger. When you approach with a brush, their brain doesn't process "grooming." It processes "unknown object coming toward my vulnerable body." This is not stubbornness.
It's survival biology.
In our research, veterinary behaviorists describe this as "trigger stacking." Your pet accumulates small stressors throughout the day. A loud truck outside. A stranger at the door.
A dropped pan in the kitchen. By the time you reach for the clippers, their stress bucket is already nearly full. One more thing pushes it over.
The Trust Deficit
You're not just grooming a coat. You're repairing a broken social contract. Most rescues have learned that humans are unpredictable.
They've been handled without consent. They've been restrained. They've been punished for natural fear responses.
This means you're starting in a deficit position. You have to bank trust before you can spend it. Every positive interaction adds a deposit.
Every forced session makes a withdrawal. If you're in the red, you'll keep hitting resistance.
The good news? Trust accrues. A pet that learns grooming means treats, praise, and release will eventually lower its guard.
It just takes time measured in weeks, not days.
Fear Versus Aggression
Here's the critical distinction. Many owners misread fear as aggression. A growling dog is often a terrified dog.
A hissing cat is usually a scared cat. These are warning shots, not attacks.
This matters because your response changes everything. If you punish a growl, you teach the pet that warning signs lead to pain. It learns to skip the warnings and go straight to the bite.
This is called "suppressed warning behavior," and it's how permanent aggression develops.
Instead, respect the warning. Back off. Give space.
Let the pet learn that communicating fear results in safety, not punishment.
The Cost of Pushing Too Fast
Let's talk consequences. A forced grooming session can undo weeks of trust work. One bad experience can teach a rescue that you're no different from everyone else.
The flinch becomes a bite. The avoidance becomes full-blown panic.
Aggregate reviews from professional groomers show a pattern. The most difficult cases are usually pets whose owners tried to force grooming at home, failed, and then brought in a fearful, defensive animal. These pets require extensive rehabilitation before grooming is even possible.

Image source: Bing (Web (fair-use with source credit))
The Hard Truth About Forced Grooming
Forced grooming is any session where the pet has no choice. You hold them down. You clip the nails despite their struggling.
You wash them because "it has to be done." The phrase "it has to be done" justifies countless traumatic experiences for rescue pets.
Here's the uncomfortable truth: rarely does grooming actually have to happen right now. Mats can wait a day. Nails can wait a week.
A little longer coat can wait. What can't wait is the trust you're destroying in the meantime.
What Happens During a Forced Session
When you physically overpower a pet, several things happen simultaneously. Cortisol spikes, the stress hormone that floods their system. Their heart rate climbs.
Their pupils dilate. They enter a state of learned helplessness.
Learned helplessness looks like giving up. The pet goes limp. It stops struggling.
Some owners mistake this for calming down. It is not calm. It is a dissociative shutdown, a sign the animal has decided resistance is useless.
The pet learns a devastating lesson: you are not safe. It generalizes this lesson to grooming tools, to the grooming location, and sometimes to all humans. The bond you've built shrinks.
The Setback Effect
Here's the number you need to remember. A single forced grooming session can set back trust by two to four weeks, based on case studies from veterinary behavior practices. Sometimes longer.
That means your ten days of careful desensitization can be erased in ten minutes. The math is brutal. Recovery is always slower than regression.
Bite Risk and Injury Prevention
Forced grooming doesn't just damage trust. It puts both of you at physical risk. A panicking pet is a biting pet.
Their teeth are the only defense they have.
Bite wounds range from minor nicks to infected punctures requiring medical attention. The American Veterinary Medical Association reports that a significant percentage of dog bites occur during handling activities like grooming. The pet is not "mean." It is desperate.
From the pet's side, forced restraint can also cause injury. Twisting to escape can strain spines. Slipping in a tub can break nails.
Thrashing against a restraint can bruise internal organs. This is a safety issue on both ends.
What Forcing Looks Like in Practice
You might not realize you're forcing. It can be subtle. Holding a paw just a little too firmly.
Pinning a squirming dog with your forearm. Shaving a mat while a cat struggles underneath you.
If you hear a high-pitched whine, see flattened ears, or feel muscles go rigid, you are forcing. Your pet is not being dramatic. It is communicating distress.
The alternative is to stop. Release. Give space.
Finish tomorrow. The coat will still be there.
Before You Start: Read Your Pet's Body Language
Before any grooming session, you need to speak fluent canine or feline body language. This is not optional. This is the entire foundation.
The first and most reliable sign of stress is the "whale eye." This is when the dog turns its head away but keeps its eyes locked on you. You see the whites of the eyes, crescent-shaped and wide. It means the dog is both scared and watchful, ready to defend itself.
Lip licking is another classic signal. This is not the quick tongue flick of a hungry dog. This is a slow, deliberate lick of the nose in the absence of food.
It's a calming signal.
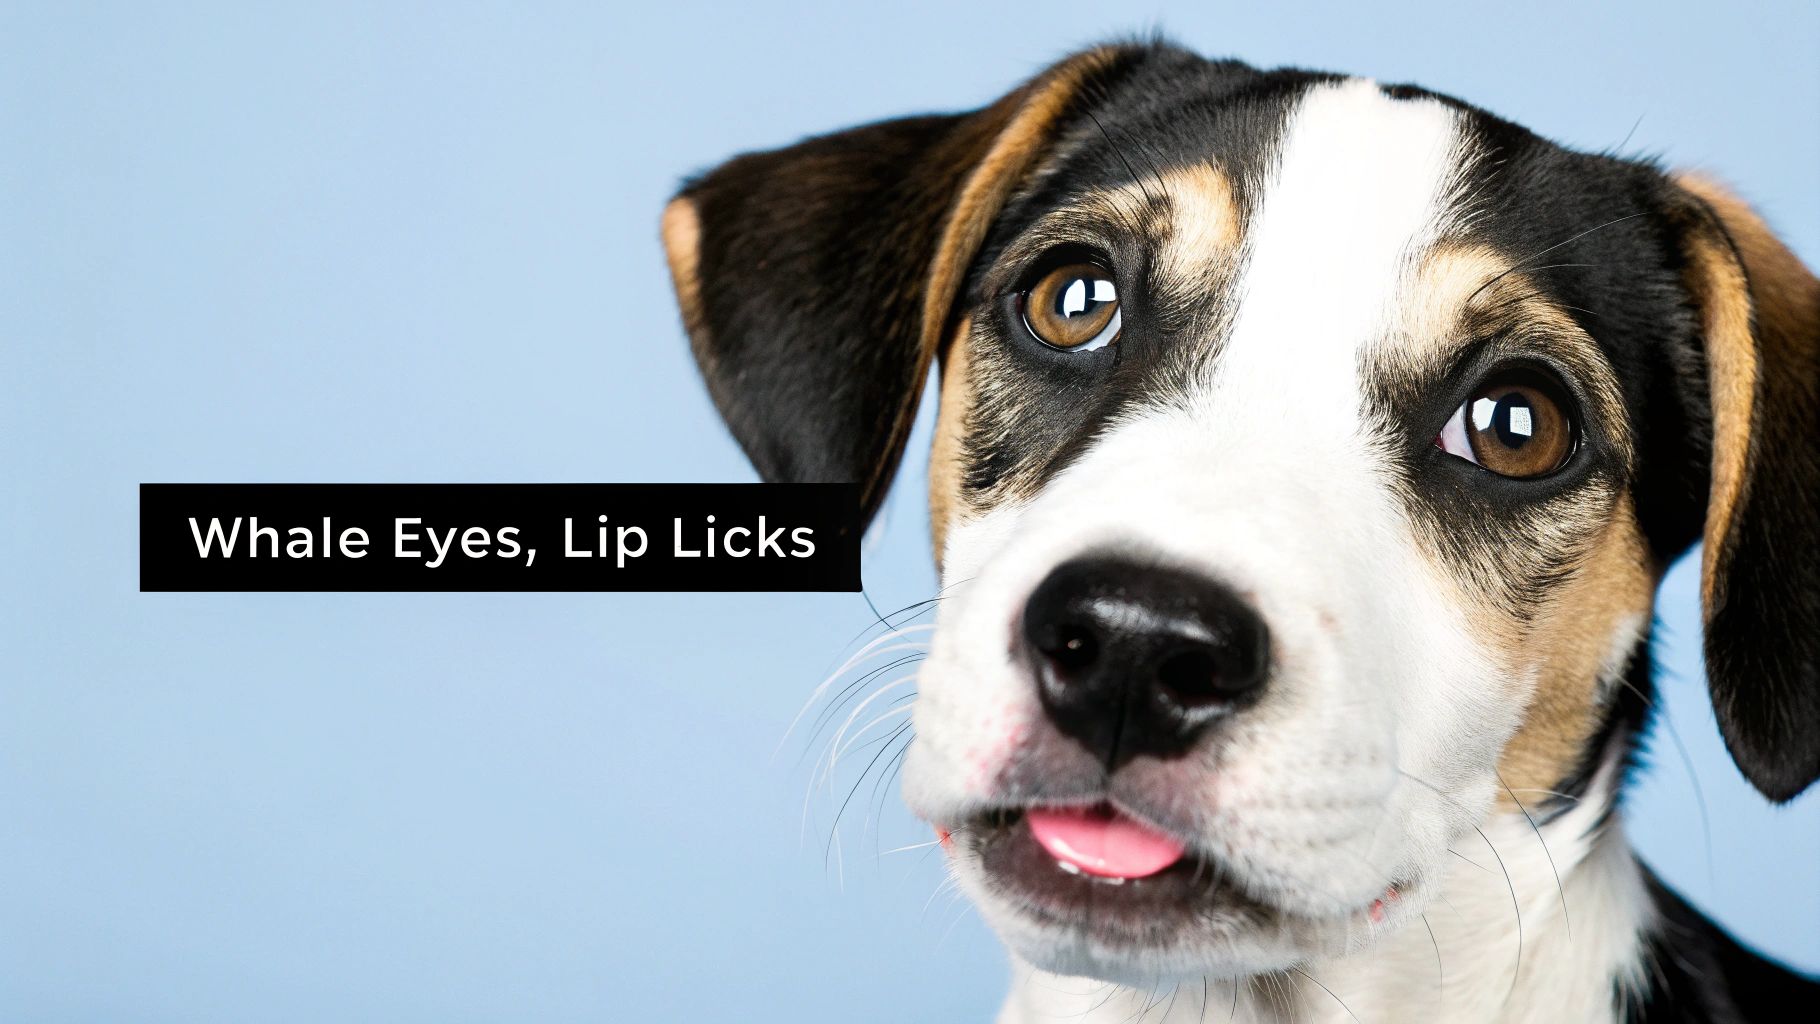
Image source: Bing (Web (fair-use with source credit))
The Stress Signals Most Owners Miss
A tucked tail between the legs is obvious to most people. But the more subtle tail signals matter just as much. A tail tucked tight against the body signals high fear.
A tail wagging slowly with low amplitude is not happiness. It's nervousness.
Yawning is a big one. Dogs yawn when stressed, just like humans. If your dog yawns while you approach with the brush, it's not tired.
It's overwhelmed.
Shedding is another tell. If fur starts flying while you brush, even a little, the stress response has kicked in. The piloerection reflex is firing.
In cats, the signals differ slightly. Dilated pupils that stay wide in bright light signal fear. Ears flattened to the sides, whiskers pulled back, and a tail lashing slowly are red flags.
Knowing the Difference Between Uncomfortable and Panicked
These are two different states that require two different responses.
Uncomfortable means the pet is wary but still engaged. You see mild whale eye but the body is loose and soft. The pet is looking at the treat in your other hand.
This is workable. You can continue slowly.
Panicked means the pet has left the building. The body is rigid. The pupils are blown.
The breathing is shallow and fast. This pet is not learning anything. It's in survival mode.
You need to learn the threshold where uncomfortable becomes panicked. It will be different for every pet. Push past it, and you lose the session.
Respect it, and you build tolerance.
How Fear Presents in Different Pets
Every rescue is an individual. But there are patterns worth knowing.
Young dogs who were poorly socialized often freeze rather than run. They shut down because they haven't learned to flee. Senior pets, dogs and cats alike, may show fear as stiffness or mobility resistance, especially if they're dealing with joint pain.
Greyhounds and other sighthounds tend toward nervousness and trembling. Herding breeds often show fear as hypervigilance, scanning the room constantly. Terriers can go straight to growling and snapping because their breed history rewards boldness.
The lesson isn't to stereotype. It's to watch closely and learn your specific pet's baseline behavior. Then you can spot the deviations.
Essential Gear for Anxious Pets
You don't need a salon full of equipment to groom a scared rescue. In fact, less is often more. Simpler tools mean fewer scary objects to desensitize.
The right tools reduce fear because they handle better. They don't pull. They don't vibrate.
They don't make terrifying noise. They also reduce your frustration, which matters because pets read your emotions instantly.
Brushes and Combs
For dogs with short coats, a rubber curry brush is gentle and feels almost like a massage. It's a fantastic starting tool for a fearful dog. For medium and long coats, a slicker brush with fine, bent wire bristles is the standard choice.
The Hertzko self-cleaning slicker brush is a popular pick because the retractable bristles make cleanup easy, which cuts down on session length.
Avoid Furminator-style de-shedding tools on a nervous pet. The blades are sharp and can irritate sensitive skin. They're better for confident pets that don't flinch at touch.
For cats, start with a soft bristle brush. It mimicks a mother's grooming tongue. A stainless steel comb for mats is essential, but use it only after the pet accepts brushing.
Ear cleaning should be done with cotton balls and a vet-approved ear solution. Never insert a cotton swab into the ear canal. That's a recipe for injury and distrust.
Nail Care Tools
Nail grinding causes more fear than almost anything else. The vibration and sound are deeply unsettling to most pets, rescue or not. If you have the option, start with manual clippers instead.
Here's a practical tactic we've seen work well in our research of professional grooming methods. Get a pair of clippers with a safety guard. The guard limits how deep the blade cuts, which dramatically reduces the risk of cutting the quick.
This protects the pet from pain and protects the trust you're building.
File the rough edges with a standard nail file, not a grinder, at least at first. The file is silent and non-threatening.
Grooming Tables and Bathing Gear
You don't need a professional hydraulic grooming table. A non-slip bath mat in the tub is far more important. Pets that feel unstable are defensive pets.
Slipping terrifies them.
For water, use a handheld sprayer rather than the faucet. The faucet sound is scary. The sprayer is gentler but still best introduced gradually.
Waterless shampoo is a lifesaver for rescues that panic at water. You can get a pet reasonably clean with a thorough wipe-down using waterless foam or wipes. It's not as deep as a bath, but it's worth the absence of trauma.
Clippers for Matting
If you need to shave mats, do not start with loud clippers. The vibration and noise will cause panic. Look for low-decibel clippers, ideally under 60 decibels.
The Andis Pulse is a quiet, cordless option. The Wahl Arco is another strong choice, known for a quiet motor.
Get a guard comb attachment. This prevents accidentally nicking the skin, which is a real risk on nervous pets that move suddenly. A nick is painful and catastrophic for trust.
What to Skip
Skip anything that makes a sudden sharp noise. Skip anything with strong vibrations. Skip scissors near the skin entirely.
Skip and slow down if you feel your own tension rising.
The goal is a calm tool. Calm tools make calm handlers. Calm handlers make confident pets.
The Acclimation Phase: Setting Up for Success
This is the most important phase of the entire process, and the one that gets skipped most often. The acclimation phase is your chance to teach your pet that grooming tools are not threats. They are treat dispensers.
During this phase, you are not grooming. You are only building positive associations. This can take days or weeks.
It depends entirely on the pet's starting anxiety level.
Letting Them Sniff and Explore
Set the brush on the floor between you and your pet. Then sit down. Get comfortable.
Don't reach for the brush. Just let it exist.
Does your pet approach it? Great. Toss a treat near the brush.
Does your pet hesitate? That's okay. Move the brush across the room and take a step back.
You're building from a distance.
Repeat this until your pet approaches the brush without hesitation. This could take ten minutes. It could take a week.
It's not a race.
Pairing Tools with High-Value Treats
Once the brush is no longer scary, start the association phase. Every time the pet looks at the brush, click or mark with a word and deliver a treat. The sequence is brush, look, treat.
Brush, sniff, treat. Brush, touch, treat.
What qualifies as high value? In our research, the most effective treats are small, soft, and stinky. Boiled chicken shredded into tiny pieces.
Diced cheese. Freeze-dried liver. Trial a few options to find your pet's favorite.
The key is timing. The treat must arrive within one second of the desired behavior. This is called "marker-based training," and it's how professional trainers build lightning-fast associations.
The Three-Second Rule
Here's your first hard number. In early sessions, touch your pet with the brush for exactly three seconds. Then stop.
Treat. Release.
Three seconds is short enough to be tolerable. It's shorter than the moment where panic sets in. It gives your pet a success experience.
And it ends the interaction on a positive note.
Ending on a positive note matters because your pet remembers the end of the experience more vividly than the beginning. End good, and the next session starts better.
Setting a Non-Negotiable Session Limit
Your own enthusiasm is a risk. You'll see progress and want to push further. Don't.
Set a timer for five minutes during the acclimation phase. When the timer goes off, stop. Even if your pet is tolerating brushing beautifully, stop.
Why? Because you're training tolerance, not maximum output. You want your pet to always have a little more capacity to give.
Ending while things are good builds the belief that grooming is safe and short. Ending after the pet has shutdown teaches that grooming is endless and scary.
Keeping the Location Neutral
Choose a grooming location that doesn't feel like a trap. A corner of the living room works well. Spread a mat or towel on the floor.
This creates a defined space without the confinement of a bathroom or grooming table.
If your pet chooses to leave the mat, let it leave. A pet that feels it can escape is a pet that stays voluntarily. That choice is the entire ballgame.
Once the acclimation phase is complete, usually after one to two weeks of consistent sessions, you're ready to move into the actual grooming work. That's where the pressure-and-release technique lives, and it's the next section we're covering.
The Pressure-and-Release Technique
This is the single most important practical skill you can use when grooming an anxious rescue. The pressure-and-release technique is a way of touching your pet that gives them a sense of control. It helps them learn that grooming is not a trap, and that they can escape discomfort at any time.
The concept is simple, but it's a behavior science gold standard. You apply gentle, even pressure with your hand or tool. You hold it for a few seconds.
Then you release the pressure entirely, usually pairing that release with a treat. The pet learns that enduring a moment of touch results in relief and reward.
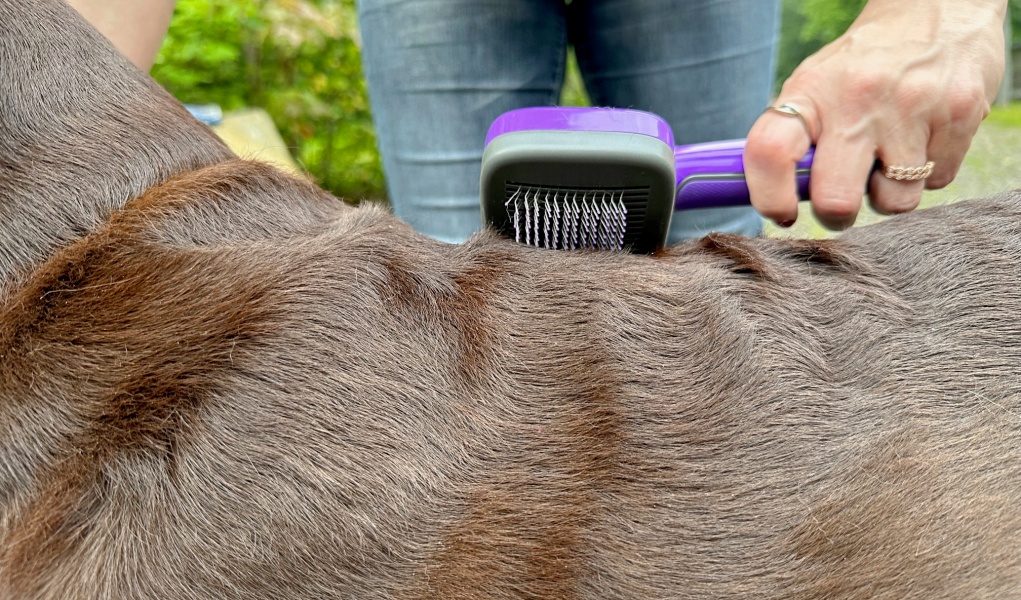
Image source: Bing (Web (fair-use with source credit))
How the Technique Works
Start with your hand before any tool. Place it on your pet's shoulder. Apply light, even pressure for three seconds.
Then lift your hand completely off. Treat. Pause.
Repeat.
This teaches your pet that touch has an endpoint. It won't last forever. The pressure stops on their timeline, not yours.
That predictability is deeply reassuring to a nervous animal.
Once your pet accepts hand pressure, add the brush. Same sequence. Brush, pressure, three seconds, release, treat.
The tool becomes just another source of brief touch rather than a scary object that stays on their body.
Applying It to Brushing
When you brush, use the same rhythm. One slow, smooth stroke from the shoulder to the hip. Then lift the brush.
Treat. Let your pet process.
Two or three strokes is plenty for the first session. Resist the urge to do "just one more." One more becomes five more, and five more becomes a shutdown.
You can build up stroke count as your pet gains confidence. But always keep the pattern consistent. Stroke, release, treat, pause.
Stroke, release, treat, pause.
The rhythm matters more than the number of strokes. A calm, predictable rhythm is the foundation of trust.
Applying It to Paw and Face Handling
Paws and faces are the most sensitive areas for most pets. They are also the most necessary to handle for nail trims and eye care. Use the same pressure-and-release approach, but move even slower.
Start by touching a paw with one finger for one second. Treat. Release.
Build up to holding the paw for three seconds. Then five. Then gently pressing a toe.
For the face, start with the jaw area. Stroke downward toward the chin. Avoid the top of the head and the ears initially.
These are vulnerable spots that many anxious pets protect fiercely.
Work in tiny increments. One second of ear touch this week. Two seconds next week.
It feels absurdly slow, but it works.
Why Release Matters as Much as Pressure
Most nervous pets brace against continuous pressure. They stiffen. They hold their breath.
They wait for it to end. When it doesn't end, they panic.
Release interrupts that cycle. It tells the pet "you can relax now, it's over." That's why the release is the reward, even more than the treat.
You'll see your pet physically soften during the release. The shoulders drop. The muscles unknot.
That's the relaxation response kicking in.
Common Technique Mistakes
You're pressing too hard if your pet flinches, pulls away, or whines. Light pressure is pound for pound the safest approach. You can always increase pressure as your pet relaxes.
You're holding too long if your pet freezes mid-touch. Three seconds is plenty at first. Even one second is acceptable when dealing with a deeply anxious pet.
You're moving too fast if your pet darts away between strokes. Slow down. Allow a full pause.
Let your pet choose to come back to you.
The technique is called pressure-and-release, not pressure-and-hold. The release is where the learning happens.
Step-by-Step: Grooming Without the Panic
You've built a foundation. Now it's time to combine the acclimation work with actual grooming tasks. This section walks you through a realistic timeline for a pet that's moderately afraid.
Adapt it if your pet is more confident or more fearful.
The golden rule throughout this process is to move at your pet's pace. If you're moving faster than they are, you're moving too fast.
Days 1 to 3: Tool Introduction
No grooming happens during these first three days. Your only goal is to make the tools a neutral presence in your pet's environment.
Place a brush near their food bowl. Let them sniff it while they eat. Put a nail clipper on the floor during playtime.
Let it exist without anyone touching anyone.
Every time your pet voluntarily approaches a tool, mark and treat. This builds a positive association before any touch happens.
Days 4 to 7: One-Second Touches
Now you introduce brief contact. Touch the brush to your pet's back for one second. Then remove it and treat.
That's the entire session.
Do this a few times each day, with generous pauses. Your pet should choose to stay near you between touches. If they walk away, let them.
Bring the brush out again later.
You're teaching the foundational lesson: touch with a tool is quick and followed by good things.
Week 2 to 3: Short Brushing Sessions
Your pet is now tolerating one-second touches with the brush. It's time to lengthen the interaction slightly.
Use the pressure-and-release pattern. One smooth stroke from shoulder to hip. Release.
Treat. Two strokes. Release.
Treat. Keep the total session to three or four strokes maximum.
Watch closely for stress signals. Whale eye, lip licking, or a stiff body means you've reached the edge. Stop there.
End on a good note.
Weeks 4 and Beyond: Nail Clipping and Full Grooming
Nail clipping is the most challenging task for most rescues. Your pet may never love it. The goal is tolerance, not enthusiasm.
Start by handling paws without any tool. Touch each paw with gentle pressure for a few seconds. Treat.
Do this for days before introducing the clippers.
When you're ready to clip, hold the clipper in one hand and a high-value treat in the other. Clip one nail. Immediately feed a treat and release.
Stop for the day.
One nail per session is a reasonable rule for a fearful pet. Two nails is a great day. If your pet is shaking, you've hit zero.
Stop entirely and try again tomorrow.
The One-Nail-per-Session Rule
Why one nail? Because nail clipping is scary, and scary experiences need to be short. Clipping one nail takes about two seconds.
The entire interaction, including preparation and treats, takes under a minute.
That brief moment of discomfort is survivable. It ends quickly. The treat makes it worth enduring.
Over several weeks, your pet builds a tolerance that lets you do more.
Remember that you're not trying to accomplish a full grooming session. You're building a behavior. Each tiny success stacks on the previous one.
Building a Gradual Grooming Schedule
Once your pet tolerates brushing and nail clipping, you can start combining tasks. But always keep it short.
One reasonable weekly schedule for an anxious rescue:
| Day | Task | Duration |
|---|---|---|
| Monday | Brush body | 3 to 5 minutes |
| Tuesday | Handle paws | 2 minutes |
| Wednesday | Brush face and ears | 1 to 2 minutes |
| Thursday | Rest | None |
| Friday | Clip one nail | 1 minute |
| Saturday | Brush body | 3 to 5 minutes |
| Sunday | Rest | None |
This schedule provides consistent exposure without overwhelming your pet. The rests are just as important as the grooming.
Bathing a Rescue Pet Without Trauma
Baths are a major trigger for many rescues. The slippery tub, the running water, the loss of solid ground. It combines every possible feline or canine fear into one experience.
You have two paths forward. The towel bath method for very anxious pets. And a carefully structured tub session for pets that can tolerate it.
Choose the path your pet is ready for, not the one you prefer.
The Towel Bath Method
A towel bath is exactly what it sounds like. You skip the tub entirely.
Warm a wet washcloth or a soft towel. Wipe down your pet's coat section by section. You can use pet-safe wipes or waterless shampoo for a deeper clean.
This method has two major advantages. It never involves water running from a faucet. And it keeps your pet on solid, secure footing.
For a deeply fearful pet, a towel bath is the difference between cleanliness and trauma.
The No-Scald Tub Session
If your pet tolerates the tub, structure the session carefully to minimize fear.
Place a rubber bath mat in the bottom of the tub. Pets hate slipping more than they hate water. The mat gives them confidence to stand.
Use a handheld sprayer, not the faucet. The faucet emits a terrifying, echoing roar. The sprayer is gentler and more controllable.
Wet your pet's back first. Never start with the head. The head and face are the most sensitive areas.
They should be cleaned last, with a washcloth.
Check your water temperature on your wrist. It should feel lukewarm, not hot. Pets have sensitive skin and burn easily.
Handling the Face Last
Faces are a no-go zone for most scared pets. You need to wash them, but you don't need to make it a fight.
Use a damp washcloth with a small amount of shampoo. Wipe the face quickly. Avoid the eyes and ear canals completely.
One or two quick wipes should suffice. Then immediately give a high-value treat and leave the tub.
You're not washing a show dog. You're washing a pet that needs to learn baths aren't torture.
When to Skip the Bath Entirely
There will be days when a bath is not an option. That is not a failure. That is an informed decision.
Skip the bath if your pet is shaking before you even enter the bathroom. Skip it if they've had a stressful day. Skip it if you are frustrated or rushed.
Use waterless shampoo instead. It's an imperfect solution, but it maintains some hygiene without destroying trust.
Drying Without Falling Apart
The dryer is often scarier than the bath itself. The noise alone sends many pets into panic.
Start with a towel. A warm, fluffy towel. Rub gently.
Let your pet sniff it first.
If you use a hair dryer, introduce it far away from your pet. Turn it on in another room. Let them get used to the sound at a distance.
Then bring it closer over several sessions.
Air drying is also acceptable for many pets. Just make sure they're warm and dry before they settle down for the night.
Common Mistakes That Destroy Trust
Even well-intentioned owners make mistakes. The good news is that these are avoidable once you know what they are. The bad news is that they can undo weeks of progress in minutes.
Pushing Past the Five-Minute Limit
Your pet is handling brushing beautifully. You push to seven minutes. Then ten.
Then fifteen.
This is a trap. Your pet is not signaling comfort. They're silently tolerating.
And tolerance has a hard limit. When you cross it, the shutdown happens fast.
Respect the timer. Five minutes is the absolute maximum for an anxious pet. Even if they look calm, end the session.
Good sessions build confidence. Overlong sessions build avoidance.
Getting Greedy After a Calm Moment
This is the same trap in a different form. Your pet is calm. The brush is moving smoothly.
You decide to clip two more nails. You decide to try the face.
Then the calm shifts to panic. A growl. A snap.
A complete shut down. You've traded a good experience for a traumatic one.
The discipline to stop while you're ahead is the discipline that builds trust. Just because you can doesn't mean you should.
Using Force-Based Restraint
Holding your pet still is the fastest way to teach them that grooming is a fight. The more you restrain, the harder they struggle. The harder they struggle, the more restraint you use.
It's a spiral.
Instead, let the pet choose to stay. They will choose to stay when grooming is truly a positive experience. If they won't stay, they're not ready.
End the session and try again later.
Punishing Fear Signals
Growling is a warning, not a crime. Punishing a growl teaches a pet to suppress warning signals. The pet learns that growling causes pain, so it skips growling and goes straight to biting.
The same applies to hissing, lip curling, and snapping. These are your pet saying "I'm scared and I need space." Honor that message.
Ignoring the Early Signs
Whale eye. Lip licking. Tucked tail.
These are early warning signs that appear long before a bite.
Most owners miss them because they're subtle. They're focused on the task, not the dog. Slow down.
Watch your pet's face. The signs are always there if you look.
When to Stop and Call a Professional
There's a hard truth here. Some rescue pets should never be groomed at home. Not because they're bad, but because the risk outweighs the reward.
You are not a failure if you call in a professional. You are a responsible owner who understands your limits.
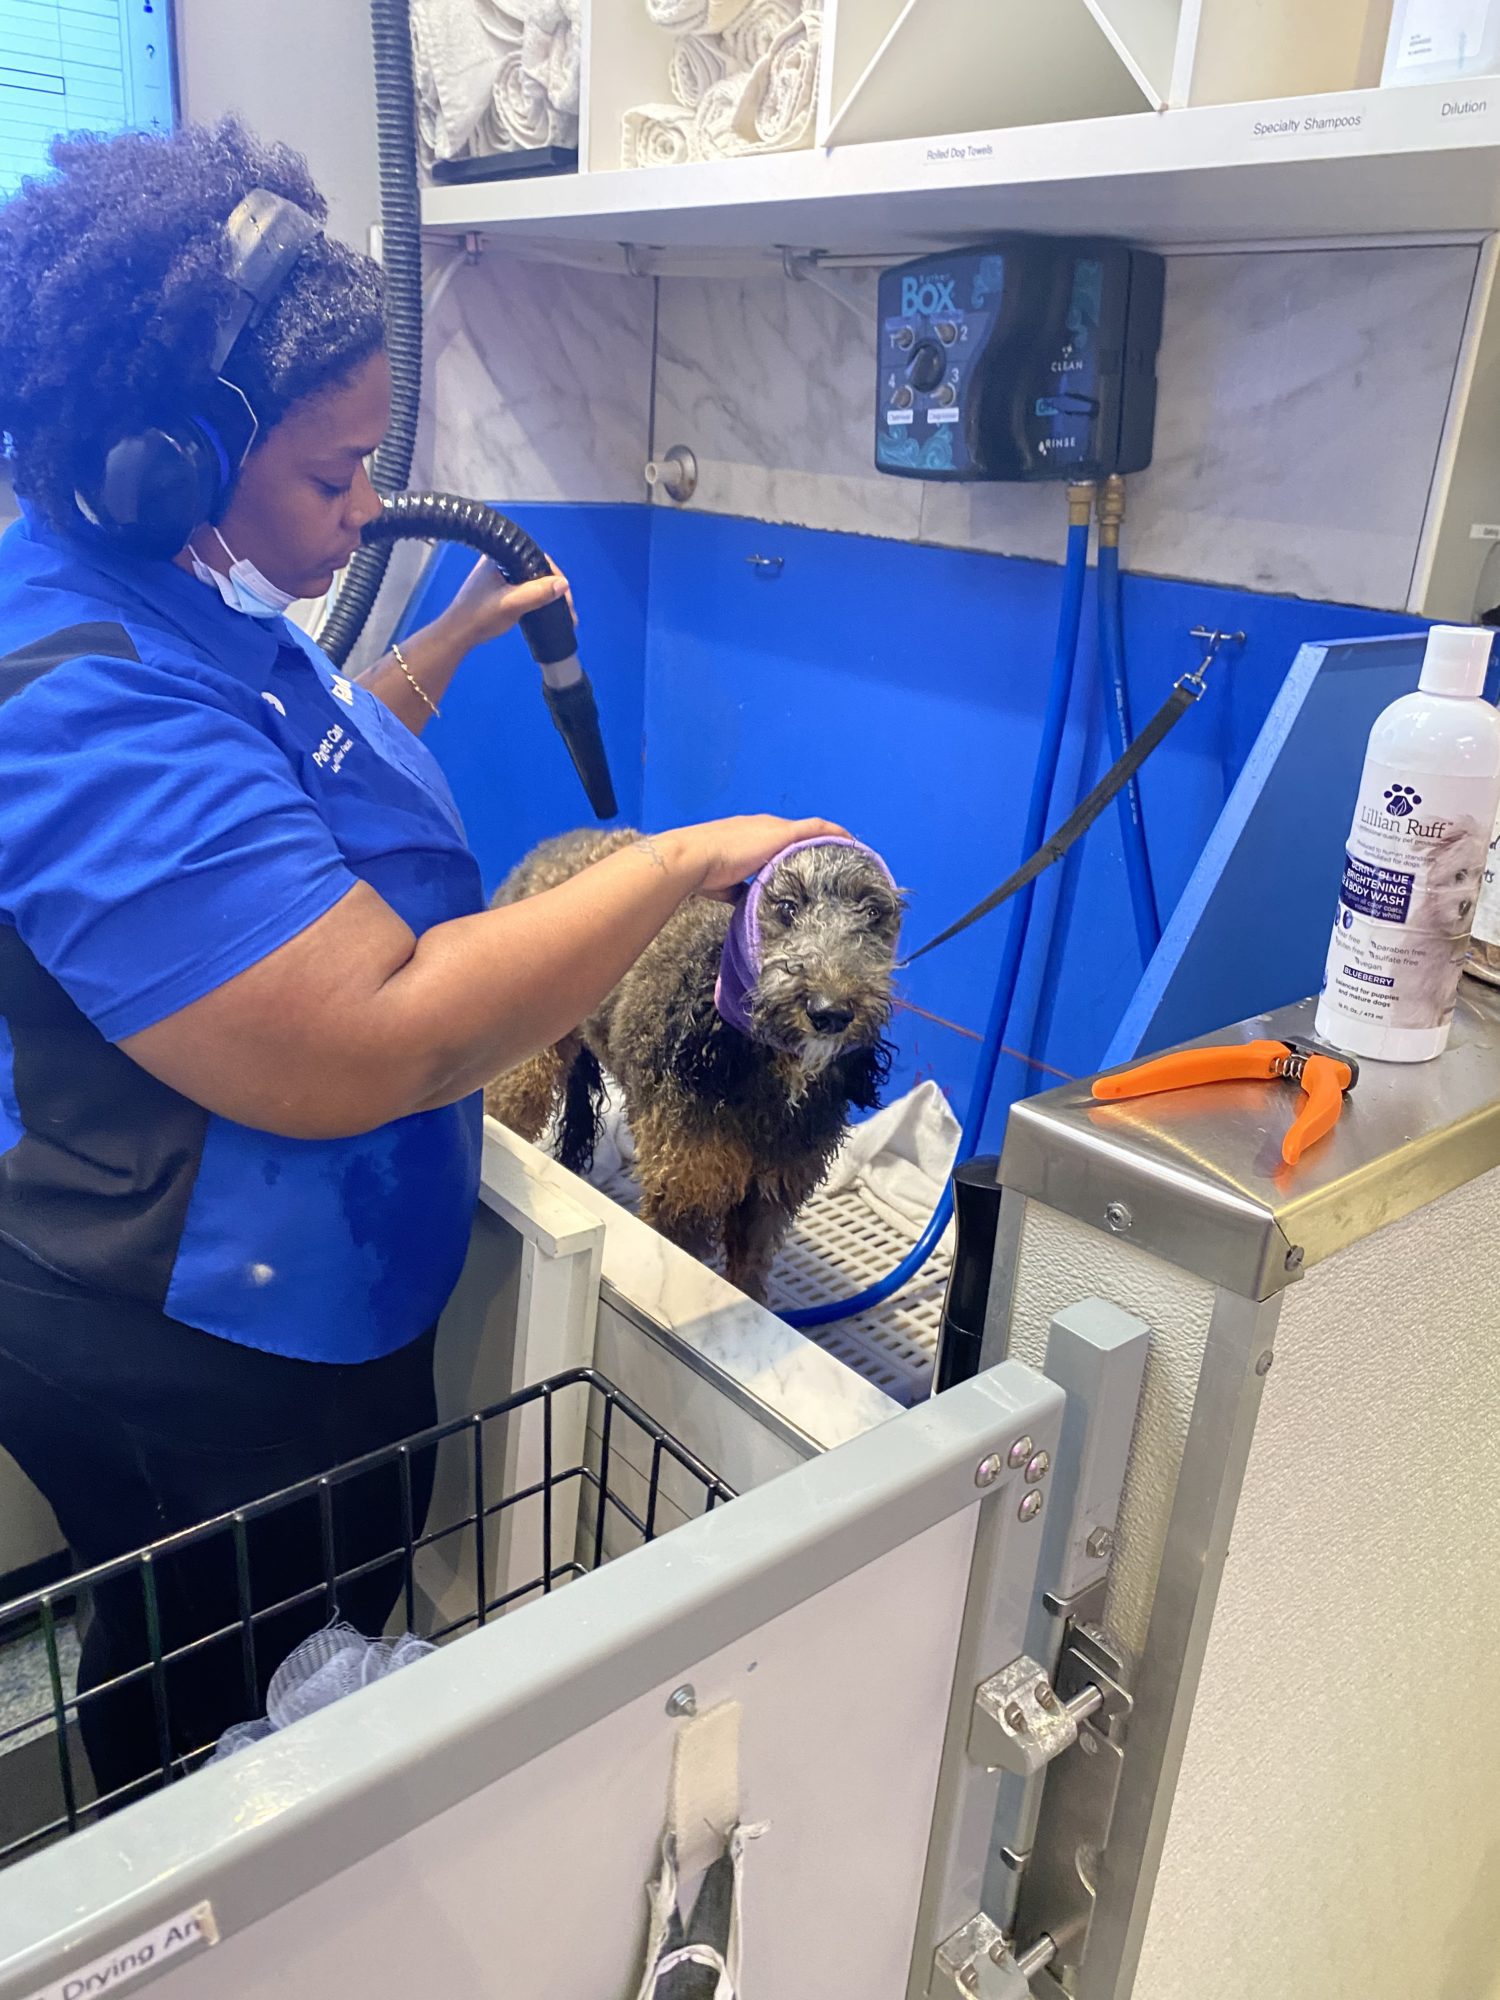
Image source: Bing (Web (fair-use with source credit))
Red Flags That Say "Hands Off"
Active biting attempts during grooming are a clear red flag. This is not your pet being mean. This is a desperate animal defending itself.
Severe matting is another. Mats close to the skin are dangerous to cut at home. Scissors can easily nick the skin, leading to infection and a massive trust setback.
Chronic shaking or freezing while you hold any grooming tool means the acclamation process isn't working. You need professional intervention or a different approach.
What a Fear Free Certified Groomer Does Differently
Fear Free certification is a formal training program that teaches groomers to recognize stress signals and handle pets without force.
Fear Free groomers use pheromone sprays and calming music. They work slowly. They never restrain pets with loops or force.
They understand that a calm pet is a manageable pet.
This is different from a standard salon, where speed and volume often trump gentle handling. A Fear Free groomer will often refuse to complete a service if the pet is too stressed, which is the correct approach.
When Sedation Is Justified
Sedated grooming is a last resort. It involves veterinary-administered medication that keeps the pet calm and still during the procedure.
This should only be used when severe matting poses a health risk, or when the pet is so traumatized that no amount of training will make grooming safe. It is not a convenient solution for a busy owner.
Sedation carries risks, especially for senior pets or those with health conditions. The decision should be made only with veterinary guidance.
Preparing Your Pet for a Professional Session
If you do visit a professional, prepare your pet to make the trip as stress-free as possible.
Bring their favorite treats and a familiar blanket. Let them meet the groomer in a quiet space before any work begins. Ask the groomer to show you the tools they'll use.
During the session itself, avoid hovering. Your anxiety will transfer to your pet. Let the professional do their job.
Check in at the end and ask for a report on how your pet handled it.
A good professional will tell you if your pet needs multiple short sessions rather than one long one. Trust their expertise.
Long-Term Maintenance: Building a Grooming Routine
Once your rescue accepts grooming, you enter a phase of maintenance. This is where the trust you've built begins to compound.
A consistent routine is even more important than technique. Pets thrive on predictability. A regular, calm grooming schedule turns a scary event into a boring part of the week.
How to Keep Trust Growing Between Sessions
Trust doesn't stay static. It grows or it shrinks. Every positive interaction grows it.
Every forced session shrinks it.
This means the work of building trust never ends. It becomes a habit. A way of being around your pet.
Touch your pet gently throughout the day, not just during grooming. Let them leave when they choose. Reward them for choosing to stay.
Adjusting Your Approach as Confidence Grows
Your pet's confidence will grow. The sessions become longer. The tools become familiar.
You may even get to a point where your pet naps through brushing.
When this happens, don't abandon the foundation. Keep sessions short. Keep treats flowing.
Keep ending on a positive note.
As trust deepens, you can try new tools and techniques. A nail grinder might become tolerable once your pet has a solid history with a clipper. A bath might become accepted once a shower is familiar.
Seasonal Considerations for Coat Care
Your grooming routine should change with the seasons.
In the spring, many dogs shed their winter coats heavily. You may need to increase brushing frequency to manage the loose hair. This is an ideal time to practice your pressure-and-release technique because your pet will get plenty of exposure.
In the summer, you may want to keep coats shorter for heat management. But be careful about shaving double-coated breeds. Their coats protect them from both heat and sun.
In the winter, your pet's skin gets dry. Less frequent bathing is better to preserve natural oils. Make sure you dry thoroughly after any bath to prevent chills.
Recognizing When the Bond Is Solid
There will be a moment when you realize something has changed. Your pet walks toward you when you pick up the brush. They offer a paw during nail clipping.
They relax into the bath
This is the reward. The trembling dog from the shelter has become the trusting pet who believes you are safe.
Quick Reference: What to Do in an Emergency
No matter how careful you are, emergencies happen. A nail gets cut too short. A bite occurs.
A mat is worse than you thought.
When these emergencies occur, stay calm. Your reaction sets the tone for your pet's recovery.
You've Quicked a Nail
Quicking happens when you cut into the quick, the sensitive inner part of the nail. It bleeds and it hurts. It also terrifies your pet.
Stop immediately. Apply styptic powder or cornstarch to the nail tip with firm pressure. This stops the bleeding within a minute.
Do not punish your pet for pulling away. Do not force them to finish the trim. Give treats, offer comfort, and end the session.
The nail will heal, but the trust must be repaired.
Your Pet Bites During Grooming
If your pet bites you, the worst thing you can do is punish them. The bite was a defensive response to fear. Punishing it teaches your pet that you are dangerous.
Instead, gently remove yourself from the situation. Give your pet space. Check your own injury and treat it appropriately, even if it's minor.
After emotions cool, reassess your approach. You're moving too fast. Slow down and rebuild your acclimation work.
Severe Matting
Mats that are tight against the skin are a serious health risk. They trap moisture, causing skin infections. They pull and hurt your pet.
And the most dangerous part is they are close to the skin.
Never reach for scissors. A single sharp point in the wrong direction causes a deep cut that requires stitches.
Your only safe choice at home is to seek veterinary assistance or a professional groomer. They can safely remove mats with clippers designed for the task.
Your Pet Is Shaking Uncontrollably
Shaking is a sign of severe stress. Your pet has reached their absolute limit. Continuing any grooming task will only deepen the trauma.
Stop immediately. Remove the tools from the area. Give your pet a safe space, whether that's a crate, a quiet room, or simply your lap.
Let them settle completely before attempting anything again. This may take hours. It may take days.
You Feel Overwhelmed It's Okay to Stop
There is no rule that says you must groom your pet alone. Grooming a rescue pet is hard work. It requires patience, timing, and a thick skin.
If you feel overwhelmed, frustrated, or angry, stop. Your emotional state directly transfers to your pet. And frustration leads to rushed decisions that cause injuries.
Walk away. Take a break. Come back when you are calm and centered.
Frequently Asked Questions
How long does it take for a rescue pet to accept grooming?
Expect a timeline of two to six weeks for moderate cases. Pets with deep trauma can take months. The key is consistent, short sessions where the pet always ends with a positive experience.
Progress happens in tiny increments, not dramatic leaps.
Can I use a Dremel instead of nail clippers?
Yes, but it's usually more frightening for a scared pet. The sound and vibration trigger panic in many animals. If you want to use a grinder, introduce it at a distance over several sessions before ever touching your pet's paw.
Many pets do better with manual clippers and a file.
What treats work best for desensitization?
The best treats are small, soft, smelly, and impossible to eat quickly. Boiled chicken, cheese, hot dogs, and freeze-dried liver are top choices for most pets. The key is using a treat valuable enough to compete with their fear.
Should I groom a scared cat the same way as a dog?
The core principles are the same, but cats have different stress signals and different handling requirements. Cats need even more patience and typically respond better to shorter, gentler sessions. Never scruff a cat for grooming.
It triggers a fear response and can cause injury.
Is it okay to let my pet avoid grooming altogether?
If your pet has a comfortable coat and healthy nails, not grooming regularly is acceptable. You can manage with pet wipes and occasional baths. For certain breeds, like long-haired cats and dogs, their coat health depends on grooming.
In those cases, you'll need to find a system that works.
What's the best way to find a Fear Free Certified groomer?
The Fear Free Certification program maintains a directory on its official website, which is a trusted source for locating certified professionals in your area. You can also ask your veterinarian or local shelter for recommended groomers who use low-stress handling techniques. Look for a groomer who is patient, works at your pet's pace, and communicates honestly about how your pet is coping.
Final Verdict: Patience Over Perfection
Grooming a scared rescue pet will test your patience more than any other aspect of rescue life. This is the work that separates owners who push from owners who understand.
The metric for success is not a perfect coat or a flawlessly manicured set of paws. The metric is a pet that walks toward you instead of away. A pet that trusts you with their most vulnerable moments.
Your Takeaway Checklist for This Week
Read your pet's body language before touching any tool. If you see stress signals, stop and retreat. Let your pet sniff and explore all tools before use.
Start with one brush stroke. Treat. Release.
End every session on a positive note. Keep sessions under five minutes. Clip only one nail at a time.
Never force restraint. Call a professional if you're over your head.
When You'll Know You've Made It
You've made it when your pet falls asleep while you brush them. When they offer a paw without being asked. When they follow you into the bathroom for bath time instead of hiding under the bed.
Those are the moments that make it all worth it. The trust you've built isn't just about grooming. It's about everything.
It's the reason you adopted a rescue in the first place.