
If you've been searching how to brush a cat that hates it, you've probably already got the scratches to show for it. Here's what most advice skips entirely: a cat who fights the brush is usually telling you something specific. Sometimes it's fear.
Very often, it's pain.
Cats spend roughly 30 to 50 percent of their waking hours grooming themselves, so the coat is deeply personal territory. Feline skin is also only a few cell layers thick across much of the body, far thinner and more mobile than a dog's. That combination explains a lot of the drama.
Work out why your cat objects first, because the right plan changes completely depending on the answer.

Image source: Bing (Web (fair-use with source credit))
Quick Answer
Brush a cat that hates it in short, low-pressure sessions. First rule out pain with a vet check. Start with a rubber curry brush or grooming glove instead of a slicker.
Groom only safe zones at first: cheeks, chin, shoulders. Keep every session under 90 seconds. Stop before your cat complains, not after.
Why Your Cat Fights the Brush (And Why It's Rarely Stubbornness)
Cats don't have a stubborn streak about grooming. They have thresholds. When you cross one, they tell you to stop in the only language they've got.
In our research across veterinary behaviour guidance and professional grooming practice, brush aversion nearly always traces back to one of six causes. Most owners assume the last one on this list. It's usually one of the first three.
| Cause | What it looks like | Typical fix |
|---|---|---|
| Musculoskeletal pain (osteoarthritis) | Flinches over hips, spine, or shoulders. Worse in older cats | Vet exam and pain management first |
| Existing mats pulling the skin | Yelps or bites at one specific spot every time | Stop brushing. Assess the mat |
| Overstimulation | Fine for 8 to 15 seconds, then swats out of nowhere | Shorter sessions, safe zones only |
| Fear or no handling history | Bolts, hides, flattens before you touch them | Slow desensitisation over weeks |
| Wrong tool | Tolerates hands, hates the brush specifically | Switch to rubber curry or glove |
| Wrong context | Fine on the sofa, furious when picked up | Let the cat choose the spot |
Pain is the most under-diagnosed cause
Feline osteoarthritis is far more common than most owners realise, and it hides well. Cats don't limp obviously. They just stop jumping, stop grooming their back end, and start resenting hands near their spine.
The Cornell Feline Health Center at Cornell University College of Veterinary Medicine notes that degenerative joint disease shows up radiographically in the majority of older cats. Many of those cats have never had a single owner-reported pain symptom. Brush resistance is often the first real sign.
Dental disease does the same thing at the front end. A cat with a painful mouth won't tolerate a brush near the jaw, chin, or cheeks. Those are the exact spots we normally recommend starting with.
Overstimulation has a clock, not a mood
Petting-induced overstimulation isn't your cat changing its mind. It's a sensory threshold being reached. Repeated stroking over the same area builds arousal until the cat needs it to stop.
The giveaway is consistency. If your cat reliably tolerates 10 to 20 seconds and then turns, that's a threshold, not unpredictability. Thresholds are workable.
You just have to quit at eight seconds instead of twelve.
The 60-Second Answer: Stop, Check for Pain, Then Rebuild
If you do nothing else from this guide, do these three things in this order. Skipping straight to step three is the most common mistake we see, and it's why so many owners plateau for months.
Step 1: Stop brushing entirely for now. Every forced session teaches your cat that the brush predicts something unpleasant. You're not losing ground by pausing. You're stopping the damage.
Step 2: Rule out pain. Book a vet exam that specifically covers joints, teeth, ears, and skin. Ask for a flea comb check and a look for mats close to the skin.
Step 3: Rebuild the association from zero. Treats first, brush second. One stroke, then stop. Build from there over weeks, not days.
The three gates, as an if/then flow
| Gate | Question | If YES | If NO |
|---|---|---|---|
| Gate 1 | Did this start suddenly? | Vet visit before anything else | Continue to Gate 2 |
| Gate 2 | Are there mats tight against the skin? | Hands off. Book a professional | Continue to Gate 3 |
| Gate 3 | Does the cat escalate within 15 seconds? | Micro-sessions and safe zones only | Standard short sessions |
As of 2026, the feline-friendly handling guidance published by the American Association of Feline Practitioners still leads with the same core principle: reduce restraint, increase the cat's sense of choice. That applies just as much to your living room floor as it does to a clinic exam table.
Timelines matter here too. A mildly reluctant cat often accepts a short groom within two to six weeks. A genuinely fearful or formerly feral cat can take three to six months.
Some cats never learn to enjoy it, and the honest goal becomes quick maintenance plus professional help two to four times a year.
Sudden Aversion vs Lifelong Aversion: The Fork That Changes Everything
This is the branch point. Everything downstream depends on it, and it takes one question to answer.
Did your cat used to tolerate brushing? If yes, and something changed, you have a medical problem until proven otherwise. If your cat has never liked it, you have a training and handling problem.
Don't guess. Think back honestly over the last six to twelve months.
Red flags that mean a vet visit before a brush
Book an appointment first if you see any of these. Training a cat through pain doesn't work, and it damages trust you'll need later.
- A cat that used to tolerate brushing and now doesn't. Especially over age seven.
- Flinching, rippling skin, or sudden bolting when you touch the lower back or tail base. This can indicate feline hyperesthesia syndrome or spinal pain.
- A coat that's gone greasy, clumped, or dandruffy along the spine. That's a cat who has stopped grooming itself, which points to arthritis, obesity, or dental pain.
- Scratching, scabs, or hair loss alongside the brush hatred. Flea allergy dermatitis, cheyletiellosis, and mange all make touch genuinely painful.
- Circular crusty patches or broken hairs. Ringworm is zoonotic. Stop grooming and isolate the tools.
- Sudden weight loss, increased thirst, or appetite change. Hyperthyroidism, diabetes, and chronic kidney disease all wreck coat quality.
- Aggression that's escalated from swat to bite in a short window.
- Any cat over 11 that resents being touched anywhere new.
Signs it's behavioural, not medical
These patterns point toward handling history and thresholds rather than pain. You still want a vet to confirm, but the plan is different.
- Your cat has disliked brushing since kittenhood with no change in intensity.
- The cat tolerates being stroked in the same spot but reacts to the brush specifically.
- Reactions happen at a predictable point, roughly the same number of strokes every time.
- The cat is fine until you pick it up or move it, then objects to everything.
- It's a rescue or formerly stray adult with no known handling history.
- The cat runs when it sees the brush but is otherwise relaxed and affectionate.
The socialisation window for kittens runs from about two to seven weeks of age. Cats who weren't handled gently during that period often find human touch genuinely unfamiliar rather than unpleasant. That's fixable, but only with patience and food, never persistence.
Read Your Cat's Escalation Ladder Before You Touch Anything
Cats give warnings. Owners just miss them, because the window between "I'm done" and "I'm biting" can be under three seconds.
Learn this sequence and you'll stop getting bitten almost immediately. More importantly, you'll start ending sessions on a good note instead of a bad one.

Image source: Web (Bing) / pethealthcaretips.com (Web image (fair-use with source credit))
Tail flick, skin ripple, airplane ears: the three-second warning
| Rung | What you'll see | What to do |
|---|---|---|
| 1. Freeze | Body goes still. Purring stops | Finish the stroke. Stop |
| 2. Tail flick | Tip twitches, then whole tail thumps | Stop immediately |
| 3. Skin ripple | Fur along the back twitches | Stop. Move to a safe zone or end |
| 4. Airplane ears | Ears rotate sideways and flatten | Already too late. Hands off |
| 5. Pupil dilation | Eyes go wide and black | Back away. No eye contact |
| 6. Head turn to hand | Cat looks pointedly at the brush | Final warning |
| 7. Growl or hiss | Vocal protest | Session over |
| 8. Swat, bite, or bolt | Contact or escape | You've lost the session |
Aim to stop at rung one or two. Every single time. That's the whole trick.
Ending at rung eight teaches your cat that biting works, and biting gets stronger. Ending at rung one teaches your cat that you listen, which is the foundation everything else is built on.
Safe zones vs trigger zones on every cat
Most cats have a consistent map. Scent-gland-rich areas near the face are usually welcome. The back half of the body usually isn't.
Generally safe zones (start here):
- Cheeks and jawline
- Under the chin
- Forehead and between the ears
- Base of the ears
- Top of the shoulders
Generally trigger zones (add last, or never):
- Belly and inner thighs
- Tail base and lower back
- Hind legs and britches
- Armpits and behind the elbows
- Feet and tail itself
The frustrating part is that trigger zones are exactly where mats form. That's not a coincidence. Cats can't reach those areas well either, which is why the fur felts there in the first place.
So the plan isn't to avoid those areas forever. It's to earn access to them over weeks, one short session at a time.
Check the Coat First: Mat Mapping and Mat Grades
Before any brushing plan, run your hands over your cat's whole body. Not with a brush. With fingers.
You're looking for tangles, lumps, and firm patches. If you find something tight against the skin, the brushing plan changes completely.
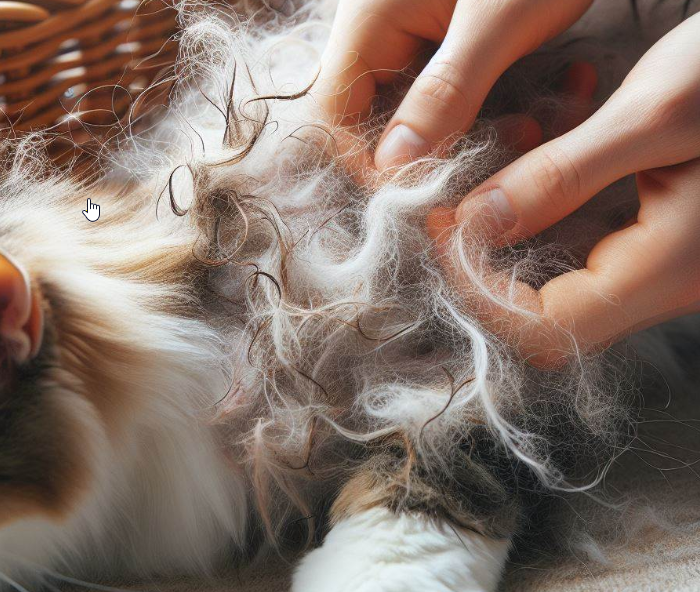
Image source: Bing (Web (fair-use with source credit))
The seven spots mats hide
Mats form where fur rubs, where the cat can't reach, and where movement creates friction. Check these in order, and check them on shorthairs too. Mats aren't a longhair-only problem.
- Armpits and behind the elbows. The number one spot. Constant friction, zero self-grooming access.
- Groin and inner thighs. Second most common. Also the most sensitive to touch.
- The britches (back of the hind legs). Long fur, high friction, out of reach.
- Tail base and lower back. The classic arthritis giveaway. If a cat can't twist, this area mats first.
- Behind and under the ears. Fine, soft fur that felts fast.
- The ruff (chest and neck). Especially on Persians, Ragdolls, and Maine Coons.
- Hocks and around the anus. Sanitary problems start here.
Dark-coated cats are the hardest. Mats stay invisible on a black cat until they're already tight to the skin. Go by feel, never by sight.
Comb-out, split, clip or refer: grading what you've found
| Mat grade | How it feels | What to do |
|---|---|---|
| Grade 1: Tangle | Loose, moves freely, comb passes with light pressure | Comb out at home. Hold the base of the hair |
| Grade 2: Felted mat | Firm clump, still lifts away from skin | Split gently with a mat splitter, then comb |
| Grade 3: Close to skin | Won't lift. Skin tents when you pull | Stop. Clippers only, by a professional |
| Grade 4: Pelt | Fur felted into a sheet over a body region | Vet visit. Sedated shave-down |
The absolute rule: never use scissors on a mat. Feline skin lifts into the mat as you pull it away from the body. What looks like a clump of fur is often a clump of fur with a fold of skin inside it. Scissor injuries during home de-matting are one of the most common owner-inflicted wounds groomers and emergency vets see.
Second rule: never bathe a matted cat. Water shrinks and tightens mats. A grade 2 mat becomes a grade 3 in one wash, and now the skin underneath is damp and can't dry.
If you find grade 3 or 4 matting, the brushing training goes on hold. Get the coat sorted professionally first, then start the rebuilding work on a comfortable cat. Training a cat whose skin is being pulled with every movement is a losing game.
Pick Your Starting Tool Based on Coat and Tolerance
Here's the mistake almost everyone makes. They buy a slicker brush because it's what the pet shop sells, then wonder why the cat hates grooming.
For a cat that already objects, the tool is a huge part of the problem. Change the tool and a surprising number of cats stop fighting within a week.

Image source: Bing (Web (fair-use with source credit))
Rubber curry, glove, slicker, comb and rake compared
| Tool | What it does | Best for | Watch out for |
|---|---|---|---|
| Grooming glove | Feels like a hand with grip | Fearful cats, first two weeks | Removes very little undercoat |
| Rubber curry brush | Soft nubs lift loose hair, massages skin | Shorthairs, brush-phobic cats | Not enough for dense longhair coats |
| Boar bristle brush | Distributes sebum, smooths topcoat | Shorthairs, finishing | Doesn't reach undercoat at all |
| Pin brush | Rounded pins, gentle on skin | Medium and long coats, daily upkeep | Skates over mats without finding them |
| Slicker brush | Fine angled wires pull undercoat | Longhairs, once tolerance is built | Bare wire tips can cause slicker burn |
| Greyhound comb | Coarse and fine tines in one | Finding mats, final check | Painful if you hit a tangle at speed |
| Undercoat rake | Widely spaced teeth pull dead coat | Double-coated breeds in moult | Too aggressive for thin, fine coats |
| Deshedding tool | Blade edge strips undercoat fast | Heavy shedders, short sessions | Easy to over-strip and irritate skin |
| Flea comb | Fine teeth trap parasites and debris | Diagnosis, not grooming | Slow going on long coats |
Why the slicker is almost never the right first tool
A slicker brush works by dragging fine wire pins through the coat. On a cat with normal tolerance, that's fine. On a cat that already flinches, it's a guaranteed fight.
Two problems. The pins concentrate pressure into tiny points, and on thin feline skin that reads as scratching. A slicker also pulls when it hits a tangle, which is exactly what your cat is bracing for.
If you want a slicker in the plan, choose one with poly-coated pin tips and a flexible head. Introduce it around week four, not week one.
Matching tool to coat type
Start here, then adjust based on how your cat responds. Coat type sets the ceiling. Tolerance sets the starting point.
- Shorthairs (Domestic Shorthair, British Shorthair, Russian Blue): Rubber curry or glove. That's genuinely all most need. Add a fine comb for a weekly mat check.
- Medium coats (Ragdoll, Birman, Turkish Angora): Pin brush plus a greyhound comb. Twice weekly minimum.
- Cottony longhairs (Persian, Himalayan, Exotic Shorthair): Comb daily. This coat texture felts faster than any other. A brush alone won't cut it.
- Double-coated longhairs (Maine Coon, Norwegian Forest Cat, Siberian): Undercoat rake during moults, pin brush between. Line brush in sections.
- Rex coats (Devon Rex, Cornish Rex): Minimal brushing. The coat is fragile and brushes break it. A soft glove or damp hands is plenty.
- Sphynx and hairless: No brushing at all. You're managing sebum with weekly wipe-downs instead.
- Senior and arthritic cats of any coat: Softest option available. A glove or curry brush, always.
A grooming glove or rubber curry typically runs £6 to £15 in the UK and $8 to $18 in the US. A decent stainless greyhound comb sits around £12 to £25. You don't need an expensive kit.
You need the right two tools.
The Four Decision Branches: Match the Cat to the Plan
By now you should know roughly what type of resistance you're dealing with. Here's where the paths split properly.
Find your cat below. Follow that plan and ignore the others, because mixing approaches is what causes stalls.
Branch 1: The overstimulated cat that swats after ten seconds
This cat likes attention. Then suddenly doesn't. The turn is fast and it happens at roughly the same point every time.
Your job is to work under the threshold, never through it. That means counting strokes out loud if you have to.
- Time or count the current threshold. If they turn at 12 strokes, work at 6.
- Sessions last 20 to 40 seconds. Two or three per day beats one long one.
- Cheeks, chin and shoulders only for the first fortnight.
- End every session while your cat is still relaxed. Walk away first.
- Add one extra stroke every three or four sessions. Slowly.
- If they escalate, drop back to half the previous count for a week.
Progress here is fast compared to other branches. Aggregate owner feedback and behaviour guidance suggest most overstimulated cats double their tolerance within three to four weeks.
Branch 2: The fearful rescue or formerly feral cat
This cat isn't annoyed. It's frightened. Pushing it produces flooding, which makes fear worse, not better.
Forget grooming entirely for the first two weeks. You're building a relationship with touch, not a coat routine.
- Leave the brush lying around where the cat lives. Near the food bowl works well.
- Reward any voluntary approach to the brush with a lickable treat.
- Progress to touching the cat with the back of the brush handle. One second.
- Only then move to a single stroke with a glove, at the shoulders.
- Never corner, never pick up, never block the exit.
- End sessions the moment the cat looks away or shifts weight.
The honest timeline is three to six months to a reliable short groom. Some formerly feral cats will only ever accept a glove. That's a genuine result, not a failure.
Branch 3: The senior or arthritic cat that can't self-groom
This cat needs grooming more than any other and tolerates it least. Pain management comes first and it isn't optional.
Talk to your vet about feline osteoarthritis. As of 2026, options include the monoclonal antibody frunevetmab (marketed as Solensia), licensed NSAIDs for cats, and dental treatment where oral pain is a factor. A comfortable cat is a groomable cat.
- Groom where the cat already is. Never lift or reposition an arthritic cat.
- Use only a glove or soft rubber curry. No slickers, no rakes.
- Support the body. Never ask the cat to twist or stretch.
- Work the greasy areas: spine, tail base, shoulders. Little and often.
- Keep sessions to 30 to 60 seconds. Twice daily beats once for five minutes.
- Watch for skin thinning. Elderly feline skin tears more easily.
Branch 4: The matted longhair that's already past DIY
If you found grade 3 or 4 matting, this is your branch. Home training goes on hold.
There's no gentle way to comb out a mat that's fused to the skin. Trying it hurts, and it teaches your cat that grooming means agony. Book help.
- Contact a cat-only or Fear Free certified groomer first.
- If the cat is aggressive, painful, or pelted, go to the vet instead of a groomer.
- Ask your vet about a pre-visit anxiolytic. Gabapentin and trazodone are both used off-label for this. Pregabalin oral solution (Bonqat) is licensed in several markets specifically for feline situational anxiety.
- Expect a sedated shave-down for full pelting. A #10 clipper blade is standard.
- Once the coat is off, start the training work from scratch on a comfortable cat.
- Book maintenance grooms every 6 to 12 weeks so you never get back here.
Sedation isn't a cop-out. Removing a pelt from an awake, painful cat risks skin tears, thermal burns from a hot blade, and a bite injury for whoever's holding. Under sedation the vet can also check the skin underneath.
Pelts routinely hide sores, abscesses, fleas, and in outdoor cats, maggots.
Rebuilding the Association: A Two-to-Six Week Training Flow
The technique that works is called desensitisation and counter-conditioning. Plain version: make the brush boring first, then make it predict food.
Most owners rush this by about four weeks. Go slower than feels necessary and you'll finish faster.
Week 1: The brush becomes furniture
No grooming this week. None. You're breaking the link between the brush and the bad thing that follows it.
- Leave the brush out permanently, somewhere neutral.
- Every time your cat walks past it, drop a treat nearby.
- Pick the brush up, then put it straight back down. Treat.
- Hold the brush while stroking your cat with your other hand.
- If your cat leaves the room when you touch the brush, you're going too fast. Just leave it lying there for another few days.
Success looks like indifference. Your cat should walk past the brush without changing course. That's the whole goal for week one.
Week 2: One stroke, one lick mat, done
Now the brush touches the cat, briefly, and something great happens at the same time.
A lick mat with squeezy cat paste is the most useful piece of kit here. It occupies the cat for a controlled length of time and keeps the head pointed away from your hands.
- Set the lick mat down. Let the cat start eating.
- One single stroke over the shoulders with a glove or curry brush.
- Remove the brush. Let the cat finish the treat.
- Repeat once or twice daily, no more.
- By day four or five, build to three strokes.
- By day seven, aim for five to eight strokes in one session.
If your cat stops licking when the brush touches, the treat isn't valuable enough or the pressure is too much. Fix one variable at a time.
Weeks 3 to 6: Criteria raising and start-button behaviours
This is where it gets interesting. You start letting the cat opt in rather than deciding for them.
A start-button behaviour is a deliberate signal from your cat that means "go ahead." It sounds fancy. In practice it's usually a head bump into the brush.
- Hold the brush still, about 15cm from your cat's face.
- Wait. Don't move toward the cat.
- The moment your cat moves toward the brush, one stroke, then treat.
- If the cat doesn't move, take the brush away and try later.
- Repeat until the head bump becomes reliable.
Once you have a start button, everything speeds up. You'll know when your cat is ready and when it isn't, and you'll stop guessing.
Change one thing at a time: duration, body area, or tool. Never two at once. If you add a new body zone, drop the duration back to two strokes for that zone.
| Week | Duration target | Zones | Tool |
|---|---|---|---|
| 1 | 0 seconds | None | Brush visible only |
| 2 | 5 to 15 seconds | Shoulders | Glove or curry |
| 3 | 20 to 30 seconds | Shoulders, cheeks, chin | Glove or curry |
| 4 | 30 to 45 seconds | Add upper back | Add pin brush |
| 5 | 45 to 60 seconds | Add flanks | Pin brush, introduce comb |
| 6 | 60 to 90 seconds | Add tail base briefly | Comb for mat checks |
Belly, hind legs and armpits come after week six, if at all. Plenty of cats never grant access to those areas, and that's what professional grooms are for.
Session Mechanics That Actually Work on Difficult Cats
Technique matters as much as training. You can do everything right on the schedule and still lose a cat with sloppy hands.
These are the mechanics that separate a session that ends well from one that ends in a bite.
Let the cat pick the spot and keep the exit open
Never pick up a cat to groom it. That's step one and it's non-negotiable for a resistant cat.
The moment you lift a cat and carry it somewhere, you've removed its choice. Arousal goes up before the brush even appears. Groom where the cat already chose to be: the windowsill, the sofa arm, the top of the cat tree.
- Keep an escape route open at all times.
- Don't block them with your body, a wall, or a lap.
- Groom on a non-slip surface. Sliding feet cause panic.
- Close the door on other pets and children.
- Keep it quiet. No hoover, no dryer, no clippers running nearby.
- Consider a synthetic feline facial pheromone diffuser (Feliway Classic) set up 30 minutes before.
Here's a test that tells you everything. If your cat walks away and you feel the urge to follow, stop. A cat that can leave freely usually comes back.
A cat that gets chased learns to run sooner next time.
Line brushing, base-holding and the read-and-stop rule
Three techniques do most of the heavy lifting on difficult coats.
Base-holding stops the pull. Grip the fur between the mat and the skin with your free hand, then brush the ends. The tension goes into your fingers, not the cat's skin.
Aggregate groomer guidance treats this as the single most important habit for reducing pain during de-tangling.
Line brushing is how professionals handle longhairs. Part the coat with your free hand to expose a line of skin. Brush that thin strip only, from the skin outward.
Move the parting up a centimetre and repeat.
It's slower than surface brushing but it actually reaches the undercoat. Surface brushing on a Persian or Maine Coon leaves a tidy-looking cat with a felted layer underneath.
The read-and-stop rule is simple. First tail flick, you stop. No "just one more stroke." Not one.
- Work with the lie of the coat first, always.
- Against the grain only for undercoat removal, and only on a tolerant cat.
- Light pressure. If the skin is moving with the brush, you're pressing too hard.
- Clear the brush frequently. A loaded slicker drags.
- Never brush the same spot more than a few passes. Move on and come back.
The two-person split and when a towel wrap is fair
Two people beats one for a difficult cat, if you split the roles properly. One person feeds continuously. The other grooms.
Nobody restrains.
The feeder's job is to keep the cat's attention forward and the pace slow. The groomer works quietly from the side, never head-on. This is standard practice in cat-friendly clinics and it works just as well at home.
A towel wrap, or purrito, is a legitimate tool for a genuine necessity: a single mat check, a quick medication, a wound inspection. It's not a training method.
- Use it for under 60 seconds.
- Never for routine grooming.
- Never on a cat that's already panicking.
- Never as a substitute for the slow work.
Scruffing is different, and it's out. Restraining a cat by the neck raises arousal and fear rather than calming it. Modern feline-friendly handling guidance moved away from scruffing years ago, and there's no reason to bring it into your living room.
Mistakes That Set You Back Months (Or Send You to A&E)
Some errors cost you a fortnight. Others cost you the relationship, or a trip to hospital. These are the ones worth knowing cold.
Never cut a mat with scissors
This is the big one. Feline skin is loose and mobile, so when you lift a mat, the skin lifts with it.
You cut what you think is fur. It's fur plus a fold of skin. The resulting wounds are often long, deep, and need surgical closure.
Almost every case starts with a well-meaning owner.
If you must remove a mat at home:
- Use a mat splitter or de-matting rake, never scissors.
- Split the mat vertically into smaller sections first.
- Work outward from the tips, holding the base.
- Stop if the skin tents at all.
- If it doesn't come apart in two or three minutes, it's a job for clippers.
Clippers at home carry their own risks. Blades heat fast. Manufacturer guidance from brands like Andis and Wahl typically advises checking blade temperature every 15 to 20 seconds of continuous use.
A hot blade causes clipper burn on thin feline skin within seconds.
Scruffing, flooding and ending sessions on an explosion
Flooding means forcing a cat through the full experience until it gets used to it. That doesn't work on cats. It produces learned helplessness or escalating aggression, and both are hard to undo.
The signature of flooding is a cat that goes totally still. Owners read that as acceptance. It's usually shutdown, and it's the last stop before a bite.
Three habits undo weeks of progress:
- Ending on escalation. Whatever behaviour stops the session gets reinforced. If the bite ends it, you've just trained a biter.
- Chasing. Following a cat that walked away teaches it to leave sooner and hide better.
- Ambushing. Grabbing a sleeping cat for a quick brush destroys the safety of resting spots.
Add one more: inconsistency. Two calm weeks followed by one forced session sets you back further than three weeks of nothing.
Bathing a matted cat and other well-meant disasters
Water tightens mats. Every time. A soaked mat shrinks as it dries and pulls harder on the skin than it did before.
If a cat genuinely needs bathing (soiled fur, contamination), the mats come out first. Not after.
| Product | Risk to cats |
|---|---|
| Dog flea treatments containing permethrin | Severe toxicity. Tremors, seizures, death |
| Tea tree, pennyroyal, citrus oils | Toxic. Cats can't metabolise many essential oils |
| Human shampoo | Wrong pH. Strips coat, irritates skin |
| Alcohol-based sprays | Skin irritation, respiratory upset |
| Dog conditioning sprays | Often contain cat-unsafe ingredients |
Only ever use products labelled for cats. If a product doesn't name cats on the label, don't put it on your cat. The [U.S.
Food and Drug Administration](https://www.fda.gov) publishes species-specific approval information for veterinary products, and species labelling exists for exactly this reason.
Handling bites and scratches properly
Cat bites are not minor. The teeth are fine and sharp, so they inject bacteria deep and the puncture seals over the top.
Pasteurella multocida infection can develop within hours. Bites over a hand joint or tendon sheath are particularly serious and often need antibiotics or hospital treatment.
- Wash immediately under running water for several minutes.
- Encourage light bleeding. Don't seal the wound.
- Contact a doctor the same day for any puncture wound, especially on hands.
- Watch for redness, swelling, heat or spreading pain.
- Anyone immunocompromised should seek advice for scratches too, given the risk of cat scratch disease from Bartonella henselae.
Bite reporting and rabies observation requirements vary by state and country. Follow local health department guidance where that applies.
When to Hand It Over: Professional Groomer vs Sedated Shave-Down
There's a point where home grooming stops being kind and starts being a fight you can't win. Knowing that line saves your cat pain and saves you months of wasted effort.
Two different services exist for two different situations. People often book the wrong one.
Which service does your cat actually need?
A groomer handles coat problems on a cat that can still be handled awake. A vet handles coat problems on a cat that can't. That's the split.
| Situation | Go to a groomer | Go to a vet |
|---|---|---|
| Grade 2 mats, cat tolerates handling | Yes | No |
| Grade 3 mats, cat is calm | Yes, cat-only groomer preferred | Only if groomer declines |
| Grade 4 pelting over a body region | No | Yes, sedated shave-down |
| Cat bites or goes for the groomer | No | Yes, with sedation |
| Suspected pain or arthritis | No | Yes, exam first |
| Skin lesions, sores, or smell under the coat | No | Yes, urgently |
| Cat over 15 with heart or kidney disease | Discuss with vet first | Vet supervises |
How to pick a groomer who won't make things worse
Not all groomers are cat people. A dog groomer who takes cats occasionally is a different proposition from someone who works with cats all day.
Ask these before you book:
- Do you groom cats only, or cats and dogs? Cat-only salons are quieter and don't smell of predators.
- Are you Fear Free certified? The Fear Free programme trains handlers in low-stress technique. It's a genuine differentiator.
- What's your restraint policy? If the answer involves scruffing or a full-body hold as standard, keep looking.
- Do you use a high-velocity dryer? These terrify most cats. Air drying or towel drying is kinder.
- What happens if my cat won't settle? A good groomer stops and refers. A bad one pushes through.
- Can I book a shorter first visit? A 15 minute meet-and-greet beats a two hour full groom for a nervous cat.
Mobile groomers and house calls are worth considering. Cats stress far more from transport and unfamiliar environments than from the grooming itself. A mobile van parked outside removes half the problem.
What a sedated shave-down actually involves
Sedation isn't the same as general anaesthesia, though some cases need the latter. Your vet picks based on the cat's health and how much work the coat needs.
A typical appointment looks like this:
- Pre-visit anxiolytic at home, usually gabapentin or trazodone given one to three hours before.
- Physical exam and, for older cats, often bloodwork.
- Injectable sedation, sometimes with an IV catheter placed.
- Full clip with a #10 blade, taking the coat down to roughly 1.5mm.
- Skin inspection underneath. This is where sores, fleas, and wounds turn up.
- Recovery and monitoring before discharge.
The cat wakes up looking startling. Owners are often upset by it. But a pelted cat is in constant discomfort, and the relief afterwards is usually obvious within a day.
Skin under a pelt is often inflamed, fragile, and sometimes ulcerated. Clipping frequently reveals injuries nobody knew about. That's not the groomer's fault or the vet's.
It's what the mat was hiding.
When your cat needs medication to be groomable
Some cats genuinely can't cope without pharmacological help. That's a medical reality, not a training failure.
| Medication | Typical use | Notes |
|---|---|---|
| Gabapentin | Pre-visit sedation and anxiolysis | Widely used off-label in cats. Given 1 to 3 hours before |
| Trazodone | Situational anxiety | Off-label in cats. Sometimes combined with gabapentin |
| Pregabalin oral solution (Bonqat) | Licensed feline situational anxiety | Approved in the EU and US. Availability varies by market |
| Injectable sedation | In-clinic procedures | Veterinary administration only |
All of these are prescription-only and require a vet who knows your cat. Groomers cannot sedate, anywhere. If a groomer offers to, walk out.
What It Costs: Tools, Grooms and Vet Sedation Compared
Money is a real factor, and the numbers follow a pattern. Prevention is cheap. Crisis management is not.
Figures below reflect typical UK and US pricing as of 2026. Regional variation is significant, with metro areas running 30 to 50 percent above rural rates.
Home tools
| Item | UK typical | US typical | Replacement interval |
|---|---|---|---|
| Grooming glove | £6 to £12 | $8 to $15 | Every 1 to 2 years |
| Rubber curry brush | £6 to £15 | $8 to $18 | Every 2 to 3 years |
| Pin brush | £8 to £18 | $10 to $22 | Every 2 to 3 years |
| Greyhound comb (stainless) | £12 to £25 | $15 to $30 | 10+ years |
| Slicker brush (coated pins) | £10 to £22 | $12 to $28 | Every 2 to 3 years |
| Undercoat rake | £10 to £20 | $12 to $25 | 5+ years |
| Mat splitter | £8 to £16 | $10 to $20 | 5+ years |
| Lick mat | £5 to £10 | $6 to $12 | Every 1 to 2 years |
| Feliway Classic diffuser kit | £22 to £30 | $28 to $38 | Refills monthly |
A sensible starter kit comes to around £30 to £45 in the UK, $40 to $60 in the US. You don't need everything on that list. A glove, a curry brush, a comb and a lick mat cover most cats.
Professional services
| Service | UK typical | US typical | Frequency |
|---|---|---|---|
| Full groom, shorthair | £35 to £55 | $45 to $75 | Every 8 to 12 weeks |
| Full groom, longhair | £45 to £90 | $60 to $120 | Every 6 to 8 weeks |
| De-matting surcharge | £10 to £40 extra | $15 to $50 extra | Per session |
| Lion cut | £55 to £100 | $70 to $130 | Every 8 to 12 weeks |
| Sanitary trim only | £15 to £30 | $20 to $40 | Every 4 to 8 weeks |
| Mobile groom premium | +£10 to £25 | +$15 to $35 | Per visit |
Veterinary costs
| Service | UK typical | US typical |
|---|---|---|
| Consultation for coat or pain assessment | £40 to £70 | $60 to $100 |
| Pre-visit gabapentin (course) | £8 to £20 | $10 to $30 |
| Sedated de-mat or full shave-down | £150 to £400 | $200 to $500 |
| Pre-anaesthetic bloodwork | £60 to £120 | $80 to $180 |
| Skin scrape and cytology | £30 to £70 | $50 to $110 |
| Osteoarthritis workup with radiographs | £200 to £400 | $300 to $600 |
| Frunevetmab (Solensia) monthly injection | £30 to £50 per dose | $50 to $80 per dose |
A £12 comb used weekly for ten minutes prevents a £300 sedated shave-down. That's the entire argument.
Groomer intake data shows a consistent pattern. Cats that arrive pelted are almost never cats whose owners were negligent. They're cats whose owners stopped brushing because the cat resisted, then couldn't catch up.
Two or three minutes a week beats an hour once a season.
Safety, Zoonotics and Products That Are Toxic to Cats
Grooming is one of the few household tasks where the risks run both ways. Your cat can get hurt. So can you.
Diseases you can catch from grooming a cat
Most are minor. A couple aren't, particularly for anyone immunocompromised, pregnant, or elderly.
- Cat scratch disease. Caused by Bartonella henselae, usually transmitted through scratches or flea dirt. Symptoms include swollen lymph nodes and fever. The Centers for Disease Control and Prevention publishes clear guidance on risk groups and prevention.
- Ringworm (dermatophytosis). Fungal, highly contagious, and it survives on brushes and bedding for months. Look for circular patches of broken hair, scaling, and crusts. Stop grooming and see a vet.
- Cheyletiellosis. Sometimes called walking dandruff. The mites bite humans and cause itchy red spots.
- Fleas. Cat fleas bite people readily, usually around the ankles.
- Pasteurella infection from bites. Fast-moving and serious.
Tool hygiene most owners skip
Brushes and combs move fungal spores, mite eggs, and flea dirt between animals. In a multi-cat home, that matters.
- Remove hair from brushes after every session.
- Wash tools weekly in warm water with a mild detergent.
- Dry completely. Damp bristle bases grow bacteria.
- Use separate tools per cat if any cat has a skin condition.
- Bin wooden-handled brushes after a confirmed ringworm case. Porous materials are almost impossible to decontaminate.
- Disinfect metal combs with a veterinary-grade disinfectant if ringworm is suspected.
Cats you should never groom without veterinary advice
Some cats carry additional risk during handling. Check with your vet before any grooming beyond gentle stroking.
- Cats with known heart disease, especially hypertrophic cardiomyopathy
- Cats in respiratory distress or with chronic asthma
- Cats recovering from surgery or wearing a cone
- Cats with fragile skin syndrome or those on long-term corticosteroids
- Very frail geriatric cats over 17
- Cats with active hyperthyroidism, which raises stress sensitivity
- Any cat with an unhealed wound or abscess in the grooming area
Legal and welfare context
Grooming licensing varies widely. In the US, most states have no groomer licensing requirement, so certification through bodies like the National Cat Groomers Institute of America is voluntary but meaningful. Ask for it.
In the UK, severe neglected matting can constitute a welfare offence under the Animal Welfare Act 2006, which places a duty of care on owners to meet an animal's needs. Pelting causes documented pain and skin damage. It's not a cosmetic issue.
Insurance is another practical point. Many pet insurance policies exclude routine grooming but do cover sedated de-matting when it's medically necessary. Check your policy wording before you assume either way.
Long-Term Maintenance by Coat Type and Life Stage
Once your cat tolerates a short groom, the goal shifts. You're no longer training. You're maintaining, and the routine should be small enough that you actually keep doing it.
The mistake at this stage is scaling up too fast. A cat that accepts 90 seconds does not automatically accept ten minutes.
How often should you brush a cat?
Frequency depends on coat type more than anything else. Here's a realistic schedule.
| Coat type | Brushing frequency | Session length | Mat check |
|---|---|---|---|
| Shorthair, single coat | 2 to 3 times weekly | 2 to 4 minutes | Weekly |
| Shorthair, dense (British, Russian Blue) | 3 times weekly | 3 to 5 minutes | Weekly |
| Medium (Ragdoll, Birman) | Every other day | 5 minutes | Twice weekly |
| Cottony longhair (Persian, Himalayan) | Daily, no exceptions | 5 to 10 minutes | Daily |
| Double-coated longhair (Maine Coon, Siberian) | Daily to every other day | 5 to 10 minutes | Twice weekly |
| Rex coats | Weekly, very light | 1 to 2 minutes | Weekly |
| Hairless (Sphynx) | No brushing | Wipe-down weekly | Skin check weekly |
For a cat that fought you for months, halve every session length above and double the frequency. Little and often is the whole strategy.
Seasonal shifts to plan for
Cats moult heaviest in spring and autumn in temperate climates. Indoor cats under artificial lighting shed at a lower level almost year round, which surprises a lot of owners.
- Spring (March to May): Heaviest shed. Add one extra session weekly. Undercoat rakes earn their keep now.
- Autumn (September to November): Second moult as the winter coat comes in. Mats form fast in this window.
- Winter: Central heating dries skin and increases dandruff. Reduce pressure, focus on sebum distribution.
- Summer: Higher humidity accelerates felting in longhairs. Check the armpits and groin twice weekly.
Flea season varies by region and lengthens in warmer areas. A flea-allergic cat becomes brush-intolerant fast, so year-round parasite prevention is part of grooming maintenance, not separate from it.
Life stage adjustments
| Life stage | What changes | What to do |
|---|---|---|
| Kitten (under 6 months) | Coat is short, tolerance is trainable | Groom daily for 30 seconds, even if unnecessary |
| Adult (1 to 10) | Peak coat, peak tolerance | Maintain the established routine |
| Mature (7 to 10) | Early arthritis, reduced self-grooming | Add tail base and spine checks |
| Senior (11 to 14) | Greasy coat, more mats, less flexibility | Shorter, more frequent, softest tool |
| Geriatric (15+) | Thin skin, brittle claws, low tolerance | Glove only. Groom where they lie |
Kitten owners get the easiest ride here. Daily 30 second grooming from eight weeks builds a cat that never develops the problem. If you have a kitten now, this is the highest-value thing you can do.
Hospice and palliative grooming
For terminally ill or immobile cats, grooming becomes comfort care. Priorities change completely.
- Keep the rear end clean and mat free. That's the top priority.
- Use a warm damp cloth over a brush wherever possible.
- Groom in 20 to 30 second bursts.
- Never reposition the cat to reach a spot.
- Accept an imperfect coat. Comfort beats appearance.
- Talk to your vet about pain relief before grooming sessions.
Real Scenarios: Three Cats, Three Different Plans
The theory makes more sense against actual cases. These are composites drawn from common patterns in owner reports and grooming practice.
The nine-year-old Domestic Shorthair who suddenly turned
A tabby who accepted brushing happily for eight years starts growling and swatting when the brush reaches his lower back. The owner assumes he's become grumpy with age.
A vet exam found reduced hip mobility and pain on lumbar palpation. Radiographs confirmed degenerative joint disease. His coat had also gone greasy along the spine because he'd stopped twisting to groom it.
The plan that worked:
- Pain management started first: monthly frunevetmab injections and a joint-supportive diet.
- All grooming paused for three weeks while the medication took effect.
- Restarted with a rubber curry brush only, on the shoulders.
- Groomed on the sofa where he already slept, never lifted.
- Sessions of 45 seconds, twice daily.
Noticeable change by week four. By week eight he tolerated the spine and tail base for around 90 seconds. The greasy patches cleared within a month once he was comfortable enough to groom himself again.
Nobody trains a cat out of arthritis. Fix the pain and the behaviour often follows on its own.
The rescue Ragdoll cross with no handling history
Adopted at three years old from a hoarding case. Bolts from the room at the sight of a brush. Already had grade 2 mats behind both elbows and in the ruff.
Two competing needs made this tricky. The mats needed dealing with, but any forced handling would have destroyed months of trust-building.
The plan that worked:
- Booked a Fear Free certified cat-only groomer with a pre-visit gabapentin dose. Mats removed professionally in one visit.
- Two-week complete break from any grooming attempt.
- Brush left permanently beside the food bowl for ten days.
- Treats dropped near the brush daily, with zero contact.
- Week four: first contact with a grooming glove, one stroke, on a lick mat.
- Weeks five to fourteen: built to a reliable head-bump start button.
Four months to a consistent two minute groom with a pin brush. Body zones beyond shoulders and back are still off limits, so professional grooms every ten weeks cover the rest.
Clearing the mats professionally first removed the pain source. Training a cat around existing mats never works.
The Persian who swats at exactly fifteen seconds
Five years old, no medical findings, affectionate and confident. Loves being stroked. Reliably turns and bites at around the fifteen second mark, every single time.
Textbook overstimulation. Predictable, consistent, and entirely workable once the owner counted instead of guessed.
The plan that worked:
- Sessions capped at eight seconds. Timer on the phone.
- Three sessions daily instead of one long one.
- Only cheeks, chin and shoulders for the first two weeks.
- One extra second added every fourth session.
- Lick mat used throughout to keep the head forward.
Threshold rose from 15 seconds to roughly 70 seconds over five weeks. Given the cottony Persian coat, the owner switched to line brushing across four short sessions per day rather than one long one. No bites in the following six months.
Overstimulation isn't unpredictable. It's a clock, and you can move the clock if you stop trying to beat it.
Your Decision Guide: Which Path to Take This Week
Enough theory. Here's what to do in the next seven days, based on where you actually are right now.
Find the line that matches your cat and start there. Don't start two paths at once.
| Your situation | Do this first, this week |
|---|---|
| Cat used to be fine, now isn't | Book a vet appointment. No brushing until then |
| You can feel firm lumps in the coat | Grade the mats by feel. If they won't lift, call a groomer |
| Cat bolts at the sight of the brush | Leave the brush by the food bowl. Nothing else for 10 days |
| Cat swats after a predictable few seconds | Halve your session length. Set a timer |
| Cat is over 11 and stiff | Vet visit for pain assessment before any grooming plan |
| Coat is greasy or clumped along the spine | Vet visit. Your cat has stopped self-grooming |
| Cat tolerates hands but hates the brush | Swap to a grooming glove. Put the slicker away |
| Coat is pelted into a sheet | Vet appointment for a sedated shave-down |
| You have a kitten under 6 months | Start 30 second daily sessions immediately |
The seven-day starter plan for most cats
If you've ruled out pain and there's no serious matting, this is your week one.
- Day 1: Dig out or buy a grooming glove or rubber curry brush. Leave it where your cat lives. Do not touch your cat with it.
- Day 2: Drop a treat near the brush twice. Pick the brush up, put it down, treat.
- Day 3: Hold the brush in one hand while stroking your cat with the other. Nothing more.
- Day 4: Lick mat down. One single stroke over the shoulders. Walk away.
- Day 5: Two strokes. Same spot. Same routine.
- Day 6: Three strokes. Stop while your cat is still relaxed.
- Day 7: Three to five strokes, twice in the day. Add the cheeks if all is calm.
That's it. If day 4 goes badly, drop back to day 2 and hold there for three more days.
How to tell your plan is working
Progress on a difficult cat is quiet and gradual, so it's easy to miss. Look for these instead of waiting for a cat who suddenly loves brushing.
- Your cat stays in the room when you pick up the brush.
- The gap between the first stroke and the first tail flick gets longer.
- Your cat comes back after a session instead of hiding.
- Head bumps or rubs against the brush start appearing.
- You get through a session without a growl.
When to change tack
Stop and reassess if any of these show up. Pushing on rarely fixes them.
- No progress after three to four weeks of consistent work. Something's being missed. Usually pain.
- A growl or swat in every single session. Your threshold estimate is wrong. Halve it.
- A new mat appears despite regular grooming. You're surface brushing. Learn line brushing or get help.
- Your cat starts avoiding you generally, not just the brush. Stop completely for two weeks and rebuild trust with food and play only.
- Any bite that breaks skin. Pause the plan, treat your wound properly, and talk to your vet about the cat.
Some cats never enjoy being brushed. That's a legitimate outcome, not a failure of technique or patience.
For those cats, the working target is a 60 second maintenance groom you can both tolerate, plus a professional groom every 6 to 12 weeks. That combination keeps the vast majority of difficult cats mat free without a single sedation.
You're not aiming for a cat who purrs through a full-body groom. You're aiming for a cat whose skin stays healthy and who doesn't dread your hands.
Frequently Asked Questions
Why does my cat bite me when I brush her back but not her head?
The back, flanks and tail base are trigger zones for most cats, while the head carries scent glands and welcomes contact. Back pain from arthritis or a hidden mat is also common in that area. Groom the head and shoulders only, and get the lower back checked by a vet.
Can I use a dog brush on my cat?
Physically yes, but most dog brushes are too harsh. Dog slickers have longer, stiffer wire pins designed for thicker skin, and feline skin is far thinner. Choose a cat-specific tool with shorter, softer pins or coated tips.
Never use dog shampoos, sprays, or flea products on a cat.
How do I get a mat out without hurting my cat?
Only attempt mats that lift freely away from the skin. Hold the fur at the base with one hand, then work the tips with a comb or mat splitter. Never use scissors, because feline skin lifts into the mat and gets cut.
Anything fused to the skin needs a groomer or vet.
Is it normal for a cat to hate brushing after a bath?
Yes, and bathing usually makes things worse if mats were present. Water shrinks and tightens mats, so the coat pulls more afterwards. Wet fur also mats faster while drying.
Remove tangles before any bath, and skip high-velocity dryers, which frighten most cats badly.
My cat is 15 and hates the brush. Should I just give up?
No, but change your approach completely. Senior cats need grooming most because they can't reach their own back end. Use a soft glove only, groom wherever the cat is lying, and keep sessions to 30 seconds.
Ask your vet about arthritis pain relief first, since discomfort is usually the real objection.
How long should it take before my cat tolerates brushing?
Two to six weeks for a mildly reluctant cat, and three to six months for a fearful or formerly feral one. If you see no change after four weeks of consistent short sessions, stop and get a veterinary check. Persistent resistance almost always has a physical cause behind it.