
If you've just brought home a Shetland Sheepdog, or you're staring at one that's already shedding like it's snowing indoors, you've probably realized this isn't your average brushing routine. The Sheltie's coat is a masterpiece of nature, a double layer that keeps them warm in winter and cool in summer. But that gorgeous mane comes with a serious responsibility.
Learning how to groom a Shetland Sheepdog properly is the single best thing you can do for their comfort, your furniture, and their long-term skin health.
Here's the reality: the average Sheltie carries roughly 10 to 15 million hairs, and they don't just shed a little. They "blow" their undercoat twice a year. Research from breed clubs indicates that as of 2026, the most common reason Shelties end up with painful skin infections is improper brushing technique at home.
It's not about buying the most expensive tools. It's about understanding how the coat actually works. Let's break down the entire process so you can handle it with confidence.

Image source: Bing (Web (fair-use with source credit))
Quick Answer
Grooming a Shetland Sheepdog requires daily brushing during shedding season and weekly maintenance otherwise. Use a slicker brush and stainless steel comb to line-comb the double coat. Bathe every 4 to 6 weeks with dog-specific shampoo.
Always dry thoroughly to prevent skin issues. Trim nails monthly and check ears for buildup.
Why Grooming a Sheltie Is Different From Any Other Dog
The Shetland Sheepdog has a double coat, which is fundamentally different from a single-coated dog like a Poodle or a Yorkie. The outer layer of guard hairs is long, straight, and somewhat harsh to the touch. Their main job is to repel water and dirt.
Beneath that lies the undercoat: a soft, dense, and incredibly thick layer of fur that acts as insulation.
This double coat operates on its own schedule. Twice a year, usually in spring and fall, the undercoat loosens and dies. This is the "blowout." The dog isn't scratching because they're itchy.
The dead fur is literally falling out in clumps. If you don't remove it with the right tools, it becomes a breeding ground for bacteria, moisture, and mats that pull at the skin.
Here's how this compares to single-coated breeds:
| Feature | Sheltie Double Coat | Single Coat (Poodle, Bichon) |
|---|---|---|
| Shedding | Heavy seasonal blowouts | Minimal to none |
| Matting Risk | High if undercoat isn't brushed | High if hair isn't cut, but different cause |
| Grooming Style | Brushing and raking | Clipping and scissoring |
| Hypoallergenic | No | Yes (typically) |
The biggest mistake new owners make is treating a Sheltie's coat like a single layer. They buy a regular brush and sweep the top. This does nothing for the undercoat.
The dead fur stays trapped against the skin, creating heat, moisture, and eventually hot spots. That's why "line combing" is the only method that truly works, and we'll get to that in detail shortly.
The Essential Sheltie Grooming Kit: What You Actually Need
Before you start, you need the right arsenal. You don't need everything in the pet store, but you do need the specifics for a double coat. A generic brush from the supermarket won't cut it, and some tools can actually damage the coat.
The Core Tools
Here's what our research consistently shows as the minimum viable kit for an at-home Sheltie grooming session.
Slicker Brush. This is your workhorse. Look for one with fine, bent wire pins and a padded base. The pins should have rounded tips to avoid scratching the skin.
You'll use this for the topcoat and to smooth out loose fur.

Undercoat Rake. This tool has long, sturdy teeth. Sometimes they're single-sided, sometimes double-sided with different tooth spacings. This is essential for reaching down into the undercoat and pulling out the dead fluff that the slicker can't reach.
A rake with rotating pins is often gentler on the skin.
Stainless Steel Comb. This is your finishing tool and your inspection tool. You use it to line-comb the hair and catch any tangles the brushes missed. The teeth need to be a mix of wide and fine.
Wide teeth work through heavier sections, while the fine teeth catch the smaller mats near the skin.
The Supporting Cast
These aren't optional extras. Missing them makes the job harder and riskier.
High-Velocity Dryer. Some say you can use a human hair dryer. Don't. A human dryer doesn't have the power to push air through a double coat.
A high-velocity dryer forces the air down to the skin, blowing out loose undercoat and making the hair stand up for brushing. It's a game-changer.
Grooming Table and Loop. Safe means secure. A non-slip grooming mat on a table with a grooming arm and loop keeps the dog from jumping. The loop goes around the neck safely, preventing falls.
If you don't have a table, use a non-slip mat on a sturdy surface like a washing machine or countertop.
Shears. Look for thinning shears and a pair of straight shears. You use thinning shears to blend the fur and remove bulk without leaving blunt cut lines. Straight shears are for trimming the paw pads and the hocks.
Nail Clippers and Styptic Powder. Get either guillotine-style clippers or scissor-type clippers. Both work, it's about your comfort. Styptic powder is non-negotiable.
It stops bleeding instantly if you accidentally clip the quick.
Dog Shampoo and Conditioner. Never use human shampoo. Dog skin has a different pH balance, and human shampoo strips essential oils. You need a mild, pH-balanced dog shampoo.
A conditioner is also smart, especially if the coat feels dry or static-prone.
Here's a quick reference table for your shopping list:
| Tool | Purpose | Priority |
|---|---|---|
| Slicker Brush | Removes loose fur from topcoat | Essential |
| Undercoat Rake | Removes dead undercoat fur | Essential |
| Stainless Steel Comb | Line combing and mat check | Essential |
| High-Velocity Dryer | Dries and blows out dead coat | High |
| Grooming Table | Safety and accessibility | High |
| Thinning/Straight Shears | Trimming feet, hocks, and ears | Medium |
| Nail Clippers + Styptic | Nail health and safety | Essential |
| Dog Shampoo/Conditioner | Skin and coat hygiene | Essential |
Before You Start: Prep Work That Saves You Time and Pain
Don't just pick up a brush and go at it. A few minutes of preparation can prevent a lot of struggle, both for you and for your dog. A Sheltie who gets hurt during grooming will resist it for life.
The Mood and Environment
Set your dog up for success. Start with a calm, relaxed pet. If your Sheltie is overly excited or anxious, let them burn off some energy with a short walk first.
A tired Sheltie is a cooperative Sheltie. Also, choose a time when you are relaxed. If you're rushed, you'll make mistakes, and your dog will sense the stress.
The Prep Work Routine
First, let your dog sniff the tools. Let them see you pick them up. Give them a few treats while they touch the brush.
You want to build a positive association.
Run your hands all over their body first. This is a critical step. You're checking for:
- Burrs, cockleburs, or debris tangled in the hair
- Fleas or ticks
- Hot spots, scabs, or skin irritations
- Sensitive areas where the dog flinches
If you find painful matting, do not try to brush it out dry. A dry mat is a painful mat. You need a detangling spray designed for dogs.
Spray the mat, let it sit for a few minutes, and gently try to tease it apart with your fingers. If you can't get it out, that's where the shears come in, but we'll cover that in the mistakes section.
Setting Up Your Space
If you have a grooming table, set it up. If not, find a sturdy, non-slip surface. A rubber bath mat on a table or countertop works well.
The key is preventing slips. A dog that slides will panic.
Make sure all your tools are within arm's reach. You don't want to turn your back on a dog on a table. Have your brush, comb, rake, and detangling spray all laid out.
Step-by-Step: The Full Sheltie Grooming Routine
This is the heart of it all. The complete routine can take 30 to 45 minutes once you're practiced. When you're new, it'll take longer.
That's normal. Don't rush.
Most owners also bathe their dog first, believing a clean coat brushes better. That's incorrect. You always brush before the bath.
Brushing gets out the loose fur and mats. If you bathe first, the water tightens existing mats and makes them impossible to remove. You'll be stuck with a wet, matted, miserable dog.
Step 1: Pre-Brushing to Remove Loose Hair
Before the bath, do a rough pass with the slicker brush. This isn't the detailed grooming. This is just removing the top layer of loose hair.
Sweep the brush over the back, sides, and tail. Don't dig deep yet. Think of this as the warm-up.
Step 2: Bathing — Water Temp, Shampoo Type, and How to Rinse Properly
The bath is critical, and how you do it matters more than how often.
Always use lukewarm water. Not hot, not cold. A double coat takes a while to get completely wet.
You need to really saturate the coat down to the skin. This takes longer than you think.
Use your dog-specific shampoo. Dilute it with water in a cup before applying if it's concentrated. Rub it in with your fingers, working it down to the skin.
Don't scrub vigorously in circles, as that can tangle the coat. Work the shampoo in a downward direction, following the lay of the hair.
The rinse is the most important part of the bath. Residue from shampoo causes skin irritation and dulls the coat. You need to rinse, and rinse, and rinse again.
Run your fingers through the coat while rinsing. When you think you're done, rinse one more time.
Step 3: Drying the Coat Section by Section
Do not let a Sheltie air dry. That leaves the undercoat damp for hours, which causes a mildew smell and potential skin issues.

Start with a towel to get the big water out. Press the towel against the coat; don't rub. Rubbing causes tangles.
Then, get your high-velocity dryer.
Hold the dryer nozzle a few inches from the skin and move it in a sweeping motion. The goal is to push air down to the skin. This will blow out dead undercoat that was loosened by the bath.
Don't point the nozzle directly at the dog's face or ears. Use the lowest heat setting. The air force does the work, not heat.
For a full dry, you'll do this section by section, using your hand or a comb to lift the hair.
Step 4: Line Parting and Brushing from Root to Tip
This is the "line combing" technique, and it's the secret to a Sheltie's coat.
Start at the top of the hip. Use the tip of your steel comb to part the hair, like you're parting hair on a human. You want to expose the skin in a straight line.
Brush that section out from root to tip. The skin should be visible and clean.
Move the part down an inch, and repeat. Work your way across the entire dog, from the back of the head to the tail. You address the whole body in small, meticulous lines.
This is why the process takes time.
This method ensures every hair gets brushed. A regular pass with a slicker only gets the top layer. Line combing gets the undercoat.
Step 5: Trimming Paws, Hocks, and the "Britches"
Most Shelties don't need a full haircut. They need targeted trims.
Paws. Have a light source. Gently press the toes apart to expose the fur between the pads. This fur can grow long and become uncomfortable.
Carefully trim it flush with the pads using your straight shears. Also trim the hair that fans out over the top of the paw.
Hocks. The hocks are the back legs, below the "stifle" (knee). They have long, feathery hair. Owners often trim this to keep the area cleaner.
Use thinning shears to shorten the hair, blending it so there's no blunt line.
Britches. This is the full, fluffy hair on the back of the hind legs, like a skirt. You'll often see these stained or matted. Use your comb to locate tangles, then use thinning shears to remove any discolored or damaged ends.
Step 6: Shaping the Ears, Mane, and Tail Without Ruining the Look
Ears. Shelties have small, pricked ears. The hair on the ears should be short and neat. Use thinning shears to trim the hair on the inner and outer ear, shaping it into a rounded V.
Never use straight shears near the ear edges.
Mane and Frill. The mane is the longer hair around the neck. The frill is the white chest. These look showy when they're healthy.
Use your slicker brush to fluff them, and trim any stray hairs that are drastically longer than the rest. You want a natural look, not a sculpted one.
Tail. The tail is feathered heavily. Don't trim it unless you're going for a specific show look. Usually, an and comb with the slicker is plenty to keep it fluffy and clean.
Following these steps in order is the foundation. They prevent pain, keep the coat healthy, and make the job manageable. It takes practice, but the payoff is huge.
A well-groomed Sheltie turns heads.
Grooming Through the Seasons: Managing the "Blowout"
The Sheltie's coat doesn't stay the same all year. It changes with the seasons. Understanding this cycle makes grooming easier and keeps your dog comfortable.
Spring and Fall: The Big Shed
Twice a year, your Sheltie will "blow" their coat. This means the entire undercoat comes out over a few weeks. This is when you'll see tumbleweeds of fur rolling across your floor.
During these weeks, daily brushing is essential. You'll want to use your undercoat rake heavily. The goal is to remove as much dead fur as possible before it ends up on your carpet.
A bath at the start of the blowout can help loosen everything, but you still need to brush first.
Here's a realistic timeline: the full blowout process takes about 2 to 3 weeks for most Shelties. For the first week, you'll brush out huge clumps daily. By week two, the amount will taper off.
By week three, you should be back to a normal coat.
Summer and Winter: Maintenance Mode
Once the coat is blown, you switch to maintenance mode. In summer, your Sheltie should feel cool without the heavy undercoat. They'll look slimmer.
In winter, the undercoat will start growing back in, creating that full, fluffy appearance again.
During these off-peak times, you can drop back to brushing 2 to 3 times a week. You don't need the undercoat rake as often. A slicker brush and comb will handle the day-to-day debris and tangles.
Hot, Humid Climates vs. Cold, Wet Climates
Climate changes the game. In humid climates like Florida or the Gulf Coast, the coat takes longer to dry. The risk of mildew and skin irritation is higher.
You need to be extra thorough with the high-velocity dryer.
In cold, wet climates like the Pacific Northwest, mud and moisture are constant threats. The coat will pick up dirt, debris, and moisture quickly. You might need more frequent baths, especially after walks on wet trails.
Always dry the dog completely before they go outside again in cold weather.
In very warm climates like Arizona or Texas, watch for signs of overheating. A thick, intact undercoat in 100-degree heat is dangerous. You may need to brush more frequently to keep the undercoat thin, even outside of the blowout season.
Some owners in extreme climates opt for a professional groomer to thin the coat safely.
Common Grooming Mistakes That Hurt Your Sheltie
Everyone makes mistakes when they're learning. The key is knowing what they are before you cause real damage. Here are the most common errors we see in our research, ranked by how much pain or harm they cause.
Raking the Topcoat Instead of the Undercoat
This is the most common misunderstanding. Owners see the long, straight guard hairs and think the rake is for those. It's not.
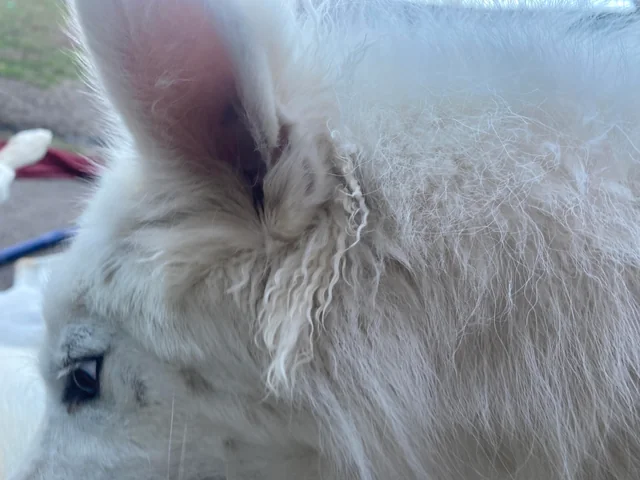
The rake is for the undercoat. If you dig the rake into the topcoat, you'll literally pull out the healthy guard hairs. This ruins the coat's texture and protection.
The right approach is to use the slicker brush on the topcoat and save the rake for the undercoat. Line combing with your steel comb will naturally separate the two layers, showing you exactly where the undercoat begins.
Brushing Dry Mats and Causing Pain
Never, ever brush a mat out of dry fur. A mat is a mass of tangled hair that has tightened against the skin. Brushing it pulls the skin, causing real pain.
Your dog will yelp, and they'll learn to hate grooming.
Instead, use a detangling spray. Let it sit for a few minutes to penetrate the mat. Then, try to tease the mat apart with your fingers.
Work from the outside edges inward. If you can't get it out, use thinning shears to cut the mat out carefully, making sure your finger is between the mat and the skin at all times.
Cutting the Quick When Trimming Nails
The quick is the blood vessel and nerve inside the nail. If you cut it, it bleeds and hurts. For a dog with dark nails, it's often invisible.
The safest method is to trim tiny slivers at a time. Look at the bottom of the nail. If you see a small dark dot in the center of the white-ish cross-section, stop.
You're at the quick. Keep styptic powder nearby. If you do cut the quick, apply the powder immediately to stop the bleeding, and give your dog a treat.
Using Human Shampoo or Conditioner
This is a big one. Human shampoo is formulated for human skin, which has a pH of around 5.5. Dog skin has a pH of about 7.5.
Using human shampoo disrupts the skin's natural barrier. It causes dryness, itching, and can lead to bacterial or fungal infections.
Always buy a shampoo specifically labeled for dogs. Look for one that's pH balanced for canines. If your Sheltie has sensitive skin, look for oatmeal-based or hypoallergenic formulas recommended by veterinarians.
Drying Too Aggressively and Causing Static
High-velocity dryers are powerful. If you hold the nozzle too close or use too high a heat setting, you'll cause static electricity. The coat becomes flyaway and impossible to brush.
The dog gets zapped, and they won't want to be groomed again.
Keep the dryer nozzle a few inches from the coat. Use the lowest heat setting. Move the nozzle in a sweeping motion, following the natural direction of the hair.
You want to detangle the coat, not blow it into a frizzy mess.
Skipping the Final Comb-Through
You did the line combing, you trimmed the paws, you're done. Right? Not quite.
It's like finishing a project and not checking your work.
The final comb-through is your chance to catch loose tangles you missed. Take your steel comb and go through the entire coat one last time. Pay extra attention to the areas behind the ears, the armpits, and the britches.
These are the zones where mats form most easily.
When to Call a Professional (and What to Ask For)
There's no shame in calling in a pro. Some situations genuinely require a trained hand. Knowing when to tap out is a sign of good ownership, not failure.
When Your Dog Has Severe Matting
If the mats are tight against the skin, don't try to fix it yourself at home. A dog with a severely matted coat needs to be shaved down, and that's a job for a professional. Trying to brush out dense, skin-tight mats at home is painful for the dog and nearly impossible.
A groomer has the tools and the techniques to do this safely.
When You Inherit a Neglected Coat
Maybe you adopted an older Sheltie that hasn't been groomed properly in months. The coat may have layers of dead undercoat and thick tangles. This is a beauty and hygiene project that takes hours.
It's a steep learning curve for a new owner. A professional can get the coat clean and healthy first, putting you in a better position to maintain it afterward.
When You Need a Specialty Cut
If you're showing your Sheltie, the grooming requirements are stricter. The American Kennel Club (AKC) breed standard has specific details about the ear shape, the mane, and the tail. A professional groomer who works with shelties regularly will know exactly what the judges expect.
What to Ask Your Groomer
Not all groomers are created equal. Many are wonderful with poodles and terriers but have never touched a double coat.
Here are the questions you should ask before leaving your Sheltie:
- Do you have experience with double-coated breeds like Shelties or Collies?
- Will you use a high-velocity dryer to dry the coat?
- Do you brush before the bath?
- Will you avoid shaving the coat unless it's severely matted?
These questions protect your dog. A groomer who answers "yes" to most of them understands the breed. One who hesitates or says they usually just clip everything short doesn't.
Frequently Asked Questions
How often should I really groom my Sheltie?
During peak shedding season, daily brushing is necessary. Outside of that, 2 to 3 times a week keeps the coat healthy. A full bath and dry routine happens every 4 to 6 weeks.
Nail trims happen every 3 to 4 weeks.
Can I shave my Sheltie in summer to keep them cool?
No. Shaving a double-coated breed is a bad idea. The topcoat protects against sunburn and insect bites.
The undercoat provides insulation against heat. Shaving destroys this system and grows back patchy. It can also cause permanent damage to the coat follicles.
Why does my Sheltie hate being brushed?
Most likely, you've caused them pain at some point, or the brushing is too aggressive. Refresh the association by giving treats during sessions. Start with light pressure.
Let your dog sniff the tools. Go slow. If the coat has hidden mats, you need to resolve those before you can expect your dog to enjoy the experience.
How do I stop tear stains?
Tear stains are usually caused by overactive tear ducts or mild allergies. Keeping the hair around the eyes trimmed short helps. Clean the area daily with a damp cloth.
Make sure your dog has access to fresh, filtered water. If stains persist, ask your vet about dietary changes or eye drops.
At what age should I start grooming my puppy?
Start immediately, but gently. The puppy coat is soft and will start transitioning to the adult coat at around 5 to 12 months. Get your puppy used to being touched, brushed, and handled right away.
Keep sessions short: 5 to 10 minutes, followed by a treat.
The 10-Minute Weekly Maintenance Routine
Life gets busy. Full grooming takes time. But a quick weekly check keeps your dog comfortable and prevents huge matting problems later.
The Quick Brush Pass
Twice a week, spend a few minutes with your slicker brush. Focus on the high-friction areas where mats form: behind the ears, the armpits, and the britches. Give the tail a quick sweep.
This takes 3 to 5 minutes.
The Inspection
While you brush, check the skin. Look for fleas, ticks, or red spots. Check the ears for a foul smell or dark wax.
Gently press the paw pads. Look for cracks or burrs. This is your early warning system.
Catching a hot spot on day one is much easier than treating a skin infection in week three.
The Simple Trim
Keep a pair of thinning shears near your brushing spot. While you're brushing, trim any hair that's getting too long between the paw pads or around the feet. This takes a few seconds and prevents those "snowball" feet in winter and mud clogs in summer.
This routine is realistic. It doesn't require a full hour every day. It just requires consistency.
Final Take: The Real Cost of Grooming (Time, Money, Effort)
Let's talk honestly about what this costs.
The Time Commitment
A full grooming session takes 30 to 45 minutes for an experienced owner. If you're new, expect closer to an hour. The weekly maintenance takes about 10 minutes.
The seasonal blowout requires daily work for 2 to 3 weeks.
The total time investment across a year is about 20 to 30 hours. That's the cost of owning a Sheltie.
The Financial Commitment
If you groom at home, your upfront cost for tools is around $150 to $300. This includes a quality slicker brush, an undercoat rake, a comb, shears, nail clippers, and a high-velocity dryer. The dryer is the biggest expense, usually $100 to $150.
Shampoo and conditioner will run you about $15 to $30 per bottle, which will last a few months.
| Item | Upfront Cost | Replacement Cost |
|---|---|---|
| Slicker Brush | $15 – $30 | Every 1-2 years |
| Undercoat Rake | $10 – $25 | Every 1-2 years |
| Steel Comb | $10 – $20 | Rarely |
| Shears (Thinning + Straight) | $30 – $60 | Every 2-3 years |
| Nail Clippers | $10 – $20 | Every 2-3 years |
| High-Velocity Dryer | $100 – $150 | Every 3-5 years |
| Shampoo + Conditioner | $15 – $30 | Every 2-3 months |
If you outsource to a professional groomer, count on $50 to $80 per visit, plus a tip. At 6 visits a year, that's $300 to $480 annually. The cost of professional grooming is significant, but the quality of a good groomer is worth it for some owners, especially if you travel frequently or have mobility issues.
The Effort Commitment
Grooming a Sheltie is a physical task. You're bending over a table, brushing for half an hour. If you have a dog that doesn't love grooming, it's a workout.
Your back will ache. You'll question why you got a dog with this much hair.
But you'll also have a happy, healthy dog with a gleaming coat. And honestly, there's nothing quite like the look of a well-groomed Sheltie running in the park with their mane blowing in the wind. The effort is real, but so is the payoff.