Tag: at-home dog grooming

  • How to Comb Check a Dog Coat

    How to Comb Check a Dog Coat

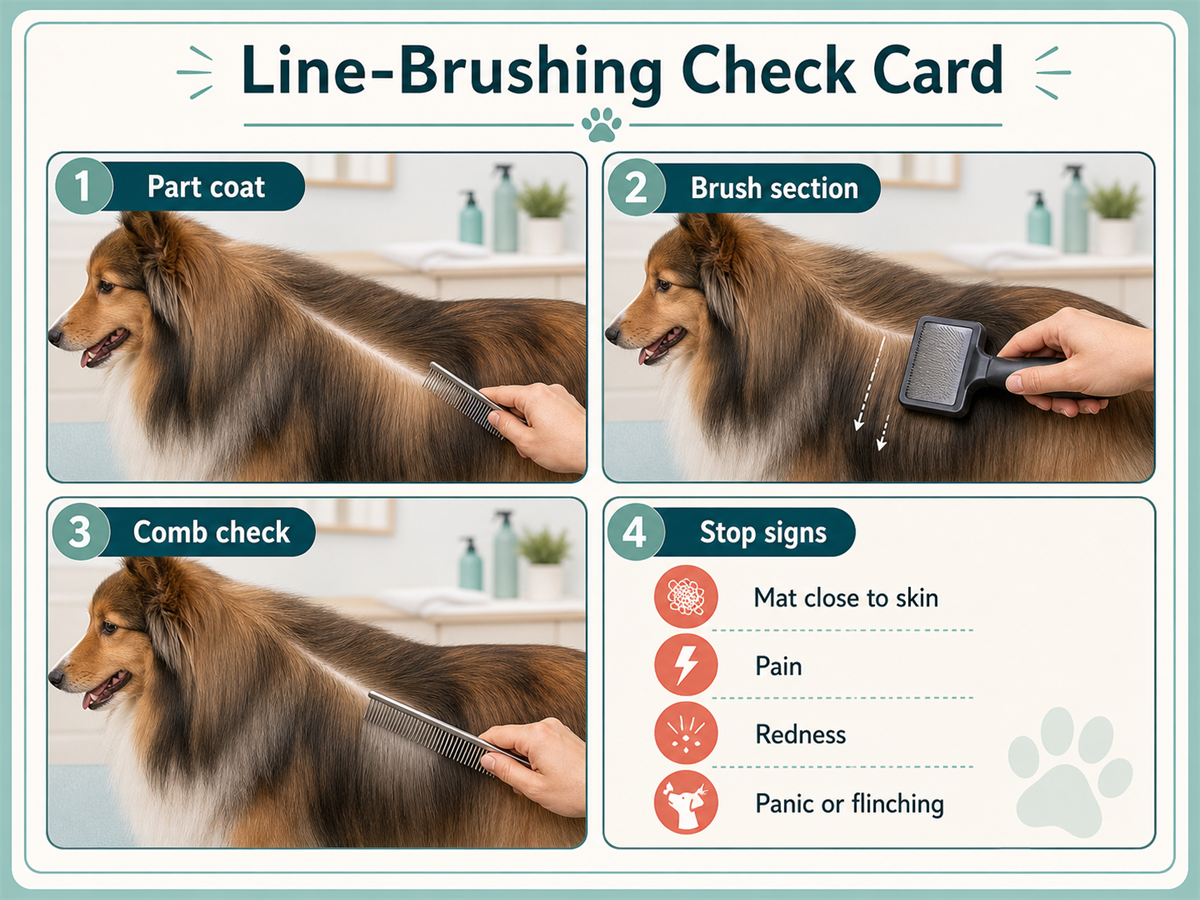
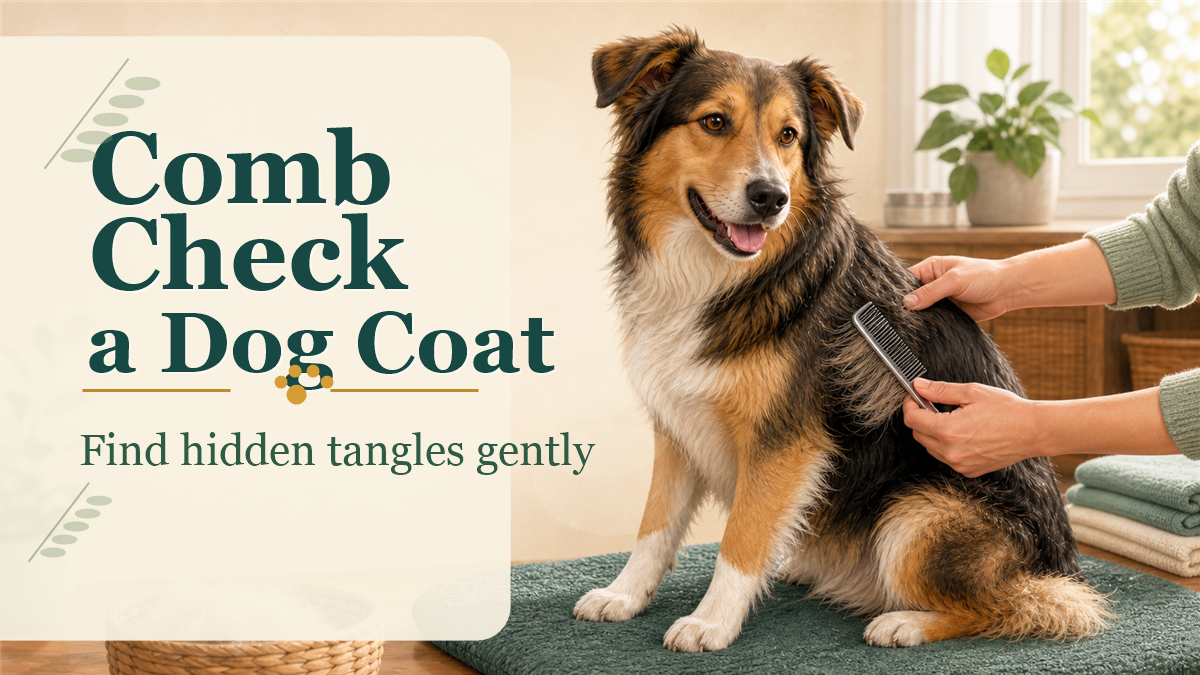
    A comb check is a gentle pass/fail test after brushing. You slide a comb through one small brushed section to see whether the coat is truly open, not just smooth on top. Pass means the comb glides through without catching, tugging, skin pull, or a worried reaction from your dog. Fail means stop that section and do not force the comb.

    Comb check before a bath, before drying a long or dense coat, or before ending a brushing session. Stop for pain, redness, tight mats, panic, defensiveness, or skin irritation. Use a groomer for coat work you cannot do gently, and call a veterinarian for painful skin, wounds, parasites, bleeding, infection signs, or any medical concern.

    What a Comb Check Is

    A comb check verifies brushing. It is not a detangling shortcut, a mat-removal method, or a reason to pull harder. The point is to learn whether the brush reached through the coat.

    This matters because a coat can look neat on the surface while tangles stay hidden underneath. The ASPCA notes that brushing helps remove loose hair and dirt, spread natural oils, and check for fleas and flea dirt. A comb check makes that brushing result easier to confirm, section by section.

    When to Comb Check

    Use a comb check after brushing a small area, not before. If you start with the comb and it hits resistance, you may drag through a tangle before you know what is there.

    Comb checking is especially useful before a bath. If the coat still has hidden tangles or mats, water and drying can make the session harder on your dog. For bath order, see dog grooming before or after bath.

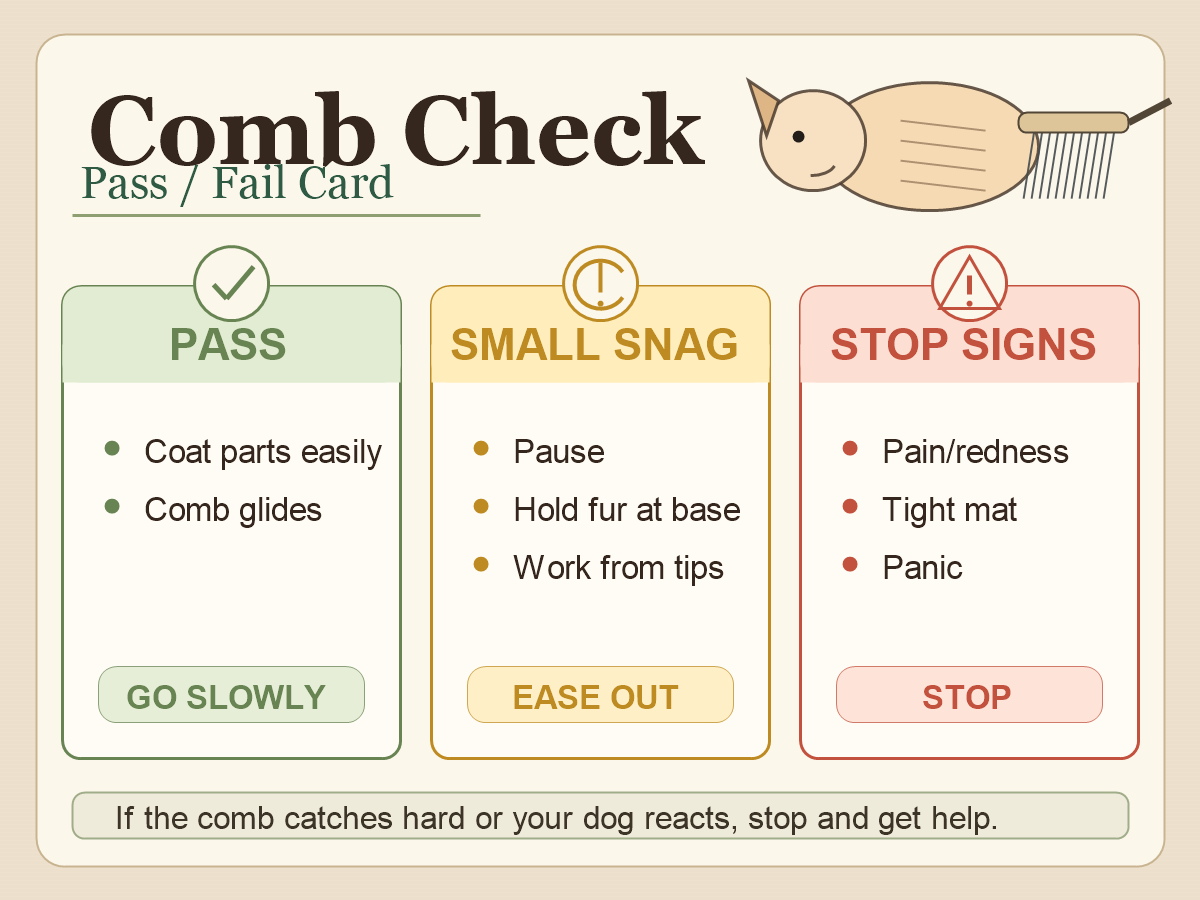
    The Pass/Fail Comb-Check Framework

    Think of each section as pass, pause, or fail. That keeps the check simple and prevents the common mistake of treating resistance like something to push through.

    ResultWhat you feelWhat to do next
    PassThe comb glides from the skin-side coat outward without snagging, tugging, or upsetting the dog.Move to the next small section.
    PauseThe comb meets a light snag, but the dog is calm and the skin is normal.Stop combing that spot. Go back to gentle brushing only if the hair separates easily.
    FailThe comb stops, pulls skin, hits a tight mat, or the dog flinches, panics, growls, snaps, or turns defensively.End work on that area. Use a groomer or veterinarian as appropriate.

    A failed section is useful information. It tells you the coat is not ready for bath, not ready for a harder comb pass, and not safe to rush.

    Comb-check pass fail card showing pass signs, small snag steps, and stop signs for pain, redness, tight mats, or panic.
    Use the comb check as a pass, pause, or stop signal instead of forcing the comb through resistance.

    Zones to Check

    Comb check the areas that rub, bend, collect loose coat, or hide tangles. Work slowly around thin or sensitive skin.

    • Behind the ears.
    • Collar and harness line.
    • Armpits.
    • Chest and belly.
    • Inner legs and feet.
    • Tail base, pants, and feathering.
    • Any spot where the coat looks packed, flat, damp, or clumped.

    If you find repeated catching in these friction zones, use dog matting vs tangles before deciding whether the area is safe for home brushing.

    How to Hold the Comb

    Use a clean metal comb category that suits the coat. Hold it lightly, close enough that you can feel resistance before it becomes a pull. Keep your other hand near the coat section so you can notice skin movement.

    1. Brush a small section first.
    2. Part or lift the coat so you can see the area you are checking.
    3. Start with a light comb pass through the brushed section.
    4. Watch the dog and the skin, not just the comb.
    5. Stop as soon as the comb catches, the skin moves, or the dog reacts.

    Do not saw the comb back and forth, brace the dog to finish, or pull harder because the section is almost done. If the comb cannot pass gently, the section fails the check.

    What to Do If the Comb Catches

    If the comb catches once, stop the comb pass and look at the area. A loose tangle may separate with gentle brushing if the dog stays calm and the skin looks normal. A tight mat, repeated catching, pain, redness, or skin pull needs a different plan.

    Use how to line brush a dog if the coat is safe to brush but you need smaller sections. Use how to prevent dog mats for a routine that reduces future catching.

    Call a groomer when the coat is tight, packed, skin-close, widespread, or beyond what you can brush without pulling. Call a veterinarian when there is pain, red or irritated skin, wounds, parasites, bleeding, swelling, infection signs, sudden coat loss, or a dog who seems medically fragile.

    Comb Check by Coat Type

    Coat typeHow to checkExtra caution
    Smooth coatUsually limited checks in thicker areas or shedding spots.Do not scrape thin skin for loose hair.
    Long silky coatCheck in small sections after brushing ends, ears, legs, belly, and tail.Stop if feathering pulls or twists around the comb.
    Curly or wavy coatUse very small sections and check close to the skin only after brushing opens the coat.Hidden mats may sit close to the skin; do not force the comb.
    Dense double coatCheck packed areas after light section brushing.Stop if undercoat is packed tight or the skin gets irritated.
    Feathered coatCheck behind ears, legs, tail, chest, and pants in short passes.These areas can be sensitive and mat from friction.

    The ASPCA’s at-home grooming tips describe different brush and comb categories by coat type. This guide stays category-level and does not recommend specific products.

    Stop Signs

    End the session if the check is no longer calm, gentle, and clear. A comb check should never turn into a struggle.

    • Pain, yelping, flinching, or repeated turning toward the comb.
    • Redness, raw skin, hot skin, swelling, scabs, wounds, bleeding, or skin irritation.
    • Tight mats, skin-close mats, packed coat, or coat that pulls the skin.
    • Panic, freezing, growling, snapping, biting, or defensive behavior.
    • Fleas, ticks, parasite dirt, sudden hair loss, or unusual skin changes.
    • Any situation where restraint or sedation seems necessary.

    For broader brushing safety mistakes, see dog brushing mistakes.

    FAQ

    What is a comb check on a dog?

    A comb check is a gentle pass through a brushed coat section to confirm that hidden tangles are not left under the surface.

    Should you comb check before bathing?

    Yes, when it is safe. Comb check after brushing and before bathing so hidden tangles or mats are not missed before water is added.

    What does it mean if the comb catches?

    It means that section does not pass. Stop the comb pass, check the skin and coat, and do not pull through resistance.

    Can I comb through a mat?

    No. Do not force a comb through tight, painful, skin-close, or repeated matting. Use a groomer or veterinarian as appropriate.

    Which coat zones should I comb check?

    Focus on behind the ears, collar line, armpits, chest, belly, legs, feet, tail, pants, feathering, and any packed or clumped area.

    Sources

  • How to Line Brush a Dog at Home

    How to Line Brush a Dog at Home

    Line brushing means lifting a dog’s coat and brushing one small section at a time so the brush reaches more than the surface coat. It can help on long, double, curly, wavy, and feathered coats, but it is not a way to remove tight mats. If the brush catches, the skin pulls, or the dog reacts in pain or fear, stop and get help from a groomer or veterinarian.

    Use light pressure, good light, and sections small enough that you can see the skin-side coat without scraping the skin. Do not force a brush or comb through mats, red skin, wounds, parasites, or a dog that is panicking, growling, snapping, or too hard to handle safely.

    What Line Brushing Is

    Line brushing is a section-by-section brushing method. You lift or part a narrow layer of coat, brush that visible section gently, move to the next nearby section, and check whether the coat is opening without tugging.

    The goal is to prevent surface brushing, where the top looks smooth while tangles stay hidden underneath. This matters most on coats that hold hair in layers, such as long coats, double coats, curly or wavy coats, and feathering behind the ears, legs, tail, and chest.

    The ASPCA’s dog grooming guidance notes that brushing helps remove dirt, spread natural oils, and check for fleas and flea dirt. Line brushing applies that same idea in smaller visible sections.

    When Line Brushing Helps

    Line brushing helps when the coat is healthy enough to brush and the problem is reach, not pain or tight matting. It is useful when the brush is only smoothing the surface, when feathering tangles between sessions, or when a thick coat needs smaller sections before a comb check.

    Coat areaLine-brushing fitStop point
    Long coatSmall rows from lower coat upwardStop if the coat pulls skin or forms tight clumps.
    Double coatSmall sections where undercoat packs behind the topcoatStop for packed coat you cannot open with light brushing.
    Curly or wavy coatVery small sections with careful comb checksStop for skin-close mats or curls that will not separate gently.
    FeatheringShort sections behind ears, legs, tail, and chestStop for pain, redness, or mats near thin skin.
    Smooth coatUsually not neededUse a simpler gentle brushing routine instead.

    If you are unsure whether a spot is a loose tangle or a mat, check dog matting vs tangles before brushing through resistance.

    Set Up Before You Start

    Choose a calm time, a steady surface, and enough light to see the coat part clearly. Keep the session short if your dog is young, tired, worried, sore, or new to brushing.

    • Use a brush or comb category that fits the coat, such as a slicker brush, pin brush, or metal comb.
    • Keep one hand close to the section so you can feel skin movement.
    • Brush with light pressure instead of pressing down toward the skin.
    • Clear hair from the brush often.
    • Reward calm pauses and stop before the dog becomes overwhelmed.

    If your dog already dislikes brushing, start with handling and tolerance work first. The guide on how to brush a dog that hates being brushed can help you keep the session safer and shorter.

    Step-by-Step Line Brushing

    Work slowly and keep each section small. If you cannot see what the brush is doing, the section is probably too large.

    1. Run your hands over the coat first. Check for mats, sore skin, wounds, parasites, swelling, heat, or painful spots.
    2. Lift a narrow layer of coat so you can see the section underneath.
    3. Hold the loose coat gently, without pulling the skin tight.
    4. Brush the exposed section with light strokes in the direction the coat grows.
    5. Move to the next small section beside or above it.
    6. Pause often to check skin color, dog comfort, and whether the brush is catching.
    7. When safe, finish the area with a gentle comb check. If the comb catches, do not force it.
    Line-brushing check card showing part coat, brush section, comb check, and stop signs.
    Use this quick sequence while line brushing: part the coat, brush a small section, comb-check only when safe, and stop for pain, redness, panic, flinching, or mats close to the skin.

    How Small Should Each Section Be?

    Each section should be small enough that you can see the coat you are brushing and feel whether the skin is being pulled. Thicker, longer, curlier, or more packed coats need smaller sections than open, easy coats.

    Use smaller sections around ears, armpits, legs, tail, collar areas, and other friction spots. These areas can mat faster and may have thinner, more sensitive skin.

    For routine spacing and prevention, see how to prevent dog mats. For a broader brushing rhythm, the dog grooming schedule by coat type can help you choose a realistic cadence.

    Follow With a Comb Check

    A comb check tells you whether the brush reached through the section. Use it only when the dog is comfortable and the coat has already opened with gentle brushing.

    The comb should move through without tugging, skin pull, or a pain response. If it catches, stop. The answer is not more force. You may need a smaller section, a calmer session, or a groomer if the coat is tight or close to the skin.

    Stop Signs

    Stop line brushing if the dog or coat shows signs that the job is no longer safe for home brushing. These signs mean the session needs to end, not intensify.

    • Pain, flinching, yelping, or repeated turning toward the brush
    • Red, raw, swollen, hot, scabbed, wounded, or bleeding skin
    • Fleas, ticks, parasite dirt, or sudden skin changes
    • Tight mats, mats close to the skin, packed coat, or coat that pulls the skin
    • Panic, freezing, growling, snapping, biting, or unsafe handling
    • Any situation where sedation or restraint seems necessary

    Use a professional groomer for tight mats, packed coat, sensitive-area matting, or coat work you cannot do gently. Use a veterinarian for wounds, parasites, painful skin, infection signs, sudden coat loss, or any medical concern.

    Common Line-Brushing Mistakes

    • Brushing only the top layer and missing the coat underneath.
    • Taking sections so large that you cannot see the brush contact.
    • Pressing the brush down into the skin.
    • Using line brushing as a mat-removal method.
    • Dragging a comb through resistance after brushing.
    • Continuing after the dog shows pain, fear, or defensive behavior.
    • Bathing a coat that still has tight tangles or mats.

    For more brushing errors to avoid, see dog brushing mistakes. If you are brushing before a bath, review dog grooming before or after bath so mats and tangles are handled before water can tighten them.

    How Line Brushing Fits With Shedding

    Line brushing can help collect loose hair from deeper coat layers, but it should still feel gentle. On shedding coats, work in small sections, clear the brush often, and stop before the skin gets irritated.

    If your main goal is normal shedding control rather than sectioning a long or curly coat, start with how to remove loose dog hair.

    FAQ

    What is line brushing a dog?

    Line brushing is brushing a dog’s coat in small lifted sections so you can reach through the coat instead of smoothing only the surface.

    Which dogs need line brushing?

    Long, double, curly, wavy, and feathered coats may benefit from line brushing. Smooth coats usually need a simpler brushing routine.

    Should line brushing hurt?

    No. Stop for pain, redness, skin pull, tight mats, panic, growling, snapping, or any sign that the dog cannot be handled safely.

    Can line brushing remove mats?

    No. Line brushing is not a severe mat-removal method. Do not force brushes or combs through mats. Use a groomer or veterinarian for tight, painful, skin-close, or widespread mats.

    Do you comb after line brushing?

    Yes, when it is safe. A comb check can confirm whether the section is open. If the comb catches or pulls skin, stop instead of forcing it.

    Sources

  • Dog Nail Trimming Setup Checklist

    Dog Nail Trimming Setup Checklist

    Before trimming a dog’s nails, set up the light, footing, calm position, rewards, paw-handling warmup, and bleeding-stop supplies. If the dog is panicking, biting, guarding paws, limping, bleeding, injured, medically fragile, sedated, aggressive, or impossible to handle safely, stop before cutting and use a veterinarian or qualified professional.

    This checklist is about setup before the trim. It is not a clipping technique tutorial, product roundup, or promise that the quick will be visible.

    The Nail-Trim Setup Checklist

    Use this as a pre-trim readiness check before the clipper or grinder touches the nail.

    Setup itemWhat to checkWhy it matters
    LightNails and paws are easy to see without rushingPoor visibility increases risk
    FootingDog is on a non-slip surfaceSlipping can increase fear and movement
    PositionDog can stand, sit, or lie calmly without pinningForced restraint can break trust and raise risk
    SuppliesTool, treats, towel or mat, and styptic product are within reachQuick cuts can bleed and hurt
    Paw handlingDog accepts brief paw touches before trimmingHandling readiness helps decide whether to proceed
    Stop rulesEveryone knows when to stopPanic, pain, bleeding, or unsafe handling ends the session

    Original One-Nail Setup Framework

    Pet Grooming Guide original framework: treat the first nail as a setup test, not a job to push through.

    1. Set the room: bright light, non-slip footing, rewards, towel, tool, and styptic product within reach.
    2. Check the dog: stop before cutting for limping, pain, injury, bleeding, panic, paw guarding, or unsafe handling.
    3. Warm up the paw: touch, hold briefly, release, and reward before any clipping or grinding.
    4. Try one nail only if calm: stop after one nail if the dog needs that win to stay comfortable.
    5. Route up when needed: use a groomer or veterinarian when restraint, pain, panic, bleeding, or medical concern is part of the session.

    Lighting and Quick Visibility

    Good lighting helps you see the nail shape, paw position, and where you should avoid cutting. On light nails, the quick may be easier to notice. On dark nails, visibility can be limited, so do not rely on lighting as a guarantee.

    • Choose a bright, steady location.
    • Avoid shadows over the paw.
    • Keep the paw in a relaxed position.
    • Stop if you cannot see well enough to work safely.
    • Use a more detailed quick-visibility guide for dark nails if needed.

    Texas A&M notes natural nail and quick angle context, but this guide stays at setup level and does not teach the full trim method.

    Restraint-Free Positioning and Footing

    Set the dog up where the body feels stable and the handler can release pressure quickly. A towel or mat can help with traction. The position should be calm enough that the dog can choose stillness, not be held down into it.

    Avoid pinning the dog, forcing a paw away from the body, distracting or tricking a fearful dog, or continuing after growling, biting attempts, freezing, or panic.

    VCA stress-free nail guidance warns against forceful or trust-breaking handling for fearful dogs. If restraint feels necessary, the setup is not ready for home trimming.

    Supplies to Place Within Reach

    Place supplies before the session starts so you do not leave the dog waiting while stress builds.

    • Dog nail clipper or grinder.
    • Styptic product.
    • Treats.
    • Towel or non-slip mat.
    • Good light.
    • Waste bag or cleanup towel.

    These are category-level supplies, not product recommendations. This guide does not include affiliate links, prices, ASINs, product rankings, or product tables.

    Paw-Handling Warmup

    Before trimming, check whether the dog accepts paw handling without escalating. Touch the shoulder or leg, slide gently toward the paw, hold briefly, release, and reward calm behavior. Keep this short.

    Stop the warmup if the dog repeatedly pulls away, guards the paw, freezes, growls, snaps, bites, limps, or shows pain. Do not try to “get it over with.” Use gradual conditioning another day or ask a qualified professional for help.

    One-Nail Test and Stop Rules

    A one-nail test keeps the first session modest. If setup, paw handling, and the first nail go calmly, you can decide whether to continue. If the dog becomes worried, stop on the smallest success.

    Stop immediately for panic, biting, snapping, paw guarding, limping, bleeding, injury, pain, sedation concerns, aggression or restraint risk, or medically fragile handling.

    ASPCA guidance supports trimming when nails touch or click on the ground, but timing does not override safety. A nail can be due and still require a groomer or veterinarian.

    When to Use a Groomer or Vet Instead

    Use a qualified groomer when the dog cannot stay calm for paw handling, when the setup requires force, or when you are not confident with the tool.

    Use a veterinarian for limping, bleeding, injury, pain, torn nails, suspected infection, medically fragile dogs, or sedation questions. Texas A&M warns long nails can tear or grow into pads and cause pain or infection; those risks belong with veterinary care when injury or pain is already present.

    FAQ

    What do I need before trimming my dog’s nails?

    Set up good light, non-slip footing, calm positioning, treats, a towel or mat, the nail tool, styptic product, and clear stop rules.

    How should I position my dog for nail trimming?

    Use a calm standing, sitting, or lying position that does not require pinning. If the dog must be forced into position, stop.

    Should I restrain my dog for nail trims?

    No. This guide uses restraint-free setup. Fearful, panicked, biting, or unsafe dogs should go to a qualified professional.

    What should I do if my dog panics before a nail trim?

    Stop before cutting. Use handling practice another day or work with a groomer or veterinarian.

    Do I need styptic powder for dog nail trims?

    Keep a styptic product within reach because cutting the quick can cause bleeding and pain. Significant bleeding, injury, or pain should route to veterinary care.

    Bottom Line

    A safer nail trim starts before the tool touches the nail. Set up bright light, stable footing, calm handling, rewards, styptic product, and clear stop rules. If the dog is painful, panicked, guarding paws, bleeding, injured, medically fragile, or unsafe to handle, stop and use a veterinarian or qualified professional.

    Sources

  • Dog Grooming Order of Operations

    Dog Grooming Order of Operations

    For most dogs, the safest grooming order is body check first, brush and comb before water, handle nails while the dog is still calm, bathe and rinse if needed, dry safely, then finish with ears, paws, and a final coat check. The order can change by coat type, bath need, nail sensitivity, and drying method.

    This is an adaptive workflow, not a rigid promise that every dog should complete every step in one session. If you see wounds, lumps that need a vet check, parasites, severe mats, burns, bleeding, pain, panic, aggression, sedation needs, restraint risk, or medically fragile handling, stop the home session and use a veterinarian or qualified professional.

    The Default Dog Grooming Order

    Use this default sequence when the dog is healthy, calm, and safe to handle.

    OrderStepMain decision
    1Body and skin checkIs it safe to groom today?
    2Brush and combCan the coat be opened before water?
    3NailsIs the dog calm enough for paw handling?
    4Bath and rinseDoes the dog need a bath today?
    5Towel and dryWhat drying method fits the coat and dog?
    6Ears, paws, final checkAre there any remaining stop signs?

    The ASPCA’s dog grooming tips support brushing before bathing to remove dead hair and mats, followed by wetting, shampooing, rinsing, and drying.

    Original Grooming Order Map

    Pet Grooming Guide original framework: use this order as a decision map, not a race to finish every task.

    1. Check first: stop for pain, wounds, severe mats, parasites, panic, or unsafe handling.
    2. Open the coat: brush and comb before water when tangles are minor and the dog is comfortable.
    3. Handle nails early only if calm: split nail work into another day if paw handling escalates stress.
    4. Bathe only when needed: skip the bath if the coat, skin, or behavior makes water unsafe today.
    5. Dry gently: prioritize towels and safe airflow over high heat.
    6. Finish with checks: ears, paws, coat dampness, debris, and comfort decide what happens next time.

    Step 1: Pre-Groom Body and Skin Check

    Start with a quick nose-to-tail check before tools come out. Look for wounds, lumps that need a vet check, parasites, severe mats, hot or painful areas, bleeding, burns, or behavior that says the dog is not safe to handle.

    Do not groom over wounds, lumps needing veterinary review, parasites, severe mats, painful skin, burns, bleeding, panic, or aggression. If any of these are present, stop and route to a veterinarian or qualified professional.

    Step 2: Brush and Comb Before Water

    Brush and comb before bathing whenever the coat needs it and the dog can tolerate it. VCA notes that brushing helps remove loose hair, dead skin, debris, and parasites while distributing oils. VCA also says severe or extensive tangles should be handled by a professional groomer or veterinarian.

    • Loose hair and minor tangles: brush before bath if the dog stays comfortable.
    • Severe mats or skin-close tangles: stop and use a professional.
    • Painful brushing: stop.
    • Parasites or skin concerns: stop and use veterinary guidance.

    Bathing over mats can make coat problems worse, so water should not be the first step when the coat is tangled.

    Step 3: Nails Before or After Bath?

    Nails often fit best before the bath because the dog is less tired and the floor is dry. That said, nail timing should follow the dog’s stress level.

    Trim or grind nails before the bath only when the dog is calm, paw handling is already accepted, good light and supplies are ready, and the handler can stop after one nail if needed.

    Move nails to another session when the dog is already stressed, paw handling triggers panic, the nail is bleeding, torn, or painful, or restraint would be required. VCA nail-handling guidance supports preparation and styptic readiness; this section is about setup logic, not clipping technique.

    Step 4: Bath, Rinse, and Towel Stage

    Bathe only when the dog needs it and the setup is safe. After brushing, wet the coat, shampoo with a dog-safe product category, rinse thoroughly, and towel before any airflow step.

    Do not bathe a dog with severe mats, wounds, burns, parasites, pain, panic, or unsafe handling. A bath should not be used to treat skin problems or cover medical odor.

    Step 5: Drying Method by Coat

    Drying should prioritize airflow and comfort, not high heat. The AKC drying guide supports airflow rather than heat for drying fur and warns that heat can burn skin.

    Coat or situationDrying direction
    Short coatTowel thoroughly and use gentle airflow if needed.
    Dense or double coatTowel, part-check damp areas, and use safe airflow.
    Long or tangle-prone coatDry while monitoring for tangles and skin comfort.
    Noise-sensitive dogUse towel work and breaks; stop for panic.

    Stop for overheating, burns, panic, pain, or unsafe restraint.

    Step 6: Ears, Paws, Final Comb Check

    After the coat is dry enough to inspect, finish with outer-ear checks, paw checks, and a final comb or brush pass where safe.

    VCA ear guidance says red, inflamed, or painful ears should be evaluated by a veterinarian before cleaning. Keep ear work conservative and visible. Do not push into painful ears, treat discharge, or clean aggressively.

    Final checks should answer whether the coat is dry at the skin where it needs to be, paws are free of debris, any skin problem appeared during grooming, and the dog stayed comfortable enough to continue next time.

    When to Change the Order or Stop

    Change the order when the dog or coat needs it. Some dogs do better with nails on a separate day. Some coats need brushing only, not a bath. Some dogs need drying breaks.

    Stop completely for wounds, lumps needing vet check, parasites, severe mats, burns, bleeding, pain, panic, aggression or restraint risk, sedation needs, or medically fragile handling. Home grooming should be split into shorter sessions rather than forced into one long workflow.

    FAQ

    What order should you groom a dog in?

    For most dogs: body check, brush and comb, nails if calm, bath and rinse if needed, dry safely, then ears, paws, and final checks.

    Should you brush a dog before or after a bath?

    Brush before the bath when the coat needs it and brushing is safe. Severe or painful tangles should go to a groomer or veterinarian.

    Should you trim dog nails before or after a bath?

    Often before the bath, while the dog is calmer and dry. Move nails to another session if paw handling causes stress or risk.

    When should you clean a dog’s ears during grooming?

    Keep ear checks near the end and conservative. Painful, red, inflamed, odorous, or draining ears need veterinary evaluation before cleaning.

    When should you stop a home grooming session?

    Stop for wounds, parasites, severe mats, burns, bleeding, pain, panic, aggression, sedation needs, restraint risk, or medically fragile handling.

    Bottom Line

    A good dog grooming order starts with safety, not tools. Check the dog first, brush before water when the coat allows it, do nail work only while the dog is calm, bathe only when needed, dry gently, and finish with ears, paws, and a final comfort check. If the dog, coat, skin, or handling situation turns unsafe, stop and bring in a professional.

    Sources