
You're staring at a horse with a mane that looks like it hasn't met a comb in weeks. The show is in three days, and you've got zero idea how to braid a horse's mane without turning it into a tangled disaster. Trust me, you're not alone.
Learning how to braid a horse's mane is one of those skills that looks effortless when a professional does it and feels impossible when you try. The good news? It's completely learnable.
With the right tools, a bit of patience, and a solid understanding of the hand motions, you'll be turning out clean, show-ready braids in no time. As of 2026, the standards haven't changed much, but the techniques have been refined to the point where even a first-timer can get respectable results.
Quick Answer
Braiding a horse's mane takes clean hair, the right tools, and about two to three hours. Dampen the mane, section it into even squares, then braid each section tightly down the neck. Fold the braid under and secure it with yarn or rubber bands.
Hunter braids lie flat as buttons. Dressage knots stand slightly taller. Practice makes permanent, so start with a calm horse.
Why Braiding Is a Visual Skill (And Why Photos Only Tell Half the Story)
Here's the thing about braiding a horse's mane. You can read every guide on the internet, watch all the videos, and still feel completely lost when you're standing in the barn with a comb in your hand. That's because braiding isn't just a sequence of steps.
It's a physical skill that lives in your fingertips.
The difference between a beautiful braid and a lumpy mess comes down to tension, fold angle, and the way you roll the finished braid under itself. These aren't things you can fully capture in a photograph. You have to feel them.
The way the yarn pulls through the hair. The exact pressure needed to keep the braid tight without yanking the horse's neck. The moment when the fold is just right and the button sits perfectly flat against the crest.
That's why this guide is structured the way it is. We'll walk through each step with visual descriptions that help you picture the process, but also with the tactile details that make the difference between a braid that holds and one that falls apart five minutes before your class. Think of it as having a friend beside you in the barn, showing you the ropes.
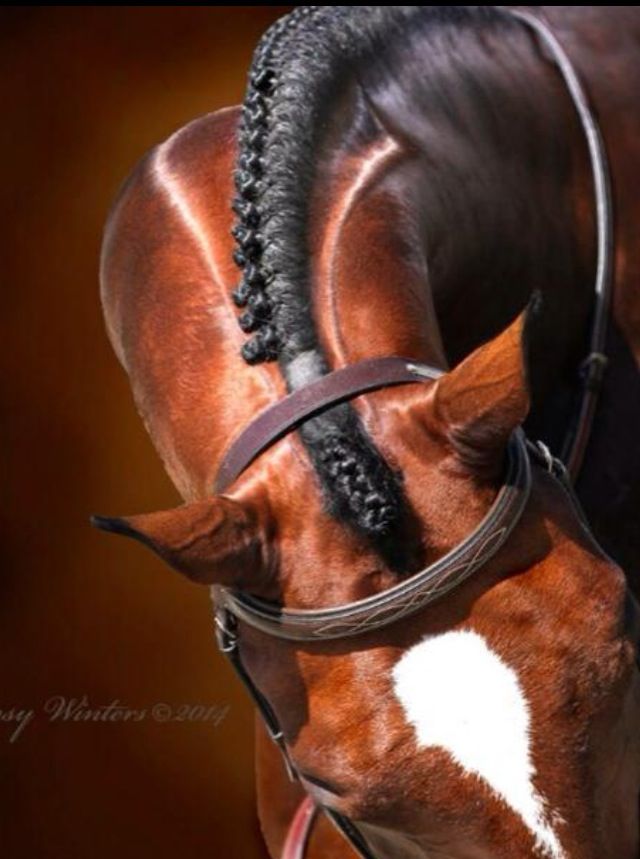
Image source: Bing (Web (fair-use with source credit))
The Quick Answer: What You Need Before You Start
Before you even touch the horse, you need to gather your gear. Nothing derails a braiding session faster than realizing you're three braids in and you've run out of yarn. Let's get you set up properly.
The Essential Tool Kit
Here's what you'll need. Each tool serves a specific purpose and makes the job dramatically easier.
| Tool | Purpose | Notes |
|---|---|---|
| Mane pulling comb | Thinning and shortening the mane | Metal comb with sharp teeth, not a regular curry comb |
| Yarn needle | Threading yarn through braid bases | Blunt tip, large eye, usually 3-4 inches long |
| Braiding yarn | Securing and tying off braids | Cotton or acrylic, choose a color that matches the mane |
| Water spray bottle | Dampening the mane | Plain water or a diluted detangler |
| Rubber bands | Alternative to yarn | Small, strong bands in black or white |
| Tail comb | Sectioning the mane | Fine-toothed, with a pointed end for clean parts |
| Show sheen or braiding spray | Reducing frizz and static | A light mist goes a long way |
How Long This Takes
Here's a reality check. A professional groom can braid an entire mane in about 45 minutes to an hour. You won't.
Your first attempt will likely take two to three hours, possibly longer if your horse is fidgety or your mane is particularly thick. Plan for this. Start early, give yourself plenty of time, and don't rush the process.
The Golden Rule: Damp Hair Braids Better, Dry Hair Holds Better
This sounds contradictory, but it's the key insight that separates good braids from great ones. Damp hair has more grip. It doesn't slip and slide the way dry, silky hair does.
That makes the braiding itself much easier. But damp hair also expands as it dries, which means your braids can loosen overnight.
The solution? Braid on damp hair, then let the braids dry completely before you touch them again. The drying process actually helps set the braid in place.
If you braid on completely dry hair, it'll look neater immediately, but it'll also fall apart faster. Damp is the way to go.
Hunter Braids vs. Dressage Knots: Know Your Goal
Before you start braiding, you need to know what you're aiming for. Different disciplines have different expectations, and showing up with the wrong style can cost you points.
Hunter Braids: Flat, Round Buttons
Hunter braids are the classic look you see in the hunter and jumper rings. They're small, flat, and round, sitting snugly against the crest of the neck like a row of buttons. The braid itself is folded under and secured, creating that signature smooth silhouette.
These braids are designed to be unobtrusive. They highlight the horse's neck and shoulder without drawing attention to themselves. Judges in the hunter ring want everything to look clean, traditional, and understated.
That's what hunter braids deliver.
Dressage Knots: Taller and More Structured
Dressage braids are similar in technique, but they're folded differently. Instead of tucking the braid completely flat against the neck, a dressage knot stands up slightly. The folded portion is secured at the base, creating a small, neat knot that has a bit of height to it.
Dressage braids are often a bit larger than hunter braids, and they're tied with yarn that's wrapped around the base multiple times. The overall effect is more formal and structured. It matches the precision and discipline of the dressage arena.
What the Judges Actually Look For
Here's what you need to understand. Judges in both disciplines are looking for consistency above everything else. The braids should be uniform in size, evenly spaced, and sitting at the same angle along the neck.
A row of perfect braids that are all slightly different sizes reads as sloppy, even if each individual braid is well-executed.
Who Each Style Is Best For
Hunter braids work best for horses with thick, full manes that can support that flat, button look. Dressage knots are more forgiving for horses with finer manes because the standing knot adds visual bulk. If you're showing in both disciplines, you'll need to master both looks.

Image source: Bing (Web (fair-use with source credit))
Step 1: Prepping the Mane (The Part Everyone Skips)
This is the step that separates the pros from the amateurs. You can have perfect technique, flawless yarn work, and beautiful folds, but if the mane isn't prepped correctly, your braids will look like a mess. Prep is everything.
Washing and Conditioning 24 Hours Before
Braiding a dirty mane is a recipe for disaster. Dirt and grime make the hair slippery and hard to grip. They also cause frizz and flyaways that ruin the clean silhouette you're going for.
Wash the mane about 24 hours before you plan to braid. This gives the hair time to fully dry and settle. Use a gentle shampoo and a light conditioner.
Skip the heavy conditioners and leave-in treatments. They make the hair too soft and silky, which means your braids will slip right out.
Pulling the Mane: Why It's Non-Negotiable
Here's where we get into the nitty-gritty. Pulling a mane involves using a special metal comb to thin and shorten the hair. You're essentially removing the thicker, coarser hairs at the base, leaving you with a shorter, more uniform mane that braids beautifully.
The process is simple but takes practice. You backcomb a small section of hair, then use your fingers to pull out the long, coarse hairs that catch on the comb's teeth. This hurts the horse slightly, so go slow and be gentle.
Most horses tolerate it fine, but some need a bit of patience and reassurance.
How to Tell If Your Mane Is Too Short, Too Long, or Just Right
The ideal mane length for braiding is between four and six inches. Anything shorter and you won't have enough hair to fold under properly. Anything longer and your braids will be bulky and unwieldy.
If your mane is too long, pull it. If it's too short, you have a problem. Braiding a mane that's under three inches is nearly impossible.
You can try banding instead, which requires less length, but it won't look as polished as braids on a properly grown-out mane.
Sectioning Like a Pro
This is where the visual nature of braiding really comes into play. You need to section the mane into even, square sections before you start braiding. Use the pointed end of your tail comb to create clean parts.
Start at the top of the neck, just behind the ears. Work your way down, creating squares that are roughly one inch by one inch. The size of your sections determines the size of your braids.
Smaller sections create smaller, tighter braids. Larger sections create bigger, bolder ones.
Use small rubber bands to hold each section in place as you go. This keeps the hair organized and prevents you from losing track of where you are. It's a small step that saves a huge amount of time and frustration later.
Step 2: The Yarn Method (The Hunter Braid Walkthrough)
Now we're getting to the good stuff. This is the classic method that produces those gorgeous, flat hunter braids you see in the show ring. It takes practice, but once you get the rhythm, it's almost meditative.
Threading the Needle and Anchoring the Base Knot
First, cut a piece of yarn about three to four feet long. Thread it through the eye of your blunt needle. If the yarn is thick, you might need to wet the end and twist it to make it easier to thread.
At the base of your first section, right where it meets the neck, tie a simple knot with the yarn. This anchors the yarn in place so it doesn't slip out while you're braiding. Make sure the knot is snug but not so tight that it digs into the horse's skin.

Image source: Bing (Web (fair-use with source credit))
The Three-Strand Braid: Keeping Tension Even
Now you braid. Divide the section into three equal strands and start a classic three-strand braid. Left over middle, right over middle, repeat.
The key here is tension. You want the braid to be tight and uniform, but not so tight that it pulls the horse's skin or creates a ridge along the neck.
A good rule of thumb is to keep the braid snug against the crest as you work. Don't pull the braid away from the neck. Keep it close, and let it lie naturally as you go.
This creates that smooth, seamless look.
Folding the Braid Under: The Exact Hand Motion
This is the moment that makes hunter braids what they are. Once you reach the end of the section, you're left with a braid that sticks out from the neck. You need to fold it under itself to create that flat, round button.
Take the end of the braid and fold it up toward the base, tucking the tip under the base knot. Then, using your fingers, roll the folded braid down and over itself, creating a tight, compact bundle. The goal is to create a round, uniform button that sits flush against the neck.
The hand motion is a bit like rolling a piece of dough into a ball. You're tucking and rolling simultaneously. It takes a few tries to get the hang of it, but once you do, it becomes second nature.
Tying Off and Tucking: Making It Stay
Once you've got your button folded, it's time to secure it. Take the two ends of your yarn and wrap them around the base of the button, crossing them over each other. Pull tight.
Then tie a firm knot.
Don't cut the yarn ends flush with the knot. Instead, leave them a few inches long. Then, use your needle to thread the yarn ends through the loop of the braid, pulling them through to the underside.
This hides the yarn and keeps it from unraveling. Tuck the excess yarn into the base of the button, and you're done.
The result is a clean, flat button that will hold for days. The yarn is hidden, the braid is secure, and the silhouette is smooth and professional.
Step 3: The Banding Method (Fast and Foolproof)
Not everyone needs the formality of yarn braids. Maybe you're just trying to keep your horse's mane neat for a weekend show, or maybe your mane is too short to fold under properly. That's where rubber bands come in.
Banding skips the yarn, the needle, and the folding. It relies entirely on the band to hold the braid in place.
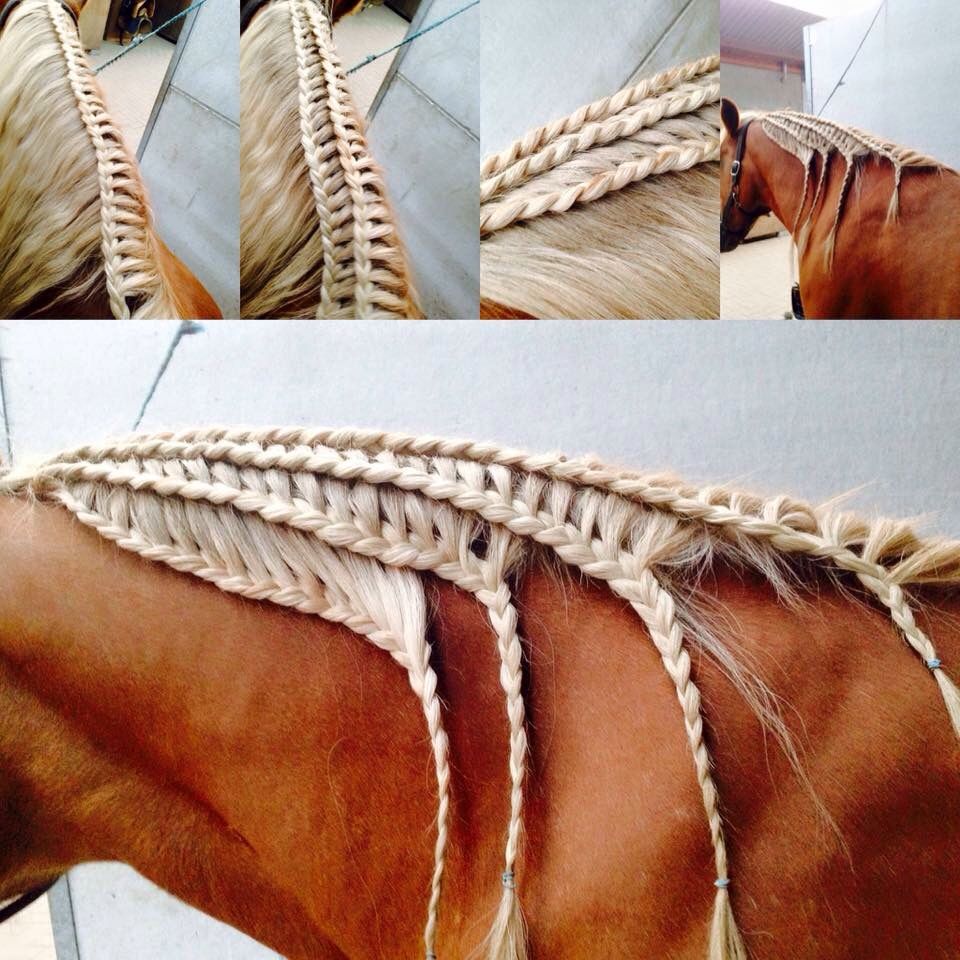
Image source: Bing (Web (fair-use with source credit))
When Rubber Bands Beat Yarn
Rubber bands are the right call when you're short on time, dealing with a fidgety horse, or working with a mane that's too short for a proper fold. They're also the standard for certain disciplines. The American Quarter Horse Association, for example, allows banded manes in many classes, and some western events expect them.
If you're showing in AQHA or APHA events, check the rulebook before you commit to yarn braids.
Banding also works well for horses that rub their manes. If your horse scratches its neck on stall doors or trees, yarn braids will snag and pull. Rubber bands are more flexible and less likely to catch on things.
The Twist-and-Fold Technique Simplified
Banding follows the same prep work. Wash, dry, pull, and section the mane. The difference is in the braiding and securing.
Here's the step-by-step:
- Take a one-inch section of mane and dampen it slightly.
- Braid the section down to the end using the same three-strand technique.
- Once you reach the end, fold the braid up toward the base, just like you would for a hunter braid.
- Hold the folded braid against the neck with one hand.
- With your other hand, wrap a small rubber band around the base of the folded braid.
- Wrap the band two or three times to make sure it's secure.
- Tuck the loose end of the braid under the band to hide it.
The finished look is similar to a hunter braid, but slightly less polished. The band is visible at the base, and the button tends to be a bit softer and less defined. That's perfectly acceptable for many disciplines, but it won't pass muster in a hunter class that requires yarn.
How to Make Banded Braids Look Polished, Not Sloppy
The secret to a clean banded braid is consistency. Every band needs to sit at the same height on the neck. Every braid needs to be the same size.
Every fold needs to be tucked tightly against the crest.
Take your time when sectioning. Use a measuring guide if you need to. You can mark a comb or a piece of cardboard with a one-inch notch to keep your sections even.
It sounds over-the-top, but the judges will notice the difference.
Also, use the right bands. Cheap, thin rubber bands snap easily and dig into the hair. Look for thick, round bands made specifically for horse grooming.
They hold better and cause less hair breakage.
Mixing Yarn and Bands: A Hybrid Approach That Saves Time
Here's a trick that professional grooms use when they're running behind. Braid the mane using the yarn method, but skip the needle work. Instead of threading the yarn through the braid, just tie it off with a rubber band.
This gives you the look of a yarn braid with the speed of banding. The yarn is woven into the braid itself, so it looks traditional. The rubber band holds everything in place without the fiddly needle work.
It's not a perfect substitute for a full yarn braid. The yarn ends are visible, and the button isn't as tight. But it's a solid compromise when you're dealing with a horse that won't stand still or a show that starts in two hours.
The Common Mistakes That Ruin Braids
Every person who braids has ruined their fair share of braids. It's part of the learning process. But there are a few mistakes that come up again and again, and they're all preventable.
Braiding Too Tightly (And the Permanent Hair Loss That Follows)
This is the most common beginner mistake. You want the braid to hold, so you pull as tight as you possibly can. That's a mistake.
Overly tight braids put constant tension on the hair follicles. Over time, this can cause traction alopecia, a form of hair loss that happens when hair is pulled too hard for too long. The mane thins out, and in severe cases, the hair stops growing back altogether.
The right tension is snug but not straining. The braid should feel secure without pulling the horse's skin into a ridge. If you can see the skin stretching around the base of the braid, you're too tight.
Uneven Sections That Create Lumpy, Mismatched Braids
Your braids are only as good as your sections. If you're grabbing random hunks of hair, you'll end up with braids of wildly different sizes. That looks messy and unprofessional.
Take the time to section properly. Use a comb with a pointed end, and part the hair cleanly. Hold each section with a rubber band as you go.
It takes an extra few minutes, but it makes a world of difference in the finished look.
Using the Wrong Yarn Tension
Yarn that's too loose falls off. Yarn that's too tight cuts into the hair and makes the braid stick out. You want the yarn to sit snugly against the base of the braid, holding it firmly without strangling it.
The same goes for the yarn itself. Choose a yarn that matches the horse's mane color. Light horses need white or cream yarn.
Dark horses need black or dark brown. Some grooms carry multiple shades to match different parts of the mane, since the hair color can vary along the neck.
Forgetting to Fold the Braid Under Properly
This is the classic "pigtail" look. You braid the section, tie it off, and leave it sticking out from the neck like a tiny tail. That's not a braid.
That's a mistake.
The fold is what turns a braid into a button. It's also what makes the whole thing look polished and intentional. If you're struggling with the fold, practice on a piece of rope or a length of yarn before you try it on your horse.
The "Pigtail" Look: Why Your Braids Point Out Instead of Lying Flat
The pigtail look happens for a few reasons. Maybe you didn't fold the braid far enough under. Maybe you didn't roll it tight enough.
Maybe you wrapped the yarn too high on the braid, which pushed the button away from the neck.
Fix it by paying attention to where the yarn sits. The yarn needs to wrap around the base of the button, not the middle. And you need to pull the button snug against the neck before you tie the final knot.
If the button is floating away from the crest, it'll look like a pigtail every time.
How Long Braids Last (And How to Keep Them Fresh)
A well-executed set of braids can last several days. The exact timeline depends on your horse, your technique, and how carefully you manage the braids overnight.
The Realistic Timeline: 3-5 Days with Proper Technique
Hunter braids secured with yarn will typically hold for three to five days. Banded braids have a shorter lifespan, usually two to three days. The rubber bands stretch out and lose their grip, especially in warm weather.
If you need braids to last a full show weekend, yarn is your best bet. It's more durable, and it doesn't degrade with heat and moisture the way rubber bands do.
Overnight Protection: Hoods, Wraps, and Careful Stall Management
The biggest threat to your braids is the horse itself. Horses rub their necks on stall walls, feed tubs, and doors. They roll in the dirt.
They scratch itches. All of that wreaks havoc on your careful work.
The solution is a braiding hood or a neck wrap. These are simple fabric covers that fit over the horse's head and neck, protecting the braids while the horse rests. They're cheap, widely available, and absolutely essential if you want your braids to survive the night.
Sweating and the Post-Ride Frizz Problem
Here's something nobody tells you about braids. They don't survive a hard workout. When your horse sweats, the moisture seeps into the braids and loosens them up.
The result is frizzy, fuzzy braids that look nothing like they did in the morning.
You can minimize this by using a light spray of show sheen before you braid. It helps repel moisture and keeps the hair smooth. But honestly, most competitors accept that braids are a morning-of-the-show thing.
They might look rough after a ride, but they're already done their job.
The Safe Removal Process That Prevents Mane Breakage
When it's time to take the braids out, resist the urge to yank them. That's how you break hair and cause damage.
Instead, use a small pair of scissors to cut the yarn or rubber band at the base of each braid. Then unravel the braid gently with your fingers. If the hair is tangled, use a wide-tooth comb to work through it slowly.
After you've removed all the braids, give the mane a good wash and condition. This helps restore moisture and keep the hair healthy for the next round of braiding.
When Not to Braid (And What to Do Instead)
Braiding isn't the only option for mane management. Sometimes it's not even the best option. Here are the alternatives and when each one makes sense.
Roaching: The Shaved-Mane Alternative for Thick, Hot Horses
Roaching involves shaving the entire mane down to the skin with clippers. It's a dramatic look, but it's incredibly practical. There are no tangles, no braiding, and no maintenance.
The mane stays clean and cool, which is a major benefit in hot summer months.
Roaching is common in certain disciplines like polo and some western events. It's also a popular choice for horses with thick, coarse manes that are difficult to manage. The downside is that it takes months for the mane to grow back, so it's not a decision you make lightly.
Pulling Short: For Horses Whose Manes Are Too Fine to Braid
Some horses have manes that are just too thin and silky to braid. The braids slip out no matter what you do. For these horses, pulling the mane short is a better option.
You're essentially doing the same pulling you'd do for braiding, but you're taking it much shorter. The result is a crisp, neat mane that lies flat along the neck. It looks tidy in the arena, and it doesn't require any braiding at all.
Loose and Natural: When the Venue Doesn't Require Turnout Polish
If you're riding at a local show or a schooling event, you might not need to braid at all. Many venues have relaxed rules about turnout. A clean, well-groomed loose mane is perfectly acceptable in these settings.
Check the show rules before you spend three hours braiding. If the class descriptions don't mention braiding, you're probably fine to skip it.
Banding Full-Time: A Pasture-Friendly Maintenance Option
If you want the look of braids without the effort of a full show prep, banding can be a daily or weekly maintenance strategy. Instead of braiding the whole mane, you just band small sections and fold them under.
It's faster than full braiding, and it keeps the mane neat and tangle-free for weeks at a time. It's a popular choice for owners who want a low-maintenance way to keep a long mane looking tidy.
The Time and Cost Reality
Let's talk numbers. Braiding takes time, and time has a cost. Here's what you can expect.
| Factor | Beginner | Professional Groom |
|---|---|---|
| Time for full mane | 2-3 hours | 45 minutes to 1 hour |
| Time for banding | 1-2 hours | 30-45 minutes |
| Cost of DIY kit | $30-$60 | Already owned |
| Cost of hiring a groom | N/A | $50-$150+ per session |
How Long It Takes a Beginner Versus a Professional Groom
Your first attempt at braiding will be slow and frustrating. Plan for two to three hours, and that's if your horse stands quietly. A professional groom can do the same job in under an hour because they've done it hundreds of times.
Their hands know exactly where to go.
The Cost of Hiring a Groom for a Weekend Show
If you're showing at a multi-day event, you might hire a groom to braid for you. Prices vary widely by region and by the groom's experience. Expect to pay anywhere from $50 to $150 per session, plus tip.
Some grooms offer discounts for multi-day bookings or for braiding both mane and tail.
What Your Braiding Kit Will Actually Cost to Assemble
Here's a rough breakdown of what you'll spend to assemble your own braiding kit:
- Mane pulling comb: $15-$30
- Yarn needle: $5-$10
- Braiding yarn (multi-pack): $10-$20
- Rubber bands: $5-$10
- Tail comb: $5-$15
- Show sheen spray: $10-$20
- Braiding hood or neck wrap: $20-$50
Total: $70-$155 for a comprehensive kit. You can trim costs by buying only the essentials, but these are the tools that make the job look professional.
The Hidden Cost: Time Spent Fixing Tired Fingers and Sore Backs
Let's be honest. Braiding a full mane is physically demanding. You're bending over the horse's neck for hours, holding your arms at awkward angles, and squeezing your fingers around small tools.
Your back will ache. Your hands will cramp.
Take breaks. Stretch. Sit down if you need to.
A well-braided mane isn't worth a week of back pain.
Real Scenarios: What Actually Happens at the Show
Every braider has a story about something going wrong at a show. Here are a few common ones, along with what you can learn from them.
The Horse That Won't Stand Still (And the Groom's Secret to Calm)
Some horses simply refuse to hold still for braiding. They shift their weight, toss their heads, and swish their tails. It's maddening.
The professional trick is to distract them. A hay net or a bucket of grain gives the horse something to focus on while you work. Some grooms also use a calm, steady voice to reassure the horse.
The more relaxed you are, the more relaxed the horse will be.
The Braid That Falls Out Five Minutes Before Your Class
This is the nightmare scenario. You've spent hours perfecting every braid, and one decides to give up right before you enter the ring. Don't panic.
This happens to everyone.
Keep a small emergency kit at ringside. Include a few rubber bands, a needle, and some yarn. You can fix a loose braid in under a minute if you're prepared.
The Rainstorm That Ruins Every Braid Overnight
You braid the night before a show, and then it rains. In the morning, your braids are frizzy, loose, and sticking out in every direction. It's a disaster.
Some grooms braid on the morning of the show to avoid this problem. Others invest in a high-quality waterproof hood. If rain is in the forecast, your best bet is to protect the braids with a hood and hope for the best.
The First-Time Braider's 4-Hour Nightmare (And What They'd Do Differently)
A first-time braider spent four hours working on a mane, only to realize halfway through that her sections were completely uneven. The left side of the mane had small, tight braids. The right side had large, loose ones.
It looked like two different people had braided the horse.
She pulled all the braids out and started over. It took another three hours, but the second attempt looked much better. Her advice?
Section the entire mane before you start braiding. Don't try to wing it.
Frequently Asked Questions
How long does it take to braid a horse's mane?
A beginner should plan for two to three hours. A professional groom can finish in under an hour. Banding takes about half the time of full braiding.
How long do braids stay in a horse's mane?
Yarn braids typically last three to five days. Banded braids last two to three days. Heat, moisture, and the horse's activity level all affect the lifespan.
Do you braid a horse's mane wet or dry?
Braid on damp hair. It has more grip and braids more easily. Let the braids dry completely before turning the horse out, since damp hair expands as it dries and can loosen the braids.
Do horses need their manes pulled before braiding?
Yes, in most cases. Pulling thins the mane and evens out the length, which creates a much cleaner and more professional result. Manes that are four to six inches long are ideal for braiding.
What is the best yarn for braiding a horse's mane?
Cotton and acrylic yarn both work well. Choose a color that matches the horse's mane, and avoid yarn that is too thick or too slick. Stretchy yarn is more forgiving for beginners.
Is braiding a horse's mane cruel or painful?
Braiding itself is not painful if done correctly. The issue is tension. Braiding too tightly can cause discomfort and, over time, permanent hair loss.
Always aim for a snug but not straining fit. If your horse flinches or pulls away, you're probably braiding too tight.