
Your cat's ears are a lot like a maze. Not just any maze, but one with an L-shaped twist that makes poking around with a cotton swab one of the worst things you can do. If you've been wondering how to clean cat ears safely, the short answer is: gently, shallowly, and only when there's a reason to.
Ear problems are one of the top reasons cats visit the vet, but most routine cleaning you can handle at home with the right technique.
The trick is knowing the difference between a little harmless wax and a full-blown infection brewing deep in that L-shaped canal. We're going to walk through the anatomy, the warning signs, and the exact step-by-step method that veterinary professionals recommend. As of 2026, aggregate veterinary guidance remains firm on one point: a healthy ear rarely needs deep cleaning, and when it does, the process is far simpler than most people think.
Quick Answer
Clean your cat's ears with a vet-approved liquid cleaner. Warm the bottle in your hands first. Fill the ear canal gently, massage the base for 30 seconds, then let your cat shake.
Wipe the visible inner ear with a cotton ball. Never use Q-tips or dig deeper than you can see. Check for redness, odor, or dark discharge before starting.
If any of those are present, stop and call your vet.
Why This Matters More Than You Think
Ears are a common source of hidden pain in cats. They're really good at hiding discomfort, too. A cat with a raging ear infection might only show one subtle sign: a slight head tilt or a little more scratching than usual.
Here's a number that puts it in perspective. Some veterinary studies suggest that up to 20% of cat visits involve some form of ear disease. That's a lot of preventable discomfort.
The ears are also deeply connected to balance. The vestibular system sits right behind the eardrum. Damage that area, and your cat could experience dizziness, nausea, and a permanent head tilt.
That's the stakes we're dealing with.
So before we talk about cleaning, let's talk about what "normal" actually looks like. A healthy cat ear is pale pink, warm, and has a light coating of yellowish wax. It should have no smell at all.
Maybe a very faint, non-offensive odor at most.
Anything beyond that deserves a closer look, not a deeper clean.
The Anatomy of a Cat's Ear (And Why It Changes Everything)
Let's get one thing straight right now: the cat ear canal isn't a straight tube like ours. It's an L-shape. It drops down vertically first, then makes a hard turn and goes horizontal toward the eardrum.
This matters for one big reason.
When you stick a cotton swab in there, you can't actually see where you're aiming. You're just pushing whatever wax and debris is in the vertical canal deeper into the bend. Over time, that material packs down like a cork.
Then you have a blocked ear, an infection, or worse.

Image source: Bing (Web (fair-use with source credit))
The eardrum sits at the very end of that horizontal canal, deep inside the skull. It's a delicate membrane, thinner than a piece of tissue paper. A cotton swab jabbed too far can puncture it.
That ruins the eardrum. Ruptured eardrums cause severe pain, balance problems, and often require surgery to fix. It's a worst-case scenario that's entirely preventable.
The L-Shaped Canal: Why Deep Cleaning Is a Myth
If you can't see past the bend, you can't clean past the bend. Period. The only safe way to clean the horizontal canal is with liquid flush, never with a tool.
You fill the ear with solution, massage it loose, and let the cat shake it all out. The force of that shake is what removes debris. You're using physics, not poking, to do the work.
Understanding the Eardrum's Location
On a cat, the eardrum sits roughly two centimeters past the turn in the canal. Sounds small, right? It is.
That's less than an inch of space where things can go wrong fast. That's exactly why vets use an otoscope to look before they clean. The tiny light lets them see the entire canal and confirm the eardrum is intact before flushing.
If the eardrum is already ruptured, certain cleaning solutions can drain into the middle ear and cause severe damage. So if there's any suspicion of injury, a professional exam before cleaning isn't optional. It's a safety requirement.
Why Cats Shake Their Heads (It's a Feature, Not a Bug)
Ever notice how a cat shakes its head like it's trying to fling its brain loose? That's not random. It's a survival instinct.
Cats shake their heads to clear debris and fluid from their ears. The sharp rotational motion uses centrifugal force to fling particles outward. When you clean their ears correctly, the shake phase isn't you losing control.
It's the most effective part of the whole process. Letting them shake after a flush clears the deeper debris you can't reach, safely and naturally.
The 60-Second Pre-Cleaning Check
The pre-cleaning check decides whether you'll have a 5-minute chore or a $400 vet visit. Don't skip it. Before you reach for any bottle, spend a full minute looking, smelling, and touching your cat's ears.
This single step catches more problems early than any other habit.
Here's what you're looking for:
- Color: Healthy ear skin is pale pink. Bright red or angry pink means inflammation.
- Discharge: A thin layer of light brown or yellow wax is normal. Dark, crumbly, coffee-ground-like substance is not.
- Odor: Normal ears are virtually odorless. A foul, yeasty, or sweet smell is an infection warning.
- Pain response: If your cat pulls away or yelps when you touch the ear base, stop immediately.
- Swelling or heat: A hot, puffy ear flap could mean a hematoma or deep infection.
Visual Signs of Trouble: Redness, Swelling, Discharge
Let's talk about what the color really tells you. Redness means blood vessels are dilated, which means inflammation somewhere. That's not a sign to clean more aggressively.
That's a sign to back off and call a professional. If the ear feels warm to the touch, there's active inflammation.
Swelling is different. A swollen ear flap, especially one that feels firm and warm, suggests a hematoma. That's a blood blister that forms when a cat's blood vessel breaks from aggressive head shaking.
This won't get better with cleaning. It requires veterinary drainage.
The "Coffee Ground" Test for Ear Mites
Look closely at any dark discharge. Ear mites produce a distinct residue that looks exactly like wet coffee grounds. Dark brown, crumbly, and slightly gritty.
If you see this, you're almost certainly dealing with Otodectes cynotis, the common ear mite. These parasites are highly contagious between animals, and they're intensely itchy. If left untreated, they cause secondary bacterial infections and severe skin damage.
Cleaning alone won't fix mites. The mites live deep in the canal and in the surrounding skin. They require prescription antiparasitic treatment from a vet.
Odor Check: What's Normal vs. What's Not
Your nose is a diagnostic tool here. A healthy cat ear has no appreciable smell. If you lean in and catch a whiff, the ear is already talking to you.
A sour, musty smell points to yeast. A sweet, sickly smell points to bacteria. Both require medication.
Cleaning buys time but doesn't cure the underlying culprit.
When to Stop and Call the Vet Before You Even Begin
The 60-second check has a built-in failsafe. If you see any of the following, skip the cleaning entirely and call your vet:
- Obvious pain when touching the ears
- Dark, coffee-ground discharge
- Foul odor
- Yellow or green pus
- A head tilt lasting more than a day
- Swelling or heat in the ear flap
These are not "clean harder" signals. They're "seek professional help" signals. It's especially critical if you suspect a eardrum rupture.
Using a cleaner on a perforated eardrum can push fluid into the middle ear, causing deep infection and irreversible damage.
Gear Up: What You Actually Need (And What to Avoid)
Now that you've confirmed the ears look healthy, it's time to gather supplies. The right tools make this job easy. The wrong ones can cause serious harm.
The safest and most effective method involves a liquid ear cleaner, cotton balls or gauze pads, and a towel for restraint. That's it. No drops, no ointments, no homemade solutions.
The Right Cleaning Solution: pH-Balanced, Veterinary-Grade
The single most important item is the cleaning solution. Use a cleaner specifically formulated for cats. Feline ear pH is slightly alkaline, around 7.3 to 7.9, which is different from humans.
Human ear drops can disrupt the natural environment of a cat's ear and cause irritation. Look for a veterinary-grade product that lists a ceruminolytic agent, which helps break down wax.

Image source: Bing (Web (fair-use with source credit))
The right product should also have drying agents to help evaporate moisture in the canal. Some cleaners include antimicrobial properties to help prevent bacterial overgrowth. Avoid anything with alcohol.
It stings on inflamed tissue and disrupts the protective lining of the ear canal. Avoid essential oil formulations not specifically approved for veterinary use. Some essential oils are toxic to cats even in small amounts.
Cotton Balls vs. Gauze Pads vs. Q-Tips: The Honest Breakdown
When it comes to wiping, the tool choice is as important as the solution. Here's the honest breakdown:
- Cotton balls are the standard choice. They're soft, absorbent, and easy to control. Use one for each wipe, and dispose of it after a single pass.
- Gauze pads are a solid alternative. They're less linty and easier to wrap around a finger. They also feel slightly more structured, which helps with targeted wiping.
- Cotton swabs (Q-tips) are the absolute worst choice. Never use them inside the ear canal. They push wax deeper and risk rupturing the eardrum. Even for the outer ear crevices, they pose a risk if the cat suddenly jerks.
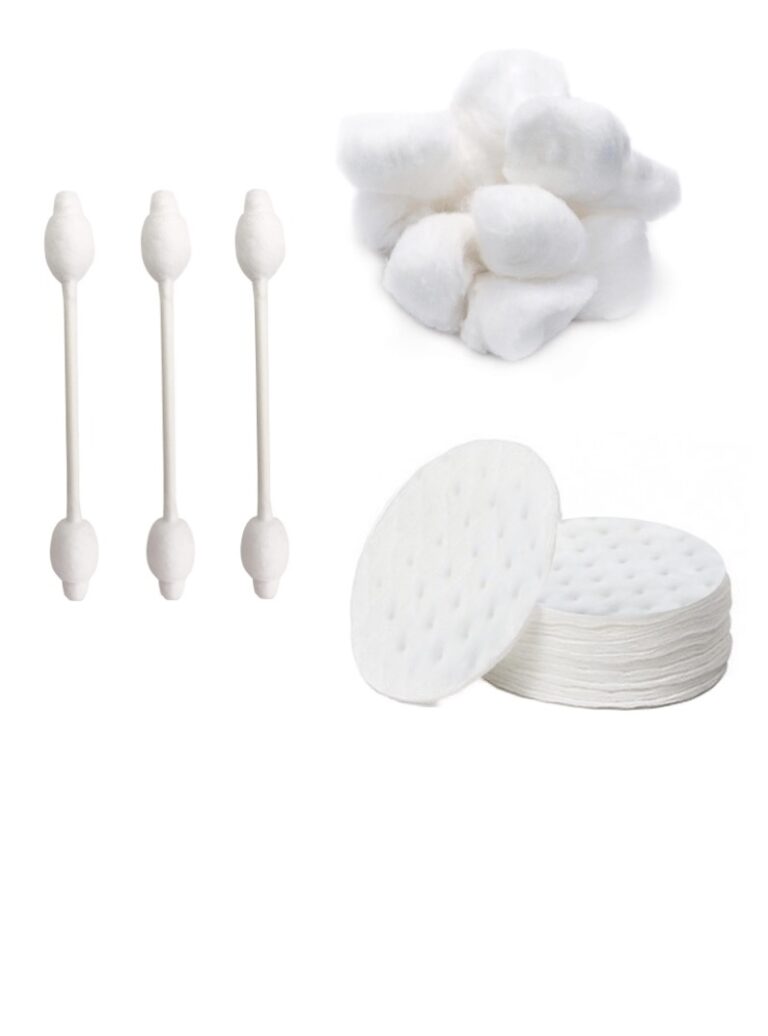
Image source: Bing (Web (fair-use with source credit))
The Purrito Method: Restraint Techniques That Don't Stress Your Cat
The purrito method is a game changer. It's a simple towel wrap that immobilizes your cat's front legs and claws, leaving only the head exposed. This gives you a clear target and much less risk of a scratched arm.
The key to a good purrito is wrapping firmly but not tightly. Your cat should be secure but still able to breathe comfortably and move its head freely.
Here's how to do it:
- Lay a large towel flat on a table.
- Place your cat in the center, facing one of the towel's corners.
- Fold the left side of the towel over your cat's body, tucking it under the opposite side.
- Fold the right side over, tucking it snugly.
- Gently hold the wrapped bundle like a football, with your cat's head peeking out.
It takes practice, and some cats will wiggle free. If it's not working, don't force it. A very stubborn cat may need two people: one to hold, one to clean.
Patience is a tool too. If your cat gets stressed, take a break and come back later. A clean ear isn't worth a ruined trust.
Step-by-Step: The Safe Cleaning Routine
Now for the main event. This is the exact sequence that vets recommend, and it works for nearly every cat. Move slowly, stay calm, and let the process flow.
Once you've done it a few times, it takes less than five minutes from start to finish.
Step 1: Warm the Cleaner (Cold Liquid Equals Panic Mode)
Cats have a strong reaction to cold liquid in their ears. It causes a sensation similar to vertigo, which makes them panic and struggle. To prevent this, warm the bottle before you start.
Place it in a cup of warm water for 60 seconds, or hold it in your closed fist for two minutes. Test a drop on your inner wrist. It should feel comfortably warm, not hot.
Step 2: Fill the Ear Canal
With your cat wrapped in the purrito, gently pull the ear flap upward and slightly outward. This straightens the ear canal. Squeeze the bottle so the solution fills the visible canal.
Don't flood it. You want enough liquid to coat the entire canal, but not so much that it overflows immediately. For most cats, 2 to 3 drops or a small gentle stream is plenty.
Step 3: Massage the Ear Base for 30 Seconds
Close the ear flap back down over the canal. Place your thumb and forefinger at the base of the ear, right where it meets the skull. Massage in a circular motion for 30 seconds.
You'll hear a wet, squishy sound. That's the solution breaking up wax and debris. This is also the step that cats seem to tolerate best.
Many of them actually enjoy the massage part.
Step 4: Let the Cat Shake
Release the ear flap and step back. Your cat will shake its head vigorously. This is good.
This is the centrifugal force working for you. The shake flings the loosened debris and solution out of the ear. Don't try to hold the head still during this phase.
Let it happen naturally.
Step 5: Wipe the Outer Ear
Once the shaking stops, gently fold the ear flap back. Use a fresh cotton ball or gauze pad to wipe the visible inner surface of the ear flap and just inside the opening. Wipe in an upward motion, from the canal opening outward.
Use a fresh cotton ball for each wipe. Never go back in with the same one. That just redistributes the wax you just removed.
Step 6: Reward and Repeat on the Other Side
Before you start the second ear, give your cat a treat. This creates a positive association. Then repeat the entire process on the other ear.
Use fresh cotton balls. If the second ear shows any signs of pain or sensitivity that the first one didn't, stop immediately and call your vet. Asymmetry is a red flag.
How Often Should You Clean? (Frequency by Cat Type)
There's no universal answer to how often you should clean your cat's ears. It depends entirely on the individual cat. Some never need their ears cleaned at all.
Others need a weekly wipe-down.
Here's a practical breakdown:
| Cat Type | Frequency | Notes |
|---|---|---|
| Healthy indoor adult | Monthly to never | Natural self-cleaning usually suffices |
| Floppy-eared breeds (Scottish Fold, Persian) | Weekly to bi-weekly | Poor airflow traps moisture and wax |
| Hairless breeds (Sphynx, Devon Rex) | Weekly | More oil production leads to faster buildup |
| Outdoor cats | Check weekly | Pollen, dirt, and debris accumulate faster |
| Senior cats | Check monthly | Slower self-cleaning and muscle weakness |
| Cats with history of ear infections | As directed by vet | Regular monitoring is critical |
The Monthly Maintenance Plan for Healthy Ears
For most cats, once a month is plenty. A healthy ear cleans itself through a process called epithelial migration. Essentially, earwax and dead skin cells slowly migrate outward to the ear opening.
That's why you rarely see buildup in a healthy ear. When you do clean monthly, you're just helping the process along, not doing the heavy lifting.
Weekly Cleaning for Floppy-Eared and Hairless Breeds
Some breeds need more attention. Floppy-eared cats like Persians and Scottish Folds have less airflow in the ear canal. This traps moisture and creates a breeding ground for yeast.
Hairless breeds like Sphynx produce more oil on their skin, which travels into the ear canal. Weekly cleaning for these cats is a reasonable baseline, but adjust based on what you see.
Outdoor Cats: What Changes With Exposure
Outdoor cats bring the outside in. Grass seeds, dirt, pollen, and even insects can find their way into an ear canal. Check their ears weekly.
If you see a foreign body, don't try to remove it yourself. A grass seed can scratch the ear canal and cause an infection. Let a vet handle extraction with proper lighting and instruments.
Senior Cats: When Less Is More
As cats age, muscle tone decreases. The ear flap may not close as tightly, and the canal may dry out. Senior cats can develop more wax impaction.
But they also have more sensitive skin. Over-cleaning a senior cat's ears leads to inflammation. For them, gentle wiping with a damp cotton ball every couple of weeks is often enough.
The two biggest mistakes people make with ear cleaning are overdoing it and under-doing it. Over-cleaning strips the protective barrier and causes irritation. Under-cleaning lets problems develop.
Watch the ears, not the calendar. Clean when you see debris, not because a certain number of days have passed.
The 7 Mistakes That Send Cats to the Vet
Every vet has seen these exact scenarios play out. Well-meaning owners who tried to help, but accidentally made things worse. Here are the mistakes that send cats to the vet, and how to avoid them.
Q-Tips: The #1 Culprit Behind Ruptured Eardrums
It's tempting. Q-tips are small. They look like they fit perfectly.
But they shouldn't go anywhere near a cat's ear canal. The tip is wider than the canal opening, so it pushes wax deeper instead of removing it. And if your cat jerks suddenly, the tip can slam into the eardrum.
That's a rupture. It's painful, costly to fix, and sometimes requires surgery. Use cotton balls or gauze instead.
They can't penetrate the canal.
Over-Cleaning: When Good Intentions Backfire
Some owners clean their cat's ears every day. They think they're being proactive. In reality, they're stripping the natural protective oils from the ear lining.
This causes dryness, itching, and inflammation. The cat scratches more, which introduces bacteria, which leads to an infection. The ear becomes a never-ending cycle of cleaning and irritation.
Healthy ears don't need daily attention. Monthly is plenty.
Using Human Ear Drops (The pH Nightmare)
Human ear drops are designed for the human ear pH of around 5.5. A cat's ear pH ranges from 7.3 to 7.9, which is more alkaline. Using human drops can disrupt this balance, making the ear vulnerable to infection.
Some human ear drops also contain ingredients that are toxic to cats. Just don't do it. Use a product specifically label for cats.
Cold Cleaner: The Vertigo Problem
Cold liquid in the ear canal triggers a violent reaction in cats. It activates the vestibular system, causing symptoms of vertigo and dizziness. The cat panics, struggles, and can suffer genuine distress.
Some cats develop a lasting aversion to ear cleaning because of a single cold-cleaner experience. Always warm the bottle before use. Always.
It takes 60 seconds and prevents a world of trouble.
Forcing It: When Restraint Becomes Trauma
Some cats simply won't tolerate ear cleaning. They squirm, hiss, bite, and scratch. If you try to force it, you're setting the stage for a permanently traumatized cat.
This is a real problem. A cat that associates ear cleaning with pain and confinement will resist every time, even when it's medically necessary. If your cat is fighting you, stop.
Step back. Try again tomorrow or get a second person to help. Never physically overpower a cat to clean its ears.
Ignoring the Head Tilt
A head tilt is a physical sign of inner ear involvement. It means the problem isn't in the outer ear. It could indicate a middle ear infection, a polyp, or even a neurological issue.
Cleaning the outer ear won't fix this. It can actually delay necessary treatment. If your cat tilts its head for more than 24 hours, see a vet immediately.
Thinking All Black Wax Is Ear Mites
Not every dark ear is infested with mites. Old dried blood, yeast overgrowth, and simple accumulated dirt can all look dark and crumbly. Treating for ear mites when the real issue is a yeast infection will delay proper treatment.
Yeast infections require antifungal medication. Mite treatments won't touch them. If you're unsure what's in the ear, a vet can take a sample and examine it under a microscope.
It takes 30 seconds and gives you a definitive answer.
When It's Not Just Dirt: Recognizing the Real Problems
Sometimes, what looks like dirt is actually a medical issue. This is where the pre-cleaning check becomes absolutely critical. Knowing what you're dealing with determines whether you can clean at home or need a vet visit.

Image source: Bing (Web (fair-use with source credit))
Ear Mites (Otodectes cynotis): Identification and Contagion
Ear mites are the most common culprit behind itchy cat ears. They're microscopic parasites that live in the ear canal and feed on skin debris and earwax. They're highly contagious.
If you have multiple pets, they can pass mites back and forth. The characteristic sign is dark, crumbly, coffee-ground-like discharge. It's actually a mix of mites, their droppings, and dried blood.
Treatment requires prescription antiparasitic drops or topical medication. Cleaning alone won't kill mites, though it helps remove some of the debris and soothe the ear. Your vet will likely recommend treating all household pets, not just the one with symptoms.
Bacterial vs. Yeast Infections: Smell and Discharge Differences
Ear infections come in two main flavors: bacterial and yeast. Yeast infections produce a sour, musty odor and thick, brown or yellowish discharge. They're usually very itchy.
Bacterial infections produce a sweeter, sickly odor and often involve pus or green discharge. They're more likely to cause pain than itching.
Both require medication. Yeast infections need antifungal treatment. Bacterial infections need antibiotics.
Sometimes both are present together. A vet can identify which one you're dealing with by taking a swab and looking at it under a microscope. This isn't something you can guess at home.
Polyps and Foreign Bodies: When Cleaning Makes It Worse
Sometimes the problem is physical, not biological. Benign growths called polyps can develop in a cat's ear canal. They start deep inside and grow outward, blocking the canal and trapping debris.
Cleaning just pushes against the polyp and causes pain. Foreign bodies like grass awns (foxtails) can also lodge themselves in the ear canal. These sharp seeds work their way in and cause intense irritation.
Cleaning won't flush them out. They need professional extraction.
Ear Hematomas: What That Swollen Flap Really Means
A swollen ear flap is a serious sign. It usually means a blood vessel has broken inside the flap. This happens from vigorous head shaking or scratching, often caused by an underlying ear problem.
The flap fills with blood, becoming thick, warm, and painful. It won't resolve on its own. A vet will drain it and address the underlying cause.
Cleaning an ear with a hematoma causes pain and doesn't help the swelling.
The Triage Guide: Home Care vs. Vet Visit
This quick guide helps you make the call. Print it out. Stick it on the fridge.
When you're not sure, defer to the vet. The cost of a checkup is far less than the cost of a ruptured eardrum or a chronic infection.
| Sign | Action |
|---|---|
| Light, yellowish wax | Safe for home cleaning |
| Mild redness with no odor | Safe for home cleaning, watch closely |
| Dark, crumbly discharge | Vet visit needed for mite treatment |
| Foul odor | Vet visit needed for medication |
| Pain on touch | Vet visit needed immediately |
| Head tilt | Vet visit needed immediately |
| Swollen, warm ear flap | Vet visit needed immediately |
| Pus or green discharge | Vet visit needed immediately |
Green Light: You Can Handle It At Home
You see a small amount of light brown or yellowish wax. There's no smell, no redness, and your cat isn't scratching excessively. The ears look and smell normal.
Go ahead with the routine cleaning steps. You're just doing maintenance, not treating a condition.
Yellow Light: Try Once, Then Call
You see a bit more wax than usual, maybe with slight redness. There's no strong odor. Your cat hasn't shown signs of pain.
You can attempt one gentle cleaning. If the debris doesn't come out easily, or if the redness persists after cleaning, call your vet. Don't keep cleaning and hoping for improvement.
One attempt is enough.
Red Light: Stop Now and See the Vet Immediately
You see any of the red flag signs: coffee-ground discharge, foul odor, pus, swelling, pain response, or head tilt. Don't reach for the cleaning bottle. Book a vet appointment.
These signs point to an underlying condition that requires diagnosis and medication. Cleaning the ears will not fix it.
Pro Tips From the Trenches
These are the subtle refinements that make ear cleaning easier. They come from years of watching vets and cat owners figure out what works. Take them seriously.
They make the job better for everyone.
The Towel Wrap That Actually Works
The purrito is a skill, not a magic trick. The most common mistake is wrapping the cat too tightly in front. If the towel constricts the chest too much, the cat will panic because it can't breathe comfortably.
Aim for a cross-body wrap: left towel corner over the right shoulder, right corner over the left shoulder. This secures the front claws without restricting movement of the chest and abdomen.
Using Treats Strategically (Never During, Always After)
Give treats before and after, not during. A treat during the cleaning session encourages rushing and doesn't reward calm behavior. Instead, give a treat after each ear is done.
This helps your cat associate the entire process with a positive outcome. Use something special, like a lickable treat or a small piece of chicken. It makes a difference.
What to Do When Your Cat Hates It
Some cats will never enjoy ear cleaning. The best you can hope for is tolerance. If your cat firmly resists, you have a few options.
Try having a second person help. One person holds and calms, the other cleans. You can also try distractions.
A treat-dispensing puzzle or a wand toy can keep your cat's attention elsewhere. And sometimes, you just have to let the vet do it. Professional cleaning under restraint is faster and less stressful than a daily battle at home.
The "One Ear Per Day" Strategy for Difficult Cats
Here's a trick that works surprisingly well for anxious cats. Clean one ear one day, and the other ear the next day. This halves the restraint time per session and gives your cat a full day to recover and forget the stress.
It's a slower process, but it's far more likely to succeed with a difficult cat.
Real Scenarios: What Different Ear Conditions Look Like
Reading about ear problems is one thing. Seeing them in real life is another. Here are three common scenarios that illustrate the differences between routine cleaning and vet visits.
The Mildly Waxy Cat: A Routine Clean Story
Your cat is a 4-year-old indoor tabby. You check her ears and see a light coating of yellowish wax. There's no smell.
She doesn't scratch or shake her head. You warm the cleaner, do the 30-second massage, let her shake, and wipe the outer ear. The whole process takes three minutes.
The wax comes out easily. She gets a treat and goes back to her nap. That's the ideal scenario.
No drama, no stress, no vet bill.
The Scratching Cat: How a Missed Sign Turned Into an Infection
You notice your cat scratching his ears for a few days, but you don't think much of it. Then you smell a yeasty odor. You look at his ears and see thick brown discharge.
You try cleaning at home, but he pulls away and cries. You book a vet appointment and find out he has a yeast infection. Medication clears it up, but you've spent money and time that could have been avoided by checking the ears when the scratching started.
The "Coffee Grinds" Cat: The Mite Nightmare and How It Resolved
You adopt a cat from the local shelter. A week later, you see him shaking his head constantly and digging at his ears. You look inside and see dark, crumbly debris that looks like coffee grounds.
You know what this is. You call the vet and get prescription mite treatment. Within two weeks, the discharge is gone and the shaking stops.
The quick action saved the cat from a secondary infection and kept the rest of your pets parasite-free.
Frequently Asked Questions
Can I use olive oil or vinegar to clean my cat's ears?
No. Homemade remedies are not safe for cat ears. Olive oil creates a moist environment that promotes yeast growth.
Vinegar disrupts the pH balance and stings on inflamed tissue. Use only a veterinarian-approved ear cleaning solution formulated specifically for cats. These products are pH-balanced and contain the right ingredients to break down wax without irritating the sensitive ear lining.
How do I know if I've hurt my cat's ear?
Signs of a damaged ear include sudden head tilting, loss of balance, circling, vocalizing when the ear is touched, or blood in the ear canal. If you suspect you've injured your cat's ear during cleaning, stop immediately and contact your vet. Time is critical.
A ruptured eardrum can lead to middle ear infections and even permanent hearing loss if left untreated.
Are there any breed-specific ear issues I should know about?
Yes. Persians and Scottish Folds have narrow, folded ear canals that trap moisture and wax. Sphynx and Devon Rex cats produce more oil and need more frequent cleaning.
Maine Coons are prone to polyps and tumors in the ear canal. If you own a breed with distinctive ear characteristics, ask your vet about a breed-specific cleaning schedule and check routine.
Can cleaning ears cause infections if done wrong?
Yes. Over-cleaning strips protective oils and leaves the ear vulnerable to bacterial overgrowth. Using contaminated cotton balls or reusing the same one across both ears can transfer bacteria.
Pushing debris deeper with Q-tips can create blockages that trap moisture. Done correctly, cleaning helps prevent infections. Done incorrectly, it routs the conditions that cause them.
What's the best way to dry a cat's ear after a bath?
After a bath, gently dry the outer ear with a soft towel. Don't insert anything into the canal. You can also use a cotton ball to remove excess moisture from the visible inner ear.
If your cat hates baths and shakes its head afterward, the shaking actually helps remove water from the canal. A cozy, warm room and a towel dry session is usually sufficient.
The Bottom Line: Your Safe Cleaning Cheat Sheet
The whole safe-cleaning process comes down to five simple steps and one hard rule. The hard rule is this: never insert anything into the ear canal. Not a Q-tip, not a cotton ball, not a finger.
The liquid flush method does the deep work. Your job is just the superficial wiping.
The 5-Step Quick Recap:
- Check: Look for redness, swelling, discharge, or odor before you start.
- Warm: Warm the cleaner to body temperature.
- Fill and massage: Fill the canal, massage the base for 30 seconds.
- Shake: Let your cat shake out the debris.
- Wipe: Clean the visible outer ear with a fresh cotton ball.
Red Flags You Should Never Ignore:
- Coffee-ground discharge
- Foul odor
- Pain when touching the ears
- Head tilt
- Swollen ear flap
- Pus or green discharge
A Simple Rule: When in Doubt, Wait It Out (or Call the Vet)
If anything about your cat's ears looks unusual, you have two safe options. Wait a day and see if it improves, or call your vet for advice. The one option that's never safe is reaching for cleaning supplies when you're unsure what you're dealing with.
A quick phone call costs nothing, and a professional opinion gives you the clarity you need to act properly.