
If you've just brought home an Angora rabbit, you're probably staring at a lot of fluff and wondering where to even begin. Learning how to groom an Angora rabbit isn't just about keeping them pretty; it's the single most important thing you'll do to keep them alive and healthy. Miss a few grooming sessions, and you're not dealing with a messy coat; you're dealing with a medical emergency.
Here's the reality check that surprises most new owners: Angora rabbits need a full grooming session every 7 to 10 days, with spot checks in between. That's 30 to 60 minutes per session, every single week, for the life of the rabbit. As of 2026, the American Rabbit Breeders Association (ARBA) recognizes five Angora breeds, each with its own coat characteristics and grooming requirements.
This isn't a weekend hobby; it's a commitment. But once you understand the why behind each step, it becomes second nature.
Why This Matters More Than You Think
Most people don't realize that grooming an Angora rabbit is fundamentally different from brushing a cat or dog. Rabbits have an incredibly delicate digestive system that cannot handle ingested fur. When your rabbit grooms itself, it swallows wool.
That wool can accumulate in the stomach and form a hard, immovable mass called a wool block. Left untreated, wool block causes a painful condition called gastrointestinal stasis, or GI stasis, which is fatal in the majority of cases without prompt veterinary intervention.
The kicker? Regular grooming is the single most effective way to prevent wool block. You're not just removing loose hair from your couch; you're removing the fur that would otherwise end up in your rabbit's digestive tract.
Think about how much fur your rabbit sheds in a week. Now imagine it all sitting in their stomach, unable to pass. That's the stakes.
Beyond the digestive danger, there's also flystrike. This is a horrific condition where flies lay eggs in soiled or damp fur, and the hatched maggots begin eating the rabbit's flesh. Rabbits with matted, urine-soaked, or feces-covered fur around the rear end are prime targets.
Flystrike can kill a rabbit within 24 hours. Grooming, especially around the vent area, is your frontline defense.
The final reason grooming matters is more obvious: skin health. Mats pull at the skin, causing pain, bruising, and even open sores. Rabbits have paper-thin skin that tears easily.
A tight mat left for too long can cut off circulation to the skin underneath, leading to necrosis. Owners who let grooming slide for just a few weeks often find themselves at the vet with a rabbit in serious distress.
Know Your Rabbit Before You Touch a Brush
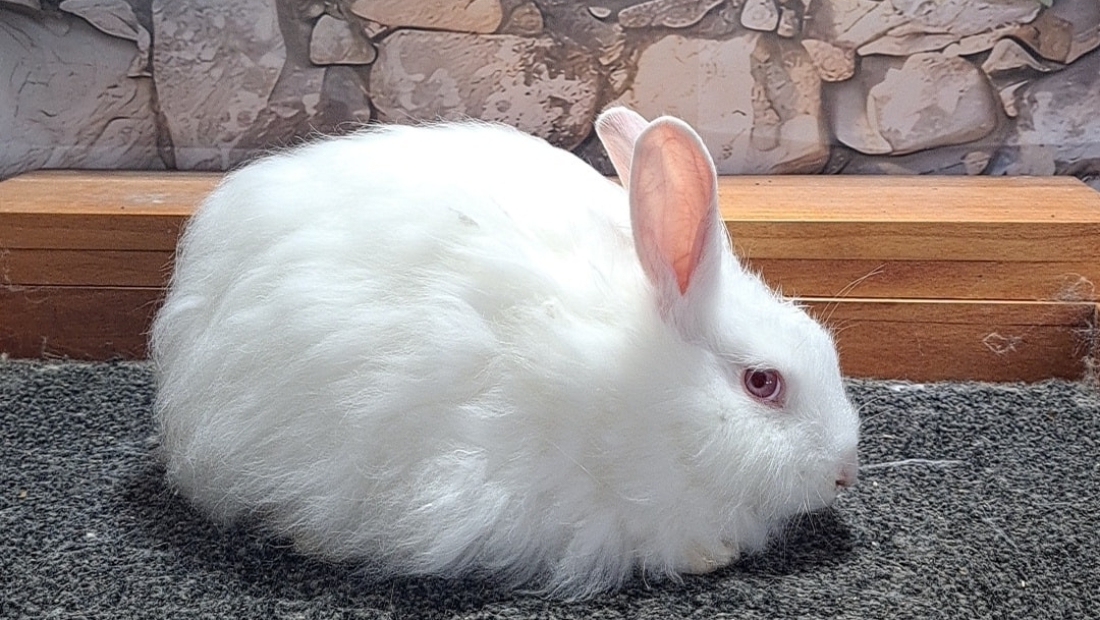
Image source: Bing (Web (fair-use with source credit))
Before you pick up a single tool, you need to know exactly which type of Angora you have. The grooming technique that works perfectly for one breed can actively harm another. This isn't a one-size-fits-all situation, and getting it wrong can mean pain for your rabbit and a ruined coat for you.
English Angora
The English Angora is the fluffiest of the bunch. It has wool covering its entire body, including its face and ears. That face and ear wool is the defining characteristic of the breed, and it requires special attention.
The English Angora also has a dense undercoat that mats quickly if ignored. Owners of English Angoras often find themselves grooming every 5 to 7 days, especially during shedding season.
French Angora
The French Angora has a denser, coarser wool than the English. Its face and ears have short, normal fur, which means less fuss in those areas. However, the body wool is thick and heavy, and it mats just as quickly.
The French Angora is often considered slightly easier to manage for beginners because you don't have to deal with face wool, but the sheer volume of body wool still demands a rigorous schedule.
German Angora
The German Angora is a fiber powerhouse, producing the highest wool yield of any Angora breed. These rabbits are historically managed by plucking rather than shearing, because their wool is naturally shed in a way that makes hand-plucking the preferred harvest method. If you have a German Angora, you'll need to learn the difference between plucking loose wool and pulling wool that isn't ready.
Pulling too early is painful for the rabbit and damages the coat.
Giant Angora
The Giant Angora is a combination breed, developed by crossing several Angora types. They produce three different types of fiber: soft undercoat, awn fluff, and coarse guard hair. This mixed coat has specific grooming needs.
Giant Angoras are also, well, giant, which means more surface area to cover. They need the same weekly schedule, but sessions may run longer simply due to size.
Satin Angora
The Satin Angora has a unique, shimmering wool with a finer texture than other Angoras. That fineness comes at a cost: the wool is more delicate and prone to static electricity. Satin Angoras are also more prone to wool block than other breeds, according to veterinary research, so their grooming schedule cannot be skipped or delayed.
You'll need to pay extra attention to anti-static measures during grooming.
Reading Your Rabbit's Shedding Cycle
Angora rabbits don't shed continuously. Instead, they go through a "blowout" every 90 to 120 days. During this window, the wool loosens and releases from the follicles in a matter of days.
You'll know it's happening because the coat will suddenly look dull, and you'll see loose fur sticking out at odd angles.
This is the most critical time for grooming. During a blowout, your rabbit will swallow massive amounts of loose wool while self-grooming. If you don't step in with intensive grooming sessions every 2 to 3 days during this period, the risk of wool block skyrockets.
Many experienced owners mark their calendars based on their rabbit's last blowout to predict the next one.
Assessing Temperament and Stress Threshold
Here's something most grooming guides skip: your rabbit's personality matters. Some Angoras are laid-back and will tolerate a full hour of grooming with minimal fuss. Others are anxious, fidgety, or outright resistant.
You need to be honest about your rabbit's stress threshold before you start, because a panicked rabbit can seriously injure itself trying to escape your grip.
If your rabbit is new, stressed, or historically difficult, start with shorter grooming sessions of just 10 to 15 minutes. Build up gradually. Watch for signs of stress: thumping hind legs, rapid breathing, attempts to bite, or a frozen, rigid posture.
A rabbit that's overwhelmed will not hold still, and a rabbit that won't hold still is at risk of being cut. Take the time to build trust. It's not wasted time; it's an investment in every future grooming session.
The Essential Grooming Kit
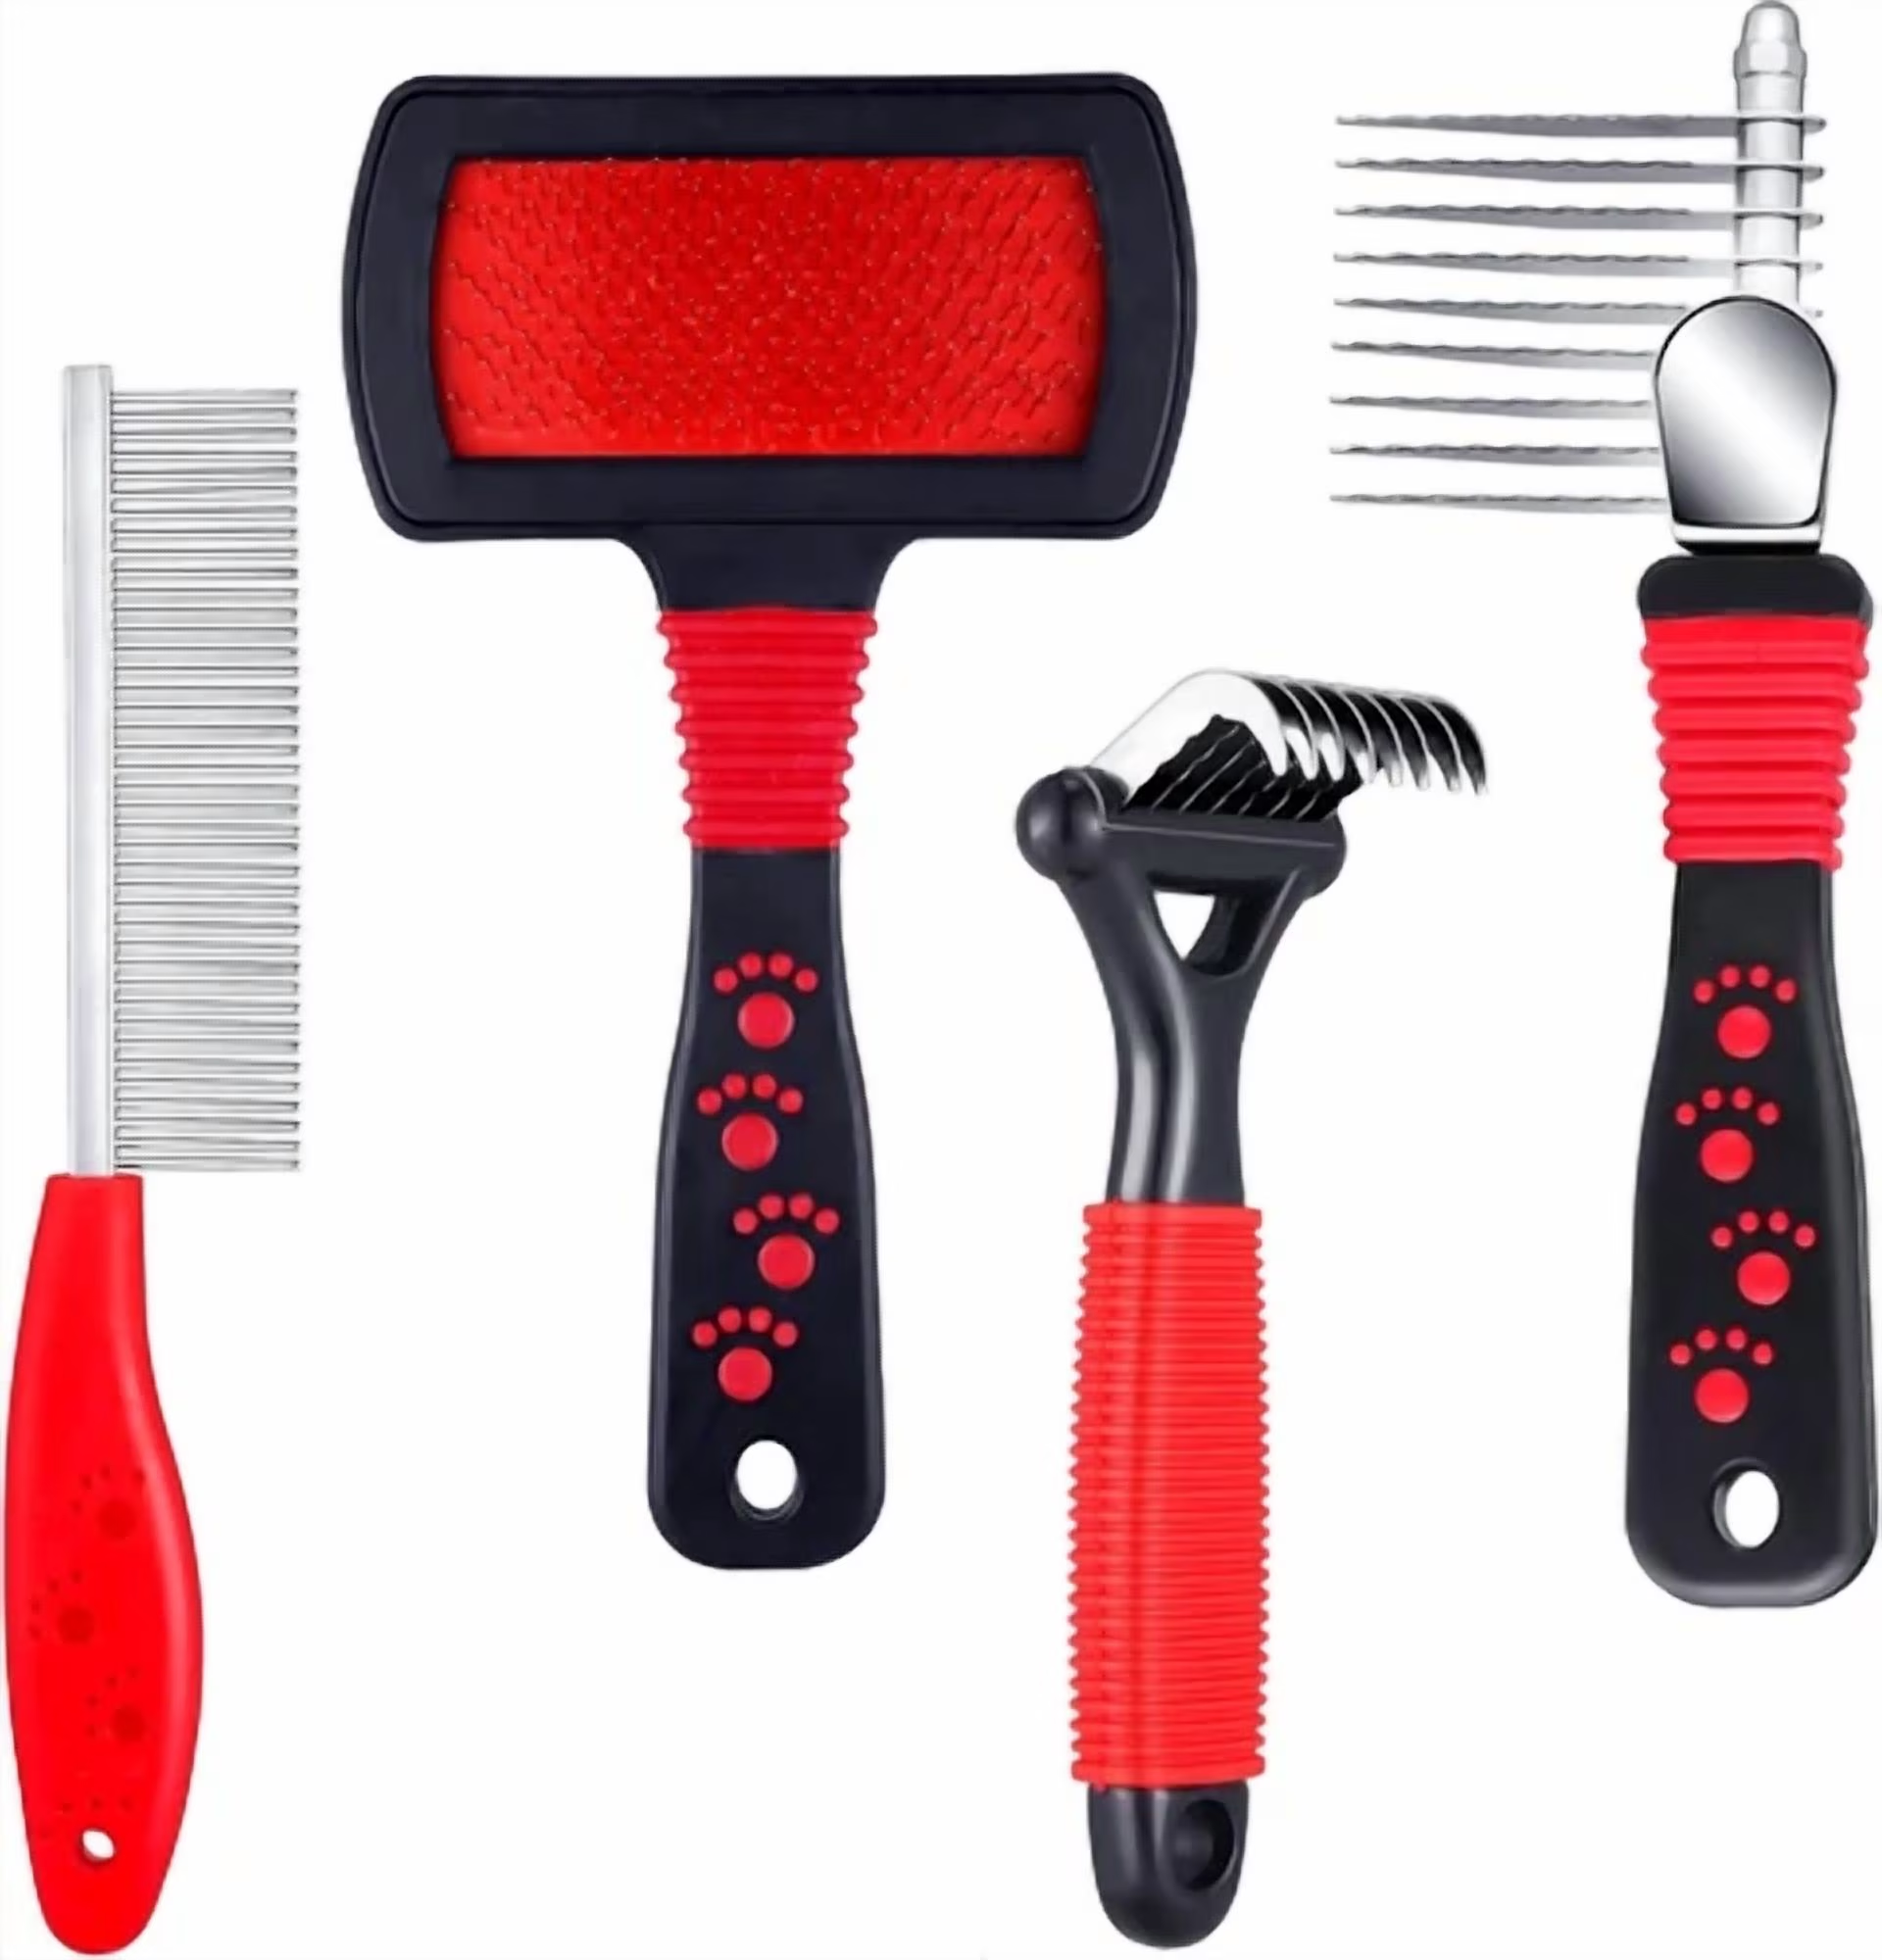
Image source: Bing (Web (fair-use with source credit))
You don't need a $200 professional grooming setup. But you do need the right tools, and they need to be designed with rabbits specifically in mind. Using the wrong brush or clippers isn't just ineffective; it can be actively dangerous for a rabbit's delicate skin.
Here's what our research and aggregate owner feedback suggest you absolutely need, and what you can skip.
| Tool | Purpose | Rabbit-Safe Choice | Skip If |
|---|---|---|---|
| Slicker brush | Daily surface brushing, removing loose wool | Small, fine-wire slicker with rounded pins | You only groom weekly; use a comb instead |
| Wide-toothed metal comb | Deep grooming, detangling, checking for mats | Stainless steel, 1/4-inch spacing between teeth | You have a short-haired rabbit (you don't) |
| Blunt-tipped scissors | Cutting away mats close to the skin | Curved, blunt-tip surgical scissors | You plan to shear exclusively with clippers |
| Electric clippers | Full-body shearing for French, Satin, Giant | Low-vibration, quiet animal clippers, size 10 blade | You have a German Angora that will be plucked |
| Anti-static spray | Reducing static electricity during brushing | Rabbit-safe, fragrance-free formula | You live in a humid climate with no static issues |
| Grooming table | Providing a stable, non-slip surface | Small table with rubber mat or towel | You have a calm rabbit and a steady lap |
The Slicker Brush
A slicker brush has fine, tightly packed wire pins with a slight bend at the tips. It's excellent for fluffing the coat and removing surface-level loose wool. However, you have to use a light touch.
The pins are sharp, and pressing too hard can scratch your rabbit's skin. Use it only on the top layer of the coat, never digging down to the skin.
The Wide-Toothed Comb
The wide-toothed comb is your main workhorse. This tool reaches through the wool all the way down to the skin, letting you detect mats early and remove loose fur from the undercoat. A metal comb with 1/4-inch spacing is the sweet spot for Angora wool.
You'll use this comb during every single grooming session, so invest in a quality one that won't bend or snap.
Blunt-Tipped Scissors
Scissors are for cutting out mats that can't be combed out. You should never use pointed scissors anywhere near your rabbit. Blunt-tipped scissors are designed to slide over the rabbit's skin without puncturing it.
Even with blunt tips, you need to be careful. The skin underneath a mat is often wrinkled or folded, and it's easy to catch a fold of skin in the blades.
Electric Clippers
For shearing an entire Angora, clippers are faster and safer than scissors for large areas. You need clippers designed for small animals, not heavy-duty dog clippers. Look for low-vibration models, as high vibration frightens rabbits.
A size 10 blade is the standard choice for Angora shearing because it leaves roughly 1/8 inch of wool for protection while removing the bulk. Use a 30-minute rule: run the clippers for a maximum of 30 minutes, then let them cool. Overheated blades can burn the rabbit's skin.
Anti-Static Spray
Static electricity is a real and underappreciated threat when grooming Angoras. Static causes the wool to cling to everything, including your brush, your hands, and the rabbit itself. More dangerously, static shocks scare rabbits, and a startled rabbit can lunge or kick, resulting in injury.
A light mist of rabbit-safe anti-static spray (or even just a damp hand passed over the coat) reduces cling and makes brushing far more comfortable for everyone.
What You Don't Need
Skip the furminator-style undercoat rakes. They're too aggressive for Angora skin. Skip human hairbrushes; their bristles are too soft and won't reach the undercoat.
And skip any grooming tool marketed for cats or dogs unless you've verified it's gentle enough for a rabbit. When in doubt, a metal wide-toothed comb does 90% of the work.
When to Brush vs. When to Pluck vs. When to Shear
This is the decision tree that confuses new Angora owners the most. The correct method depends entirely on your rabbit's breed, the condition of the coat, and the current stage of the shedding cycle. Get this wrong, and you'll either fail to remove enough wool (wool block risk) or cause your rabbit unnecessary pain in the form of pulling wool that isn't ready.
The Three Methods Explained
Brushing is the daily or weekly maintenance method. You use the slicker brush and wide-toothed comb to remove loose wool, detangle small snags, and fluff the coat. Brushing is appropriate for all Angora breeds at all times.
It's the baseline of your grooming routine.
Plucking is the manual removal of wool that has loosened from the follicle during the shedding cycle. When the wool is ready, it will slide out with minimal resistance when you gently tug a small clump between your fingers. Plucking is essential for German Angoras, whose wool is primarily harvested this way.
It can also be used on other breeds during a heavy blowout.
Shearing is cutting the wool with clippers or scissors. This is the primary harvest method for French, Satin, and Giant Angoras. Shearing is also the rescue method for severely matted rabbits of any breed, and the safe method for rabbits that won't tolerate plucking.
Breed-Based Decision Rules
Use this as your decision tree:
| Breed | Primary Method | Secondary Method | When to Use Secondary |
|---|---|---|---|
| English | Shearing | Plucking | Pluck during heavy blowout if wool loosens easily |
| French | Shearing | Brushing | Brush daily, shear every 90-120 days |
| German | Plucking | Shearing | Shear if rabbit won't tolerate plucking, or if mats are severe |
| Giant | Shearing | Plucking | Pluck loose wool tufts between full shears |
| Satin | Shearing | Brushing | Brush 2-3x weekly to prevent static and matting |
How to Tell If Wool Is Ready to Pluck
Plucking should never hurt. If the rabbit flinches, pulls away, or vocalizes, you're pulling wool that isn't ready. Walk away and try again in a few days.
When wool is ready, you'll feel it release from the skin with almost no resistance. The clump of wool will come away cleanly in your hand, leaving the skin underneath visible.
The visual cue is a noticeable change in the coat's appearance. Ready-to-pluck wool looks slightly lifted, almost like the undercoat is separating from the rabbit's body. If the coat still looks flat and dense against the skin, the wool isn't ready.
Patience is key here. Plucking too early damages the hair follicles, causes pain, and can result in patchy regrowth.
When Shearing Is the Only Safe Option
There are two scenarios where you must shear rather than pluck or brush. The first is severe matting. If your rabbit has mats that are tight against the skin, you cannot brush or pluck them out.
Brushing will pull skin into the mat and cause pain. Plucking will do worse. You have to cut or shave the mat out.
The second is a rabbit with a low stress threshold. Some rabbits will never tolerate the sensation of plucking, and forcing them through it creates a dangerous level of stress. For these rabbits, regular shearing every 90 days is a humane and safe alternative.
The wool quality won't be quite as high as plucked wool (the cut ends are blunt rather than tapered), but the rabbit's welfare matters more than fiber perfection.
Shearing Technique Basics
When shearing, you're working against the clock before the rabbit gets stressed. Lay the rabbit on a non-slip surface, facing away from you. Hold the skin taut with one hand while you run shears or clippers with the other.
Always go with the direction of the wool growth, never against it. Against the grain will pull the skin and cause uneven cuts.
The goal is to leave about 1/8 inch of wool on the rabbit. This protective layer prevents sunburn, insect bites, and minor scrapes. Going any closer with clippers increases the risk of nicking the skin with the blade.
Remember the 30-minute rule for clippers, and stop immediately if the rabbit becomes distressed.
The Step-by-Step Grooming Process
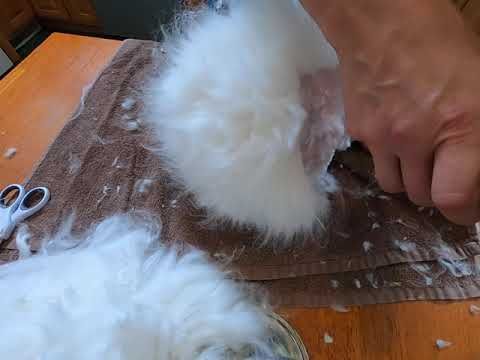
Image source: Bing (Web (fair-use with source credit))
Now we get to the practical part. This is the exact sequence we recommend based on veterinary guidance and the collective experience of experienced Angora breeders. Follow this order, and you'll cover every critical area without missing something important.
Skip a step, and you're leaving a risk on the table.
Before You Start: The 5-Minute Health Check
| Check | What to Look For | Red Flags |
|---|---|---|
| Eyes | Clear, no discharge, no crust | Cloudy eyes, excessive tearing, redness |
| Ears | Clean inside, no debris, no odor | Head shaking, scratching, black or brown waxy buildup, bad smell |
| Nose | Dry, no discharge, no sneezing | Wet or crusty nose, frequent sneezing, labored breathing |
| Mouth | Teeth visible, no drooling, appetite normal | Drooling, wet chin, reluctance to eat, visible overgrown teeth |
| Vent | Clean, dry, no visible feces or urine staining | Soiled fur, wet matting, maggots, redness, swelling |
| Skin | No bumps, flakes, bare patches, or redness | Dandruff, hair loss, scabs, visible parasites, hot spots |
| Body condition | Ribs felt but not seen, spine smooth, no lumps | Bony spine, visible ribs, distended belly, hard or firm abdomen |
This health check takes five minutes and can save your rabbit's life. If you find any red flag, pause the grooming session and evaluate whether the issue needs veterinary attention. Grooming a sick rabbit adds stress to an already compromised system.
A rabbit with a dirty vent, for example, needs immediate cleaning and a vet check for flystrike, not a full-body hair cut.
Setting Up a Safe Grooming Station
You need a stable, non-slip surface at a comfortable working height. A small table with a rubber bath mat on top works perfectly. Alternatively, you can groom your rabbit on your lap if you're sitting on the floor.
Never groom on a slippery surface like a bare kitchen counter. The rabbit will slide, panic, and likely kick out, increasing the risk of injury to both of you.
Gather all your tools before you pick up the rabbit. You don't want to be fumbling for a comb while holding a squirming rabbit in one hand. Lay everything out within easy reach.
Some owners find it helpful to have a towel on hand to wrap a struggling rabbit for a brief "bunny burrito" reset.
Step 1: The Pre-Groom Fluff
Start with the slicker brush to gently fluff the entire coat. Use short, sweeping strokes, working from the base of the ears toward the tail. Don't dig deep; just remove the surface-level loose wool and separate any obvious tangles.
This step takes 2 to 3 minutes and makes the subsequent combing much easier. It also exposes any mats you missed during the health check.
Step 2: The Full-Body Comb-Through
Switch to the wide-toothed comb. Starting at the back of the rabbit's neck, insert the comb down to the skin and gently pull outward through the wool. Work in small sections, moving systematically down one side, then the other, then the tail area.
You're not pulling the coat; you're teasing out loose wool and checking for mats.
Comb in the direction of wool growth. If you hit a snag, don't yank. Stop, hold the wool above the snag with one hand to relieve tension on the skin, and gently work the comb through.
Pulling through a snag without holding the wool taut pulls the rabbit's skin toward the comb teeth, which is painful and causes the rabbit to fight you.
Step 3: Dealing with Mats and Tangles
| Mat Severity | Technique | Tool |
|---|---|---|
| Loose surface tangle | Hold wool taut, work comb through from tip to base | Wide-toothed comb |
| Tight, small mat (no skin contact) | Insert blunt-tipped scissors flat against mat, snip vertically to break it up, then comb out | Scissors + comb |
| Tight mat against skin | Slide scissors flat between mat and skin, cut with mat on top, avoid pulling | Blunt-tipped scissors |
| Severe, widespread matting | Shave rabbit with clippers, size 10 blade, flat against skin | Electric clippers |
The most important rule with mats: never pull. Pulling a mat hurts the rabbit, damages the hair follicles, and can tear the skin. If a mat is tight enough that you can't slip a comb through it, you need to cut it out.
Place the blunt-tipped scissors flat against the rabbit's skin, underneath the mat, and snip upward. The mat will lift off, leaving the skin undisturbed.
If the rabbit has many mats or the mats are widespread, don't spend hours trying to salvage the coat. Shave it off. A shaved Angora looks a little odd for a few weeks, but it grows back, and the rabbit is far more comfortable than being subjected to hours of stressful detangling.
Step 4: The Vent and Tail Area
This is the area most owners neglect, and it's the most critical for preventing flystrike. Use your scissors or clippers to trim the fur around the rabbit's anus, genitals, and the underside of the tail. You're creating a clean zone free of long wool that can trap urine and feces.
A short trim here, no longer than 1/4 inch, makes it easy to spot any soiling quickly.
Check this area during every grooming session. If you find urine-scalded skin or matted feces, you need to clean the area gently with a damp cloth and rabbit-safe wipe, then dry it thoroughly. If you find maggots (they look like small white or yellow worms), this is a dire emergency.
You must get the rabbit to a vet immediately. Flystrike kill rabbits rapidly.
Step 5: Shearing (For French, Satin, and Giant Angoras)
When the wool is at its maximum length (roughly 4 to 6 inches, or when you notice the shedding cycle beginning), it's time for a full shear. Lay the rabbit on its side, facing away from you. Move the grain of the wool with your hand to identify the direction of growth.
Starting at the back, run the clippers flat against the skin, moving smoothly in the direction of growth.
Work in strips, like mowing a lawn. After the back, move to the sides, then the belly. For the belly, you may need to hold the rabbit upright, supported by your chest, to access the area.
Be extra careful around the nipples (females) and the genitals. Use scissors for these delicate areas instead of clippers. Always finish by trimming the vent area again, as the shearing will have loosened wool that could fall into this area.
Stop after 30 minutes of clipper use to let them cool. Check the blade temperature periodically by touching it to the back of your hand; if it's hot, stop and let it cool down.
Step 6: Post-Groom Care and Rewards
After the grooming session, give your rabbit a thorough once-over. Run your fingers through the coat to check for missed tangles or accidental nicks. If you did nick the skin, clean the area with a mild antiseptic safe for rabbits and monitor it for signs of infection over the next few days.
Then, reward your rabbit. A small piece of a favorite treat, like a slice of banana or a sprig of fresh herbs, reinforces that grooming is a positive experience. This is critical, especially for anxious rabbits.
They'll learn to tolerate grooming much better if they know a treat is coming at the end. Place the rabbit back in its cage with fresh hay and water, and make sure the environment is calm and quiet for them to relax after the session.
The Dangers Nobody Warns You About
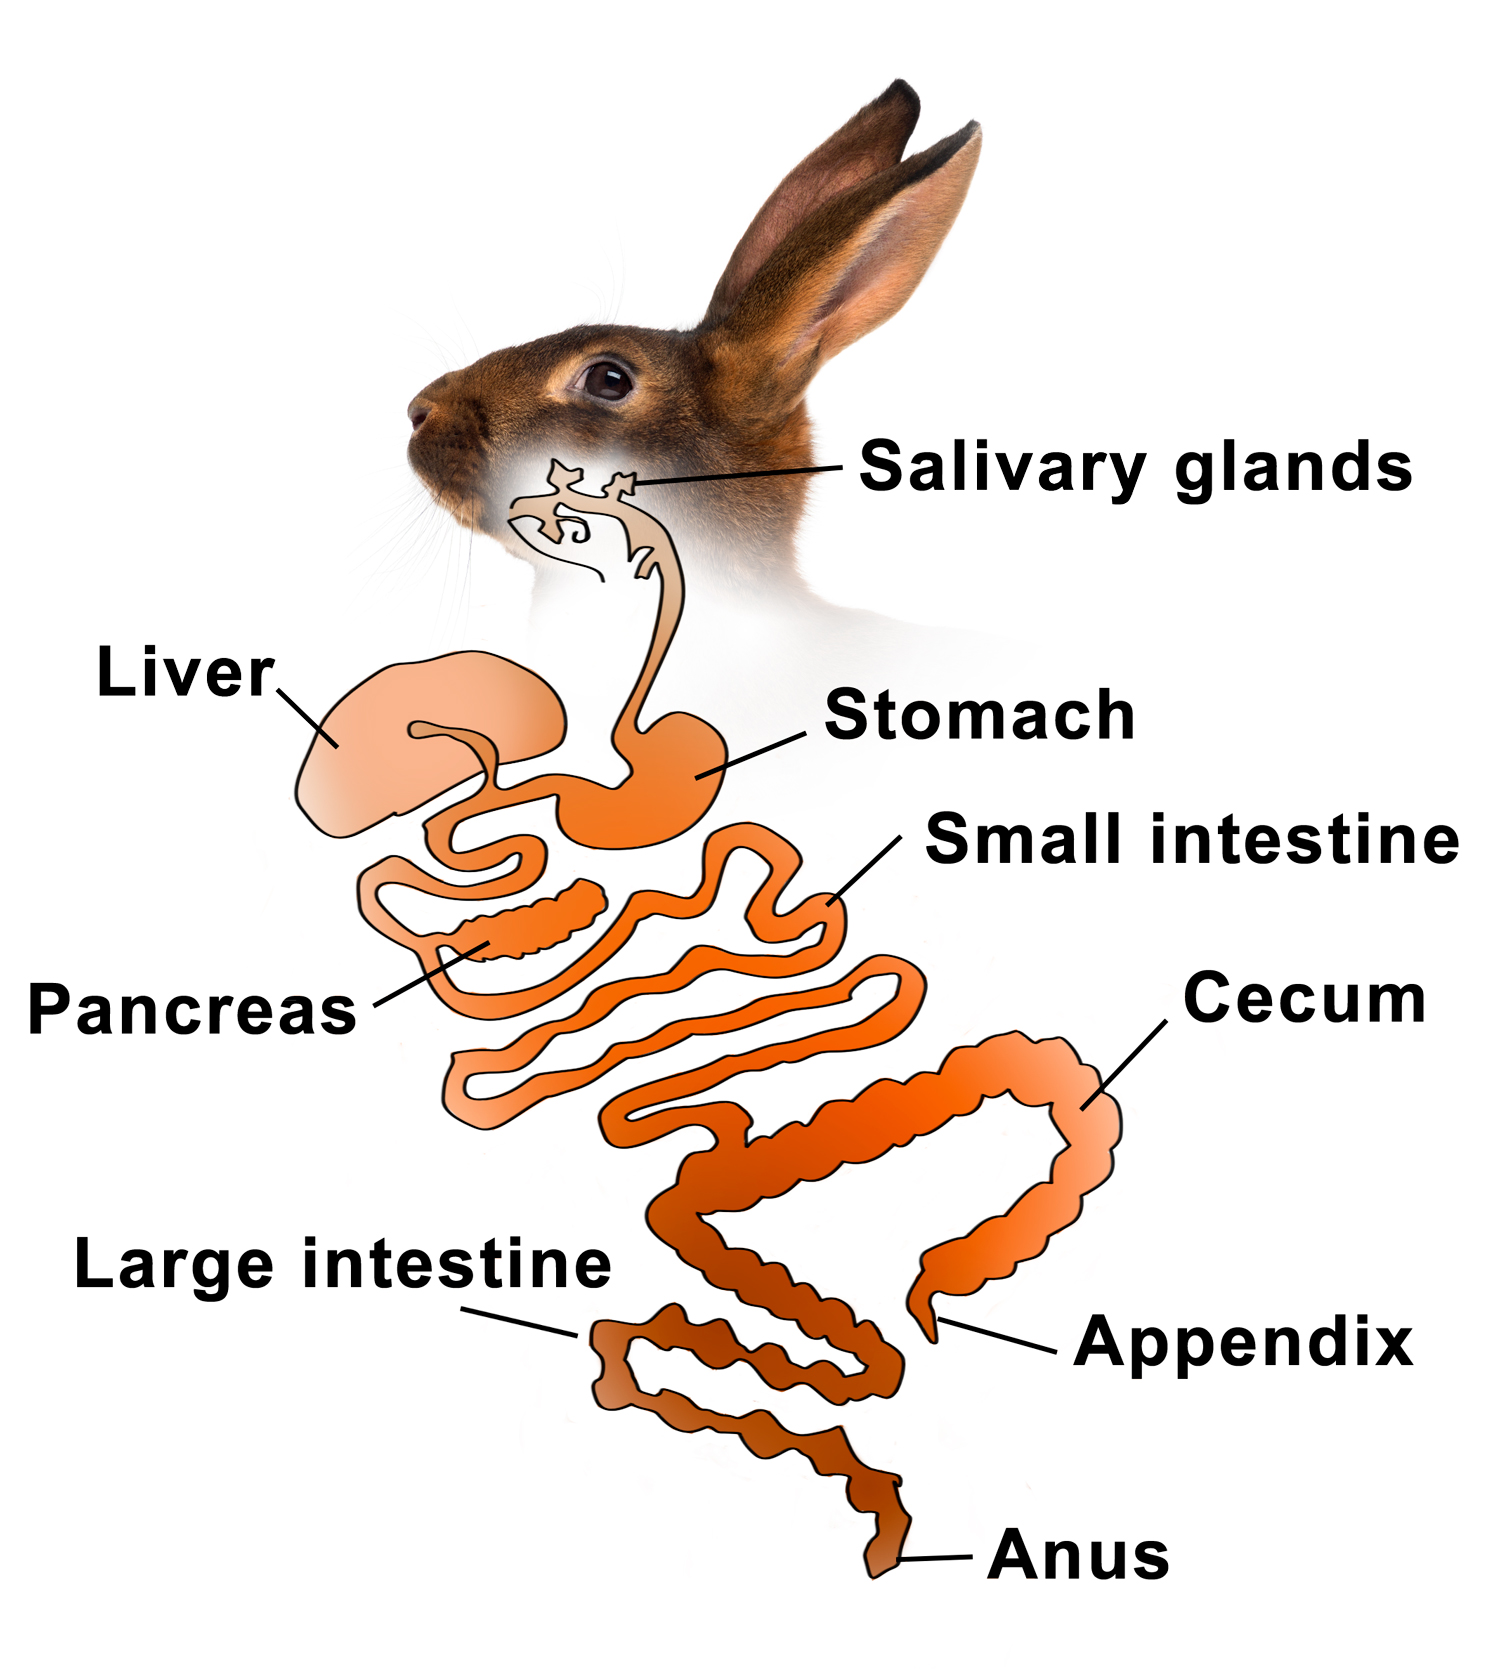
Image source: Bing (Web (fair-use with source credit))
Every Angora owner eventually hears the horror stories, but most don't truly understand the dangers until it's too late. Let's be blunt about what can happen when grooming falls behind. These aren't rare edge cases; they're the most common reasons Angora rabbits die prematurely.
Wool Block and Gastrointestinal Stasis
Wool block is the number one killer of Angora rabbits. When a rabbit grooms itself, it swallows wool. That wool doesn't dissolve or pass easily.
Over time, it accumulates in the stomach and forms a dense, felted mass that grows until it fills the stomach. Once the stomach is full, the rabbit physically cannot eat. Food stops moving through the digestive tract, and the rabbit enters gastrointestinal stasis.
GI stasis is a silent killer. The rabbit may still seem alert for the first 12 to 24 hours, but inside, the digestive system is shutting down. Without treatment, the condition is almost always fatal.
If your rabbit stops producing droppings for 12 hours, that's an emergency. You need to get to a vet for immediate treatment.
The most dangerous part? You often can't tell it's happening until it's too late. Rabbits instinctively hide signs of pain and illness.
By the time you notice your rabbit isn't eating or producing droppings, the wool block has likely been growing for weeks. This is why preventative grooming isn't optional. It's the only way to stop wool block before it starts.
The National Angora Rabbit Breeders Association and veterinary researchers alike emphasize that regular grooming is the single most effective preventative measure for wool block. You're not just maintaining a nice coat; you're actively preventing one of the most lethal conditions in rabbit medicine.
Flystrike: The 24-Hour Emergency
Flystrike, also known as myiasis, is exactly as horrifying as it sounds. A fly lands on soiled or damp fur, typically around the rabbit's rear end, and lays eggs. Within hours, those eggs hatch into maggots.
The maggots then begin feeding on the rabbit's skin and flesh, releasing toxins into the bloodstream as they eat.
Flystrike progresses with terrifying speed. A rabbit can go from healthy to critical in less than 24 hours. The maggots are visible to the naked eye, but by the time you notice them, the infestation is often severe.
If you find maggots on your rabbit, you need emergency veterinary care immediately. There is no home remedy. The vet will need to remove every single maggot and treat the rabbit for shock and infection.
Preventing flystrike is simple: keep the fur around the vent and tail area clean, dry, and short. During your weekly grooming, always check this zone. If your rabbit has diarrhea, urine scald, or matted feces, clean the area immediately and keep the rabbit under close observation.
Warm weather increases the risk substantially, as flies breed faster in heat. Don't let a dirty vent slip for even a day. If you're unsure about your rabbit's condition, a quick check takes 30 seconds.
That's 30 seconds that can save your rabbit's life.
Overheating and Hypothermia from Improper Grooming
The dense Angora coat is a double-edged sword. It insulates the rabbit so effectively that it also traps body heat. During a grooming session, especially when the wool is long and thick, your rabbit can overheat quickly.
Signs of overheating include red ears, panting, drooling, and lethargy. If you see these signs, stop grooming immediately and move the rabbit to a cooler area.
The flip side is also dangerous. If you shear a rabbit completely bald, you remove its natural insulation. A shaved rabbit is vulnerable to both cold and sunburn.
This is why we recommend leaving at least 1/8 inch of wool when shearing. It's enough protection without compromising the safety of the coat.
Shock from Stress During Grooming
Rabbits are prey animals. Their default response to danger is panic. A rabbit that feels trapped or threatened during grooming can go into shock.
Signs of shock include cold ears and feet, a body that goes limp, shallow breathing, or a rabbit that is unnaturally still. This is a medical emergency. Wrap the rabbit in a warm towel, hold it close to your body for warmth, and call your vet immediately.
When a Bath Is Necessary (and Why It's Almost Never)
Bathing an Angora rabbit is dangerous and should only be done under explicit veterinary direction. Rabbits cannot regulate their body temperature well when wet, and a wet rabbit can easily go into hypothermia. Bathing also strips the natural oils from the coat and causes extreme stress.
The vast majority of "dirty" rabbit situations can be handled with spot cleaning using a damp cloth and rabbit-safe shampoo.
Signs of Shock and When to Stop Immediately
Knowing when to stop is as important as knowing how to groom. If your rabbit starts thumping, struggling violently, or showing signs of respiratory distress, stop the session. A rabbit in distress can injure itself trying to escape.
Forcing a rabbit through a grooming session when it's panicking teaches it to fear you and makes future sessions even harder. Break the session into smaller pieces, or try again the next day. The rabbit's mental and physical safety comes before a perfectly groomed coat.
If you see: cold ears, pale gums, rapid breathing, or a limp body, stop immediately and get the rabbit to a vet. Weight loss. Refusal to eat.
You can't always see the danger coming, but watching for these signs and knowing when to stop can save your rabbit's life.
Emergency Rescue Grooming
Sometimes grooming isn't scheduled; it's an emergency. Whether you've adopted a neglected rabbit or life just got in the way for too long, you may find yourself facing a rabbit with a severely matted coat. This is a different beast from routine grooming, and it demands a different approach.
Severely Matted Rabbits: When to Call the Vet Instead of DIY
If you've inherited, rescued, or otherwise come into possession of a rabbit with severe matting, the first question you need to ask is whether the rabbit needs veterinary care before you even touch it. Rabbits in poor condition often have undiagnosed health issues that led to the matting in the first place. Pain, dental disease, obesity, and arthritis can all prevent a rabbit from grooming itself.
Signs that you should go straight to the vet instead of reaching for the clippers: weakness or lethargy, obvious weight loss, discharge from eyes or nose, a dirty or wet vent, visible skin lesions, or any sign of flystrike. A rabbit in poor health may not tolerate the stress of grooming, and you could make things worse. A full examination by a vet who sees rabbits is the safest starting point.
If the rabbit checks out healthy, you can proceed with grooming at home.
Shaving Mats Off with Clippers: Damage Control Strategies
When you've got a severely matted rabbit, the goal is simple: remove the mats safely, not salvage the coat. This is a damage control operation. You're not trying to produce beautiful wool.
You're trying to get the rabbit comfortable and safe.
Here's the approach that works:
1. Do not attempt to comb or brush. This will cause pain, and the rabbit will fight you.
2. Use clippers, flat against the skin, with a size 10 blade. A clipper blade that leaves 1/8 inch of wool gives you room to maneuver without nicking the skin.
3. Work in small sections. Start with the least matted areas to get the rabbit used to the vibration of the clippers.
4. Be prepared for skin folds. Severe matting often means the skin underneath is wrinkled or damaged. Go slowly.
5. If the skin is damaged, stop. A rabbit with wounds or sores under its mats needs veterinary treatment, not more grooming.
If mats are so tight you can't get the clipper blade flat against the skin, you may need to cut the mat itself. This is delicate work. Put the scissors between the mat and the skin, and snip upward.
Try to visualize the skin underneath before you cut. It's easier to make a small, conservative cut and reassess than to clear a big section and risk a cut.
What to Do If You Accidentally Cut the Skin
Rabbits have extremely thin skin, and even experienced owners occasionally make a wrong cut. If you nick the skin, stay calm. The rabbit will be more frightened by your reaction than the cut.
Gently apply pressure with a clean cloth or cotton ball to stop the bleeding. Most small cuts will stop on their own within a few minutes.
Clean the wound with a rabbit-safe antiseptic, such as diluted chlorhexidine, to prevent infection. Don't use hydrogen peroxide or alcohol; they're too harsh and can damage tissue. If the cut is deep, won't stop bleeding, or you're at all worried, call your vet.
Be especially careful watching any cut over the following days for swelling, redness, or discharge, which are signs of infection.
Talk to your rabbit in a calm, soothing voice throughout. Your stress will amplify theirs. Once the bleeding has stopped, assess whether to continue grooming.
In many cases, it's best to stop the session, let the rabbit calm down, and finish the next day. The rabbit needs to learn that grooming isn't a dangerous experience, and a sloppy session where you're both stressed isn't helping anyone.
How to Stabilize a Stressed Rabbit After a Difficult Session
Once the grooming is over, the recovery time matters just as much as the grooming itself. A rabbit that went through an intense, stressful session needs time to decompress. Place the rabbit in a quiet, dark room in its cage with fresh hay and water.
Don't interact with it for a few hours; just let it calm down.
If the rabbit was particularly stressed, offer a favorite treat as a reward once it's settled. This helps create a positive association with the end of the grooming experience. Watch for any signs of post-grooming shock: cold ears, lethargy, refusing food, or hiding.
If you see these, contact your vet. In most cases, a quiet recovery period is all your rabbit needs, but knowing the signs of distress can prevent a problem from turning into an emergency.
Detailed Grooming Procedure
Now that you understand the risks and the tools, let's walk through the full grooming procedure from start to finish. We've broken it down into individual sections so you can focus on each part as you go. This is the step-by-step routine that keeps your rabbit healthy and comfortable.
Preparing Your Workspace
Before you bring your rabbit to the grooming area, set everything up. You want a stable surface at a comfortable height, like a table or counter. Cover it with a non-slip mat or a thick towel so your rabbit feels secure and doesn't slide around.
Place all your tools within easy reach: slicker brush, wide-toothed comb, blunt-tipped scissors, clippers, and any sprays or wipes you might need. Keep a towel handy for wiping up any loose fur or cleaning your hands. The less time you spend reaching for tools, the faster the session goes, and the less stressed your rabbit becomes.
Restraint: The Bunny Burrito Method
If your rabbit is new, anxious, or particularly resistant, the bunny burrito method can be a lifesaver. Wrap your rabbit snugly in a towel, leaving only the area you're working on exposed. This provides a sense of security, keeps the rabbit still, and prevents injuries from kicking.
To do this, lay a towel flat. Place the rabbit in the center, facing away from you. Bring the left side of the towel over the rabbit's back, tuck it underneath the body.
Repeat with the right side. The rabbit should be wrapped like a burrito, with its head poking out the top and its rear exposed. If you're grooming the front half, wrap the rear half.
If you're grooming the rear, wrap the front.
You don't need the bunny burrito for every session or every rabbit. A calm, trusting rabbit will sit still on the table. But for the ones that won't, this method reduces stress and keeps everyone safe.
Grooming the Back and Sides
Start with the back. Use the slicker brush to fluff the coat with short, gentle strokes. Then, switch to the wide-toothed comb and work from the base of the neck toward the tail, section by section.
Your goal is to reach the skin with the comb teeth, ensuring you're releasing loose wool from the undercoat and not just brushing the surface.
Always work in the direction of wool growth. Pay special attention to the hindquarters and the shoulders, which are common spots for mats to form because they're pressure points where the rabbit rests and rubs against cage surfaces. If you feel a mat, stop and deal with it using the scissors method described in the next section.
Don't try to yank it out.
Grooming the Belly and Chest
The belly and chest are sensitive areas. Use your comb gently, keeping the teeth shallow to avoid scrapping against the rabbit's skin. Some rabbits are extremely ticklish in these areas and may try to kick.
If your rabbit becomes distressed, take it slow, speak in a calm voice, and try again.
If you need to trim the belly, especially before shearing, use your scissors with the tips pointing away from the rabbit's body. Never point scissors toward the belly or chest where the skin is thin and easy to cut.
Grooming the Legs and Feet
The legs and feet gather floor litter, hay, and urine. The fur around the feet is short and dense. Use your comb to check for any tangles around the ankles.
If mats have formed around the feet, you can carefully trim them with scissors. Make sure to avoid cutting the skin between their toes.
Grooming the Head, Face, and Ears
For rabbits with face wool, like English Angoras, you'll need special attention here. Use your fingertips to gently part the wool over the eyes to make sure the rabbit can see. Trim any wool that blocks vision.
Use small, careful snips with scissors, keeping the rounded tip of the scissors pointing away from the eye at all times.
For all breeds, check the ears. Gently examine the inside of the ear flap for any debris or signs of mites (dark, crumbly wax). Use a soft, damp cloth to clean the earfold if needed, but never push anything into the ear canal.
If you suspect mites or an ear infection, your vet will need to take a look.
Final Check and Cleanup
After you've covered the entire body, do a final pass. Run your fingers over the rabbit's coat to feel for any mats you may have missed. Check the rabbit's rear end specifically to make sure it's free of any matted fur, urine, or feces.
If you trimmed the vent area, confirm you're happy with the coverage.
Dispose of the loose wool properly. Angora wool is valuable to spinners, but you can also compost it or throw it away. Don't leave it lying around the rabbit's cage; they may eat it, which defeats the purpose of the grooming session.
Clean your tools using a soft brush and, if necessary, a mild soap and water. Dry everything completely before storing to prevent rust.
The Vent and Tail Area: Your Flystrike Defense
The area around your rabbit's vent (anus and genitals) and tail is ground zero for flystrike. Because this area is constantly exposed to urine and feces, it's where the fur gets soiled, and soiled fur attracts flies. Keeping this zone short and clean is non-negotiable for every Angora owner.
Why the Vent Area Matters
A rabbit with long, soiled fur around its vent is a ticking time bomb in warm weather. Flies can smell soiled fur from a distance. Within hours of laying eggs, maggots hatch and begin feeding on the rabbit's skin.
The rabbit goes into shock from the toxins in the maggots' saliva. Death can occur within 24 hours.
The species of flies that cause flystrike breed year-round in warm climates and throughout summer in cooler climates. Any warm, damp, or soiled fur will do. There's no "clean enough" when it comes to this area; it needs to be actively managed.
How to Trim the Vent Area
| Step | Action |
|---|---|
| 1 | Have your rabbit in the bunny burrito wrap or on a non-slip surface. |
| 2 | Using your blunt-tipped scissors or a small pair of safety clippers, trim the fur around the anus and genitals. |
| 3 | Aim to leave about 1/4 inch of fur. This is short enough to stay clean but long enough to provide a small amount of protection. |
| 4 | Trim the fur on the underside of the tail and around the base of the tail. |
| 5 | Check for any soiling. If the area is dirty, clean it with a damp cloth and dry it thoroughly before putting the rabbit down. |
Detecting Soiling and Fred, the Vent Guide
During every grooming session, check the vent. If the area is dirty, you need to clean and dry it. If the area is wet, you need to determine why.
Is the rabbit urinating excessively? Has the urine scald caused the fur to fall out? Is the rabbit having diarrhea?
These are all health concerns that require veterinary attention, not just a grooming fix. A clean, dry vent is the strongest defense against flystrike.
Post-Grooming Care and Maintenance
The grooming session doesn't end when you set the rabbit down. What you do in the hours and days after matters. The post-grooming period is when you reinforce the positive experience and keep the coat in good condition until the next session.
Rewards and Positive Reinforcement
Your rabbit needs to learn that grooming is a good thing. Always offer a favorite treat at the end of the session. Small pieces of banana, apple, or a sprig of fresh herbs work well.
Talk to your rabbit in a calm, praising voice. The more positive the association, the easier future grooming sessions become.
What to Do with the Wool
Collect the wool you've brushed or sheared. If you're a fiber artist, you can spin it into yarn. If not, you can offer it to local spinners or dispose of it.
Never leave loose wool in the rabbit's cage. A rabbit that eats loose wool is at risk of wool block.
Setting a Grooming Schedule
Your grooming schedule depends on your rabbit's breed and coat type. Use this as a general guideline:
| Breed | Full Grooming Session | Quick Check/Spot Groom |
|---|---|---|
| English Angora | Every 5-7 days | Daily for face and vent |
| French Angora | Every 7-10 days | Every 2-3 days |
| German Angora | Every 7-10 days (plucking during sheddings) | Every 2-3 days |
| Giant Angora | Every 7-10 days | Every 2-3 days |
| Satin Angora | Every 5-7 days | Every 2-3 days |
Mark your calendar. Don't let grooming slide. An Angora rabbit without a regular grooming schedule is an at-risk rabbit.
Frequently Asked Questions
How often should I groom my Angora rabbit?
Groom your Angora rabbit at least once a week, with a full grooming session lasting 30 to 60 minutes. During heavy shedding periods, increase to every 2 to 3 days. Daily spot checks of the vent area and face wool are essential for all breeds.
Can I use human or dog grooming tools?
No. Human brushes are too soft to reach the rabbit's dense undercoat. Dog grooming tools, especially furminators and undercoat rakes, are too aggressive and can damage the rabbit's thin skin.
Use tools designed specifically for rabbits, including a metal wide-toothed comb and a fine-wire slicker brush.
Do Angora rabbits need haircuts in the summer?
Yes, shearing rabbits in summer is beneficial to help them stay cool. Shear leaving 1/8 inch of wool for protection. Never shave a rabbit completely bald, as this removes natural insulation and can lead to sunburn and overheating.
Is plucking painful for the rabbit?
Plucking should never cause pain. If you're pulling wool that's ready to release, the wool slides out with almost no resistance. If the rabbit flinches or pulls away, the wool isn't ready.
Plucking too early damages the follicles and causes pain.
How long does it take to groom an Angora rabbit?
A full grooming session takes 30 to 60 minutes once you have a routine. Experienced owners can shear a rabbit in 20 to 30 minutes. First sessions may take longer as you and your rabbit learn the process.
What's the best brush for an Angora rabbit?
A wide-toothed metal comb with 1/4-inch spacing is the most essential tool for Angora grooming. It reaches the undercoat and detects mats. A fine-wire slicker brush is useful for surface fluffing and removing loose wool between combing sessions.
Can I shave my Angora rabbit completely bald?
No. Always leave at least 1/8 inch of wool when shearing. This protective layer prevents sunburn, insect bites, and minor scrapes.
Shaving your rabbit bald removes its natural protection and increases the risk of skin damage and temperature regulation issues.