

Image source: Bing (Web (fair-use with source credit))
You've brought home a Morkie and realized this little dog's coat is basically a full-time job. Learning how to groom a Morkie isn't just about keeping them cute. It's about preventing painful mats, skin infections, and eye injuries that land tiny dogs in the vet's office.
The silky, human-like hair grows continuously and mats within days if you skip brushing.
Morkies typically weigh between 4 and 8 pounds as adults. They have a double coat with a soft undercoat and a wiry topcoat. Their skin sits close to the surface and tears easily with aggressive brushing.
Most grooming-related vet visits for toy breeds come down to three preventable mistakes: clipper burns, quicked nails, and untreated eye irritation. As of 2026, the average professional groom costs $60 to $100 per session, so mastering home grooming pays for itself quickly.
Quick Answer
Groom your Morkie daily with a slicker brush using line brushing. Bathe every 2 to 4 weeks with dog-safe shampoo. Dry thoroughly with a blow dryer set to low heat.
Trim nails every 2 to 3 weeks. Clean ears weekly. Shave the sanitary area and paw pads monthly.
Schedule a full haircut every 4 to 6 weeks.
Why Grooming a Morkie Is Different (and Riskier Than You Think)
Morkie coats are deceptive. They look fluffy, but they tangle fast. The undercoat is soft and dense.
The topcoat is longer and silkier. When those layers rub together, they create friction. Add movement, collars, and moisture, and mats form at the skin line within 24 to 48 hours of skipping a brush.
The Double-Coat Trap
A Morkie has two distinct hair layers. The undercoat is fine and cottony. The topcoat is longer and straighter.
Surface brushing only fluffs the topcoat and leaves the undercoat in knots. That's where mats start, tight against the skin where you can't see them.
Line brushing is the only way to reach both layers. You part the hair in straight rows and brush each section from skin to tip. It's like mowing a lawn.
Each pass covers a new strip of ground. We'll walk through the exact technique later in this guide.
Morkie Skin and Eyes Are Fragile
Morkie skin is thin, elastic, and often visible through the hair. That makes it easy to cut with scissors or burn with overheated clipper blades. The belly and inner thighs are especially delicate.
Their eyes are equally vulnerable. Morkies have large, protruding eyes for their skull size. A comb slip or careless scissor snip can scratch the cornea.
Corneal ulcers are painful, expensive to treat, and sometimes require surgery. We'll show you how to keep tools away from the eye area entirely.
Why Generic Small Dog Advice Fails
Most grooming advice online targets medium and large breeds. A Morkie's coat is closer to a Yorkie's, with the added complication of Maltese skin sensitivity. Generic advice like "brush daily" doesn't tell you how to brush, what tools to use, or how to handle a mat that's already formed.
The stakes are higher with a 5-pound dog. A 4% body weight blood loss from a cut nail can be dangerous. Heat exhaustion from a drying session can happen in minutes.
This guide treats those risks seriously.
The Gear You Actually Need (and What to Skip)
You don't need a professional grooming table or a $300 dryer. But you do need the right tools for a coat that mats easily and skin that damages quickly.
| Tool | Purpose | What to Look For |
|---|---|---|
| Slicker brush | Daily detangling | Fine, bent pins with a cushioned back |
| Metal greyhound comb | Checking for mats | Wide and fine teeth on one tool |
| Grooming shears | Face and paw trims | Blunt tip, 6 to 7 inches |
| Electric clippers | Sanitary and body trims | Low-noise, with #10 or #7 blades |
| Nail clippers or grinder | Nail maintenance | Guillotine style for small breeds |
| Styptic powder | Stopping nail bleeding | Must have on hand before you start |
| Ear cleaner | Weekly ear hygiene | Vet-approved, alcohol-free formula |
| Dog-specific shampoo | Bathing | pH balanced for dogs, not humans |
The Three Brushes That Matter
A slicker brush is your main tool. Look for pins that are bent at the tip, not straight. Straight pins scratch the skin.
Bent pins catch tangles without digging in. The brush pad should have some cushion so you don't press too hard.
A greyhound comb serves as your inspection tool. It has wide teeth on one end and fine teeth on the other. After brushing a section, run the comb through.
If it snags, you missed a knot. If it passes cleanly, that section is done.
A pin brush with rounded tips works for quick maintenance between proper brushings. It's not a substitute for the slicker and comb. But it helps the coat stay tidy between full grooming sessions.
Clippers and Blades
You need a clipper designed for small, quiet operation. Look for a model that runs low-noise and accepts standard snap-on combs. A #10 blade cuts to roughly 1/16th of an inch.
A #7 blade leaves about 1/8th of an inch. For a Morkie, a #10 blade is safest for the belly and sanitary areas.
Skip the cheap "pet grooming kit" that includes scissors and a comb. Those scissors are often dull and unsafe near the face. Invest in one good pair of blunt-tip shears and keep them sharp.
Dull shears pull hair instead of cutting it.
What Not to Buy
Avoid furminator-style de-shedding tools. Morkies don't shed heavily, and these tools pull out the topcoat along with the undercoat. That damages the coat texture and can leave bald patches.
Skip human hair clippers. They're not designed for dense double coats and overheat quickly.
Don't buy tear stain removers with hydrogen peroxide. They can cause chemical burns on the sensitive skin under the eyes.
The Pre-Bath Game Plan: Brushing and Dematting
Here's the golden rule of Morkie grooming: never bathe a matted dog. Water causes mats to tighten and turn into felt-like clumps that can't be brushed out. Brush first, bathe second.
That's non-negotiable.
Why You Never Bathe a Matted Morkie
When hair is already tangled, washing makes things worse. Water and shampoo cause hair fibers to swell and lock together. Air drying tightens them further.
What started as a few loose knots becomes a dense mat that requires shaving.
If your Morkie comes home with mats already formed, don't reach for scissors. A mat can be deceptively thick, and you can't see where the hair ends and the skin begins. A single snip can create a wound that needs stitches.
Work through the mat methodically with a slicker brush. Start at the edges and work inward. Hold the hair at the base to prevent pulling the skin.
If the mat is too tight to brush out, move to dematting tools designed for this job.
Line Brushing, Step by Step
Line brushing isn't a special brush. It's a technique that ensures you reach every inch of the coat.
- Lay your Morkie on their side on a non-slip surface.
- Part the hair with your fingers or a comb, starting near the spine.
- Brush the section below the part, from the skin outward.
- Move the part down an inch and repeat.
- Continue until you reach the belly.
- Flip the dog over and repeat on the other side.
- Finish with the legs, tail, and face.
That's the process. It takes 15 to 20 minutes daily. If you skip a day, expect to spend 30 minutes untangling what could have been prevented.
Use the slicker brush with short, gentle strokes. Don't drag the brush through the full length of the coat in one sweep. Short strokes let you feel resistance before you pull too hard.
The moment you feel a snag, stop and work the tangle with your fingers first.
How to Tell When a Mat Is Too Tight to Save
Some mats are brushable. Some aren't. Test the mat by trying to separate it with your fingers.
If you can work your fingertips into the center, it's probably brushable. If it feels like a single solid mass, it's too tight.
Your options for a tight mat are shaving it off with clippers or taking the dog to a professional. Many owners choose to shave the matted area and let the coat grow back. A partially shaved Morkie isn't a tragedy.
The coat fills back in within 4 to 6 weeks.
Never attempt to cut a mat with scissors. The risk of cutting skin is too high. Even a professional groomer uses clippers, not scissors, for tight mats.
Clippers with a #10 blade can safely glide just above the skin.

Image source: Bing (Web (fair-use with source credit))
Bath Time Without the Drama
Bathing a Morkie every 2 to 4 weeks keeps the coat clean and skin healthy. But the bath itself can go sideways fast without precautions. Water in the ears causes infections.
Soap left in the coat causes itching. A slippery tub causes panic. Let's fix all of that.
Getting Ready: The Setup
Before you turn on the water, set up the space. Use a sink for a small Morkie, or a bathtub with a rubber mat for better footing. The water should be lukewarm, around 98 to 102 degrees Fahrenheit.
Test it on your inner wrist the same way you'd test a baby's bottle.
Have everything within reach: shampoo, conditioner, cotton balls, a cup for rinsing, and a towel. Never leave a wet Morkie unattended. They're small, they get cold fast, and they can slip in a slick tub.
The Cotton Ball Trick That Prevents Infections
Morkies have floppy ears that trap moisture. When water gets trapped in the ear canal, it creates a breeding ground for bacteria and yeast. The result is an ear infection that smells bad, hurts the dog, and requires a vet visit.
The fix is simple: place a cotton ball in each ear before the bath. Gently insert it just inside the ear opening. Don't push it deep.
The cotton ball blocks water from entering the canal while still allowing the ear to breathe. Remove them immediately after the bath and dry the ears thoroughly.
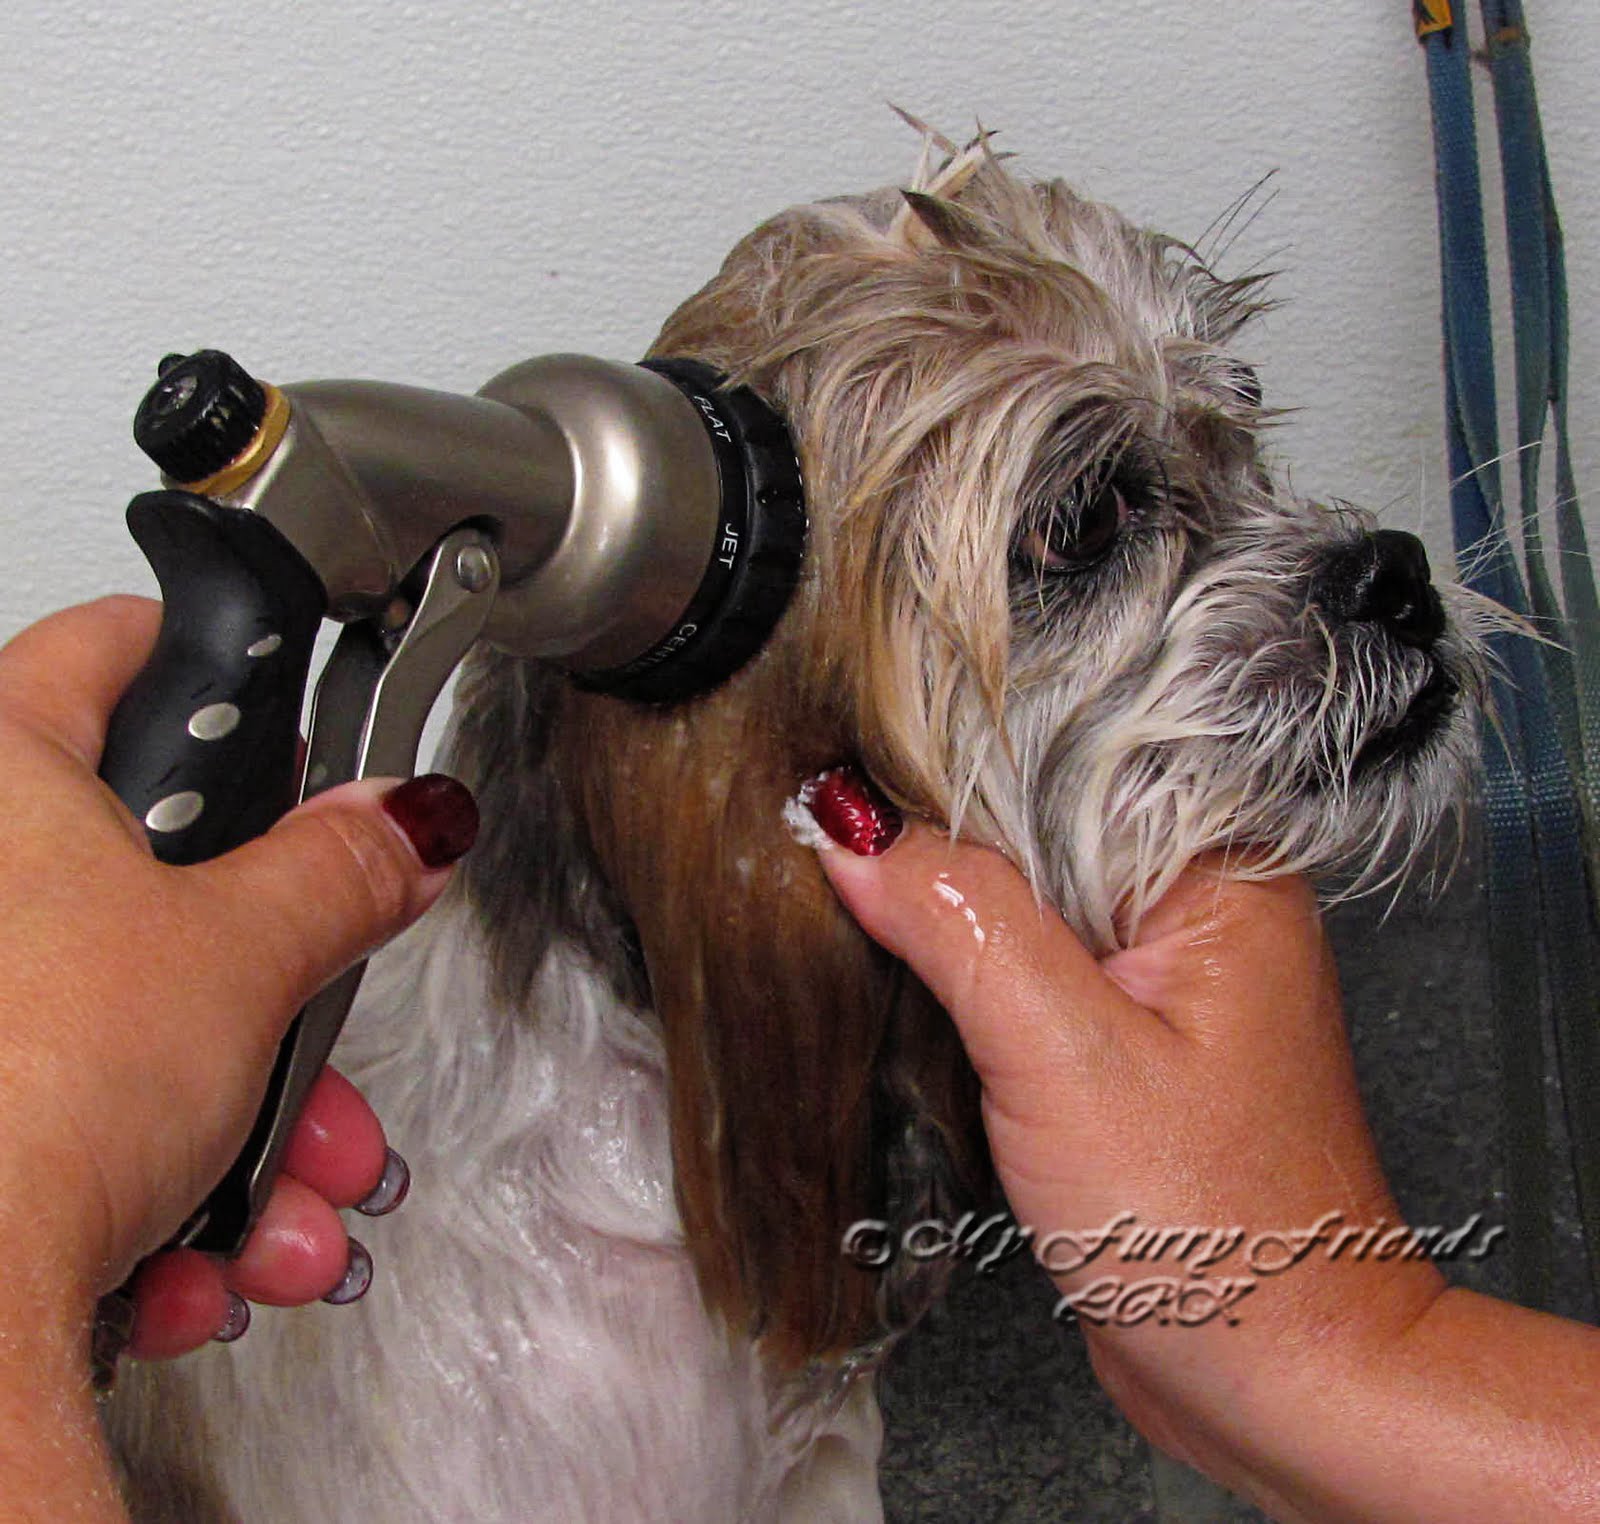
Image source: Bing (Web (fair-use with source credit))
Shampoo, Conditioner, and Rinsing
Use a dog-specific shampoo with a pH balanced for canine skin. Human shampoo is too acidic and strips natural oils. For a Morkie with sensitive skin, look for an oatmeal-based formula that soothes itching without heavy fragrance.
Dilute the shampoo before applying. A dollop mixed with water in a cup spreads more evenly and rinses out faster than concentrated shampoo. Apply it from the neck down.
Avoid the face, ears, and eyes. Use a washcloth with just water for the face.
Rinse twice as long as you think is necessary. Then rinse again. Residual soap is the most common cause of post-bath itching and hotspots.
Run your fingers through the hair until you feel no slickness.
Drying: The Critical Step
Air drying a Morkie is a recipe for mats. The wet coat clings together, and as it dries, the fibers lock into tangles. A damp Morkie also gets cold quickly.
A 5-pound dog can lose body heat fast after a bath.
Use a blow dryer set to low heat and low speed. Hold it at least 6 inches from the dog and keep it moving. Brush lightly with a slicker as you dry to keep the hair separated and straight.
This combination of heat, airflow, and brushing produces a smooth coat that resists matting.
If your Morkie is terrified of the dryer, start with a towel dry, then let them air dry in a warm room. It's not ideal, but it's safer than forcing a panicked dog through a drying session. Reintroduce the dryer gradually with treats and short sessions.
Face, Eyes, and Ears: The High-Risk Zones
The face is where grooming skills get tested. One wrong move with scissors near the eye, and you're making a trip to the emergency vet. Morkies have large, protruding eyes that sit vulnerable to scratches.
The tear staining common in this breed adds another layer of care.
Trimming the Topknot Without Poking an Eye
The "topknot" is the cute puff of hair on a Morkie's head. It's also a hazard if left unchecked. Hair falling into the eyes causes irritation, which leads to excessive tearing, which causes those brown stains.
Here's the safe way to trim around the eyes:
- Comb the hair up and away from the eyes.
- Use blunt-tip shears, never sharp-pointed ones.
- Position your fingers between the scissors and the eye.
- Cut parallel to the eye, not toward it.
- Take off small amounts. You can always trim more.
Never use electric clippers near the eyes. The vibration makes the dog flinch, and the blade can easily end up against the eyeball. Scissors with a blunt tip are safer for this precise work.
Tear Stain Management That Doesn't Burn Skin
Tear stains are a hallmark of Morkies. The brownish-red marks under the eyes come from porphyrins in tears, which stain light fur. It's cosmetic, not a health problem, but it looks messy.
Skip the commercial tear stain removers. Many contain hydrogen peroxide, which can cause chemical burns on sensitive skin. A safer approach:
- Wipe the area daily with a warm, damp cloth.
- Dry the area thoroughly afterward.
- Trim the hair short in the eye gutter to reduce tear contact with the fur.
- Consider a filtered water bowl, as some mineral content in tap water worsens staining.
If stains persist despite daily wiping, talk to your vet. Occasionally, tear staining signals blocked tear ducts or eye infections that need medical diagnosis.
Ear Hair Plucking and Cleaning: When It's Necessary
Morkies have hair that grows inside the ear canal. In some dogs, this hair traps wax and debris, leading to infections. Plucking the hair keeps the ear canal clear, but it's a controversial practice.
Some vets recommend it; others say it irritates the ear.
If your Morkie has a history of ear infections, plucking the hair likely helps. If your dog has healthy ears with minimal hair, leave it alone.
To pluck safely:
- Apply a vet-recommended ear powder to grip the hair.
- Use your fingers or hemostats to pull a few hairs at a time.
- Work in short sessions to avoid stressing the dog.
- Follow with a gentle ear cleaner on a cotton ball.
Never use cotton swabs to clean inside the ear canal. They push debris deeper. Stick to wiping the visible part of the ear and using vet-approved drops if your vet recommends them.
The Sanitary Trim and Paw Pads: Precision Work
The sanitary trim keeps urine and feces from matting into the fur around the genitals and anus. Paw pad shaving prevents slipping on hardwood floors and stops matting between the toes. Both require precision and a calm dog.
The "Potato Hold" for Safe Access
Getting your Morkie to stay still for a sanitary trim takes practice. The "potato hold" works well. Sit on the floor with your legs crossed.
Place the dog on their back in the cradle of your legs. Their head rests near your stomach. Their rear end points toward your feet.
This position gives you visual access to the belly and sanitary area. It also stabilizes the dog so they can't squirm away mid-trim. Keep a hand on their chest to maintain gentle pressure.
Clipper Safety for Bellies and Private Areas
Use a #10 blade for the sanitary area. The short length prevents matting without cutting into the skin. Hold the clipper flat against the skin and move in the direction of hair growth.
Don't press down. Let the blade do the work.
The belly and inner thighs have loose, elastic skin. It's easy to nick if you press hard or use a dull blade. Keep the clipper moving at a steady pace.
Stop frequently to check the blade temperature. If it's warm to the touch, let it cool down or use a blade coolant spray.
Take breaks if your Morkie gets restless. A squirming dog is a recipe for a cut. Rushing through the sanitary trim is never worth the risk.
Paw Pad Shaving to Prevent Slipping and Matting
Hair grows between the paw pads and around the toes. If left long, it mats into felted clumps that pull on the skin when the dog walks. It also makes the paw slippery on smooth floors, which is dangerous for a small dog.
To shave the paw pads:
- Hold the paw firmly but gently.
- Spread the toes apart to expose the hair between the pads.
- Use clippers with a #10 blade, angled away from the skin.
- Trim the hair flush with the bottom of the pad.
- Trim the hair between the toes on the top of the paw.
- Check for any mats or debris trapped in the hair.
Never use scissors between the toes. The skin is thin, and the dog may flinch. Clippers are safer.
Nails: The Step Everyone Dreads
Nail trimming is the most stressful part of grooming for many owners. Morkies often have black nails, which makes the quick hard to see. The quick is the blood vessel and nerve running through the nail.
Cutting it causes pain and bleeding.
Black Nails and the Quick: How to Read Them
With white or clear nails, you can see the pink quick through the nail. With black nails, you can't. That makes the process trickier but not impossible.
Look at the underside of the nail. In a black nail, the quick appears as a dark shadow visible from certain angles. In practice, the safest approach is to trim small amounts at a time.
Take off a thin sliver, then check the cross-section of the cut surface. If you see a dark spot in the center, you're close to the quick. Stop there.
For grinding, the same principle applies. The grinder slowly removes layers. When you see a pinkish or grayish spot at the center of the nail, you're at the quick.
Stop.
Grinder vs. Clipper for a Fidgety Morkie
| Tool | Pros | Cons |
|---|---|---|
| Guillotine clipper | Fast, cheap, quiet | Higher risk of quicking |
| Grinder | Slower, less risk of quicking | Noisy, takes longer |
A grinder is gentler on the nail structure and less likely to split the nail. It also sands down the nail in a way that leaves a smoother edge. The downside is the noise, which some dogs hate.
A guillotine clipper is faster but riskier. One misjudgment, and you've cut the quick. For a beginner with a fidgety Morkie, start with a grinder.
It gives you more control.

Image source: Bing (Web (fair-use with source credit))
What to Do When You Quick the Nail
It happens to everyone. You misjudge the length, snip too far, and the nail starts bleeding. Don't panic.
The bleeding looks worse than it is.
Keep styptic powder or cornstarch on hand. Dip the bleeding nail into the powder and apply gentle pressure with a cotton ball. Hold for a couple of minutes.
The bleeding should stop. If it doesn't stop after 10 minutes, call your vet.
A Realistic Grooming Schedule That Saves You Money
Consistency is everything with a Morkie coat. A small daily investment prevents bigger problems down the road.
Weekly Maintenance Checklist
- Brush daily with a slicker brush and comb.
- Wipe the eyes daily with a warm, damp cloth.
- Check the ears weekly for redness, odor, or discharge.
- Clean the ears weekly with a vet-approved cleaner.
- Brush the teeth 2 to 3 times per week.
Monthly Deep-Groom Routine
- Bathe with dog-safe shampoo every 2 to 4 weeks.
- Trim nails every 2 to 3 weeks.
- Shave the sanitary area.
- Shave the paw pads.
- Trim the topknot around the eyes.
When to Book a Professional
Every 4 to 6 weeks:
- Full haircut if you're not comfortable doing it yourself.
- Gland expression if needed.
- Any grooming task that exceeds your comfort level.
Professional grooming costs $60 to $100 per session. If you can handle the weekly brushing and maintenance at home, you can extend the time between appointments.
Mistakes That Send Owners to the Vet
Some grooming mistakes are minor. Others end in a trip to the emergency clinic. Here are the ones to avoid at all costs.
Clipper Burn and Razor Burn
Clipper burn looks like red, irritated skin. It usually happens when the blade is dull or overheated. A hot blade pressed against sensitive skin causes friction burns.
In severe cases, the skin blisters.
Prevent clipper burn by keeping blades sharp, using coolant spray when they heat up, and never pressing the clipper into the skin. If you see redness after a groom, apply a soothing balm approved by your vet.
Cutting the Eye Area and Skin Folds
The skin around a Morkie's eyes and muzzle is incredibly thin. A single snip with scissors can create a deep wound that needs stitches. Even a small cut near the eye can cause a corneal ulcer.
Always use blunt-tip shears. Always keep your fingers between the scissors and the eye. And always cut parallel to the eye, never toward it.
The "Worse Before It's Better" Shave-Down Reality
If you let mats go too long, the only option is a full shave-down. The dog comes home looking bald and embarrassed. The coat grows back, but it takes 4 to 6 weeks to reach a reasonable length.
A shave-down isn't a failure. It's a reset. The key is to prevent it from happening again with a daily brushing routine.
When to Stop and Call a Professional
There's no shame in admitting when a grooming task is beyond your skill level. Knowing when to stop protects your dog from harm.
Signs Your Morkie Is Too Stressed to Continue
If your Morkie is shaking, panting, or trying to escape, stop what you're doing. Pushing through a panicked dog's resistance increases the risk of injury for both of you. Take a break, offer treats, and try again later.
If the dog remains anxious, book a professional groomer.
Medical Red Flags
- Persistent itching or scratching that causes hair loss
- Red, inflamed, or bleeding skin
- Discharge from the eyes, ears, or nose
- Lumps, bumps, or swelling under the skin
- Difficulty walking or standing after a groom
These warrant a vet visit before any further grooming.
How to Find a Groomer Experienced with Toy Breeds
Look for a groomer who works with toy breeds specifically. Ask how they handle nervous dogs. Check if they use force-free techniques.
Read reviews from other small dog owners. A good groomer will gladly answer your questions about their experience with Morkies.
The 5-Minute Daily Habit That Prevents Everything
The secret to a mat-free Morkie is a quick daily routine.
The Quick Once-Over That Catches Mats Early
Spend 5 minutes each day running a slicker brush through your Morkie's coat. Focus on the high-friction areas: behind the ears, under the collar, and around the legs. These spots tangle first.
Catching a knot early means brushing it out in seconds instead of shaving it off later.
Making Grooming a Bonding Ritual, Not a Battle
Pair grooming with treats and praise. Keep sessions short and positive. Your Morkie will learn that the brush means good things.
Over time, they'll tolerate and even enjoy grooming.
Training Tips for a Cooperative Puppy
Start handling your Morkie's paws, ears, and face from day one. Touch their nails while they're eating. Play with their ears while they're relaxed.
The younger they are when they learn that touch means comfort, the easier grooming becomes.
Frequently Asked Questions
How short can I shave my Morkie without risking sunburn?
A #10 blade leaves about 1/16th of an inch, which may expose sensitive skin to UV rays. If your Morkie spends time outdoors, keep at least a #7 blade length (1/8th inch) and apply dog-safe sunscreen to exposed areas.
Why does my Morkie's hair smell even after a bath?
Residual shampoo, trapped moisture, or a bacterial infection in the skin can cause persistent odor. Rinse thoroughly, dry completely, and check for any signs of skin infection. If the smell persists, consult your vet.
Can I use human hair conditioner on my Morkie?
No. Human conditioners have a pH that's wrong for canine skin and can cause irritation. Use a dog-specific conditioner that's pH balanced for their skin.
How do I stop my Morkie from biting during grooming?
First, check for signs of pain or discomfort. If it hurts, the dog will bite. Use positive reinforcement, take frequent breaks, and keep sessions short.
If biting persists, consult a professional trainer or behaviorist.