
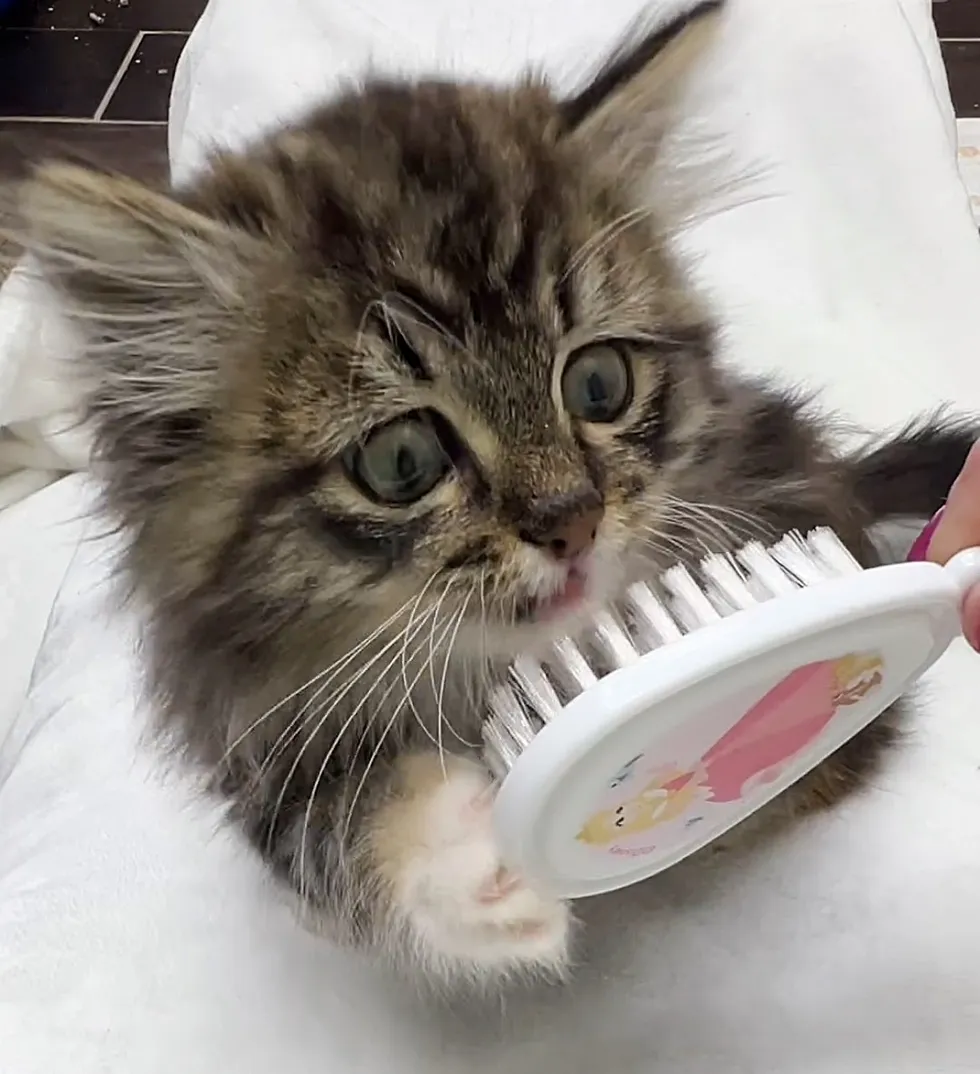
Image source: Bing (Web (fair-use with source credit))
Quick Answer
You can start grooming a kitten at 2 to 3 weeks old with gentle handling and soft brushing. Nail trims begin around 5 to 6 weeks. Full baths wait until 8 weeks minimum.
The socialization window between 2 and 7 weeks is critical for teaching kittens to accept grooming.
The question "when can you start grooming a kitten" has a simpler answer than most owners expect: earlier than you think, but with very different tasks at each age. Most first-time kitten owners picture a squirming, hissing ball of needle claws and assume grooming is something to postpone. That's backward.
The developmental window between 2 and 7 weeks is when kittens form lifelong associations with human handling. Miss that window, and you're fighting an uphill battle for the next 15 years. Veterinary guidance from the American Association of Feline Practitioners emphasizes early handling as a cornerstone of feline behavioral health.
As of 2026, this remains the standard of care.
Let's break down exactly what you can do at each age, and why it matters more than you think.
Why Starting Early Actually Matters
Kittens don't wake up one day ready to be brushed, bathed, and nail-trimmed. That willingness requires deliberate, early exposure. There's a narrow window where it works best, and it closes faster than most owners realize.
This window is called the socialization period. For kittens, it runs from roughly 2 to 7 weeks of age. During this phase, kittens are primed to accept novel experiences as normal.
They haven't yet developed the fear response that makes new things terrifying.
The Scientific Backing for Early Handling
Researchers have studied this for decades. Multiple peer-reviewed studies in animal behavior confirm that kittens handled gently during the first 7 weeks of life grow into cats that are more relaxed around people. They're less likely to bite, scratch, or panic during vet visits.
They tolerate restraint better and recover from stress faster.
Here's what early grooming actually buys you:
- Vets that don't require sedatives for routine exams. A cat that accepts handling everywhere means easier blood draws, temperature checks, and ear exams.
- No fight over nail trims. Maintaining your adult cat's claws without a wrestling match is a small miracle.
- Easier mat detection. You'll run your hands over your cat's body regularly and spot lumps, bumps, fleas, and skin issues early.
- A calmer cat overall. Grooming becomes a bonding ritual, not a battle.
The "One-Shot Deal" Reality
Once that socialization window closes, training gets considerably slower. You'll need weeks of counter-conditioning and trust-building. You'll deal with more hissing and thrashing.
The independent, mouthy teenager phase that starts around 12 weeks makes everything harder.
But here's the good news: it's never too late to start. It just gets harder the longer you wait.
Kitten Development Timeline: What's Happening Under the Fur
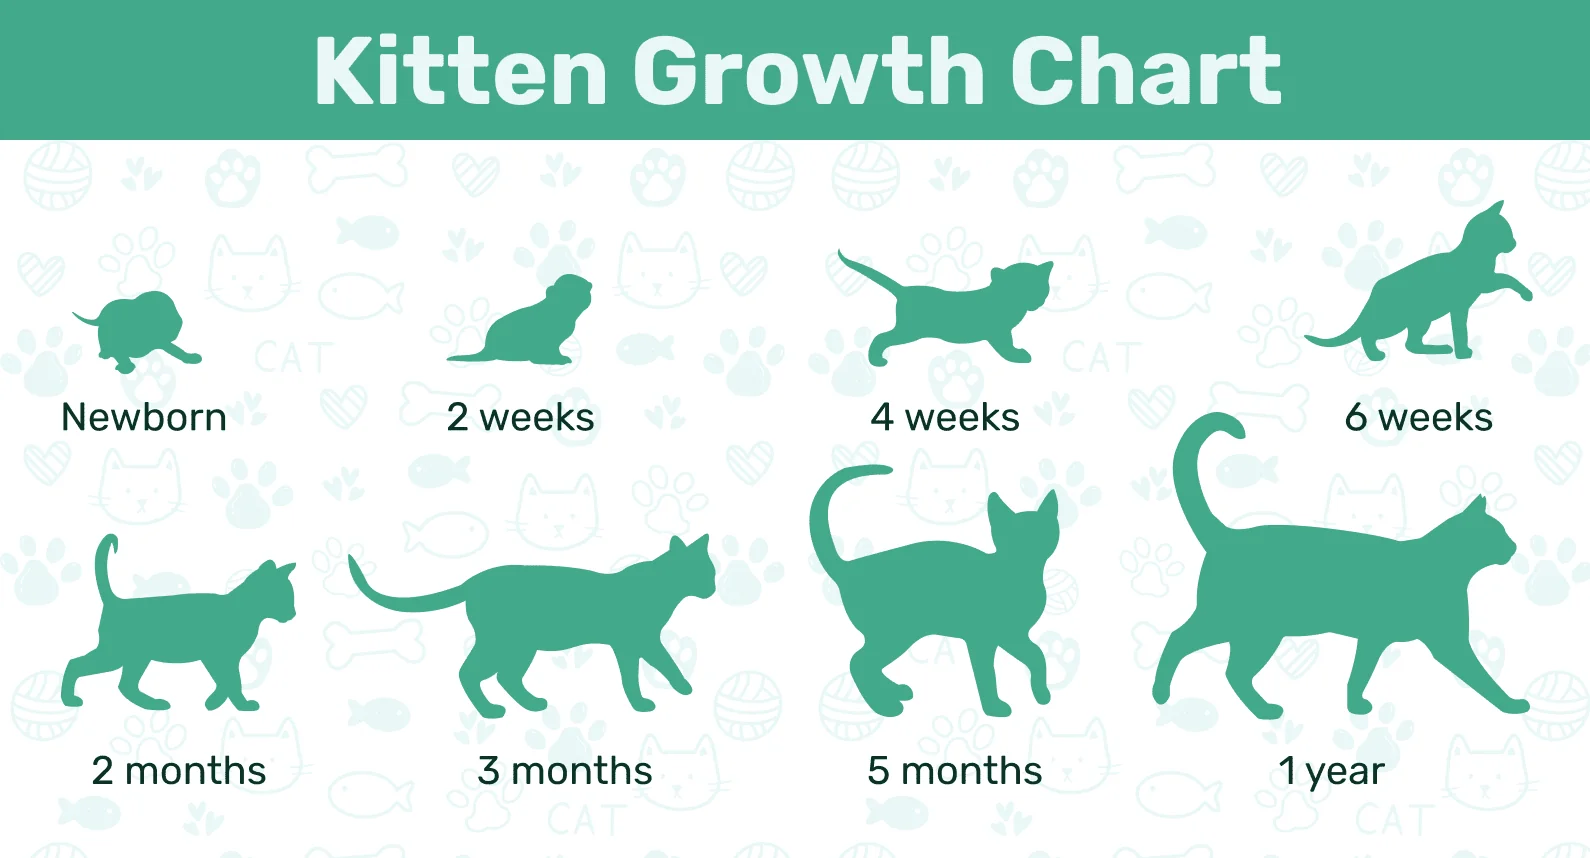
Image source: Bing (Web (fair-use with source credit))
Your kitten's body changes fast between weeks 1 and 12. Each stage brings new physical abilities and new limits. Grooming requires understanding exactly where she is in this progression.
Week 0 to 2: The Neonatal Stage
A newborn kitten is essentially a sensory-undeveloped creature. Her eyes are sealed shut. Her ear canals are closed.
She can't regulate her own body temperature and relies entirely on her mother and littermates for warmth.
Do not bathe a kitten in this stage. She'll lose body heat faster than she can produce it, risking hypothermia. You also shouldn't be doing any grooming here at all.
The only thing you can do is gentle handling. Pick her up for a minute or two multiple times a day. Touch her paws, her ears, her back.
This builds neural pathways that associate human touch with safety.
Week 2 to 4: The Transitional Stage
Eyes open around 10 to 14 days. Ear canals open around 2 to 3 weeks. Kittens begin to hear and see, and their world expands dramatically.
This is where soft-brush desensitization begins.
Take a soft baby brush or a very soft kitten slicker. Stroke it gently over her back once or twice. Keep sessions under 2 minutes.
Offer treats before and after. The goal is not a clean coat, it's a tiny baby learning that brushes are safe.
Week 4 to 8: The Socialization Stage
This is the critical period. Kittens learn social skills, litter box behavior, and handling tolerance during these weeks.
Now you can push grooming more deliberately:
- Touch paws and ears. Get her used to you manipulating her toes. Press each toe pad lightly so she's used to the pressure.
- Short brush sessions. 2 to 3 minutes daily with a soft kitten brush.
- Introduction to nail trims. Around 5 to 6 weeks, begin clipping just the very tips of her claws. Keep it to two or three nails at a time.
Week 8 to 12: The Juvenile Stage
Kittens get more independent and more cautious. This is the point where a lack of early handling shows up as resistance.
You can now introduce:
- First baths if needed (8 weeks minimum).
- Ear cleaning with a soft, damp cotton ball or pad.
- Full grooming sessions of 5 to 10 minutes.
The Training Cliff at 12 Weeks
After 12 weeks, kittens lose their natural openness to new experiences. Their fear response sharpens. This doesn't mean you can't train an older kitten.
It means the approach changes. You'll need slower introductions, higher-value treats, and more patience. Every step becomes a negotiation rather than a simple exposure.
Before You Touch a Brush: Pre-Grooming Prep
Jumping straight into grooming a 3-week-old kitten is a recipe for stress. For everyone. Here's what you need to do first.
Read Your Kitten's Body Language
Cats communicate everything with their bodies. You just have to know what to look for.
Relaxed and ready:
- Loose, floppy body posture
- Purring
- Half-closed, slow-blinking eyes
- Tail held high with a slight curve at the tip
Stressed or scared:
- Flattened ears pressed against the head
- Tail lashing or thrashing
- Hissing or growling
- Dilated pupils
- Trying to escape or hide
If you see stress signals, stop. Pick up the kitten for just a few seconds, then let her down. Force leads to more fear, not less.
Set Up a Safe, Quiet Space
Grooming shouldn't happen in the middle of a noisy living room. Cats pick up on chaotic environments instantly.
Choose a small, quiet room. A bathroom or bedroom works well. Close the door.
Turn off the TV or music. Let the kitten sniff her grooming tools before you use them.
Per AAFP guidelines, a calm environment is one of the strongest predictors of handling success.
The Towel-Wrap Swaddle
This is the single most useful technique for nervous kittens. It's also called the "kitten burrito."
Lay a small towel flat on a table or your lap. Place the kitten on top, facing away from you. Fold the left side over her body and tuck it under her right side.
Fold the bottom up over her hindquarters. Finally, fold the right side over her back and hold it gently.
This wraps her legs and torso snugly. Most kittens settle immediately because it mimics the security of the litter pile. You'll have full access to her head, ears, front paws, and shoulders.
Session Length: Short Is Non-Negotiable
Here's the number to remember: 2 to 5 minutes.
That's it. A full grooming session for a kitten under 12 weeks should never exceed that. Their attention span is tiny and their stress tolerance is even smaller.
You can do multiple short sessions per day. That's better than one long one.
Rewards: The Currency of Trust
Treats aren't optional. They're insurance.
Before you start, have a small pile of high-value treats nearby. Something soft and smelly works best. Give one treat before you even touch the brush.
Give another during the session if the kitten stays calm. Give a final treat at the end every single time.
She'll start associating the grooming tools with food rewards. That connection is gold.
The Step-by-Step Grooming Introduction Plan
Now we get into the actual process. Follow this sequence in order, and you'll have a well-groomed kitten without the war stories.
Step 1: Handling Practice (2 to 3 Weeks)
No tools yet. This is all about your hands.
Pick up the kitten 4 to 6 times a day for 30 to 60 seconds each time. Hold her against your chest. Stroke her back, her head, her ears, her tail.
Gently squeeze each paw and touch each toe. Look at her ears and mouth.
The goal is desensitization. She learns that being handled is safe and predictable.
Step 2: Brush Introduction (3 to 4 Weeks)
Now you add a tool.
Use a very soft brush or a soft-bristle baby brush. Avoid anything with stiff plastic bristles. Stroke her back and the sides of her body once or twice.
Stop there. End with a treat.
Do this daily. Increase the number of strokes over the course of a week. By the end of week 4, your kitten should accept a full back-and-sides brushing without complaint.
Step 3: Paw and Ear Desensitization (4 to 5 Weeks)
This is the step most owners skip. Then they wonder why their adult cat freaks out at nail trims.
At 4 weeks, start pressing each toe pad gently with your thumb. Hold for 2 seconds, then release. Do all four paws on each front foot, then move to the back feet.
You're literally teaching her that toe pressure leads to treats.
For the ears, use your fingertip to massage the base of each ear. Lift the ear flap and look at the canal. You don't need to clean it yet.
Just get her used to the sensation.
Step 4: First Nail Trim (5 to 6 Weeks)
Here's where the real work begins.
At 5 to 6 weeks, those baby claws are sharp enough to sting. Start clipping just the very tip of two or three nails per session. Use a kitten-sized nail clipper. Never use human nail clippers on a kitten; they crush the nail rather than cutting cleanly.
Per Cornell University College of Veterinary Medicine, your goal is both a shorter nail and a kitten that tolerates the process.
Step 5: First Bath (8 Plus Weeks)
Baths are different. They're the highest-stress grooming task because they involve water, restraint, and temperature management.
Only bathe a kitten if she's actually dirty. If she's just a little dusty, use kitten-safe wipes or a waterless foam shampoo. Wet baths are for spilled food, flea infestations, or coming home from a shelter covered in questionable substances.
When you do bathe, keep the water shallow and warm. Use a kitten-safe shampoo specifically formulated for felines. Human shampoo is a hard no; it disrupts the pH balance of a kitten's skin and causes irritation.
Step 6: Blow Dryer Acclimation (8 to 12 Weeks)
Most kittens hate the blow dryer. That's not a personality flaw, it's a survival instinct. The noise alone is overwhelming.
Start slowly. Turn the dryer on the lowest heat and lowest speed setting. Hold it at least 2 feet away from the kitten.
Point it toward her back, not her face. Keep it running for just 5 seconds. Stop, reward, repeat.
Gradually reduce the distance and increase the duration. Most kittens never fully accept the dryer, but they'll tolerate it if they've been conditioned from an early age.
Your Grooming Sessions: At a Glance
| Age | Grooming Task | Duration Limit |
|---|---|---|
| 2 to 3 weeks | Handling practice only | 1 minute per session |
| 3 to 4 weeks | Soft brush introduction | 2 minutes per session |
| 4 to 5 weeks | Paw and ear desensitization | 3 minutes per session |
| 5 to 6 weeks | First nail trim (tips only) | 3 minutes per session |
| 8+ weeks | First bath if needed | 5 minutes max |
| 8 to 12 weeks | Blow dryer acclimation | 5 to 10 seconds per exposure |
Nail Trimming: The Highest-Risk Task for Beginners

Image source: Bing (Web (fair-use with source credit))
Nail trimming carries the highest risk of injury for both of you. It's also the grooming task that most owners dread the most. Here's how to do it safely, every time.
Understanding the Quick
The quick is the pink area inside the nail that contains blood vessels and nerves. Cut into it, and you'll cause real pain and bleeding. Your kitten will remember that pain for a long time.
On light-colored nails, the quick is clearly visible as a pink line. On dark nails, it's nearly impossible to see, which makes trimming more dangerous.
The rule is simple: cut only the white, translucent tip of the nail. If you're not sure, cut less. You can always trim more later.
Clippers vs. Grinders
There are two main tools for kitten nail maintenance:
Clippers:
- Fast and quiet
- Best for precise cuts
- Risk of crushing the nail if blades are dull
- Requires a steady hand and good angle
Grinders:
- Slower but more forgiving
- No risk of crushing
- Noise and vibration can scare kittens
- Best for smoothing rough edges after clipping
For most owners, clippers are the better starting point. They're easier to control and quieter, which is crucial for a nervous kitten.
How to Hold the Paw
Hold the kitten in your lap with her back against your chest. Use your non-dominant hand to grasp her front paw. Apply gentle pressure on the toe pad to extend the claw outward.
This gives you a clear view and angles the nail for a clean cut.
The Cut
Make a single, confident cut at a 45-degree angle. Don't twist the clipper. Don't hesitate.
A clean, fast cut hurts less than a slow, sawing motion.
What to Do If You Hit the Quick
You will hit the quick eventually. Every cat owner does. Here's what to do:
- Stay calm. Your kitten will yowl, and it will sound dramatic. Cats are theatrical.
- Apply styptic powder to the bleeding nail. It stops bleeding within seconds.
- Keep the kitten still for a minute so the blood can clot.
- End the session immediately. Offer a treat, then put her down.
If you don't have styptic powder, cornstarch or flour pressed firmly against the nail works in a pinch. Never use hydrogen peroxide; it damages the tissue and delays healing.
Nail Trim Frequency
Kittens grow nails fast. Plan on trimming every 1 to 2 weeks. Their needle-sharp baby claws will need more frequent attention in the early weeks.
Handling the Wiggler
Some kittens simply won't hold still. That's normal.
If you're dealing with a wiggler, use the towel-wrap swaddle from earlier. Wrap the kitten snugly, leaving one paw exposed. Trim that paw, unwrap, reward, and try the next paw later.
You don't have to do all four feet in one session.
Bathing a Kitten: When It's Necessary vs. When to Skip It

Image source: Bing (Web (fair-use with source credit))
Bathing a kitten is the most stressful grooming task for everyone involved. The good news is, most kittens never need a full bath. Cats are excellent self-cleaners.
The even better news? When you do need to bathe, there's a safe way to do it.
When a Bath Is Actually Necessary
- Flea infestation. A bath can help remove fleas, but never use adult-strength flea shampoo on a kitten under 8 weeks old. Check with your vet first.
- Spilled food or litter stuck in the fur. Sticky substances can attract more dirt and cause skin irritation.
- Diarrhea contamination. Fecal material on the coat needs to be removed promptly.
- Coming home from a shelter. Shelters often bathe kittens before adoption, but some need a follow-up at home.
- Hairless breeds. Sphynx and Donskoy cats need weekly baths to remove skin oils that their coat can't absorb.
When to Skip the Bath
- Kittens under 8 weeks old. Their ability to regulate body temperature is still developing. The stress of a bath can cause hypothermia.
- Minor dust or dirt. Use a damp cloth or kitten-safe grooming wipes instead.
- "Just because." Bathing too often strips natural oils from the skin and coat, causing dryness and irritation.
Generally, cats only need baths every 4 to 6 weeks at most. For most kittens, that's plenty.
The Steps for a Safe Kitten Bath
Step 1: Prep everything before you get the kitten.
Fill the sink or tub with 2 to 3 inches of warm water. The temperature should feel like bath water for a human infant: about 100 to 102 degrees Fahrenheit. Have the shampoo, a cup for rinsing, and a towel ready.
Step 2: Use shampoo designed for kittens.
Never use human shampoo, dish soap, or adult cat shampoo. These disrupt the pH balance of a kitten's skin and can cause burns and irritation. Use a kitten-specific shampoo with a mild, pH-balanced formula.
Step 3: Keep the kitten's head above water.
Wet the body thoroughly, gently. Apply a small amount of shampoo and work it into a lather. Keep the suds away from the face, especially the eyes, nose, and ears.
If you need to clean the face, use a damp cloth.
Step 4: Rinse completely.
Soap residue is a major cause of skin irritation. Rinse until the water runs clear. This takes longer than you think.
Step 5: Dry immediately.
Wrap the kitten in a warm, dry towel. Pat dry, don't rub. Then switch to a second dry towel and continue patting until she's mostly dry.
Keep her in a warm room away from drafts until she's completely dry.
Step 6: Skip the blow dryer.
Unless you've already acclimated your kitten to the noise, skip it. The noise and airflow are overwhelming. Towel drying is safer and less stressful.
If you must use a dryer, keep it on low heat and low speed, held at least 2 feet away.
How Often Can You Bathe a Kitten?
| Kitten Type | Bath Frequency | Notes |
|---|---|---|
| Short-haired, indoors | Only when actually dirty | Usually every 4-6 weeks max |
| Long-haired | Every 4-6 weeks if needed | More frequent brushing prevents baths |
| Hairless (Sphynx, Donskoy) | Weekly | Skin oils accumulate without fur to absorb them |
| Under 8 weeks | Never unless medically necessary | Risk of hypothermia and stress |
Grooming by Coat Type: What Your Specific Kitten Needs
Different coats demand different grooming routines. What works for a short-haired tabby won't work for a long-haired Maine Coon.
Short-Haired Kittens
The easy category. Short-haired kittens need minimal grooming.
Brush once or twice a week with a soft bristle brush or a rubber grooming mitt. This removes loose fur, distributes natural oils, and cuts down on shedding. Weekly nail trims still apply.
Short-haired kittens rarely need baths. They keep themselves clean, and their coats don't mat easily.
Long-Haired Kittens
The high-maintenance category. Long-haired kittens need daily brushing, even as babies.
Their coat mats easily, especially behind the ears and under the armpits. A slicker brush followed by a wide-tooth comb works well.
Start grooming sessions at 5 minutes. Build up to 10 to 15 minutes as your kitten gets used to it. Always be extra gentle around the belly and tail, two areas where even the most patient kitten may resist.
Hairless Breeds (Sphynx, Donskoy, Peterbald)
Hairless cats require a different kind of grooming: weekly bathing.
Without a coat, their skin produces excess oils that sit on the surface. The oils attract dirt, create a greasy residue, and can clog pores. Weekly baths keep their skin healthy.
Use a gentle, hypoallergenic shampoo formulated for cats. Avoid shampoos with strong fragrances or harsh chemicals. After the bath, dry the kitten thoroughly with a warm towel.
Hairless kittens also need ear cleaning more frequently since they lack the protective ear hair that keeps debris out.
Seasonal Shedding
Cats shed more heavily in spring and fall. Even kittens follow this pattern to some degree.
During peak shedding seasons, increase brushing frequency for short-haired and long-haired cats. For long-haired breeds, daily brushing becomes even more important when the undercoat is turning over.
Quick Coat Reference
| Coat Type | Brushing Frequency | Bath Frequency | Key Tools |
|---|---|---|---|
| Short-haired | 1-2 times weekly | Only when dirty | Bristle brush, grooming mitt |
| Long-haired | Daily | Every 4-6 weeks | Slicker brush, wide-tooth comb |
| Hairless | Wipe down weekly | Weekly | Soft cloth, hypoallergenic shampoo |
Common Mistakes That Send Kittens to the Vet
Some grooming mistakes are harmless. They just make the session longer. Others can genuinely injure your kitten or create long-term behavioral problems.
Here's what to avoid.
Using Human Shampoo
The pH of human skin is about 5.5. Cat skin, which is closer to 7.5, is more alkaline. This difference might sound small, but it matters.
When you use human shampoo on a cat, it disrupts the natural acid mantle of the skin. The result is dry, itchy, flaky skin, sometimes with redness and inflammation. Repeated exposure can cause hair loss and open sores.
Per veterinary sources at the American Veterinary Medical Association, cat-specific grooming products are the only safe choice for bathing.
Using Adult Cat Shampoo on a Kitten
Adult cat shampoos are more concentrated and may contain ingredients that are harsh on younger, more sensitive skin. Always use a shampoo specifically labeled for kittens.
Using Cotton Swabs in the Ears
The fastest way to rupture a kitten's eardrum is to stick a cotton swab in her ear canal. The eardrum is thin, and a swab can easily reach deep enough to damage it.
To clean a kitten's ears, use a soft, damp cotton ball or pad. Wipe the outer ear visible area only. Never push anything inside the ear canal.
If the ears look dirty, waxy, or smell bad, that's a vet visit, not a grooming session.
Forcing a Scared Kitten
If a kitten is hissing, thrashing, or trying to escape, that's not a kitten that needs "tough love." That's a kitten that will develop a lifelong fear of grooming if you push through.
Stop. Let her go. Try again in a few hours with treats and a shorter session.
Every forced interaction sets your training backwards.
Bathing Too Frequently
Even with the right shampoo, over-bathing destroys the natural oils that keep a cat's coat healthy. Dry, brittle fur becomes prone to matting and static electricity. Irritated skin becomes itchy, which leads to scratching and sometimes secondary infections.
Stick to the frequency guidelines in the table above. When in doubt, don't bathe.
Pulling at Mats
Matting happens. When it does, don't grab the mat and pull to separate it. That pulls the skin painfully and may tear it.
Instead, use a de-matting comb or a pair of blunt-nosed scissors. Work slowly through the mat, cutting along its length rather than across. For mats located close to the skin, a vet or professional groomer is the safest option.
Trimming Nails Too Short
The quick is the pink line inside your kitten's nail. Cut into it and you'll hit blood vessels and nerve endings, causing pain and bleeding.
When in doubt, cut only the very tip. You can always trim more. A clean, comfortable trim beats a painful, rushed one.
Starting Too Late
If you adopt a kitten at 14 weeks and she's never been handled or groomed, the process will be harder. Not impossible, but harder.
Begin with short handling sessions. Build trust first. Move to brushes and nail trims slowly.
Consider consulting a professional groomer or your vet for advice if you're struggling.
Reading Your Kitten's Signals: Stress vs. Normal Fussiness
You need to know the difference between a kitten that's mildly annoyed and one that's genuinely scared. The difference determines whether you push through or back off.
Normal Fussiness
These signals mean your kitten is uncomfortable, but she's coping.
- Squirming or wriggling in your lap
- Soft meowing or complaining
- Trying to turn her head away from the brush
- Trying to push your hand away with a paw
When you see these, you can continue the session. But keep it short. Fussiness escalates to fear quickly.
Stress Signals
These signals mean she's genuinely overwhelmed. Stop immediately.
- Hissing or growling. Not a playful sound. This is real.
- Flattened ears. Pinned back tight against her skull.
- Tail lashing. Rapid side-to-side movement, unlike the gentle twitch of a relaxed tail.
- Dilated pupils. Her eyes will look like black saucers in a bright room.
- Panting. Open-mouth breathing is a sign of extreme stress.
- Attempting to flee. She stops trying to work with you and just wants out.
- Freezing. The kitten goes completely still. This is a fear response, not compliance.
The "Stop and Try Again Later" Rule
If you see any of the signs above, set the kitten down gently. Give her a treat and let her go. The session is over.
Wait at least a few hours before trying again. If the stress happened repeatedly, give it a full day. Each attempt must be a positive experience, even if it's just a few seconds of contact.
A Word on Medication and Professional Help
If your kitten consistently reacts with extreme stress to handling, talk to your veterinarian. They can assess whether there's a medical cause, a neurological issue, or a behavioral problem that requires professional help.
Some cats benefit from calming pheromone sprays or supplements. In rare cases, anti-anxiety medication is warranted. Your vet is the only one who can safely recommend these options.
When to Call a Professional Groomer or Your Vet
Grooming at home is doable for most owners. But there are times when you need backup.
Red Flags for a Vet Visit
- Skin irritation. Redness, bumps, open sores, or hair loss during grooming.
- Fleas or ticks. Especially on a kitten under 8 weeks old. Don't use over-the-counter flea treatments without veterinary advice.
- Ear discharge or a bad smell from the ears. This could indicate ear mites or an infection.
- Matted fur that's tight against the skin. Trying to pull or cut this off at home risks injury.
- You can't see the quick on dark nails. This is a day-one skill you're still learning, which is fine, but if you're not confident and your kitten won't hold still, a vet tech or groomer can do it safely.
When to See a Professional Groomer
- Severe matting. If mats have formed close to the skin, this requires clippers. Pulling on these causes real pain.
- Sanitary trims. Removing fur around the rear end, a delicate task best done with a guarded clipper blade.
- Your kitten is past 12 weeks and has never been handled. A professional groomer with experience in anxious cats can start the desensitization process.
What to Expect at a Professional Grooming Session
Professional kitten grooming typically includes:
- A warm bath with kitten-safe shampoo
- Gentle brushing and deshedding
- Nail trimming
- Ear cleaning (outer ear only)
- Sanitary trim if requested
Price varies by region and groomer. Most kitten grooming sessions run between $40 and $80. Always choose a groomer with experience handling young kittens.
They'll be gentler and more patient.
The Long-Term Payoff: Grooming as Bonding
Done right, grooming isn't just maintenance. It's a ritual that deepens the bond between you and your cat.
More Than a Clean Coat
Every grooming session is an opportunity to:
- Check for health issues early. Lumps, bumps, skin changes, and external parasites are easier to spot when you're handling your cat regularly.
- Build and maintain trust. Grooming becomes a daily or weekly ritual where she knows she's safe and gets treats.
- Reduce hairballs. Regular brushing removes loose fur she'd otherwise swallow.
- Lower stress overall. Groomed cats are more comfortable, which means less anxiety-related behavior.
The First Year Cycle
The first year is about establishing habits. Sessions start at 2 to 3 minutes when she's tiny and expand to 10 or 15 minutes as she grows. By her first birthday, grooming will be a normal part of her routine.
Making It a Lifelong Habit
Your cat will live 15 to 20 years. The grooming habits you establish now will carry through that entire life.
A senior cat that's comfortable being groomed is much easier to maintain. You'll be able to help with hygiene issues that older cats struggle with, like untidy rear ends or stiff joints that make self-cleaning difficult. You'll catch serious health issues like tumors or skin infections months earlier than a cat owner who never handles their cat.
Grooming isn't just something you do to your cat. It's something you build together, week by week, for years.
Frequently Asked Questions
Can I groom a 4-week-old kitten?
Yes, but only with a soft brush and gentle handling. At 4 weeks, focus on short brushing sessions of 2 to 3 minutes. Also start touching her paws and ears to desensitize her to handling.
She's still too young for baths or nail trims.
How often should I brush my kitten?
Short-haired kittens need brushing 1 to 2 times weekly. Long-haired kittens need daily brushing to prevent mats. Hairless breeds don't need brushing but do need weekly wiping or bathing.
During seasonal sheds, increase brushing frequency for all kittens.
Is it safe to bathe a 6-week-old kitten?
Only if medically necessary. The American Association of Feline Practitioners recommends waiting until 8 weeks for a full bath. A 6-week-old kitten has limited ability to regulate body temperature.
If she's covered in something dangerous, call your vet before bathing.
What if my kitten hates being brushed?
Go slower and shorter. Keep sessions under 2 minutes. Use high-value treats before, during, and after.
Try a different brush texture, some kittens hate slicker brushes but tolerate soft bristle brushes or grooming mitts. If she still resists, stop for a few days and try again.
Can I use adult cat shampoo on a kitten?
No. Adult cat shampoo is more concentrated and may irritate a kitten's sensitive skin. Use a shampoo specifically labeled for kittens.
If you don't have kitten shampoo, plain warm water is safer than human shampoo or dish soap.
When can I start nail trimming my kitten?
Around 5 to 6 weeks old, start trimming just the tips of two or three nails per session. Use kitten-sized clippers and avoid the quick. Do this daily until the kitten becomes comfortable, then move to every 1 to 2 weeks.