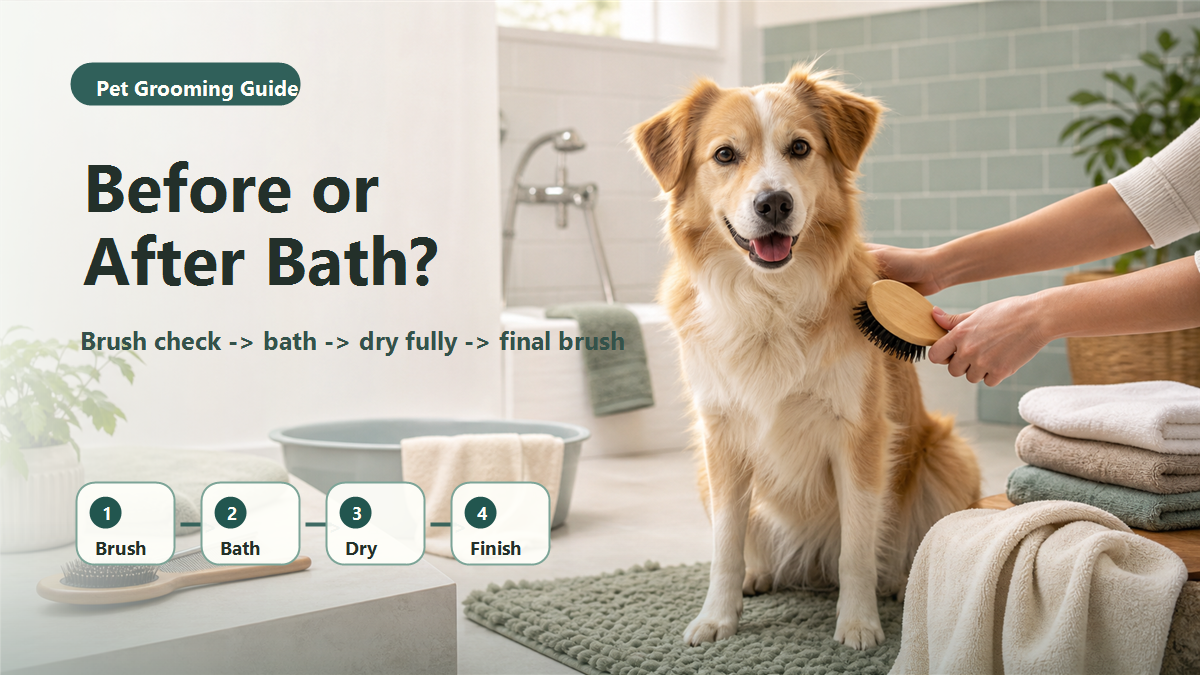
Most dogs should be checked and lightly brushed before a bath, then dried fully and brushed again afterward. The before-bath pass finds loose hair, dirt, small tangles, skin problems, ear or eye concerns, paw issues, and stress signs before water makes the session harder. The after-bath pass finishes the clean, dry coat. For a broader routine, use the dog grooming checklist for beginners.
If the coat is tightly matted, painful, skin-close, or hiding sores, do not bathe over it and do not cut it out at home. Stop and use a professional groomer or veterinarian.
Quick Answer: What Happens Before vs After the Bath?
| Grooming step | Best timing for most dogs | Why | |
|---|---|---|---|
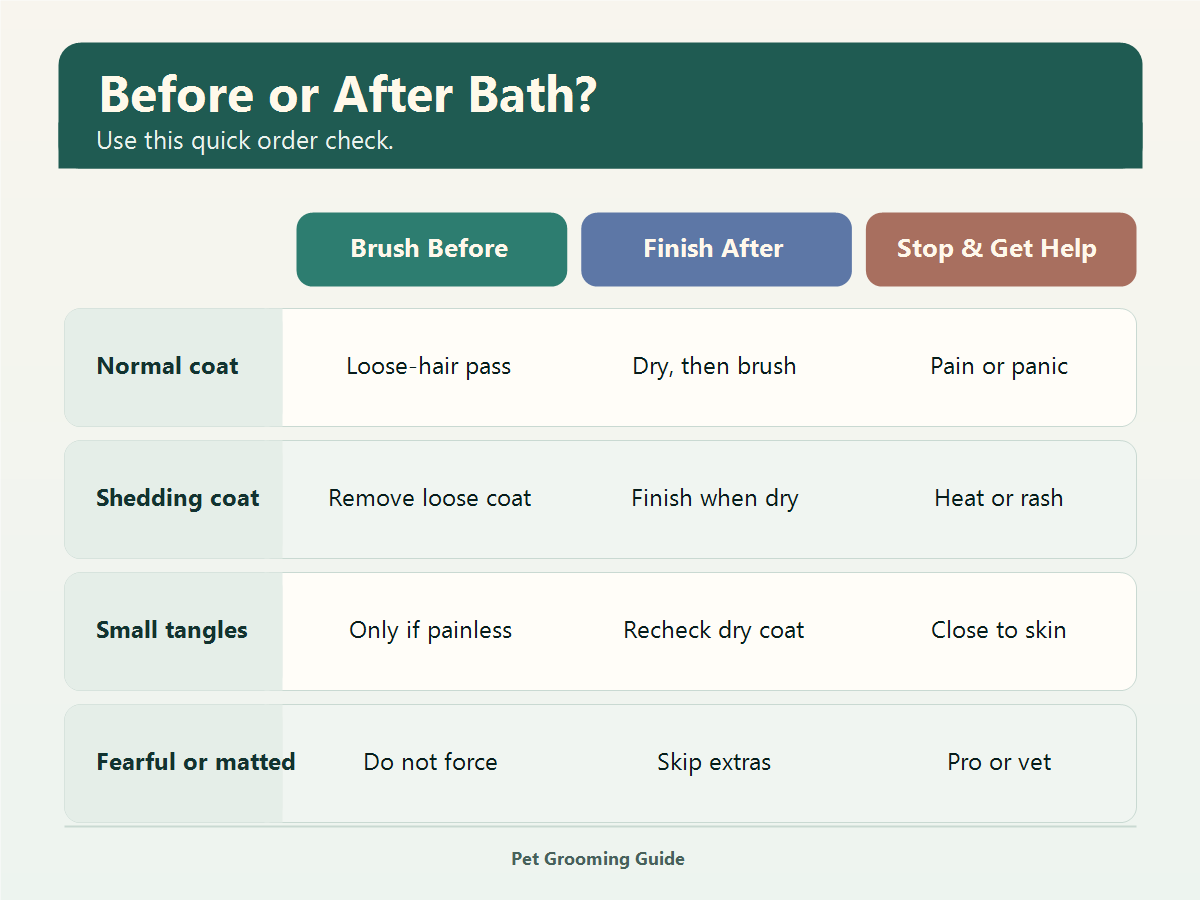
| Coat and skin check | Before the bath | Find tangles, mats, sore skin, parasites, lumps, wounds, and stress before the coat is wet. | |
| Brush or comb check | Before and after | Brush lightly before water; finish only after the coat is fully dry. | |
| Small loose tangles | Before the bath, only if painless | Water can tighten tangles. Stop if the hair pulls skin or the dog flinches. | |
| Tight mats | Neither at home | Do not bathe, cut, or force-comb tight mats. Use a groomer or vet. | |
| Nails | Separate session if needed | Nails can happen before, after, or another day. Calm handling matters more than timing. | |
| Ears and eyes | Check before; wipe gently only when safe | Pain, discharge, redness, swelling, squinting, or odor are vet signs, not routine grooming jobs. | |
| Final brush and finish | After the dog is fully dry | Damp coat can hide tangles and moisture near the skin. |
| Day | Practice goal | Keep it short |
|---|---|---|
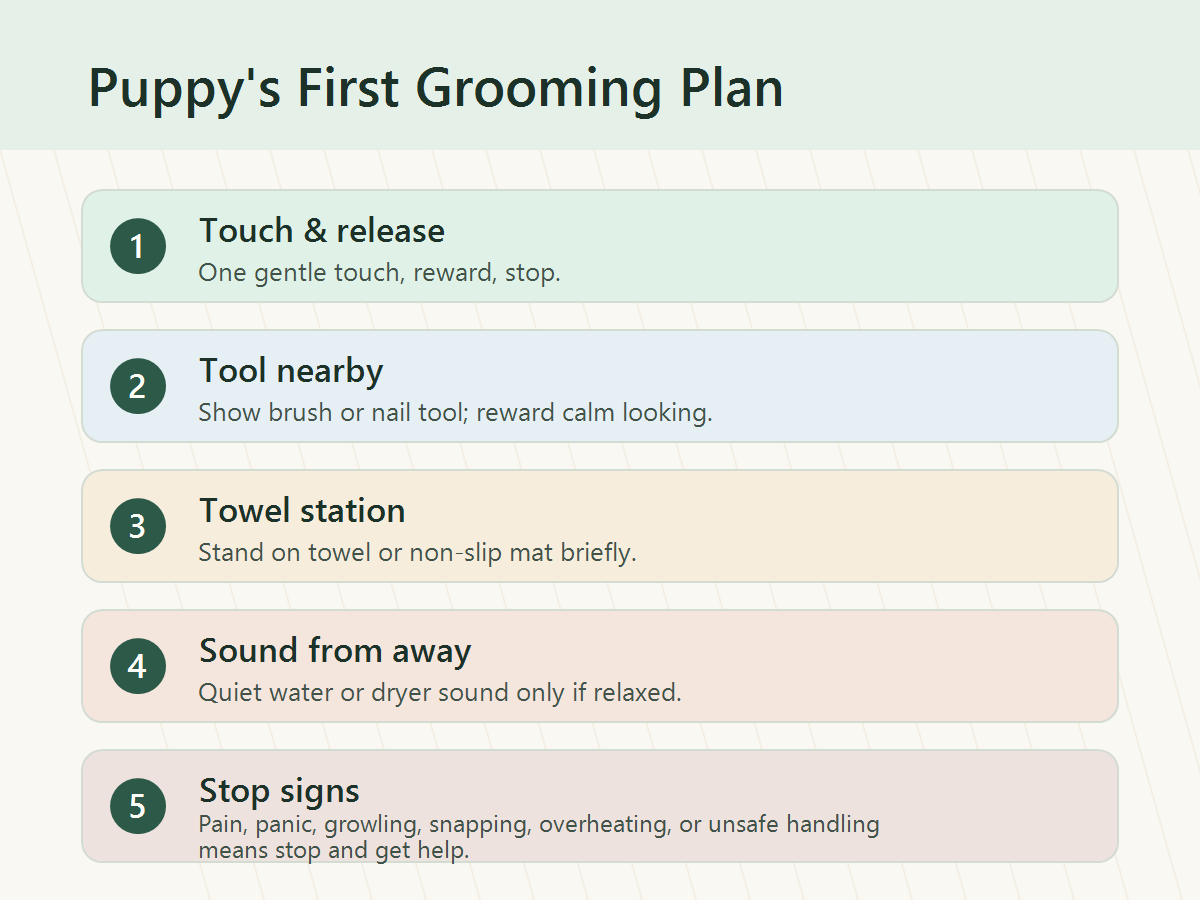
| 1 | Touch the shoulder and back, reward, then release. | About 30 seconds. |
| 2 | Touch each paw briefly without holding it tightly. | 30 to 60 seconds. |
| 3 | Touch the ears, collar area, chest, and tail area lightly. | 30 to 60 seconds. |
| 4 | Show the brush or comb, reward calm interest, and put it away. | Several brief repetitions. |
| 5 | Make one soft brush stroke on an easy area. | Under 1 minute. |
| 6 | Stand on a towel or non-slip mat and step off again. | About 1 minute. |
| 7 | Touch a nail tool near the paw without trimming. | About 30 seconds. |
| 8 | Use a towel rub on the chest, side, or back. | About 1 minute. |
| 9 | Visit the bath area with no water and no bath. | 1 to 2 minutes. |
| 10 | Let your puppy hear quiet water from a comfortable distance. | About 30 seconds. |
| 11 | Touch a damp cloth to a paw, chest, or easy coat area. | About 30 seconds. |
| 12 | Play a quiet dryer or clipper sound at a distance only if your puppy stays calm. | A few seconds. |
| 13 | Combine an easy brush stroke with the towel or mat station. | 1 to 2 minutes. |
| 14 | Repeat the easiest successful routine and stop early. | End on calm. |
If your puppy moves from curious to worried, make the next step easier. If your puppy panics, snaps, bites, yelps, guards a body area, or cannot settle, stop the plan and ask a veterinarian, qualified trainer, or professional groomer for help.
Touch-Tolerance Scorecard
Use this scorecard during every grooming practice. It helps you decide whether to continue, make the step easier, or stop.
| Score | Puppy signs | What to do |
|---|---|---|
| Green | Loose body, curious, can take rewards, comes back toward you, recovers quickly. | Continue briefly, then stop while it is still easy. |
| Yellow | Pulls away, yawns, lip licks, turns head away, hides, stiffens, refuses rewards. | Pause, reduce the step, shorten the session, or return to hand touch only. |
| Red | Growls, snaps, bites, panics, yelps, freezes, guards a body area, or seems painful. | Stop. Call a veterinarian, qualified groomer, or qualified trainer as appropriate. |
AVSAB’s humane training statement supports reward-based methods and cautions against aversive methods. For puppy grooming, that means you make the step easier instead of using punishment, harsh restraint, or force.
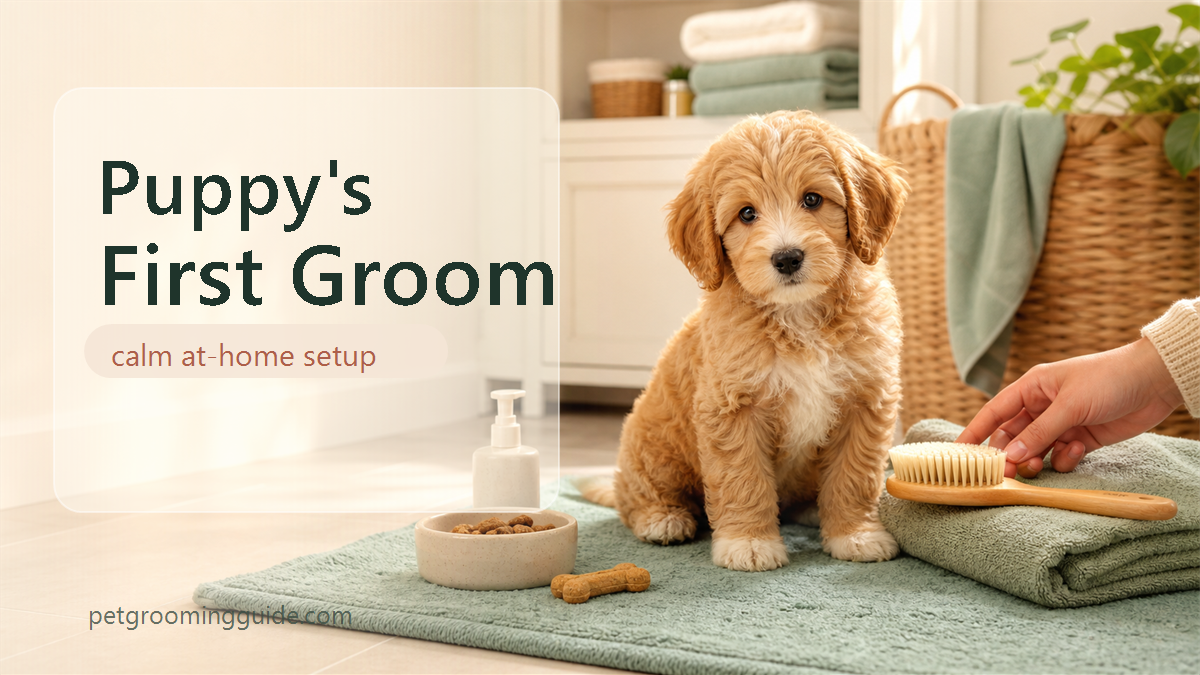
First Brush, First Bath Setup, and First Nail Practice
For the first brush, choose an easy area such as the shoulder, side, chest, or back. Touch with your hand first. If your puppy stays loose, make one gentle brush stroke in the direction the coat grows, reward, and stop.
Do not start with mats, the belly, feet, ears, tail area, or anywhere your puppy guards. Do not cut mats out with scissors. If the coat is already tangled close to the skin, painful, or widespread, ask a professional groomer or veterinarian for help. For broader home-safety context, see common dog bathing mistakes before you attempt a full bath.
For the first bath setup, practice the bath area before using water. Use a non-slip surface, keep the room comfortable, prepare towels, and avoid spraying the eyes, ears, and nose. When a real bath is needed, use lukewarm water and a dog or puppy shampoo that fits your puppy’s health needs.
For nail practice, touch the paws and let the nail tool appear nearby before any trimming. If you do not know where the quick is, or your puppy pulls away hard, yelps, bleeds, limps, or guards a paw, stop and get guidance.
The ASPCA’s dog grooming tips cover basic brushing, bathing, ear, and nail care. Keep puppy work smaller than an adult routine and route pain, skin changes, ear odor, discharge, redness, or injury to your veterinarian.
Grooming Sounds Without Overwhelming Your Puppy
Dryers, clippers, running water, and nail tools can be scary if they arrive all at once. Introduce sound from a distance, at a low level, for a few seconds. Pair calm noticing with a reward or break, then stop.
Do not point a dryer at your puppy’s face, ears, or eyes. Avoid hot air, long sessions, and any setup that makes your puppy pant hard, drool heavily, try to escape, or seem overheated. If your puppy shows heavy panting, weakness, collapse, repeated vomiting, distress, or heat-related concern, stop grooming and contact a veterinarian right away.
How to Prepare for the First Professional Groomer Visit
Ask your veterinarian about vaccine and exposure risk before scheduling a public or professional grooming visit. Ask the groomer what they require, what services are appropriate for a first puppy visit, and how they handle puppies who are still learning.
The first visit may be a short introduction instead of a full bath, haircut, nail trim, and blow-dry. Coat type, health, vaccine guidance, matting, behavior, and the groomer’s policies all matter.
After the first two weeks of practice, use a longer-term dog grooming schedule by coat type to decide what needs regular attention. If your puppy is already worried about brushing, slow down and use the gentler troubleshooting steps in how to brush a dog that hates being brushed.
When to Stop and Ask for Help
Call your veterinarian for illness, wounds, parasites, skin irritation, redness, swelling, discharge, eye problems, ear odor or pain, limping, suspected pain, overheating, vaccine uncertainty, medication questions, or any medical concern.
Call a professional groomer for coat maintenance beyond your skill level, painful or tight mats, haircut planning, sanitary trimming, face trimming, or any work near sensitive areas that you cannot do calmly and safely.
Call a qualified trainer or behavior professional for severe fear, growling, snapping, biting, panic, repeated escape attempts, or handling that is not improving with easier steps. Bite-risk grooming is not a home practice project.
If your puppy is calm enough for a voluntary station behavior, Fear Free’s chin-rest guidance can help you understand cooperative-care practice. Do not use it to hold a puppy in place through fear or pain.
FAQ
When should I start grooming my puppy at home?
You can start gentle at-home handling and grooming introductions early if your puppy is healthy and the sessions are short, clean, and calm. Ask your veterinarian about vaccine timing, public exposure, and individual health risks.
Should the first puppy grooming include a full bath?
Not always. Many puppies do better with touch, towel, brush, mat, and bath-area practice before a full bath. A full bath can wait unless your puppy truly needs one.
When can my puppy go to a professional groomer?
Ask your veterinarian and the groomer. Timing depends on vaccine guidance, local illness risk, your puppy’s health, coat needs, and the groomer’s requirements.
What if my puppy bites the brush?
Slow down. Show the brush, reward calm looking, and put it away before your puppy grabs it. Do not chase, scold, pry, or turn brushing into a wrestling game.
What if my puppy is already scared of grooming?
Use easier steps and stop before panic. For growling, snapping, biting, severe fear, or a puppy who cannot recover after a break, ask a qualified trainer, veterinarian, or professional groomer for help.
Can I trim my puppy’s face, feet, or sanitary area at home?
Only if you have the skill, lighting, tool control, and a calm puppy. For most beginners, face, eye-area, paw, sanitary, and haircut work are safer with a professional groomer.
Bottom Line
A puppy’s first grooming at home should build trust in tiny steps. Practice touch, brush sight, towel handling, bath-area setup, paw handling, and quiet sounds before expecting a full groom. For the wider routine after puppy introductions, use the full how to groom a dog at home guide. Stop for fear, pain, skin or ear trouble, eye concerns, overheating, unsafe handling, vaccine uncertainty, or any veterinary concern.
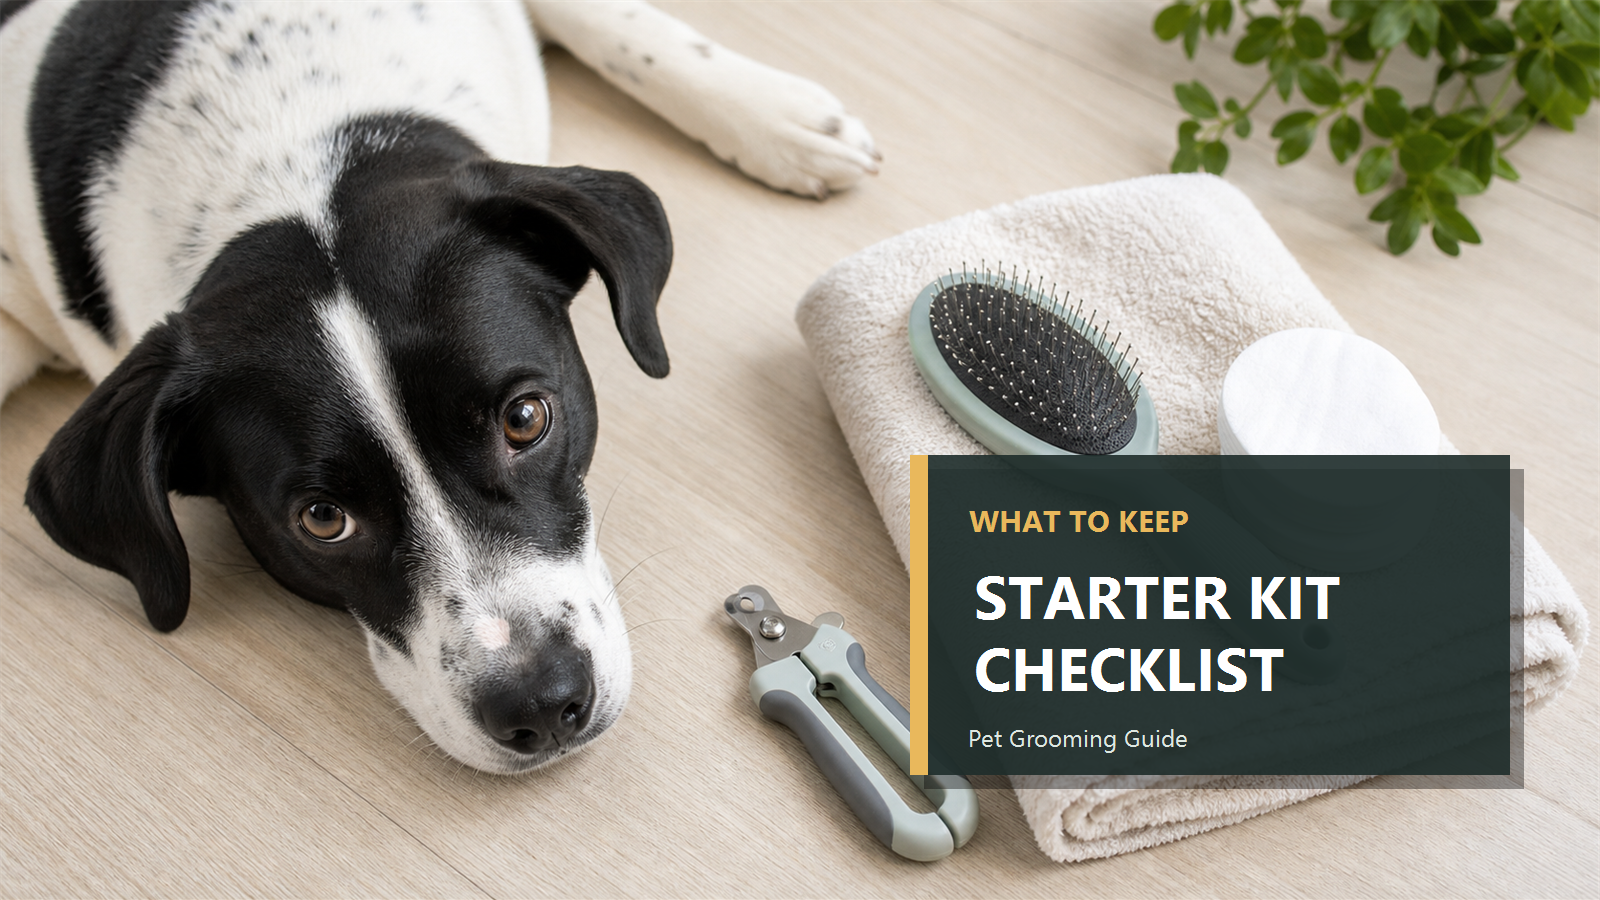
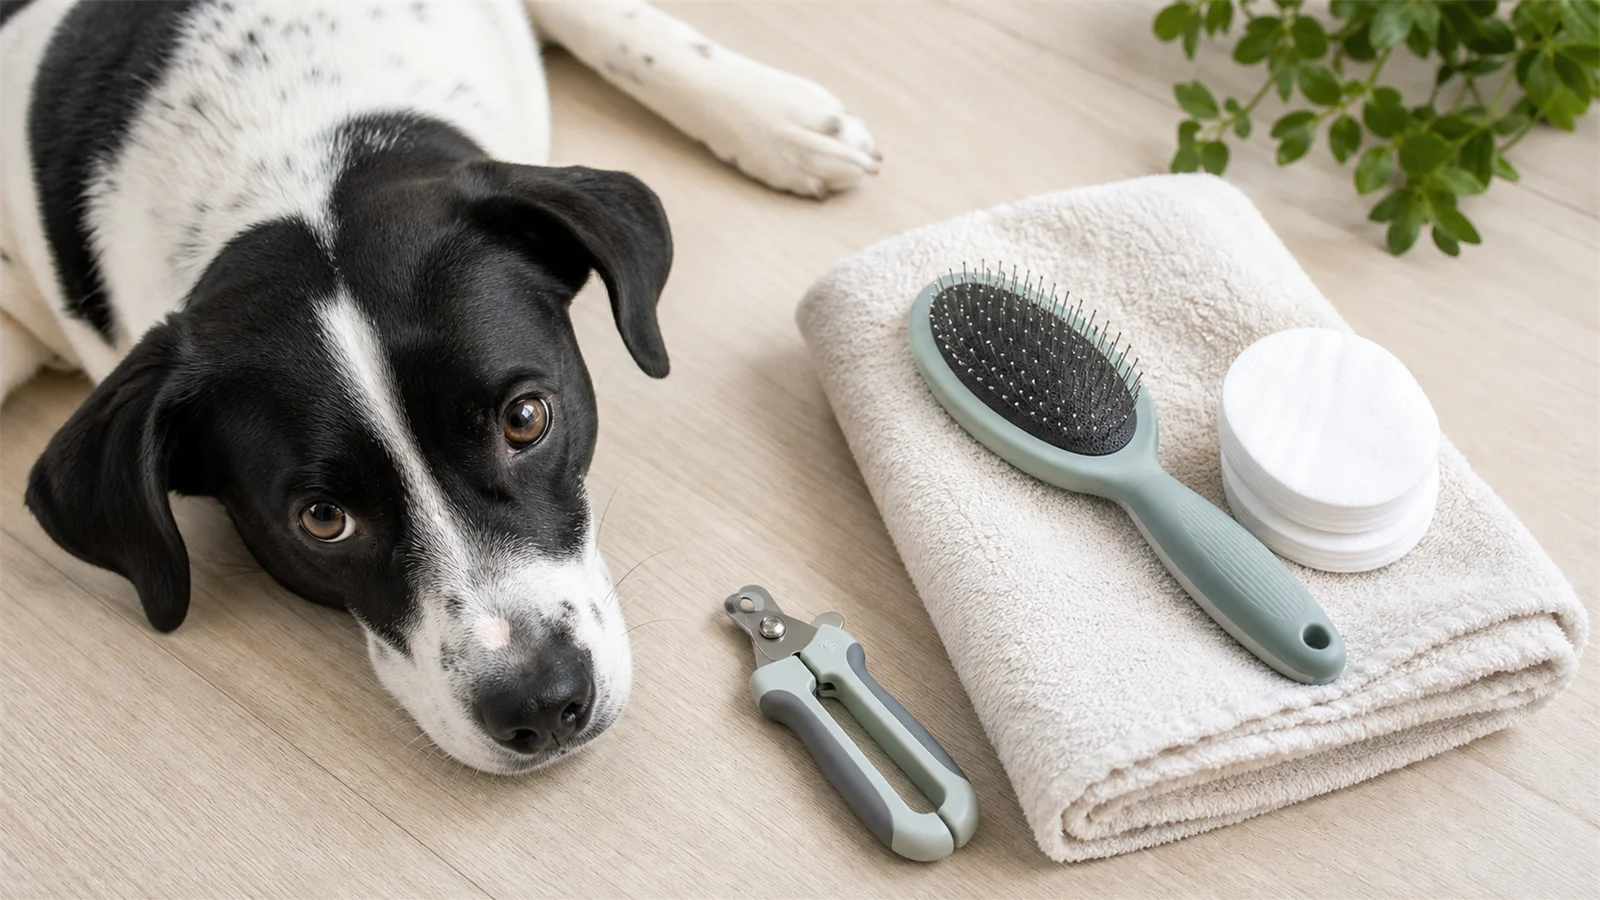
Dog Grooming Kit Checklist for Beginners
A beginner dog grooming kit should cover routine brushing, bathing, drying, nails, paws, gentle face and ear-area cleanup, safe setup, comfort breaks, and dry storage. It does not need professional tools, brand-specific bundles, medicated products, sedatives, restraints, dematting blades, or anything meant to replace a groomer or veterinarian.
Use this checklist by category. The goal is not to buy everything at once. The goal is to know what belongs in a safe starter kit, what can wait, and what should stay out of a beginner home kit.
Starter Dog Grooming Kit Checklist
| Category | What to include | Why it belongs |
|---|---|---|
| Brush and comb category | A coat-appropriate brush or comb category | Helps remove loose coat and find tangles early |
| Bath basics | Dog-safe shampoo category and towels | Supports routine bathing without human products |
| Drying | Absorbent towels and a safe drying area | Reduces trapped moisture after baths |
| Nails and paws | Nail tool category and paw-check supplies | Supports routine inspection and cautious nail care |
| Face and ear-area wiping | Soft cloths or wipes approved for dogs | Keeps cleanup gentle and surface-level |
| Setup | Non-slip mat and good lighting | Helps prevent slipping and rushed handling |
| Storage | Dry container, labels, and cleaning schedule | Keeps tools organized and easier to inspect |
| Comfort | Treats, breaks, and a calm session plan | Helps the dog learn grooming in small steps |
This page stays category-level on purpose. Specific products, brands, costs, retailer links, and rankings belong outside this informational checklist.
Original Starter, Optional, Stop Matrix
Pet Grooming Guide original framework: build the kit in three lanes: starter items, optional later items, and stop-and-call boundaries.
| Task area | Starter kit | Optional later | Stop and call |
|---|---|---|---|
| Brushing and comb checks | Coat-appropriate brush/comb category | Extra coat-specific tools | Severe mats, painful mats, skin redness, swelling, or discharge |
| Bath and dry | Dog-safe shampoo category and towels | Extra drying aids if safe and appropriate | Chemical exposure concern, sores, bleeding, or panic |
| Nails and paws | Nail tool category, towel, and light | Paw-hair trimming tools only with skill | Limping, pain, bleeding, swelling, or embedded object |
| Ears and face | Soft cloth or wipe category | None without a clear need | Ear pain, discharge, eye symptoms, or facial pain |
| Tool care | Dry storage, labels, and inspection routine | Inventory log | Damaged cords, cracks, rust, sparks, overheating, or wet electric tools |
| Comfort | Break plan, treats, and short sessions | Training or acclimation plan | Panic, aggression risk, unsafe handling, or forced restraint |
Optional Items That Can Wait
Optional tools depend on coat type, comfort level, and whether the basic routine is already calm and repeatable.
- Clippers or trimmers can wait until the dog is comfortable with sound and handling.
- Deshedding tools can wait until you understand coat type and pressure risk.
- Specialized combs can wait until you know where tangles form.
- Travel-size duplicates can wait until the home kit is stable.
- Any tool with blades, cords, batteries, chemicals, or sharp edges can wait until you can inspect and store it safely.
If a tool comes with a manual or label, that instruction is the authority. Stop using damaged tools, wet electric tools, missing guards, cracked housings, rusty blades, or anything that sparks, overheats, smells like burning, or feels unsafe.
What Does Not Belong in a Beginner Kit
Do not build a home kit around advanced or medical tasks. These are not beginner grooming supplies:
- Sedatives or calming medications.
- Restraint systems for forced handling.
- Medicated shampoos chosen without veterinary direction.
- Pesticide products chosen as grooming shortcuts.
- Wound-care supplies for treating grooming injuries.
- Dental scaling tools.
- Dematting blades for painful or severe mats.
- Ear medications.
- Tools meant for electrical repair, blade sharpening, or clipper repair.
The safer choice is a modest kit and a clear stop rule. When the task exceeds your skill, your dog is distressed, or the skin or coat does not look normal, pause the home session and route to the right professional.
Storage and Cleaning Matter
A kit is safer when it is easy to inspect. Store tools dry, away from bath areas, and separated from household cleaners. Keep labels and manuals with any item that has blades, cords, batteries, or chemicals.
After each session, remove hair from brushes and clippers where appropriate, let damp items dry fully, and discard anything damaged. For the broader routine, pair this kit page with the dog grooming checklist for beginners.
When to Skip Grooming and Call Someone Else
Stop the session and call a veterinarian or professional groomer for severe mats, painful mats, wounds, sores, bleeding, redness, swelling, discharge, persistent odor with irritation, ear pain or discharge, eye symptoms, limping, pain, panic, aggression risk, breathing trouble, chemical exposure concern, or unsafe handling.
Call the manufacturer or service route for damaged electrical tools, cracked housings, sharp or broken blade teeth, rust, overheating, sparking, burning odor, missing guards, or wet electric tools.
FAQ
What should be in a dog grooming kit for beginners?
A beginner kit should include safe categories for brushing, bathing, drying, nails, paws, surface-level face and ear-area cleanup, non-slip setup, comfort breaks, and dry storage. It should not start with advanced or medical tools.
Do I need clippers in a beginner dog grooming kit?
Not always. Clippers can wait until the dog is comfortable with handling and sound, and until you understand safety, blade heat, guards, and manufacturer instructions.
Should a dog grooming kit include ear medicine or medicated shampoo?
No. Ear medications, medicated shampoos, pesticide products, and treatment supplies should be used only with appropriate veterinary direction.
Is this a product buying guide?
No. This is a category checklist. It intentionally avoids brands, models, costs, retailer links, product rankings, product tables, and buying CTAs.
Bottom Line
A safe beginner dog grooming kit is modest, organized, and category-based. Start with brushing, bathing, drying, paw checks, surface-level cleanup, setup, comfort, and storage basics. Leave severe mats, medical signs, forced handling, damaged electrical tools, and treatment products to the right professional route.
Sources
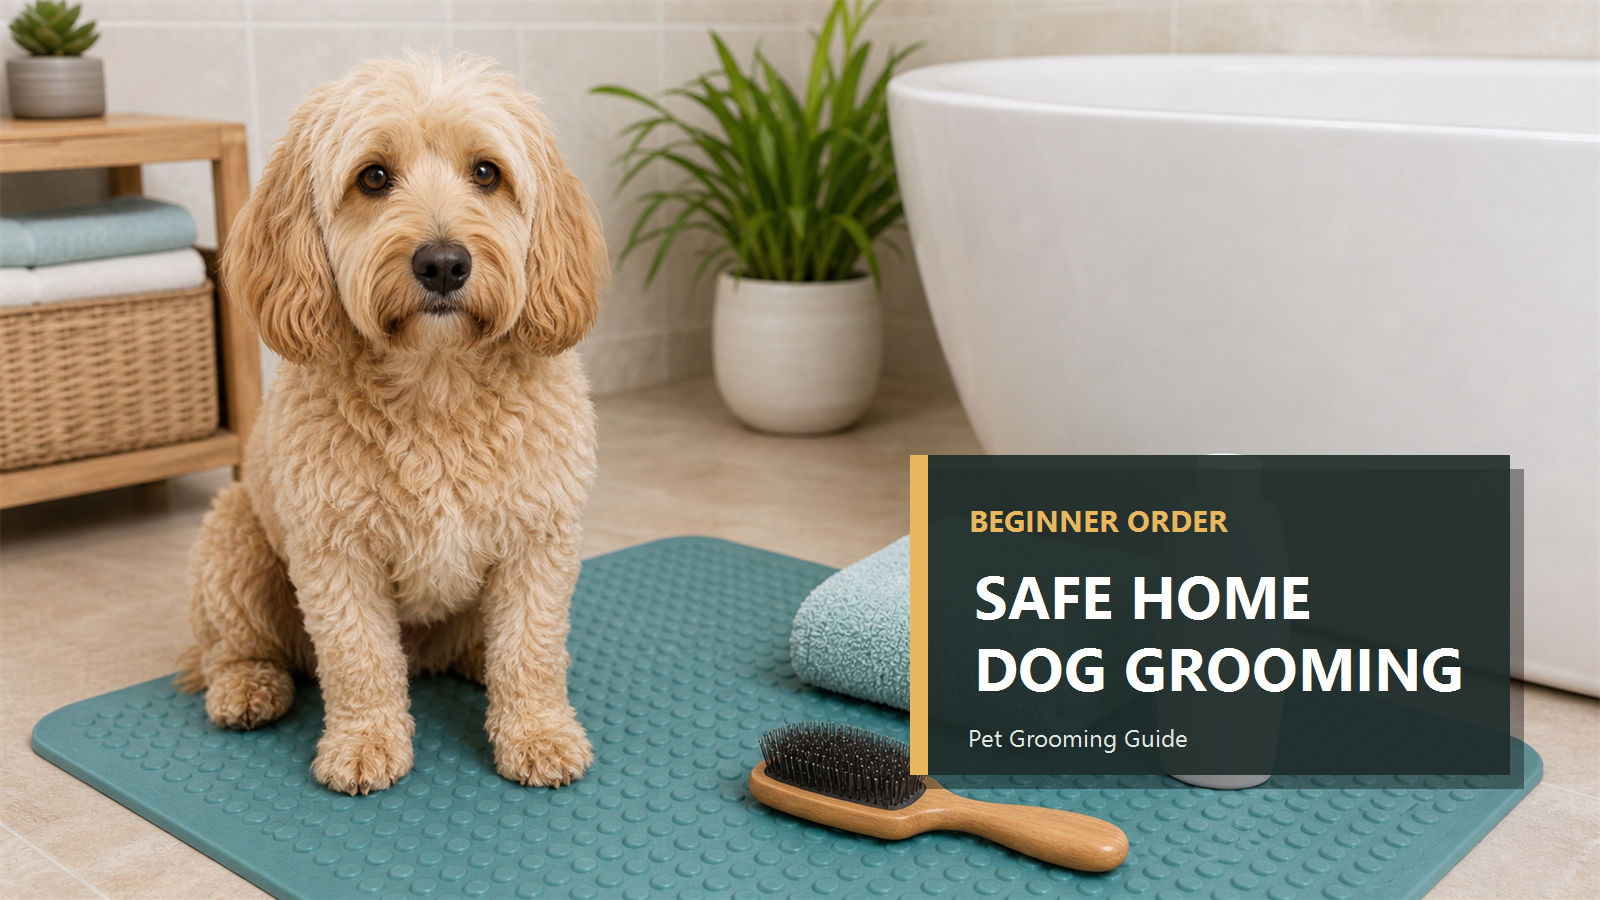
How to Groom a Dog at Home Safely
To groom a dog at home safely, start with a calm setup and a quick body check, brush and comb before bathing, decide whether a bath is needed, rinse and dry thoroughly, check paws and nails carefully, keep face and ear work surface-level, and stop as soon as the dog, coat, skin, or tool setup becomes unsafe.
You do not have to finish every grooming task in one session. For many dogs, the safest home groom is short, calm, and intentionally unfinished.
At-Home Dog Grooming Order
Use this order as a safety flow, not a race. Skip any step that would make the session too long, stressful, or risky.
| Step | What to do | Stop or skip if |
|---|---|---|
| 1 | Set up a quiet, well-lit room with non-slip footing | The dog is already panicked or the floor is slippery |
| 2 | Check coat, skin, paws, eyes, and ears before tools touch the dog | You see pain, swelling, bleeding, discharge, severe mats, or unsafe handling |
| 3 | Brush and comb gently before any bath | Mats are tight, painful, close to skin, or in a sensitive area |
| 4 | Bathe only if needed, using a dog-appropriate shampoo category | A bath would make the session too long or the dog is not safe to bathe today |
| 5 | Rinse well and dry fully on a non-slip surface | The dog overheats, panics, struggles to breathe, or cannot be handled calmly |
| 6 | Check paws and nails within your skill level | There is limping, bleeding, swelling, paw guarding, or nail-trim uncertainty |
| 7 | Wipe face and ear areas only where appropriate | There is eye squinting, discharge, ear pain, odor with irritation, or facial pain |
Original Safe-Order Framework
Pet Grooming Guide original framework: build the session around stopping early, not getting everything done.
- Set the room: quiet space, bright light, towels, non-slip footing, and tools placed before the dog arrives.
- Check first: look for mats, soreness, skin changes, paw problems, ear/eye concerns, and stress level.
- Brush before water: gently loosen loose coat and find tangles before bathing.
- Choose the smallest useful session: brush-only, bath-only, paw check, or full routine only when calm and safe.
- Route up quickly: use a groomer for severe coat problems or handling limits, and use a veterinarian for pain, injury, discharge, limping, or medical concern.
Set Up the Room First
Choose a quiet area with good light, a stable surface, towels, and clean water if bathing. Keep electric tools away from water and damp surfaces. Read product labels and tool manuals before the dog is on the grooming surface.
Skip the session if the room is too hot, the surface is slippery, the dog is already panicked, or you cannot keep the setup controlled without force.
Do a Quick Body and Coat Check
Before brushing or bathing, look over the coat and skin. This is a safety check, not a diagnosis.
Stop and call a veterinarian or professional groomer if you see severe mats, painful mats, wounds, sores, bleeding, redness, swelling, discharge, odor with irritation, eye squinting, ear pain, limping, obvious pain, parasites, sudden skin or coat changes, panic, aggression risk, or unsafe handling.
Brush and Comb Before Bathing
Brush and comb gently before a bath to remove loose coat and find tangles. Bathing over tangles can make coat problems harder to manage, especially on thick, curly, or double-coated dogs.
Do not force a brush through mats. Do not cut mats out at home if they are tight, painful, close to the skin, or in a sensitive area. That belongs with a qualified groomer or veterinarian, depending on the dog and skin condition.
Decide Whether to Bathe Today
A bath is not always required. If the dog is clean enough and the main need is brushing, stop after brushing and comfort checks. If a bath is needed, use a dog-appropriate shampoo category and follow the label.
Avoid human shampoos, medicated products chosen without veterinary direction, pesticide shortcuts, or chemical mixtures. Rinse well and keep water and shampoo away from the eyes and ear canal. For bath-specific mistakes, use the dog bathing mistakes guide before repeating the routine.
Dry Fully and Watch Comfort
Drying matters because trapped moisture can irritate skin and make thick coats uncomfortable. Use towels first and keep the dog warm, calm, and secure on a non-slip surface.
If using any electric drying tool, follow the manufacturer instructions, avoid heat stress, and stop for panic, overheating, breathing trouble, collapse, or unsafe handling. This guide does not teach advanced salon drying.
Check Paws and Nails Carefully
After brushing or bathing, check the paws for trapped moisture, debris, nail-edge issues, and signs of discomfort. Nail work should stay within what you can safely do. If you need a dedicated setup check, use the dog nail trimming setup checklist.
Stop and call a veterinarian for limping, pain, swelling, bleeding, cuts, burns, blisters, discharge, excessive licking, chemical exposure concern, or sudden sensitivity. Stop and call a groomer for paw-hair trimming uncertainty or mats between toes.
Keep Ears and Face Surface-Level
For the face and ear area, keep home grooming gentle and surface-level. Wipe only where appropriate and do not insert tools or cotton swabs into the ear canal.
Ear pain, discharge, odor with irritation, head shaking, eye discharge, eye squinting, or facial pain should stop the grooming session and move the decision to a veterinarian.
Skip This Today Decision Box
| If this is true | Safer choice |
|---|---|
| The dog is nervous but not unsafe | Do one short task and end positively |
| The coat has small tangles you can brush gently | Work slowly, then stop before frustration |
| The dog has painful mats or skin changes | Stop and call a groomer or veterinarian |
| Nails are stressful today | Skip nails and use a nail-specific setup guide later |
| Bathing would make the session too long | Brush today, bathe another day |
| Tools look damaged or wet | Do not use them; follow the manufacturer route |
Cleanup After the Session
When the session ends, clean and dry the grooming area, remove hair from tools, store tools away from moisture, and note any issue you should revisit later. If the dog seems sore, itchy, unusually tired, or uncomfortable after grooming, stop home grooming and consider veterinary advice.
FAQ
What order should I groom my dog at home?
Start with setup and a body check, then brush and comb, decide on bathing, rinse and dry, check paws and nails, do gentle face or ear-area wiping if appropriate, and clean up. Stop anytime safety changes.
Do I have to bathe my dog every time I groom?
No. Many home sessions can be brushing, paw checks, or comfort work only. A shorter session is often safer than trying to do everything at once.
Can I remove severe mats at home?
No. Severe, painful, tight, or skin-close mats should be handled by a professional groomer or veterinarian. Do not cut them out at home.
When should I stop grooming immediately?
Stop for wounds, bleeding, swelling, discharge, pain, panic, breathing trouble, collapse, chemical exposure concern, severe mats, damaged tools, wet electric tools, or unsafe handling.
Bottom Line
Safe home grooming is a sequence of small decisions. Set up the room first, check the dog before tools touch the coat, brush before bathing, skip tasks that are too much for today, and route pain, injury, severe mats, discharge, panic, or unsafe handling to a veterinarian or qualified groomer.
Sources
Dog Grooming Checklist for Beginners
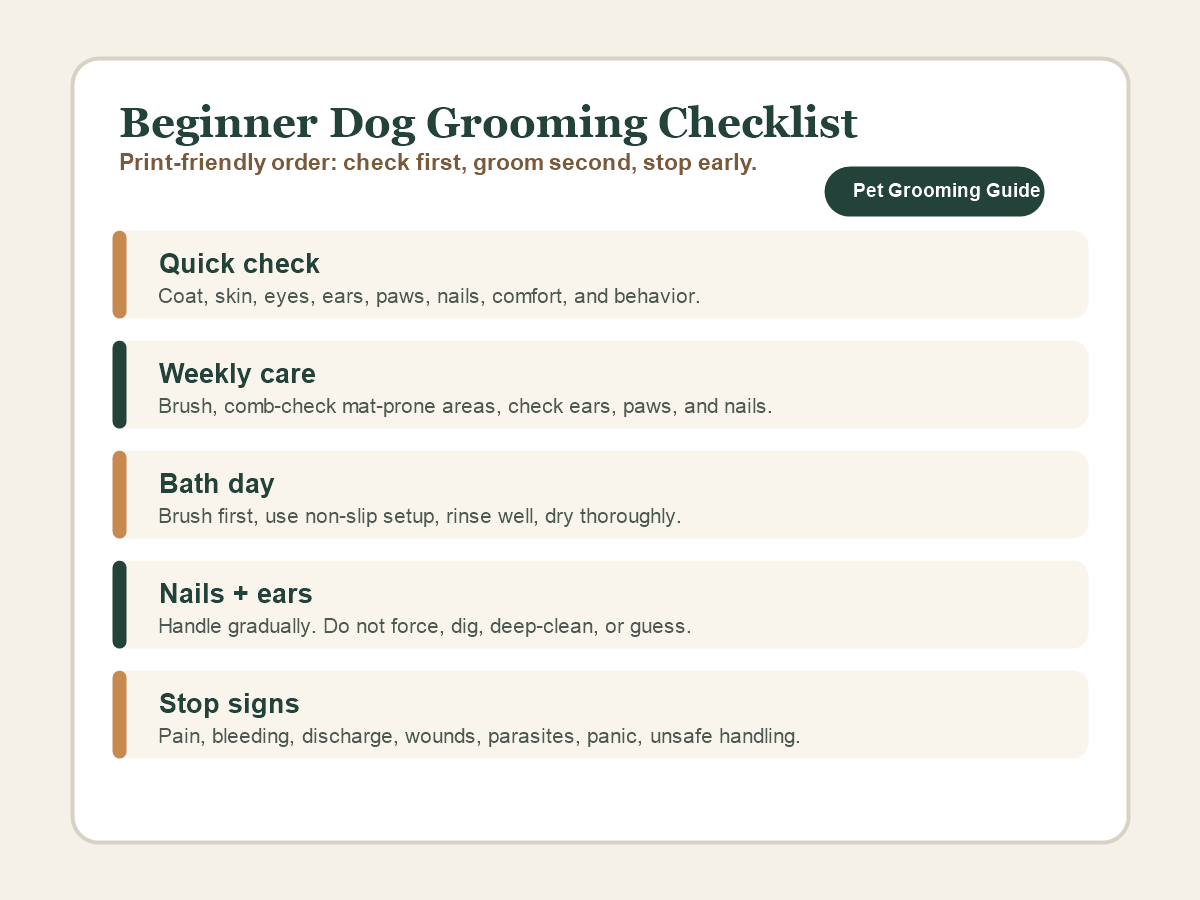
A beginner dog grooming checklist should help you notice problems early, keep your dog comfortable, and avoid tasks that belong with a professional. Start with simple checks: coat, skin, eyes, ears, paws, nails, comfort, and behavior. Then build brushing, bathing, nails, and ear care into short sessions your dog can tolerate.
Do not try to do everything in one day. A calm five-minute session is more useful than a full routine that ends in fear or force.
Beginner Rule: Check First, Groom Second
Before brushing, bathing, trimming nails, or cleaning ears, look at the whole dog. Check:
- Coat condition and loose hair.
- Red, raw, flaky, wounded, or painful skin.
- Eyes for squinting, redness, injury, or discharge.
- Ears for odor, redness, swelling, pain, or discharge.
- Paws for cracked pads, debris, swelling, or limping.
- Nails for length, cracks, and safe handling tolerance.
- Behavior for fear, growling, freezing, frantic movement, or panic.
If you find a medical-looking problem, grooming is no longer the solution. Stop and ask a veterinarian.
Daily or Quick Check
Use this as a fast habit, especially after walks or outdoor play.
| Area | What to check | What not to do |
|---|---|---|
| Coat | Dirt, burrs, loose hair, small tangles | Do not pull painful tangles |
| Skin | Redness, sores, parasites, swelling | Do not diagnose or treat skin problems |
| Eyes | Clear, comfortable eyes | Do not treat red, painful, or discharging eyes |
| Paws | Debris, cracked pads, limping | Do not dig at embedded objects |
| Behavior | Calm enough to handle | Do not force restraint |
For puppies, seniors, and nervous dogs, this daily check may be the whole session.
Weekly Checklist
Most beginners can start with a weekly maintenance session:
- Brush with a coat-appropriate tool category.
- Comb-check mat-prone areas if the coat is long, curly, dense, or feathered.
- Check ears without deep cleaning.
- Check nails and paws.
- Wipe ordinary surface dirt from the coat or feet.
- Note any changes to skin, coat, smell, comfort, or behavior.
Short smooth coats may need less brushing than curly or long coats, but every dog benefits from being checked regularly. For timing by coat, use the dog grooming schedule by coat type.
Monthly or As-Needed Checklist
Some tasks happen less often or depend on the dog:
- Bathing when dirty, smelly from ordinary activity, or seasonally needed.
- Nail trimming or grinding when nails are long and the dog can be handled safely.
- Ear cleaning only when appropriate and not painful.
- Professional grooming for coat shaping, clipping, heavy shedding help, or unsafe handling.
Do not bathe to cover up persistent odor, itch, discharge, wounds, or inflamed skin. Those are stop signs.
Bath-Day Checklist
Before the bath:
- Brush out loose hair and small tangles.
- Stop if mats are tight, painful, widespread, or close to the skin.
- Put a non-slip surface in place.
- Keep towels ready.
- Plan a short session with breaks.
During the bath:
- Use lukewarm water.
- Keep shampoo and water away from eyes and ear canals.
- Rinse thoroughly.
- Stop if the dog panics, overheats, struggles to breathe, or cannot be handled safely.
After the bath:
- Dry thoroughly, including paws, armpits, belly, ears, and skin folds.
- Brush again once fully dry.
- Save nails or ears for another day if the dog is tired.
For a deeper bath-day safety check, see dog bathing mistakes to avoid at home.
Nail Checklist
Nail care should be gradual. Handle paws first, reward calm behavior, and trim or grind only small amounts when you know where you are working.
Stop for bleeding, pain, limping, panic, sudden jerking, growling, or uncertainty about nail anatomy. Do not wrestle through nail care. A groomer, veterinary team, or trainer-informed plan can make nail work safer.
Ear Checklist
For beginners, ear care starts with looking and smelling, not deep cleaning. Healthy ears should not be painful, swollen, heavily odorous, or full of discharge.
Do not put cotton swabs down the ear canal. Do not treat suspected ear infections at home. Do not keep cleaning an ear that looks worse or hurts.
Grooming Tasks Beginners Should Avoid
Beginners should not attempt:
- Severe mat removal.
- Cutting mats out with scissors.
- Advanced clipping or breed trims.
- Deep ear cleaning.
- Medical skin, ear, eye, fold, or wound care.
- Anal gland expression.
- Dental scaling.
- Forced restraint or sedation.
Learning what to skip is part of good at-home grooming.
When to Stop and Call a Pro or Vet
Call a veterinarian for wounds, parasites, hot spots, bad odor with redness, red or raw skin, ear pain or discharge, eye squinting or discharge, limping, bleeding nails, suspected infection, breathing trouble, overheating, or pain.
Call a professional groomer for severe mats, coat work you cannot safely maintain, nail care you cannot do safely, or a dog that cannot be groomed without force.
Bottom Line
A beginner grooming routine should feel calm, short, and repeatable. Check your dog first, do the easy maintenance your dog can tolerate, split bigger tasks across days, and stop early when you see pain, fear, skin problems, ear problems, severe mats, or unsafe handling.
FAQ
What should be on a beginner dog grooming checklist?
A beginner checklist should include coat brushing, skin checks, eyes, ears, paws, nails, bath planning, drying, behavior checks, and clear stop rules.
How often should beginners groom a dog at home?
Do quick comfort checks often, brush on a coat-appropriate schedule, bathe as needed, and check nails every one to two weeks. Adjust for coat type and tolerance.
What grooming tasks should beginners avoid?
Avoid severe mat removal, advanced clipping, deep ear cleaning, medical care, forced restraint, sedation advice, anal gland expression, and dental scaling.
Do I have to do nails, ears, brushing, and bathing in one session?
No. Splitting tasks across days is often safer and calmer, especially for puppies, seniors, fearful dogs, and beginners.
What are signs I should stop grooming?
Stop for pain, bleeding, discharge, swelling, wounds, parasites, overheating, breathing trouble, panic, aggression, or any handling that feels unsafe.
Dog Bathing Mistakes to Avoid at Home
The biggest dog bathing mistakes are skipping the pre-bath brush, bathing over tangles, using an unsafe setup, spraying the face or ears carelessly, leaving shampoo residue, drying poorly, and forcing a frightened or painful dog through the bath. A safer home bath starts before the water turns on.
Quick Answer
Before bathing your dog, brush and check the coat, prepare non-slip footing, use lukewarm water, keep water away from eyes and ears, rinse until the coat feels clean, and dry for comfort. Stop for severe mats, wounds, parasites, ear discharge, pain, panic, growling, snapping, or unsafe handling.
Bath-Prep Checklist
Use this checklist before water touches the coat. It is a routine grooming check, not medical advice or a reason to push through pain or fear.
| Before the bath | Why it matters | Stop if you see |
|---|---|---|
| Brush and check the coat | Tangles can tighten after water, and brushing helps reveal skin issues. | Severe mats, painful coat, wounds, or skin irritation. |
| Check ears, paws, skin, and behavior | A bath should not hide pain, illness, or handling risk. | Ear discharge, parasites, limping, panic, growling, or snapping. |
| Set non-slip footing | Slipping can make baths stressful and unsafe. | A dog who cannot stand calmly or safely. |
| Use lukewarm water | Water that is too hot or cold can upset the dog. | Shivering, overheating, distress, or trying to escape. |
| Control face and ear water | Direct spray near eyes, ears, and nose can frighten or irritate dogs. | Head shaking, face sensitivity, ear pain, or strong odor. |
| Rinse and dry patiently | Residue and damp coat can leave the skin uncomfortable. | Fear of dryer noise, heat discomfort, or unsafe handling. |
Mistake 1: Skipping the Pre-Bath Coat Check
Brush before bathing when the dog can tolerate it. VCA notes that burrs and tangles should be brushed out before a bath because they can become harder to remove afterward. The ASPCA also explains that brushing helps keep the coat in good condition and lets you inspect the skin.
Do not bathe over severe mats. Do not cut mats out with scissors. If the coat is severely tangled, painful, tight to the skin, or paired with irritation, use a professional groomer or veterinarian.
Mistake 2: Using the Wrong Setup or Water Approach
An unsafe bath setup can turn a normal grooming task into a fear event. Use a stable, non-slip surface, keep supplies within reach, and use lukewarm water. Avoid chasing the dog around the room or lifting a struggling dog into a tub without a safe plan.
For large or nervous dogs, shorten the goal. A quick paws-and-belly rinse may be safer than forcing a full bath.
Mistake 3: Letting Shampoo or Water Get Into Eyes and Ears
ASPCA Pet Insurance grooming guidance recommends avoiding the ears, eyes, and nose during bathing. Use controlled water flow around the face. A damp cloth can be safer than direct spray for many dogs.
Stop if you notice ear pain, discharge, strong odor, swelling, head shaking, or sensitivity. Bathing is not a fix for ear problems.
Mistake 4: Not Rinsing Long Enough
Shampoo residue can irritate skin and leave the coat feeling dull or tacky. Rinse slowly, especially through dense, long, curly, or double coats. Lift sections of coat gently and check that water runs clear.
Do not assume a quick surface rinse is enough on thick coats. Dense-coated dogs may need more careful rinsing than their coat length suggests.
Mistake 5: Drying in a Way That Leaves Mats, Chill, or Fear
Drying should match the dog and coat. Towel-dry thoroughly, especially around the chest, belly, legs, and undercoat. If using a dryer, avoid high heat, keep the noise and airflow tolerable, and stop if the dog becomes frightened.
For long, curly, or mat-prone coats, drying without brush and comb checks can allow tangles to tighten. For fearful dogs, the priority is calm handling and safety, not a perfect finish.
Mistake 6: Bathing Too Often or Using Bath Time to Solve Medical Issues
Merck notes that dogs may be bathed with pet shampoo when dirty, smelly, or seasonally appropriate. Bathing more often is not always better. If you need a starting point by coat type, use the dog grooming schedule by coat type as a planning guide, then adjust for skin, coat condition, activity, and veterinarian guidance.
Do not try to solve itching, redness, wounds, parasites, odor with inflamed skin, sudden hair loss, or recurring ear problems with repeated baths. Those signs need veterinarian guidance.
When to Stop and Call a Groomer or Vet
Stop the bath if the dog is panicking, growling, snapping, repeatedly trying to escape, or showing pain. Stop and call a groomer or veterinarian for severe mats, wounds, skin infection signs, parasites, ear pain or discharge, medical fragility, or unsafe handling.
Puppies, seniors, and medically fragile dogs may need a shorter, gentler plan approved by a veterinarian or professional groomer.
Helpful Companion Guides
- Pet Grooming Safety Checklist for Dogs at Home
- Dog Grooming Checklist for Beginners
- When to Stop a Dog Brushing Session
- Weekly Dog Brushing Routine
Bottom Line
A good dog bath is mostly preparation: brush and check the coat first, set up stable footing, keep water away from eyes and ears, rinse patiently, and dry for comfort instead of speed. If the bath turns into pain, panic, medical concern, severe matting, or unsafe handling, stop and use a veterinarian or professional groomer.
FAQ
Should I brush my dog before or after a bath?
Brush before the bath, especially if the dog has tangles or loose coat. You can do a second gentle brush after the coat is mostly dry if the dog tolerates it.
Can I use human shampoo on my dog?
Use dog shampoo unless your veterinarian tells you otherwise. Skin needs vary, and this guide does not recommend specific products.
How often should I bathe my dog?
Bathe when the dog is dirty, smelly, or seasonally needs it. Coat type, skin condition, activity, and veterinarian guidance matter more than a universal schedule.
What if my dog is scared of baths?
Do not force a full bath. Work on short, calm introductions to the bath area, water sounds, towels, and touch. Stop for panic, growling, snapping, or unsafe handling.
Is air-drying okay?
It depends on coat type, room temperature, and dog comfort. Thick, long, or curly coats may need more careful drying to avoid moisture and tangles. Avoid heat and forced drying if the dog is frightened.