Tag: dog bathing

  • Dog Grooming Without a Bathtub

    Dog Grooming Without a Bathtub

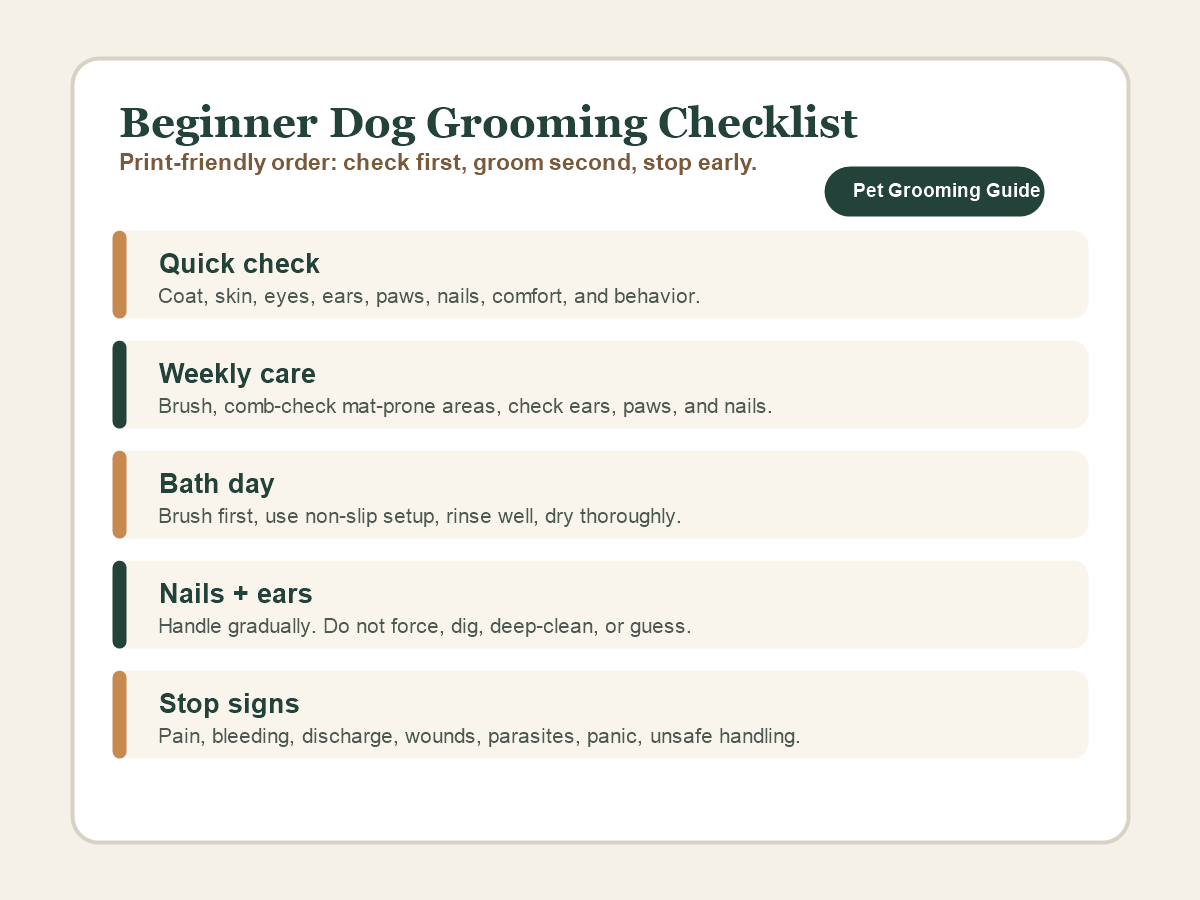
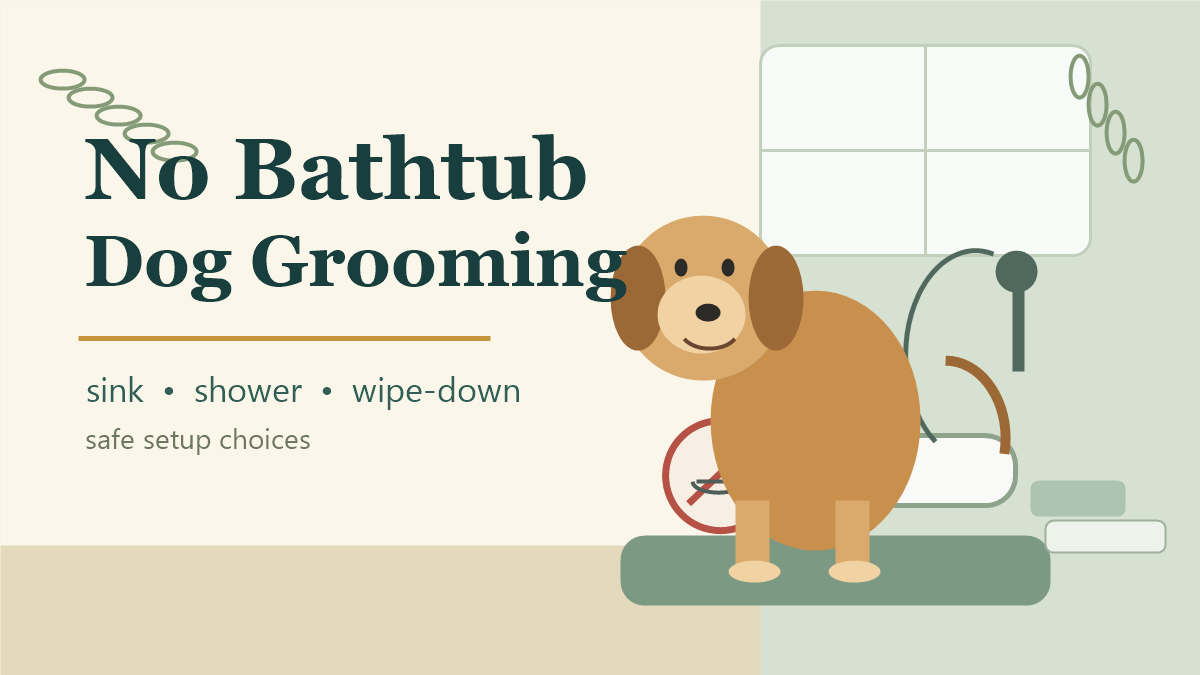
    You can groom a dog without a bathtub by choosing the safest setup for the dog, the mess, and the room you have. Small dogs may use a sink only when lifting is easy and the surface is secure. Many dogs do better in a shower, with a paw rinse or wipe-down, or with a professional bath. Outdoor rinsing is only a mild-weather option when footing, water control, and handling are safe.

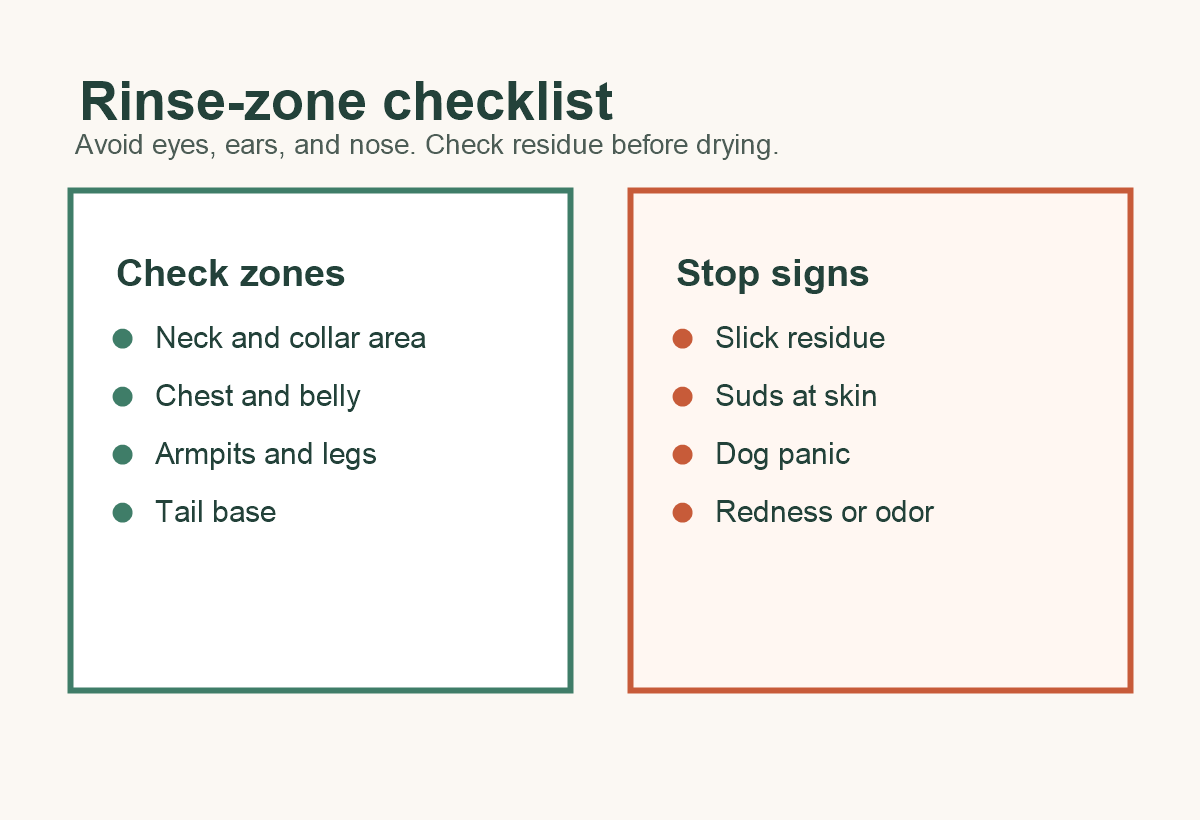
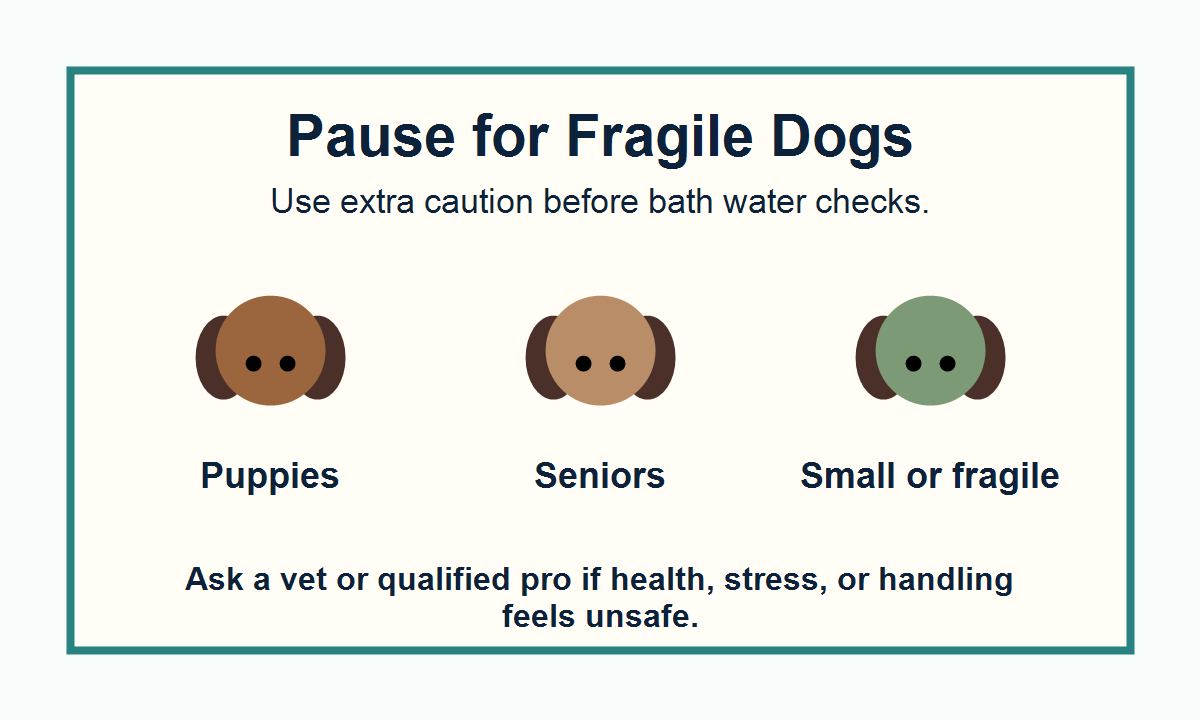
    Do not turn a no-tub problem into a handling problem. Stop and get help if the dog is too heavy to lift, slips, panics, bites, has severe mats, has wounds or skin irritation, shows pain, has chemical residue on the coat, or cannot be handled calmly.
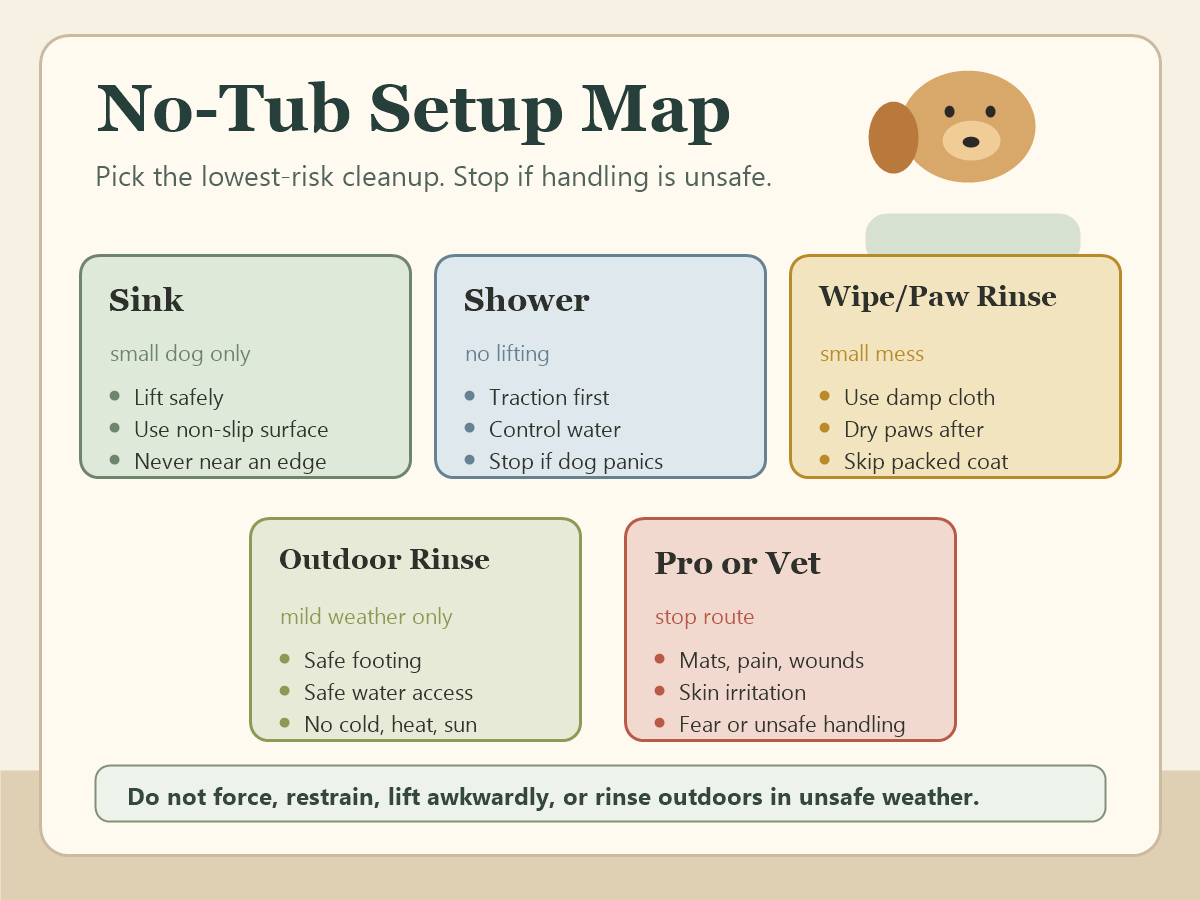
    No-tub setup map for dog grooming showing sink, shower, wipe or paw rinse, outdoor rinse, and pro or vet stop route.
    Use this setup map to pick the lowest-risk cleanup route. Stop for unsafe lifting, slipping, pain, mats, wounds, skin irritation, fear, or unsafe weather.
    SituationBetter optionSkip it when
    Small dog, safe lift, steady surfaceSink setupThe dog is heavy, jumpy, slippery, panicked, or near an edge.
    Medium or larger dog with bathroom accessShower setupThe floor is slick, water control is poor, or the dog tries to flee.
    Small mess on paws, belly, or coat surfaceWipe-down or paw rinseMud is packed in, the coat is matted, or the skin looks sore.
    Mild weather, secure footing, controlled waterOutdoor rinseIt is cold, hot, icy, windy, directly sunny, slippery, or hard to control the dog.
    Large, fearful, painful, matted, or medically fragile dogProfessional bath, groomer, or veterinarianHome grooming would require force, awkward lifting, restraint, or guesswork.

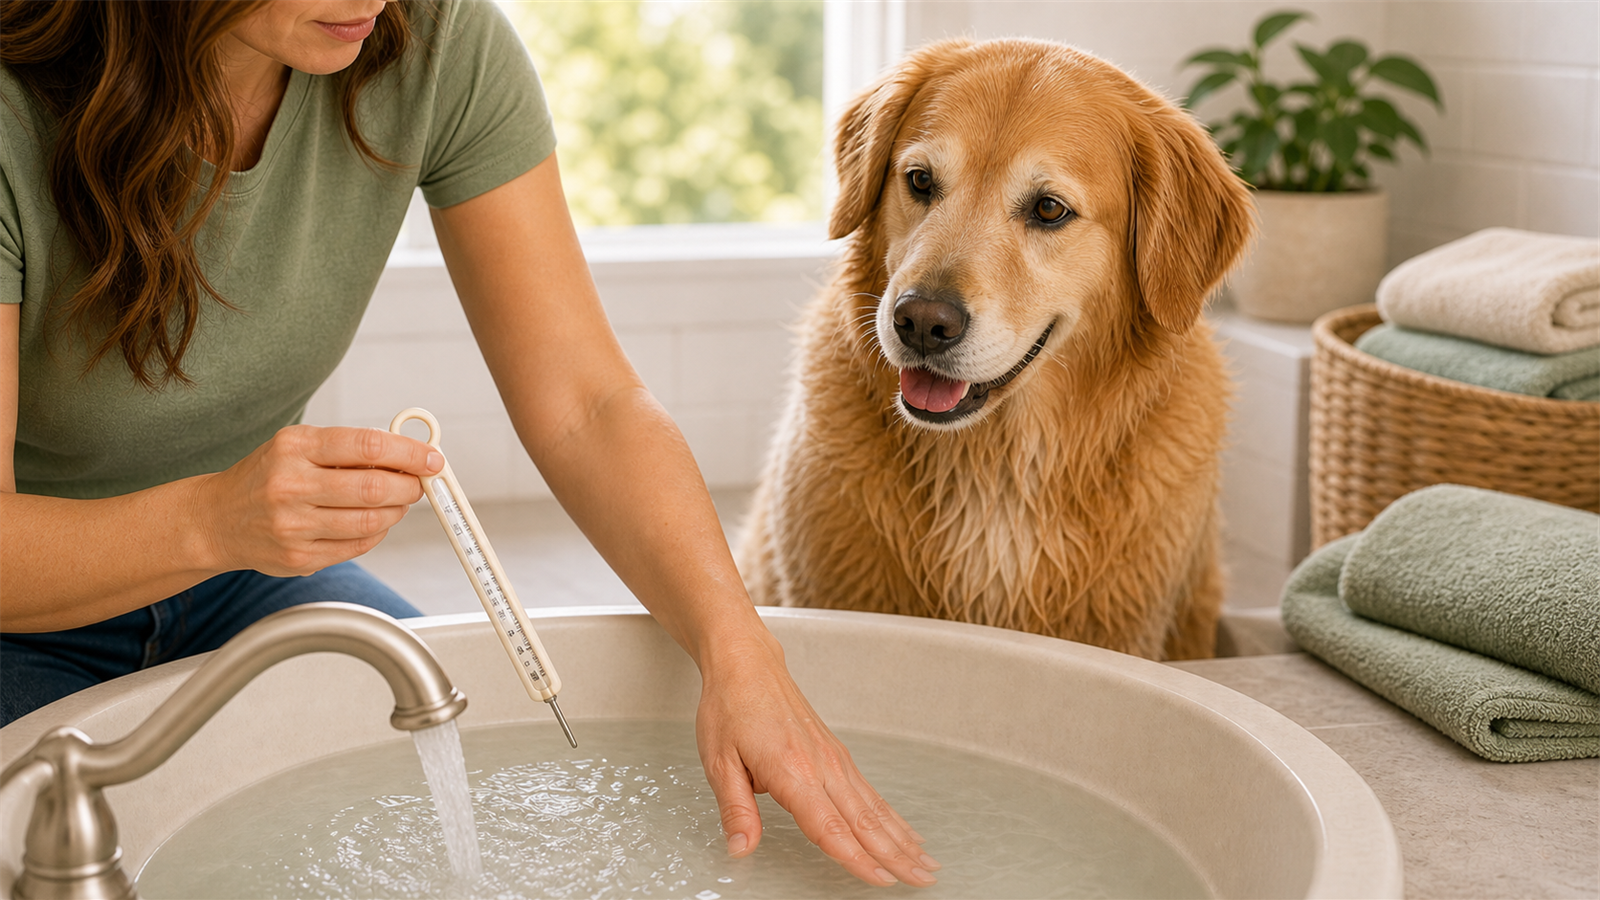
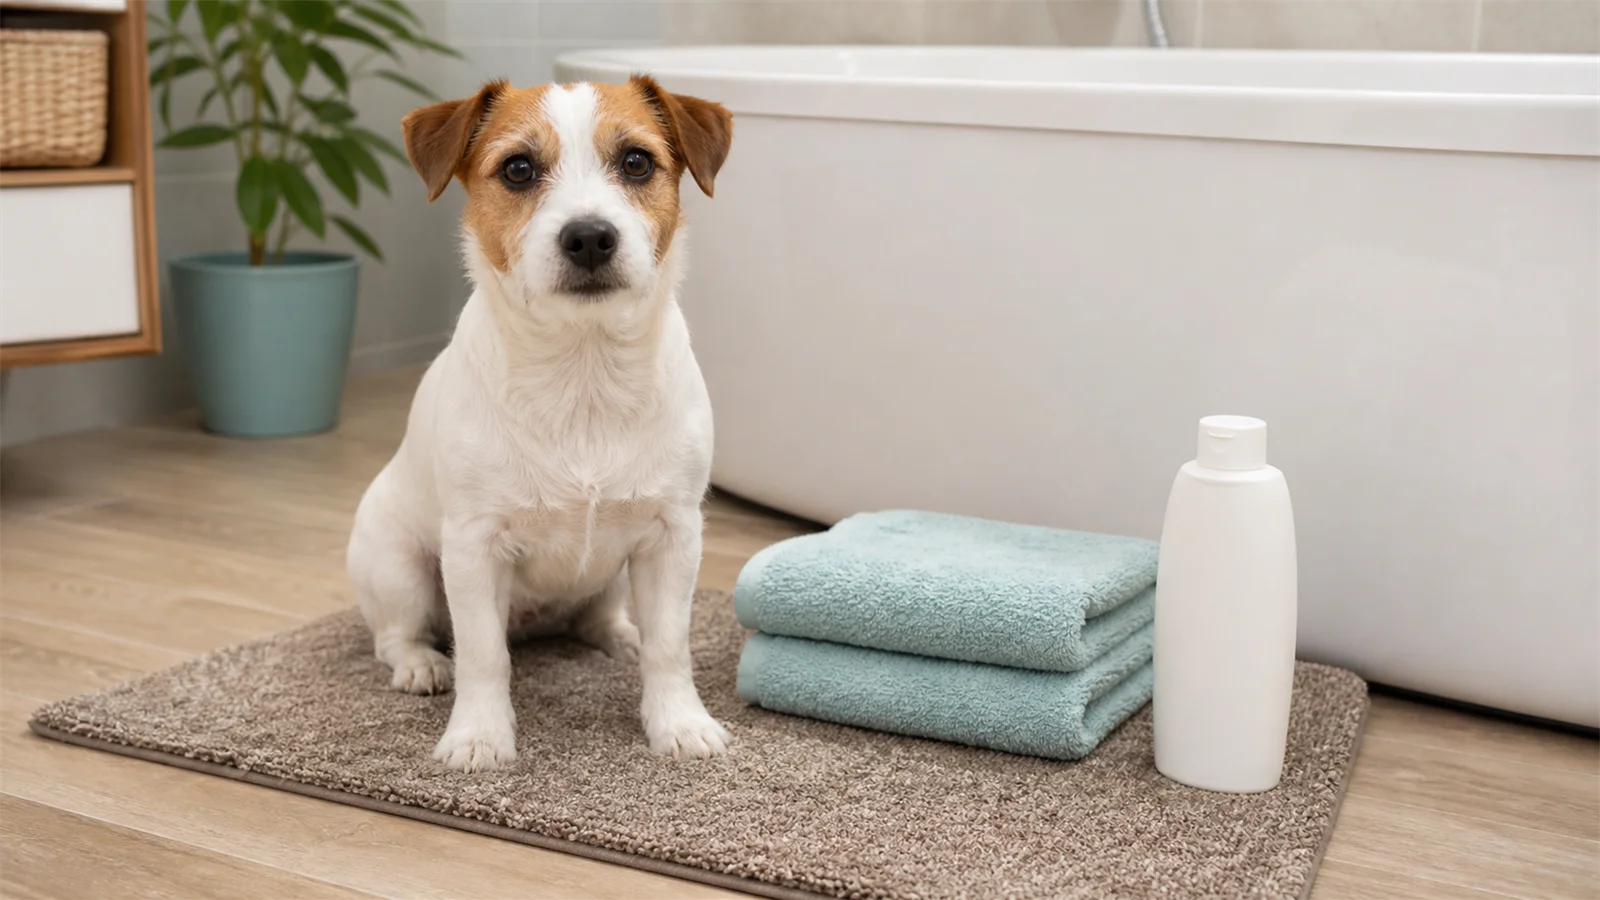
    Sink Setup: Small Dogs Only When the Lift Is Safe

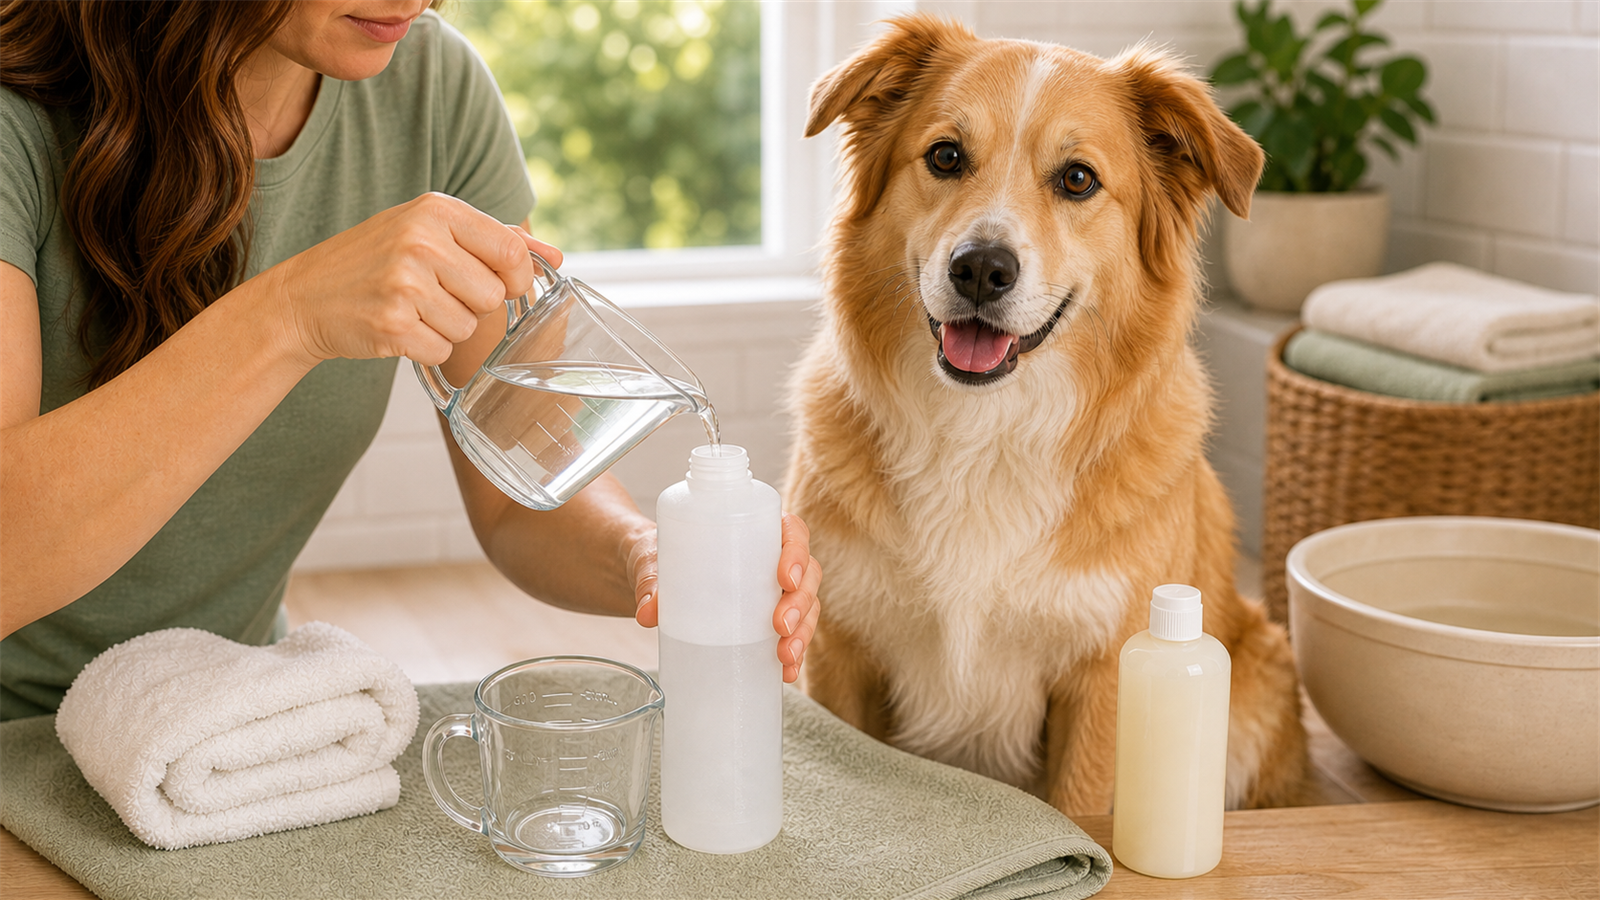
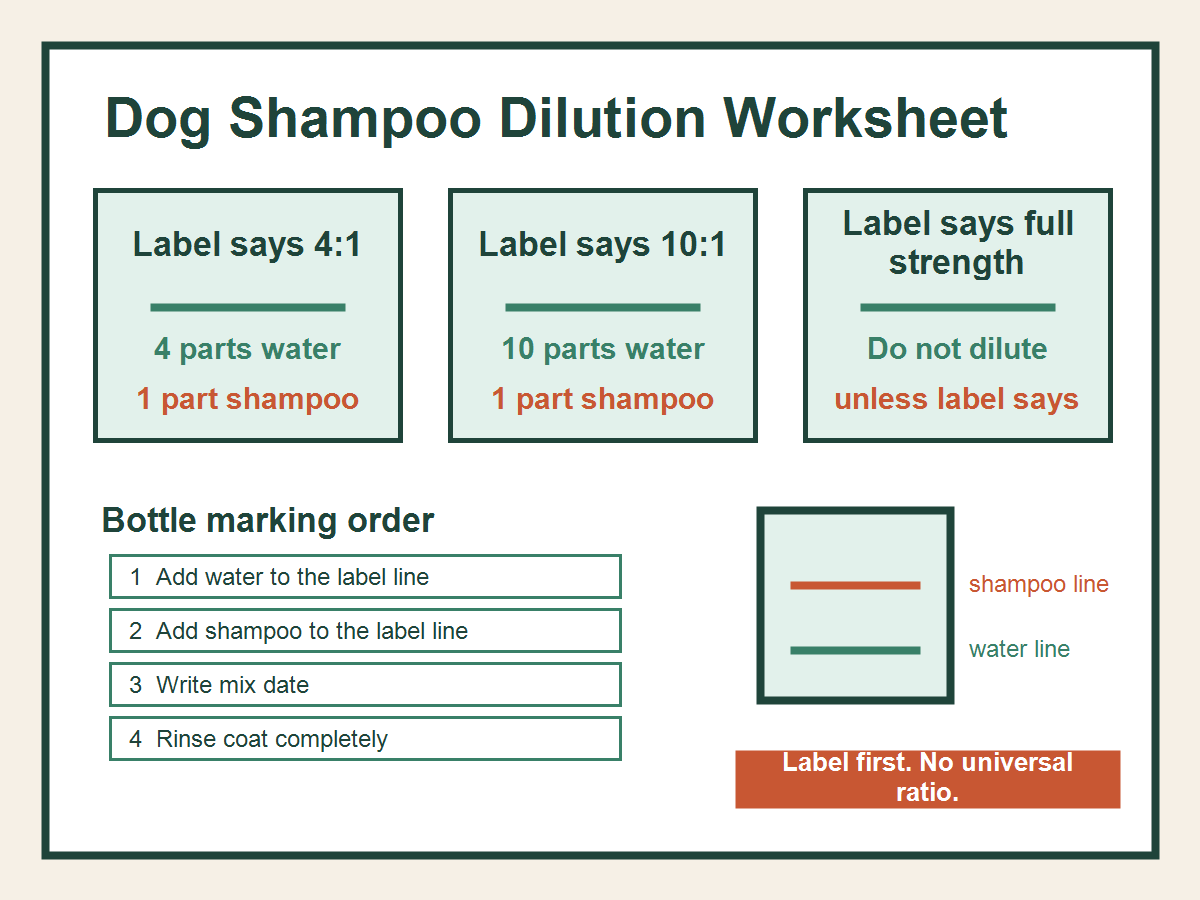
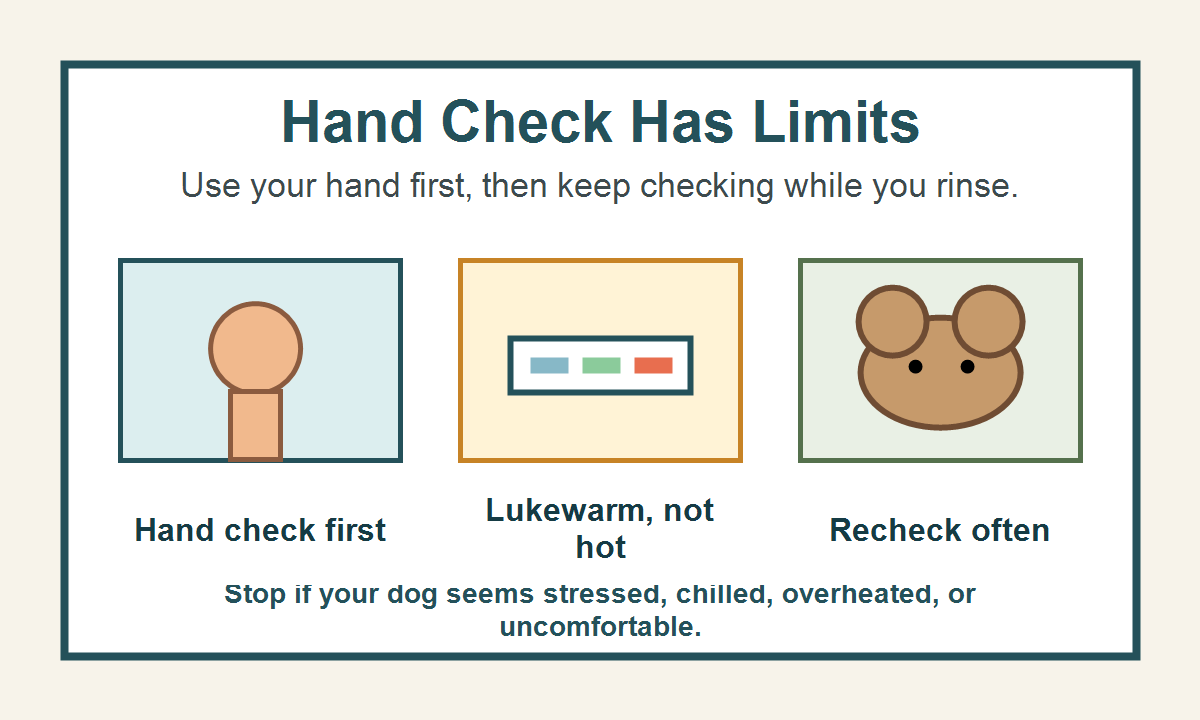
    A sink can work for a small dog when the handler can lift the dog comfortably, the sink area is uncluttered, and the dog can stand on a non-slip surface without leaning near an edge. Keep towels within reach before you start, and use lukewarm water rather than hot water. If you are unsure what lukewarm should feel like, review dog bath water temperature before the bath.

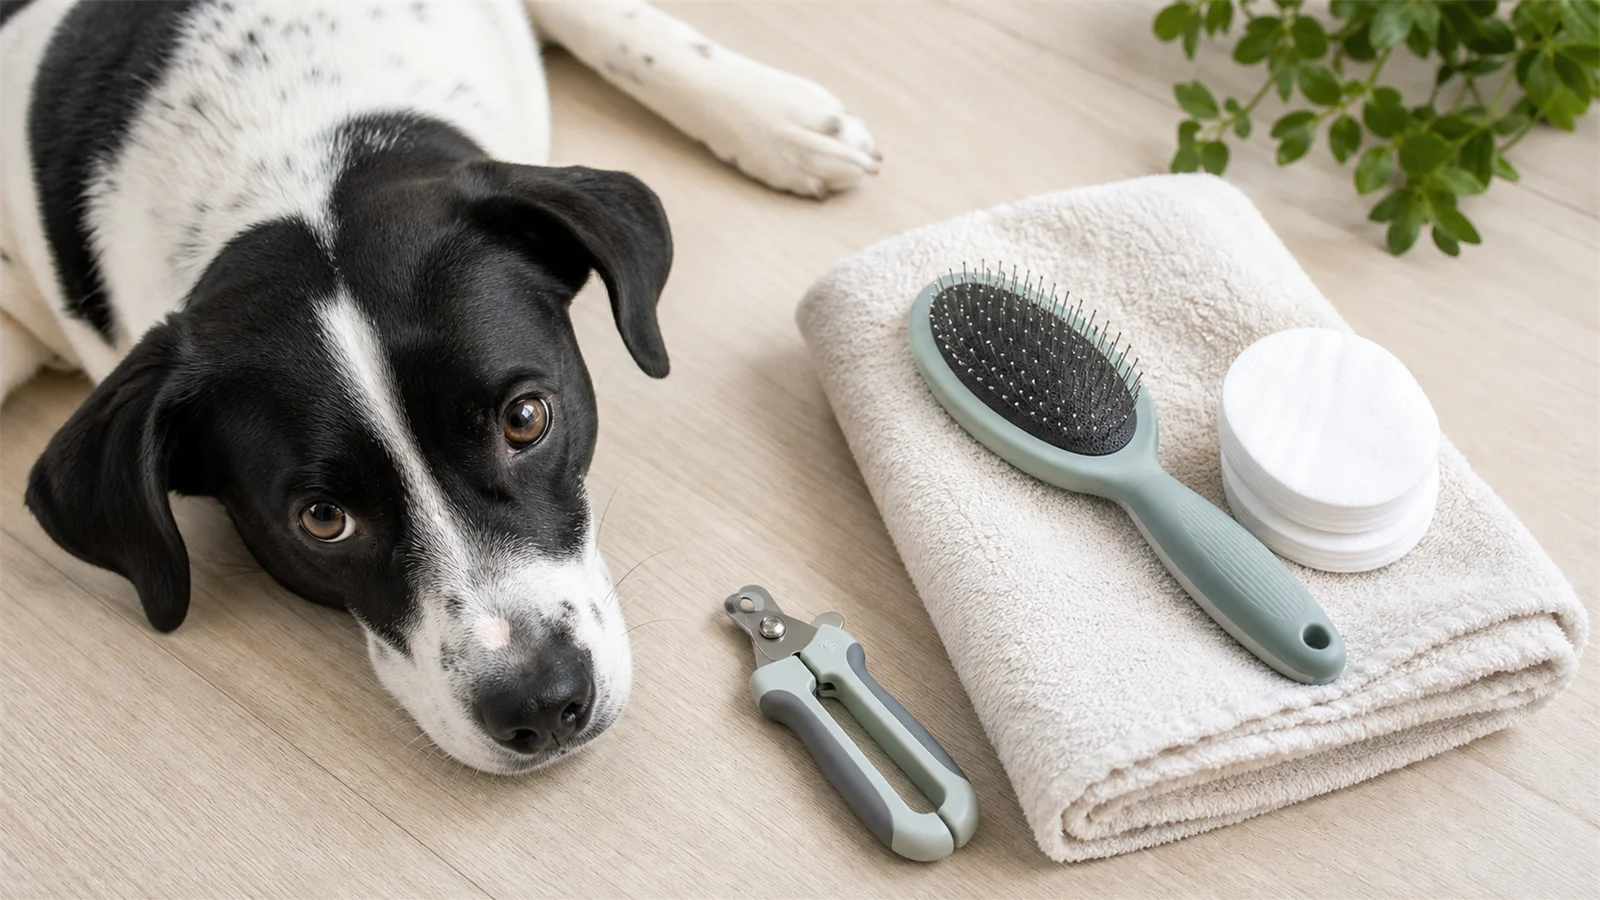
    Brush or check the coat first. The ASPCA dog grooming tips recommend brushing before bathing and keeping water away from a dog’s ears, eyes, and nose. Use a cup, pitcher, or controlled sprayer rather than blasting water at the face.

    Skip the sink if the lift feels awkward, the dog stiffens or scrambles, the counter is crowded, or you would need to hold the dog in place by force. A sink bath should feel lower-risk than the alternatives. If it does not, use a shower, wipe-down, or professional bath.

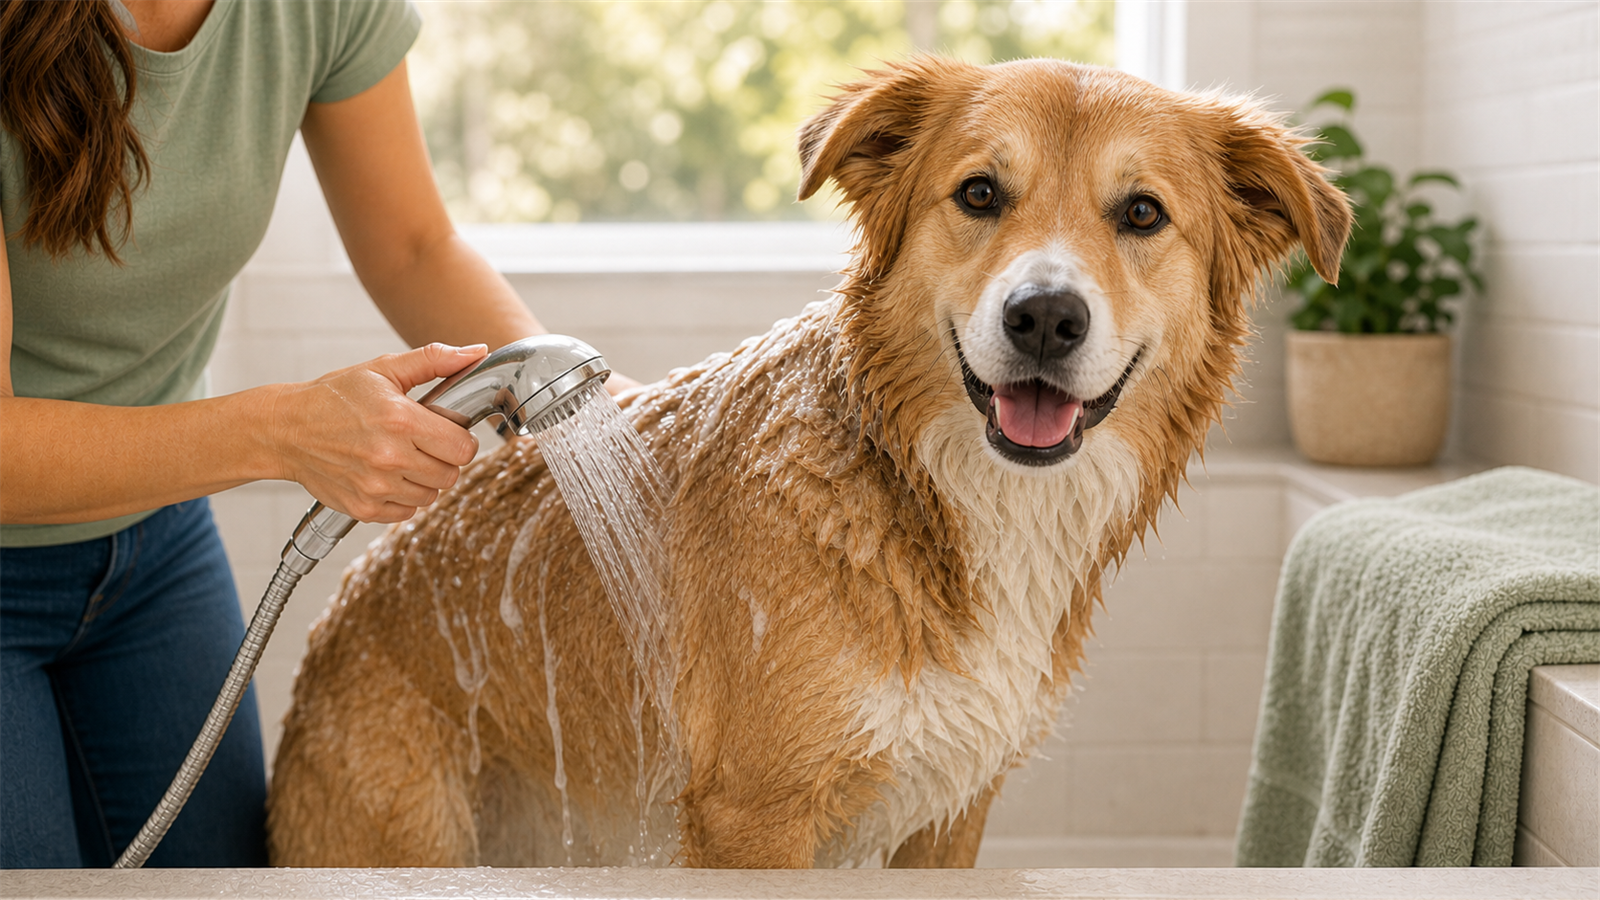
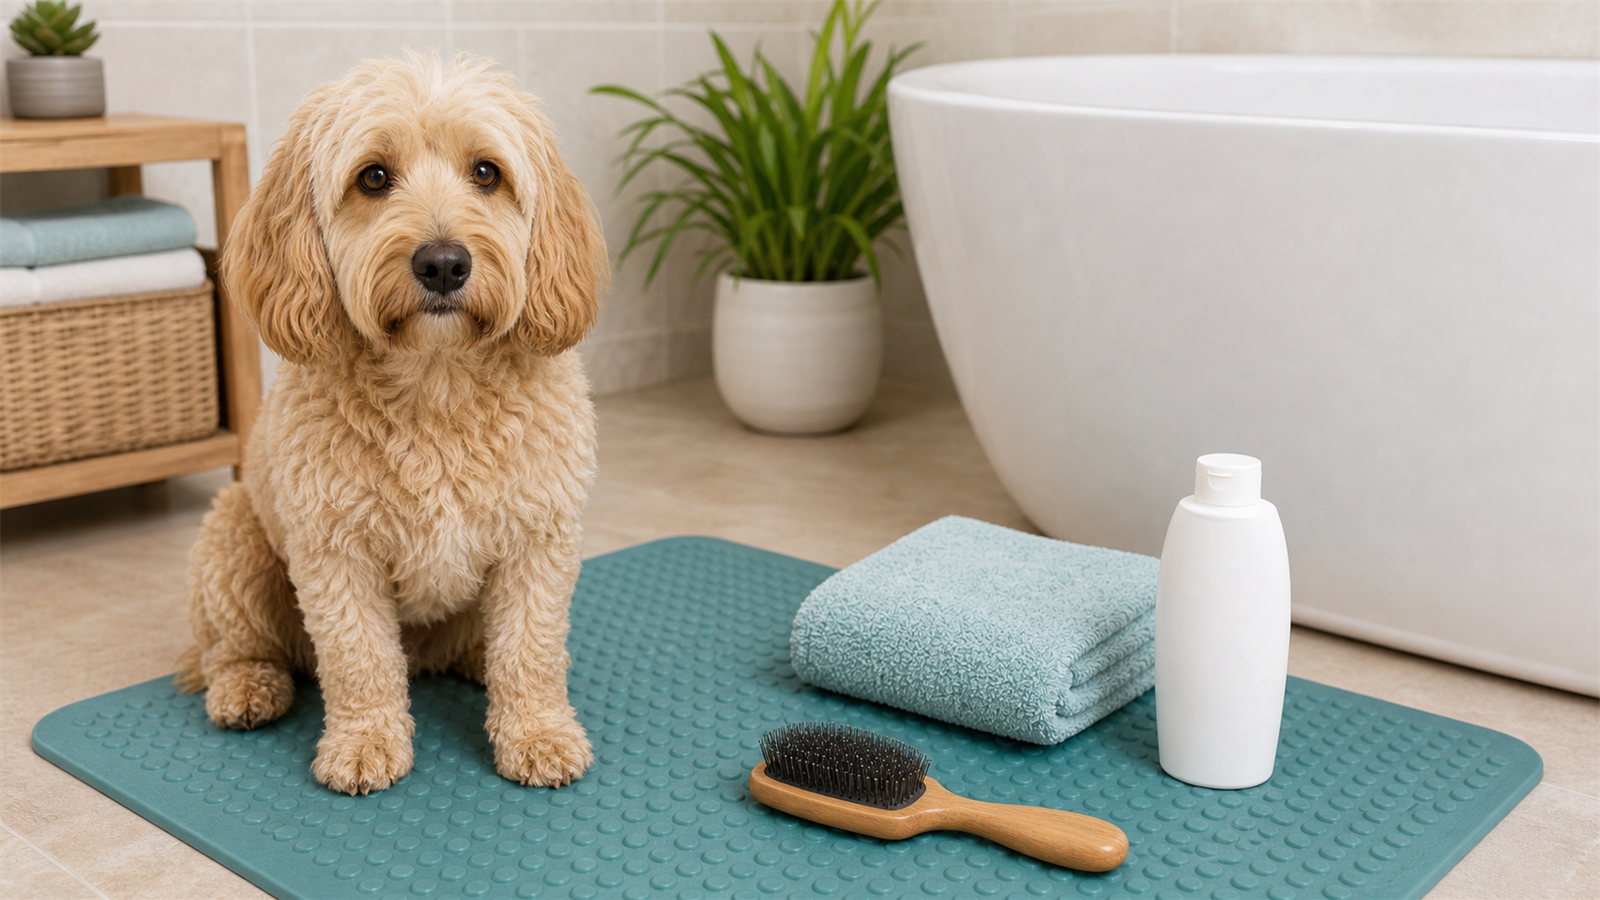
    Shower Setup: Traction First, Water Control Second

    A shower is often better than a sink for dogs that should not be lifted. Set up the floor first with secure traction. Put towels where you can reach them without stepping away from the dog. Use a handheld sprayer, cup, or pitcher so you can keep water controlled and away from the face.

    Keep the water warm, not hot, and rinse thoroughly. The SF SPCA at-home grooming guidance supports warm water and complete rinsing during home baths. For mistakes to avoid before, during, and after the bath, see dog bathing mistakes.

    Stop the shower setup if the dog cannot stand securely, repeatedly tries to leave, freezes, snaps, or becomes too distressed to continue calmly. Do not solve poor footing with more restraint.

    Wipe-Down or Paw Rinse for Small Messes

    Not every mess needs a full bath. Light dirt on paws, belly fur, or the coat surface may be easier to handle with a damp cloth, warm washcloth, or short paw rinse. This keeps the session brief and avoids turning a small cleanup into a stressful full wash.

    The AKC clean dog paws guidance describes using dog-safe wipes or a warm soapy washcloth for muddy, sandy, or salty paws. For a dedicated routine, use how to clean dog paws after a walk.

    Skip a wipe-down if the coat is packed with mud, matted, sticky with an unknown substance, or sitting over red or painful skin. Those are not scrub-harder situations.

    Outdoor Rinse: Mild Weather Only

    An outdoor rinse is a narrow option, not the default no-tub answer. Use it only when the weather is mild, the footing is secure, water access is controlled, drainage is safe, and the dog stays calm. Keep the rinse short and bring the dog indoors to dry.

    Do not rinse outdoors in cold weather, hot weather, direct heat, icy conditions, high wind, poor footing, unsafe drainage, or any situation where the dog is hard to control. Do not use buckets or open containers in a way that creates slipping, lifting, or dumping risk. If the setup feels improvised in a bad way, choose a different cleanup path.

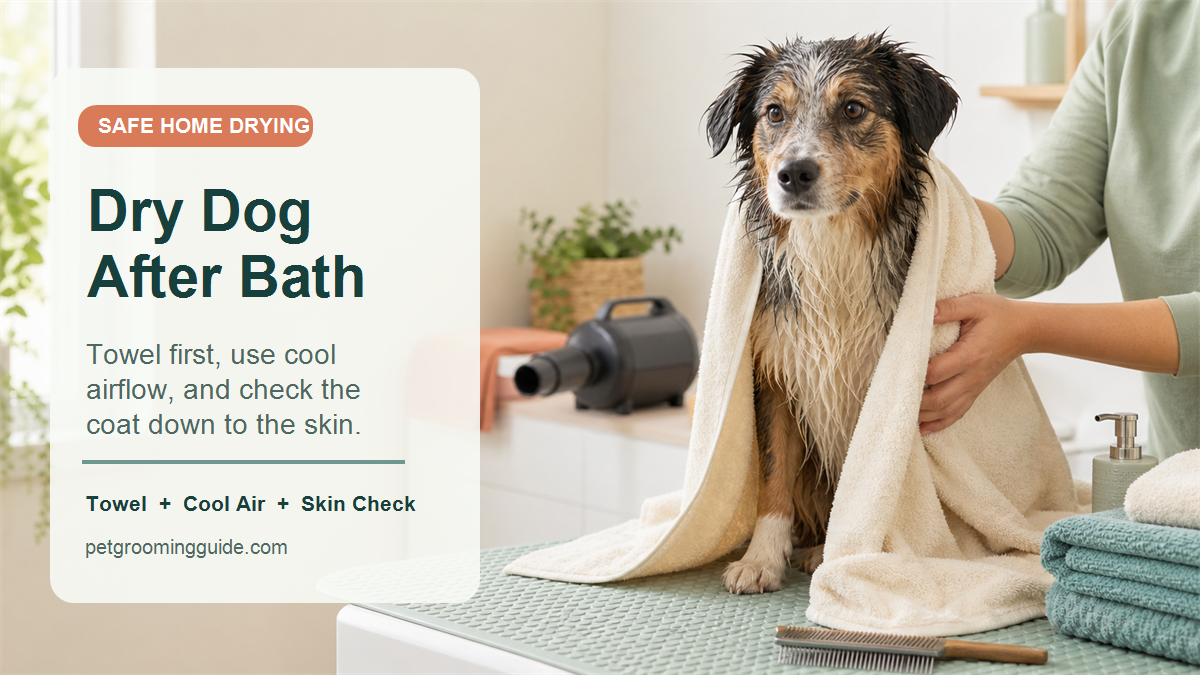
    Drying in a Small Space

    Dry with towels first. If you use airflow, keep it comfortable, keep ventilation open, and stop if the dog becomes frightened, overheated, or uncomfortable. The AKC drying guide notes that airflow does the drying and that heat can burn skin.

    Do not use high heat close to the skin, and do not send a damp dog into cold or hot outdoor conditions. For more detail, see how to dry a dog after a bath.

    When to Use a Groomer or Veterinarian

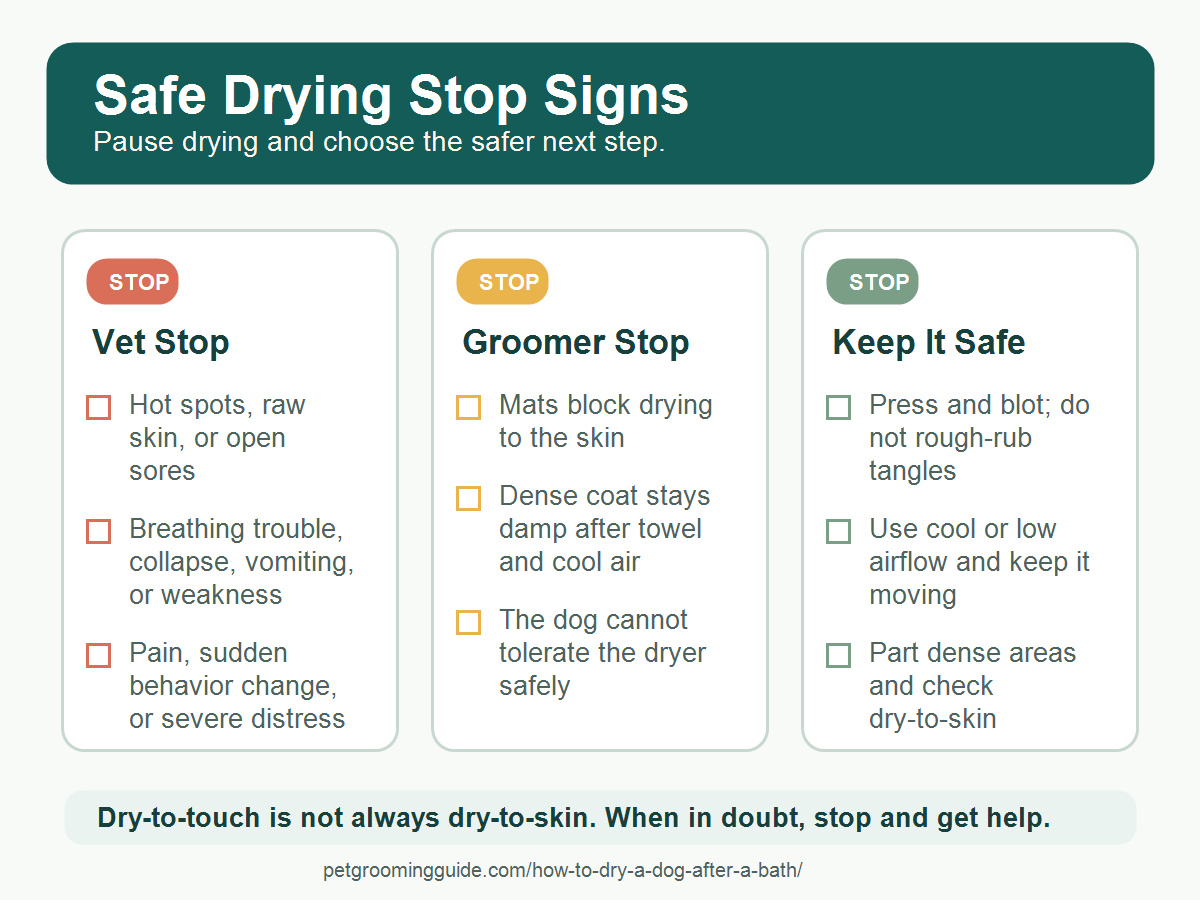
    Use a professional groomer when the dog is too large to handle safely, the coat is packed or matted, the dog is too fearful for calm home handling, or the bath setup would require force. Use a veterinarian for wounds, pain, bleeding, skin irritation, chemical exposure, heat or cold stress, or a medically fragile dog.

    If you are unsure whether the session should continue, the safer answer is to pause. The guide when to stop grooming and call a pro covers the stop signs that should end a home session.

    Conclusion

    The best no-bathtub grooming setup is the one that cleans the actual mess without adding lifting, slipping, weather, or handling risk. Use a sink only for small dogs when lifting and footing are safe, use a shower when traction and water control are good, choose a wipe-down for small messes, and keep outdoor rinsing limited to mild, controlled conditions. When the dog, coat, skin, or setup is not safe, stop and get professional help.

    FAQ

    How can I bathe my dog without a bathtub?

    Choose a sink, shower, wipe-down, paw rinse, mild-weather outdoor rinse, or professional bath based on dog size, coat condition, weather, footing, and handling safety.

    Can I wash my dog in the shower?

    Yes, if the floor has traction, the water is lukewarm, the dog can stand calmly, and you can keep water away from the ears, eyes, and nose.

    Is it safe to bathe a dog in a sink?

    Only for a small dog that can be lifted safely onto a steady non-slip surface. Skip the sink if lifting, balance, edge risk, or behavior is unsafe.

    Can I rinse my dog outside?

    Only in mild weather, on safe footing, with controlled water access and a calm dog. Do not rinse outside in cold, heat, direct sun, slippery conditions, or poor-control setups.

    When should I use a professional bath instead?

    Use a professional bath when the dog is too large, fearful, painful, matted, medically fragile, hard to handle calmly, or unsafe to lift or rinse at home.

    Sources

  • Should You Groom a Dog Before or After a Bath?

    Should You Groom a Dog Before or After a Bath?

    Most dogs should be checked and lightly brushed before a bath, then dried fully and brushed again afterward. The before-bath pass finds loose hair, dirt, small tangles, skin problems, ear or eye concerns, paw issues, and stress signs before water makes the session harder. The after-bath pass finishes the clean, dry coat. For a broader routine, use the dog grooming checklist for beginners.

    If the coat is tightly matted, painful, skin-close, or hiding sores, do not bathe over it and do not cut it out at home. Stop and use a professional groomer or veterinarian.

    Quick Answer: What Happens Before vs After the Bath?

    Decision card showing when to brush before a dog bath, finish after drying, or stop and get help.
    Use this quick card to choose what happens before the bath, what waits until the coat is dry, and when to stop.

    The Safe Beginner Order

    For a normal home grooming session, use this order:

    1. Check the coat, skin, ears, eyes, paws, nails, and behavior.
    2. Brush or comb loose hair and small surface tangles only if they move without pain.
    3. Bathe if the dog needs it and can stay safe and calm.
    4. Rinse thoroughly, especially through dense, long, curly, or double coats.
    5. Towel dry, then keep drying until the coat is dry down near the skin.
    6. Brush again once the coat is dry.
    7. Move nails, ears, paws, or trimming to another short session if the dog is tired.

    ASPCA dog grooming guidance recommends brushing before bathing to remove dead hair and mats, and it also notes careful water control around the ears, eyes, and nose.

    What to Do Before the Bath

    Start with your hands and eyes before you reach for a tool. Look for redness, sores, scabs, fleas or flea dirt, ticks, swelling, odor from skin folds, ear discharge, eye squinting, limping, cracked paw pads, bleeding nails, or behavior that says the dog cannot handle more.

    Then do a light brush or comb check. For a short coat, this may be a quick loose-hair pass. For a long, curly, silky, or shedding coat, work in small sections and check the places that tangle first: behind the ears, under the collar, armpits, chest, belly, tail base, rear legs, and paw feathering.

    Keep the brush pass gentle. If the hair does not move, the dog flinches, or the coat feels packed close to the skin, stop. That information is the point of the pre-bath check.

    Mats and Tangles: The Bath Decision

    Small loose tangles may be handled before the bath only when the dog is calm and the hair separates without skin pulling. Do not keep brushing harder to make the bath happen.

    Tight mats, widespread mats, painful mats, skin-close mats, and mats over red or wounded skin should stop the home bath. Water can make tangled coat tighter and can hide problems underneath. Do not use scissors near the skin to remove mats. The same safety idea applies during the bath itself; the dog bathing mistakes guide covers bath-specific errors to avoid.

    When Bathing First Can Make Sense

    Some professional groomers bathe certain dirty or heavily shedding coats before the final brush-out. That is usually done with grooming equipment, coat knowledge, and drying control that many beginners do not have at home. Groomer to Groomer discusses this professional disagreement for double-coated dogs, which is useful context for exceptions, but it is not universal beginner advice. The safer home rule is still: inspect first, remove only loose and painless coat problems, bathe only when the coat is safe to wet, then finish after full drying.

    Bathing first is not a good shortcut for mats, sores, unknown skin problems, ear problems, eye problems, panic, or unsafe handling.

    Dry Fully Before the Final Brush

    The final brush should wait until the dog is fully dry. A coat can feel dry on top while the undercoat, armpits, belly, collar area, tail base, or paw feathering still holds moisture. For more drying detail, see how to dry a dog after a bath.

    Drying does not have to mean high heat. Use towels, a warm but not hot room, calm breaks, and airflow the dog can tolerate. Be extra cautious with puppies, seniors, heavy-coated dogs, flat-faced dogs, and dogs that become stressed by noise or air movement.

    Nails, Ears, and Eyes Do Not Need to Fit the Same Session

    Many home grooming sessions go badly because the owner tries to do everything at once. Nails can be trimmed before the bath, after the bath, or on a different day. If the dog is already tired from bathing and drying, move nails to another calm session.

    Ear cleaning should be need-based and gentle, not an automatic deep-cleaning step after every bath. Do not treat painful, red, swollen, smelly, or discharging ears as a normal bath task. Ask a veterinarian.

    For eyes, keep shampoo and rinse water controlled. Wipe the face gently with a damp cloth if needed, but stop for squinting, injury, heavy discharge, swelling, or pain.

    Coat-Type Notes

    Short coats

    Do a quick pre-bath loose-hair pass, check skin and paws, bathe if needed, dry well, and finish with a short brush or cloth pass.

    Double coats and shedding coats

    Remove loose coat gently before the bath, but avoid scraping or overworking the skin. After the bath, dry thoroughly before the final brush. Dense coats can trap moisture even when the top layer looks finished. The dog grooming schedule by coat type can help plan routine timing without turning one bath day into too much work.

    Long, silky, curly, or mat-prone coats

    Check friction zones before the bath. Do not wet tight tangles. After the bath, dry fully and use a careful final comb check only if the dog is comfortable.

    Fearful Dogs and Puppies

    A fearful dog or puppy does not need a full grooming day. Split the job into tiny sessions: one day for a brush check, another for bath setup practice, another for a short bath, and another for nails or ears if needed.

    Stop for panic, growling, snapping, repeated escape attempts, freezing, heavy panting that does not settle, or handling that no longer feels safe. A shorter session that ends calmly is better than forcing the whole list.

    When to Use a Groomer or Vet

    Use a professional groomer for tight or widespread mats, coat work beyond your skill, trimming close to skin, heavy undercoat removal that you cannot do calmly, or a dog that needs safer handling than you can provide at home.

    Use a veterinarian for wounds, hot spots, red or raw skin, parasites, bad odor from skin or ears, ear discharge, eye injury, eye discharge, bleeding nails, limping, pain, breathing distress, heat stress, sudden behavior change, or a medically fragile dog.

    Bottom Line

    For most dogs, the safest home order is simple: check and lightly brush before the bath, skip the bath if mats or medical concerns appear, bathe and rinse only when the dog can stay safe, dry completely, then do the final brush. Nails, ears, eyes, and trimming can wait for another session if the dog is stressed.

    FAQ

    Should you brush a dog before or after a bath?

    Usually both. Brush lightly before the bath to remove loose hair and find small tangles, then brush again after the coat is fully dry.

    What if my dog has mats before a bath?

    Do not bathe over tight, painful, widespread, or skin-close mats. Stop and use a professional groomer or veterinarian.

    Should nails be done before or after the bath?

    Either can work. If the dog is tired or stressed after bathing, trim nails another day.

    Should ears be cleaned before or after bathing?

    Check ears during grooming, but clean only when needed and safe. Pain, odor, redness, swelling, or discharge should go to a veterinarian.

    Should double-coated dogs be brushed before bathing?

    For home grooming, yes: do a gentle pre-bath brush and coat check, then dry fully before the final brush. Heavy or difficult coat work may need a groomer.

    Should you cut a dog’s hair before or after a bath?

    Basic finishing is usually cleaner after the dog is bathed, rinsed, and fully dry. Do not clip over mats, cut close to skin, or attempt major coat work without the right skill and setup.

    Sources

  • How to Dry a Dog After a Bath Safely

    How to Dry a Dog After a Bath Safely

    To dry a dog after a bath, towel first, choose air drying or low-stress airflow based on the coat and the dog, then check dense areas down to the skin. Short smooth coats may dry with towels and supervised air drying in a comfortable room. Dense, double, curly, long, or mat-prone coats often need more careful section-by-section drying so dampness does not sit near the skin. If the bath itself was difficult, start with these dog bathing mistakes before the next wash.

    Stop before you try to finish the job if your dog is overheating, struggling to breathe, panicking, painful, too hard to handle safely, or showing skin, ear, or eye trouble. Use a professional groomer for mats, thick coats you cannot dry to the skin, or dogs who cannot tolerate drying. Call a veterinarian for raw skin, hot spots, open sores, breathing trouble, collapse, vomiting, weakness, eye irritation, ear pain, or a medically fragile dog.

    Safe dog drying stop signs card showing when to call a veterinarian, use a groomer, or keep towel and cool-air drying gentle.
    Use this as a quick safety check while drying. Stop for breathing trouble, heat stress, pain, panic, mats that block drying, or skin trouble.
  • Grooming stepBest timing for most dogsWhy
    Coat and skin checkBefore the bathFind tangles, mats, sore skin, parasites, lumps, wounds, and stress before the coat is wet.
    Brush or comb checkBefore and afterBrush lightly before water; finish only after the coat is fully dry.
    Small loose tanglesBefore the bath, only if painlessWater can tighten tangles. Stop if the hair pulls skin or the dog flinches.
    Tight matsNeither at homeDo not bathe, cut, or force-comb tight mats. Use a groomer or vet.
    NailsSeparate session if neededNails can happen before, after, or another day. Calm handling matters more than timing.
    Ears and eyesCheck before; wipe gently only when safePain, discharge, redness, swelling, squinting, or odor are vet signs, not routine grooming jobs.
    Final brush and finishAfter the dog is fully dryDamp coat can hide tangles and moisture near the skin.
    Dog or coat situationSafer drying planStop and get help if
    Short smooth coatTowel well, then allow supervised air drying in a warm, comfortable roomThe dog is cold, shivering, panting hard, or skin looks irritated
    Dense or double coatTowel, dry in sections, and check near the skin in thick areasThe coat stays damp near the skin or the dog cannot tolerate more drying
    Long, curly, or tangle-prone coatBlot gently, use controlled airflow if tolerated, and avoid rubbing tangles tighterYou find mats, pulling, skin-close tangles, or painful spots
    Noise-sensitive or fearful dogUse towels first, add distance and breaks, or skip the dryer if fear risesThe dog trembles, freezes, hides, snaps, growls, or tries to escape frantically
    Puppy, senior dog, flat-faced dog, or medical concernKeep the session short, gentle, and closely supervisedBreathing, balance, fatigue, overheating, pain, or distress appears

    Start With Towels, Not Heat

    Start by letting the dog shake in a safe spot, then use absorbent towels to remove as much water as you can. Press, blot, and squeeze lightly through the towel instead of rubbing hard circles into the coat.

    Rough rubbing can worsen tangles, especially behind the ears, under the collar line, in the armpits, along the belly, on the legs, and near the tail base. Use another dry towel before you use more force.

    Choose Air Drying or Dryer Drying

    Air drying is not automatically good or bad. It depends on coat density, room temperature, humidity, skin condition, and how well the dog stays comfortable while drying.

    Air drying may be enough for some short smooth coats when the room is comfortable and the dog is supervised. Dense, double, long, curly, or mat-prone coats need a closer check because the surface can feel dry while the coat near the skin is still damp. For routine planning by coat type, use the dog grooming schedule by coat type.

    If you use airflow, keep it comfortable, moving, and away from the eyes, ears, nose, and mouth. A dog-safe dryer or forced-air dryer may be useful for some coats, but this guide is not a dryer buying guide. Do not use high heat close to the skin, and do not confine a wet dog in a hot room, crate, car, or small space to speed drying.

    Check Dry-to-Skin, Not Just Dry-to-Touch

    A coat can feel dry on top while moisture remains underneath. Part the coat gently with your fingers and feel near the skin in the areas most likely to hold dampness.

    Check behind the ears, the collar line, chest, armpits, belly, thighs, tail base, and between the toes. If the coat feels cool, damp, clumped, or heavy near the skin, that area is not fully dry.

    Cornell’s canine health guidance notes that thick coats that do not dry fully and matted areas that hold moisture can increase hot-spot risk. That is a reason to dry carefully, not a reason to force a scared or painful dog through a dryer session.

    Use Dryer Air Safely

    Dryer safety is about heat, noise, airflow, restraint, and session length. Keep the airflow moving, check the skin often with your hand, and give breaks before the dog is overwhelmed.

    Human hair dryers can focus heat in a small area. If one is used at all, use only a cool or low setting, keep distance from the coat, keep the dryer moving, and stop if the dog shows distress. Do not aim airflow into the face, ears, eyes, nose, or mouth.

    Stop the dryer for heavy panting, frantic escape attempts, trembling, freezing, growling, snapping, repeated hiding, coughing, breathing trouble, weakness, or collapse. Those are not training moments. They are stop signs.

    Handle Mats and Tangles Before They Become a Drying Problem

    Do not try to blast a matted coat dry at home. Mats can trap moisture and pull on skin, and water can make some tangles feel tighter. If the dryer cannot move air through the coat or you cannot part the coat without pulling, stop.

    Use a professional groomer for mats, pelted coat, skin-close tangles, or a coat that stays damp because air cannot reach the base. Use a veterinarian if the skin under or near the mat looks red, raw, swollen, bleeding, painful, smelly, or irritated.

    Protect the Face, Ears, Eyes, and Paws

    Use a towel for the face instead of blowing air toward it. Dry around the muzzle, beard, cheeks, and folds with gentle blotting. Do not push towel corners, cotton swabs, or liquid into the ear canal.

    Dry the outside of ear flaps, then stop and call a veterinarian if there is ear odor, discharge, redness, swelling, head shaking, pain, or repeated scratching. Stop for eye redness, squinting, pawing at the eye, discharge, or any sign that shampoo, water, or airflow irritated the eye.

    Dry paws enough that the dog can walk safely. Check between toes and pads, but do not dig at sore skin or force a paw hold if the dog panics or pulls hard.

    When to Call a Groomer or Veterinarian

    Call a professional groomer when the coat is too dense to dry to the skin, mats block airflow, the dog cannot tolerate dryer noise, or the dog is too large, strong, slippery, fearful, or painful to handle safely at home.

    Call a veterinarian for hot spots, raw skin, open sores, skin irritation, swelling, discharge, ear pain, eye irritation, breathing trouble, overheating, collapse, vomiting, weakness, severe distress, pain, or any puppy, senior dog, flat-faced dog, or medically fragile dog who does not seem right after the bath.

    Cornell’s hot-spot guidance explains why thick coats and moisture matter. ASPCA dog grooming tips reinforce gentle grooming and protecting sensitive areas. A peer-reviewed heat-stroke article supports treating overheating signs as serious, which is why this guide routes heat stress, breathing trouble, weakness, collapse, or vomiting to a veterinarian instead of giving home treatment steps.

    FAQ

    Can I let my dog air dry after a bath?

    Sometimes. Air drying may be fine for some short smooth coats in comfortable conditions, but dense, double, curly, long, or mat-prone coats usually need a dry-to-skin check and may need controlled airflow.

    How do I know if my dog’s coat is dry to the skin?

    Part the coat in thick areas and feel near the skin. If the base feels cool, damp, clumped, or heavy, that area is not fully dry.

    Can a damp coat cause hot spots?

    Damp, thick, or matted coat can contribute to skin trouble when moisture stays near the skin. Hot spots, raw skin, or painful areas need veterinary guidance.

    Is it safe to use a human hair dryer on a dog?

    Use extreme caution. Human hair dryers can get too hot and too focused, so use only cool or low air, keep distance, keep it moving, check the skin often, and stop if the dog is distressed.

    Should I brush while drying?

    Only if the coat is safe to handle and the dog is calm. Do not brush through mats, painful tangles, damp irritated skin, or areas where the dog flinches, growls, snaps, or panics.

    When should a groomer dry my dog instead?

    Use a groomer when the coat is dense, matted, slow to dry, dryer-sensitive, or too hard for you to dry safely to the skin at home.

    Bottom Line

    Drying a dog safely means removing surface water, choosing the lowest-stress drying method, checking thick coat down to the skin, and stopping early for mats, skin irritation, overheating, breathing trouble, fear, pain, or unsafe handling. The goal is a dry, comfortable dog, not finishing a drying session at any cost.

  • How to Rinse Dog Shampoo Completely

    How to Rinse Dog Shampoo Completely

    Rinse dog shampoo by working through the coat in zones, not just by spraying the top of the back until the water looks clearer. Shampoo can hide in armpits, belly fur, feet, tail areas, folds, feathering, and dense undercoat.

    Keep water and soap out of the eyes, ears, nose, and mouth. Stop if the dog is panicking, the skin looks irritated, or handling no longer feels safe.

    Why Complete Rinsing Matters

    VCA medicated-shampoo guidance stresses rinsing all shampoo from the body and not leaving residue on the skin. The same residue concern matters during routine bathing, even when the shampoo is not medicated.

    The MSD Veterinary Manual notes that shampoo residue can irritate skin. Rinsing is not a quick final splash; it is its own step.

    The Rinse-Check Sequence

    Rinse-zone checklist for dog shampoo with missed zones and stop signs.

    Start at the neck and shoulders, then move down the body. Work through the chest, belly, legs, and feet. Recheck armpits, tail base, feathering, folds, and any dense coat zones before drying.

    Use your fingers to part the coat gently where the dog is comfortable. The goal is to let water reach the skin level without scrubbing painful skin or forcing the dog into a risky position.

    Common Missed Zones

    The easiest places to miss are the armpits, belly, chest, tail base, feet, legs, skin folds, long feathering, and dense undercoat. These areas can still feel slick after the topcoat looks clean.

    If the dog has mats, painful skin, folds with odor, or areas that cannot be handled calmly, do not push through. Use a veterinarian or qualified groomer.

    Rinse Checks by Coat Type

    Smooth coats need a surface check plus belly and feet. Dense double coats need extra time near the skin and undercoat. Long or feathered coats need attention at the ends, armpits, tail, and leg feathering. Curly or wavy coats can hold residue inside tight coat texture. Folded-skin areas need gentle rinsing and careful drying when the skin is healthy.

    These checks are clues, not a guarantee. Some skin conditions, coat types, and products need professional guidance.

    Residue Feel Test and Water Clarity

    Clearer water, fewer suds, less slickness, and normal coat texture are useful signs. They do not prove every bit of residue is gone in every dog.

    If the coat still feels slippery, soapy, strongly scented, or heavy, keep rinsing. If the skin becomes red, painful, or irritated, stop and get guidance instead of continuing to scrub.

    Rinse Water Temperature and Spray Direction

    Use lukewarm, not hot, water. ASPCA grooming guidance supports keeping water out of the ears, eyes, and nose during bathing. Aim the spray away from the face and keep the flow gentle enough that the dog stays under control.

    Stop Signs After Shampoo or Rinsing

    Stop for open sores, burns, infection signs, persistent itching, redness, odor, distress, panic, aggression, a medically fragile dog, or unsafe handling. Do not treat a bath as a fix for a skin problem that needs veterinary care.

    FAQ

    How do I know dog shampoo is fully rinsed?

    Use several clues: clearer water, fewer suds, less slickness, and normal coat feel. Treat those as checks, not proof.

    What happens if shampoo stays on a dog’s skin?

    Residue can irritate skin. Persistent redness, itching, odor, or distress should be checked by a veterinarian or qualified groomer.

    Which areas are easiest to miss?

    Armpits, belly, chest, tail base, feet, folds, feathering, and dense undercoat areas are commonly missed.

    Should rinse water be warm or cold?

    Use lukewarm water. Avoid hot water and icy water.

    What should I do if my dog is itchy after a bath?

    Do not assume it is only residue. If itching persists or comes with redness, odor, pain, or distress, contact a veterinarian.

    Bottom Line

    Rinse by zone, check the hidden areas, and keep going while the coat feels slick or sudsy. Stop quickly for skin changes, distress, or unsafe handling.

  • Dog Shampoo Dilution Guide

    Dog Shampoo Dilution Guide

    Dilute dog shampoo only when the label or your veterinarian says to dilute it. The ratio is not universal. A label that says to mix 10 parts water with 1 part shampoo is giving a different instruction from a label that says to use the shampoo full strength.

    For routine bathing, the safest habit is label first, fresh mix second, full rinse third. Do not guess a ratio, and do not use this page as medicated-shampoo instructions.

    What Dog Shampoo Dilution Means

    Dilution means mixing shampoo with water before it goes on the coat. Some shampoos are designed for that; some are not. A Merck Veterinary Manual shampoo therapy table notes that some shampoos may be diluted in water, and the wider veterinary point is simple: follow the product instructions.

    If the label does not tell you to dilute the shampoo, do not invent a mix. If the label is unclear, check the manufacturer’s directions before the bath.

    How to Read Ratios Like 4:1, 10:1, and 16:1

    A ratio describes parts, not a single bottle size. In a generic example, 10 parts water to 1 part shampoo means ten equal parts of water and one equal part of shampoo. Those parts could be ounces, cup marks, or fill lines, as long as you use the same unit for both sides.

    Read the wording carefully. Some labels spell out water first. Others may phrase the instruction differently. Use the exact order and wording on your own product.

    A Simple Dilution Worksheet

    Dog shampoo dilution worksheet showing generic 4 to 1, 10 to 1, and full-strength label examples plus bottle marking order.

    Before mixing, write down five things: the label ratio, the bottle size or fill line, the water amount, the shampoo amount, and the mix date. Add one more reminder on the bottle: rinse completely.

    Example only: if the label says 4 parts water to 1 part shampoo, the full mix has 5 total parts. A small batch could use 4 ounces of water and 1 ounce of shampoo. That example does not apply to a product with a different label.

    The Bottle-Mark Method

    Use a clean mixing bottle. Mark the water line first, then mark the shampoo line based on the actual label. Add water before shampoo if the label allows it, mix gently, and make only what you expect to use for that bath unless the label says storage is allowed.

    Do not reuse a bottle that held harsh cleaners or anything unsafe for pets. Do not leave an unlabeled mix where someone might mistake it for plain water or another product.

    Routine Shampoo vs Medicated Shampoo

    Medicated or prescribed shampoos are different. VCA medicated-shampoo guidance emphasizes veterinarian-prescribed directions, contact time, and rinsing all shampoo away. This page does not give medicated-shampoo dosing or treatment instructions.

    If a veterinarian prescribed the shampoo, follow the veterinarian and label directions instead of a general bath routine.

    Common Dilution Mistakes

    The common mistakes are guessing, copying a ratio from another bottle, assuming every shampoo should be diluted, storing a mix without label support, and using too much shampoo because more feels cleaner.

    More shampoo can be harder to rinse. The MSD Veterinary Manual notes that shampoo residue can irritate skin, which is why dilution and rinsing belong together.

    Skin and Rinse Stop Signs

    Stop the bath and get veterinary guidance for open sores, skin disease, sudden irritation, allergic reaction signs, swelling, distress, or a medically fragile dog. Do not use shampoo dilution as a way to manage a skin problem at home.

    FAQ

    What does 10:1 dog shampoo dilution mean?

    In a generic example, it means 10 parts water to 1 part shampoo. Always check your own product label because wording and order matter.

    Should all dog shampoo be diluted?

    No. Dilute only when the label or veterinarian directions say to dilute.

    Can I dilute medicated dog shampoo?

    Only under the product label and veterinarian directions. This page does not give medicated-shampoo instructions.

    How long does diluted dog shampoo last?

    Follow the label. If the label does not say a diluted mix can be stored, mix fresh for the bath.

    What happens if I use too much shampoo?

    Too much shampoo can be harder to rinse and may leave residue. Persistent itching, redness, or distress needs veterinary guidance.

    Bottom Line

    A good dilution routine is not complicated: read the label, measure by parts, mix only what the directions allow, and rinse until the coat no longer feels slick or sudsy. If the shampoo is medicated or the skin looks abnormal, use veterinary directions instead.

    Related dog bath guides

  • Dog Bath Water Temperature: What Lukewarm Should Feel Like

    Dog Bath Water Temperature: What Lukewarm Should Feel Like

    Use lukewarm, not hot, water for a routine dog bath. The goal is simple: water that feels comfortable and mild, with no hot bite, no icy shock, and no guesswork once the bath is already moving.

    Do not bathe a dog at home if there are burns, open sores, signs of skin infection, heat or cold stress, panic, aggression, or handling that no longer feels safe. Puppies, senior dogs, small dogs, and medically fragile dogs need extra caution, and a veterinarian or qualified professional should guide bathing when health status is part of the concern.

    The Safe Target: Lukewarm, Not Hot

    For routine bathing, the practical target is lukewarm water. ASPCA dog grooming guidance describes using lukewarm water for bathing and keeping water out of the ears, eyes, and nose. A Merck Veterinary Manual shampoo therapy table uses the same basic direction: lukewarm, never hot.

    This guide does not give a universal number for every dog and every bathroom setup. Water temperature can shift during the bath, and a dog’s age, size, skin condition, stress level, and health status all matter.

    Why a Hand Check Can Mislead You

    A hand or wrist check is useful for catching water that is obviously hot or cold, but it is not a perfect safety test. Owner comfort is not the same as dog comfort. A spray hose can warm up or cool down after it runs. A tub can feel different from the water coming out of the nozzle.

    Hand checking dog bath water with a reminder that the hand test has limits and water should be rechecked during the bath
    A hand check helps, but it should not be treated as proof that the whole bath will stay comfortable.

    Check the water before the dog gets wet. Check again before rinsing the chest, belly, legs, and tail area. If the water suddenly feels sharp, hot, chilly, or uncomfortable, stop and adjust before continuing.

    Use Extra Caution With Puppies, Seniors, Small Dogs, and Fragile Dogs

    Puppies, senior dogs, small dogs, thin-coated dogs, and medically fragile dogs may have less tolerance for temperature stress or a long bath. Keep the session short, keep the room calm, and stop before the dog becomes exhausted or highly stressed.

    Dog bath caution graphic for puppies, senior dogs, small dogs, and medically fragile dogs
    When health, age, size, or stress changes the risk, pause the bath and get professional guidance.

    Set Up the Bath Before Water Touches the Dog

    Before you start, make the footing secure, place towels within reach, and test the water flow away from the dog. Keep the water shallow for a home bath. Avoid spraying or pouring water directly into the ears, eyes, or nose.

    If the dog is already worried, rushing the water step can make the bath harder. Start slowly, keep one hand steady on the dog if safe, and stop if the dog begins to panic, growl, snap, scramble hard, or repeatedly try to escape.

    Stop Signs During a Dog Bath

    Stop the bath if you see skin redness, pain, suspected burns, shivering, heavy panting, weakness, panic, aggression, open sores, discharge, strong odor from irritated skin, or any handling risk. This page is not a treatment guide for skin, ear, eye, heat, cold, injury, or behavior problems.

    If the bath was started because of itching, odor, sores, parasites, sudden hair loss, or recurring skin trouble, pause and ask a veterinarian what should happen next. A bath can clean surface dirt, but it should not be used to cover up a medical problem.

    Where This Fits in Home Dog Grooming

    Water temperature is only one part of a safer bath. Brush first when the coat allows it, use a calm setup, rinse thoroughly, and dry the dog in a way that does not overheat or frighten them.

    FAQ

    What temperature should dog bath water be?

    Use lukewarm, not hot, water. This article does not give a universal numeric target because dogs, bathrooms, water flow, and health status vary.

    Is warm water or cold water better for dogs?

    Lukewarm water is the safer routine direction. Avoid hot water and icy water.

    Can hot bath water hurt a dog?

    Yes. Hot water can irritate or burn skin. Stop for redness, pain, distress, panic, or any burn concern.

    Should puppies or senior dogs use cooler bath water?

    Use extra caution with puppies, seniors, small dogs, and medically fragile dogs. Ask a veterinarian when health status affects bathing.

    How do I tell if bath water is too hot for my dog?

    Check that the water feels lukewarm, not hot, before and during bathing. Stop if the dog seems distressed, chilled, overheated, painful, or uncomfortable.

    Bottom Line

    For a routine dog bath, choose lukewarm water, check it more than once, and stop quickly when the dog or the skin tells you something is wrong. A calm, short bath with mild water is better than pushing through a setup that feels uncertain.

  • Dog Grooming Checklist for Beginners

    Dog Grooming Checklist for Beginners

    A beginner dog grooming checklist should help you notice problems early, keep your dog comfortable, and avoid tasks that belong with a professional. Start with simple checks: coat, skin, eyes, ears, paws, nails, comfort, and behavior. Then build brushing, bathing, nails, and ear care into short sessions your dog can tolerate.

    Do not try to do everything in one day. A calm five-minute session is more useful than a full routine that ends in fear or force.

    Beginner dog grooming checklist graphic covering quick checks, weekly care, bath day, nails and ears, and stop signs.

    Beginner Rule: Check First, Groom Second

    Before brushing, bathing, trimming nails, or cleaning ears, look at the whole dog. Check:

    • Coat condition and loose hair.
    • Red, raw, flaky, wounded, or painful skin.
    • Eyes for squinting, redness, injury, or discharge.
    • Ears for odor, redness, swelling, pain, or discharge.
    • Paws for cracked pads, debris, swelling, or limping.
    • Nails for length, cracks, and safe handling tolerance.
    • Behavior for fear, growling, freezing, frantic movement, or panic.

    If you find a medical-looking problem, grooming is no longer the solution. Stop and ask a veterinarian.

    Daily or Quick Check

    Use this as a fast habit, especially after walks or outdoor play.

    AreaWhat to checkWhat not to do
    CoatDirt, burrs, loose hair, small tanglesDo not pull painful tangles
    SkinRedness, sores, parasites, swellingDo not diagnose or treat skin problems
    EyesClear, comfortable eyesDo not treat red, painful, or discharging eyes
    PawsDebris, cracked pads, limpingDo not dig at embedded objects
    BehaviorCalm enough to handleDo not force restraint

    For puppies, seniors, and nervous dogs, this daily check may be the whole session.

    Weekly Checklist

    Most beginners can start with a weekly maintenance session:

    • Brush with a coat-appropriate tool category.
    • Comb-check mat-prone areas if the coat is long, curly, dense, or feathered.
    • Check ears without deep cleaning.
    • Check nails and paws.
    • Wipe ordinary surface dirt from the coat or feet.
    • Note any changes to skin, coat, smell, comfort, or behavior.

    Short smooth coats may need less brushing than curly or long coats, but every dog benefits from being checked regularly. For timing by coat, use the dog grooming schedule by coat type.

    Monthly or As-Needed Checklist

    Some tasks happen less often or depend on the dog:

    • Bathing when dirty, smelly from ordinary activity, or seasonally needed.
    • Nail trimming or grinding when nails are long and the dog can be handled safely.
    • Ear cleaning only when appropriate and not painful.
    • Professional grooming for coat shaping, clipping, heavy shedding help, or unsafe handling.

    Do not bathe to cover up persistent odor, itch, discharge, wounds, or inflamed skin. Those are stop signs.

    Bath-Day Checklist

    Before the bath:

    • Brush out loose hair and small tangles.
    • Stop if mats are tight, painful, widespread, or close to the skin.
    • Put a non-slip surface in place.
    • Keep towels ready.
    • Plan a short session with breaks.

    During the bath:

    • Use lukewarm water.
    • Keep shampoo and water away from eyes and ear canals.
    • Rinse thoroughly.
    • Stop if the dog panics, overheats, struggles to breathe, or cannot be handled safely.

    After the bath:

    • Dry thoroughly, including paws, armpits, belly, ears, and skin folds.
    • Brush again once fully dry.
    • Save nails or ears for another day if the dog is tired.

    For a deeper bath-day safety check, see dog bathing mistakes to avoid at home.

    Nail Checklist

    Nail care should be gradual. Handle paws first, reward calm behavior, and trim or grind only small amounts when you know where you are working.

    Stop for bleeding, pain, limping, panic, sudden jerking, growling, or uncertainty about nail anatomy. Do not wrestle through nail care. A groomer, veterinary team, or trainer-informed plan can make nail work safer.

    Ear Checklist

    For beginners, ear care starts with looking and smelling, not deep cleaning. Healthy ears should not be painful, swollen, heavily odorous, or full of discharge.

    Do not put cotton swabs down the ear canal. Do not treat suspected ear infections at home. Do not keep cleaning an ear that looks worse or hurts.

    Grooming Tasks Beginners Should Avoid

    Beginners should not attempt:

    • Severe mat removal.
    • Cutting mats out with scissors.
    • Advanced clipping or breed trims.
    • Deep ear cleaning.
    • Medical skin, ear, eye, fold, or wound care.
    • Anal gland expression.
    • Dental scaling.
    • Forced restraint or sedation.

    Learning what to skip is part of good at-home grooming.

    When to Stop and Call a Pro or Vet

    Call a veterinarian for wounds, parasites, hot spots, bad odor with redness, red or raw skin, ear pain or discharge, eye squinting or discharge, limping, bleeding nails, suspected infection, breathing trouble, overheating, or pain.

    Call a professional groomer for severe mats, coat work you cannot safely maintain, nail care you cannot do safely, or a dog that cannot be groomed without force.

    Bottom Line

    A beginner grooming routine should feel calm, short, and repeatable. Check your dog first, do the easy maintenance your dog can tolerate, split bigger tasks across days, and stop early when you see pain, fear, skin problems, ear problems, severe mats, or unsafe handling.

    FAQ

    What should be on a beginner dog grooming checklist?

    A beginner checklist should include coat brushing, skin checks, eyes, ears, paws, nails, bath planning, drying, behavior checks, and clear stop rules.

    How often should beginners groom a dog at home?

    Do quick comfort checks often, brush on a coat-appropriate schedule, bathe as needed, and check nails every one to two weeks. Adjust for coat type and tolerance.

    What grooming tasks should beginners avoid?

    Avoid severe mat removal, advanced clipping, deep ear cleaning, medical care, forced restraint, sedation advice, anal gland expression, and dental scaling.

    Do I have to do nails, ears, brushing, and bathing in one session?

    No. Splitting tasks across days is often safer and calmer, especially for puppies, seniors, fearful dogs, and beginners.

    What are signs I should stop grooming?

    Stop for pain, bleeding, discharge, swelling, wounds, parasites, overheating, breathing trouble, panic, aggression, or any handling that feels unsafe.

  • Dog Bathing Mistakes to Avoid at Home

    Dog Bathing Mistakes to Avoid at Home

    The biggest dog bathing mistakes are skipping the pre-bath brush, bathing over tangles, using an unsafe setup, spraying the face or ears carelessly, leaving shampoo residue, drying poorly, and forcing a frightened or painful dog through the bath. A safer home bath starts before the water turns on.

    Quick Answer

    Before bathing your dog, brush and check the coat, prepare non-slip footing, use lukewarm water, keep water away from eyes and ears, rinse until the coat feels clean, and dry for comfort. Stop for severe mats, wounds, parasites, ear discharge, pain, panic, growling, snapping, or unsafe handling.

    Dry dog bath setup with towel, closed shampoo, brush, and non-slip mat

    Bath-Prep Checklist

    Use this checklist before water touches the coat. It is a routine grooming check, not medical advice or a reason to push through pain or fear.

    Before the bathWhy it mattersStop if you see
    Brush and check the coatTangles can tighten after water, and brushing helps reveal skin issues.Severe mats, painful coat, wounds, or skin irritation.
    Check ears, paws, skin, and behaviorA bath should not hide pain, illness, or handling risk.Ear discharge, parasites, limping, panic, growling, or snapping.
    Set non-slip footingSlipping can make baths stressful and unsafe.A dog who cannot stand calmly or safely.
    Use lukewarm waterWater that is too hot or cold can upset the dog.Shivering, overheating, distress, or trying to escape.
    Control face and ear waterDirect spray near eyes, ears, and nose can frighten or irritate dogs.Head shaking, face sensitivity, ear pain, or strong odor.
    Rinse and dry patientlyResidue and damp coat can leave the skin uncomfortable.Fear of dryer noise, heat discomfort, or unsafe handling.

    Mistake 1: Skipping the Pre-Bath Coat Check

    Brush before bathing when the dog can tolerate it. VCA notes that burrs and tangles should be brushed out before a bath because they can become harder to remove afterward. The ASPCA also explains that brushing helps keep the coat in good condition and lets you inspect the skin.

    Do not bathe over severe mats. Do not cut mats out with scissors. If the coat is severely tangled, painful, tight to the skin, or paired with irritation, use a professional groomer or veterinarian.

    Mistake 2: Using the Wrong Setup or Water Approach

    An unsafe bath setup can turn a normal grooming task into a fear event. Use a stable, non-slip surface, keep supplies within reach, and use lukewarm water. Avoid chasing the dog around the room or lifting a struggling dog into a tub without a safe plan.

    For large or nervous dogs, shorten the goal. A quick paws-and-belly rinse may be safer than forcing a full bath.

    Mistake 3: Letting Shampoo or Water Get Into Eyes and Ears

    ASPCA Pet Insurance grooming guidance recommends avoiding the ears, eyes, and nose during bathing. Use controlled water flow around the face. A damp cloth can be safer than direct spray for many dogs.

    Stop if you notice ear pain, discharge, strong odor, swelling, head shaking, or sensitivity. Bathing is not a fix for ear problems.

    Mistake 4: Not Rinsing Long Enough

    Shampoo residue can irritate skin and leave the coat feeling dull or tacky. Rinse slowly, especially through dense, long, curly, or double coats. Lift sections of coat gently and check that water runs clear.

    Do not assume a quick surface rinse is enough on thick coats. Dense-coated dogs may need more careful rinsing than their coat length suggests.

    Mistake 5: Drying in a Way That Leaves Mats, Chill, or Fear

    Drying should match the dog and coat. Towel-dry thoroughly, especially around the chest, belly, legs, and undercoat. If using a dryer, avoid high heat, keep the noise and airflow tolerable, and stop if the dog becomes frightened.

    For long, curly, or mat-prone coats, drying without brush and comb checks can allow tangles to tighten. For fearful dogs, the priority is calm handling and safety, not a perfect finish.

    Mistake 6: Bathing Too Often or Using Bath Time to Solve Medical Issues

    Merck notes that dogs may be bathed with pet shampoo when dirty, smelly, or seasonally appropriate. Bathing more often is not always better. If you need a starting point by coat type, use the dog grooming schedule by coat type as a planning guide, then adjust for skin, coat condition, activity, and veterinarian guidance.

    Do not try to solve itching, redness, wounds, parasites, odor with inflamed skin, sudden hair loss, or recurring ear problems with repeated baths. Those signs need veterinarian guidance.

    When to Stop and Call a Groomer or Vet

    Stop the bath if the dog is panicking, growling, snapping, repeatedly trying to escape, or showing pain. Stop and call a groomer or veterinarian for severe mats, wounds, skin infection signs, parasites, ear pain or discharge, medical fragility, or unsafe handling.

    Puppies, seniors, and medically fragile dogs may need a shorter, gentler plan approved by a veterinarian or professional groomer.

    Helpful Companion Guides

    Bottom Line

    A good dog bath is mostly preparation: brush and check the coat first, set up stable footing, keep water away from eyes and ears, rinse patiently, and dry for comfort instead of speed. If the bath turns into pain, panic, medical concern, severe matting, or unsafe handling, stop and use a veterinarian or professional groomer.

    FAQ

    Should I brush my dog before or after a bath?

    Brush before the bath, especially if the dog has tangles or loose coat. You can do a second gentle brush after the coat is mostly dry if the dog tolerates it.

    Can I use human shampoo on my dog?

    Use dog shampoo unless your veterinarian tells you otherwise. Skin needs vary, and this guide does not recommend specific products.

    How often should I bathe my dog?

    Bathe when the dog is dirty, smelly, or seasonally needs it. Coat type, skin condition, activity, and veterinarian guidance matter more than a universal schedule.

    What if my dog is scared of baths?

    Do not force a full bath. Work on short, calm introductions to the bath area, water sounds, towels, and touch. Stop for panic, growling, snapping, or unsafe handling.

    Is air-drying okay?

    It depends on coat type, room temperature, and dog comfort. Thick, long, or curly coats may need more careful drying to avoid moisture and tangles. Avoid heat and forced drying if the dog is frightened.

    Sources