Tag: dog drying

  • Dog Grooming Bathroom Setup

    Dog Grooming Bathroom Setup

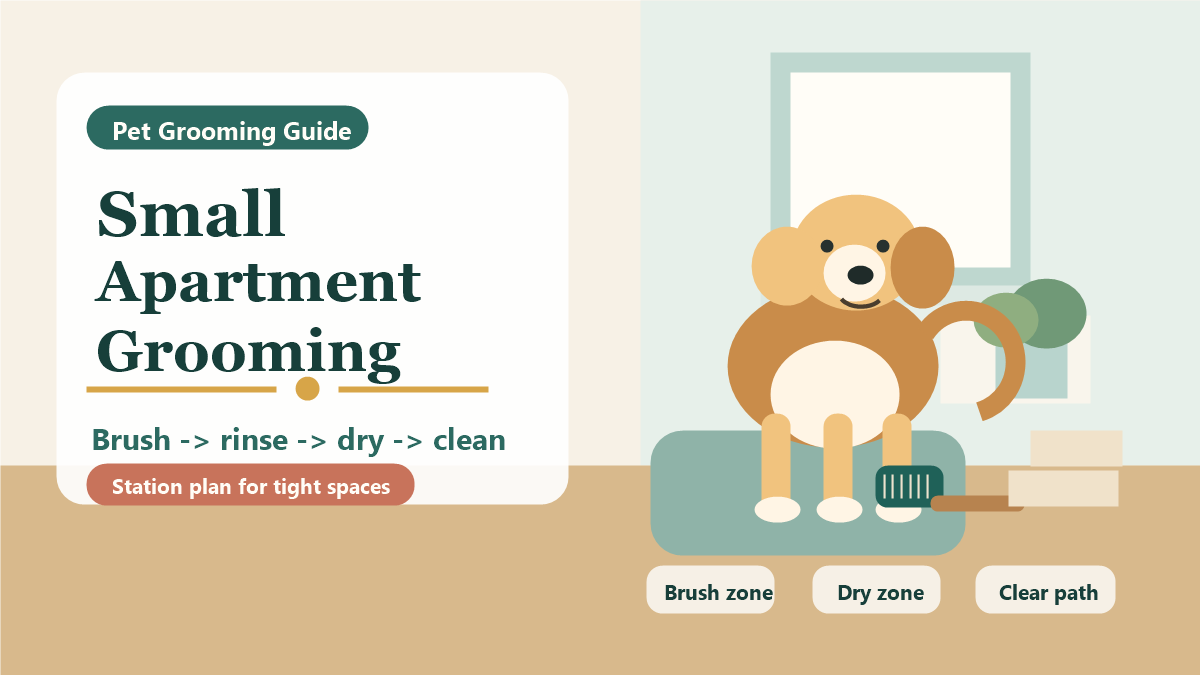
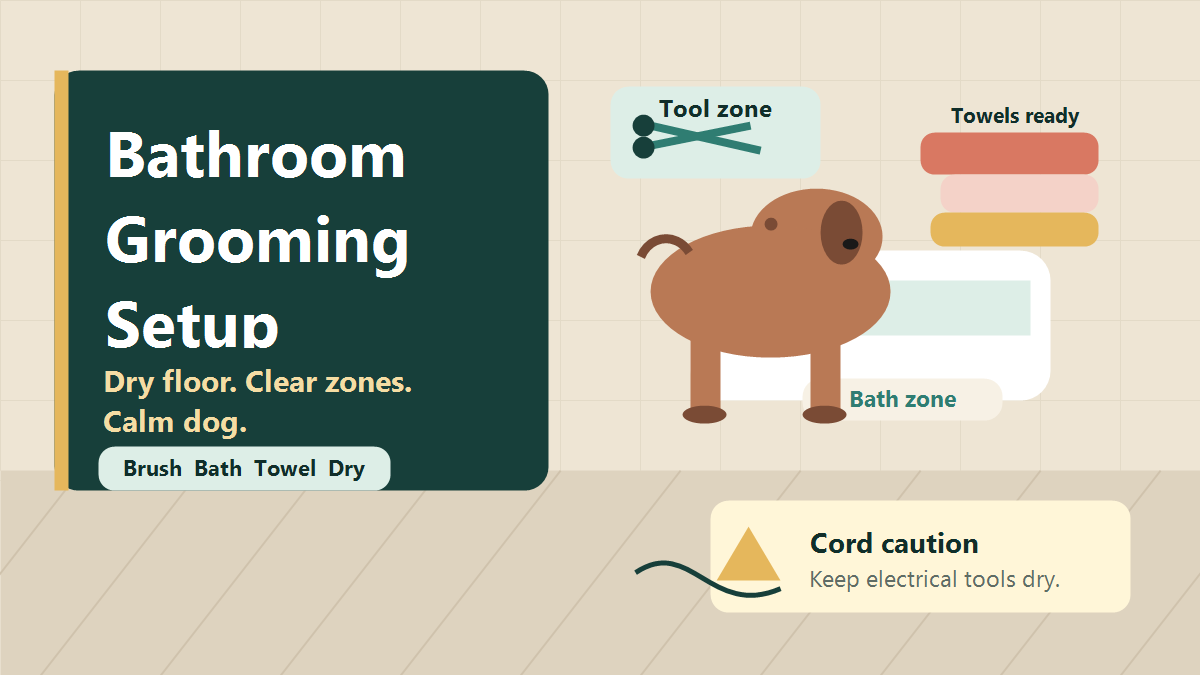
    A safer dog grooming bathroom setup has clear zones before the dog enters the room: brush, bath, towel, drying, tools, drain awareness, and cleanup. Keep the floor dry where people walk, keep cords and electrical tools away from splash or standing water, leave the exit and airflow open, and stop if the dog cannot be handled calmly.

    This setup is for ordinary at-home grooming logistics. It is not a fix for panic, pain, wounds, severe mats, parasites, breathing trouble, or unsafe handling. In those cases, pause and use a veterinarian or qualified groomer.

    Set the Bathroom Before the Dog Comes In

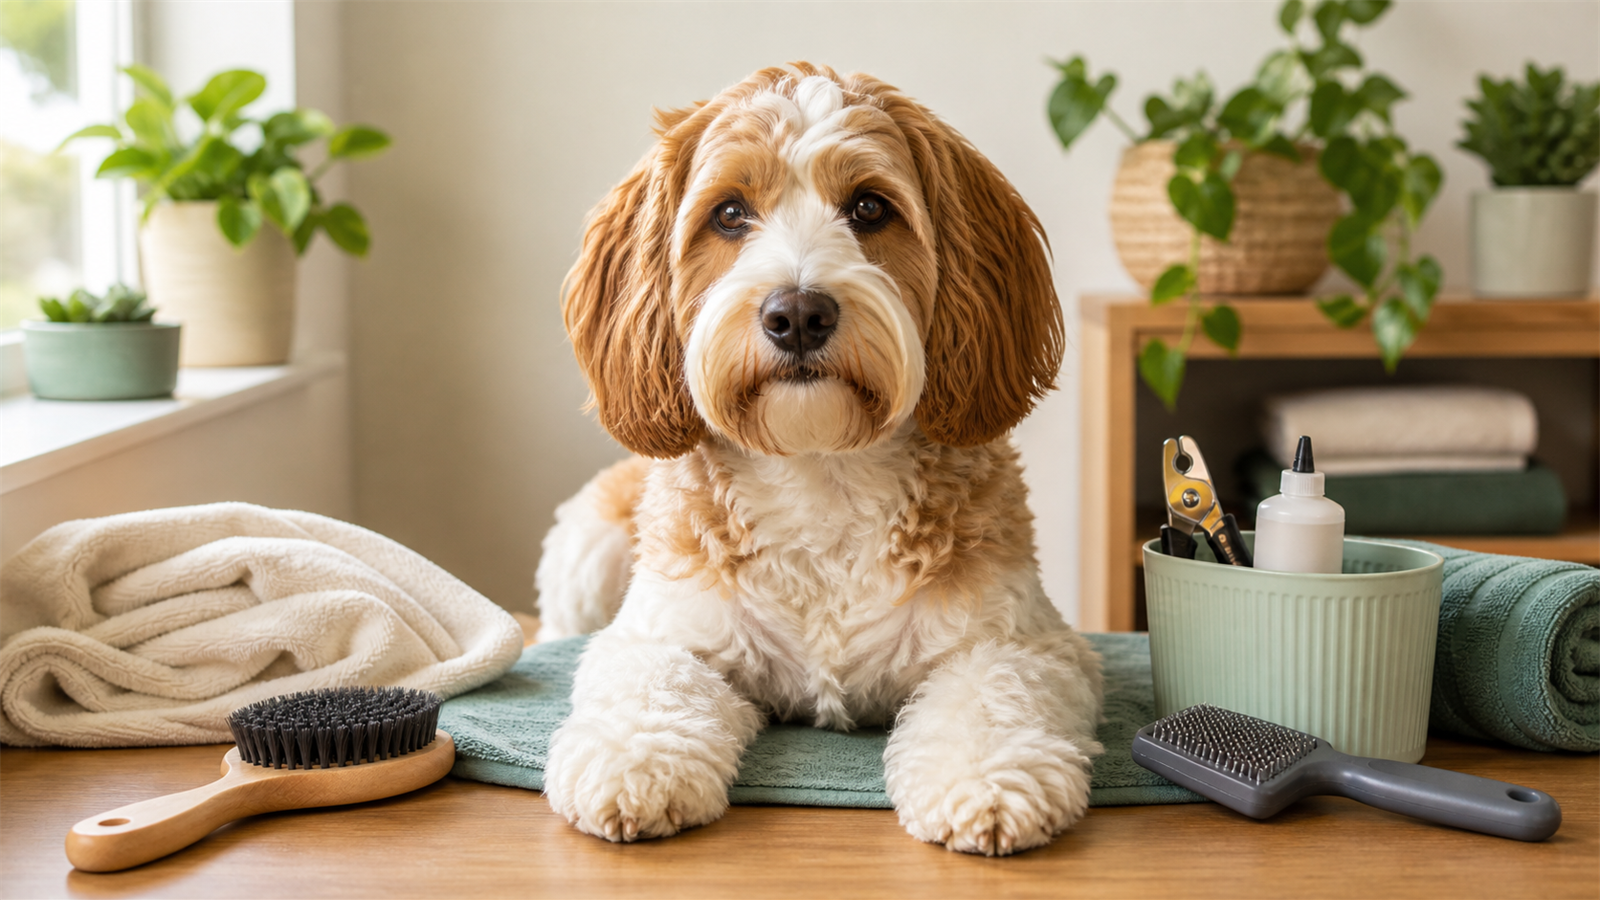
    Bathroom grooming gets harder when towels, tools, and cleanup supplies are scattered. Set the room first so the dog spends less time waiting on a wet, cramped, or slippery surface.

    1. Clear the floor and exit path.
    2. Stage towels where you can reach them without stepping away.
    3. Keep brushes, combs, and other grooming tools outside splash zones.
    4. Check footing in the brush, bath, towel, and drying areas.
    5. Keep cords, chargers, dryers, and clippers away from water.
    6. Confirm ventilation and a calm route out of the room.

    The ASPCA dog grooming tips support brushing before bathing and using a practical bath setup with warm water. Wet floors and clutter are also basic safety hazards; OSHA slip, trip, and fall guidance supports keeping walking surfaces clean, dry, and clear.

    Bathroom zone map for dog grooming showing brush, bath, towel, drying, tool, cleanup, drain, and cord wet-zone caution areas.
    Use this zone map as a quick check: dry prep first, keep bath/towel/drying/tools/cleanup separate, and keep cords out of wet zones.

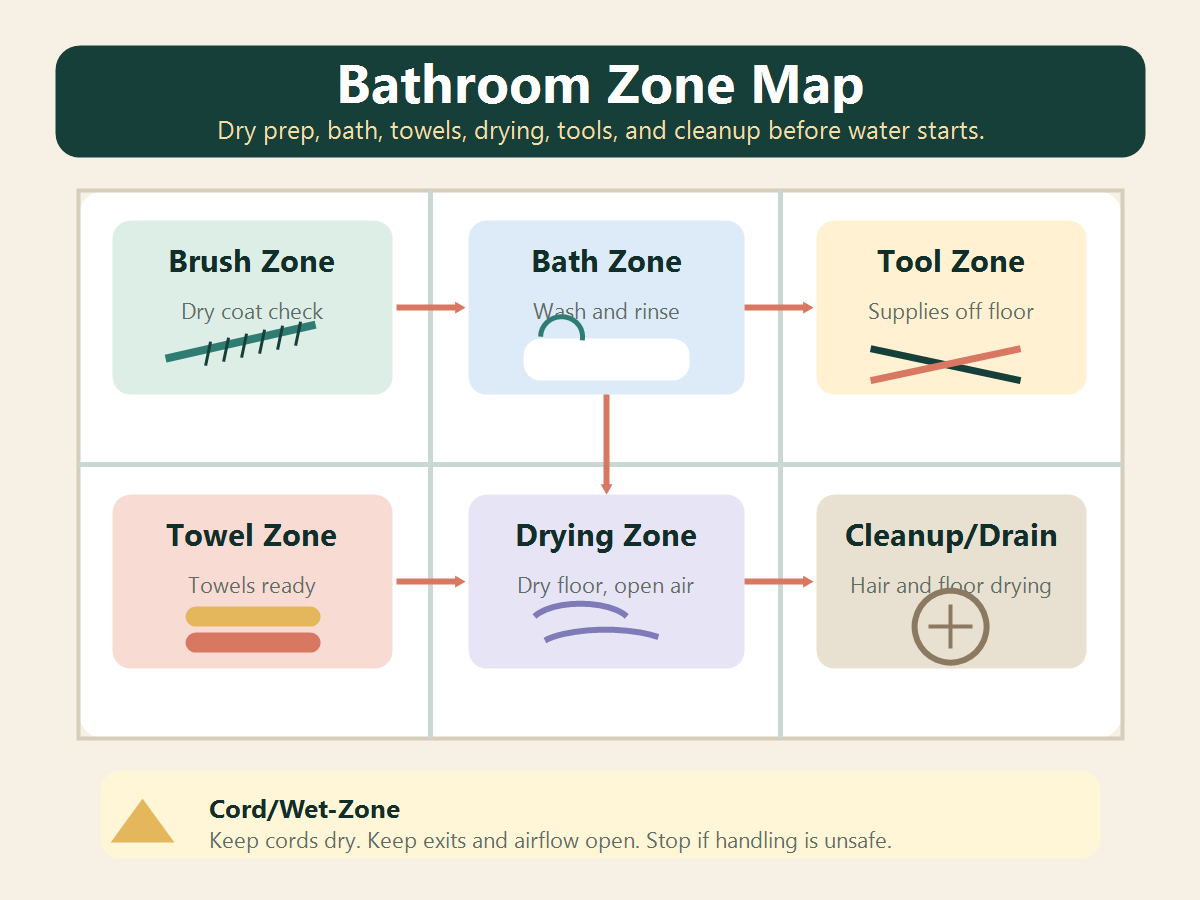
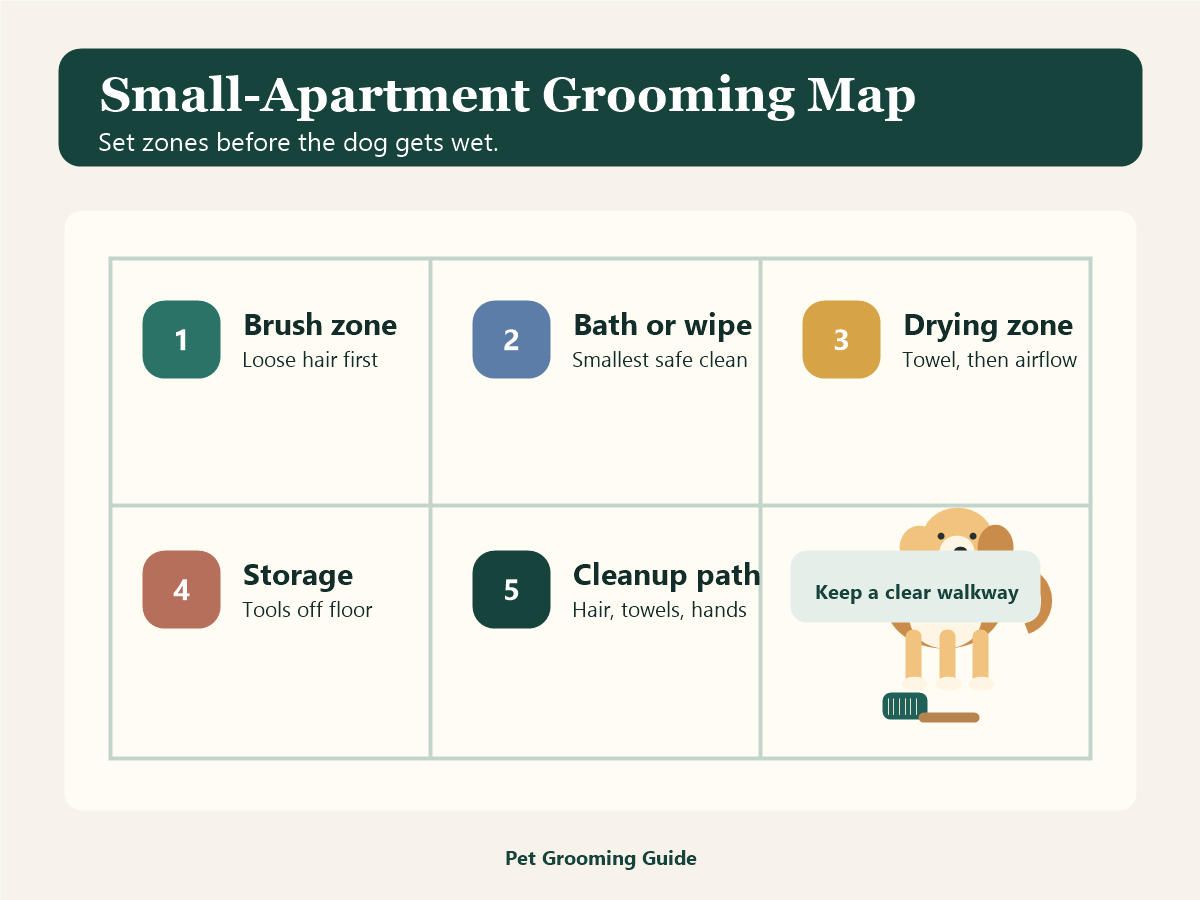
    Think of the bathroom as a short workflow, not one crowded wet area. The goal is to move from dry coat work to bath, towel, drying, and cleanup without crossing cords through water or blocking the dog's exit path.

    ZonePurposeSetup note
    Brush zoneRemove loose coat and check for tangles before waterKeep it dry and away from tub splash.
    Bath zoneWet, wash, and rinseUse stable footing and do not lift a dog into a setup you cannot control safely.
    Towel zoneFirst dry-off step before the dog shakes water across the roomStack towels before the dog is wet.
    Drying zoneTowel drying and comfortable airflow when appropriateKeep cords away from standing water and away from the exit path.
    Tool zoneBrushes, combs, nail tools if used, and grooming suppliesKeep tools organized and out of the dog's walking path.
    Cleanup and drain zoneHair capture, drain awareness, floor drying, and suppliesClean hair and water before they become slip or clog problems.

    Small, Medium, and Large Dog Setup Notes

    Small dogs may fit in a sink or low tub only when lifting is easy, the surface is secure, and the dog stays calm. Keep one hand free for steady support and never leave the dog perched near an edge.

    Medium dogs usually need more towel staging and a clear turn-around path. If the dog bumps into cabinets, blocks the door, or cannot stand comfortably, the room is not set up well enough for a calm session.

    Large dogs need more floor space, more towels, and a plan that does not depend on awkward lifting. If the bathroom forces you to pull, drag, hoist, or trap the dog, choose a different setup or use professional help. For no-tub alternatives, see dog grooming without a bathtub.

    Footing and Floor Control

    Footing matters in every zone, not just inside the tub. A dog that slips may panic, twist, scramble, or resist the next bath. Keep the standing surface stable, dry the walking path as you go, and remove laundry, bottles, cords, and loose supplies from the floor.

    Do not block the doorway with towels, bins, stools, or a closed-in drying setup. The dog and handler both need a clear way out if the session has to stop quickly.

    Cord and Water Separation

    Keep electrical tools, chargers, and cords outside wet zones. UL Standards & Engagement discusses the risk of electric grooming appliances near water and safety measures such as GFCI protection. This article does not give electrical work or wiring advice.

    Do not run cords across wet floors, into splash zones, under towels, or through the dog's exit path. If you cannot keep the drying area dry and controlled, towel dry first and move the dog to a safer ventilated area before using airflow.

    Drying Zone

    The drying zone should be dry, ventilated, and calm. Start with towels. If airflow is used, keep it comfortable, keep the dog on secure footing, and stop for panic, coughing, breathing trouble, overheating signs, or unsafe handling. For more drying detail, use how to dry a dog after a bath.

    Do not crowd the drying zone with closed doors, blocked vents, wet cords, or piles of towels on the floor. A dry path out of the room matters as much as the drying tool itself.

    Cleanup Flow

    Cleanup is part of the setup. Plan for hair capture, towel placement, drain awareness, floor drying, and tool storage before you start. The CDC home cleaning guidance supports cleaning first and following product labels when using cleaning or disinfecting products.

    Keep cleaners away from pets, avoid mixing products, and let surfaces dry before the dog returns to the room. If the dog has parasites, wounds, discharge, or signs of infection, routine bathroom cleanup advice is not enough; ask a veterinarian or qualified professional.

    When to Stop

    Stop the session if the dog panics, becomes aggressive, has breathing trouble, shows pain, has wounds, has severe mats, has parasites, cannot stand securely, or cannot be handled without force. Stop as well if the room setup creates electrical, ventilation, slipping, lifting, or blocked-exit risk.

    A paused session is better than pushing through a bathroom setup that has become unsafe.

    Bottom Line

    A good dog grooming bathroom setup separates dry prep, bath work, towels, drying, tools, drain awareness, and cleanup before water starts running. Keep floors and exits clear, keep cords away from wet zones, use calm handling, and stop for pain, panic, breathing trouble, severe mats, parasites, wounds, or any setup you cannot control safely.

    FAQ

    What should I set up before bathing my dog in the bathroom?

    Set towels, secure footing, grooming tools, a clear exit path, drying space, and cleanup supplies before the dog enters the room.

    Where should grooming tools go in a bathroom setup?

    Keep brushes, combs, nail tools, dryers, chargers, and cords outside splash zones and out of the dog's walking path.

    Can I use a dryer in the bathroom?

    Only if the setup keeps electrical tools and cords away from water, the floor is dry and secure, ventilation is open, and the dog tolerates airflow calmly.

    Is a bathroom setup enough for every dog?

    No. Dogs with panic, aggression, breathing trouble, pain, wounds, severe mats, parasites, or unsafe handling needs should be routed to a veterinarian or qualified groomer.

    Sources

  • Dog Grooming in a Small Apartment

    Dog Grooming in a Small Apartment

    Dog grooming in a small apartment works best when you set up stations before you start: brush first, contain loose hair, clean only what needs cleaning, dry with airflow and ventilation, then clear the floor, drains, towels, and tools. The goal is not a no-mess promise. It is a calmer path through a tight space.

    Stop before you begin if your dog is too large to handle safely in the space, the floor is slippery, ventilation is poor, or the dog has severe mats, wounds, pain, panic, biting risk, heat or cold stress, or medical fragility. In those cases, use a professional groomer or veterinarian instead of forcing a home session.

    Quick Answer: The Small-Apartment Grooming Plan

    StationWhat happens thereSmall-space rule
    Brush zoneLoose hair, coat check, small painless tangles onlyBrush before water so less hair reaches the bath area.
    Bath or wipe zonePaw rinse, wipe-down, shower, or safe basin when neededUse the smallest safe cleaning method for the mess.
    Drying zoneTowels first, then airflow if the dog tolerates itKeep air moving and avoid high heat in a closed space.
    Storage zoneTowels, brush, comb, cloths, waste bags, and cleanup toolsKeep tools off the floor and out of the dog’s path.
    Cleanup pathHair, drains, wet floors, towels, tools, and handsClean after the dog is settled so you are not dividing attention.
    Station map for dog grooming in a small apartment showing brush, bath or wipe, drying, storage, and cleanup path zones.
    Use this station map before the dog gets wet: brush first, pick the smallest safe clean, dry with ventilation, keep tools off the floor, then clean hair, towels, and hands.

    Plan the session like a short route through the apartment, not like one crowded grooming spot. A simple order is brush zone, bath or wipe zone, drying zone, storage zone, then cleanup path. For the broader sequence of home grooming tasks, see dog grooming order of operations.

    Keep one clear walking path for you and the dog. Move stools, loose rugs, cords, laundry baskets, and open bottles before the coat is wet. Put towels and cleanup cloths where you can reach them without stepping over the dog.

    If the apartment layout makes you turn, lift, restrain, or dry the dog in a way that feels unsafe, shrink the job. A wipe-down, paw rinse, or separate brush session may be the right answer.

    Brush Zone: Control Hair Before Water

    Start with brushing or a coat check when the coat allows it. The ASPCA dog grooming tips recommend brushing before bathing to remove dead hair and mats. In an apartment, that same step also helps keep loose coat from spreading into the bath and drying areas.

    Pick a spot with traction and enough room for the dog to stand naturally. A washable mat, towel, or easy-clean floor area can work if it does not slide. Keep a bag or bin nearby for hair from the brush, but do not let the dog step around loose hair piles or tools.

    Do not brush over painful skin, wounds, severe mats, or tight hair close to the skin. Do not keep working because the apartment is already set up. The coat check is allowed to end the session.

    Bath Or Wipe-Down Zone

    Use the smallest safe cleaning method that fits the mess. Light dirt may need only a paw rinse or wipe-down. A fuller bath may fit better in a shower, tub, or safe basin, depending on your dog and your space. If you do not have a tub, the dog grooming without a bathtub guide covers no-tub options.

    Before water starts, check footing. Slippery tile, narrow corners, unstable basins, and unsafe lifting are bigger problems in a small apartment because there is less room to recover if the dog slips or bolts.

    Keep water lukewarm, avoid spraying into the ears, eyes, and nose, and rinse carefully. Do not turn a cramped bathroom into a restraint area. If the dog panics, freezes, snaps, repeatedly tries to escape, or cannot stand safely, stop.

    Drying Zone: Airflow, Noise, And Ventilation

    Towel first, then use airflow only if the dog tolerates it. The AKC drying guide explains that airflow, not heat, dries fur, and that heat can burn skin. That matters in small rooms where heat, humidity, and noise build quickly.

    Do not run a dryer in a closed, poorly ventilated space. Open a safe ventilation path if you can, keep the dryer moving, and avoid aiming hot air close to the skin.

    Stop drying if the dog is distressed, the room feels hot or stuffy, the floor gets slippery, or you cannot keep the dryer, towels, and dog under calm control.

    Storage And Spill Control

    Small apartments reward setup. Before you start, place towels, brush, comb, cleanup cloths, waste bags, and any needed rinse supplies within reach. Close bottles when they are not in your hand. Keep sharp tools, cords, and slick containers off the floor.

    Do not stack supplies in the dog’s exit path. If the dog needs a break, you should be able to move away from the grooming zone without stepping over wet towels, cords, or loose tools.

    Cleanup Checklist For Small Spaces

    Clean after the dog is safe and settled. The CDC guidance on healthy dogs includes cleanup and handwashing as basic ways to reduce germ spread around dogs. In an apartment, cleanup also keeps wet floors, loose hair, and used towels from becoming the next problem.

    • Collect loose hair from the brush zone.
    • Check the bath or rinse area for hair and residue.
    • Remove hair from the drain catcher if one was used.
    • Wipe obvious water from floors before anyone walks through.
    • Set towels aside for washing or drying.
    • Clean brushes, combs, and rinse tools, then let them dry.
    • Wash your hands after handling hair, towels, drains, or cleanup cloths.

    Stop Signs And When To Use A Pro

    A small apartment can make a hard grooming session harder. Stop and use a professional groomer, veterinarian, or qualified handler if the dog has severe or widespread mats, wounds, painful skin, unsafe mobility, panic, biting risk, heat or cold stress, breathing distress, or medical fragility.

    Use a professional groomer for coat work that needs safer handling, better equipment, or skill beyond a basic home session. Use a veterinarian for wounds, raw skin, ear discharge, eye injury, limping, pain, parasites, bad odor from skin or ears, breathing trouble, heat stress, or sudden behavior change.

    Bottom Line

    For dog grooming in a small apartment, set the route before the dog is wet: brush zone, bath or wipe zone, drying zone, storage zone, and cleanup path. Keep footing secure, keep air moving, keep tools off the floor, and stop as soon as the space or the dog no longer feels safe.

    FAQ

    How do you groom a dog in a small apartment?

    Use stations. Brush first, choose a safe bath or wipe-down area, dry with towels and airflow, store tools off the floor, then clean hair, drains, floors, towels, tools, and hands.

    How do you control dog hair while grooming indoors?

    Brush before water, keep one planned brush zone, collect loose hair before moving to the bath area, and clean the floor after the dog is settled.

    How do you dry a dog in an apartment?

    Towel first, then use airflow with ventilation if the dog tolerates it. Avoid high heat, closed rooms, slippery floors, and drying setups that make the dog panic.

    Can you groom a dog without a bathtub?

    Yes, for some dogs and messes. A wipe-down, paw rinse, shower, or safe basin may work, but the setup still needs traction, space, calm handling, and a safe cleanup path.

    When is a small apartment unsafe for dog grooming?

    It is unsafe when footing is poor, ventilation is blocked, lifting is risky, the dog cannot be handled calmly, or there are medical, pain, matting, heat, breathing, or behavior stop signs.

    Sources

  • Dog Grooming Order of Operations

    Dog Grooming Order of Operations

    For most dogs, the safest grooming order is body check first, brush and comb before water, handle nails while the dog is still calm, bathe and rinse if needed, dry safely, then finish with ears, paws, and a final coat check. The order can change by coat type, bath need, nail sensitivity, and drying method.

    This is an adaptive workflow, not a rigid promise that every dog should complete every step in one session. If you see wounds, lumps that need a vet check, parasites, severe mats, burns, bleeding, pain, panic, aggression, sedation needs, restraint risk, or medically fragile handling, stop the home session and use a veterinarian or qualified professional.

    The Default Dog Grooming Order

    Use this default sequence when the dog is healthy, calm, and safe to handle.

    OrderStepMain decision
    1Body and skin checkIs it safe to groom today?
    2Brush and combCan the coat be opened before water?
    3NailsIs the dog calm enough for paw handling?
    4Bath and rinseDoes the dog need a bath today?
    5Towel and dryWhat drying method fits the coat and dog?
    6Ears, paws, final checkAre there any remaining stop signs?

    The ASPCA’s dog grooming tips support brushing before bathing to remove dead hair and mats, followed by wetting, shampooing, rinsing, and drying.

    Original Grooming Order Map

    Pet Grooming Guide original framework: use this order as a decision map, not a race to finish every task.

    1. Check first: stop for pain, wounds, severe mats, parasites, panic, or unsafe handling.
    2. Open the coat: brush and comb before water when tangles are minor and the dog is comfortable.
    3. Handle nails early only if calm: split nail work into another day if paw handling escalates stress.
    4. Bathe only when needed: skip the bath if the coat, skin, or behavior makes water unsafe today.
    5. Dry gently: prioritize towels and safe airflow over high heat.
    6. Finish with checks: ears, paws, coat dampness, debris, and comfort decide what happens next time.

    Step 1: Pre-Groom Body and Skin Check

    Start with a quick nose-to-tail check before tools come out. Look for wounds, lumps that need a vet check, parasites, severe mats, hot or painful areas, bleeding, burns, or behavior that says the dog is not safe to handle.

    Do not groom over wounds, lumps needing veterinary review, parasites, severe mats, painful skin, burns, bleeding, panic, or aggression. If any of these are present, stop and route to a veterinarian or qualified professional.

    Step 2: Brush and Comb Before Water

    Brush and comb before bathing whenever the coat needs it and the dog can tolerate it. VCA notes that brushing helps remove loose hair, dead skin, debris, and parasites while distributing oils. VCA also says severe or extensive tangles should be handled by a professional groomer or veterinarian.

    • Loose hair and minor tangles: brush before bath if the dog stays comfortable.
    • Severe mats or skin-close tangles: stop and use a professional.
    • Painful brushing: stop.
    • Parasites or skin concerns: stop and use veterinary guidance.

    Bathing over mats can make coat problems worse, so water should not be the first step when the coat is tangled.

    Step 3: Nails Before or After Bath?

    Nails often fit best before the bath because the dog is less tired and the floor is dry. That said, nail timing should follow the dog’s stress level.

    Trim or grind nails before the bath only when the dog is calm, paw handling is already accepted, good light and supplies are ready, and the handler can stop after one nail if needed.

    Move nails to another session when the dog is already stressed, paw handling triggers panic, the nail is bleeding, torn, or painful, or restraint would be required. VCA nail-handling guidance supports preparation and styptic readiness; this section is about setup logic, not clipping technique.

    Step 4: Bath, Rinse, and Towel Stage

    Bathe only when the dog needs it and the setup is safe. After brushing, wet the coat, shampoo with a dog-safe product category, rinse thoroughly, and towel before any airflow step.

    Do not bathe a dog with severe mats, wounds, burns, parasites, pain, panic, or unsafe handling. A bath should not be used to treat skin problems or cover medical odor.

    Step 5: Drying Method by Coat

    Drying should prioritize airflow and comfort, not high heat. The AKC drying guide supports airflow rather than heat for drying fur and warns that heat can burn skin.

    Coat or situationDrying direction
    Short coatTowel thoroughly and use gentle airflow if needed.
    Dense or double coatTowel, part-check damp areas, and use safe airflow.
    Long or tangle-prone coatDry while monitoring for tangles and skin comfort.
    Noise-sensitive dogUse towel work and breaks; stop for panic.

    Stop for overheating, burns, panic, pain, or unsafe restraint.

    Step 6: Ears, Paws, Final Comb Check

    After the coat is dry enough to inspect, finish with outer-ear checks, paw checks, and a final comb or brush pass where safe.

    VCA ear guidance says red, inflamed, or painful ears should be evaluated by a veterinarian before cleaning. Keep ear work conservative and visible. Do not push into painful ears, treat discharge, or clean aggressively.

    Final checks should answer whether the coat is dry at the skin where it needs to be, paws are free of debris, any skin problem appeared during grooming, and the dog stayed comfortable enough to continue next time.

    When to Change the Order or Stop

    Change the order when the dog or coat needs it. Some dogs do better with nails on a separate day. Some coats need brushing only, not a bath. Some dogs need drying breaks.

    Stop completely for wounds, lumps needing vet check, parasites, severe mats, burns, bleeding, pain, panic, aggression or restraint risk, sedation needs, or medically fragile handling. Home grooming should be split into shorter sessions rather than forced into one long workflow.

    FAQ

    What order should you groom a dog in?

    For most dogs: body check, brush and comb, nails if calm, bath and rinse if needed, dry safely, then ears, paws, and final checks.

    Should you brush a dog before or after a bath?

    Brush before the bath when the coat needs it and brushing is safe. Severe or painful tangles should go to a groomer or veterinarian.

    Should you trim dog nails before or after a bath?

    Often before the bath, while the dog is calmer and dry. Move nails to another session if paw handling causes stress or risk.

    When should you clean a dog’s ears during grooming?

    Keep ear checks near the end and conservative. Painful, red, inflamed, odorous, or draining ears need veterinary evaluation before cleaning.

    When should you stop a home grooming session?

    Stop for wounds, parasites, severe mats, burns, bleeding, pain, panic, aggression, sedation needs, restraint risk, or medically fragile handling.

    Bottom Line

    A good dog grooming order starts with safety, not tools. Check the dog first, brush before water when the coat allows it, do nail work only while the dog is calm, bathe only when needed, dry gently, and finish with ears, paws, and a final comfort check. If the dog, coat, skin, or handling situation turns unsafe, stop and bring in a professional.

    Sources