You've probably watched a YouTube video of someone calmly brushing a fluffy golden retriever and thought, "I could do that." And you absolutely can, with the right tools and a little patience. But learning how to groom a pet at home in 2026 involves more than just buying a brush and hoping for the best. It means understanding your pet's specific coat, knowing where the danger zones are, and being honest about what you should leave to a professional.
The good news? Grooming your pet at home can save you anywhere from $600 to $1,400 per year, depending on your pet's breed and size. The trade-off is that you're taking on the responsibility for your pet's skin health, comfort, and safety.
Veterinary guidelines on coat care are clear: done right, home grooming strengthens your bond. Done wrong, it can cause serious injury. Let's walk through everything you need to know.
Quick Answer
Groom your pet at home by brushing first to remove mats. Bathe with pet-safe shampoo and lukewarm water. Dry thoroughly to prevent skin infections.
Trim nails carefully to avoid the quick. Clean ears with vet-approved solution. Know your limits and call a professional when needed.
Why This Guide Is Different (and Why You Need It)
Most articles about home grooming read like a shopping list. Buy this brush. Buy that shampoo.
Done. That approach misses the real story. Grooming is a physical interaction with a living animal who has instincts, fears, and physical limits.
Get it wrong, and you're not just dealing with a bad haircut. You're dealing with cuts, burns, infections, and a pet that panics the moment they see a brush.
Our research, drawing on veterinary dermatology guidelines and manufacturer safety documentation, shows that most home grooming injuries fall into a few predictable categories. Clipper burns top the list. Nail quick cuts are close behind.
Then comes water trapped in ears leading to infections, and the long-term coat damage from shaving double-coated breeds.
The Real Risks Most Articles Ignore
Here's what generic advice won't tell you. A clipper blade can heat up to over 50°C (120°F) during continuous use. At that temperature, it can burn your pet's skin in seconds.
Most people don't know that. They just keep clipping, and the dog yelps, and they think the dog is being dramatic.
Similarly, human shampoo has a pH of around 4.5 to 6. Dogs and cats have skin that's closer to neutral, around 6 to 7.5. Using human shampoo on a pet strips away the natural protective oils, leaving their skin dry, itchy, and vulnerable to infection.
It's not just a minor mistake. It's a repeated friction point that leads to hot spots and chronic scratching.
These aren't edge cases. Veterinary reports show these are the most common issues presented at clinics after a home grooming session. The good news is that every single one of them is preventable with the right knowledge.
When Home Grooming Is a Good Idea (and When It Absolutely Isn't)
Let's be realistic. Home grooming works brilliantly for some pets and some owners. For others, it's a terrible idea.
It's a good idea when your pet has a relatively low-maintenance coat, tolerates being handled, and you're willing to learn the correct techniques. Short-haired breeds, most terriers with wiry coats, and many mixed breeds fall into this category. You can absolutely handle brushing, occasional baths, and nail trims at home.
It's a bad idea when you have a double-coated breed like a Husky or German Shepherd and you're planning to shave them down for summer. Don't do it. That undercoat acts as insulation against both cold and heat.
Shaving it can permanently damage the coat's ability to regrow properly, and it puts your dog at risk of sunburn and heatstroke. More on this later.
It's also a bad idea if your pet has severe matting tight against the skin. Trying to cut out a mat close to the skin with scissors is one of the most dangerous things you can do. The skin underneath is thin, stretched, and often bunched up in folds.
One wrong snip means a trip to the emergency vet.
Finally, it's a bad idea if your pet shows extreme fear or aggression during grooming. Forcing an animal to sit through a groom when they're terrified doesn't just stress them out. It creates a permanent negative association that makes every future groom harder, for you and for any professional groomer you eventually hire.
What You'll Need Before You Start: The Essential Toolkit
Let's talk tools. You don't need a $500 professional setup, but you do need the right basics. Using the wrong tool for your pet's coat type is like using a hammer to drive a screw.
It'll sort of work, but it'll cause damage along the way.
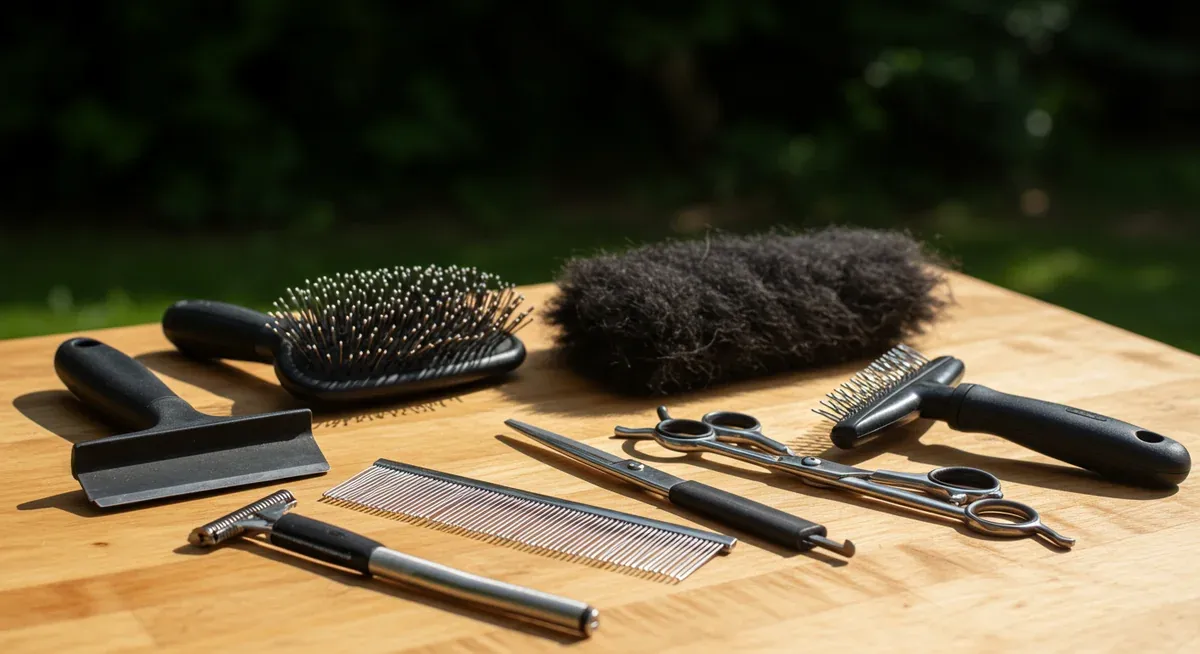
Here's what a solid starter kit looks like, with realistic price estimates as of 2026:
| Tool | Purpose | Estimated Cost |
|---|
| Slicker brush | Removes mats, tangles, and loose undercoat | $10–$25 |
| Undercoat rake | Reaches deep into double coats to pull dead hair | $10–$20 |
| Pin brush | For longer coats; gentle on sensitive skin | $8–$18 |
| Bristle brush | Finishes and distributes natural oils on short coats | $8–$15 |
| Dematting comb | Cuts through light mats (use with extreme caution) | $10–$20 |
| Pet-safe shampoo | Correct pH for your pet's skin | $10–$25 |
| Pet-safe conditioner | Detangles and moisturizes | $10–$20 |
| Nail clippers (guillotine or scissor style) | For size-appropriate nail trims | $10–$20 |
| Nail grinder | Smoothes edges after clipping; good for anxious pets | $20–$40 |
| Styptic powder | Stops bleeding if you cut the quick | $5–$10 |
| Ear cleaning solution | Vet-approved; prevents infections | $10–$15 |
| Cotton balls | For ear cleaning (never cotton swabs) | $3–$5 |
| Towels | Large, absorbent cotton towels for drying | $10–$20 |
| Non-slip bath mat | Keeps your pet secure in the tub | $10–$15 |
That's roughly $130 to $250 for a complete starter kit. Compare that to one or two professional grooming sessions for a medium-sized dog, and you'll see the payback happens fast. Just remember: quality matters.
A cheap slicker brush with sharp wire tips can scratch your pet's skin. Look for brushes with rounded tips.
The 15-Minute Pre-Groom Assessment
Before you pick up a single tool, you need to assess your pet. This isn't optional. Skipping this step is how people end up with injuries, both to themselves and their pets.
Think of it as a pre-flight checklist. You wouldn't take off without checking the wings, and you shouldn't groom without checking the coat.
Start with a visual inspection. Run your hands slowly over your pet's entire body, from head to tail. You're feeling for mats, tangles, bumps, lumps, ticks, and any areas of tenderness.
Pay special attention to the spots where mats love to hide: behind the ears, under the armpits, around the collar area, and between the back legs.
A mat feels like a hard, dense clump of fur that doesn't move easily against the skin. A tick feels like a small, round bump that's firmly attached. A lump could be anything from a harmless lipoma to something more serious.
If you find a lump that's new, growing, or bothering your pet, make a vet appointment before you groom.
Reading Your Pet's Body Language: Calm, Nervous, or "Do Not Approach"
Your pet's body language tells you everything about whether today is a grooming day or a "let's just cuddle on the couch" day.
A relaxed pet has a soft, loose body. Their ears are in a neutral position, their tail is relaxed, and they might even lean into your touch. That's your green light.
A nervous pet shows signs like lip licking, yawning, tucked tail, flattened ears, and a stiff body. They might try to move away from your hands. That's your yellow light.
You can proceed, but you need to go slowly, use treats liberally, and be ready to stop if they escalate.
A fearful or aggressive pet shows signs like growling, snarling, snapping, baring teeth, and tensing up. That's your red light. Do not proceed.
Forcing a groom at this point is dangerous for you and traumatic for them. Stop, assess what's triggering them, and consider whether a professional might be better equipped to handle them.
Setting Up Your Grooming Station Safely
Your grooming station should be set up before you bring your pet into the room. Fumbling with tools while trying to hold onto a wriggling dog is a recipe for disaster.
Choose a space with good lighting. A bathroom or laundry room works well because they're easy to clean and usually have a bathtub. Place a non-slip mat in the tub or on the floor where you'll be working.
Slippery surfaces make pets anxious and can cause them to try to escape, which is when accidents happen.
If you're using a grooming table, invest in a grooming loop. This is a soft restraint that attaches to the table and goes around your pet's neck, preventing them from jumping off and injuring themselves. Never use a loop on a cat.
They can panic and strangle themselves. For cats, a secure hold on a non-slip surface is safer.
Have all your tools laid out within arm's reach. Keep treats nearby. You want to reward calm behavior throughout the session.
This isn't bribery. It's positive reinforcement, and it's the single most effective way to make grooming a pleasant experience for your pet.
Brushing 101: The Foundation of Everything
Brushing is not just about making your pet look pretty. It's the most important thing you can do for their skin and coat health. Regular brushing distributes natural oils through the fur, removes dead hair and dander, stimulates blood flow to the skin, and gives you a chance to check for unusual bumps or parasites.
The frequency of brushing depends entirely on your pet's coat type. A short-haired breed like a Beagle needs a quick brush two to three times a week. A long-haired breed like a Golden Retriever or Persian cat needs daily brushing to prevent mats from forming.
Here's a quick breakdown based on coat types:
| Coat Type | Examples | Brushing Frequency | Recommended Tool |
|---|
| Smooth/short | Beagles, Boxers, Dalmatians | 2–3 times/week | Bristle brush, rubber curry |
| Double coat | Huskies, German Shepherds, Labs | 3–4 times/week (daily during shedding season) | Undercoat rake, slicker brush |
| Long/silky | Yorkshire Terriers, Shih Tzus | Daily | Pin brush, slicker brush |
| Curly/wavy | Poodles, Bichon Frises, Portuguese Water Dogs | Daily (requires frequent professional grooming too) | Slicker brush, comb |
| Wiry | Terriers, Schnauzers | 2–3 times/week | Slicker brush, stripping knife (for pros) |
| Hairless | Chinese Crested, Sphynx | Weekly (plus regular bathing) | Soft cloth, gentle brush |

Image source: Bing (Web (fair-use with source credit))
Choosing the Right Brush for Your Pet's Coat Type
Look back at your pre-groom assessment. What coat type did you identify? That dictates your brush.
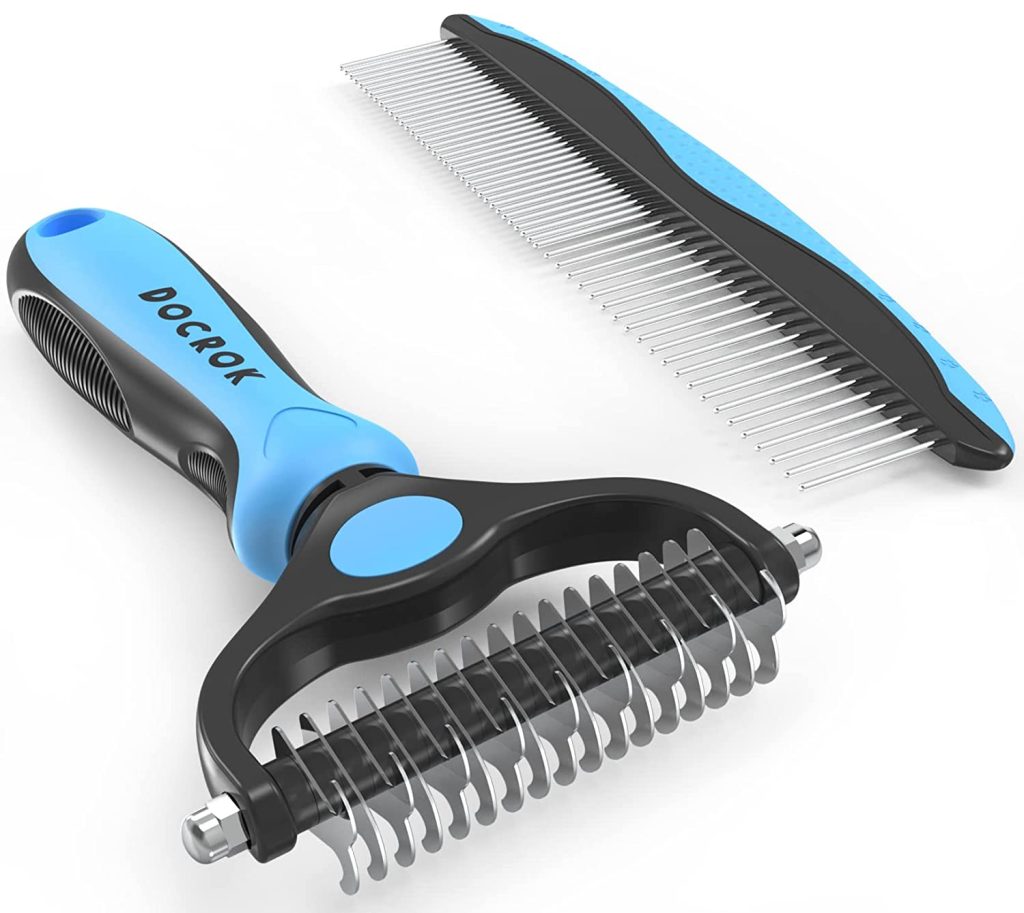
For double coats, an undercoat rake is essential. It has long, widely spaced pins that reach down through the topcoat to pull up the dead undercoat. This is what you want during shedding season.
A slicker brush, which has fine, short wires set close together, works well for removing loose hair and small tangles across the body.
For long, silky coats, a pin brush is gentler and less likely to pull or break the hair. Use it to work through the coat before following up with a slicker for finishing. For curly coats, a slicker brush is your workhorse.
You'll also need a metal comb to check for small mats, especially around the ears and tail.
For short coats, a bristle brush or rubber curry brush will do the job. These remove loose hair and massage the skin, which pets love.
Proper Brushing Technique: Direction, Pressure, and Frequency
Brush in the direction of hair growth. Always. Brushing against the grain is painful and can irritate the skin.
Start from the head and work your way back, section by section.
Here's the technique that works for most pets:
- Use one hand to hold the skin taut at the area you're brushing. This prevents the brush from pulling the skin.
- Brush in short, firm strokes, following the natural direction of the hair.
- Pay special attention to the areas where mats form, like behind the ears and under the armpits.
- After brushing a section, run a metal comb through it to check for any remaining tangles.
- Reward your pet with treats and praise throughout.
Pressure matters more than most people realize. You want to apply enough pressure to remove dead hair and work through tangles, but not so much that you're scraping the skin. Watch your pet's reaction.
If they flinch, you're pressing too hard.
How to Handle Mats Safely
Mats happen. They form when loose hair gets tangled with active hair and then gets compressed by friction from collars, harnesses, or just regular movement. The longer a mat stays, the tighter it gets, and the closer it pulls to the skin.
For light mats, you can often work them out with a slicker brush or dematting comb. Hold the base of the mat firmly against the skin to prevent pulling. Work from the tips of the mat inward, using short, gentle strokes.
For severe mats that are tight against the skin, don't try to brush them out. You'll pull and hurt your pet. Don't grab scissors either.
The skin under a mat is often folded and thin. One wrong cut can cause a serious injury. This is the moment to call a professional groomer.
They have the tools and the training to safely remove mats, often with a clipper rather than scissors.
What if your pet has a few mats but isn't severely matted overall? You can try a dematting tool like a Matbreaker, which has blades that slice through the mat without cutting the skin. Just go slowly and carefully.
Bathing: More Than Just Shampoo and Water
Bathing is where most home grooming goes sideways. People either bathe too often, use the wrong products, or fail to dry their pet properly. Each of these mistakes can cause real problems.
How Often Should You Actually Bathe Your Pet?
The old advice was "don't over-bathe your dog." That's partially true, but modern veterinary dermatology says it's more nuanced. For most dogs, bathing every four to six weeks is fine. For dogs with skin allergies or conditions, more frequent bathing with a veterinary-prescribed shampoo can actually be therapeutic.
Cats are different. Most cats are excellent self-groomers and only need a bath in specific situations, like if they've gotten into something toxic or sticky. Hairless breeds like Sphynx cats need regular bathing to remove the oil buildup on their skin.
Here's a practical guideline:
- Most dogs: every 4, 6 weeks
- Dogs with oily coats or skin conditions: as directed by your vet
- Dogs that swim or roll in stink: as needed, but use a gentle shampoo
- Most cats: only when necessary
- Hairless cats: weekly to bi-weekly
Over-bathing strips the natural oils from your pet's skin and coat, leading to dryness, itching, and potential infections. Under-bathing leads to oil buildup, odor, and a dirty coat. Balance is key.
Selecting Pet-Safe Shampoos
Never, ever use human shampoo on your pet. We've covered the pH issue, but there's more to it. Human shampoo also contains fragrances, dyes, and other ingredients that can irritate a pet's sensitive skin.
When you're choosing a pet shampoo, look for one that's specifically formulated for your pet's species. Dog shampoo is different from cat shampoo. Cats have even more sensitive skin than dogs, and some ingredients that are safe for dogs are toxic to cats.
Look for shampoos that are:
- pH-balanced for pets
- Free from artificial dyes and heavy fragrances
- Formulated for your pet's specific skin type (sensitive, dry, oily)
- Medicated if your vet recommends it
Avoid shampoos that contain tea tree oil, which is toxic to pets, and anything with harsh chemical detergents.
Step-by-Step Bathing: Water Temperature, Ear Protection, and Rinsing
Follow these steps for a safe, effective bath:
- Brush before bath: Always brush your pet thoroughly before getting them wet. Water makes mats tighter and harder to remove.
- Protect the ears: Place cotton balls gently in your pet's ears to prevent water from getting in. Remove them immediately after the bath. Water in the ear canal is the number one cause of ear infections after bathing.
- Set the temperature: Lukewarm water, around 95-100°F (35-38°C), is ideal. Test it on the inside of your wrist like you would for a baby. Hot water burns, cold water is unpleasant.
- Wet thoroughly: Use a sprayer or cup to wet your pet's coat completely. Start at the neck and work your way down. Don't spray directly into their face or ears.
- Shampoo: Dilute the shampoo with water in a cup before applying. Concentrated shampoo is hard to rinse out and can be harsh on the skin. Work it into a lather, starting at the neck and working down. Use a washcloth to gently clean the face.
- Rinse thoroughly: This is the step people rush. Leftover shampoo residue causes skin irritation and itching. Rinse, rinse, rinse again. You're done when the water runs clear and you can't feel any slipperiness.
- Squeeze out excess water: Gently squeeze the coat from top to bottom to remove excess water. Don't rub with a towel, which causes tangles. Press the towel into the coat and squeeze.
The Dangers of Improper Drying
Drying is just as important as bathing. Damp fur is a breeding ground for bacteria and yeast, leading to hot spots (moist dermatitis) and skin infections.
For short-haired dogs, a few good towelings usually suffice. For longer-haired dogs and most double-coated breeds, you'll need a blow dryer.
Never use a human hair dryer. They get too hot and can burn your pet's skin. They're also noisy, which can terrify a nervous pet.
Invest in a pet-specific dryer. These use less intense heat and are designed for animals. If you're on a budget, even a high-velocity dryer with a low-heat setting will work.
Here's the safe drying process:
- Towel dry as much as possible first.
- Set the dryer to the lowest heat setting.
- Keep the dryer moving constantly. Never focus it on one spot.
- Hold the dryer at least 6 inches away from your pet's skin.
- Use one hand to brush and lift the coat while drying, so you get down to the skin.
- Take breaks if your pet gets stressed.
- You're done when the skin feels completely dry, not just the top layer of fur.
For flat-faced breeds like Pugs and Bulldogs, extra care is needed during drying. They can't regulate heat as well and can overheat quickly. Use lower heat and give frequent breaks.
Nail Trimming Without the Fear (Theirs and Yours)
Nail trimming is the part most people dread. It's also the part where most home grooming injuries happen. But with the right tools and technique, it's completely manageable.

Image source: Bing (Web (fair-use with source credit))
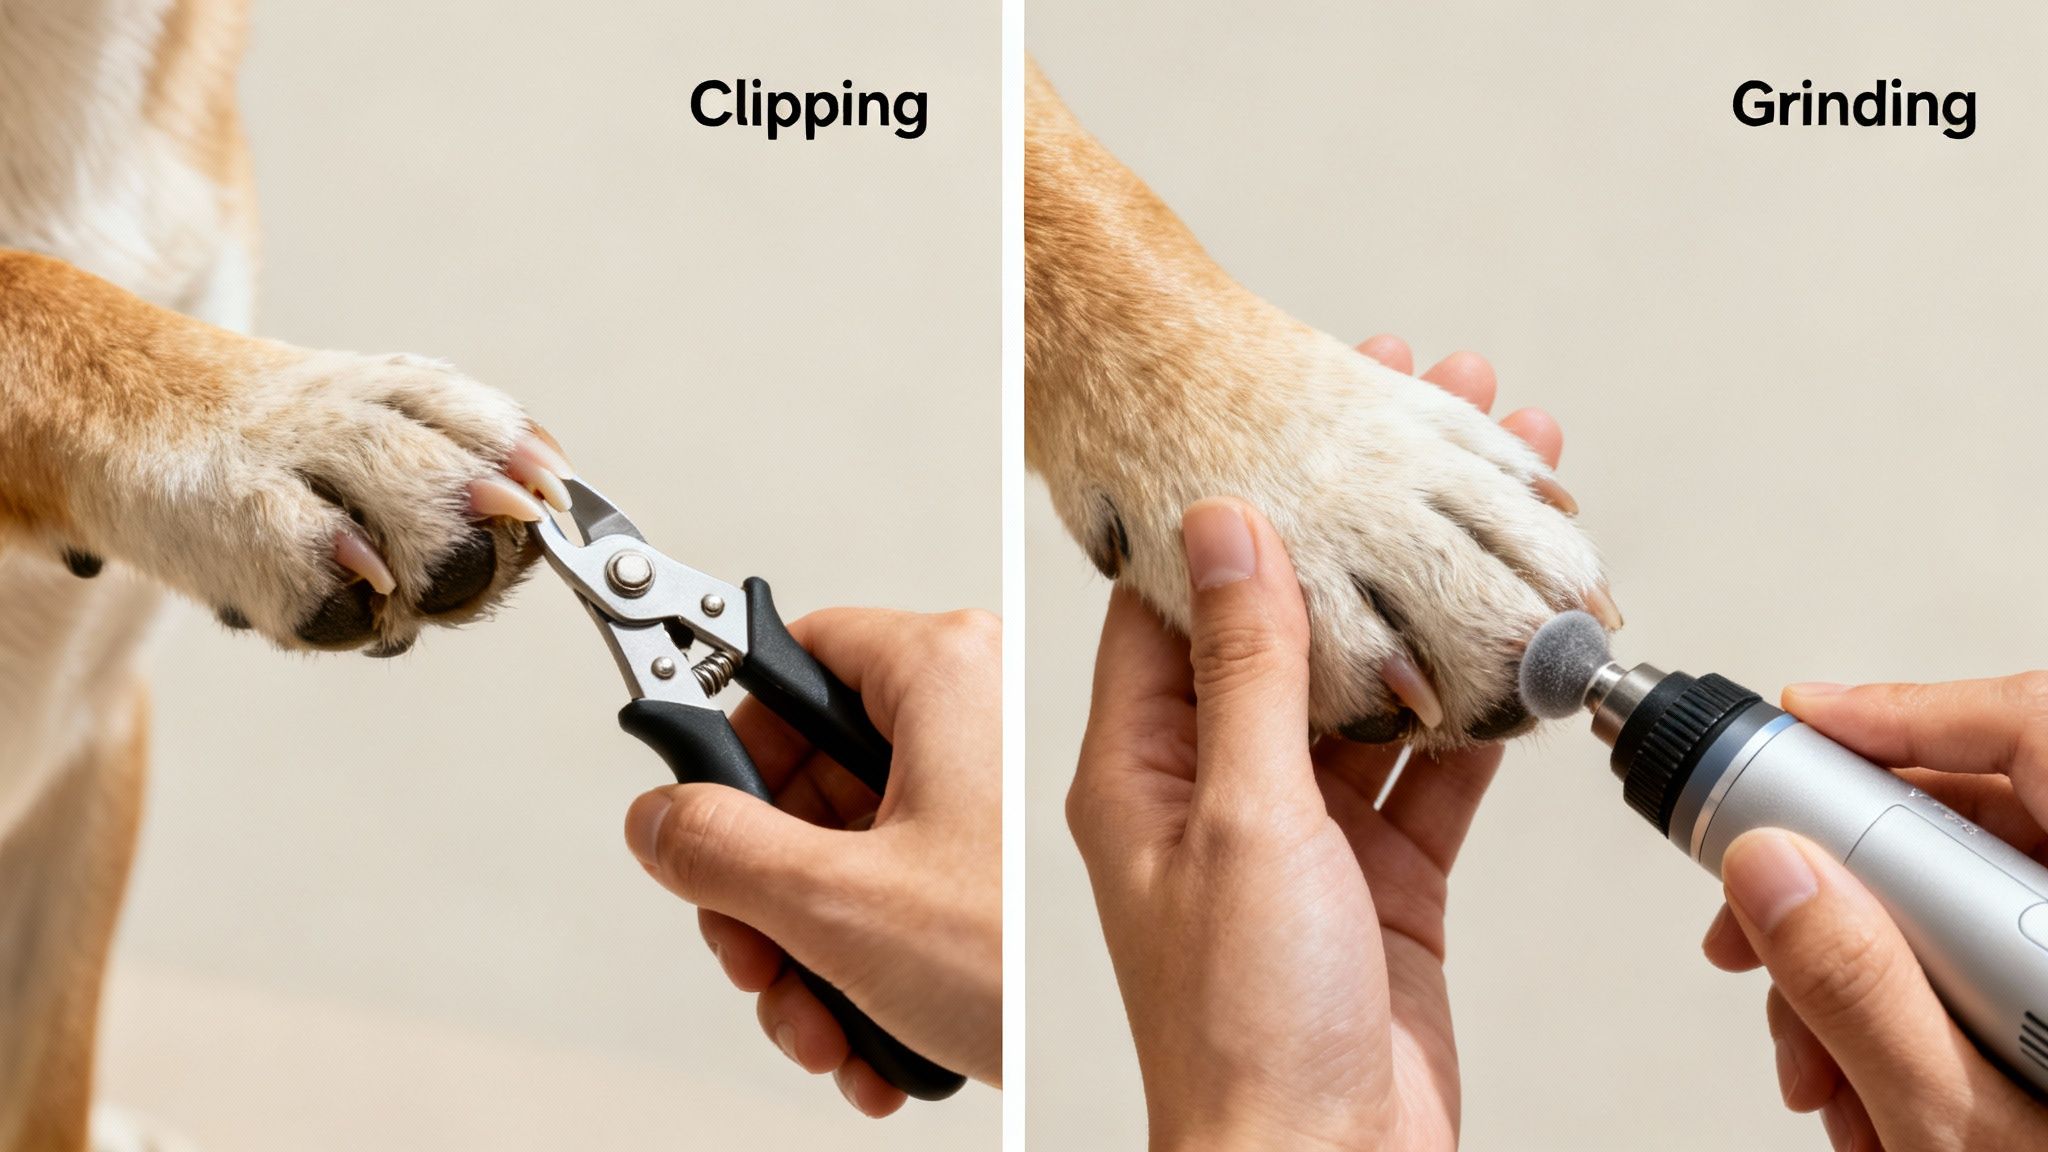
Choosing the Right Nail Clipper or Grinder
There are two main types of nail clippers for pets: guillotine and scissor-style. Both work well. The right choice depends on your pet's size and your comfort level.
Guillotine clippers have a small hole that you slide the nail into, then squeeze the handle to bring a blade down over the nail. They work best for small to medium dogs and cats. Scissor-style clippers look like garden shears on a small scale.
They work well for larger dogs with thick nails.
Nail grinders use a rotating sanding drum to grind the nail down instead of cutting it. They're a good option for pets who are anxious about the "snip" feeling of clippers. They also leave the nail with a smooth, rounded edge, which is nice.
The downside is the noise and vibration, which some pets hate.
One thing to note: the quick, the blood vessel inside the nail, grows with the nail. If you trim regularly and often, the quick recedes. If you let the nails grow long, the quick grows long too.
Regular trims make trimming easier over time.
How to Find the Quick on Light and Dark Nails
On light-colored nails, the quick is visible. It looks like a pink triangle inside the nail. You can clearly see where it ends, and you know exactly where to cut.
Dark nails are harder. You can't see the quick at all. Your best tool is the cross-section view.
When you look at the cut end of a nail, you'll see a solid circle with a small dark dot in the center. That dot is the quick. Cut just below it.
Another technique is to look at the underside of the nail. The quick runs down the center of the nail. As you trim closer to it, the nail's shape changes.
It becomes more hollow-looking. Trim in tiny increments and check after each clip.
The good news: the quick is smaller than you think. You have more room than you realize. Start conservative.
You can always trim a little more.
Step-by-Step Safe Nail Trim
- Position your pet: Have someone hold your pet steady on a non-slip surface. If you're alone, put your pet on a table at waist height. You need to see the nail from the top and the underside.
- Hold the paw firmly: Gently but firmly hold the paw. Splay the toes so you can see each nail clearly.
- Identify the quick: Look for the pink area on light nails. Look for the dark dot on dark nails.
- Cut at a 45-degree angle: Position the clipper so you're cutting the nail at a slight angle, following the natural curve of the nail. This helps prevent splitting.
- Cut below the quick: Leave a comfortable margin. You want to take off the tip that curves downward.
- Reward: Give your pet a treat after each paw, or even after each nail if needed.
- Repeat every 3, 4 weeks: Regular trims keep the quick short and the process quick.
What to Do When You Hit the Quick
It happens. Even professionals cut the quick sometimes. If it happens to you, stay calm.
Your pet will be fine.
Press a clean towel or cotton ball firmly against the nail tip. This creates pressure to slow the bleeding. Hold it for two to three minutes.
Apply styptic powder to the nail tip if you have it. This is a clotting agent that stops bleeding on contact. It might sting for a moment.
After the bleeding stops, let your pet rest. Give them praise and a treat. Don't make a big deal out of the accident.
If your pet is nervous, this is the moment to stop the session and try again another day.
Building Nail-Trimming Tolerance in Anxious Pets
If your pet panics at the sight of clippers, you need a desensitization plan. It won't work in one session, but it will work over a few weeks.
Start by simply touching your pet's paws while giving treats. Do this for a few days until your pet is relaxed about paw handling. Then introduce the clippers.
Let your pet sniff them. Click the clippers near your pet without touching their paws. Treat them for staying calm.
Eventually, clip one nail. Just one. Then stop.
Treat and praise. Build up to a full trim over several sessions. If your pet regresses, back up a step and rebuild.
Ear Cleaning and Eye Care: The Often-Forgotten Zones
Ears and eyes don't get enough attention in home grooming. They're small, easy to miss, and their problems can become serious quickly.
Safe Ear Cleaning Solutions and Techniques
Your pet's ears need regular checks. Look for wax buildup, dirt, redness, swelling, or a bad smell. If any of these are present, it's time to clean.
If the ears look severely irritated, or if your pet is constantly shaking their head, call your vet. You might be dealing with an infection that requires medication.
Use a vet-approved ear cleaning solution. These are available at pet stores and veterinary clinics. Never use hydrogen peroxide, alcohol, or vinegar.
These can damage the delicate tissue inside the ear.
Here's how to safely clean your pet's ears:
- Fill the canal: Hold your pet's ear flap upright. Gently fill the ear canal with the cleaning solution. Don't push the tip of the bottle into the ear.
- Massage the base: Gently massage the base of the ear for about 30 seconds. You should hear a squishing sound. This loosens debris.
- Let them shake: Allow your pet to shake their head. This helps bring debris to the surface.
- Wipe gently: Use a cotton ball to wipe away the loosened debris from the ear flap and the outer part of the canal. Never use cotton swabs. They push debris deeper into the ear and can cause injury.
- Repeat until clean: Repeat until the cotton ball comes out clean.
Ear cleaning frequency varies. Some breeds, like Cocker Spaniels, need weekly cleaning. Others, like many cats, might only need it monthly.
Check your pet's ears weekly and clean when you see buildup.
How to Flush Eyes Safely
Eye care is simpler than ear care. Most pets just need a regular wipe of the eye area to remove discharge and tear stains.
Use a soft, damp cotton ball or a pet-specific eye wipe. Gently wipe from the inner corner of the eye outward. Use a fresh cotton ball for each eye to avoid spreading any infection.
If your pet has discharge that's yellow, green, or bloody, that's a red flag. Call your vet. If your pet's eyes look red or swollen, or if they're squinting or rubbing their face, that's also a vet visit.
For flushing a foreign object from the eye, you can use sterile saline solution (the same kind used for contact lenses). Gently flush the eye with a steady stream of saline. If the object doesn't come out easily, don't keep trying.
Wrap your pet up, call your vet, and get there as soon as possible.
Recognizing Ear Infections and When They Need a Vet
Ear infections are common, especially in dogs with floppy ears. The signs are hard to miss: head shaking, scratching at the ears, redness, swelling, a bad odor, and brown or yellow discharge.
If your pet shows these signs, don't try to clean the ears with an over-the-counter cleaner. See your vet first. Cleaning an already-infected ear can make it worse.
Your vet will prescribe medication, and you can resume cleaning after the infection clears.
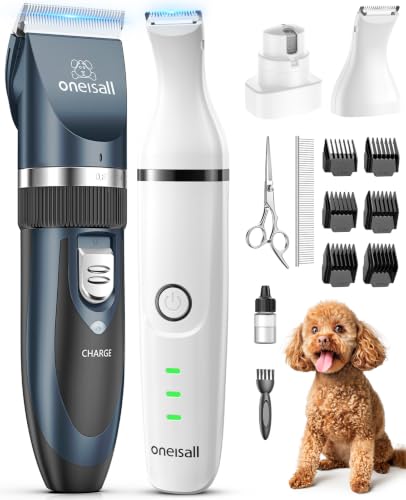
Clipping and Trimming: When to Attempt It, When to Back Off
Clipping and trimming is the most advanced home grooming skill. It also carries the highest risk of injury. Proceed with caution, and know your limits.

Image source: Bing (Web (fair-use with source credit))
The Blade Size Guide: What Each Number Actually Means
Clipper blades are numbered, and the number corresponds to the length of the hair left after clipping. The lower the number, the shorter the cut. It's counterintuitive, but the number represents the blade's cutting gap.
Here's a practical reference:
| Blade Number | Hair Length | Best For |
|---|
| #10 | 1.5 mm (1/16 inch) | Surgical areas, sanitary trims, tight matting removal |
| #7F | 9.6 mm (3/8 inch) | Summer cuts on medium-length coats |
| #5F | 6.4 mm (1/4 inch) | Short, even trims |
| #4F | 4.8 mm (3/16 inch) | Medium-length trims |
| #3F | 3.2 mm (1/8 inch) | Very short but not skin-tight |
The "F" designation means the blade has the finish cut blade, which leaves a smoother, more even finish.
Why You Should Never Shave a Double-Coated Breed
This bears repeating. A double coat consists of a dense, soft undercoat for insulation and a coarser topcoat for weather protection. Together, they regulate the dog's body temperature in both summer and winter.
Shaving a double coat destroys this system. It removes the undercoat and often damages the topcoat permanently. The coat often regrows patchy, discolored, or not at all.
Your dog becomes more susceptible to heatstroke in summer and hypothermia in winter. They're also at higher risk of sunburn.
What should you do instead? Regular brushing with an undercoat rake removes the dead undercoat, allowing air to circulate while keeping the protective topcoat intact. This is what vets and groomers recommend.
Safe Trimming Zones vs. High-Risk Zones
Paw pads and sanitary areas are safe to trim for most people. The face, ears, and tail are high-risk zones. Leave those to professionals unless you have training.
For paw pads, use rounded-tip scissors to carefully trim hair that grows between the pads. This hair can mat and trap debris, causing discomfort. For sanitary trims, use a #10 blade to carefully clip the area around the genitals and anus.
This prevents matting and keeps the area clean.
The face, especially around the eyes, ears, and muzzle, has thin, loose skin. A moving clipper or a sharp pair of scissors can easily nick it. The tail has a lot of loose skin and blood vessels.
Unless you're confident, leave these areas to a professional.
Clipper Safety: Overheating, Nicks, and Blade Maintenance
Clippers generate heat through friction. The more you cut, the hotter the blade gets. Overheated blades can burn your pet's skin, leaving painful, red welts.
Here's how to stay safe:
- Use cooling spray: Spray the blade with a clipper coolant spray every 5 to 10 minutes of use. This lubricates and cools the blade.
- Maintain your blades: Oil the blades regularly with clipper oil. Keep the blade tight but not over-tight.
- Check the blade temperature: Place the flat side of the blade against the back of your hand. If it feels too hot for you, it's too hot for your pet. Stop and let it cool down.
- Go in the direction of hair growth: Clipping against the grain causes pulls, irritation, and a closer cut than you intended.
- Use the right blade for the job: Don't use a #10 blade on a broad body area. It's too tight and can cause irritation.
The Cat Caveat: Grooming Felines Without Losing a Hand
Cats are not small dogs. Their skin is thinner, their coats are different, and their tolerance for handling varies widely. What works for a dog often fails with a cat.
Approach cat grooming with extra care.
How Cat Grooming Differs from Dogs
Cat skin is thinner and more delicate than dog skin. It's easier to nick with clippers or scissors. Cat hair also has a different life cycle, with more time spent in the resting phase.
This means cats don't shed the same way dogs do, and their fur responds differently to brushing.
Cats also have a much smaller tolerance for restraint. Most cats will tolerate a short grooming session, but they have a hard limit. When they reach it, they'll let you know with a hiss, a swipe, or a bite.
Pushing past that limit is dangerous.
Nail Trims, Brushing, and Bathing for Cats
For cats, the most important grooming tasks are nail trims and brushing.
Nail trims: Most cats need their nails trimmed every two to three weeks. The process is the same as for dogs. Be gentle, go fast, and use treats.
A cat in a calm, relaxed state is easier to handle. You might want to wrap your cat in a towel with one paw out. This is called the "purrito" method, and it works wonders.
Brushing: Long-haired cats need daily brushing to prevent mats. Short-haired cats can be brushed once or twice a week. Use a slicker brush or a specialized cat brush.
Go gently, especially around the belly and legs.
Bathing: Most cats never need a bath. They groom themselves efficiently. If you must bathe a cat, use a cat-specific shampoo, keep the session as short as possible, and dry them thoroughly.
The trick is to use lukewarm water, not too deep, and to avoid getting water in the ears.
When Cat Grooming Is a Two-Person Job or a Professional Job
If your cat is calm and tolerant, you can groom them yourself. If your cat is very anxious or aggressive, don't force it. A professional groomer has the handling skills and equipment to safely groom a difficult cat.
There's no shame in calling in a pro.
Severely matted cats are also best left to professionals. Mats on cats are often tight against the skin, and the skin underneath is even thinner than on dogs. Removing them safely requires skill and experience.
The 7 Biggest Home Grooming Mistakes (and How to Avoid Them)
People make the same mistakes over and over. If you can avoid these seven, you'll be ahead of most home groomers.
Mistake 1: Skipping the Pre-Brush
You can't wash a matted coat. Water just makes mats tighter. Always brush thoroughly before bathing.
This removes loose hair and untangles what you can. Many groomers won't even bathe a pet without a full pre-brush.
Mistake 2: Using Human Products
Human shampoo and conditioner are the wrong pH for pets. They strip the natural oils from the coat and dry out the skin. Use pet-specific products.
It's not expensive, and it's much healthier for your pet.
Mistake 3: Rushing the Dry
Wet or damp fur leads to hot spots, mildew, and infection. Many people towel-dry their pet and call it done. That's not enough for most breeds.
Use a pet dryer and make sure the skin is completely dry.
Mistake 4: The Double-Coat Shave Disaster
We've covered this. Shaving a double-coated breed is destructive and dangerous. It's the biggest mistake you can make.
Don't do summer cuts on double-coated breeds.
Mistake 5: Ignoring Fear Signals
Your pet's body language is telling you something. A growl is a warning. A tense body is a warning.
Pushing past these signals is how you get bitten, and it creates lasting fear. Stop when they're stressed.
Mistake 6: Cutting Mats with Scissors
The skin under a mat is thin and folded. Scissors can easily cut it. Always use a clipper with a #10 blade to remove mats that are tight to the skin.
If you're not comfortable, call a professional.
Mistake 7: Over-Bathing and Over-Brushing
Too much of a good thing is a bad thing. Bathing too often strips the coat of its natural oils. Brushing too aggressively damages the hair and irritates the skin.
Find the right balance for your pet.
Realistic Costs: What You'll Spend vs. What You'll Save
Let's talk real numbers. Home grooming saves you money, but it costs something too. The tools, the time, and the learning curve are all part of the "price."
Starter Kit Budget: The Honest Cost of Quality Tools
As of 2026, expect to spend between $130 and $250 for a quality starter kit. That's for tools that will last. Cheap tools break, hurt your pet, and frustrate you.
If you want to save money, buy only what you need for your pet's coat type. If you have a short-haired dog, you don't need an undercoat rake. If you have a Sphynx cat, you don't need a slicker brush.
Long-Term Maintenance: Replacement Blades, Shampoos, and Tool Care
Your tools need upkeep. Clipper blades need oiling and eventually replacement. Brushes need cleaning.
Shampoo and conditioner run out.
Budget a small amount each month for these consumables. Expect to replace clipper blades every year or two, depending on use. A well-maintained blade lasts longer.
Comparing At-Home Costs to Professional Grooming Rates
The savings add up quickly. Let's say you have a medium-sized dog that needs grooming every six weeks. A professional groom costs $60 to $90 per session.
That's $520 to $780 per year. Your annual kit cost and consumables might run $80 to $150 in year one.
Year one: you save $300 to $600. Year two: you save more, because the tools are already bought.
The trade-off? A professional does a better job on haircuts and breeds with complex grooming requirements. For simple maintenance, home grooming wins.
| Cost Category | Per Year (Estimated) |
|---|
| Professional grooming (every 4–6 weeks) | $520–$1,040 |
| Home grooming (tools + consumables) | $80–$250 |
| Potential savings | $270–$900 |
When to Call a Professional: The Red Flag Checklist
Knowing when to stop is part of being a responsible pet owner. It's a skill, just like clipping nails or brushing mats.
Severe Matting, Skin Conditions, and Behavioral Red Flags
Severe mats that are tight against the skin are a job for a professional. They'll use clippers carefully to remove the mats without injuring your pet.
If your pet has any of these skin conditions, see your vet before you consider grooming. Open wounds, hot spots, severe flaking or scaling, lumps that are changing, or signs of fleas or ticks. These require medical attention first, not a bath.
Behaviorally, if your pet is aggressive during grooming, stop trying. You will not out-muscle an animal in a panic. A professional groomer has the training and the physical handling skills to manage difficult pets (or they'll refer you to a vet for sedation, which is sometimes the safest option).
Grooming Needs Beyond Your Skill Level
Certain groom styles require professional training. Hand-stripping wiry coats. Poodle styling.
Oriental cat grooming. These are not DIY projects. Attempting them can injure your pet and make the coat worse.
Learn to identify your pet's grooming needs. If you're unsure, ask a professional or have a consult with your vet.
How to Find a Good Groomer and Communicate Your Pet's Needs
When you need a groomer, ask for recommendations from your vet, friends, and family. Read reviews. Tour the facility.
Look for a clean, well-lit space where animals seem calm.
When you talk to the groomer, be specific about your pet's needs. Mention any behavior concerns and any special handling requirements. The groomer will appreciate the honesty, and your pet will get a better experience.
Frequently Asked Questions
How often should I groom my pet at home?
Brush daily or every other day, depending on coat type. Bathe every 4, 6 weeks for most dogs, and only when needed for cats. Trim nails every 3, 4 weeks.
Check ears weekly. Adjust based on your pet's breed and lifestyle.
What's the best way to dry a long-haired dog?
Use a pet-specific dryer on low heat. Keep it moving constantly and hold it at least 6 inches from the skin. Towel-dry first to remove excess water.
Never use a human hair dryer on your pet. Drying properly prevents hot spots and skin infections.
Can I use baby wipes on my pet?
Baby wipes are not ideal for pets. They can contain ingredients that are safe for babies but irritating to animals. Use pet-specific wipes, which are formulated with a safe pH and ingredients, instead.
Why does my dog hate being brushed?
This usually means brushing has been painful in the past or you're using the wrong brush. Check for mats and tangles first, and use the correct brush for your dog's coat. Go slowly, use treats, and stop when they're stressed.
It takes time to build up to a positive experience.
What do I do if my pet won't sit still?
Break the groom into short sessions and end on a positive note. Do one paw one day and a few brushes the next. Use treats to reinforce calm behavior.
A relaxed pet is easier to groom than a stressed one. Also, check for areas that might be sensitive or painful.
How do I keep my pet calm during grooming?
Start with a pre-groom walk or play session to burn off energy. Use a calm, quiet space with good lighting. Give treats throughout and use a reassuring voice.
Take breaks if your pet gets too stressed. For some pets, a long session is overwhelming, so break it into smaller pieces.
The Bottom Line: Your Safe Home Grooming Checklist
Grooming at home saves money, builds trust, and keeps your pet clean and comfortable. But it demands preparation, patience, and respect for your pet's limits. Master the basics, and you'll wonder why you ever paid a professional to brush a short-haired dog.
Here's your quick-reference routine for weekly maintenance:
- Pre-groom check: Run your hands over your pet's body to feel for mats, lumps, and changes in skin condition.
- Brush thoroughly: Use the correct brush for your coat type, and section by section, work from head to tail.
- Check the ears: Look for dirt, wax, redness, or odor. Clean with a vet-approved solution.
- Check the eyes: Wipe away any discharge with a damp cotton ball.
- Inspect nails: Trim every 3, 4 weeks, or as needed.
- Bath every 4, 6 weeks for most dogs, only as needed for cats. Dry completely.
- Protect against pests: Check for fleas and ticks. Look in the ears, under the collar, and between the toes.
The Gear You Actually Need (No More, No Less)
This list is your floor, not your ceiling. If you're on a budget, these are the non-negotiables:
- Brushes appropriate for your pet's coat
- Pet-safe shampoo and conditioner
- Nail clippers and styptic powder
- Ear cleaning solution and cotton balls
- A puppy or grooming table (or a safe, non-slip surface)
- A pet-specific dryer (for anything but short, smooth coats)
The One Rule That Trumps Everything
Safety first. Always. If your pet is in distress, you're not going to finish the grooming session.
You're going to stop. If you're not confident in a technique, you don't try it anyway and hope for the best. You call a professional.
Respect your animal's limits, and you'll have a healthy, happy, well-groomed pet for years to come.