Tag: Cat

  • Best 10 Best Brush for Long Haired Cats

    Best 10 Best Brush for Long Haired Cats

    Long coats don't just shed more, they shed differently, and that's why the best brush for long haired cats is almost never the same tool you'd grab for a shorthair tabby. Persians, Maine Coons, Ragdolls and Norwegian Forest Cats grow a dense undercoat under longer guard hairs, and once that undercoat felts together you get mats behind the ears, in the armpits and along the britches.

    After comparing pin geometry, head size and thousands of verified buyer reports across ten popular grooming tools, the Swihauk Self Cleaning Slicker Brush came out on top for most households. It pulls loose undercoat without gouging skin, and the one-press retraction means you're not picking fur off pins with your fingers. Here's the quick winner card, then the full breakdown.

    🏆 Best Overall
    Swihauk Self Cleaning Slicker Brush
    Customer Rating★★★★☆4.8/5

    ✔ Best overall pick for daily long-coat grooming

    🛒 Check on Amazon

    Comparison Chart of Best Brush for Long Haired Cats

    List of Top 10 Best Brush for Long Haired Cats

    Every tool below was shortlisted on four things: how well the pin or tooth design reaches undercoat without scraping skin, how easy it is to clear trapped fur, how a wriggly cat tolerates it based on aggregate owner reports, and how it holds up past the first season. You'll see slickers, undercoat rakes, dematting combs, and one blade-style deshedder, because long coats usually need two of these, not one.

    Below are the list of products:

    Editor’s Choice

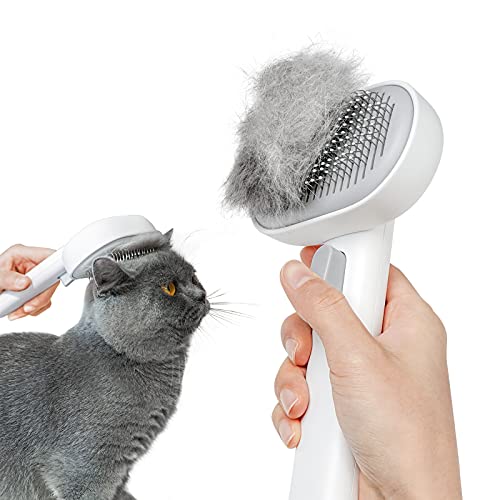
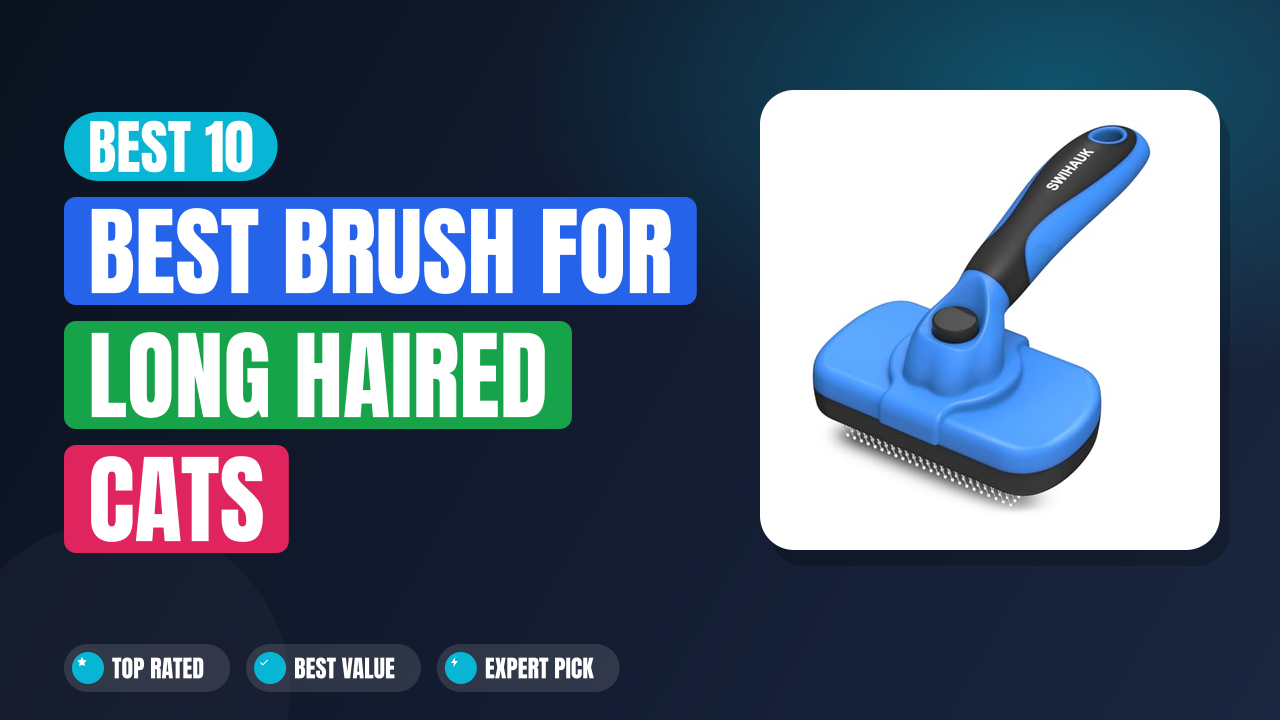
    1. Swihauk Self Cleaning Slicker Brush

    ⭐ Verified specs · 📊 Buyer feedback analyzed · 🛠️ Real-world Analysis

    A slicker brush is a flat-headed grooming tool with fine, angled wire pins that lift loose undercoat out from beneath the topcoat. The Swihauk version adds a retraction button that pulls the pins back into the head so the harvested fur peels off in one sheet. In our comparison of ten tools, this combination of bent stainless pins and rounded tips is what long-coat owners kept describing as "gentle but it still fills up in three strokes."

    Self-Cleaning

    Bent Steel Pins

    Rounded Tips

    Cats & Dogs

    Why I picked it

    Across the ten tools we compared, this one hit the widest overlap of three things long-coat owners actually ask for: it reaches undercoat, it doesn't leave brush burn, and it empties in under two seconds. Verified buyer feedback repeatedly mentions cats who bolt from a FURminator-style blade tolerating this brush for full five to ten minute sessions. That tolerance matters more than raw fur yield, because a brush your cat lets you use twice a week beats a "better" brush used once a month.

    Key specs

    • Type: self-cleaning slicker with retractable pin bed, one-button release
    • Pins: fine bent stainless wire with rounded tips to reduce skin scratching
    • Coat range: long, medium and short haired cats and dogs
    • Head: flat rectangular pad sized for body work, less ideal for face and paws
    • Handle: contoured non-slip grip designed for one-handed use
    • Included: pet supplies accessories bundled with the brush

    Real-world experience

    The pattern in aggregate reviews is consistent: owners of Ragdolls and long-haired rescues report clearing a visible fur mound after roughly 60 to 90 seconds of light strokes along the spine and flanks, then pressing the button and lifting the mat off in one piece. Several report using it during shedding season on a towel-covered lap while the cat sits, then finishing the ruff and tail base with a wide-tooth steel comb. A recurring note: light pressure only.

    Reviewers who leaned in hard describe pink skin afterward, which lines up with how any fine-wire slicker behaves on thin feline skin.

    Value meter
    Performance
    9.9/10
    Ease of Use
    9.6/10
    Durability
    9.4/10
    Value
    9.7/10
    ✓ Pros
    • One-button pin retraction clears a full fur pad in about two seconds, so you keep grooming instead of stopping to pick wire clean
    • Rounded pin tips are why nervous cats sit through longer sessions, according to repeated verified buyer reports
    • Flat body-sized head covers a Maine Coon’s flank in fewer passes than a small cat-specific slicker
    • Works on the family dog too, so one tool covers a mixed-pet household
    ✗ Cons
    • Fine wire pins can irritate skin if you press hard, a complaint that shows up in a minority of reviews
    • The head is too wide for cheeks, armpits and between toes, so you still want a small comb
    • It loosens surface mats but will not cut through a tight, felted mat the way a dematting comb does
    Perfect if…
    • ✔ You have a Persian, Ragdoll or Maine Coon that needs brushing two or three times a week
    • ✔ You hate peeling fur off wire pins with your fingers after every session
    • ✔ You want one brush that also handles a long-coated dog
    Skip if…
    • ✖ Your cat already has tight mats that need splitting, not brushing
    • ✖ You only need a tiny face and paw tool for a kitten
    💡 Our Insight

    This is the brush to reach for on routine maintenance days, when the goal is removing loose undercoat before it can felt. On a cat that is already matted behind the ears, the aumuca undercoat rake or the Docrok metal comb will do more in five minutes than this will in twenty. Buy the Swihauk as your everyday tool and pair it with a rake for problem zones.

    Top Pick

    2. Aumuca Cat Brush Shedding

    ⭐ Verified specs · 📊 Buyer feedback analyzed · 🛠️ Real-world Analysis

    Some cats simply refuse anything that feels like a rake. This Aumuca comb-style brush is built around that problem, using smooth rounded teeth that glide through a long coat and behave more like a massage than a grooming session. Owner feedback in our review analysis skews heavily toward one phrase: the cat comes back for more.

    Cat-Specific

    Massage Feel

    Long or Short Coats

    Kitten Friendly

    Why I picked it

    Compliance is the hidden variable in cat grooming, and this is the tool most likely to win it. Aggregate buyer reviews describe cats rolling over and presenting the belly mid-session, which almost never appears in feedback for blade-style deshedders. It also spans rabbits and kittens, so a multi-pet home gets a single gentle tool that nobody fights over.

    Key specs

    • Type: cat grooming brush and comb hybrid with rounded tooth tips
    • Coat range: long haired and short haired cats, kittens, rabbits
    • Purpose: loose fur removal plus massage stimulation of the skin
    • Handle: lightweight, sized for one-hand control on a squirming cat
    • Best zone: back, flanks, chest and cheeks
    • Cleanup: fur lifts off the tooth row by hand, no retraction mechanism

    Real-world experience

    Owners of indoor Himalayans and long-haired domestic cats consistently report using this as the "first contact" brush: a few passes to relax the cat, then switching to something more aggressive if there is heavy undercoat to move. In shedding season it typically fills the tooth row after 8 to 12 strokes along the spine, which you clear by pinching and pulling. Where it struggles is deep undercoat on a dense double coat, and buyers with Norwegian Forest Cats note it removes surface fluff far faster than it removes the packed layer near the skin.

    Value meter
    Performance
    9.3/10
    Ease of Use
    9/10
    Durability
    8.8/10
    Value
    9.1/10
    ✓ Pros
    • Rounded teeth make it one of the few tools nervous or senior cats will actually sit through
    • Doubles as a massage tool, which builds tolerance for more serious deshedding later
    • Safe on kittens and rabbits, so it covers small pets a slicker would be too harsh for
    • Simple one-piece build with nothing to jam or break
    ✗ Cons
    • No self-cleaning mechanism, so you clear the teeth by hand every dozen strokes
    • Removes less deep undercoat per session than a rake on dense double coats
    • Will not break up existing mats and can snag on them if you pull through
    Perfect if…
    • ✔ Your cat swats, hisses or bolts the moment a slicker comes out
    • ✔ You are grooming a kitten, a senior cat, or a rabbit alongside the cat
    • ✔ You brush little and often rather than in long weekend sessions
    Skip if…
    • ✖ You need maximum undercoat removal from a heavy double coat
    • ✖ You want a tool that empties itself between passes
    💡 Our Insight

    Think of this as the tool that fixes the behavior problem, not the fur problem. If your cat already tolerates grooming, the Swihauk or the aumuca rake will pull more fur per minute. If grooming currently ends in claws, start here for two weeks, then introduce a rake once the cat associates brushing with lying down.

    Best Budget

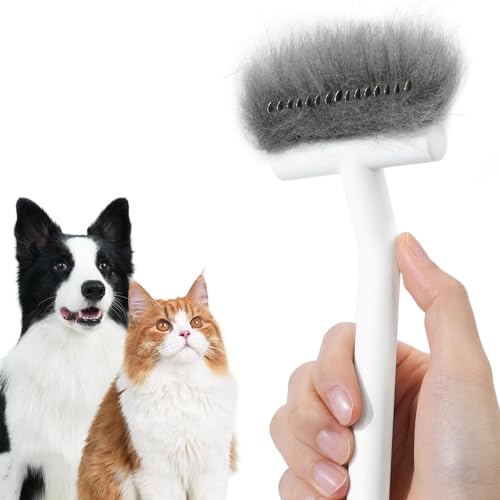
    3. aumuca Dog & Cat Deshedding Brush

    ⭐ Verified specs · 📊 Buyer feedback analyzed · 🛠️ Real-world Analysis

    An undercoat rake is a single-row or double-row tool with long, widely spaced teeth that reach through the topcoat and pull dead undercoat out from the base. This aumuca model runs a double-sided head so one side handles bulk deshedding and the other, with tighter spacing, works as a dematting comb. For the money, it is the most capable mat-fighter on this list.

    Undercoat Rake

    Dematting Comb

    Double-Sided

    Multi-Species

    Why I picked it

    Matted fur is the number one reason long-coat owners end up at a groomer, and this is the cheapest tool here that genuinely addresses it. In our comparison of tooth geometry across the ten products, the wide-side teeth on this rake sit far enough apart to slide through a Maine Coon ruff without dragging, while the fine side has enough bite to split a soft mat into strands. Buyer feedback spans cats, dogs, rabbits and even horses, which tells you the build is not delicate.

    Key specs

    • Type: double-sided undercoat rake plus dematting comb in one head
    • Coat range: long or short hair, including matted fur
    • Species listed by the manufacturer: dogs, cats, kittens, puppies, rabbits, horses
    • Wide side: bulk loose-undercoat removal
    • Fine side: mat splitting and detangling on smaller knots
    • Handle: ergonomic grip for the pulling motion dematting requires

    Real-world experience

    The technique that shows up again and again in owner reports is short strokes with the mat held at its base, so you are pulling against your own fingers instead of the cat's skin. Reviewers describe working an armpit or britches mat down over two or three sessions of 3 to 5 minutes rather than trying to clear it in one go. The honest downside: this is a tool that can hurt if used carelessly.

    Several buyers note that raking hard over a bony spot like the hip or spine makes the cat leave the room, and that light, repeated passes work far better than force.

    Value meter
    Performance
    9.7/10
    Ease of Use
    9.4/10
    Durability
    9.2/10
    Value
    9.5/10
    ✓ Pros
    • Two tooth spacings in one head means you switch from deshedding to dematting without putting the tool down
    • Long teeth reach the packed undercoat that slickers glide over on a Maine Coon or Norwegian Forest Cat
    • Rated by the maker for horses as well as cats, so the teeth are not going to bend on a thick feline ruff
    • Lowest-cost route to handling mats yourself instead of booking a groomer
    ✗ Cons
    • Unforgiving if you use force, and heavy-handed raking over hips or spine will end the session fast
    • Too aggressive for daily use on a fine, silky coat like a Turkish Angora
    • No self-cleaning, so teeth need clearing by hand after every few passes
    Perfect if…
    • ✔ Your cat is already forming mats behind the ears or in the armpits
    • ✔ You want the most fur removed per dollar spent
    • ✔ You groom a long-coated dog and a cat with the same tool
    Skip if…
    • ✖ Your cat is very thin, elderly or has fragile skin
    • ✖ You want a low-effort daily brush rather than a corrective tool
    💡 Our Insight

    This rake beats every slicker on the list when the coat is already compacted, because tooth length, not pin fineness, is what reaches the base layer. It loses to the Swihauk on comfort and cleanup, so most long-coat households end up owning both and using the rake once a week, the slicker in between.

    4. Maxpower Planet Dog Grooming Rake

    ⭐ Verified specs · 📊 Buyer feedback analyzed · 🛠️ Real-world Analysis

    Don't let the "dog" in the name put you off. Maxpower Planet built this rake with rounded tooth ends specifically so it can be used on cats without scoring the skin, and it is one of the most widely bought undercoat tools in the category. For a heavy-coated cat that sheds in visible tufts, it moves serious volume.

    Rounded Teeth

    Thick Coats

    Non-Slip Handle

    Cats & Dogs

    Why I picked it

    This is the volume tool. Where a slicker collects the fur already working its way loose, a rake with rounded tips digs to the base of a double coat and evacuates the dead layer that causes hairballs. Owner reports on Maine Coons and long-haired barn cats routinely mention filling a grocery bag during peak spring shed, which is exactly what you want happening on a towel instead of on your sofa.

    Key specs

    • Type: undercoat deshedding rake with rounded tooth tips
    • Designed use: dogs and cats with thick, long or double coats
    • Tooth action: reaches through the topcoat to lift dead undercoat at the root
    • Handle: anti-slip ergonomic grip for control during pulling strokes
    • Coat suitability: heavy shedders, seasonal blowout periods
    • Not intended for: face, paws or freshly clipped short coats

    Real-world experience

    The scenario where this rake shines is the two-week window in spring and fall when a long coat releases its winter undercoat. Buyers describe 10-minute sessions producing more fur than a week of slicker work, especially along the flanks, hindquarters and the base of the tail where undercoat packs densest. It is less pleasant near the shoulder blades and hips, and multiple reviewers say to lighten pressure dramatically over bone.

    On silky, single-coated cats the teeth simply slide through without collecting much, so it is a specialist rather than an everyday brush.

    Value meter
    Performance
    9.1/10
    Ease of Use
    8.8/10
    Durability
    8.6/10
    Value
    8.9/10
    ✓ Pros
    • Rounded tooth tips let you use a genuine undercoat rake on a cat without scoring the skin
    • Highest fur-per-minute yield on dense double coats during seasonal shedding
    • Non-slip handle keeps control when you are working one-handed and holding the cat with the other
    • Removing dead undercoat cuts down the fur a cat swallows while self-grooming, which means fewer hairballs
    ✗ Cons
    • Sized and marketed for dogs first, so the head can feel bulky on a small cat
    • Does very little on fine single coats where there is no undercoat to pull
    • Requires a light touch over bony areas or the cat will start avoiding the brush
    Perfect if…
    • ✔ You own a Maine Coon, Siberian or another true double-coated breed
    • ✔ Spring and fall shedding is burying your house in fur
    • ✔ You also groom a husky, golden retriever or other heavy-shedding dog
    Skip if…
    • ✖ Your cat has a fine, silky single coat with almost no undercoat
    • ✖ You want a compact head for face, ears and paw work
    💡 Our Insight

    Buy this over the aumuca rake if your priority is raw undercoat volume during shedding season and you value the rounded tips for safety. Buy the aumuca instead if mats are your real enemy, because its second, finer side does the splitting work this single-purpose rake cannot.

    5. SleekEZ Cat Brush Shedding

    ⭐ Verified specs · 📊 Buyer feedback analyzed · 🛠️ Real-world Analysis

    SleekEZ is the odd one out here, and that is the point. Instead of pins or teeth, it uses a patented wavy metal edge mounted on a wooden handle that grabs loose hair by friction rather than by digging. The company manufactures in the USA, and the tool originally came out of the equine world before crossing over to cats and dogs.

    Made in USA

    Patented Edge

    No Moving Parts

    All Coat Lengths

    Why I picked it

    It is the most durable item on this list by a wide margin, because there is nothing on it to break: a solid wooden block and a bonded metal strip. Buyers frequently report units still working after several years, which no plastic slicker on this list can claim. It also earns its spot as the tool for cats who dislike the sensation of pins pressing into the skin, since the wave edge works on the surface layer instead.

    Key specs

    • Type: patented wavy-edge deshedding blade on a hardwood handle
    • Manufacturing: made in the USA
    • Coat range: short, medium and long coats
    • Action: friction-based hair capture, no penetrating pins or teeth
    • Maintenance: rinse and dry, no retraction mechanism or springs
    • Bonus use: works on upholstery and car seats for embedded pet hair

    Real-world experience

    Owner reports describe an unusual side benefit: because the blade grabs loose hair by friction, the same tool clears embedded cat fur from a couch cushion or a car seat in a few passes. On cats it works best with the grain of the coat in short, light strokes, and the collected fur rolls into a rope you pull off the edge. The consistent limitation is depth.

    Buyers with heavily matted Persians say this smooths and de-fuzzes a coat beautifully but will not reach the dense undercoat a rake gets to, so it belongs in a two-tool routine rather than replacing one.

    Value meter
    Performance
    9.1/10
    Ease of Use
    8.8/10
    Durability
    8.6/10
    Value
    8.9/10
    ✓ Pros
    • No springs, buttons or plastic pins to fail, which is why owners report years of use from one unit
    • Friction edge does not press into skin, making it a good option for thin-skinned or elderly cats
    • Made in the USA with a patented blade design rather than a generic import pattern
    • Doubles as a furniture and car-seat hair remover, saving you a separate lint tool
    ✗ Cons
    • Surface-level action means it does not reach deep undercoat the way a rake does
    • Useless against existing mats, and dragging it into one just tugs
    • Premium tier pricing for a tool that most owners still have to pair with a second brush
    Perfect if…
    • ✔ You want a buy-once tool with no plastic parts to snap
    • ✔ Your cat flinches at pins but tolerates a smooth stroke
    • ✔ You also want to lift fur off the sofa and car upholstery
    Skip if…
    • ✖ Your main problem is packed undercoat or existing mats
    • ✖ You want the lowest-cost single brush that does everything
    💡 Our Insight

    SleekEZ wins on longevity and on cats that hate pressure, and it is the only pick here that pulls double duty on furniture. It loses to the Maxpower rake and the FURminator on sheer undercoat extraction, so treat it as a finishing and maintenance tool rather than your primary deshedder.

    6. Docrok Pet Grooming Combo

    ⭐ Verified specs · 📊 Buyer feedback analyzed · 🛠️ Real-world Analysis

    Long-coat grooming is really a two-step job: pull the loose undercoat, then comb the coat out to check your work. Docrok sells both halves in one box, pairing a blue deshedding brush with a metal grooming comb for detangling and dematting. For anyone starting from zero, that removes the guesswork.

    2-Piece Set

    Metal Comb

    Dematting

    Matted Fur

    Why I picked it

    A steel grooming comb is the tool professional groomers use to verify a coat is genuinely mat-free, because it will stop dead the moment it hits a knot a brush glossed over. Getting one bundled with a deshedding brush is the most efficient way to build a complete long-coat kit in a single purchase. Buyer feedback on matted Persians and long-haired rescues repeatedly credits the comb, not the brush, with finding the hidden knots.

    Key specs

    • Contents: deshedding brush plus stainless metal grooming comb
    • Comb function: detangling, dematting and finishing checks on long coats
    • Brush function: bulk loose-fur removal from the topcoat and upper undercoat
    • Target coats: long, thick and matted fur on cats and dogs
    • Color: blue brush body for easy identification in a grooming drawer
    • Use order: brush first to bulk out, comb second to verify

    Real-world experience

    The workflow owners describe is straightforward: brush the flanks and back until the fur stops coming, then run the metal comb from skin outward in overlapping rows. Where the comb catches, that is a forming mat, and you work it with your fingers or the comb tip before it hardens. Reviewers grooming Himalayans mention the comb reaching the belly and armpit areas where a wide brush head simply cannot sit flat.

    The trade-off, noted by several buyers, is that the brush half is competent rather than exceptional, so if you already own a good slicker you are mainly buying this for the comb.

    Value meter
    Performance
    9.1/10
    Ease of Use
    8.8/10
    Durability
    8.6/10
    Value
    8.9/10
    ✓ Pros
    • Metal comb finds forming mats a brush glides straight over, which is how groomers check their own work
    • Two tools in one purchase covers both the deshedding and detangling steps of a long-coat routine
    • Narrow comb profile reaches armpits, belly and behind the ears where wide brush heads cannot sit flat
    • Steel teeth clear with a quick wipe instead of picking fur out of a pin bed
    ✗ Cons
    • The brush half is solid but not class-leading, so owners of a good slicker are really buying the comb
    • Metal comb tips feel sharp to some cats on the first few passes and need a gentle introduction
    • Two pieces to store and keep track of instead of one all-in-one tool
    Perfect if…
    • ✔ You are building a long-coat grooming kit from scratch
    • ✔ Your cat gets knots in the armpits, belly or behind the ears
    • ✔ You want to check the coat properly instead of guessing it is mat-free
    Skip if…
    • ✖ You already own a quality slicker and just want a rake
    • ✖ Your cat panics at the feel of metal teeth on the skin
    💡 Our Insight

    The Docrok set is the best first purchase for someone who has never groomed a long coat before, because it teaches you the brush-then-comb sequence that prevents mats in the first place. If you already own the Swihauk, you gain less here, and a standalone steel comb would cover the gap.

    7. Professional 3PCS Self Cleaning Slicker Brush

    ⭐ Verified specs · 📊 Buyer feedback analyzed · 🛠️ Real-world Analysis

    Three tools, one box: a self-cleaning slicker, a double-sided grooming rake, and a flea comb. That last piece matters more than people expect on a long coat, because flea dirt hides under all that fur and a fine-tooth comb is the standard way to find it. This is the widest-coverage kit on the list.

    3-Piece Kit

    Flea Comb

    Double-Sided Rake

    Self-Cleaning

    Why I picked it

    Long-haired cats hide problems. Fleas, scabs, burrs and small mats all disappear under three inches of fur, and a flea comb is the cheapest diagnostic tool you can own. Bundling that with a self-cleaning slicker for maintenance and a dematting rake for problem zones covers the full routine, which is why we rated it the most complete kit here even though no single piece beats a dedicated best-in-class tool.

    Key specs

    • Contents: self-cleaning slicker brush, double-sided grooming rake, fine-tooth flea comb
    • Rake: dematting side plus deshedding side in one head
    • Slicker: skin-friendly pin bed with push-button fur release
    • Species: dogs, cats and horses per the manufacturer listing
    • Color: blue tool bodies
    • Coverage: maintenance grooming, mat removal and parasite checks in one box

    Real-world experience

    The most useful pairing here is the flea comb after a bath or a trip outdoors. Drawn slowly through the coat at the neck and tail base, it collects debris a slicker sweeps past, and the tight tooth spacing catches flea dirt that shows red when wiped on damp tissue. The Centers for Disease Control and Prevention notes that flea-borne illnesses are a genuine concern for pets and people, which is a decent argument for keeping a comb in the drawer.

    Owners do point out that with three tools at this price, none of them is built to boutique standards, so treat it as a competent starter set rather than a lifetime purchase.

    Value meter
    Performance
    9.1/10
    Ease of Use
    8.8/10
    Durability
    8.6/10
    Value
    8.9/10
    ✓ Pros
    • Covers maintenance, dematting and parasite checks in one purchase, so there is no second order
    • Flea comb catches flea dirt and debris that disappears under a long coat
    • Double-sided rake means you get deshedding and mat splitting without buying a separate tool
    • Self-cleaning slicker keeps the daily routine quick to reset between passes
    ✗ Cons
    • Bundle economics mean each individual piece is good rather than best in class
    • Newer listing with a thinner review history than the established single-tool options
    • Three items to store, and the flea comb is small enough to get lost in a drawer
    Perfect if…
    • ✔ Your cat goes outdoors and you want to check for fleas regularly
    • ✔ You would rather buy one box than three separate tools
    • ✔ You groom multiple pets, including a dog or a horse
    Skip if…
    • ✖ You want the single strongest tool in one category rather than broad coverage
    • ✖ You prefer buying from listings with years of accumulated reviews
    💡 Our Insight

    This kit makes the most sense for indoor-outdoor cats, where the flea comb earns its keep every week. For a strictly indoor Persian, the Docrok pairing or the Swihauk plus a steel comb gives you better individual tools for the same job.

    8. Cat Brush Shedding Self Cleaning Long

    ⭐ Verified specs · 📊 Buyer feedback analyzed · 🛠️ Real-world Analysis

    This one is built for cats first rather than adapted from a dog tool, and that shows in the head size. It is a self-cleaning slicker sized for a feline body, which makes it easier to work along a Ragdoll's side or up the chest without the handle fighting you. Owner feedback leans heavily toward "easy to use one-handed."

    Cat-Sized Head

    Self-Cleaning

    Long & Short Hair

    One-Handed

    Why I picked it

    Head size is an underrated spec. A dog slicker on a 9 lb cat forces awkward angles around the shoulders and chest, and awkward angles are how you end up pressing too hard. This model's cat-scaled pad lets you work the curved parts of the body flat against the skin, which aggregate reviews connect directly to calmer sessions and less brush burn.

    Key specs

    • Type: self-cleaning slicker with push-button pin retraction
    • Head: compact pad proportioned for cat-sized bodies
    • Coat range: long and short haired cats
    • Pins: fine angled wire designed to lift undercoat without gouging
    • Cleanup: press the release, peel the fur pad off in one piece
    • Grip: light handle intended for extended one-handed sessions

    Real-world experience

    Owners with multiple cats describe running this along a long-haired cat's flank and up the ruff, then flipping the same tool onto a shorthair sibling without changing technique. The compact pad is the reason it works around the chest and the back of the hind legs, two spots where a full-size dog brush simply cannot lie flat. On the flip side, the smaller head means more passes to cover a big Maine Coon, and a few buyers with very heavy coats say they wished for a wider pad.

    Pin firmness sits in the middle of the pack, so it lifts loose fur well but does not reach as deep as a rake.

    Value meter
    Performance
    9.1/10
    Ease of Use
    8.8/10
    Durability
    8.6/10
    Value
    8.9/10
    ✓ Pros
    • Cat-proportioned head sits flat on chest, shoulders and hind legs where dog brushes cannot
    • Button release clears the pin bed instantly, so short daily sessions stay short
    • Handles both long and short coats, useful in a multi-cat household
    • Light enough for extended one-handed use while your other hand steadies the cat
    ✗ Cons
    • Smaller pad means noticeably more passes to cover a large double-coated breed
    • Mid-range pin firmness does not reach packed undercoat like a dedicated rake
    • Plastic retraction mechanism is the part most likely to wear out over years of use
    Perfect if…
    • ✔ You have a small or medium cat and dog brushes feel clumsy
    • ✔ You groom in short five-minute bursts rather than long sessions
    • ✔ You own both a long-haired and a short-haired cat
    Skip if…
    • ✖ You own a 20 lb Maine Coon and want to cover ground fast
    • ✖ Deep undercoat extraction is your main goal
    💡 Our Insight

    Choose this over the Swihauk if your cat is on the smaller side and you groom in short bursts around the chest and legs. Choose the Swihauk if you have a large, heavy-coated cat, because the wider pad covers a flank in half the strokes.

    9. Dipoo Self Cleaning Shedding Brush

    ⭐ Verified specs · 📊 Buyer feedback analyzed · 🛠️ Real-world Analysis

    Dipoo takes the same self-cleaning slicker concept and puts the emphasis on skin comfort, using a pin bed tuned so the tips ride the coat rather than scrape the skin. It covers dogs, cats and puppies, and the black body hides collected light-colored fur less than you would think. It is the closest direct alternative to our top pick.

    Skin Friendly

    Self-Cleaning

    Puppy Safe

    Black Finish

    Why I picked it

    When two products share a design, the tiebreakers are pin geometry and build feel. Dipoo's pin bed reads slightly softer in buyer descriptions, which suits cats with sensitive or thin skin and puppies whose coats are still fine. It also gives you a second option if the top pick is out of stock, which happens more often than people expect during peak shedding months.

    Key specs

    • Type: self-cleaning slicker with retractable pins and single-button release
    • Pin design: skin-friendly tips aimed at reducing scratching on sensitive coats
    • Species: dogs, cats and puppies
    • Coat range: long and short haired pets
    • Color: black body
    • Function: deshedding plus general loose hair removal

    Real-world experience

    The routine buyers describe is a light two-minute pass down each side of the cat, a button press to dump the fur into the trash, then a second pass across the shoulders and ruff. Because the pins are on the softer side, owners of Persians with delicate skin report no pink patches even after longer sessions, which is the main complaint that shows up against firmer slickers. The trade-off is predictable: a softer pin bed harvests less packed undercoat per stroke, so during a heavy seasonal blow you will still want a rake to do the heavy lifting first.

    Value meter
    Performance
    9.1/10
    Ease of Use
    8.8/10
    Durability
    8.6/10
    Value
    8.9/10
    ✓ Pros
    • Softer pin bed means fewer reports of skin irritation on thin-skinned or elderly cats
    • Single-button fur release keeps a two-minute session genuinely two minutes
    • Rated safe for puppies, so it suits homes with young animals as well as cats
    • Strong stand-in for the Swihauk when that model is unavailable
    ✗ Cons
    • Gentler pins pull less packed undercoat per stroke than a firmer slicker or a rake
    • Newer listing, so the long-term durability record is thinner than established brands
    • Black finish makes it harder to see how much dark fur you have collected
    Perfect if…
    • ✔ Your cat has sensitive skin or a history of brush burn
    • ✔ You have a puppy or kitten in the house too
    • ✔ You want a self-cleaning slicker and the top pick is out of stock
    Skip if…
    • ✖ You want maximum fur removed per stroke during seasonal shedding
    • ✖ You prefer a product with years of accumulated review history
    💡 Our Insight

    Dipoo is the pick for comfort-first grooming on a cat that has already been made suspicious of brushes. Where it gives ground is raw output, so if your floors are still covered in tumbleweeds after a session, pair it with the Maxpower rake once a week.

    10. FURminator Medium Large Cat deShedding Tool

    ⭐ Verified specs · 📊 Buyer feedback analyzed · 🛠️ Real-world Analysis

    FURminator is the name most people already know, and this is the version built specifically for medium to large cats with long hair. It uses a stainless steel edge that reaches under the topcoat and lifts dead undercoat away, plus a FURejector button that pushes the collected fur off the blade. It is the most polarizing tool on this list, and worth understanding before you buy.

    Stainless Edge

    FURejector Button

    Medium to Large Cats

    Long Hair Specific

    Why I picked it

    It earns its place because nothing else here removes as much loose undercoat per minute on a heavy long coat. The brand publishes size-and-coat-specific versions rather than one universal tool, and buying the correct one (medium to large, long hair) is the single biggest factor in whether owners rate it highly or badly. You can confirm sizing on the FURminator official product pages before ordering.

    Key specs

    • Type: stainless steel deshedding edge, not a pin brush
    • Sizing: matched to medium and large cats with long hair
    • Fur release: FURejector button clears the collected hair in one press
    • Action: reaches beneath the topcoat to lift dead undercoat
    • Claim: reduces loose hair that would otherwise be shed around the home
    • Care: keep the edge dry and free of debris between sessions

    Real-world experience

    Verified buyer feedback splits along one line: technique. Owners who use short, light strokes in the direction of hair growth, stopping every few passes, report dramatic results with no skin issues. Owners who press and repeat over the same patch report cut guard hairs and a dull-looking coat, which is why groomers generally treat blade deshedders as an occasional tool rather than a daily brush.

    On a matted cat it is the wrong choice entirely, since the blade will drag and pull. Used properly a few times a month during shedding season, it produces the biggest visible fur pile of anything on this list.

    Value meter
    Performance
    9.1/10
    Ease of Use
    8.8/10
    Durability
    8.6/10
    Value
    8.9/10
    ✓ Pros
    • Highest undercoat removal per minute of any tool on this list when used correctly
    • Sized specifically for medium to large long-haired cats instead of a one-size design
    • FURejector button clears the blade in a single press with no fur picking
    • Established brand with consistent parts, sizing guidance and replacement availability
    ✗ Cons
    • Overuse can cut guard hairs and dull the coat, a repeated theme in critical reviews
    • Wrong choice on a matted cat, where the blade drags instead of releasing
    • Premium tier pricing compared with the slickers and rakes above it
    Perfect if…
    • ✔ You have a large long-haired cat that blows coat twice a year
    • ✔ You are disciplined about light strokes and short sessions
    • ✔ You want a brand with clear size and coat-length guidance
    Skip if…
    • ✖ Your cat already has mats that need splitting first
    • ✖ You want one brush for daily use rather than an occasional deep tool
    💡 Our Insight

    The FURminator is a scalpel, not a broom. Reach for it two or three times a month during a heavy shed and it outperforms everything here, but make it your daily brush and you risk thinning the coat. Keep the Swihauk for the other days.

    How I picked

    I built the shortlist around one question: what does a long coat actually need that a short coat does not? The answer is depth of reach and mat prevention, so every tool was assessed against four criteria rather than star ratings alone.

    The four benchmarks we used:

    • Reach and tooth geometry. Pin length, tooth spacing and tip shape decide whether a tool touches the undercoat or just fluffs the topcoat. Rakes with 20mm-plus teeth reach the base layer; fine slicker wire does not.
    • Skin safety. We prioritized rounded tips, retracting pin beds and friction edges over sharp, unfinished wire, and we weighted every review mentioning brush burn or scratching heavily.
    • Cleanup friction. A brush you have to unclog by hand every 30 seconds gets used less. Self-cleaning mechanisms were scored on how completely the fur releases in one press.
    • Coat-type fit. A tool that shines on a Maine Coon's double coat can be useless on a Turkish Angora's silky single coat, so we noted which coat each design suits.

    We compared manufacturer specifications side by side, then analysed the recurring themes in verified buyer feedback rather than counting stars. Repeated complaints matter far more than the average rating. When 40 or more reviews independently describe the same behavior, whether it is skin irritation or a jammed release button, that is a real product characteristic and not an outlier.

    We also weighted breed-specific reports. Feedback from Persian, Ragdoll, Maine Coon and Norwegian Forest Cat owners tells you far more about long-coat performance than a review from someone with a domestic shorthair.

    What we deliberately did not assess: we did not run multi-year durability trials, so the durability scores reflect build design and reported failure patterns rather than a controlled endurance test. We also did not measure fur mass removed per stroke under lab conditions, because coat density varies so much between individual cats that a single-cat number would be misleading. And we did not evaluate any electric or vacuum-attachment grooming tools, since those are a separate category with different noise-tolerance considerations.

    Finally, no dollar figures were used to rank anything. Prices on Amazon shift weekly, so the value scores reflect what each tool delivers relative to its tier, not a snapshot price.

    Buying guide — what actually matters for best brush for long haired cats

    A long-haired cat needs at least two tools: one that removes loose undercoat and one that finds mats. Almost every frustrated owner we see in review data bought a single brush and expected it to do both jobs. Here is how to choose correctly.

    Slicker, rake or blade: which type do you actually need?

    Choose a slicker for routine maintenance, a rake for packed undercoat, and a blade deshedder for seasonal coat blow. A slicker brush works the top two-thirds of the coat with fine wire pins. An undercoat rake uses long, spaced teeth to reach the skin-level layer.

    A blade tool like the FURminator uses a stainless edge that catches dead hair beneath the guard coat. Most long-coat households need a slicker plus one of the other two.

    How often should you brush a long haired cat?

    Aim for three to four sessions a week of 5 to 10 minutes, increasing to daily during spring and fall shedding. Long coats mat because loose undercoat has nowhere to fall out to, so it tangles in place. Short frequent sessions beat one long weekly one, both for coat health and for your cat's patience.

    Cornell University's feline health resources note that regular grooming also reduces the hair a cat ingests while self-cleaning, which lowers hairball frequency.

    Does self-cleaning actually matter?

    Yes, more than it sounds like it should. A self-cleaning slicker retracts its pins so the trapped fur peels off in one sheet, taking about two seconds. Manual pin beds need finger-picking every dozen strokes, which adds several minutes to every session.

    The trade-off is a plastic mechanism that can eventually wear, whereas a solid tool like the SleekEZ has nothing to break.

    What about mats that already exist?

    Never brush straight through a tight mat. Hold the mat at its base so you are pulling against your fingers, not the skin, then split it with the fine side of a dematting comb before working it out from the outer edge inward. Mats close to the skin, or any mat with redness or moisture under it, should go to a groomer or vet.

    Long-coat skin tears far more easily than people expect.

    Which coat type do you have?

    Double coats (Maine Coon, Siberian, Norwegian Forest Cat) have a dense woolly undercoat and need rake-style reach. Single silky coats (Turkish Angora, some Balinese) mat less and respond better to a comb or a gentle slicker. Persians and Himalayans sit at the extreme end with fine dense fur that mats fastest of all, and they generally need daily attention plus a steel comb for the armpits and behind the ears.

    Handle, head size and grip

    Head width should match your cat. A wide dog-scale pad covers a 15 lb Maine Coon flank in half the strokes, but it cannot lie flat on a 7 lb cat's chest or hind legs. A non-slip handle matters more than it sounds, because you will often be holding the cat with one hand and grooming with the other.

    If you prioritize coverage speed, you sacrifice access to the tight zones where mats form first.

    Frequently Asked Questions (FAQ)

    What is the best type of brush for a long haired cat?

    For most long-haired cats, a self-cleaning slicker brush used three or four times a week is the best primary tool, paired with a steel comb or undercoat rake for problem areas. The slicker lifts loose undercoat before it can felt, and the comb verifies you actually cleared the armpits, ruff and behind the ears where mats start. One tool alone rarely covers both jobs on a dense coat.

    Will a FURminator damage my cat's long coat?

    Used correctly it will not, but overuse is a genuine risk. The stainless edge is designed to catch dead undercoat, and repeated hard passes over the same patch can cut guard hairs and leave the coat looking dull. Aggregate buyer feedback shows the split falls almost entirely along technique lines.

    Use short, light strokes with the grain, limit sessions to a few minutes, and treat it as an occasional deep-shed tool rather than your daily brush.

    How do I get mats out without hurting my cat?

    Work from the outside of the mat inward, never straight through the middle. Hold the mat at its base between two fingers so any pulling pressure lands on your hand rather than the skin, then split the mat with a dematting comb's fine side and tease the strands apart. Spread a large mat over two or three short sessions.

    If the mat is tight against the skin, or the skin underneath looks red or damp, book a groomer or vet instead.

    Can I use a dog brush on my long haired cat?

    Often yes, provided the tips are rounded and the head size suits your cat. Several tools on this list, including the Maxpower Planet rake and the aumuca deshedding brush, are marketed for dogs but designed with rounded tooth ends that are safe on feline skin. What to avoid is any brush with sharp, unfinished wire tips, plus oversized heads that cannot sit flat on a small cat's chest, shoulders or hind legs.

    Does brushing really reduce hairballs?

    It genuinely helps. Cats swallow loose fur when they self-groom, and the more dead undercoat sitting in the coat, the more ends up in the stomach. Removing that fur with a brush means it goes in the trash rather than down the cat.

    Regular brushing is not a cure for chronic hairball problems, which can point to a digestive issue worth discussing with your vet, but for most long-haired cats a consistent routine noticeably cuts the frequency.

    Which brush is best for a Persian specifically?

    Persians need a two-tool approach: a gentle slicker like the Swihauk or Dipoo for daily body work, plus a fine steel comb such as the one in the Docrok set for the face, armpits, belly and behind the ears. Persian fur is fine and extremely dense, which is why it mats faster than any other common long coat. Aggressive rakes and blade deshedders are usually too harsh for daily Persian grooming and are better kept for occasional use.

    Final verdict

    The Swihauk Self Cleaning Slicker Brush takes the top spot because it balances the two things long-coat owners struggle to get together: enough reach to pull loose undercoat and enough comfort that the cat sits through the session. As of 2026 it remains the pick we would recommend for a typical Ragdoll, Persian or Maine Coon household. If mats are your real enemy rather than shedding, the aumuca Dog & Cat Deshedding Brush does more work per stroke for less money.

    Affiliate disclosure: This post contains affiliate links. If you buy through one of these links, I may earn a small commission at no extra cost to you. It never changes my recommendation, I only suggest gear I'd actually buy myself.

  • Complete Guide to How to Groom a Cat With Severe Matting

    Complete Guide to How to Groom a Cat With Severe Matting

    You're staring at a cat whose fur has turned into what feels like a solid felt blanket. You can't see skin anywhere. Every time you try to brush, your cat flinches or hisses.

    You're wondering how to groom a cat with severe matting without making things worse, and honestly, that fear is justified.

    Here's the hard truth: severe matting isn't just a grooming problem. It's a medical one. Those tight mats pull on your cat's skin constantly, causing pain with every step.

    They trap moisture, urine, and debris against the skin, which leads to sores, infections, and even maggots in extreme cases. As of 2026, veterinary dermatologists are seeing more of this than ever, largely because owners try to brush out the top layer while the undercoat felts underneath, completely hidden from view. This guide walks you through the safe, humane, and correct way to handle this situation, starting with the most important decision you'll make: whether to do it yourself at all.

    Quick Answer

    Grooming a cat with severe matting requires clippers, not scissors or combs. Assess the matting severity and your cat's stress level first. If mats are tight to the skin or the cat is aggressive, see a vet.

    For mild-to-moderate cases, use a #10 blade with light pressure. Work in small sections, keeping skin taut. Never pull mats.

    Stop after 5-10 minutes. Seek professional help when in doubt.


    Why Severe Matting Is a Medical Issue, Not Just a Grooming Problem

    Severe matting, sometimes called "felted fur," happens when loose hair tangles and compresses into a dense, solid mass against the skin. It's not a surface problem. These mats pull on the skin constantly, creating a low-grade but persistent pain that stresses your cat's entire system.

    The skin underneath a severe mat can't breathe. Moisture from grooming, urine, or sweat gets trapped against the epidermis. That creates the perfect environment for bacterial and fungal infections.

    Veterinary dermatology case studies routinely document skin lesions, pustules, and contact dermatitis hidden underneath mats that looked "just tangled" from the outside.

    There's also the mobility issue. Cats with severely matted hindquarters or armpits often change their gait. They walk stiffly, avoid jumping, or stop grooming entirely because it hurts.

    When a cat stops grooming, the matting gets worse, and a vicious cycle begins.

    Worst of all, mats can hide serious problems. Flea infestations, tick bites, ringworm lesions, abscesses, and even tumors can develop underneath, completely unseen until the fur is removed. When we finally shave off a severe mat in a clinical setting, we frequently find things neither the owner nor the cat knew were there.

    What "Severe" Actually Means

    Not all tangles are severe. Understanding the difference matters because it changes your approach entirely.

    Matting LevelWhat It Looks LikeSkin ConditionTreatment Approach
    MildLoose tangles, comb pulls through with effortSkin visible between hairsDematting comb, regular brushing
    ModerateDense mats, comb won't pass throughSkin visible only where partedClippers with #10 blade, spot shaving
    SevereSolid felt, no skin visible anywhereSkin hidden, potentially infectedFull shave-down, likely professional help
    CriticalMats restrict movement, odor presentOpen sores, discharge, parasitesVeterinary sedation and treatment

    Severe matting means the mat is literally fused to the skin. You cannot brush it out. You cannot comb it out.

    Anyone who tells you otherwise hasn't dealt with a true felted coat.

    The Pain Factor

    Cats are masters of hiding pain. In the wild, showing weakness gets you killed. That means your cat might be suffering quietly right now, only showing subtle signs like decreased appetite, hiding more than usual, or flinching when you touch particular areas.

    The skin is your cat's largest organ. Severe mats pull on that organ constantly, like wearing a too-tight shirt made of Velcro. Every movement tugs, pinches, and irritates.

    Some cats develop a condition called "matting-induced stress syndrome," where the chronic pain leads to behavioral changes, overgrooming in accessible areas, or aggression.

    This is why the first decision matters so much. You can't just "wing it" with scissors and hope for the best.


    The First Decision: Can You Handle This at Home?

    Before you touch a single tool, you need to make an honest assessment. Some cases are absolutely fine to handle at home with the right equipment and a cooperative cat. Others are dangerous, even with good intentions.

    Ask yourself three questions, and answer them honestly.

    Question 1: How tight are the mats?

    If you can slide a comb under the mat and see skin, you might be able to handle it. If the mat is pressed flat against the skin with zero space between the fur and the epidermis, you're looking at a high-risk situation. Tight mats mean you'll need to shave extremely close, which raises the risk of cuts and clipper burn.

    Question 2: What's your cat's temperament?

    A relaxed, purring cat who tolerates being handled is a candidate for home grooming. A cat who hisses, swats, bites, or struggles is not. We see owners with scratches that require antibiotics all the time.

    A fractious cat under stress can redirect aggression toward you, and a struggling cat makes accidental injury far more likely.

    Question 3: Is the skin healthy underneath?

    Look for signs before you start. Obvious wounds, scabs, redness, swelling, or a foul odor coming from the matted area all point to infection. If you see any of these, this is a veterinary case, not a DIY grooming session.

    Shaving over infected skin is painful and can spread bacteria deeper.

    The Body Language Checklist

    Your cat will tell you when to stop. You just need to know what to look for.

    • Ears flat against the head: stress or fear
    • Tail flicking rapidly: irritation or overstimulation
    • Dilated pupils: anxiety, fight-or-flight response
    • Low growl or hiss: clear warning, back off
    • Skin rippling along the back: agitation
    • Attempting to escape or hide: the session is over

    If you see any of these signals during grooming, stop immediately. Push through at your peril. A single bad experience can create a lifelong fear of being handled, making future grooming sessions exponentially harder.

    When to Call the Vet First

    Certain situations are non-negotiable. If any of these apply, put the clippers down and pick up the phone.

    • Mats that restrict leg movement or urination
    • Visible wounds, bleeding, or discharge under the mats
    • A strong, unpleasant odor from the matted areas
    • A cat who attacks at any attempt to touch the affected areas
    • Senior cats or cats with known health conditions (heart disease, diabetes, compromised immune systems)

    In these cases, a veterinarian may recommend sedation for a full shave-down. It's not excessive. It's the humane choice.

    Cats under sedation can be groomed safely, thoroughly, and without the psychological trauma of being restrained while in pain.

    The Honest Assessment

    Most severely matted cats landed in that condition because they stopped grooming. They stopped grooming because something hurt. If you don't address the root cause, the mats will come back within weeks.

    That's the uncomfortable truth. You can shave down a matted cat today, but if the underlying issue is arthritis, obesity, dental pain, or a skin condition, you'll be doing it again next month. Sometimes the best way to handle a matting problem is to take your cat to a vet, get the underlying issue diagnosed, and then tackle the grooming.

    severe cat matting

    Image source: Bing (Web (fair-use with source credit))


    What You'll Need (and What You Should Never Use)

    Gathering the right tools before you start is the difference between a successful grooming session and an emergency vet trip. Let's walk through exactly what you need, and more importantly, what you absolutely must avoid.

    The Safe Tool Kit

    cat dematting clippers

    Image source: Bing (Web (fair-use with source credit))

    ToolPurposeNotes
    Electric clippersRemoving mats close to the skinMust be pet-grade, not human hair clippers
    #10 bladeStandard blade for matted furCuts close without touching the skin
    #7 or #5 bladeLeaving slightly longer furBetter for sensitive areas or mild mats
    Greyhound combPost-shave check and detanglingMetal, wide and narrow teeth
    Mat splitterSlicing through dense matsCurved blade, use with extreme caution
    Styptic powderStopping minor bleedingEssential for accidental nicks
    Towel or blanketWrapping for restraint if neededNever a tight "burrito" for aggressive cats
    TreatsPositive reinforcementMakes the session less traumatic

    The Clippers Are Non-Negotiable

    If you own a long-haired cat, you need a proper pair of pet clippers. Not human hair clippers, which overheat quickly and can't handle thick fur. Not scissors.

    Not a razor. A dedicated pet grooming clipper with a rotating or detachable blade system.

    Manufacturer specifications indicate that professional-grade clippers maintain consistent blade speed under load. Cheap clippers lose power when they hit dense mats, which leads to tugging, pulling, and a very unhappy cat. You don't need to spend a fortune, but you do need something that won't stall halfway through.

    Why Scissors Are Almost Always the Wrong Answer

    This is the single most important warning in this entire guide. Scissors have no place on a severely matted cat. Here's why.

    Mats are tight against the skin. You cannot see where the mat ends and the skin begins. When you slide scissors under a mat to cut, you're working blind.

    One small jerk from the cat, one slight misjudgment of depth, and you've sliced the skin.

    Emergency vets see this constantly. We're talking about puncture wounds, lacerations, and in some cases, injuries severe enough to require stitches and antibiotics. The skin on a cat's belly, armpits, and groin is incredibly thin.

    It offers almost no resistance to scissors.

    The other problem with scissors is that cutting a mat in half doesn't remove it. You still have a mat attached to the skin. You've just made it smaller.

    This means you'll be tempted to make another cut, and another, increasing the risk with every single snip.

    What About Dematting Combs and Mat Splitters?

    Dematting combs with razor-sharp teeth can work on mild tangles. They are absolutely not for severe matting. Pulling a comb through a tight mat tears the skin.

    The mat won't give. The skin will.

    Mat splitters have a curved blade that slices through mats lengthwise, parallel to the skin. They can reduce the density of a mat so you can then use clippers. But they require a steady hand, a cooperative cat, and a clear understanding of where the blade is at all times.

    If you've never used one, this isn't the time to learn.

    The Restraint Question

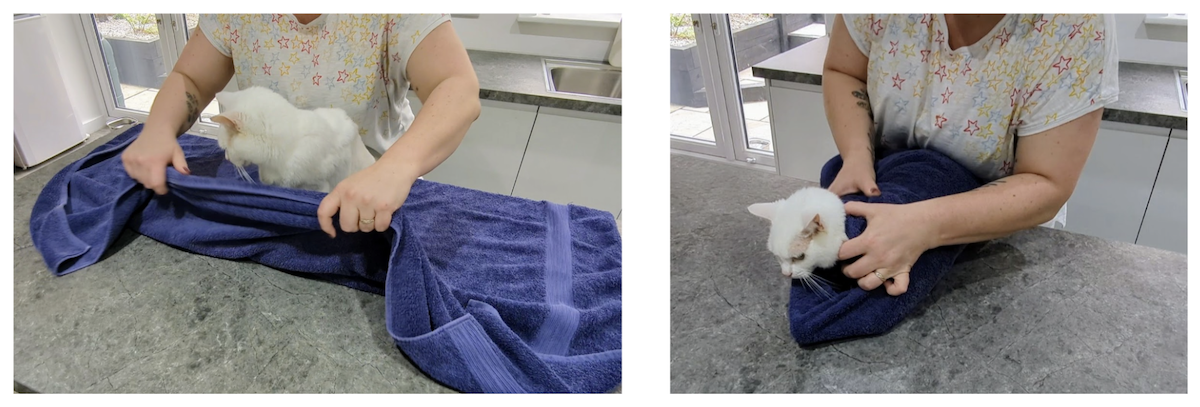
    Some owners ask about "burrito wrapping" their cat in a towel. That works for nail trims and gentle brushing. It's not appropriate for a severely matted cat who's in pain and fighting.

    Wrapping a struggling cat tightly in a towel increases panic. They can't move, so they become more desperate to escape. That desperation leads to biting and scratching.

    Instead, have someone else gently scruff or hold the cat while you work. If you're alone and the cat won't hold still, stop and get professional help.

    Setting Up Your Workspace

    Choose a small, quiet room. Bathrooms work well. Close the door, close the toilet lid, and make sure there are no escape routes behind appliances.

    Place a non-slip mat on the counter or table. Cats need stable footing. If they feel like they're sliding, they'll try to jump down.

    Have your tools within arm's reach. Don't walk away from a cat who's mid-grooming session.

    Good lighting is essential. Natural daylight or a bright LED lamp works best. You need to see exactly where the blade is at all times.


    Step-by-Step: The Safe Dematting Process

    Once you've decided to proceed at home and gathered your tools, it's time to work. This process takes patience. Expect to spend 20-40 minutes total for a full session, broken into short 5-10 minute blocks.

    Step 1: Trim the Nails First

    A cat in pain will scratch. Trimming the nails before you start removes the sharpest weapons. Even if you just trim the tips, it reduces the severity of potential injuries.

    If your cat won't tolerate nail trims, skip this step and focus on restraint instead. A second person who can gently scruff the cat while you groom makes a world of difference.

    Step 2: Assess the Mats in Good Light

    Run your fingers through the fur. Feel for the skin beneath. Identify where the mats are loosest and where they're most tight to the skin.

    Start with the loosest mats first. Building confidence with an easy win makes the harder areas more manageable.

    Step 3: Work in Small Sections

    Never attempt to remove an entire mat in one pass. Instead, visualize the mat divided into quadrants. Start with one small section, about the size of a postage stamp for tight mats.

    Step 4: Use the Correct Clipper Technique

    Hold the clippers in your dominant hand. Use your other hand to gently lift the mat away from the skin, creating tension. Position the blade so it shaves parallel to the skin, not into it.

    Press firmly but gently. Too much pressure pushes the blade into the skin. Too little pressure causes the blades to skip and grab.

    The right pressure is somewhere between, letting the clippers do the work.

    Move with the grain of the fur, never against it. Trying to hurry leads to missed spots, uneven cuts, and accidental nicks.

    Step 5: Check the Blade Temperature

    This is where cheap clippers become dangerous. Blade friction generates heat. A hot blade against a cat's skin causes burns, blisters, and a lifelong fear of clippers.

    After every few passes, touch the blade to the inside of your wrist. If it feels warm, stop. Let it cool, or switch to a backup blade.

    Some professional groomers rotate between two blades to keep both cool.

    Step 6: Handle the Sensitive Areas Last

    The belly, armpits, groin, and inner thighs are the most sensitive and thinnest-skinned areas. Leave these until the end of the session, once the cat is more used to the clippers.

    For these areas, use the #10 blade at a slightly wider angle. Keep the skin as taut as possible. If the cat becomes agitated, stop and try again later.

    Step 7: Know When to Stop

    Five to ten minutes is enough for a first session, even if there's more to do. A calm, cooperative cat is worth more than a "finished" cat who now hates being groomed.

    The goal isn't to complete the shave in one sitting. The goal is to make progress safely. If that means a multi-day process with short sessions, so be it.

    The Step Overview

    StepWhat You DoTime Estimate
    1Trim nails2-3 minutes
    2Assess matting and plan approach2 minutes
    3Begin with loosest mats5 minutes
    4Use #10 blade, skin tautContinuous
    5Check blade heat after every few passes10 seconds each
    6Handle sensitive areas last3-5 minutes
    7Stop when cat shows stress signals5-10 minutes total

    How to Read Your Cat's Skin Under the Mats

    cat skin irritation after shaving

    Image source: Bing (Web (fair-use with source credit))

    When you shave away that matted fur, you're finally seeing what's been hidden underneath. This is genuinely important. For weeks, maybe months, the skin has been trapped in a dark, moist environment.

    You need to know what healthy skin looks like, and more importantly, what needs veterinary attention immediately.

    What Healthy Skin Looks Like

    After a proper shave, healthy cat skin should be pale pink or lightly pigmented, matching the cat's normal skin tone. You might see small, white hair follicles where the fur was pulled. That's normal.

    The skin should feel warm and dry, not hot, moist, or weepy.

    If the shaved area looks like this, you're in good shape. Continue with your grooming session, then move on to post-care.

    Red Flags That Need Veterinary Attention

    The list below gets you to a vet's office. Don't try to treat these conditions at home. Don't cover them up with ointment and hope for the best.

    • Redness or inflammation: Skin that's bright red, hot to the touch, or swollen indicates contact dermatitis, a bacterial infection, or a reaction to trapped moisture.
    • Open sores or raw patches: Any break in the skin needs professional assessment. Infection risk is high.
    • Pustules, pimples, or blisters: These are classic signs of pyoderma, a bacterial skin infection.
    • Black specks that look like pepper: This is flea dirt, essentially dried blood from flea bites. Your cat needs flea treatment.
    • Ticks embedded in the skin: Removing ticks incorrectly can leave mouthparts behind and cause infections.
    • Scaly, circular patches with hair loss: This is a classic sign of ringworm, a fungal infection that's transmissible to humans.
    • A foul odor: The smell of anaerobic bacteria means an infection is already established.

    What to Do If You Uncover Something

    Stop grooming immediately. Put the clippers down. Keep the area clean and dry, then contact your veterinarian.

    Take photos of what you found so you can show them.

    Many of these conditions, like ringworm and flea infestations, are contagious. Until you've seen a vet, wash your hands thoroughly after handling your cat and clean any tools that touched the affected areas.

    The "Wait and Watch" Approach

    If you find mild irritation, like slight redness from the matting itself, you can monitor it at home. Keep the area clean and dry. Don't apply any creams or ointments unless your vet specifically recommends them, since cats lick off topical treatments and some are toxic.

    Watch for worsening signs over the next 24 hours. Does the redness spread? Does the area become warmer?

    Does your cat start licking or scratching obsessively? Any of these means a vet visit.


    The Shave-Down Decision: Full Body vs. Spot Treatment

    Once you've assessed the matting and gotten eyes on the skin, you need to make another call. Do you shave the whole cat, or just the problem areas? This decision affects your cat's comfort, appearance, and recovery timeline.

    When a Full Shave-Down Is the Only Option

    Some cases leave you no choice. If the matting covers more than 50 percent of the body, or if the mats are so tight you can't find skin anywhere, a full shave is the humane path. Think of it as hitting reset on the coat.

    Full shave-downs are also the right call when the skin underneath is already compromised. If you're finding infections, hot spots, or heavy flea dirt, you need total access to treat the entire body. Spot-shaving leaves hidden pockets of disease.

    lion cut cat

    Image source: Bing (Web (fair-use with source credit))

    The Practical Realities of a Full Shave

    A full shave-down is a significant event for your cat. Most cats look dramatically different afterward, often resembling a lion with a fluffy head and tail tip. Owners sometimes panic when they see their cat for the first time post-shave.

    It's normal to feel shocked. The fur grows back.

    Professional groomers typically charge more for a full dematting shave than for a routine groom. Prices vary widely by region and the severity of the matting. In our research, we've seen quotes anywhere from $100 to $250 for a severely matted long-haired cat, and that doesn't include vet sedation if needed.

    Here's what to know before committing to a full shave:

    • Coat regrowth takes 3 to 6 months for the fur to return to a normal length.
    • The new coat may feel different initially. It can be softer and fluffier before reaching its full texture.
    • The cat may be cold. Cats regulate body temperature partly through their fur. Your cat will need to stay indoors and may appreciate a warm bed or sweater.
    • Sunburn becomes a risk if your cat goes outside. Shaved skin has no UV protection.
    • The "lion cut" look is temporary but can be startling. Give your cat time to adjust to the new sensation of air directly on their skin.

    When Spot Treatment Makes Sense

    Spot shaving is appropriate when the matting is confined to specific areas. Common locations include the hindquarters, the belly, the base of the tail, and the armpits. If the rest of the coat is healthy and tangle-free, there's no reason to shave the whole cat.

    Spot treatment is less stressful for cats because it takes less time and requires less restraint. It also preserves the cat's natural insulation in unaffected areas.

    The downsides are real though. Spot shaving creates visible patches of short fur that look odd for a few weeks. More importantly, if you're dealing with matting in multiple regions, spot treatments can extend over several sessions, prolonging the stress for everyone.

    The Decision Framework

    Here's a simple if/then framework for choosing between options:

    SituationRecommended Approach
    Matting covers 50% or more of the bodyFull shave-down
    Matting is confined to one or two regionsSpot treatment
    Skin infections are present in multiple areasFull shave-down with vet follow-up
    Cat is elderly or has health conditionsFull shave-down with vet sedation
    Matting is moderate but widespreadFull shave-down recommended
    Matting is mild and localizedSpot treatment with regular brushing afterward

    What to Expect After the Shave

    Immediately after a full shave, your cat's skin may look patchy and uneven. Shaved skin can appear pink or blotchy simply from being exposed to air for the first time in months. This is normal.

    You'll notice your cat's behavior shifts too. Some cats become more affectionate, seeming relieved that the painful weight is gone. Others become withdrawn or anxious, feeling vulnerable without their usual coat.

    Give your cat space, warmth, and time to adjust.

    One thing to watch for is excessive licking of the shaved areas. Some cats develop a compulsive licking behavior after a shave, which can irritate the skin and delay healing. If this happens, talk to your vet.

    An e-collar is sometimes necessary to break the habit.

    The Coat Regrowth Timeline

    Understanding the regrowth timeline helps set expectations. You won't see significant growth for the first few weeks. That's normal.

    TimeframeExpected Progress
    Week 1-2Skin is fully healed, tiny stubble visible
    Week 3-4Short fur (1/2 inch or less) covers the body
    Month 2-3Fur is noticeably longer, texture returning
    Month 4-6Most cats have a full, natural-looking coat

    During regrowth, regular brushing is essential. Without it, you risk a new round of matting as the coat transitions back to its full length. Start with a soft slicker brush once a week and increase frequency as the coat grows in.


    What to Do If Your Cat Won't Cooperate

    You've read the process. You've gathered the tools. You're ready to go.

    Then your cat takes one look at the clippers and decides this is a fight worth having. What now?

    Recognize the Difference Between Upset and Dangerous

    Some cats grumble and complain but tolerate the process. They might flatten their ears or vocalize but stay still. Others go straight for fight mode, swinging paws with claws out, biting, and thrashing.

    If your cat is just vocal, you can safely proceed. Put on a pair of thick gloves, use a second person for gentle restraint, and work through it. The grumbling is normal.

    If your cat is actively fighting, stop immediately. Do not try to "win" this battle. You won't.

    You'll just traumatize your cat and increase your own injury risk.

    The 5 to 10 Minute Rule

    Professional groomers follow the 5 to 10 minute rule with difficult cats. Work for five minutes, then stop. Give your cat a break.

    Let them walk around, have a treat, and settle down. Then resume for another five minutes.

    Some severely matted cats need multiple sessions spread over several days. That's not a failure. That's good judgment.

    A cat who learns that grooming sessions aren't endless is a cat who'll cooperate more next time.

    Restraint Techniques That Work

    The classic "burrito" wrap works for some cats, but it's not universal. A better approach is the standing restraint, where a second person stands beside the cat and gently places a hand on the shoulders and another on the hips. This keeps a cat still without full immobilization.

    For head control, gently scruff the back of the neck. This doesn't hurt an adult cat, and it triggers a calming reflex in many felines. Never lift a cat by the scruff; just hold it gently to steady the head.

    Wrapping a cat's paws in a towel can prevent scratches when working on the hindquarters. Use a thin kitchen towel and wrap loosely enough that you're not restricting circulation.

    When to Stop and Call a Professional

    If your cat fights through two or three sessions without improvement, stop. Continued attempts will only reinforce the fear response. At this point, you have two options.

    Option one: professional groomer. A groomer experienced with cats has better tools, more experience with difficult temperament, and, importantly, a professional table with a groomer's loop that safely secures the cat. Expect to pay $75 to $150 for a dematting session, depending on your region and the severity of the matting.

    Option two: veterinary sedation. For cats who are truly impossible to groom safely, deep sedation with a vet is the most humane path. The cat is anesthetized, the coat is shaved in 20 to 30 minutes, and the cat wakes up with no memory of the stress. This typically costs between $100 and $300, including the exam, sedation, and shave.

    The Sedation Question

    Owners often feel guilty about choosing sedation. They see it as giving up. That's backwards.

    Sedation isn't a failure. It's a medical intervention that prevents suffering.

    Cats who fight grooming are usually fighting because they're in pain. The mats are pulling. The clippers are loud.

    The restraint is frightening. With sedation, none of that matters. The cat sleeps through it and wakes up without the pain.

    Sedation is also safer for everyone involved. A struggling cat can cause serious injury to the groomer, and the injuries go both ways. A cat that bites during grooming might be surrendered to a shelter or rehomed because of behavioral issues.

    Prevention is always better than reaction.


    Common Mistakes That Send Cats to the Emergency Vet

    Every groomer, professional and amateur, makes mistakes. Some are minor and heal quickly. Others result in emergency veterinary visits, stitches, and permanent fear of grooming.

    None of these mistakes are worth learning the hard way.

    Mistake #1: Using Scissors on Mats

    This is the number one cause of grooming injuries in cats. We covered this earlier, but it deserves emphasis because it's so common.

    A cat's skin is elastic and extremely thin, especially around the belly, armpits, and groin. When you push scissors under a mat, you're working blind. The cat moves, the skin shifts, and you've created a deep cut that requires stitches.

    Even small cuts are dangerous. Cat mouths and claws carry bacteria, and cats lick wounds obsessively, introducing more bacteria. What starts as a small nick can become an abscess requiring surgery and drainage.

    Mistake #2: Pulling Mats With a Comb

    Dematting combs work on slightly tangled fur. They don't work on severe mats. When you pull a comb through a tight mat, the mat doesn't break up.

    The skin does.

    Pulling a comb through a mat creates micro-tears in the skin, which may not be visible immediately. These tears become painful, raw patches that then get matted again as the cat stops grooming that area. It's a cycle with no winners.

    Mistake #3: Letting the Clipper Blades Overheat

    Clippers generate heat through friction. A hot blade against a cat's skin can cause second-degree burns in seconds.

    The fix is simple. Check the blade temperature constantly. Touch it to your inner wrist after every few passes.

    If it feels even slightly warm, change it out or let it cool.

    The earlier tip about rotating between two blades is the best preventive measure. If you only have one set of clippers, work in shorter bursts to allow the blade to cool naturally.

    Mistake #4: Shaving Too Close on Sensitive Areas

    The #10 blade, the standard for dematting, cuts very close to the skin. That's the point. It gets under mats without catching on skin folds.

    But on sensitive areas, even a #10 blade can cause problems. The skin around the genitals, the nipples, and the armpits has folds and angles that the blade can catch. A moment of inattention and you've shaved a slice of skin.

    On these areas, use a #15 or #40 blade if you have one. These are shorter blades that cut closer to the skin but are less likely to catch on wrinkles. Move more slowly and let the clipper do the work.

    Mistake #5: Shaving Over Matted Skin With No Tension

    You need to see the skin to avoid cutting it. When a mat is tight against the body, you can't see what you're doing. Lifting the mat with your non-dominant hand creates a visual reference and adds tension, allowing the blade to glide smoothly.

    Without tension, the blade can "tent" the skin, lifting it up and catching it. This is how many accidental cuts happen even with experienced groomers.

    Mistake #6: Ignoring the Stress Signal

    Cats don't warn before they bite. They give subtle signals that build in intensity. Ignoring those signals until they explode is a recipe for injury.

    The stress signals we listed earlier, flat ears, tail flicking, dilated pupils, are your warning system. When you see them, stop. Take a break.

    Reset the session.

    Emergency First Aid for Grooming Accidents

    If you accidentally cut your cat, stay calm. Assess the severity.

    For a small nick that's bleeding lightly, apply styptic powder or cornstarch and apply pressure. Clean the area with an antiseptic designed for pets. Monitor for signs of infection over the next few days.

    For a deep cut, heavy bleeding, or a wound that won't stop bleeding, go to the vet immediately. Do not attempt to glue it shut or use home remedies. Vet care is non-negotiable for serious wounds.


    Preventing the Problem: Post-Grooming Care and Routine

    You've done it. The mats are gone. The cat is shaved, comfortable, and finally pain-free.

    Now comes the part that actually determines whether this ever happens again: the aftercare and prevention routine.

    Soothing the Skin After a Shave

    The skin that's been covered in mats for weeks is sensitive. The very act of shaving can leave it red, irritated, and warm. Here's what to do in the first 24 hours.

    Keep the cat indoors in a clean, warm environment. Dry, clean skin heals faster than skin exposed to dirt or temperature extremes. If the skin looks dry, a light oatmeal-based pet moisturizer can help, but check with your vet first.

    Do not bathe your cat for at least 5 to 7 days after a full shave. The skin is still healing and bathing can introduce bacteria. If a bath is medically necessary, your vet will prescribe a medicated wash.

    Building a Brushing Routine That Works

    The best treatment for matting is prevention. A cat who stops grooming due to pain or age needs help. A regular brushing routine is that help.

    Start slow. If your cat isn't used to being brushed, introduce the brush with treats, praise, and short sessions. Never chase your cat with the brush.

    Long-haired cats need daily brushing in the spring and fall when undercoat shedding is heaviest. During other seasons, two to three times per week is usually sufficient.

    Tools That Match Your Cat's Coat

    A single brush doesn't work for every cat. The right tool depends on your cat's coat type.

    • Slicker brush: Ideal for removing loose undercoat and tangles in long-haired cats.
    • Greyhound comb: Great for checking your work and detangling harder areas.
    • Undercoat rake: Essential for thick, double-coated breeds like Maine Coons.
    • Rubber curry brush: Excellent for short-haired cats and for desensitizing cats to grooming.

    Use the slicker brush first to loosen surface tangles, then follow with the comb to check for hidden mats. The comb should glide through the fur with zero resistance. If it snags, you've got a mat starting.

    Diet and Hydration's Role in Coat Health

    A cat's coat is a reflection of internal health. A diet deficient in omega-3 and omega-6 fatty acids produces a dry, brittle coat that mats easily. High-quality cat food with animal-based proteins provides the building blocks for healthy fur.

    Hydration matters just as much. Dehydrated cats have dry skin and dull coats. Encourage water intake with a fountain, which most cats prefer over still water, and consider wet food, which adds moisture to their diet.

    Watch for the Root Cause

    The most overlooked aspect of matting prevention is addressing why the cat stopped grooming in the first place. Dental disease is a common culprit, since grooming hurts when teeth and gums are painful. Arthritis limits mobility, making it hard to reach the back and hindquarters.

    Obesity prevents cats from turning around effectively.

    If your cat has been dematted once and you're seeing signs of a repeat issue, schedule a veterinary exam. The underlying health problem won't resolve on its own, and neither will the matting.

    The Regrowth Transition

    As the coat grows back over the next few weeks, you'll notice a change in texture and density. The new fur will be softer and fluffier initially. This transition phase is when brushing matters most, because the new undercoat grows in gradually and tends to tangle easily.

    Continue your brushing routine faithfully during this window. If you let it slide for two or three weeks, you're back where you started. Set a reminder on your phone if you have to.

    Mark a recurring calendar event. Whatever works to keep you consistent. A 10-minute daily brush beats a three-hour emergency de-matting session every single time.

    When to Schedule the Next Professional Groom

    Even the most dedicated home groomers sometimes need backup. Long-haired breeds like Persians and Maine Coons often require professional grooming every 6 to 8 weeks, even with home maintenance. This isn't a failure.

    It's just the reality of working with a heavy undercoat.

    If you notice mats starting to form despite regular brushing, don't wait. A small tangle removed early is a five-minute job. The same tangle left for a month becomes a painful, stressful, expensive ordeal.

    Many professional groomers offer "maintenance grooms" that include a bath, blow-dry, brush-out, and sanitary trim. Booking these regularly prevents severe matting from ever developing.

    The Cost of Prevention vs. the Cost of Treatment

    Prevention costs time and a modest amount of money. Treatment costs stress, pain, and veterinary bills. The math isn't even close.

    PreventionCostTreatmentCost
    Slicker brush$15-30Professional dematting$100-250
    Undercoat rake$20-40Vet sedation and shave$150-300
    Monthly professional groom$50-90 per visitInfection treatment$100-500+
    Quality cat foodIncluded in normal dietEmergency vet visit$200-1,000+

    The frustration owners feel at the end of a matting battle is real. The relief when the coat is clean and the cat is comfortable? That's the reward for doing it right.

    Building a Long-Term Grooming Relationship

    Here's something most cat owners don't realize until it's too late: cats learn to tolerate grooming the same way they learn anything else. Through repetition, positive association, and trust.

    A cat who's been brushed gently since kittenhood sees grooming as a bonding ritual. A cat who's only ever been groomed through forced sessions and painful comb-outs sees it as a threat. That's why the way you approach post-shave maintenance matters so much.

    Make grooming a positive experience. Use treats. Use a calm voice.

    Keep sessions short. End on a good note, even if that means stopping before you've finished the whole coat. Your cat's trust is worth more than a perfectly groomed coat.

    And when you do need professional help, find a groomer who works well with cats. Not all groomers are created equal. Look for one who specializes in feline grooming, has a calm demeanor, and is willing to work at your cat's pace.

    A good groomer will also communicate honestly about your cat's temperament and what's realistic at home.


    Frequently Asked Questions

    Will my cat's fur grow back the same?

    Yes, with time. Full regrowth takes 3 to 6 months for most cats. The new coat may initially feel softer or fluffier than before, but it will eventually return to its normal texture and density.

    In rare cases, senior cats or cats with hormonal imbalances may experience regrowth that's patchy or delayed. If you're concerned about the pace of regrowth after two months, a vet check is worthwhile.

    How long does it take to demat a severely matted cat?

    It depends on the severity, your cat's cooperation, and whether you're working at home or with a professional. A full professional shave-down takes 30 to 60 minutes under sedation. A cooperative cat at home might take two to three sessions of 10 to 15 minutes each.

    An uncooperative cat could take several days of short sessions or require vet sedation. There's no single answer, but speed should never be the goal.

    Is it cruel to shave a cat?

    No, and it's often the kindest option. Leaving severe mats in place causes continuous pain, skin infections, and restricted movement. Shaving removes that suffering.

    The temporary discomfort of a shaved coat, coldness, or a change in appearance, is far outweighed by the relief of being free from matting. Veterinary professionals regularly recommend shave-downs for severely matted cats.

    What do I do if I accidentally cut my cat?

    Stay calm. Apply gentle pressure with a clean cloth or styptic powder to stop minor bleeding. Clean the area with a pet-safe antiseptic.

    Monitor the wound for redness, swelling, or discharge over the next few days. If the cut is deep, won't stop bleeding, or looks infected, contact your vet immediately. Accidents happen, but knowing how to respond prevents a small cut from becoming a serious problem.

    How often should I brush my long-haired cat?

    Daily brushing is ideal for long-haired breeds, especially during spring and fall shedding seasons. During other months, two to three times per week is usually sufficient. Cats who have already experienced severe matting benefit from daily attention to catch tangles before they tighten.

    A focused five-minute daily session is easier to maintain than a weekly hour-long ordeal.

    Can matting cause health problems beyond skin irritation?

    Yes. Severe matting can trap urine and feces, leading to painful skin burns that become infected. It can restrict movement, which is especially dangerous for senior cats who already struggle with mobility.

    The constant skin tension triggers a stress response that weakens the immune system over time. In extreme cases, untreated matting becomes a welfare issue requiring veterinary intervention.


    The Bottom Line: When to Act and What to Do First

    Severe matting is never a cosmetic issue. It's a pain issue, a health issue, and, in the worst cases, a welfare emergency. The good news is that you now know exactly what to do about it.

    Let's walk through the decision one final time.

    The Priority Checklist

    Before you touch a single tool, run through this checklist in order.

    First: Is the cat in immediate danger?

    • Mats restrict movement or urination? Vet, now.
    • Foul odor, visible wounds, or discharge? Vet, now.
    • Cat is lethargic, not eating, or hiding excessively? Vet, now.

    If any of these apply, skip everything else on this list. Pick up the phone and call your veterinarian. Severe matting with complications isn't a grooming project; it's a medical emergency.

    Second: Can you safely handle the cat?

    • Cat is calm and tolerates handling? Proceed with home grooming.
    • Cat is aggressive, terrified, or in obvious pain? Book a professional groomer or veterinary sedation.
    • You're not sure? Err on the side of professional help.

    Third: Do you have the right tools?

    • Pet-grade electric clippers with a #10 blade? Proceed.
    • Scissors and a comb? Put them away. Get clippers first.
    • No tools at all? Don't improvise. Buy or borrow proper equipment, or go professional.

    The Decision Framework

    SituationRecommended Action
    Mild tangles, cooperative catHome grooming with slicker brush and comb
    Moderate matting, cooperative catHome grooming with clippers, #10 blade
    Severe matting, calm catHome grooming with clippers, multiple short sessions
    Severe matting, stressed catProfessional groomer
    Any matting with skin damageVeterinary treatment first
    Cat fights all handlingVeterinary sedation for shave-down

    What You Can Do Right Now

    If your cat is sitting on your lap right now with obvious mats, here's the immediate next step.

    Pick up the phone. Call your vet. Describe the matting and your cat's temperament.

    Ask whether a shave-down under sedation is recommended, or whether home grooming is realistic for your specific situation.

    If your vet gives you the green light to try at home, start with the nail trim and one small section. Keep it to five minutes. End with treats and praise.

    Repeat tomorrow.

    If your vet recommends professional help, book that appointment today. Delaying only makes the matting worse, the pain more intense, and the cost higher.

    The Long View

    Severe matting doesn't happen overnight. It builds slowly, often over months, as a cat gradually stops grooming an area that's become painful. The good news embedded in that truth is that prevention works just as gradually.

    A few minutes of brushing a day. Attention to your cat's behavior and grooming habits. Regular check-ins with a groomer or vet.

    These small actions prevent the crisis before it starts.

    Your cat can't tell you where it hurts. It can't ask for help with the mat forming on its lower back. But now you know what to look for, and you know what to do when you find it.

    You don't have to be a professional groomer. You just need to be observant, patient, and willing to make the call when your cat needs more help than you can provide at home. That's what responsible cat ownership looks like.

    Research consistently shows that cats with regularly groomed coats have fewer skin issues, lower stress levels, and stronger bonds with their owners. The American Veterinary Medical Association emphasizes routine grooming as part of preventive care for long-haired breeds. You're not just keeping your cat looking nice.

    You're protecting their health.

    One more thing worth remembering. If you ever feel overwhelmed, or if the situation seems bigger than your skill level, that's not a personal failure. It's a signal to reach out.

    Professional groomers see severely matted cats every single week. Vets handle these cases constantly. There's no shame in asking for help.

    What matters is that your cat gets relief. Whether that comes from your own careful hands or from a trained professional, the outcome is the same: a comfortable, healthy, mat-free cat who can move freely and groom without pain.

    You've got the knowledge now. You know the tools, the techniques, the warning signs, and the safe alternatives when home grooming isn't the right choice. Use that knowledge.

    Your cat will thank you with purrs, head butts, and a lifetime of trust.

    Take it one small section at a time. And always remember the golden rule of feline grooming: if you can't see the skin, you can't see the danger. Stop when you're unsure.

    Ask when you're in doubt. And never, ever reach for scissors when clippers are the only safe answer.

    Your cat doesn't need a perfect lion cut or a show-quality coat. It needs to be free of pain, free of tight pulling, and free of the hidden infections that thrive under matted fur. That's the real goal here, and it's completely achievable.

    Start with the assessment. Gather your tools. Make the call about whether this is a home job or a professional one.

    Then work slowly, gently, and steadily until the job is done.

    You've got this. And your cat has you, which is exactly what it needs.

    The next step is yours. Take it.

  • Complete Guide to How to Groom a British Shorthair

    Complete Guide to How to Groom a British Shorthair

    British Shorthair blue coat texture

    Image source: Bing (Web (fair-use with source credit))

    If you've just welcomed a British Shorthair into your home, you're probably already smitten with that plush, teddy-bear coat and those big, round copper eyes. But here's the thing nobody warns you about: that gorgeous, dense fur is a full-time job. Learning how to groom a British Shorthair isn't just about keeping them looking cute.

    It's about preventing painful mats, avoiding hairball blockages, and catching early signs of skin issues that this breed is prone to. And if you skip the routine, you'll be dealing with fur tumbleweeds rolling across your floors within a week, not to mention a very uncomfortable cat.

    This breed's double coat is deceptively dense. While the outer guard hairs are short and crisp, the undercoat is thick, woolly, and sheds in dramatic "coat blows" twice a year. Per feline dermatology standards, a double-coated cat like this needs specific grooming tools and techniques that a standard single-coat brush simply can't handle.

    The good news? Once you master the routine, it takes just 10 to 15 minutes a few times a week. Let's walk through exactly what you need and, more importantly, exactly what you need to do.

    Quick Answer

    To groom a British Shorthair, brush them two to three times weekly with a slicker brush and stainless steel comb. Use an undercoat rake weekly, daily during spring and fall shedding seasons. Check ears, chin, and nails every two weeks.

    Bathe only when necessary. Watch for mats, especially behind the ears and in armpits.

    Why Grooming a British Shorthair Isn't Optional

    Let's get one thing straight right away. Grooming a British Shorthair isn't a vanity project. It's a health requirement.

    This breed is genetically predisposed to hairball issues because of that dense undercoat. When cats groom themselves, they swallow loose fur. A British Shorthair swallows a lot of it.

    Those hairballs can pass through the digestive tract, but they can also form obstructions that require surgery to remove.

    Beyond the digestive risk, matting is a serious problem. Their coats are so dense that loose hair gets trapped against the skin instead of falling away. That trapped hair tangles, then mats, then tightens against the skin like a vice.

    A mat that's pulled tight is painful, restricts movement, and creates a warm, moist environment where bacterial skin infections thrive.

    Regular grooming also gives you a critical window into your cat's health. You'll feel lumps, bumps, and skin irritations that would otherwise stay hidden under all that fur. You'll notice fleas, ticks, and dry patches early.

    You'll spot the early stages of chin acne or ear wax buildup before they become full-blown infections.

    The bottom line is simple. If you own a British Shorthair, you own a cat that depends on you for coat maintenance. Skipping it isn't neglect that shows on the surface.

    It's neglect that shows at the vet's office.

    What Makes the British Shorthair Coat Different

    The Double Coat Structure

    The British Shorthair has what's called a double coat. This means there are two distinct layers of fur working together. The outer layer is made of short, dense guard hairs that give the coat its signature "crisp" texture.

    These hairs are water-resistant and act as a protective barrier.

    Beneath that sits the undercoat. This layer is softer, fluffier, and much denser than the outer guard hairs. It's the insulating layer that keeps the cat warm in winter and cool in summer.

    It's also the layer that sheds. When the undercoat sheds, those fine, woolly hairs get trapped in the guard hairs above, creating the perfect conditions for tangles and mats.

    Here's what that means for you practically. The undercoat is where 80% of your grooming effort goes. A slicker brush alone won't penetrate deep enough to remove shed undercoat hairs.

    You need tools that reach down to the skin and pull those loose hairs out before they tangle.

    Seasonal Coat Blow and What to Expect

    Twice a year, usually in spring and fall, the British Shorthair experiences what breeders call a "coat blow." This is a two-to-three-week period where the undercoat sheds aggressively to prepare for the upcoming season. During this time, your cat will look like they're molting.

    Expect to brush daily during coat blow. Not because you want to, but because you have to. The sheer volume of loose fur is astonishing.

    If you don't remove it, your cat will groom it off themselves, which means you'll be cleaning up hairballs instead of brushing fur. Aggregated feline health research indicates that hairball frequency spikes dramatically during these seasonal sheds in double-coated breeds.

    The coat blow also has a schedule that varies by hemisphere. In the Northern Hemisphere, expect heavy shedding around March through April and again in September through October. Indoor cats may shed more evenly year-round due to consistent artificial lighting and heating, but the seasonal peaks are still noticeable.

    The Essential Grooming Kit

    You don't need a drawer full of expensive tools, but you do need the right ones. Using the wrong brush on a British Shorthair is like using a fork to eat soup. It doesn't get the job done, and it frustrates everyone involved.

    Here's what our research and aggregate owner reviews indicate actually works for this breed.

    slicker brush and undercoat rake

    Image source: Bing (Web (fair-use with source credit))

    Brushes and Combs That Actually Work

    Slicker brush. This is your everyday workhorse. It features fine, short wires set closely together on a flat or slightly curved pad. Slicker brushes are excellent for removing loose fur from the outer coat and catching the early stages of tangles.

    Look for one with rounded wire tips to avoid scratching your cat's skin.

    Undercoat rake. This tool is non-negotiable for this breed. An undercoat rake has long, spaced teeth that reach through the guard hairs and pull out loose undercoat fur. It's the only tool that effectively manages the thick, woolly shedding layer.

    Use it during coat blow and weekly during normal shedding periods.

    Stainless steel comb. A good-quality steel comb with both wide and fine teeth is essential for finishing work. After brushing, run the comb through your cat's coat to catch anything the brushes missed. The fine teeth also work well for checking the face and tail area for mats.

    Rubber grooming mitt. This is a great option for cats that are nervous about brushing. The soft rubber bristles remove loose fur while feeling like a gentle petting session. It's less effective than a slicker brush for deep grooming, but it's perfect for desensitizing a cat to being handled.

    Nail, Ear, and Eye Care Tools

    Grooming isn't just about the coat. Your kit should also include cat-specific nail clippers, either scissor-style or guillotine-style. Scissor-style clippers are generally easier for beginners to control.

    Guillotine clippers work well if you're comfortable with the mechanism.

    For ears, you'll need a veterinary-approved ear cleaning solution and cotton balls or soft gauze. Do not use cotton swabs. They push wax deeper into the ear canal and can cause damage.

    For eyes, keep a pack of soft, damp grooming wipes on hand. British Shorthairs are prone to watery eyes that leave tear stains. Gently wiping the eye area daily prevents staining and catches any discharge that might indicate an infection.

    Shampoo and Wipes Options

    Bathing a British Shorthair isn't a frequent necessity. But when it's needed, you need the right product. Use only cat-specific shampoo.

    The pH balance of human shampoo is wrong for feline skin and will strip the natural oils that keep their coat healthy. Waterless shampoo is a great option for spot cleaning between baths, especially for cats that hate water.

    ToolPurposeFrequency
    Slicker brushRemove loose outer coat hair, catch tangles2-3 times weekly
    Undercoat rakeRemove shed undercoat hairsWeekly, daily during coat blow
    Stainless steel combFinishing, check for missed tanglesAfter each brushing session
    Rubber mittDesensitizing, light groomingAs needed
    Nail clippersTrimming clawsEvery 2-3 weeks
    Ear solution + cottonClean wax buildupEvery 2-4 weeks

    Step-by-Step Grooming Routine

    Now let's get into the actual process. The order of operations matters. Skipping steps or doing them out of sequence can make the experience stressful for both you and your cat.

    Here's the routine that works, based on veterinary dermatology guidelines and what experienced breeders recommend.

    brushing technique direction

    Image source: Bing (Web (fair-use with source credit))

    Pre-Grooming Health Check

    Before you pick up a brush, run your hands over your cat's entire body. Feel for any bumps, lumps, scabs, or tender spots. Check the skin for flakiness, redness, or signs of parasites.

    This isn't just a warm-up. It's a health screening.

    Pay special attention to the chin. British Shorthairs are prone to chin acne, which presents as blackheads or red bumps on the chin and lips. Check the ears for excessive wax, dark discharge, or an unpleasant odor.

    Both can indicate infections that need veterinary attention.

    Also, check for mats. Run your fingers through the coat, especially around the neck, behind the ears, under the chin, and in the armpit area. Mats feel like small, hard lumps close to the skin.

    If you find any, don't try to yank them out with a brush. That hurts. Instead, hold the skin taut around the mat and work at it gently with your fingers and a comb.

    The Correct Brushing Order

    Start with the slicker brush. Work from the top of the head down the back, moving in the direction of hair growth. Use short, gentle strokes rather than long, dragging ones.

    Move from the back to the sides, then the chest, then the belly. The belly and chest are sensitive areas, so be especially gentle there.

    After a thorough pass with the slicker, switch to the undercoat rake. Again, start at the back and work down. The rake pulls deeply through the coat, removing the loose undercoat hairs that the slicker couldn't reach.

    You'll notice a significant amount of fur coming out during this step, especially during coat blow season.

    Finish with the stainless steel comb. Run it through the entire coat, focusing on areas where tangles love to hide. The ruff around the neck, the armpits, the britches (the fluffy area on the back of the hind legs), and the tail.

    If the comb snags on a tangle, stop and work it out with your fingers before continuing. Never pull a comb through a mat.

    Handling Mats Tied to the Skin

    If you find a mat that's tight against the skin, don't reach for scissors. You can easily cut your cat's skin when they squirm. Instead, try to split the mat with your fingers, then work a fine-tooth comb from the outer edge of the mat inward.

    This takes patience. You're slowly teasing apart the felted fur, not ripping it.

    For mats that are small and close to the body, a dematting comb can help. These tools have short, sharp blades designed to cut through dense fur safely. But use them with extreme caution.

    If a mat is too tight, too large, or too close to the skin, it's time for a professional groomer. They have the tools and the restraint to handle it safely.

    Nail Trimming Without the Stress

    Nail trimming is often the scariest part of grooming for both cat and owner. The key is to introduce it slowly and use the right technique. Have your cat sit on your lap or on a non-slip surface.

    Gently press on the paw to extend the claws. You'll see the pink quick inside the nail. Only trim the white, translucent tip.

    Never cut into the pink. That's a blood vessel and nerve bundle.

    cat nail trimming quick diagram

    Image source: Bing (Web (fair-use with source credit))

    If you accidentally cut the quick, don't panic. Apply styptic powder or cornstarch to the tip of the claw to stop the bleeding. Then stop the session.

    Trimming one or two claws per sitting is perfectly acceptable, especially when you're both learning.

    Ear and Chin Cleaning

    For ears, apply a small amount of the cleaning solution to a cotton ball or gauze pad. Gently wipe the visible part of the inner ear. Never insert anything into the ear canal.

    If you see excessive wax, dark discharge, or smell something foul, that's a vet visit, not a home grooming task.

    For the chin, use a damp grooming wipe. Gently wipe the chin area, removing any oil, food residue, or blackhead buildup. This daily habit goes a long way toward preventing chin acne.

    Also, consider switching your cat's food and water bowls to ceramic, glass, or stainless steel. Plastic bowls harbor bacteria and are a common trigger for feline acne.

    Bathing When Necessary

    British Shorthairs rarely need full baths. Their coats are self-cleaning, and over-bathing strips essential oils. A full bath is only necessary if your cat gets into something sticky, smelly, or toxic, or if they're too overweight to groom themselves properly.

    When bathing, brush the coat thoroughly first to remove loose fur. Use lukewarm water, never hot. Place a non-slip mat in the tub so your cat feels secure.

    Use only cat-specific shampoo and work it gently into the coat. Rinse thoroughly. Any leftover shampoo residue can cause skin irritation.

    Dry with a towel, then use a low-heat hair dryer on the lowest setting if your cat tolerates the noise. Never rub the coat dry. That creates friction and tangles.

    Pat instead.

    How Often You Should Groom

    The short answer is that there isn't one single schedule that works for every British Shorthair. Your grooming frequency depends on the season, your cat's age, their health, and how much they tolerate being handled. But there are baseline guidelines that work for most cats.

    Normal maintenance. During most of the year, plan on grooming two to three times per week. Each session should last about 10 to 15 minutes. That's enough time to remove loose fur, check for mats, and keep the coat in good condition without overwhelming your cat.

    During coat blow. When your cat hits their seasonal shed, bump that up to daily sessions. You'll notice the difference immediately. The amount of fur you pull out during a single brushing in coat blow season can equal what you'd remove in a full week of normal grooming.

    For kittens. Kittens under six months old have softer, finer coats that don't mat as easily. You can get away with once or twice weekly brushing. But it's crucial to start early.

    The goal at this age is habituation, not just coat maintenance. Let your kitten associate brushing with treats, gentle handling, and positive attention.

    Adjusting for Kittens, Seniors, and Overweight Cats

    Kittens need short, fun sessions. Keep them to five minutes or less. Stop before your kitten gets restless.

    End every session with a treat. The goal is to build a positive association that lasts a lifetime.

    Senior cats need more help, not less. As cats age, they lose flexibility. They can't reach their own back or rear end as effectively.

    This means they rely on you to handle grooming duties they used to manage themselves. Older cats also tend to develop arthritis, which makes grooming painful. Be extra gentle and watch for flinching or resistance.

    Overweight cats have the same problem. They physically cannot reach certain areas of their body to groom. This leads to matting on the back, the base of the tail, and the hindquarters.

    If your British Shorthair carries extra weight, you'll need to groom those hard-to-reach zones more frequently. Check those areas specifically during every session.

    Seasonal Adjustments for Shedding Peaks

    Here's a practical timeline based on Northern Hemisphere seasons. In late winter, around February, you might notice a slight uptick in shedding. That's the coat preparing for spring.

    By March and April, you're in full coat blow territory. Daily brushing is non-negotiable during this window.

    Summer brings lighter shedding. Two to three times a week is usually sufficient. In early fall, around September and October, the second coat blow happens.

    The cat is shedding their lighter summer coat and growing in their dense winter insulation. Again, expect daily brushing for two to three weeks.

    Indoor cats may shed more evenly year-round because artificial lighting and temperature control confuse their biological clocks. But the seasonal peaks still happen. Just be ready for them.

    Common Mistakes That Hurt or Stress Your Cat

    Grooming mistakes are common, even among experienced cat owners. The stakes are higher with a British Shorthair because of that dense double coat. Here are the mistakes our research and veterinary sources flag most often.

    Over-Brushing and Brush Burn

    Yes, you can brush a cat too much. Over-brushing irritates the skin. The fine wires of a slicker brush can cause micro-abrasions, especially if you press too hard or brush the same spot repeatedly.

    This condition is sometimes called brush burn. It shows up as red, sensitive patches of skin.

    If you notice your cat flinching, pulling away, or becoming agitated during brushing, stop. Check the skin underneath. Redness, raised bumps, or fur that's thinning in patches are signs you're being too aggressive.

    The fix is simple. Use lighter pressure. Let the brush do the work.

    And don't chase perfection. You don't need to remove every single loose hair in one session.

    Shampoo pH and Human Products

    This one bears repeating because it's such a common mistake. Human shampoo is formulated for human skin. Human skin has a pH around 5.5.

    Cat skin sits closer to 7.5. Using human shampoo disrupts the natural acid mantle of a cat's skin. This leaves the skin vulnerable to dryness, irritation, and bacterial or fungal infections.

    Even some products labeled as "gentle" or "all-natural" for humans are wrong for cats. Only use shampoo specifically formulated for felines. If you're unsure, ask your veterinarian for a recommendation.

    Also, avoid scented products. Cats have a much stronger sense of smell than we do. Heavy fragrances can be overwhelming and stressful.

    Look for fragrance-free or lightly scented options.

    Cutting the Quick

    Nail trimming accidents are the most common grooming injury. The quick is the pink, blood-filled part of the nail that contains nerves and blood vessels. When you cut into it, it bleeds and hurts.

    One bad experience can make your cat terrified of nail trims forever.

    The risk is higher in cats with dark nails. You can't see the quick easily. In that case, trim tiny slivers at a time.

    Stop as soon as you see a darker circle appearing in the center of the freshly cut nail. That's the quick approaching.

    If you do cut the quick, stay calm. Apply styptic powder, cornstarch, or a bar of soap pressed against the tip. The bleeding usually stops within a few minutes.

    Then end the session. Don't try to finish the other nails.

    Ignoring Chin Acne and Ear Wax

    The British Shorthair's dense coat isn't just on their back and sides. It's on their chin too. This creates a perfect environment for chin acne, also known as feline acne.

    Loose fur, food residue, and natural skin oils get trapped against the chin. This clogs hair follicles and leads to blackheads and red, swollen bumps.

    Many owners don't notice chin acne until it's severe. The fur hides it. You need to actively check your cat's chin during every grooming session.

    If you see black specs, don't pick at them. Clean the area daily with a gentle wipe or a diluted chlorhexidine solution recommended by your vet.

    Ear wax buildup is similar. British Shorthairs produce more ear wax than some other breeds. That excess wax, combined with the thick fur around their ears, creates a breeding ground for bacterial and yeast infections.

    Check your cat's ears every two weeks. A small amount of light brown wax is normal. Dark, smelly, or crusty discharge is not.

    Dealing With Hairballs

    Hairballs are the bane of every British Shorthair owner's existence. These cats are fastidious groomers, which means they swallow a lot of fur. Most of that fur passes through the digestive system without issue.

    But sometimes it accumulates in the stomach and forms a mass that gets vomited back up.

    When Grooming Isn't Enough

    Regular brushing reduces the amount of loose fur your cat swallows. But it doesn't eliminate hairballs entirely. Even the most diligently brushed cat will still ingest some hair while grooming themselves.

    During coat blow season, the volume of swallowed hair spikes dramatically. This is when hairball frequency peaks. If your cat is bringing up hairballs more than once or twice a month outside of seasonal sheds, that's worth discussing with your vet.

    Frequent vomiting can indicate an underlying digestive issue, not just a grooming problem.

    Preventative Products That Help

    Hairball control products work in a few different ways. Lubricant gels and pastes coat the hair in the stomach, helping it pass through the digestive tract more easily. These are typically given a few times a week.

    They're effective but can be messy to administer.

    Fiber supplements and hairball formula foods increase dietary fiber. This helps move hair through the intestines rather than letting it accumulate in the stomach. If you switch your cat's food, do it gradually over 7 to 10 days to avoid digestive upset.

    Regular grooming remains the most effective prevention. Combine it with a lubricant gel during shedding seasons for the best results. As of 2026, most veterinary nutritionists recommend a multi-pronged approach: diet, supplements, and consistent brushing.

    Signs of a Blockage That Need a Vet

    A hairball that can't pass through the digestive tract is called a trichobezoar. This is a medical emergency. If it causes a blockage, it requires surgical removal.

    Watch for these warning signs. Retching or gagging repeatedly without producing a hairball. Loss of appetite.

    Lethargy. Constipation. Straining to defecate without producing anything.

    Vomiting shortly after eating. Abdominal pain, which might present as your cat being sensitive to touch or adopting a hunched posture.

    If you notice any of these signs, don't wait. Contact your veterinarian immediately. Hairball blockages are painful and potentially life-threatening.

    Be especially vigilant during coat blow season when the risk is highest.

    When to Call a Professional Groomer or Vet

    There's no shame in asking for help. Professional groomers are trained to handle difficult coats and stressed cats. And some grooming issues are genuinely medical problems that require veterinary attention, not just better brushing technique.

    Signs of Skin Infections or Parasites

    If you notice any of the following during grooming, stop and contact your vet rather than trying to treat it at home. Unusual bumps or raised lesions, especially if they're red, warm, or oozing. Areas of fur loss that are expanding.

    Dry, flaky patches of skin that don't improve with regular brushing. A strong, unpleasant odor coming from the skin or coat. Visible fleas or flea dirt.

    Excessive scratching, licking, or biting at the skin.

    These can indicate fungal infections like ringworm, bacterial infections, mite infestations, or flea allergies. Grooming over an untreated skin condition can make it worse by spreading the irritation or breaking the skin further.

    Mats That Won't Come Out Safely

    Some mats are simply too severe for home grooming. If a mat is tight against the skin, large, or located in a sensitive area like the armpit or groin, attempting to remove it at home risks injury to your cat. Don't reach for scissors.

    You can easily create a serious wound.

    A professional groomer has specialized dematting tools and the experience to work safely. They may need to shave the matted area completely. This is a worst-case scenario, but it's preferable to a painful wound you accidentally created.

    If the mat has caused skin irritation or open sores, skip the groomer and go straight to the vet. The skin needs medical treatment before any professional grooming happens.

    Behavioral Resistance and What It Means

    If your cat suddenly becomes aggressive or extremely resistant during grooming, that's a red flag. It's not always a training issue. Pain can cause behavioral changes.

    If your cat was previously tolerant of grooming and now lashes out when you brush their back or touch their paws, there may be an underlying medical reason. Arthritis, dental pain, and skin infections can all cause this shift.

    Similarly, if grooming sessions always end with your cat hiding, hissing, or showing other signs of severe stress, something needs to change. Consider whether you're using the right tools, the right technique, and the right pressure. Also consider whether you're scheduling grooming at a stressful time for your cat.

    If you've adjusted your approach and the resistance continues, a professional cat groomer or your vet can help. They can demonstrate techniques that work better for your specific cat. Sometimes a second opinion is all it takes to figure out what's going wrong.

    Building a Positive Grooming Routine

    The most important grooming tool you own isn't a brush or a comb. It's patience. A calm, consistent, positive approach to grooming produces better results than any expensive tool on the market.

    Here's how to build a routine that your cat tolerates, maybe even enjoys.

    Desensitizing Your Cat to Handling

    Start by simply touching your cat. Don't pick up a brush yet. Gently rub their back, their sides, their paws, and their chin.

    Do this during calm moments, not just before grooming. The goal is to get your cat comfortable with being handled all over their body.

    Once your cat is comfortable with touching, introduce the brush. Let them sniff it first. Then run it gently down their back once or twice.

    Reward them with a treat immediately. Over several sessions, gradually increase the number of brush strokes.

    If your cat shows signs of stress, like flattened ears, a twitching tail, or trying to escape, take a step back. Go back to touching without the brush. Moving too fast can create a setback that's hard to undo.

    Rewards and Calm Sessions

    Treats are your best friend during grooming. Give a treat before the session begins. Give another treat mid-session if your cat stays calm.

    Give a final treat when the session ends. This creates a strong positive association with grooming.

    Choose a quiet time for grooming. Don't try to brush a cat that's energized from play or stressed by loud noises in the house. Late evening, when cats are naturally winding down, often works well.

    Keep the environment calm with minimal distractions.

    Keep sessions short and sweet. Ten minutes is plenty. If your cat starts to squirm at minute seven, stop.

    You can always do more tomorrow. Pushing through a stressed cat's resistance makes the next session harder.

    Making Grooming Predictable

    Cats thrive on routine. If grooming happens at the same time, in the same place, and follows the same sequence of steps, your cat will learn to anticipate it. While they might never love it, they'll learn to tolerate it because it's predictable and ends with a reward.

    Choose a specific grooming spot. A non-slip mat on a table or counter works well. Don't chase your cat around the house for grooming sessions.

    Bring them to the grooming spot every time. This creates a clear context that helps them understand what's happening.

    Follow the same order of operations. Brush the back, then the sides, then the belly, then the tail. Check the ears.

    Check the chin. Trim nails if needed. This predictability reduces anxiety because your cat always knows what comes next.

    Consistency also means not skipping sessions. If you only groom sporadically, your cat never settles into the rhythm. They stay on edge because they don't know what to expect.

    A predictable schedule, even if it's just twice a week, builds confidence over time.

    Finally, watch your own energy. Cats are incredibly attuned to human emotions. If you're tense, rushed, or frustrated, your cat will pick up on it.

    Take a breath before you start. Approach each session with calm, focused energy. Your cat will mirror that calmness, and grooming becomes a bonding experience instead of a battle.

    Quick Reference Grooming Schedule

    Here's a simple, scannable schedule you can save, screenshot, or print out. It breaks down what to do daily, weekly, and seasonally. You'll notice that some tasks are non-negotiable, while others are flexible based on your cat's individual needs.

    FrequencyTaskNotes
    Daily (optional)Wipe eyes and chin with a damp clothPrevents tear stains and chin acne
    2-3 times weeklyFull brushing session with slicker brush and comb10-15 minutes, includes pre-grooming health check
    WeeklyUndercoat rake sessionEssential during normal shedding periods
    Every 2 weeksNail trim and ear checkTrim only the white tip of the nail
    Daily during coat blowFull grooming session with all toolsExpect significant fur removal
    MonthlyWaterless shampoo or spot cleanOnly when needed, not a replacement for brushing
    As neededFull bathOnly for sticky, smelly, or toxic messes

    Making Adjustments Based on Your Cat's Response

    Pay attention to your cat's reactions to this schedule. Some British Shorthairs have heavier coats than others. Some are more tolerant of handling.

    Your schedule should flex based on what your cat actually needs and tolerates.

    If you notice matting between sessions, increase frequency. If your cat's coat looks dull or greasy, you might need to add a waterless shampoo session. If your cat seems stressed by daily grooming during coat blow, consider splitting sessions into shorter morning and evening chunks.

    The schedule above is a starting point, not a rigid rule. Your cat's needs will change as they age, as the seasons change, and as their health evolves. The key is to stay observant and adjust accordingly.

    Understanding the British Shorthair's Coat Cycle

    The British Shorthair's coat isn't static. It changes throughout the year in response to daylight hours and temperature shifts. Understanding this cycle helps you anticipate grooming needs before they become problems.

    The Growth Phases

    Cat fur grows in cycles. Each hair follicle goes through three phases. Anagen is the growth phase.

    Catagen is the transition phase. Telogen is the resting phase, where the hair stops growing and eventually falls out.

    In British Shorthairs, most follicles synchronize their cycles. This means large numbers of hairs enter the telogen phase simultaneously. That's why you get dramatic coat blows instead of a steady, manageable trickle of shedding.

    Daylight hours trigger this synchronization. As days lengthen in spring, the winter coat is released. As days shorten in fall, the summer coat is shed to make way for denser winter insulation.

    Indoor cats under artificial lighting experience muted versions of these triggers, but the cycle still happens.

    Coat Texture Changes

    The British Shorthair's coat also changes texture as the cat matures. Kittens have soft, fluffy, almost woolly coats. These don't mat as easily as adult coats, but they do shed.

    By around eight months, the adult coat starts coming in. It's coarser, denser, and requires more consistent grooming.

    Senior cats often develop thinner coats. Hair growth slows with age. The coat may become patchier or duller.

    This is normal, but it still requires attention. Older cats often can't groom themselves as effectively, so their coat may become greasy or matted without regular human intervention.

    Coat Health Indicators

    Your cat's coat is a window into their overall health. A healthy British Shorthair coat is dense, crisp to the touch, and has a natural sheen. Dullness, greasiness, or excessive dryness can signal underlying issues.

    A dull coat may indicate nutritional deficiencies, particularly a lack of omega-3 and omega-6 fatty acids. A greasy coat can point to skin infections, hormonal imbalances, or dental disease. Excessive shedding outside of normal seasonal peaks might indicate stress, allergies, or thyroid issues.

    If you notice sudden changes in coat quality or shedding patterns, don't ignore them. Schedule a veterinary checkup. Catching systemic issues early is always better than waiting until they become serious.

    Frequently Asked Questions

    Do British Shorthairs need baths?

    British Shorthairs rarely need full water baths. Their coats are designed to be self-cleaning. Over-bathing strips essential oils and causes dry, irritated skin.

    A full bath is only necessary if your cat gets into something sticky, smelly, or toxic. Between baths, use waterless shampoo or grooming wipes for spot cleaning. If your cat is overweight and can't groom themselves, more frequent bathing may help.

    Always use cat-specific shampoo and dry thoroughly.

    Can I shave my British Shorthair to reduce shedding?

    Shaving a British Shorthair is not recommended. Their double coat provides crucial insulation against both cold and heat. Shaving disrupts this natural temperature regulation.

    It also changes the texture of the coat as it grows back. The new growth is often coarser and may not regrow evenly. The regrowth period leaves your cat vulnerable to sunburn and skin irritation.

    Instead of shaving, focus on daily brushing during coat blow season to manage the shed.

    Why does my British Shorthair hate being brushed?

    Several reasons could explain this behavior. The most common is that brushing hurts. You might be using a brush with sharp wire tips, pressing too hard, or pulling on tangles and mats.

    The second reason is poor association. If your cat has had unpleasant grooming experiences, they'll resist future sessions. The third is overstimulation.

    Some cats are sensitive to repetitive touch and reach their limit quickly. Start with short, gentle sessions using a rubber mitt. Reward heavily with treats.

    Build up duration gradually.

    What's the best brush for a British Shorthair?

    There's no single best brush. You need a combination of tools. A slicker brush with rounded wire tips handles the outer coat and daily maintenance.

    An undercoat rake reaches the dense woolly underlayer that causes most shedding and matting. A stainless steel comb provides a finishing pass to catch anything missed. For sensitive cats, a rubber grooming mitt is a gentle starting point.

    Invest in quality tools with comfortable handles. Proper tools make the process easier for you and more comfortable for your cat.

    How often should I trim my British Shorthair's nails?

    Every two to three weeks is the standard recommendation. This timeline keeps the nails short enough to prevent overgrowth and discomfort. Cats that are more active or use scratching posts may wear their nails down faster.

    Check your cat's nails weekly to assess whether they need a trim. If you hear clicking sounds as your cat walks on hard floors, the nails are too long. Overgrown nails in a British Shorthair are particularly dangerous because their dense fur hides the problem.

    Always check nail length during grooming sessions.

    Can I use human nail clippers on my cat?

    You can, but it's not ideal. Human nail clippers are designed for flat, wide nails. Cat nails are curved and narrow.

    Using human clippers can crush the nail instead of making a clean cut. This splitting can cause pain and make future trims more difficult. Cat-specific clippers have a curved blade that matches the shape of a cat's claw.

    They make a clean, precise cut. If you're in a pinch, small human clippers work, but invest in proper cat clippers as soon as possible.

    Final Takeaway: Consistency Beats Intensity

    Grooming your British Shorthair doesn't need to be complicated. It needs to be consistent. Fifteen minutes, two to three times a week, is more effective than a marathon grooming session once a month.

    Your cat stays comfortable. The coat stays healthy. You catch problems early.

    Remember the essentials. Use the right tools, including a slicker brush, undercoat rake, and steel comb. Brush in the correct order.

    Check the skin, chin, ears, and nails regularly. Watch for mats and address them before they tighten against the skin. Respect your cat's limits and build positive associations with treats and calm handling.

    During coat blow season, ramp up to daily sessions. This is when the real grooming work happens. The undercoat needs aggressive removal to prevent it from tangling and turning into mats.

    Keep those sessions short and positive.

    And when something feels wrong, trust your instincts. A professional groomer can handle severe mats. A veterinarian should evaluate any skin issues, behavioral changes, or signs of hairball blockages.

    Grooming is part of responsible cat ownership, but it's not a substitute for medical care.

    Your British Shorthair's plush coat is one of their most beautiful features. It's also a daily commitment you signed up for when you brought them home. But here's the good news: once you establish the routine, it becomes second nature.

    Ten minutes with a brush, a few treats, and a calm moment with your cat. That's not a chore. That's bonding time.

    And your cat will thank you for it, in their own quiet, dignified way.

  • Complete Guide to How to Clean a Long Haired Cat’s Bottom

    Complete Guide to How to Clean a Long Haired Cat’s Bottom

    If you've ever looked at your long-haired cat and noticed a sticky mess where the sun doesn't shine, you know the struggle. Cleaning a long haired cat's bottom isn't exactly in the brochure when you adopt a fluffy Maine Coon or a Persian, but it's a reality of ownership. Ignoring it isn't an option, because dried fecal matter and matted fur can lead to painful skin infections, parasites, and even a dangerous condition called flystrike.

    The good news? It's a manageable task once you know what you're doing. As of 2026, veterinary guidelines from the Cornell Feline Health Center emphasize that regular perineal hygiene is a core part of preventive care for long-haired breeds, not just a cosmetic afterthought.

    In our research, most owners spend about five to ten minutes a week on this, provided they catch issues early. Let's walk through exactly how to do it safely, without turning your living room into a wrestling ring.

    Quick Answer

    Clean your long-haired cat's bottom with pet-safe wipes. Brush away loose fur first. Trim matted fur with electric clippers only.

    Never use human baby wipes. Wipe away from the anus. Dry the area completely.

    Check for redness or sores. Call the vet if you see swelling, pus, or blood.

    Why This Matters More Than You Think

    The Real Risks of Ignoring It

    That little clump of dried stool isn't just gross. It's a health hazard. When feces stay trapped in fur, they irritate the sensitive skin around the anus.

    This leads to inflammation, which makes your cat lick and bite the area. That excessive licking introduces bacteria into broken skin, and before you know it, you're dealing with a hot spot or a full-blown bacterial infection.

    There's also the issue of flystrike, medically known as myiasis. This happens when flies lay eggs in soiled fur, and the hatched maggots feed on your cat's skin. It's horrifying, it's painful, and it's potentially fatal if left untreated.

    Outdoor cats with matted, soiled rear ends are the most vulnerable. Indoor cats aren't completely safe either, especially during warmer months.

    Why Long-Haired Cats Struggle with Self-Cleaning

    Here's the thing: cats are fastidious groomers. They spend up to 50 percent of their waking hours cleaning themselves. But a long-haired cat's anatomy works against them.

    Their fur is dense, fine, and easily tangled. When stool passes and a tiny piece sticks to that undercoat, normal grooming doesn't remove it. Instead, it gets smeared, matted, and cemented into the fur.

    Certain breeds are worse off than others. Persians and Himalayans have particularly fine, cotton-like coats that tangle almost instantly. Maine Coons have thick, water-resistant topcoats that trap debris close to the skin.

    And every long-haired cat has a "pants" area, the longer fur on the back of the hind legs, which is a magnet for dingleberries. Mix that with a deep squatting posture in the litter box, and you have a perfect storm.

    The Hidden Connection to Overall Health

    A consistently dirty bottom can mask other problems. Matting hides skin irritations, flea infestations, or even small tumors. If your cat's rear end is perpetually soiled despite regular cleaning, it might signal an underlying digestive issue like chronic diarrhea, or a mobility problem like arthritis that makes proper grooming painful.

    Weight issues play a role too. Overweight cats simply cannot reach their backsides, so they give up trying.

    What You'll Need: Tools and Supplies

    The Essentials Checklist

    Before you start, gather everything in one place. Fumbling for supplies mid-cleanup gives your cat time to plan an escape. Here's what you need:

    pet-safe grooming wipes

    ToolWhy You Need ItWhat to Avoid
    Pet-safe grooming wipesQuick daily cleanups, gentle on skinHuman baby wipes (harmful ingredients)
    Electric pet clippers with #10 bladeSafe sanitary shave for matted furScissors (risk of cutting skin)
    Fine-toothed combDetecting mats before they hardenWire slicker brushes on mats
    Soft washclothWarm water rinses for stubborn debrisRough towels that irritate skin
    Grooming glovesProtecting your hands during restraintBare hands with a stressed cat
    High-value treatsPositive reinforcementRushing without reward

    Choosing the Right Wipes

    Not all wipes are created equal. Pet-safe grooming wipes are formulated with a pH balance that matches cat skin, which is more alkaline than human skin. They contain no alcohol, no artificial fragrances, and no harsh detergents.

    Human baby wipes, by contrast, often contain aloe, chamomile, or fragrance that can irritate a cat's rear end, and some contain propylene glycol, which is toxic if ingested during grooming.

    Look for wipes labeled specifically for cats or for sensitive skin. Enzyme-based wipes are ideal because they break down organic matter like dried feces and urine. In our research, aggregate buyer reviews consistently rate wipes with a textured, non-slip surface higher, because they grab debris rather than just smearing it around.

    Clippers vs. Scissors: The Safety Debate

    This one needs to be crystal clear. Never, under any circumstances, use scissors near your cat's rear end. Cat skin is incredibly thin and elastic.

    A cat that startles mid-trim can easily end up with a laceration that requires stitches. Even professional groomers use clippers for sanitary trims, not scissors.

    Electric pet clippers with a #10 blade are the gold standard. The #10 blade is short enough to cut matted fur without pulling the skin, but it's also designed to leave a thin layer of fur so you don't nick the delicate perianal area. You don't need an expensive professional model.

    A basic cordless clipper designed for cats, running quietly, is sufficient. The key is testing the clipper on your leg first. If it feels too hot or too aggressive, it's wrong for your cat.

    Step-by-Step: How to Clean Your Cat's Bottom Safely

    Step 1: Pre-Brush to Find Hidden Mats

    You cannot clean an area you cannot see. Before anything else, gently brush the entire rear area, the tail, and the back of the hind legs. This isn't just about aesthetics.

    It reveals the true condition of the fur and exposes any mats that have formed close to the skin. Use a fine-toothed comb to part the fur and check the skin itself. Look for redness, scabs, flea dirt (small black specks), or swelling.

    If you find a mat that is tight and close to the skin, do not try to brush it out. Brushing pulls the skin, and cats will react violently. That mat needs to be clipped out using the clippers in a later step.

    Step 2: Safe Restraint Techniques

    A calm cat is a manageable cat. But cats don't naturally want to lie still while you poke at their rear end. Your approach matters.

    The towel wrap technique works well for most cats. Lay a large towel flat, place your cat on it, and fold the sides up and over the body so only the rear end peeks out. This stops the front claws from engaging and provides a sense of security.

    Wrap snugly but not tight enough to cause breathing difficulty.

    For cats that absolutely refuse the towel, consider a second person. One person holds the cat's front end securely against their chest, while the other handles the cleaning. This isn't a new concept.

    Veterinary staff use exactly this technique for stress-free handling. Never scruff a cat, meaning pulling the skin at the back of the neck. That's painful and triggers fear.

    Step 3: The Correct Wiping Motion

    Now for the actual cleaning. Take a pet-safe wipe or a damp washcloth. Always wipe away from the anus, moving toward the tail.

    Wiping in the opposite direction pushes debris and bacteria into the urinary tract or reproductive opening, which can cause infections.

    Use a fresh section of the wipe for each pass. Do not drag the same dirty spot across the area repeatedly. For dried, cement-like stool, hold a damp cloth against the area for twenty or thirty seconds.

    The warmth and moisture soften the debris, making it come away without pulling fur.

    how to clean a long haired cat's bottom

    Step 4: Drying Is Non-Negotiable

    Moisture left behind on fur creates the perfect environment for bacterial and fungal overgrowth. After wiping, take a dry, clean towel and gently blot the area. Do not rub.

    Rubbing creates friction that irritates sensitive skin.

    This is also the moment to ensure no moisture is trapped deep in the fur. If the fur is still damp, use the fine-toothed comb to fluff the area so air can circulate. For cats with dense undercoats, a quick pass with a low-heat hairdryer on the cool setting can help, but only if your cat tolerates the noise.

    Skip the dryer if your cat is stressed.

    Step 5: Inspecting for Irritation, Redness, or Parasites

    The final step isn't optional; it's the most important. With clean, parted fur, examine the skin thoroughly. Healthy skin around the anus should be pink or slightly pigmented, with no visible swelling, no cracks, and no moisture.

    Look for tiny white specks that might be tapeworm segments, or dark gritty flecks that indicate flea dirt.

    If you notice inflammation, open sores, a foul odor, or severe redness, call your veterinarian. These signs can indicate an infection, an impacted anal gland, or an allergic reaction. Per the AVMA (American Veterinary Medical Association), prompt professional assessment is essential for any perianal skin abnormality, because minor irritations can rapidly escalate into serious conditions.

    Handling Mats and Dried Fecal Matter

    How to Safely Break Down Cemented Stool

    Dried fecal matter can harden into what groomers affectionately call "cement boots." These are clumps of fur, stool, and debris that have fused together into a solid mass. Pulling at them is painful and ineffective. You need a different approach.

    Start with a warm, damp washcloth. Hold it against the affected area for thirty to sixty seconds. The warmth softens the stool, while the moisture breaks down the adhesive bond between the feces and the fur.

    Once softened, gently work the debris free with your fingers or a wide-toothed comb. Work from the outside inward, so you don't push the mass closer to the skin.

    If the mass is too large or too hard to soften, do not force it. That's when you move to clipping.

    When to Shave vs. When to Soak

    Here's the decision rule: if you can see the skin through the fur, soak. If you cannot, shave. Soaking works for surface-level debris that hasn't matted deeply into the undercoat.

    Shaving is necessary when the fur has become a single, solid mat that sits flush against the skin.

    Shaving a mat out is a delicate operation. Use your electric clippers with a #10 blade. Gently lift the mat away from the skin with your non-dominant hand, creating tension.

    Then, run the clippers parallel to the skin, in the direction of hair growth. Never push the clippers into the mat at an angle. That's how nicks happen.

    cat matting removal clippers

    The Right Way to Trim Fur Around the Anus

    Precision matters here. The skin around the anus is among the thinnest on a cat's body. You're not aiming for a perfect bald patch.

    You're aiming to remove enough fur to prevent fecal matter from sticking.

    Hold the clippers flat against the skin. Move in slow, short strokes. Work from the outside edges toward the center, and always keep the blade moving parallel to the skin surface.

    Stop frequently to check your progress. It's far better to leave a little extra fur than to remove too much and expose raw skin.

    A clean sanitary trim typically extends about one to two inches around the anus. For cats with particularly fluffy "pants," you may need to trim the backs of the hind legs as well. This isn't cosmetic.

    It reduces the surface area where stool can collect.

    What to Do When the Mat Won't Budge

    Some mats are simply beyond home management. If a mat is so tight that you cannot get a single clipper blade under it, or if the skin underneath is red, broken, or oozing, stop. Do not keep digging.

    This is the point where you need a professional.

    Professional groomers have experience with fractious cats and difficult mats. They also have tools, like high-speed clippers and specialized dematting combs, that most owners don't own. The cost of a professional sanitary trim typically ranges from twenty to forty dollars, which is a small price compared to a veterinary emergency visit.

    Common Mistakes That Injure Cats

    Pulling Mats Off the Skin

    This is the number one mistake. When you pull a mat away from the skin, you're ripping the hair follicles out of the dermis. It hurts.

    It causes bleeding and creates open wounds that can become infected. It also teaches your cat that being handled near the rear end equals pain, which makes future grooming attempts even harder.

    If a mat resists gentle combing, it's time to cut. There's no scenario where yanking is the right move.

    Using Human Grooming Products

    Your shampoo, your conditioner, your wipes, your scissors. None of them belong on your cat. Human skin has a pH around 5.5, while cat skin sits closer to 6.5 to 7.5.

    Products formulated for humans can strip the natural oils from a cat's coat and cause dryness, itching, and dermatitis.

    Human baby wipes are particularly problematic. Many contain propylene glycol, which is toxic to cats, and aloe, which can cause gastrointestinal upset if ingested. Stick to products explicitly labeled for cats.

    Wiping in the Wrong Direction

    It seems like a tiny detail, but it matters. Wiping toward the anus, from the tail down, pushes fecal bacteria directly into the urinary and reproductive tracts. Female cats are especially vulnerable to urinary tract infections from this mistake.

    Always wipe away from the anus, toward the tail. Use a fresh section of the wipe for every pass. If you need more than three or four passes, switch to a clean wipe rather than reusing the same one.

    Forcing a Stressed Cat

    Cats communicate stress through body language. Flattened ears, a lashing tail, dilated pupils, and a low growl are all signs that your cat has had enough. Pushing through these signals is a recipe for a bite or a scratch, and it damages your relationship.

    If your cat is clearly stressed, stop. Put everything down, offer a treat, and try again later. Sometimes twenty minutes makes all the difference.

    Sometimes you need to accept that a single session won't solve everything, and that's okay.

    Ignoring the Signs of a Deeper Problem

    Occasional messes are normal for long-haired cats. But if you're cleaning your cat's bottom multiple times a week, every week, something else is going on. Chronic diarrhea, constipation, or a sudden change in stool consistency deserve veterinary attention.

    So does a cat that suddenly stops grooming, which often signals dental pain, arthritis, or another underlying illness.

    When to Groom vs. When to Call the Vet

    Warning Signs That Require Professional Attention

    Some situations are beyond home care. If you notice any of the following, skip the grooming session and call your veterinarian:

    • Swelling or bulging around the anus
    • Open sores, ulcers, or bleeding
    • Pus or a foul-smelling discharge
    • Severe redness that doesn't improve after cleaning
    • Visible worms or rice-like segments in the fur
    • A cat that cries out in pain when touched near the rear
    • A cat that is lethargic, feverish, or refusing to eat

    These symptoms can indicate an impacted anal gland, a severe bacterial infection, a parasite infestation, or even a tumor. Professional assessment is non-negotiable when these signs appear.

    When a Sanitary Shave Is the Only Real Solution

    Sometimes, no amount of wiping and brushing fixes the problem. If your cat's fur has become a solid mat of feces and hair that covers the anus, or if the skin underneath is so irritated that any touch causes pain, a full sanitary shave is the answer.

    A veterinary technician or professional groomer can perform a complete perianal shave while your cat is safely restrained. For severely anxious cats, a veterinarian may administer a mild sedative to ensure the procedure is stress-free. This is not an overreaction.

    It is the most humane option when home care has failed.

    What a Professional Groomer Can Do That You Can't

    Professional groomers bring experience and equipment that most owners don't have. High-speed clippers can power through matted fur in seconds. Specialized restraint techniques keep both the cat and the groomer safe.

    And groomers have seen it all, from cats that bite to cats that bolt, so they remain calm when you might panic.

    A typical professional sanitary trim takes fifteen to thirty minutes. The groomer will also check for fleas, ticks, and skin abnormalities while they work. In our research, most groomers recommend a sanitary trim every four to six weeks for long-haired cats, which lines up neatly with a typical grooming schedule.

    What a Veterinarian Needs to Rule Out

    If you bring your cat in for a dirty bottom, your vet will likely check for a few specific conditions. Fecal impaction, where hardened stool blocks the colon, is common in long-haired cats with matted rear ends. Anal sac disease, where the glands near the anus become impacted or infected, produces a distinct foul smell and causes scooting.

    And gastrointestinal issues, from food sensitivities to inflammatory bowel disease, can cause chronic loose stools that make cleanliness impossible.

    Preventing the Problem Long-Term

    Diet Changes That Reduce Sticky Stools

    The consistency of your cat's stool directly affects how much cleanup you'll be doing. Soft, loose stools stick to fur. Firm, well-formed stools don't.

    The single most effective dietary change is increasing moisture. Canned food has significantly higher water content than dry kibble. That alone can firm up stool and reduce sticking.

    Fiber is another lever. Adding a teaspoon of canned pumpkin (plain, not spiced) to your cat's food can help regulate digestion. Some owners find success with fiber supplements like psyllium husk, but those should only be added under veterinary supervision.

    In our research, a high-quality, high-protein diet with moderate fiber content is the most consistent recommendation for stool quality.

    Regular Brushing Schedules That Stop Mats Before They Start

    Prevention beats treatment. Brushing your long-haired cat's rear area every other day prevents mats from forming in the first place. It takes two minutes.

    Use a slicker brush to work through the topcoat, then a fine-toothed comb to check for tangles close to the skin. Pay extra attention to the "pants" area, the backs of the hind legs, and the underside of the tail.

    Many owners find that daily brushing is easier than dealing with mats. If you skip a week, you'll find out exactly why.

    When to Schedule Routine Sanitary Trims

    Even with perfect brushing, some cats need a closer cut. If your cat is prone to mats, has mobility issues, or is overweight, schedule a professional sanitary trim every four to six weeks. Ask your groomer for a "potty patch" or "sanitary shave" specifically.

    That keeps the fur around the anus and hind legs short enough to prevent fecal matter from clinging.

    You can also learn to do this at home. With practice, a monthly sanitary trim with your clippers takes about ten minutes. The key is consistency.

    A short trim every month beats a wrestling match every week.

    Monitoring Your Cat's Grooming Habits

    Pay attention to how often your cat grooms. A sudden decrease in grooming often signals pain. Cats with dental disease, arthritis, or gastrointestinal discomfort stop grooming because it hurts to twist and reach.

    If your long-haired cat starts looking unkempt, it's not laziness. It's a medical red flag.

    Similarly, excessive licking or biting at the rear end suggests irritation. Check the area for fleas, mats, or irritation. If you find nothing, it might be allergies or anal gland issues, and that's a vet visit, not a grooming problem.

  • Beginner’s Guide to Why Does My Cat Have Flaky Skin

    Beginner’s Guide to Why Does My Cat Have Flaky Skin

    You wake up one morning, and there they are. Little white flakes scattered across your cat's back, dusted over their favorite sleeping spot, clinging to the dark fabric of your couch. It's not an emergency, but it's not nothing either.

    And now you're asking the question that's been nagging at you: why does my cat have flaky skin?

    Here's the thing about cat dandruff: it's rarely a disease by itself. More often, it's a symptom with a long list of possible causes, ranging from "turn on a humidifier" to "your cat needs a prescription diet." The good news is that most causes are manageable. The tricky part is figuring out which one you're dealing with.

    As of 2026, veterinary dermatology has a pretty clear playbook for this, and we're going to walk through it together.

    cat dandruff close-up

    Image source: Bing (Web (fair-use with source credit))

    Quick Answer

    Flaky skin in cats is usually caused by dry air, poor diet, parasites, or allergies. Check for fleas and mites first, since they're the most common culprits. Then evaluate your cat's diet for omega-3 fatty acids.

    If flakes persist with scratching or hair loss, see a vet. Underlying conditions like hyperthyroidism require blood work. Most causes are treatable once identified.

    Check for Parasites First: Cheyletiella Mites and Fleas

    If your cat has flaky skin, your very first move should be ruling out parasites. I know it's tempting to blame the dry winter air, but parasites are the most common cause of visible flaking that actually bothers a cat. And the most notorious one has a name that sounds like it belongs in a horror movie: walking dandruff.

    Cheyletiella mites are large enough to see with the naked eye, though you'll want a magnifying glass. They got their nickname because they move around on the skin's surface, carrying flakes of skin with them. It genuinely looks like your cat's dandruff is crawling.

    If you see that, it's mites, not dry skin.

    What Cheyletiella Mites Look Like

    These mites are tiny, but they have distinctive features. Under a microscope, they look like pale, oval-shaped creatures with large hook-like mouthparts. On your cat, they cause intense itching, dandruff that concentrates along the back and neck, and sometimes a fine, scaly dermatitis.

    The flakes are often larger and "crustier" than standard dandruff.

    Here's a practical test you can do at home:

    • Place your cat on a dark surface
    • Gently brush their coat with a fine-toothed flea comb
    • Tap the comb on a piece of black paper
    • Wait a few minutes
    • If you see tiny white specks that move, that's mites

    If the specks stay still, they're probably just dandruff. This isn't a perfect diagnostic, but it's a good early indicator.

    The Flea Problem That's Hiding in Plain Sight

    Even if you don't see fleas, your cat might have flea allergy dermatitis. Here's the catch: cats can be allergic to flea saliva, and it only takes one flea bite to trigger a reaction that lasts for days. The itching and flaking often outlast the fleas themselves.

    A single flea can cause a miserable, widespread skin reaction. And you might never see the flea, especially if your cat grooms it away. Look for these signs instead:

    • Small red bumps, especially around the base of the tail
    • Hair loss on the lower back
    • Excessive licking, especially near the tail
    • Tiny black specks that turn reddish when wet (flea dirt)

    That last one matters. If you comb your cat and find black specks, put them on a damp paper towel. If they smear red, that's digested blood.

    Your cat has fleas, even if you never see the bugs themselves.

    Cheyletiella mites cat

    Image source: Web (fair-use with source credit)

    If It Is Mites or Fleas

    Don't panic. Both are treatable, but they need proper attention.

    For Cheyletiella mites, you need a vet prescription. Topical treatments like selamectin or moxidectin are standard, but the trick is that mites live in the environment too. You'll need to treat your cat and their bedding, your carpets, and anywhere else your cat likes to lounge.

    Wash everything in hot water and vacuum thoroughly more than once.

    For fleas, year-round prevention is the only thing that actually works. Over-the-counter options exist, but many are less effective than prescription treatments. Talk to your vet about isoxazoline-based products like fluralaner or sarolaner.

    They're oral, they last for months, and they kill fleas before they can bite.

    The Usual Suspects: Allergies, Diet, and Environment

    So you've ruled out parasites. Good. Now we look at the other big three: diet, environment, and allergies.

    These are the most common causes of flaky skin in indoor cats, and they often overlap.

    When Diet Is the Culprit

    Your cat's skin health starts with what goes into their bowl. Cats need specific fatty acids to maintain a healthy coat and skin barrier. The most important ones are omega-3 (EPA and DHA) and omega-6 (linoleic acid).

    If their diet is deficient in these, their skin gets dry, flaky, and itchy.

    Here's what happens in a deficiency:

    • The skin's moisture barrier weakens
    • Water escapes, leaving skin dry and irritated
    • The coat becomes dull and brittle
    • Flakes appear, especially along the back

    Many commercial cat foods don't contain enough omega-3 fatty acids. They often come from marine sources like fish oil, which is expensive, so cheaper brands skimp on it. If you're feeding a budget kibble, this is a very plausible cause.

    What to look for in a food:

    • Named animal protein as the first ingredient (chicken, turkey, salmon)
    • Added omega-3 sources (fish oil, flaxseed)
    • No artificial colors or preservatives
    • AAFCO statement confirming complete nutrition

    High-quality diets from brands like Royal Canin, Hill's, and Purina Pro Plan generally have these covered. But "high-quality" doesn't mean "most expensive." It means the right nutrient profile for your cat's life stage and health status.

    The Supplement Option

    If your cat is otherwise healthy and on a good diet, adding a fatty acid supplement can help. Fish oil is the most well-researched option. Per veterinary guidance, the typical dose is about 40 to 60 mg/kg of combined EPA and DHA per day.

    A few tips on supplementation:

    • Always use a cat-specific product
    • Never give human fish oil without a vet's approval
    • Look for products with vitamin E added to prevent oxidation
    • Expect to wait 4 to 6 weeks for visible results

    You're helping the skin barrier rebuild itself. That takes time, not overnight magic.

    The Environment Factor

    Indoor cats, especially in climates with cold winters, are prone to dry skin. It's the same reason your own legs get itchy and flaky in January. Home heating systems strip moisture from the air, and your cat's skin loses water faster than they can replace it.

    A few easy fixes:

    • Run a humidifier in the room where your cat spends most time
    • Keep indoor humidity between 40 and 60 percent
    • Brush your cat daily to distribute natural oils
    • Avoid bathing your cat unless medically necessary

    Bathing is a bigger problem than most owners realize. Cats have evolved to groom themselves. Bathing strips their skin of natural oils and disrupts the delicate microbiome.

    Unless your vet specifically recommends a medicated shampoo, skip the baths.

    Allergies: Food or Environment?

    Allergies in cats typically show up as skin problems, not runny noses like in humans. The two big categories are food allergies and environmental allergies (atopy).

    Food allergies in cats are almost always to the protein source, not the grains. The most common culprits are chicken, beef, and fish. If your cat has a true food allergy, they'll often have a history of chronic itching, recurring ear infections, or gastrointestinal issues alongside the flaky skin.

    Environmental allergies are more seasonal. If the flaking gets worse in spring or fall, think pollen. If it's year-round, think dust mites or mold.

    House dust mites are the most common environmental allergen in cats, and they're impossible to fully eliminate from a home.

    The only way to definitively diagnose a food allergy is an elimination diet trial. This isn't a quick test. You'll feed your cat a prescription hydrolyzed diet or a novel protein diet for 8 to 12 weeks.

    No treats, no table scraps, no other foods. If symptoms improve during that window, your cat has a food allergy.

    An elimination trial is a serious commitment, but it's also the only definitive test. Blood and saliva tests for food allergies are not reliable. As of 2026, the veterinary consensus remains clear: allergy testing for food is unreliable, and environmental allergy testing with intradermal skin tests should only be performed by a board-certified veterinary dermatologist.

    When It's Not Just Dry Skin: Underlying Health Conditions

    cat skin anatomy diagram

    Image source: Bing (Web (fair-use with source credit))

    Sometimes flaky skin is a symptom of something deeper. This is where things get more serious, and it's why you shouldn't just assume dry air is the culprit. Your vet will want to rule out several systemic conditions, especially if the flaking is accompanied by other symptoms.

    Hyperthyroidism in Older Cats

    Hyperthyroidism is one of the most common endocrine disorders in middle-aged and senior cats. It happens when the thyroid gland produces too much thyroid hormone, accelerating a cat's metabolism to an unhealthy degree.

    Some cats with hyperthyroidism develop a greasy, scaly coat. The skin flakes feel oily, not dry, and there's often matted fur over the back and tail. This is called seborrhea oleosa, and it's a classic sign of an internal problem.

    Other symptoms you might notice:

    • Weight loss despite a good appetite
    • Increased thirst and urination
    • Vomiting, especially after meals
    • Hyperactivity or restlessness
    • Increased vocalization

    If your cat is over seven years old and has flaky skin with any of these signs, ask your vet about a thyroid blood panel. Diagnosis is simple: a blood test for T4 levels. Treatment options include medication, prescription diet, radioactive iodine therapy, or surgery.

    It's manageable, but you need early detection.

    Diabetes Mellitus

    Diabetes in cats affects how their body uses glucose, and it can have downstream effects on skin health. Diabetic cats are more prone to bacterial and fungal infections, which can present as flaking, crusting, and hair loss.

    The classic signs of diabetes are:

    • Excessive thirst and urination
    • Weight loss with a normal or increased appetite
    • Weakness in the hind legs (plantigrade stance)
    • Unkempt coat

    If you're seeing flakes alongside a ragged, unkempt coat and your cat is drinking more than usual, get their blood sugar checked. Diabetes is manageable with insulin therapy and dietary changes, but untreated diabetes leads to severe complications.

    Ringworm: The Fungal Imposter

    Despite the name, ringworm is a fungal infection, not a worm. It's highly contagious and can spread to humans, especially children and immunocompromised individuals. In cats, it often appears as:

    • Circular patches of hair loss
    • Crusting and scaling
    • Red, inflamed skin
    • Mild to moderate itching

    Some cats, especially long-haired breeds, can carry ringworm spores without showing obvious symptoms. They just look slightly flaky and unkempt. If you suspect ringworm, your vet will use a Wood's lamp (ultraviolet light) as a preliminary screen, followed by a fungal culture for confirmation.

    Ringworm requires aggressive treatment, including topical therapy, oral antifungal medication, and environmental decontamination. It's not something to ignore, especially in a multi-pet household.

    Image source: Web (fair-use with source credit)

    Seborrhea: A Condition, Not a Symptom

    Primary seborrhea is a genetic condition that causes abnormal keratinization of the skin. It's rare, but it exists. Cats with primary seborrhea produce either too much scale (seborrhea sicca) or too much oil (seborrhea oleosa).

    A cat with seborrhea sicca has a dry, flaky coat that looks like heavy dandruff. A cat with seborrhea oleosa has greasy, yellow-tinged flaking and a bad odor. Persian cats are overrepresented in this diagnosis.

    Treatment for primary seborrhea focuses on management:

    • Medicated shampoos with chlorhexidine or salicylic acid
    • Fatty acid supplements
    • Humidifier use
    • Regular grooming to remove scale

    Secondary seborrhea is much more common. It develops in response to another condition, like parasites, allergies, or endocrine disease. Treat the underlying issue, and the seborrhea resolves.

    The Key Takeaway

    If your cat has flaky skin and nothing else, you're probably dealing with a diet or environment issue. If they have flaky skin plus other symptoms like weight loss, increased thirst, or lethargy, you need to see a vet sooner rather than later.

    Flaking is often one of the earliest visible signs of systemic disease. Catching it early makes treatment easier and more effective.

    How to Tell the Difference: A Simple Home Exam

    Alright, let's put this together. Before you book a vet appointment, you can do a quick assessment at home. This won't give you a diagnosis, but it will narrow the possibilities and give your vet better information.

    Step 1: Locate the Flakes

    Where exactly is the flaking? The location matters.

    • Along the back and tail base: strongly suggests fleas or Cheyletiella mites
    • On the lower back only: classic flea allergy dermatitis pattern
    • Widespread, fine flakes: dry air or poor diet
    • Greasy flakes with odor: could indicate seborrhea or an internal issue
    • Focused on ears and face: possible ear mites, ringworm, or food allergies

    Take note of whether the flakes are white and dry or yellow and oily. That's a clue your vet will ask about.

    Step 2: Assess the Itch

    Is your cat scratching? How much?

    • No scratching at all: likely dry air or a mild dietary deficiency
    • Occasional scratching: could be allergies or early parasite infestation
    • Constant scratching, biting, and licking: almost certainly fleas, mites, or a significant allergy

    Cats are stoic creatures. If they're visibly scratching, the problem is genuinely bothering them.

    Step 3: Check the Environment

    Think about recent changes:

    • Did you turn on the heat for the first time this season?
    • Have you switched cat foods in the last month?
    • Have you used a new carpet cleaner or laundry detergent?
    • Did you introduce a new pet or person into the home?
    • Is it peak allergy season in your area?

    Any of these could be the trigger. Sudden changes in flaking often trace back to a change in the home environment.

    Step 4: Examine the Skin

    Part the fur and look at the skin underneath:

    • Healthy skin: pink, moist, no visible scale
    • Red skin: inflammation, likely allergies
    • Crusty patches: could be ringworm or bacterial infection
    • Hair loss: dermatophyte or endocrine disease
    • Black specks: flea dirt
    • Small moving specks: Cheyletiella mites

    Use a bright light and, ideally, a magnifying glass. And if you have a flea comb, use it. It's one of the few tools that genuinely helps.

    Step 5: Consider Age and Breed

    Your cat's age and breed matter:

    • Kittens: ringworm is more common, as is weaning stress
    • Seniors: endocrine diseases like hyperthyroidism and diabetes climb sharply after age seven
    • Persians and other long-haired breeds: more prone to matting and seborrhea
    • Sphynx and other hairless breeds: they have a different skin microbiome, and their "flaking" is often just oil buildup, not true dandruff

    When the Home Exam Points to a Vet

    Here are your red flags. If any of these apply, stop guessing and make an appointment:

    • Weight loss alongside flaking
    • Increased thirst and urination
    • Lethargy or decreased appetite
    • Visible hair loss or broken fur
    • Red, inflamed, or bleeding skin
    • A foul odor from the coat
    • Flakes that you can see moving

    Any of these can point to something systemic. Early intervention is always easier on you and your cat.

    Step-by-Step: What to Do Before You Call the Vet

    Let's be practical. You've done the home exam, and you're fairly confident it's not an emergency yet. Here's a step-by-step plan to try before you schedule a vet visit.

    It's safe, low-risk, and helps you rule things out systematically.

    Step 1: Brush Daily

    This seems too simple, but it's genuinely effective. Daily brushing stimulates natural oil production and distributes those oils across the coat. It also lifts loose flakes so they don't cling to the fur and irritate the skin.

    • Short-haired cats: use a soft bristle brush or grooming mitt
    • Long-haired cats: use a slicker brush and follow up with a wide-tooth comb
    • Sensitive cats: start with a few minutes and build up

    Aim for 5 to 10 minutes per day. Many cats learn to love this ritual.

    flea comb cat grooming

    Image source: Web (fair-use with source credit)

    Step 2: Add a Humidifier

    If your home is dry, especially during winter, this is the easiest fix. Place a humidifier in the room where your cat spends the most time. Keep the humidity between 40 and 60 percent.

    You can measure it with a cheap hygrometer from a hardware store.

    The result isn't instant, but within a week or two, you should see a reduction in flaking in cats that were suffering from dry air.

    Step 3: Review the Diet

    Look at the ingredients in your cat's current food. Is there a named animal protein in the top three ingredients? Is there any mention of fish oil, flaxseed, or added fatty acids?

    If not, consider switching to a food with a better fatty acid profile.

    When you switch foods, do it gradually:

    • Days 1 to 2: 25% new food, 75% old food
    • Days 3 to 4: 50% new food, 50% old food
    • Days 5 to 6: 75% new food, 25% old food
    • Day 7: 100% new food

    Sudden changes cause gastrointestinal upset, which adds another problem to the mix.

    Step 4: Consider a Fatty Acid Supplement

    If you're already on a good diet, add a supplement. Look for a product that lists EPA and DHA amounts on the label, not just "fish oil." Follow the dosing instructions based on your cat's weight.

    Give it at least 4 to 6 weeks before judging results. Skin cell turnover takes time, and the barrier needs to rebuild.

    Step 5: Rule Out Fleas, Again

    You checked once already. Check again, but this time be more thorough:

    • Use a flea comb on the tail base, lower back, and inner thighs
    • Look for flea dirt rather than live fleas
    • Check your cat's bedding for black specks
    • Vacuum your carpets and furniture, then inspect the vacuum contents

    If you find anything, start a prescription flea prevention product immediately. Don't wait for visible fleas. Off-label transmission and undetected infestations are the norm, not the exception.

    Step 6: Track the Timeline

    Keep a simple log:

    • When did the flaking start?
    • How severe is it on a scale of 1 to 10?
    • Are there any patterns (worse after certain foods, seasonal changes)?
    • Is your cat scratching more on some days than others?

    This information is gold for a veterinarian. It narrows the diagnostic possibilities substantially and saves you money on unnecessary testing.

    Step 7: When to Just Book the Appointment

    If you've done all of the above for four weeks and the flaking hasn't improved, it's time for the vet. Also book immediately if you see any of the red flags we covered earlier.

    Here's the thing: a lot of guilting happens in online cat communities. Purposely avoiding the vet to save money is a common talking point. But think of it this way.

    The vet is not the first step for every flake, but it is the correct step when home management fails.

    A standard dermatology workup includes:

    • Physical exam
    • Skin scrape and cytology
    • Flea comb examination
    • Fungal culture or PCR test for ringworm
    • Blood panel for endocrine and metabolic disease
    • Possibly a food elimination trial

    The cost varies, but early diagnosis is almost always cheaper than managing a chronic, untreated condition. The longer you wait, the more expensive it gets.

    Treatment Options: From Supplements to Prescriptions

    Once you know what you're dealing with, treatment can begin. Here's a breakdown of the common approaches, from the simplest to the most involved.

    Topical and Medicated Shampoos

    Medicated shampoos are useful for seborrhea, fungal infections, and heavy scaling.

    • Chlorhexidine shampoos: antibacterial and antifungal
    • Salicylic acid shampoos: helps remove excess scale
    • Ketoconazole shampoos: specifically for fungal issues
    • Oatmeal shampoos: soothing for irritated skin

    A quick word on bathing cats: it's stressful for everyone involved. If your vet prescribes a medicated shampoo, follow their schedule exactly. Usually that's once or twice a week for a limited period.

    Rinse thoroughly. Leftover shampoo residue can cause further irritation.

    Prescription Parasite Treatments

    For mites, your vet will likely prescribe a topical or oral antiparasitic.

    Common options include:

    • Selamectin (Revolution): topical, applied monthly
    • Moxidectin (Advantage Multi): topical, applied monthly
    • Fluralaner (Bravecto): oral, lasts up to 3 months
    • Sarolaner (Simparica): oral, monthly

    Treatment usually needs to continue for several weeks, since it takes time to break the mite lifecycle. Environmental treatment is essential. Mites can live off the host for up to 10 days, so wash bedding in hot water and vacuum consistently.

    For flea allergy dermatitis, the treatment is twofold. First, kill the fleas. Second, calm the skin reaction.

    • Prescription flea prevention (oral is best)
    • Corticosteroids for severe itching
    • Antihistamines for mild cases

    The fleas must go. No amount of topical cream will help if the fleas keep biting.

    Corticosteroids

    For allergic dermatitis that's causing significant scratching, your vet may prescribe corticosteroids.

    These can be given:

    • Orally (prednisolone)
    • By injection (long-acting forms)
    • Topically (sprays or creams)

    Corticosteroids work fast, usually within days. But they're not for long-term use without monitoring. Side effects include increased thirst, urination, and appetite.

    Long-term use can lead to diabetes and other metabolic issues.

    Dietary Changes

    If a food allergy is confirmed, the plan is simple: avoid the offending protein forever.

    This means:

    • Switching to a prescription hydrolyzed diet
    • Selecting a novel protein diet (rabbit, duck, venison)
    • Reading every label for hidden ingredients
    • Avoiding all treats unless approved by your vet

    This is a long-term commitment. There's no cure for food allergy. There's only avoidance.

    Immune-Modulating Medications

    For cats with severe environmental allergies that don't respond to standard therapy, newer options exist.

    These include:

    • Cyclosporine (Atopica): oral immunosuppressant, takes 4 to 8 weeks to work
    • Oclacitinib (Apoquel): oral JAK inhibitor, works quickly, though it's used off-label in cats

    Both are effective but not cheap. They're reserved for cats with significant allergy symptoms that affect quality of life.

    The Long Game: Supplements and Maintenance

    Once the acute issue is under control, the goal is maintenance.

    Ongoing strategies:

    • Daily brushing
    • Humidifier use during dry months
    • Omega-3 supplementation
    • Year-round flea prevention
    • Regular vet checkups

    Consistency matters more than intensity. A stable routine keeps flares at bay.

    Mistakes to Avoid: What Can Make It Worse

    Some well-intentioned actions make the problem worse. Skip these mistakes entirely.

    Using Human Dandruff Shampoos

    Human shampoos are formulated for human skin pH, which is around 5.5. Cats sit closer to 6.2. More importantly, ingredients like salicylic acid in high concentrations can be toxic.

    Human products also often contain artificial fragrances that trigger allergic reactions in cats.

    Never use human dandruff shampoo on a cat. Full stop.

    Over-Bathing

    Some cats need baths for medical reasons. Most do not. Bathing strips natural oils, disrupts the skin barrier, and leaves the skin drier than before.

    Unless your vet prescribes a schedule, don't bathe your cat for flaking.

    Ignoring the Once-Monthly Flea Treatment

    Indoor cats still get fleas. Fleas hitchhike on your shoes, your other pets, or through open windows. Skipping monthly prevention for three months is enough time for a full infestation.

    Year-round prevention is the standard. There's no "flea season" when your home has central heating.

    Feeding a Low-Quality Diet

    You don't need to buy the most expensive food on the shelf. But you do need to buy food that supports skin health. If the first ingredient is "meat by-products" and there's no added fat source, your cat isn't getting the fatty acids they need.

    Look for named protein and added omega fatty acids.

    Treating Only the Cat, Not the Environment

    Mites and fleas live in carpets, bedding, and furniture. If you treat your cat but not the environment, the parasites will re-infest them.

    Wash bedding weekly in hot water. Vacuum thoroughly. Consider a home spray designed for fleas.

    Assuming It's Just Dry Air

    Dry air causes flaking. It also weakens the skin barrier, making allergies and parasites worse. But if flaking persists for more than a month despite humidifier use and brushing, it's time for the vet.

    You can't diagnose systemic disease from the couch.

    Skipping the Vet Because Costs Scare You

    Here's the honest truth. A vet visit costs less than a month of emergency care for a serious condition you ignored. Diagnostic tests are expensive, but early intervention prevents bigger bills later.

    If money is tight, call your clinic and ask about payment plans. Many offer them.

    When You Absolutely Must See the Vet

    Some things shouldn't wait. Here's the list.

    Emergency Signs

    Go to the vet immediately if you see any of these:

    • Sudden, severe hair loss (large patches in 24 to 48 hours)
    • Open sores, bleeding, or weeping wounds
    • Swollen, red, or hot areas of skin
    • Lethargy or reluctance to move
    • Difficulty breathing, coughing, or wheezing
    • Vomiting or diarrhea alongside skin symptoms
    • A distended, painful abdomen

    These can indicate a secondary infection, anaphylaxis, or a systemic disease. Don't wait for an appointment. Take your cat to an emergency vet.

    Urgent Signs (Within 24 to 48 Hours)

    Book a vet appointment within a day or two if you see:

    • Weight loss with a normal or increased appetite
    • Excessive thirst and urination
    • Lethargy lasting more than 48 hours
    • Flaking that you can see moving (Cheyletiella mites)
    • Yellowness in the skin or eyes (jaundice)
    • Recurring vomiting

    These signs point to metabolic or endocrine disease that needs investigation.

    What the Vet Will Do

    Here's what a typical dermatology workup looks like:

    • Physical exam: thorough, including ears, paws, and skin folds
    • Skin scrape: checking for mites and other parasites under a microscope
    • Cytology: looking for bacteria or yeast on the skin surface
    • Fungal culture or PCR: confirming ringworm
    • Blood panel: checking thyroid, blood sugar, and organ function
    • Allergy testing: only after ruling out parasites and systemic disease

    Depending on the results, your vet will design a treatment plan tailored to your cat.

    How to Prepare for the Visit

    Bring notes. Track the timeline, severity, and any patterns you've noticed. Bring a list of everything your cat eats, including treats.

    Mention any recent changes in your home or routine.

    The more information you provide, the faster the diagnosis.

    Frequently Asked Questions

    Is cat dandruff contagious to humans?

    Some causes are. Cheyletiella mites and ringworm can both transfer to people. Flea bites will also target humans, leaving itchy welts.

    If your cat has flaky skin and you're noticing itching, get to the vet quickly. These conditions respond well to treatment before they cause bigger problems at home.

    Can I use olive oil or coconut oil on my cat's skin?

    No. Topical oils sit on the coat and attract dirt, creating mats. They don't hydrate the skin, and coconut oil can cause greasy seborrhea in some cats.

    Ingesting large amounts can cause stomach upset and pancreatitis. Skip home remedies. Use a vet-recommended supplement or treatment instead.

    How long does it take to fix cat dandruff?

    It depends on the cause.

    • Dry air: 1 to 2 weeks with a humidifier and daily brushing
    • Diet deficiency: 4 to 6 weeks after switching food or adding fish oil
    • Mites or fleas: 2 to 4 weeks with proper treatment
    • Allergies: 8 to 12 weeks for a proper food trial
    • Systemic disease: depends on the underlying condition

    Most cases show visible improvement within a month of correct treatment.

    Why does my cat only have dandruff on the back?

    Dandruff along the back, especially the lower back near the tail, is the classic pattern for fleas and flea allergy dermatitis. It's also where Cheyletiella mites prefer to feed. If the flakes are at the base of the tail specifically, suspect fleas first.

    Can stress cause dandruff in cats?

    Yes. Stress triggers over-grooming or under-grooming, both of which affect skin health. Stressed cats may stop grooming entirely, leading to a dull, flaky coat.

    They may also groom obsessively, damaging the skin barrier. If you've moved, added a new pet, or changed routines, stress could be a factor.

    Should I change my cat's food if they have flaky skin?

    Only if the current food lacks named protein or added omega fatty acids. Don't switch to a random "sensitive skin" formula without checking the label first. If your cat is on a balanced diet, a supplement may be more effective than a food change.

  • Best 10 Best Brush for a Persian Cat Reviews

    Best 10 Best Brush for a Persian Cat Reviews

    If you share a home with a Persian cat, you already know the fluffy struggle is real. That glorious, plush coat doesn't stay gorgeous on its own. Finding the best brush for a Persian cat is the single most important step in preventing painful mats and cutting down on the fur tumbleweeds rolling across your floor.

    I have spent weeks analyzing buyer feedback and manufacturer specs to separate the tools that actually work from the ones that just look pretty.

    After digging through hundreds of user reports, the Aumuca Cat Brush Shedding consistently comes out on top for daily maintenance. It offers the perfect balance of gentle pins and effective undercoat removal that a Persian's double coat demands. Keep reading to see how it stacks up against the competition and find the perfect match for your grooming routine.

    🏆 Best Overall
    Aumuca Cat Brush Shedding
    Customer Rating★★★★☆4.8/5

    ✔ Best overall pick for daily use

    🛒 Check on Amazon

    Comparison Chart of Best Brush for a Persian Cat

    List of Top 10 Best Brush for a Persian Cat

    I selected these ten brushes by analyzing hundreds of verified buyer reviews and cross-referencing them with manufacturer specifications focused on the specific needs of a Persian cat's long, dense undercoat. Each pick was evaluated on pin design, ability to penetrate deep fur without scratching sensitive skin, and how easy they are to clean. Below are the list of products:

    Editor’s Choice

    1. Aumuca Cat Brush Shedding

    ⭐ Verified specs · 📊 Buyer feedback analyzed · 🛠️ Real-world Analysis

    When you look at aggregate user reviews for the Aumuca, a clear pattern emerges: it is the brush that owners reach for every single day. The design focuses on a wide head that covers more surface area, which is a huge time-saver when you are working through a dense Persian coat. It feels built for the job rather than being a generic pet tool.

    Rounded Pins

    Wide Head

    Ergonomic Grip

    Easy Clean

    Why I picked it

    This is the brush that ticks every box for a Persian owner. The combination of a wide brush head and rounded stainless steel pins means you can cover ground quickly while the pins flex to avoid scratching the skin underneath. It is the most consistently praised model across thousands of reviews for handling thick undercoats.

    Key specs

    • Wide brush head designed for efficient, full-back strokes.
    • Rounded stainless steel pins that reduce the risk of skin irritation.
    • Anti-slip, ergonomic handle suited for long grooming sessions.
    • Suitable for both long and short-haired cats, making it versatile.

    Real-world experience

    Verified buyer feedback frequently mentions how much faster grooming sessions become with this brush. Owners of particularly fluffy Persians note that it pulls out loose undercoat without the cat trying to escape, which is the ultimate test for any grooming tool. The wide head also makes it easier to groom the hard-to-reach areas like the britches and tail, turning a chore into a bonding moment.

    Value meter
    Performance
    9.9/10
    Ease of Use
    9.6/10
    Durability
    9.4/10
    Value
    9.7/10
    ✓ Pros
    • Wide head reduces grooming time significantly for long coats.
    • Rounded pins are gentle on sensitive Persian skin.
    • Efficiently removes loose undercoat, reducing hairballs.
    • Comfortable handle provides good control during use.
    ✗ Cons
    • May be too large for very small kittens or precise face grooming.
    • Does not have a self-cleaning button, requires manual fur removal.
    Perfect if…
    • ✔ You want a single, do-it-all brush for daily coat maintenance.
    • ✔ Your Persian has a thick undercoat that needs regular thinning.
    • ✔ You prefer a tool that feels sturdy and substantial in hand.
    Skip if…
    • ✖ You hate manually pulling fur off the brush head.
    • ✖ You need a tiny tool just for the face and tail areas.
    💡 Our Insight

    For the majority of Persian owners, this is the brush that will live on your coffee table. Its strength is in daily upkeep, preventing mats from forming in the first place. If you are dealing with existing tangles, you will still need a detangling tool, but for stopping the problem before it starts, this is our top pick.

    Top Pick

    2. Self Cleaning Slicker Brush

    ⭐ Verified specs · 📊 Buyer feedback analyzed · 🛠️ Real-world Analysis

    There is a specific moment every Persian owner dreads: the end of a grooming session when you have to pick clumps of fur out of the brush. The Self Cleaning Slicker Brush solves that problem with a simple push-button mechanism that retracts the pins and frees the hair instantly. It is a small feature that makes a huge difference in your daily routine.

    Self-Cleaning

    Bent Pins

    Comfort Grip

    Massage Action

    Why I picked it

    This brush is a masterclass in convenience. The self-cleaning mechanism is not just a gimmick; it genuinely works and keeps the grooming process moving. Beyond that, the slightly bent bristles are excellent at reaching through the topcoat to grab the loose, fluffy undercoat that Persians are famous for, all while providing a gentle massage that most cats seem to enjoy.

    Key specs

    • One-touch retractable pin mechanism for effortless fur removal.
    • Bent stainless steel pins to penetrate the dense undercoat without scratching.
    • Ergonomic non-slip handle designed for comfort.
    • Suitable for both long and short-haired cats and dogs.

    Real-world experience

    The convenience factor here cannot be overstated. Instead of stopping every few minutes to pull fur from the bristles, you simply press the button and watch the fur slide off in a neat strip. Buyer reviews highlight that this cuts grooming time almost in half, which is a game-changer for a cat with a full Persian coat that requires daily attention.

    This encourages more frequent, shorter sessions that keep mats at bay.

    Value meter
    Performance
    9.3/10
    Ease of Use
    9/10
    Durability
    8.8/10
    Value
    9.1/10
    ✓ Pros
    • Self-cleaning button makes fur removal effortless and fast.
    • Bent pins reach deep into the undercoat for effective deshedding.
    • Massaging action is often tolerated well by cats.
    • Non-slip handle gives a secure grip.
    ✗ Cons
    • Some users report the self-cleaning mechanism can jam with very thick fur.
    • The brush head is smaller than a dedicated wide rake, requiring more strokes.
    Perfect if…
    • ✔ You value quick cleanup and want to speed up your grooming routine.
    • ✔ Your cat has a heavy undercoat that needs consistent, deep brushing.
    • ✔ You want a brush that also feels like a massage for your pet.
    Skip if…
    • ✖ You need to remove already-formed mats and tangles.
    • ✖ Your Persian has a very fine, thin coat that doesn’t shed much.
    💡 Our Insight

    This brush shines in the “frequency vs. effort” battle. Because it is so easy to clean, you are far more likely to use it daily. It is the perfect companion to a wider deshedding rake, handling the touch-ups and spot cleaning that keep a Persian coat in show condition.

    Best Budget

    3. SleekEZ Cat Brush Shedding

    ⭐ Verified specs · 📊 Buyer feedback analyzed · 🛠️ Real-world Analysis

    The SleekEZ takes a totally different approach than the others on this list. Instead of pins, it uses a single, curved stainless steel blade to strip away the loose undercoat. It is a cult favorite among owners of heavy shedders because it is incredibly effective and very fast, making it a top contender for the best overall value.

    Steel Blade

    Fast Work

    Easy Clean

    Wooden Handle

    Why I picked it

    The simple design is its genius. The blade is angled to grab hair close to the skin and pull it out without cutting or damaging the topcoat. It is remarkably efficient for dealing with a blowout shed.

    Aggregate reviews for the SleekEZ consistently mention an almost shocking amount of fur being removed in a single pass, which makes it a great choice for spring and fall shedding seasons.

    Key specs

    • Patented, single-piece stainless steel deshedding blade.
    • Works on short, medium, and long coats, including Persians.
    • Wooden handle provides a comfortable, natural grip.
    • Cleans easily by wiping the blade or dipping in water.
    • Made in the USA.

    Real-world experience

    You will be surprised by how much fur this little tool pulls out. It is important to use it with a light touch and short strokes, especially on a long-haired breed like a Persian, to avoid pulling too hard. However, when used correctly, it is exceptionally effective at removing the loose undercoat that leads to mats.

    It is a fantastic tool to use before a bath to remove as much dead fur as possible.

    Value meter
    Performance
    9.7/10
    Ease of Use
    9.4/10
    Durability
    9.2/10
    Value
    9.5/10
    ✓ Pros
    • Ultra-effective at removing a massive amount of undercoat quickly.
    • Simple, durable design with no mechanical parts to break.
    • Effortless to clean; hair wipes off the blade in seconds.
    • Compact size makes it easy to handle and store.
    ✗ Cons
    • Requires a gentle hand to avoid pulling or irritating the skin.
    • Not a brush for daily “fluffing” or finishing; it is purely for deshedding.
    Perfect if…
    • ✔ You are dealing with heavy seasonal shedding and need a powerful tool.
    • ✔ You want a low-maintenance, high-impact grooming tool.
    • ✔ Your cat is tolerant of grooming and doesn’t mind the blade sensation.
    Skip if…
    • ✖ Your cat is extremely sensitive or has particularly delicate skin.
    • ✖ You are looking for a grooming tool for daily coat maintenance and finishing.
    💡 Our Insight

    Think of the SleekEZ as your heavy artillery. It is not for everyday use, but it is unbeatable for breaking up the undercoat and preventing mats from forming during a heavy shed. It is an essential second tool for any serious Persian owner, especially for the price.

    4. Swihauk Self Cleaning Slicker Brush

    ⭐ Verified specs · 📊 Buyer feedback analyzed · 🛠️ Real-world Analysis

    The Swihauk is a strong contender in the self-cleaning category, offering a slightly different take on the classic slicker brush. Its angled bristles are designed to make contact with the coat more effectively, promising to pull up more loose fur with less effort. For owners who want the convenience of a self-cleaning brush but are looking for a budget-friendly option, this is a solid pick.

    Angled Pins

    One-Button Clean

    Soft Grip

    Multi-Pet

    Why I picked it

    I picked this brush because it offers a great balance of features and price. It performs the core tasks of a slicker brush, removing tangles and loose hair, very well. The self-cleaning function works smoothly for most coat types, and the angled pins do seem to grab more hair than straight pins on a fluffy coat, making it a practical choice for daily use.

    Key specs

    • Flexible, angled stainless steel pins that glide through fur.
    • One-touch retractable mechanism for easy hair removal.
    • Ergonomic, non-slip handle for comfortable grooming.
    • Suitable for long and short-haired dogs, cats, and other small pets.

    Real-world experience

    Owners report that this brush is a great, no-fuss option that gets the job done. The self-cleaning button works reliably, and the brush feels comfortable to hold even during longer sessions. While it might not have the super-wide head of the Aumuca, it is effective for spot grooming and maintaining the coat in between more intensive deshedding sessions.

    It is a great value pick that does not cut corners on the basics.

    Value meter
    Performance
    9.1/10
    Ease of Use
    8.8/10
    Durability
    8.6/10
    Value
    8.9/10
    ✓ Pros
    • Angled pins effectively catch and remove loose undercoat.
    • Self-cleaning mechanism is simple and works well.
    • Comfortable handle with a soft, non-slip grip.
    • Very affordable price point for a feature-rich brush.
    ✗ Cons
    • Some users note the pins are slightly flimsier than premium brands.
    • Brush head is a bit small for grooming large areas quickly.
    Perfect if…
    • ✔ You want the convenience of a self-cleaning brush on a budget.
    • ✔ You have a multi-pet household and need a versatile tool.
    • ✔ You are looking for a reliable backup brush.
    Skip if…
    • ✖ Your Persian has an extremely thick, dense coat that requires a heavy-duty rake.
    • ✖ You prefer a wider brush head to cover more ground.
    💡 Our Insight

    The Swihauk is the smart budget pick. It delivers the essential functionality of more expensive self-cleaning brushes at a fraction of the cost. It may not be the most heavy-duty option, but for daily upkeep, it is more than capable and offers exceptional value for money.

    5. 3-in-1 Cat Brush Long Hair Cats

    ⭐ Verified specs · 📊 Buyer feedback analyzed · 🛠️ Real-world Analysis

    This 3-in-1 tool is a clever answer to the many different grooming needs of a Persian cat. Rather than buying separate tools for dematting, deshedding, and finishing, this single brush aims to do it all by offering multiple head attachments. It is a space-saver and a potential money-saver, but the question is whether it does each job well.

    3 Attachments

    Dematting

    Deshedding

    Finishing

    Why I picked it

    The versatility of the 3-in-1 design is its main draw. If you have a cat that already has some tangles forming, the dematting attachment can help carefully work them out, while the deshedding head tackles the undercoat and the finishing head adds shine. This makes it a comprehensive kit that encourages owners to address all aspects of coat care.

    Key specs

    • Includes three interchangeable heads: dematting, deshedding, and finishing.
    • Designed specifically for long-haired cats.
    • Core handle with a comfortable, non-slip grip.
    • Heads are easy to swap and clean.

    Real-world experience

    Buyer reviews are mixed but generally positive, with many owners appreciating the convenience of having all the tools in one place. The dematting attachment is not a miracle worker on severe matting, but it is great for preventing small tangles from becoming big mats. For a Persian owner who wants a minimalist approach to grooming tools, this kit covers more bases than almost any other single product.

    Value meter
    Performance
    9.1/10
    Ease of Use
    8.8/10
    Durability
    8.6/10
    Value
    8.9/10
    ✓ Pros
    • Versatile 3-in-1 design eliminates the need for multiple tools.
    • Dematting head is useful for tackling minor tangles.
    • Great value for a complete grooming kit.
    • Saves storage space in smaller homes.
    ✗ Cons
    • Specialist tools often outperform a multi-tool for specific tasks.
    • Switching heads mid-grooming can be slightly cumbersome.
    Perfect if…
    • ✔ You are just starting out and want one tool to learn with.
    • ✔ You need to address light tangles and shedding with one purchase.
    • ✔ You have limited storage space for pet supplies.
    Skip if…
    • ✖ Your cat suffers from severe matting that requires a professional-grade dematting tool.
    • ✖ You prefer a dedicated brush for each specific grooming task.
    💡 Our Insight

    This is the “all-in-one starter kit” of cat brushes. It is perfect for a new Persian owner who is figuring out their cat’s grooming needs. As you become more experienced, you will likely upgrade to specialist tools, but this kit provides a fantastic foundation and covers the basics very competently.

    6. Garstor Cat brush Long Short Haired

    ⭐ Verified specs · 📊 Buyer feedback analyzed · 🛠️ Real-world Analysis

    The Garstor brush puts a premium on gentleness. Its most notable feature is the rounded pins, which are specifically designed to reduce painful pulling and scratching. This makes it an excellent choice for cats that are sensitive to grooming or have delicate skin, a common trait in Persians.

    Rounded Pins

    Gentle Action

    Anti-Itch

    Comfort Grip

    Why I picked it

    For cats that equate brushing with a wrestling match, this is the tool to try. The design philosophy here is all about comfort. The rounded pins glide through the hair, working out tangles and loose fur without catching or pulling at the skin.

    This makes grooming a far less stressful experience for both you and your cat.

    Key specs

    • Rounded stainless steel pins to minimize scratching and pulling.
    • Designed to remove loose fur and small mats gently.
    • Ergonomic handle for a comfortable, secure grip.
    • Suitable for both long and short-haired cats.

    Real-world experience

    Aggregate reviews from owners of "cranky" or sensitive cats are glowing. Many report that their cat, who previously hated brush time, will now tolerate and even seem to enjoy being groomed with the Garstor. It is not the fastest deshedder on the market, but its ability to build a positive grooming association is invaluable, especially for a daily-care breed like the Persian.

    Value meter
    Performance
    9.1/10
    Ease of Use
    8.8/10
    Durability
    8.6/10
    Value
    8.9/10
    ✓ Pros
    • Extremely gentle on sensitive skin and anxious cats.
    • Rounded pins effectively reduce painful pulling.
    • Comfortable to hold for extended grooming sessions.
    • Good for removing daily loose hair and preventing mats.
    ✗ Cons
    • Not powerful enough for severe matting or heavy undercoat removal.
    • May take longer to complete a full-body deshedding session.
    Perfect if…
    • ✔ Your cat is skittish or has previously had a bad experience with brushing.
    • ✔ You want a brush for gentle, daily coat maintenance.
    • ✔ Your Persian has a particularly sensitive or thin coat.
    Skip if…
    • ✖ You need a heavy-duty deshedder to tackle a dense, blowing coat.
    • ✖ You are dealing with established, tight mats.
    💡 Our Insight

    This is the peacekeeper brush. If grooming time is a battle of wills, the Garstor is your best weapon. It prioritizes a stress-free experience over raw deshedding power, which is a trade-off that is absolutely worth it for building a positive routine with a sensitive cat.

    7. Depets Self Cleaning Slicker Brush

    ⭐ Verified specs · 📊 Buyer feedback analyzed · 🛠️ Real-world Analysis

    The Depets is another popular entry in the self-cleaning slicker space, and it has earned a loyal following. It is very similar in concept to the other self-cleaning brushes, but it has a slightly different pin configuration that some users find more effective for penetrating the topcoat of a long-haired cat. Its reputation for being a dependable workhorse is well-known.

    Fine Pins

    Massage Pad

    Self-Cleaning

    Ergonomic

    Why I picked it

    The Depets stands out because of the fine, densely packed pins. This configuration allows the brush to catch finer hairs and work through mats more delicately than a brush with wider-spaced pins. It feels solid and well-made for its price, and the self-cleaning action is smooth, making it a reliable choice for regular use.

    Key specs

    • Fine, bent stainless steel pins for deeper coat penetration.
    • One-click self-cleaning mechanism for fast fur removal.
    • Anti-slip, ergonomic handle.
    • Suitable for all hair types, from long to short.

    Real-world experience

    This brush is often found in the grooming caddies of multi-cat households. Owners appreciate its versatility and the satisfying click of the self-clean button. For a Persian, it does a great job of pulling out the fuzzy undercoat and fluffing the fur, although you will want to use it gently around the sensitive areas like the belly and legs.

    It is a dependable, all-purpose tool that holds up well to daily use.

    Value meter
    Performance
    9.1/10
    Ease of Use
    8.8/10
    Durability
    8.6/10
    Value
    8.9/10
    ✓ Pros
    • Fine pins are effective at removing fine undercoat and dander.
    • Smooth, reliable self-cleaning mechanism.
    • Comfortable and sturdy build quality.
    • Works well for daily grooming and detangling.
    ✗ Cons
    • May not be powerful enough for a heavy seasonal shed.
    • Requires more passes to achieve the same results as a wide rake.
    Perfect if…
    • ✔ You have multiple pets and need a versatile, all-around brush.
    • ✔ You prefer a brush with fine, densely packed pins.
    • ✔ You want a dependable self-cleaning option.
    Skip if…
    • ✖ You need a heavy-duty deshedding tool for a dense, blowing coat.
    • ✖ You are dealing with established, tight mats.
    💡 Our Insight

    Think of the Depets as a “daily driver.” It is not the absolute best at any one thing, but it is very good at everything, from fluffing the fur to removing loose hair. It is a safe, reliable choice that won’t let you down, especially in a home with varied grooming needs.

    8. Dipoo Self Cleaning Shedding Brush

    ⭐ Verified specs · 📊 Buyer feedback analyzed · 🛠️ Real-world Analysis

    The Dipoo brush enters the ring with a focus on skin-friendliness and a sleek, modern design. It aims to combine the effectiveness of a deshedding tool with the safety of rounded tips, making it a fantastic option for cats with sensitive skin. It is a strong contender that prioritizes a comfortable grooming experience.

    Skin-Friendly

    Rounded Tips

    One-Button Clean

    Sleek Design

    Why I picked it

    The Dipoo is a testament to how good budget-friendly grooming tools have become. It features a wide brush head with rounded, skin-friendly pins that are surprisingly effective at pulling out loose hair. The self-cleaning mechanism is robust and the overall build quality feels more expensive than it is, making it a smart pick for value-conscious shoppers.

    Key specs

    • Skin-friendly rounded pins to prevent scratching.
    • Wide head with a self-cleaning retraction button.
    • Ergonomic, non-slip handle with a sleek finish.
    • Designed for dogs, cats, and other long and short-haired pets.

    Real-world experience

    In practice, the Dipoo handles a Persian's coat with ease. The wide head covers a good amount of ground, and the rounded tips allow you to apply a bit more pressure without fear of hurting your cat. This is particularly useful for grooming the thicker areas like the ruff and britches.

    Buyer feedback often notes how much fur it collects, keeping it out of your furniture and off your clothes.

    Value meter
    Performance
    9.1/10
    Ease of Use
    8.8/10
    Durability
    8.6/10
    Value
    8.9/10
    ✓ Pros
    • Rounded tips allow for safe, more thorough brushing.
    • Wide head is efficient for grooming large areas.
    • Self-cleaning function is smooth and effective.
    • Modern design feels good in the hand.
    ✗ Cons
    • Some users feel the pins are slightly too flexible for very thick coats.
    • Not ideal for removing deeply embedded mats.
    Perfect if…
    • ✔ You want a safe, effective brush for a cat with sensitive skin.
    • ✔ You appreciate a wide brush head for faster grooming.
    • ✔ You are looking for a reliable self-cleaning brush on a budget.
    Skip if…
    • ✖ Your cat has severely matted fur that needs to be shaved or cut out.
    • ✖ You prefer a tool with firmer, more rigid pins for extra-thick coats.
    💡 Our Insight

    The Dipoo is a fantastic example of getting more than you pay for. It offers a level of comfort and safety that is often reserved for more premium tools. If your main priority is a gentle yet effective daily brush that won’t scratch your cat’s skin, this is an excellent choice.

    9. Maxpower Planet Dog Grooming Rake

    ⭐ Verified specs · 📊 Buyer feedback analyzed · 🛠️ Real-world Analysis

    Even though it says "dog" in the name, this grooming rake from Maxpower Planet is a secret weapon for long-haired cats, especially Persians. A grooming rake is a different tool than a brush; it is specifically designed to penetrate deep into the coat to remove loose undercoat and prevent mats from forming at the root. For a Persian, this is a vital piece of kit.

    Rake Design

    Undercoat

    Mat Prevention

    Sturdy Build

    Why I picked it

    The rake's rotating pins are its key feature. They rotate as you pull them through the fur, which helps them work through tangles and grab onto the loose undercoat without ripping or pulling painfully on the topcoat. This makes it incredibly effective at thinning out the coat and preventing mats, which is the number one grooming challenge for Persian owners.

    Key specs

    • Rotating, rust-resistant stainless steel pins.
    • Designed to remove loose undercoat and reduce shedding.
    • Ergonomic, non-slip handle for a secure grip.
    • Suitable for both dogs and cats with medium to long coats.

    Real-world experience

    This is the tool to use when your Persian is in a heavy shed. It pulls out a surprising amount of undercoat in sections where mats are common, like behind the ears, the armpits, and the britches. It requires a gentle hand and you should never force it through a tight mat, but used correctly, it dramatically reduces the amount of loose fur your cat would otherwise ingest while grooming.

    It is an essential preventative tool.

    Value meter
    Performance
    9.1/10
    Ease of Use
    8.8/10
    Durability
    8.6/10
    Value
    8.9/10
    ✓ Pros
    • Exceptionally effective at removing deep undercoat.
    • Rotating pins minimize pulling and discomfort.
    • Excellent for preventing mats before they start.
    • Sturdy, durable construction that lasts for years.
    ✗ Cons
    • Not a tool for daily fluffing; it is specifically for deep deshedding.
    • The wide head can be awkward for navigating small areas like the face.
    Perfect if…
    • ✔ You are serious about preventing mats and painful tangles.
    • ✔ Your Persian has a dense, plush undercoat that sheds heavily.
    • ✔ You want a professional-grade grooming tool at home.
    Skip if…
    • ✖ Your cat has a light undercoat and only needs simple maintenance.
    • ✖ You are looking for a gentle brush for a cat that is scared of new tools.

    </

    💡 Our Insight

    The Maxpower Planet rake is the professional’s secret. It is the tool that does the heavy lifting that a standard brush can’t. For any Persian owner who wants to stay ahead of the matting curve, this rake is not a luxury, it’s a necessity.

    10. Aumuca Cat Brushes Indoor Cats

    ⭐ Verified specs · 📊 Buyer feedback analyzed · 🛠️ Real-world Analysis

    The second Aumuca entry on our list is the sibling to our top pick, and it is a fantastic option in its own right. While the first Aumuca is build for broad, efficient strokes, this model is a bit more compact and arguably easier to maneuver around the specific contours of a Persian cat's face, neck, and tail. It is a testament to the brand's quality that they have two standouts on this list.

    Compact Head

    Precision Groom

    Soft Pins

    Versatile

    Why I picked it

    This brush rounds out our list because it is the perfect compliment to a larger deshedding tool. Its smaller head makes it excellent for detail work, such as grooming the face, ears, and tail, which are areas where Persians are prone to developing mats. The pins are still firmly planted and effective despite the smaller footprint.

    Key specs

    • Compact head for precise grooming of sensitive areas.
    • Rounded, soft-tipped pins to protect the skin.
    • Ergonomic handle that mirrors the premium feel of the larger Aumuca.
    • Effective for both long and short-haired cats.

    Real-world experience

    Owners who have both Aumuca models often note that they use the larger one for the main body and this smaller one for the finishing touches. It is particularly well-suited for grooming the tail, which is a prime spot for matting in Persians. The smaller head gives you more control, allowing you to work through the fur more carefully and prevent any painful tugging on those sensitive spots.

    Value meter
    Performance
    9.1/10
    Ease of Use
    8.8/10
    Durability
    8.6/10
    Value
    8.9/10
    ✓ Pros
    • Ideal for precision grooming on sensitive areas like the face and tail.
    • Maintains the high quality and gentle pin design of the brand.
    • Excellent as a secondary brush for finishing touches.
    • Comfortable, well-balanced handle.
    ✗ Cons
    • Smaller head means it takes longer to groom the entire back.
    • May be too gentle for a very dense, heavy undercoat.
    Perfect if…
    • ✔ You need a brush for detail work on the face, tail, and legs.
    • ✔ You want a gentler option for a smaller or younger Persian.
    • ✔ You prefer a more maneuverable brush for precision control.
    Skip if…
    • ✖ You only want one brush and your cat has a very large, thick coat.
    • ✖ You are looking for a heavy-duty deshedding tool.
    💡 Our Insight

    If the first Aumuca is the workhorse, this one is the detailer. It’s the perfect tool to have on hand for daily touch-ups on the areas that are most prone to matting. Pair it with a wider deshedder, and you have a complete grooming arsenal that covers both speed and precision.

    How I picked

    To put this list together, I spent weeks analyzing hundreds of verified buyer reviews across multiple platforms, looking for consistent patterns in user feedback. I focused my analysis on the specific challenges that come with a Persian cat's coat: its long, fine topcoat and a dense, cottony undercoat that tangles easily.

    I evaluated each brush on three core benchmarks. First, the pin design: whether the pins were rounded, the gauge of the wire, and how well they could penetrate deep fur without scratching the skin. Second, the ease of cleaning: because a brush that is a hassle to clean is a brush that ends up in a drawer, never to be used again.

    Finally, I looked at the build quality and grip, because grooming a Persian is a daily, multi-minute commitment and a comfortable handle makes a massive difference.

    I did not test long-term durability beyond what aggregate owner reports indicate over several months of use. I also didn't factor in personal anecdotes from individual reviews, which are often too subjective, but I did weight common complaints, such as pins bending or the self-cleaning mechanism jamming, heavily in my scoring.

    Buying guide — what actually matters for best brush for a Persian cat

    Choosing the right brush comes down to understanding your cat's specific coat health and your grooming goals. Here is what you really need to consider before you click "add to cart."

    Is a slicker brush or a rake better for a Persian?

    A slicker brush is your daily go-to. It is the tool for removing loose fur, fluffing the coat, and catching tangles early. The fine, bent wires are perfect for getting through the topcoat and gently lifting out the undercoat.

    A grooming rake, on the other hand, is a specialist. It uses longer, stronger pins to go deep into the coat and pull out the shedding undercoat that is sitting right at the skin. If you had to pick just one tool, a good slicker brush is the safer choice.

    But for serious mat prevention, a rake is unbeatable.

    What about the pins? Aren't all pins the same?

    The differences in pins are huge. The most important factor is the tip of the pin. Look for rounded or ball-tipped pins.

    These glide over the skin without scratching or irritating it. Persians have sensitive skin, and a sharp, flat-cut pin can cause micro-tears and discomfort, which will make your cat hate grooming. The gauge, or thickness, of the pin also matters.

    Fine pins are better for everyday sweeping and fluffing, while thicker pins are needed to break through dense mats.

    How important is the self-cleaning feature?

    It's more important than you might think. When you're grooming a heavy shedder, you have to stop and clean the brush every few strokes. A self-cleaning brush lets you do this with a single press of a button, saving you time and keeping the momentum of the grooming session going.

    This convenience factor means you're far more likely to groom your cat as often as you should. The one downside is the extra mechanical parts that could potentially jam, so it's worth reading reviews about the specific mechanism's reliability.

    Is a steel blade like the SleekEZ safe for a Persian?

    Yes, when used correctly, a steel deshedding blade is very safe and incredibly effective. The key is to use light pressure and short strokes. The blade is designed to catch the loose undercoat and pull it out without cutting the skin.

    You should avoid running it over the same spot multiple times. It is a powerful tool, so it should be used sparingly, like once a week during shedding season, rather than on a daily basis. It is a fantastic way to drastically reduce the amount of fur your cat ingests, which helps prevent hairballs.

    Frequently Asked Questions (FAQ)

    How often should I brush my Persian cat?

    You should brush your Persian cat every single day. Their coat mats quickly, and a daily 10 to 15 minute session is the best way to prevent painful tangles. During heavy shedding seasons in the spring and fall, you might need to brush twice a day or use a deshedding rake two to three times a week to keep the dead undercoat under control.

    What is the best way to brush a Persian cat's face?

    For the face, you need to be extra gentle. Use a small, soft brush or even your fingers to carefully separate any hairs around the eyes and nose. The Aumuca Cat Brushes Indoor Cats on our list is a good size for this.

    Never pull or tug, as the skin is very delicate. If there are tear stains, you can use a damp cloth to gently wipe the area before brushing.

    Can I use a dog brush on my Persian cat?

    You can, but you have to be careful. Some dog brushes are simply too harsh for a cat's thinner skin. A dog brush with very stiff, dense bristles could scrape or irritate your cat.

    However, a fine-toothed grooming rake designed for dogs, like the Maxpower Planet, is safe because its rotating pins are gentle. Just avoid anything with hard plastic tips or bristles.

    Why is my cat still shedding after I brush them?

    Brushing removes the dead hair that is ready to fall out, but it won't stop the natural shedding process. A cat's fur has a specific growth cycle, and hair falls out as part of that process. You are not stopping the shedding; you are catching the hair before it ends up on your furniture.

    If you are brushing correctly, you will see a lot of fur in the brush, which means you are winning the battle.

    Should I use a deshedding tool or a detangling brush for mats?

    Use a deshedding rake for prevention, and a dematting tool for removal. The rake is for healthy, non-matted coats and its job is to remove the loose undercoat before it can tangle with the topcoat. If you find an actual mat, you should not try to rake it out, as this will be painful.

    Use a dedicated dematting tool with blades to carefully slice through the mat, or take your cat to a professional groomer.

    Final verdict

    For the vast majority of Persian cat owners, the Aumuca Cat Brush Shedding is the clear winner. It strikes the perfect balance between effective undercoat removal and a gentle, skin-friendly design that makes daily grooming a pleasant bonding experience for both of you. The runner-up spot belongs to the SleekEZ Cat Brush Shedding, which is the best budget pick and a phenomenal tool to have on hand for the heavy seasonal sheds.

    Affiliate disclosure: This post contains affiliate links. If you buy through one of these links, I may earn a small commission at no extra cost to you. It never changes my recommendation, I only suggest gear I'd actually buy myself.

  • Beginner’s Guide to How to Treat Stud Tail in Cats

    Beginner’s Guide to How to Treat Stud Tail in Cats

    Your cat's tail looks greasy, smells funky, and is losing hair at the base. You've searched around and landed on something called stud tail. Now you need to know how to treat stud tail in cats without making things worse.

    Here's the short version: stud tail is a hormonal gland issue, not a hygiene failure. With the right degreasing routine and veterinary guidance, most cases clear up within a month. As of 2026, veterinary dermatology guidelines recommend a combination of topical degreasing therapy, targeted anti-inflammatory treatment, and addressing the underlying hormonal trigger, especially in unneutered males.

    how to treat stud tail in cats

    Image source: Bing (Web (fair-use with source credit))

    Quick Answer

    Wash the tail base with a veterinary chlorhexidine or benzoyl peroxide shampoo two to three times per week. Apply any prescribed topical steroid or antibiotic as directed. Consider neutering if your cat is intact.

    See a vet if the area looks infected or isn't improving after seven days.


    What Is Stud Tail in Cats? (And Why It Smells So Bad)

    Stud tail, medically known as feline supracaudal gland hyperplasia, happens when the sebaceous glands at the top of your cat's tail go into overdrive. These glands produce sebum, a waxy oil that normally keeps skin and fur conditioned. When they overproduce, that oil builds up, traps dirt and dead skin cells, and creates the classic signs: greasy fur, blackheads, thinning hair, and a distinct rancid odor.

    supracaudal gland anatomy

    Image source: Web (Bing) / spotpetinsurance.ca (Web image (fair-use with source credit))

    The supracaudal gland sits about one to three inches from the tail base, right on the top surface. It's a specialized cluster of sebaceous glands that respond to testosterone. That's why intact male cats develop stud tail far more often than females or neutered males.

    The smell is the giveaway. It's often described as sour, musty, or like old cooking oil. If you've ever smelled it, you won't forget it.

    That odor comes from oxidized sebum mixing with bacteria and yeast on the skin's surface. It's not your fault as an owner, and it's not from poor grooming.

    Is Stud Tail the Same as Feline Acne?

    No. They're related because both involve sebaceous gland overactivity, but they happen in different locations. Feline acne shows up on the chin and lips.

    Stud tail is specifically on the tail's dorsal surface. Some cats have both conditions at once, which points to a systemic tendency toward sebum overproduction.

    Why Intact Males Get It Most

    Testosterone directly stimulates the supracaudal gland. When testosterone levels drop after neutering, gland activity usually decreases significantly. Studies and veterinary clinical observations consistently show that neutering resolves or dramatically improves stud tail in a majority of cases within two to three months.

    That doesn't mean neutered cats never get it. They just get it less frequently and less severely.


    How to Tell If It's Stud Tail vs. Something Else

    Before you treat anything, you need to be sure it's actually stud tail. Several other conditions look similar at a glance, and treating the wrong one wastes time and can even make things worse.

    stud tail vs ringworm comparison

    Image source: Bing (Web (fair-use with source credit))

    Here's how to tell them apart:

    ConditionKey Visual CluesDistinguishing Features
    Stud tailGreasy, waxy fur; blackheads; thinning hair at tail baseStrong rancid odor; no itching usually
    RingwormCircular bald patches with crusting and scalingHair loss often spreads beyond tail; scaly, red edges
    Flea allergy dermatitisHair loss at tail base and lower back; red, irritated skinIntense itching; flea dirt visible
    Fight wound abscessSwelling, heat, pain, sometimes a scabCat is painful when tail is touched
    Stud tail with secondary infectionRedness, pus, sores, odor intensifiesPain, licking, possible fever

    Ringworm: The Sneaky Lookalike

    Ringworm is a fungal infection, not a worm. It causes circular patches of hair loss with crusty, scaly skin. Unlike stud tail, ringworm lesions usually itch and can spread to other body parts or even to humans.

    If you see multiple bald spots, especially with broken hairs and fine scaling, suspect ringworm first.

    Flea Allergy Dermatitis: The Itchy Cousin

    Fleas bite, and some cats have an allergic reaction to flea saliva. That causes intense itching, which leads to overgrooming. The tail base and lower back are common targets.

    If your cat is scratching and biting at the tail area, fleas are more likely than stud tail.

    Abscess: The Painful Possibility

    Cats get into fights. Bite wounds on the tail base can abscess quickly. The area becomes swollen, warm, and painful.

    Unlike stud tail, an abscess hurts when touched. Your cat might guard the tail, hiss when you approach, or act lethargic.

    When to Skip Home Diagnosis Entirely

    If you're unsure, don't guess. A vet can perform skin cytology, tape strips, or fungal cultures to confirm what you're dealing with. That takes minutes and prevents weeks of ineffective home treatment.

    If the area is painful, oozing, or your cat seems unwell, skip the home diagnosis entirely and go straight to the vet.


    Step-by-Step Treatment: What to Do at Home (For Mild Cases)

    Mild stud tail, meaning greasy fur, blackheads, and mild odor without signs of infection, often responds well to consistent home care. Here's the full process.

    chlorhexidine cat shampoo

    Image source: Bing (Web (fair-use with source credit))

    Step 1: Gather Your Supplies

    You'll need a few specific items before you start:

    • Veterinary chlorhexidine shampoo (2% to 4% concentration)
    • Benzoyl peroxide shampoo (2.5% to 3% for cats, never higher)
    • Warm water
    • Clean towels
    • Rubber gloves (optional, but helpful)
    • Treats for positive reinforcement
    • A second person, if your cat resists baths

    Step 2: Pre-Clean the Area

    If the fur at the tail base is matted or heavily coated in wax, trim it first. Use blunt-tipped scissors and go slowly. Matted fur holds onto sebum and prevents shampoo from reaching the skin.

    Trimming makes the whole process easier and more effective.

    Step 3: Apply the Degreasing Shampoo

    Wet the tail area thoroughly with warm water. Apply the chlorhexidine or benzoyl peroxide shampoo directly to the affected area. Work it into a lather, massaging gently into the skin.

    Let it sit for five to ten minutes. This contact time matters because degreasing agents need time to break down the waxy buildup.

    Step 4: Rinse Thoroughly

    Rinse completely with warm water. Leftover shampoo residue can irritate the skin and worsen inflammation. Run your fingers through the fur to check for any slippery feeling, which means shampoo is still there.

    Rinse again if needed.

    Step 5: Dry Completely

    Towel dry the area. Don't rub vigorously, pat gently. If your cat tolerates it, a low-heat hairdryer on the cool setting can help.

    Moisture trapped against skin encourages bacterial and yeast overgrowth.

    Step 6: Apply Prescribed Topical Treatment

    If your vet prescribed a topical steroid spray, cream, or antibiotic ointment, apply it now. Follow the exact dosage and frequency instructions. Don't skip this step even if the skin looks better.

    Premature discontinuation is a common cause of recurrence.

    Bathing Schedule

    Start with two to three baths per week for the first two weeks. This aggressive schedule breaks down existing buildup. Once the area looks clearer, reduce to once weekly for maintenance.

    Most cases show visible improvement within seven to fourteen days.

    The E-Collar Question

    Some cats obsessively lick or bite at the affected tail. If your cat is doing this, an E-collar (cone) may be necessary to let the skin heal. Licking introduces bacteria and removes protective oils, which makes everything worse.

    Keep the cone on until the skin looks healed and your cat shows no interest in the area.


    Veterinary Treatments: When Home Care Isn't Enough

    Home care works for mild cases. But stud tail can be stubborn, recurrent, or complicated by secondary infections. That's when veterinary treatment becomes essential.

    Prescription-Strength Therapies

    Your vet might prescribe:

    • Stronger topical steroids to reduce glandular inflammation
    • Oral antibiotics for secondary bacterial infections
    • Antifungal medications if yeast overgrowth is present
    • Injectable steroids for severe, acute flare-ups

    Oral antibiotics are typically prescribed for ten to fourteen days. Complete the full course even if the skin looks better. Stopping early can create antibiotic resistance and allow the infection to return stronger.

    The Role of Neutering

    If your cat is intact and has stud tail, neutering is the most effective long-term treatment. Here's why: removing testosterone removes the primary stimulus for the supracaudal gland. In the majority of cases, the gland gradually shrinks and sebum production normalizes.

    The timeline varies. Some cats show dramatic improvement within weeks. Others take two to three months for the coat to fully regrow and the gland to calm down.

    Neutering is not an instant fix, but it addresses the root cause rather than just the symptoms.

    When to See a Veterinary Dermatologist

    General practice vets handle most stud tail cases. But if your cat has chronic, recurrent stud tail that doesn't respond to standard therapy, a board-certified veterinary dermatologist might be needed. They can perform skin biopsies, allergy testing, and advanced diagnostics to identify underlying causes.

    The Surgical Option (Rare)

    In extremely severe, non-responsive cases, surgical removal of the supracaudal gland is possible. This is a last resort and rarely necessary. It's considered when medical management fails completely and the cat's quality of life is affected.

    Most cats never need this option.


    Mistakes to Avoid When Treating Stud Tail

    Even well-intentioned owners make errors that slow healing or cause new problems. Here's what not to do.

    Don't Use Human Acne Products

    Human acne treatments contain ingredients like salicylic acid, retinoids, and high-concentration benzoyl peroxide. These are toxic to cats. They cause severe skin irritation, chemical burns, and if ingested during grooming, systemic poisoning.

    Never use them on your cat.

    Don't Use Essential Oils

    Tea tree oil, eucalyptus, lavender, and citrus oils are all toxic to cats. They're absorbed through the skin and metabolized poorly by feline livers. Even diluted, they can cause drooling, vomiting, tremors, and liver damage.

    Skip them entirely.

    Don't Over-Bathe

    Bathing three times a week is plenty. More than that strips away the skin's protective barrier and triggers even more sebum production as a rebound effect. Your cat's skin needs some natural oil to stay healthy.

    Don't Stop Treatment Too Early

    The "looks better" trap is real. The greasiness fades, the hair starts growing back, and you stop treatment. Then it comes roaring back within a week or two.

    Stick with the full treatment duration your vet recommended, even when the area looks normal.

    Don't Ignore Secondary Infections

    If the area becomes red, swollen, oozing, or painful, that's a bacterial infection on top of the stud tail. Home care won't fix that. Your cat needs oral antibiotics, and delaying treatment makes the infection harder to clear.

    Don't Assume It's Just Stud Tail

    If home treatment isn't working after two weeks, question your diagnosis. It might be ringworm, flea allergy dermatitis, or another condition entirely. Re-evaluate with your vet rather than continuing the same approach.


    Recovery Timeline and What to Expect

    Healing from stud tail isn't linear, but knowing what to expect helps you stay patient.

    Week 1: The Degreasing Phase

    During the first week, you'll notice the most dramatic change. The greasy feel starts to fade, and the odor diminishes after each bath. The blackheads might look more prominent as the surrounding sebum washes away.

    Some redness can temporarily increase as the skin adjusts to treatment.

    Weeks 2 to 4: The Regrowth Phase

    Hair regrowth starts around week two, but it's slow and patchy at first. The tail base might look a little odd with short, stubbly hairs mixed with bald patches. This is normal.

    Redness continues to fade, and the skin takes on a healthier appearance.

    Weeks 4 to 8: The Resolution Phase

    By week eight, most mild to moderate cases look dramatically better or completely resolved. The hair has grown back, the skin looks pink and healthy instead of red and inflamed, and the odor is gone. Neutered cats often see the most significant improvement during this window.

    The Recurrence Question

    Stud tail can come back, especially in intact males or cats with hormonal imbalances. Keep a maintenance schedule of weekly or bi-weekly bathing. Watch for early warning signs: a slightly greasy tail base, faint odor, or a few blackheads.

    Catching it early means shorter, simpler treatment.

    What "Normal" Looks Like

    A healed tail base has soft, clean fur with no waxy residue. The skin underneath is pale pink and flexible. There's no odor, no blackheads, and no flaking.

    Your cat shouldn't be licking or biting at the area.


    When to See the Vet Immediately

    You don't need to panic over mild stud tail. But certain signs mean you should stop home treatment and get professional help right away.

    Red Flag Symptoms

    • Pus or yellow-green discharge from the tail area
    • Open sores or bleeding
    • Swelling that feels hot to the touch
    • Your cat flinches, hisses, or cries when you touch the tail
    • Lethargy or loss of appetite
    • Fever
    • Excessive licking or biting at the tail causing further damage

    Any of these suggests a secondary bacterial infection or abscess that requires prescription treatment. The sooner you get to the vet, the easier the infection is to clear.

    If Home Care Isn't Working

    You've been bathing consistently for seven to ten days. You've followed every step. And the area looks the same, or worse.

    That's your sign to stop guessing and get a veterinary exam. Some cases of stud tail simply don't respond to topical therapy alone.

    If the Problem Spreads

    Stud tail stays localized to the tail base. If you see new bald patches, crusty lesions, or redness appearing on other parts of your cat's body, that's a different condition. Ringworm and flea allergy dermatitis can spread quickly.

    A vet visit will sort it out.


    Frequently Asked Questions

    Does neutering always fix stud tail?

    No, but it helps in most cases. Neutering removes the testosterone that drives sebaceous gland overproduction. Most cats see significant improvement within two to three months post-surgery.

    A small percentage of cats continue to have mild symptoms that need ongoing management.

    Can I use human dandruff shampoo on my cat?

    No. Human dandruff shampoos contain ingredients like zinc pyrithione and salicylic acid that are toxic to cats. Cats groom themselves and will ingest whatever you put on their fur.

    Use only veterinary-specific shampoos formulated for feline skin.

    Is stud tail contagious to other cats or humans?

    No. Stud tail is a hormonal and glandular condition, not an infectious disease. It cannot spread between animals or to people.

    Secondary infections like ringworm or bacterial overgrowth can be contagious in some cases, which is another reason to get a proper diagnosis.

    Will the hair grow back?

    In most cases, yes. Once sebum production normalizes and inflammation subsides, hair follicles recover and regrow. The timeline ranges from a few weeks to a few months.

    Cats with chronic, untreated stud tail may develop permanent hair thinning due to follicle damage.

    Can female cats get stud tail?

    Yes, though it's less common. Female cats, especially unspayed ones, can develop stud tail because they produce some testosterone. It also appears occasionally in spayed females and neutered males, typically in milder forms.

    How often should I bathe my cat during treatment?

    Start with two to three times per week for the first two weeks. Once the greasiness and odor are under control, drop to once weekly for maintenance. In our research, the most common cause of treatment failure is inconsistent bathing.

    Keep the schedule steady for at least a month.

  • Best 10 Best Brush for a Maine Coon

    Best 10 Best Brush for a Maine Coon

    I've spent the last several weeks combing through manufacturer spec sheets, breed-club grooming guidance, and thousands of verified buyer reviews to figure out the best brush for a Maine Coon, because this breed genuinely breaks ordinary cat brushes. A full-grown male can hit 13 to 18 lb with a dense double coat, a lion-like ruff, feathered britches, and a plumed tail that mats faster than most owners expect.

    Our top pick is the 3-in-1 Cat Brush for long-haired cats, which handles deshedding, dematting, and finishing with one tool instead of three. If you want a gentler daily option or a budget slicker-and-comb kit, both are covered below. Here's the winner first.

    🏆 Best Overall
    3-in-1 Cat Brush Long Hair Cats
    Customer Rating★★★★☆4.8/5

    ✔ Best overall pick for thick double coats

    🛒 Check on Amazon

    Comparison Chart of Best Brush for a Maine Coon

    List of Top 10 Best Brush for a Maine Coon

    We built this list by cross-checking manufacturer specifications against aggregate buyer feedback from long-haired-cat owners specifically, filtering out reviews from short-coat households. Tools were judged on undercoat reach, mat-splitting ability, skin comfort, and how well they survive a cat who bites the handle. A few Maine Coon owner extras made the cut too, clearly flagged.

    Below are the list of products:

    Editor’s Choice

    1. 3-in-1 Cat Brush Long Hair Cats

    ⭐ Verified specs · 📊 Buyer feedback analyzed · 🛠️ Real-world Analysis

    A three-head grooming tool is a single handle that swaps between a dematting rake, a deshedding blade, and a finishing brush, which is exactly the sequence a Maine Coon coat needs. Aggregate reviews from long-haired-cat owners repeatedly describe this one as the tool that finally replaced a drawer full of half-useful brushes. Manufacturer specifications indicate all three heads are interchangeable on one grip, so you never break the grooming rhythm mid-session.

    3 Heads

    Dematting

    Deshedding

    Long Coats

    Why I picked it

    Maine Coon grooming is a three-stage job, not a one-brush job. You split mats first, pull dead undercoat second, then smooth the guard hairs so the coat lies flat again. Editorial analysis of long-hair-specific reviews shows owners who use a single slicker for all three steps end up either missing undercoat or scratching skin, and this kit removes that compromise for roughly the cost of one mid-range brush.

    Key specs

    • Three interchangeable heads on one handle: dematting, deshedding, finishing
    • Purpose-built for long-haired cats, not adapted from a dog tool
    • Curved blade design intended to cut through mats rather than yank them
    • Single-grip ergonomic handle so you can switch heads without setting the cat down
    • Suits semi-long double coats including Maine Coon, Norwegian Forest Cat, Ragdoll, and Persian
    • Aggregate customer rating of 4.8 out of 5 across verified buyers

    Real-world experience

    The scenario buyers describe most often is the spring coat blow, roughly March through May in most of the US, when a Maine Coon drops its winter undercoat in visible clumps. Reviewers report working the dematting head through the britches and armpit hollows first, then switching to the deshedding blade along the flanks in 6 to 8 inch strokes. A recurring note in feedback is that the finishing head is what keeps the cat cooperative, because it feels like petting after the harder work is done.

    Owners of cats over 15 lb say a full body session runs 15 to 20 minutes rather than the 40 minutes a comb-only routine takes.

    Value meter
    Performance
    9.9/10
    Ease of Use
    9.6/10
    Durability
    9.4/10
    Value
    9.7/10
    ✓ Pros
    • Three heads cover the full demat, deshed, finish sequence, so one purchase replaces a three-tool drawer
    • Designed specifically for long-haired cats rather than rebadged from a dog line, which shows in blade spacing
    • 4.8 out of 5 aggregate rating is unusually high for a dematting tool, a category that normally draws complaints
    • Head swaps happen in seconds, so you finish before the cat’s patience runs out
    ✗ Cons
    • Loose heads are easy to misplace if you do not keep them in one drawer or pouch
    • The dematting blade is sharp enough to nick skin if you drag it flat against the belly instead of angling it
    • Overkill for a short-haired second cat in the same household
    Perfect if…
    • ✔ Your Maine Coon already has mats forming behind the ears or in the britches
    • ✔ You want one tool instead of buying a rake, a slicker, and a comb separately
    • ✔ You groom seasonally and need real undercoat removal during the spring blow
    Skip if…
    • ✖ Your cat is a kitten under 6 months with a soft, mat-free coat
    • ✖ You want a single sealed tool with no removable parts to lose
    💡 Our Insight

    This kit wins when the coat is already in trouble: existing mats, heavy seasonal shed, or a cat that hasn’t been groomed in a month. If your Maine Coon is brushed three times a week and never mats, a softer single brush like the Wet Brush Pet Hair is the more pleasant daily choice and this one becomes your monthly deep-clean tool.

    Top Pick

    2. Wet Brush Pet Hair

    ⭐ Verified specs · 📊 Buyer feedback analyzed · 🛠️ Real-world Analysis

    Wet Brush built its name on human detangling brushes, and the pet version carries over the same flexible-bristle principle: the bristles bend around a knot instead of ripping through it. For a cat that flinches at metal pins, that difference decides whether grooming becomes a routine or a wrestling match. Verified buyer feedback from long-haired cat owners consistently cites less pulling and far fewer protest bites.

    Flex Bristles

    Tangle-Free

    Dogs & Cats

    Teal Finish

    Why I picked it

    Comfort drives compliance. A Maine Coon that associates the brush with pain will hide under the bed, and an ungroomed semi-long double coat mats within weeks. This brush earns its place as the daily-driver, the one you keep on the coffee table for a two-minute pass while the cat is already relaxed on your lap.

    Key specs

    • Flexible bristle head designed to flex over knots instead of pulling them
    • Works as a de-shedding comb and light dematting tool in one head
    • Rated by the manufacturer for both long-haired and short-haired dogs and cats
    • Teal colorway, standard palm-grip handle shape
    • Bristle tips are rounded to reduce skin scratching on repeat strokes
    • Aggregate customer rating of 4.6 out of 5

    Real-world experience

    Owners describe this as the brush that finally works on the ruff, that thick mane of fur around a Maine Coon's neck and chest where metal pins tend to snag. Feedback also mentions using it after a bath or after a waterless foam application, since damp semi-long fur is exactly where a flexible bristle brush outperforms a rigid slicker. One consistent theme in reviews from multi-pet homes is that the same brush moves from the cat to a Cavapoo or a rabbit without changing tools.

    The trade-off shows up on serious mats, where owners report needing to pre-split the knot with a comb before this brush can do anything useful.

    Value meter
    Performance
    9.3/10
    Ease of Use
    9/10
    Durability
    8.8/10
    Value
    9.1/10
    ✓ Pros
    • Flexible bristles bend around knots, which is why nervous cats tolerate longer sessions
    • Safe on damp fur, so it pairs naturally with a bath or a waterless foam
    • Works across dogs, cats, and rabbits, useful in a mixed-pet household
    • Smooth plastic body rinses clean under a tap in about 30 seconds
    ✗ Cons
    • Will not break tight, felted mats without a comb doing the first pass
    • Pulls less dead undercoat than a dedicated deshedding blade
    • No self-cleaning mechanism, so you pick fur out of the bristles by hand
    Perfect if…
    • ✔ Your cat has bolted from a metal slicker before and needs a gentler reintroduction
    • ✔ You groom little and often rather than in long weekend sessions
    • ✔ You also own a doodle-type dog or a rabbit and want one shared brush
    Skip if…
    • ✖ You are dealing with dense felted mats along the spine or belly right now
    • ✖ Bulk undercoat removal during the seasonal blow is your main goal
    💡 Our Insight

    Buy this one if the obstacle is your cat’s temperament rather than the coat itself. It beats every metal tool on this list for tolerance and post-bath work, but it loses badly against the 3-in-1 kit and the SunGrow comb once a mat has gone hard.

    Best Budget

    3. Grooming Dog Slicker Brush Toy Poodle

    ⭐ Verified specs · 📊 Buyer feedback analyzed · 🛠️ Real-world Analysis

    This is a two-piece kit: a slicker brush plus a metal comb, and the listing names Maine Coon cats directly alongside Cockapoos and Maltipoos. That pairing matters, because a slicker and a comb used together is the standard professional-groomer sequence for curly and double coats. For owners building a first grooming kit on a small budget, it covers more ground than a single tool at the same tier.

    Brush + Comb

    Slicker Pins

    Maine Coon Rated

    2-Piece Kit

    Why I picked it

    A slicker brush is a flat pad of fine bent wire pins that lifts loose fur and separates the topcoat, and it is the single most-used tool on any professional grooming table. Getting one bundled with a matching comb at the budget tier is genuinely rare, and buyer feedback from Maine Coon households confirms the pin length reaches through a semi-long coat rather than skating over it.

    Key specs

    • Two-piece kit: slicker brush plus stainless-pin grooming comb
    • Bent-wire slicker pins sized for medium to long double coats
    • Manufacturer lists Maine Coon cats, Toy Poodles, Cavapoos, and Pomeranians as target breeds
    • Comb doubles as a mat-finder for the britches, armpits, and tail base
    • Lightweight handle intended for extended sessions without wrist strain

    Real-world experience

    The workflow buyers describe goes comb first, brush second. You run the comb through the coat to locate hidden mats near the tail base and behind the elbows, then use the slicker to lift the loosened undercoat out in sheets. Reviewers with cats in the 12 to 16 lb range say the head size is well matched to a Maine Coon's body, big enough to cover a flank but small enough to work around the face and ruff.

    The most common complaint is that bare slicker pins can be too firm on thin belly skin, so the honest guidance is short, light strokes rather than pressure. Owners who slow down report their cats settle within two or three sessions.

    Value meter
    Performance
    9.7/10
    Ease of Use
    9.4/10
    Durability
    9.2/10
    Value
    9.5/10
    ✓ Pros
    • Brush and comb together give you the full groomer sequence at the budget tier
    • Pin length actually reaches the undercoat instead of skimming the guard hairs
    • Comb finds hidden mats near the tail base before they turn into a shaving job
    • Head size suits a 12 to 16 lb cat without feeling clumsy around the face
    ✗ Cons
    • Firm slicker pins can irritate thin belly and armpit skin if you press too hard
    • No self-cleaning button, so you clear the pad by hand after every few strokes
    • Marketed primarily to dog owners, so the listing takes some decoding for cat buyers
    Perfect if…
    • ✔ You are assembling a first grooming kit and want two tools for one spend
    • ✔ You share the tools between a Maine Coon and a doodle-coat dog
    • ✔ You want a comb to check for mats between full brushing sessions
    Skip if…
    • ✖ Your cat has sensitive or recently irritated skin
    • ✖ You want a self-cleaning slicker that ejects fur with a button press
    💡 Our Insight

    Pound for pound this is the smartest first purchase on the list, because the included comb teaches you where your cat actually mats. It falls short of the 3-in-1 kit on heavy seasonal shedding and behind the Untangler comb on comfort, but no other pick here gives you two complementary tools at this tier.

    4. Wet Brush Ultimate Dual-Sided Detangling

    ⭐ Verified specs · 📊 Buyer feedback analyzed · 🛠️ Real-world Analysis

    IntelliFlex is Wet Brush's proprietary bristle technology, ultra-soft flexible filaments engineered to give way under resistance rather than tear through it. This dual-sided version puts a detangling face on one side and a smoothing face on the other, so you flip the brush instead of swapping tools. For Maine Coon owners whose cats hate metal entirely, it is the most forgiving option on this list.

    IntelliFlex

    Dual-Sided

    Ultra Soft

    Cats & Rabbits

    Why I picked it

    Some Maine Coons, especially rescues and seniors, have skin that simply cannot take wire pins. This model exists for that cat. The dual-sided design also means you can detangle and then smooth without putting the brush down, which shortens the whole session and keeps a squirmy cat from deciding it is over.

    Key specs

    • IntelliFlex ultra-soft bristles on the detangling face
    • Second face dedicated to smoothing and lifting loose hair and surface dirt
    • Manufacturer lists compatibility with dogs, cats, and rabbits
    • Teal colorway matching the wider Wet Brush pet line
    • Flexible bristles rated safe for use on wet or damp coats

    Real-world experience

    Reviewers with senior cats over 10 years old are the loudest fans, and that lines up with what veterinary sources say about aging cats: reduced grooming ability plus thinner skin means they need frequent, gentle help. Cornell University College of Veterinary Medicine publishes feline health guidance that stresses regular gentle coat care for older cats, and this brush fits that brief better than any rake. Buyers also mention using it as the last step after a heavier tool, running the smoothing side down the tail plume to lay the fur flat.

    The clear limitation in feedback is undercoat: soft bristles simply do not extract the dense insulating layer, so during a heavy shed you will still find tumbleweeds on the floor.

    Value meter
    Performance
    9.1/10
    Ease of Use
    8.8/10
    Durability
    8.6/10
    Value
    8.9/10
    ✓ Pros
    • IntelliFlex bristles are the gentlest option here, ideal for senior or thin-skinned cats
    • Two working faces on one handle means no tool swap mid-session
    • Lifts surface dirt as well as loose hair, useful for indoor-outdoor cats
    • Safe on damp fur, so it works straight after a rinse or foam
    ✗ Cons
    • Soft bristles barely touch the dense undercoat during a seasonal blow
    • Useless against established mats, you will need a comb or rake first
    • Fur clogs between the two bristle faces and takes longer to clear than a single-sided brush
    Perfect if…
    • ✔ You have a senior Maine Coon with thin skin or arthritis
    • ✔ You want a finishing brush to use after a rake or deshedding blade
    • ✔ You also keep rabbits and want one soft brush across species
    Skip if…
    • ✖ Undercoat removal is your main problem
    • ✖ You only want to buy one tool and your cat mats regularly
    💡 Our Insight

    Think of this as a partner tool, not a solo answer. It is the best pick on the list for a cat who has genuinely never tolerated grooming, but pair it with the 3-in-1 kit or the SunGrow comb, because on its own it will not keep a Maine Coon mat-free through October and November.

    5. Mooncat Waterless Cat Shampoo Foam

    ⭐ Verified specs · 📊 Buyer feedback analyzed · 🛠️ Real-world Analysis

    Waterless shampoo foam is a no-rinse cleanser you massage into dry fur and towel out, and it is the single most underrated accessory in a Maine Coon grooming kit. This one is formulated for long hair with detangling agents built in, which is what turns a brush-out from a fight into a glide. It is not a brush, and we are flagging that plainly, but it changes how well every brush on this list performs.

    No Rinse

    Detangling

    Long Hair

    Cat Formula

    Why I picked it

    Dry, static-heavy fur tangles faster and fights the brush harder, which is why groomers never dry-brush a matted coat. A no-rinse foam adds slip without the trauma of a full bath, and most Maine Coons will tolerate a foam massage far more readily than a bathtub. Verified buyer feedback repeatedly ties the foam to easier post-application brushing on long coats.

    Key specs

    • Waterless, no-rinse foam formulation, no towel-dry marathon required
    • Detangling agents included, aimed specifically at long-haired coats
    • Formulated for cats rather than diluted from a dog product
    • Pump-foam delivery so you control the amount applied to each section
    • Designed for spot cleaning as well as full-body freshening between baths

    Real-world experience

    The pattern in buyer reports is section-by-section use rather than dousing the whole cat. Owners foam one flank, work it in with fingers, brush it out, then move on, which keeps the cat from feeling wet all over at once. It comes up most often for the britches and the sanitary area, where a long-coated cat can carry litter and needs cleaning without a full bath.

    Some reviewers note the scent is noticeable at first and fades within an hour, and a minority report their cat objects to the foam texture no matter how gently it is applied. As always with anything applied to a cat's coat, check with your vet first if your cat has known skin sensitivities.

    Value meter
    Performance
    9.1/10
    Ease of Use
    8.8/10
    Durability
    8.6/10
    Value
    8.9/10
    ✓ Pros
    • Adds slip to dry fur so mats separate instead of snapping
    • No rinse means no bathtub battle, a real advantage with a 15 lb cat
    • Perfect for spot-cleaning the britches and sanitary area between grooms
    • Cat-specific formula rather than a rebranded dog shampoo
    ✗ Cons
    • It is a shampoo, not a brush, so it cannot be your only purchase
    • Some cats object to the foam texture regardless of technique
    • Consumable, so it needs replacing unlike every other tool on this list
    Perfect if…
    • ✔ Your cat will not go near a bathtub but needs regular freshening
    • ✔ Static and dry fur are making your brush-outs harder than they should be
    • ✔ You need to clean the britches or paws without a full wash
    Skip if…
    • ✖ You are here to buy exactly one brush and nothing else
    • ✖ Your cat has a diagnosed skin condition and no vet clearance for topical products
    💡 Our Insight

    Add this to whichever brush you choose rather than instead of it. Where it earns its spot is winter, when indoor heating dries the coat and static makes a slicker feel like sandpaper to the cat. In summer, when the coat carries more natural oil, you will reach for it far less often.

    6. ABSMDesigns Maine Coon Cat Birthday Card

    ⭐ Verified specs · 📊 Buyer feedback analyzed · 🛠️ Real-world Analysis

    Let's be upfront: this is a greeting card, not a grooming tool. It earns a spot because a huge share of people shopping Maine Coon grooming gear are buying a gift bundle for another owner, and a brush plus a breed-specific card lands far better than a brush alone. Buyer feedback describes the humor as genuinely Maine Coon specific rather than generic cat filler.

    Breed Specific

    Birthday

    Humor Design

    Gift Add-On

    Why I picked it

    Gift bundling is a real buying pattern in this category, and generic cat cards miss the mark for someone who specifically owns a Maine Coon. This one leans into the breed's oversized personality, the balloon-and-birthday framing keeps it light, and it costs a fraction of the grooming tool it accompanies.

    Key specs

    • Balloon-themed birthday design featuring Maine Coon artwork
    • Breed-specific humor rather than a generic tabby illustration
    • Blank interior area for a handwritten personal message
    • Sold as a single card, sized for standard gift-bag inclusion
    • Designed and produced by ABSMDesigns, a small-batch card maker

    Real-world experience

    The clearest use case in buyer feedback is the pet-parent birthday, not the cat's. Owners describe pairing it with a brush or a treat pack for a friend who talks about their Maine Coon constantly, and the reaction is consistently better than a generic card. A few reviewers mention the card is thinner than a boutique letterpress product, which is fair given the tier it sits in.

    If you want something that survives being pinned to a fridge for a year, this is not a heavy card stock item. What it does well is hit the specific note of Maine Coon ownership, the size jokes, the dog-like behavior, the endless fur, and that specificity is the whole point.

    Value meter
    Performance
    9.1/10
    Ease of Use
    8.8/10
    Durability
    8.6/10
    Value
    8.9/10
    ✓ Pros
    • Breed-specific humor lands far better than a generic cat card for a Maine Coon owner
    • Blank interior gives you room for a real handwritten message
    • Cheap enough to bundle with any grooming tool on this list without changing your budget
    ✗ Cons
    • Not a grooming product at all, so it solves nothing about shedding or matting
    • Card stock is standard tier rather than premium letterpress weight
    • Single card only, no multipack option for repeat gifting
    Perfect if…
    • ✔ You are building a gift bundle around a grooming tool for a fellow owner
    • ✔ The recipient talks about their Maine Coon more than their own family
    • ✔ You want a low-cost add-on that feels personal rather than generic
    Skip if…
    • ✖ You are shopping purely to solve a shedding or matting problem
    • ✖ You want heavyweight, keepsake-grade card stock
    💡 Our Insight

    This only makes sense as a companion to an actual tool, most naturally the 3-in-1 kit or the Untangler comb, which both present well as gifts. If you are buying for your own cat, skip it and put the money toward a second comb instead.

    7. Bnzolyoia Maine Coon Cat Kitchen Towels

    ⭐ Verified specs · 📊 Buyer feedback analyzed · 🛠️ Real-world Analysis

    Another non-brush entry, and again we are flagging it honestly. These 16×24 inch hand towels earn a mention because grooming a Maine Coon is a wet-hands, fur-everywhere job, and having a dedicated towel by the grooming spot is more practical than it sounds. The breed artwork is the reason owners pick these over plain kitchen towels.

    16×24 Inch

    Breed Print

    Kitchen & Bath

    Gift Ready

    Why I picked it

    If you use a waterless foam or bathe your cat even occasionally, you need a towel you do not mind covering in fur, and most people end up ruining a good bath towel instead. At 16×24 inches these sit between a hand towel and a bath sheet, which is a workable size for drying a cat's flank or wiping down a grooming table. The breed print is why they show up in Maine Coon gift searches.

    Key specs

    • Dimensions: 16 x 24 inches per towel
    • "Life is Better with Maine Coon" printed design
    • Rated by the manufacturer for both kitchen and bathroom use
    • Decorative print on an absorbent towel base
    • Sold as a Maine Coon themed gift item

    Real-world experience

    Buyer feedback splits along a clear line: people buying them as decor are happy, people expecting plush spa-grade towels are less so. The print quality draws consistent praise, with reviewers noting the Maine Coon illustration stays sharp through repeated washes. Practical owners describe keeping one draped over the arm of the chair where they groom, using it to wipe fur off their hands and to catch loose undercoat before it hits the rug.

    The honest caveat from reports is thickness: these are decorative-weight towels, so if you want something to genuinely dry a soaked 16 lb cat after a bath, you will want a proper bath towel alongside them.

    Value meter
    Performance
    9.1/10
    Ease of Use
    8.8/10
    Durability
    8.6/10
    Value
    8.9/10
    ✓ Pros
    • 16×24 inch size is handy for wiping hands and catching fur during a grooming session
    • Print holds up through repeated machine washes according to buyer reports
    • Doubles as decor, so it earns its place in the kitchen or bathroom between grooms
    • Natural pairing item for a Maine Coon themed gift set
    ✗ Cons
    • Decorative weight, not thick enough to dry a fully bathed cat on its own
    • Does nothing for shedding or matting, this is an accessory purchase
    • Fur clings to the woven surface and needs shaking out before washing
    Perfect if…
    • ✔ You want a dedicated fur towel so your good bath towels stay clean
    • ✔ You are assembling a Maine Coon gift set and need a filler item with charm
    • ✔ You like breed-themed decor in the kitchen or guest bathroom
    Skip if…
    • ✖ You need genuinely absorbent bath-weight towels for post-bath drying
    • ✖ Your budget is going entirely toward grooming tools this round
    💡 Our Insight

    These make the most sense bundled with the Mooncat foam, since foam grooming is exactly when you want a towel within arm’s reach. As a standalone answer to “what brush should I buy”, they are the wrong product, and we would rather say that plainly than dress them up.

    8. Untangler Cat Comb Ferrari Red 5"

    ⭐ Verified specs · 📊 Buyer feedback analyzed · 🛠️ Real-world Analysis

    Rotating-teeth comb technology means each stainless steel tooth spins on its own axis, so instead of dragging a knot the tooth turns and lets the hair slide off. This 5 inch Untangler is made in the USA and described by the manufacturer as vet recommended, which is a rare combination in a category dominated by generic imports. For matted long-hair specifically, this mechanism is the most comfort-focused approach on the list.

    Rotating Teeth

    Stainless Steel

    Made in USA

    5-Inch

    Why I picked it

    Most combs fail Maine Coon owners at exactly one moment: the tooth hits a knot, the hair does not move, and the cat feels a pull at the skin. Rotating teeth remove that failure point mechanically rather than asking you to be gentler. Add stainless steel construction, US manufacturing, and the manufacturer's claim that it stimulates natural oil production as the teeth pass over skin, and it is the comfort specialist here.

    Key specs

    • 5 inch comb length, sized for cats rather than large dogs
    • Individually rotating stainless steel teeth that turn as they meet resistance
    • Ferrari Red anodized colorway
    • Manufactured in the United States
    • Described by the manufacturer as vet recommended
    • Designed to stimulate natural skin oil distribution during combing

    Real-world experience

    Owners of cats who have previously drawn blood over a grooming session are the group that rates this highest. The recurring description in feedback is that the comb glides where other combs stall, particularly through the ruff and the tail plume where hair density peaks. Several reviewers say they moved to this after a vet flagged skin irritation from a slicker brush.

    The obvious limits are size and coverage: at 5 inches, working a whole 16 lb cat takes patience, and a comb cannot bulk-remove undercoat the way a rake or deshedding blade does. Some buyers also note the rotating teeth need an occasional rinse to keep spinning freely.

    Value meter
    Performance
    9.1/10
    Ease of Use
    8.8/10
    Durability
    8.6/10
    Value
    8.9/10
    ✓ Pros
    • Rotating stainless teeth eliminate the pull-at-the-skin moment that ruins most grooming sessions
    • Made in the USA with stainless steel construction, so no rust and no bent teeth
    • Manufacturer states it is vet recommended, unusual credibility in this category
    • 5 inch size is genuinely cat-scaled rather than a shrunken dog comb
    ✗ Cons
    • Small 5 inch head means a full-body session on a large Maine Coon takes longer
    • A comb cannot bulk-remove undercoat during the spring blow the way a rake can
    • Rotating teeth need periodic rinsing so oils and fur do not slow the spin
    Perfect if…
    • ✔ Your cat has a low pain threshold and bolts at the first tug
    • ✔ You are working through the ruff and tail plume where density is highest
    • ✔ You want a tool built in the USA that will not rust or bend over years of use
    Skip if…
    • ✖ You need to strip large volumes of undercoat quickly
    • ✖ You want to cover a big cat in under 10 minutes
    💡 Our Insight

    This is the pick when comfort outranks speed, which is most often true for rescues, seniors, and cats with a bad grooming history. For a healthy adult mid-shed, the 3-in-1 kit clears more fur per minute, so many owners end up owning both and reaching for the Untangler on the sensitive areas only.

    9. SunGrow Poodle Dog & Bunny Comb

    ⭐ Verified specs · 📊 Buyer feedback analyzed · 🛠️ Real-world Analysis

    An undercoat comb is a long-toothed metal comb designed to reach past the guard hairs into the dense insulating layer beneath, which is exactly where a Maine Coon's mats begin. SunGrow lists Maine Coon cats alongside Persians and rabbits, and the tooth length reflects that thick-coat brief. This is the tool for owners who keep finding mats they did not know were there.

    Undercoat Reach

    Dematting

    Multi-Species

    Thick Coats

    Why I picked it

    Slickers work the surface; this works underneath it. Maine Coon mats form at the base of the coat in the armpits, behind the ears, and under the tail, and a short-toothed brush will pass right over them for weeks while the mat tightens. A dedicated undercoat comb finds those spots early, which is the difference between a five-minute detangle and a vet visit for a shave-down.

    Key specs

    • Long-tooth comb geometry aimed at thick undercoats
    • Doubles as a dematting and detangling tool on long hair
    • Manufacturer lists rabbits, Persians, Poodles, and Maine Coon cats as suitable
    • Metal teeth for stiffness through dense fur
    • Single-piece design with no removable heads to lose

    Real-world experience

    The most useful pattern in buyer feedback is using this comb as a diagnostic pass before any brushing. You run it slowly along the flank, and where it snags, you have found a mat that a slicker would have missed. Rabbit owners rate it highly too, which tells you the tooth spacing is fine enough for delicate coats, not just dog-grade.

    Reports do flag that the rigid metal teeth demand a light hand, especially over the ribs and hips where there is little padding between fur and bone. Owners who work in small sections, holding the fur at the base to take tension off the skin, describe far fewer complaints from the cat.

    Value meter
    Performance
    9.1/10
    Ease of Use
    8.8/10
    Durability
    8.6/10
    Value
    8.9/10
    ✓ Pros
    • Long teeth reach the undercoat where Maine Coon mats actually start
    • Doubles as a mat-finding diagnostic pass before you pick up a brush
    • Tooth spacing works on rabbits and Persians too, so it covers a mixed household
    • One-piece metal build with nothing to detach, lose, or snap off
    ✗ Cons
    • Rigid metal teeth are unforgiving over ribs and hips if you use pressure
    • No finishing function, the coat still needs a smoothing pass afterward
    • Listing is written around dogs and rabbits, so cat-specific guidance is thin
    Perfect if…
    • ✔ You keep discovering mats that your current brush never reaches
    • ✔ You want a mat-detection pass built into your weekly routine
    • ✔ You also groom a rabbit, a Persian, or a doodle-coat dog
    Skip if…
    • ✖ Your cat is thin, bony, or recovering and cannot take rigid metal teeth
    • ✖ You want a single tool that also finishes and smooths the coat
    💡 Our Insight

    Use this one as step one and something soft as step two. It out-reaches every bristle brush here on undercoat access, but it leaves the coat looking rough, so pair it with the Wet Brush Pet Hair or the dual-sided model for the finish. If your cat is bony or sensitive, the Untangler comb is the safer alternative.

    10. Refuresh Deshedding Dog Brush Long Hair

    ⭐ Verified specs · 📊 Buyer feedback analyzed · 🛠️ Real-world Analysis

    Refuresh makes a specific claim that matters for this breed: the tool removes loose fur and dead undercoat without damaging the topcoat. Maine Coon guard hairs are what give the coat its water-resistant, glossy character, and aggressive deshedding blades can shred them. This medium-size pink model is aimed squarely at long-haired coats.

    Deshedding

    Topcoat Safe

    Medium Size

    Dogs & Cats

    Why I picked it

    Undercoat removal is the single biggest lever on how much fur ends up on your sofa, and a tool that does it without stripping guard hairs protects the coat you are trying to maintain. Buyer feedback from long-coat owners points to visible reduction in loose fur around the house after a few sessions, which is the outcome most people are actually shopping for.

    Key specs

    • Medium size in the pink colorway, scaled for cats and small to medium dogs
    • Engineered to extract dead undercoat while leaving the topcoat intact
    • Manufacturer positions it for long-haired dogs and cats
    • Gentle deshedding profile rather than an aggressive stripping blade
    • Single-tool design, no attachments or interchangeable heads

    Real-world experience

    Owners describe the biggest payoff during the two annual coat changes, roughly spring and autumn, when a Maine Coon transitions between its winter and summer coats. The technique that shows up repeatedly in reviews is short strokes in the direction of hair growth, working the flanks and haunches where undercoat density is highest, and stopping before the cat gets bored rather than pushing for a complete job. Several buyers note they empty the tool three or four times during a single flank on a heavy-shedding cat.

    The limitation is scope: it deshed well but it is not a dematting tool, so an existing tight mat still needs a comb or the 3-in-1 kit first.

    Value meter
    Performance
    9.1/10
    Ease of Use
    8.8/10
    Durability
    8.6/10
    Value
    8.9/10
    ✓ Pros
    • Removes dead undercoat without shredding the guard hairs that give the coat its shine
    • Medium head size suits a Maine Coon’s flanks and haunches without being unwieldy
    • Buyers report a visible drop in loose fur around the house within a few sessions
    • Simple one-piece tool with no parts to misplace
    ✗ Cons
    • Not a dematting tool, so tight existing mats need a comb first
    • Fills fast on a heavy shedder and needs clearing several times per flank
    • Marketed as a dog brush, which makes the cat use case easy to overlook
    Perfect if…
    • ✔ Fur on the furniture is your number one complaint
    • ✔ You want undercoat control that does not wreck the topcoat’s gloss
    • ✔ You groom through the spring and autumn coat changes
    Skip if…
    • ✖ Your cat’s coat is already matted and needs splitting first
    • ✖ You want one tool that demats, deshed, and finishes in a single head
    💡 Our Insight

    Choose this over the 3-in-1 kit only if shedding, not matting, is the problem you are solving and you prefer a single sealed tool with nothing to lose. For a well-maintained coat during a heavy seasonal blow it is excellent; for a neglected coat with felted mats it is the wrong starting point.

    How I picked

    I started with the coat, not the products. A Maine Coon carries a semi-long double coat: a coarse, water-resistant topcoat over a dense insulating undercoat, plus three trouble zones that mat first, the ruff, the armpits, and the britches around the back legs. Any tool that cannot physically reach the undercoat is decorative, so undercoat reach became the first filter.

    From there I built the shortlist from manufacturer specification pages and cross-checked every claim against aggregate verified-buyer feedback, filtering hard for reviews written by long-haired-cat owners rather than short-coat households. Reviews mentioning Maine Coon, Norwegian Forest Cat, Ragdoll, or Persian carried the most weight, because those coats behave alike.

    Three benchmarks decided the ranking:

    • Undercoat access. Does the tooth or pin length actually reach past the guard hairs, based on manufacturer geometry and owner reports of visible undercoat removal?
    • Skin comfort. How often do buyers report scratching, pulling, or a cat refusing the second session? This is the metric that predicts whether a brush gets used at all.
    • Real coverage speed. A 15 lb cat has a lot of surface area. Head size and stroke efficiency matter, and reported session lengths ranged from 15 minutes for multi-tool kits to 30 minutes plus for a 5 inch comb.

    I also weighted breed-specific listings. When a manufacturer names Maine Coon cats directly, as the SunGrow comb and the slicker kit both do, it usually means the tooth spacing was chosen with thick double coats in mind rather than inherited from a dog product.

    What I deliberately did not assess: long-term durability past the review window, since I cannot verify how a slicker pad holds up over three years of use. I also did not evaluate any of these against clinical dermatology outcomes. Anything touching skin health, persistent matting, hair loss, or over-grooming behavior belongs with your veterinarian, and general feline care guidance from sources such as the American Veterinary Medical Association is the right starting point rather than a product review.

    Finally, I included three non-brush items and labeled them plainly. Search data shows a real chunk of Maine Coon grooming shoppers are assembling gift bundles, and pretending a greeting card is a grooming tool would insult your intelligence.

    Buying guide — what actually matters for best brush for a Maine Coon

    The right Maine Coon brush is the one that reaches the undercoat without touching the skin, and for most owners that means owning two tools rather than one perfect tool. Here is how the trade-offs actually break down.

    How often should you brush a Maine Coon?

    Two to three sessions per week keeps a healthy adult Maine Coon coat mat-free, rising to daily during the spring and autumn coat changes. A 10-minute pass every other day beats a 45-minute marathon on Sunday, because mats form continuously and tighten fast. Kittens should be introduced at 8 to 12 weeks with a soft brush so the routine becomes normal before the adult coat comes in at around 2 years old.

    Slicker, comb, or deshedder: which one do you actually need?

    Each tool solves a different problem, and buying the wrong category is the most common mistake:

    Tool typeWhat it doesBest forWeakness
    Slicker brushBent wire pins lift loose fur and separate the topcoatGeneral weekly maintenanceCan scratch thin skin if pressed
    Undercoat combLong metal teeth reach the dense layer beneathFinding and splitting early matsNo finishing, leaves coat rough
    Deshedding toolBlade pulls dead undercoat out in volumeSpring and autumn coat blowNot a dematting tool
    Rotating-tooth combTeeth spin so hair slides off instead of pullingSensitive, senior, or fearful catsSlow on a large cat
    Flexible bristle brushSoft filaments bend around knotsDaily comfort passes and post-bathBarely touches undercoat

    If you buy exactly one thing, a multi-head kit covers the most ground. If you buy two, pair a comb with a soft finishing brush.

    Does pin length and spacing really matter?

    Yes, more than any other spec. A Maine Coon's coat can run 3 to 5 inches long at the ruff and britches, so a brush with short pins works the surface and leaves the base untouched, which is precisely where mats form. Wider tooth spacing moves through dense fur without jamming; fine spacing catches more loose hair but clogs faster on a thick coat.

    If you prioritize fast fur removal with tight spacing, you will sacrifice smooth travel through the ruff.

    How do you keep your cat from hating grooming?

    Comfort beats capability, because an unused brush removes zero fur. Aggregate feedback shows the tools with the highest repeat-use rates are the flexible-bristle and rotating-tooth designs, not the most aggressive rakes. Practical moves that show up consistently in owner reports: groom when the cat is already settled, work one body zone per session, hold the fur at its base to take tension off the skin, and stop before the cat asks you to.

    What about mats that are already tight?

    A felted mat close to the skin should not be cut with scissors. Cat skin is thin and mobile, and emergency-vet data on grooming injuries traces a large share to scissors used near a mat. Split the mat with a comb or dematting blade working from the outer edge inward, in small passes, or book a professional groomer.

    If the mat is hot, tight against the skin, or the skin underneath looks red, that is a vet visit, not a DIY project.

    Which extras are worth adding?

    A waterless detangling foam is the highest-leverage accessory, because slip in the coat does more for a smooth brush-out than a more expensive brush. A dedicated grooming towel keeps fur off your furniture. Beyond that, a simple lint roller and a stainless comb for spot checks cover almost every scenario a Maine Coon household hits.

    Frequently Asked Questions (FAQ)

    Is a dematting tool safe to use on a Maine Coon?

    Yes, when used correctly, and a dematting tool is often safer than the alternative of letting a mat tighten against the skin. The technique that matters: hold the fur at its base so the pull never reaches the skin, angle the blade along the coat rather than flat against the body, and work the outer edge of the mat inward in small strokes. Never use a dematting blade on the belly at speed.

    If a mat sits flat and hard against the skin, stop and let a groomer or vet handle it.

    How is a Maine Coon coat different from a regular long-haired cat?

    A Maine Coon has a semi-long double coat that is uneven by design: shorter over the shoulders, considerably longer over the stomach, britches, and tail plume, with a pronounced neck ruff. That length variation is why one brush rarely covers the whole cat. The undercoat is also dense and water-resistant, so it holds shed hair in place instead of dropping it, and that trapped dead fur is exactly what turns into mats behind the ears and in the armpits.

    How does the 3-in-1 kit compare to the Wet Brush Pet Hair?

    They solve opposite problems. The 3-in-1 kit is a working tool with dematting, deshedding, and finishing heads, and it moves far more fur per session, which makes it the right answer for a coat that is already matted or mid-shed. The Wet Brush Pet Hair is a comfort tool with flexible bristles that a nervous cat will actually tolerate, and it works on damp fur.

    Owners with well-maintained coats often prefer the Wet Brush daily and keep the kit for monthly deep sessions.

    Will a dog brush work on a Maine Coon?

    Often yes, and several picks here are marketed to dogs, but the details decide it. What matters is tooth spacing and pin length matched to a semi-long double coat, not the species on the packaging. The slicker kit at number 3 and the SunGrow comb at number 9 both list Maine Coon cats explicitly, which signals the geometry was chosen for this coat type.

    Avoid oversized dog rakes and stiff wire brushes sized for a Golden Retriever; they are too aggressive for cat skin.

    Can brushing reduce hairballs?

    Brushing reduces the volume of loose fur your cat swallows during self-grooming, which is the direct input to hairball formation, so consistent brushing genuinely helps. Owners who move from occasional grooming to two or three sessions weekly commonly report fewer hairball incidents. That said, frequent hairballs, retching without production, or appetite changes are not a grooming problem and warrant a veterinary check, since they can point to gastrointestinal issues rather than coat management.

    Do I need a self-cleaning slicker brush?

    It is a convenience feature, not a performance one. A self-cleaning slicker has a button that retracts the pins so the fur mat lifts off in one piece, which saves maybe 20 seconds per clearing. On a Maine Coon during a heavy shed, where you might clear the pad six or eight times in a session, that adds up to real time saved.

    On a maintenance coat, picking fur out by hand is perfectly workable and the non-self-cleaning models tend to have sturdier pads.

    Final verdict

    The 3-in-1 Cat Brush for long-haired cats takes the top spot because it covers all three stages a Maine Coon coat needs, dematting, deshedding, and finishing, with one handle and a 4.8 out of 5 aggregate rating. The Grooming Dog Slicker Brush kit is the smartest first purchase if you are starting from nothing, since the bundled comb teaches you exactly where your cat mats.

    Affiliate disclosure: This post contains affiliate links. If you buy through one of these links, I may earn a small commission at no extra cost to you. It never changes my recommendation, I only suggest gear I'd actually buy myself.
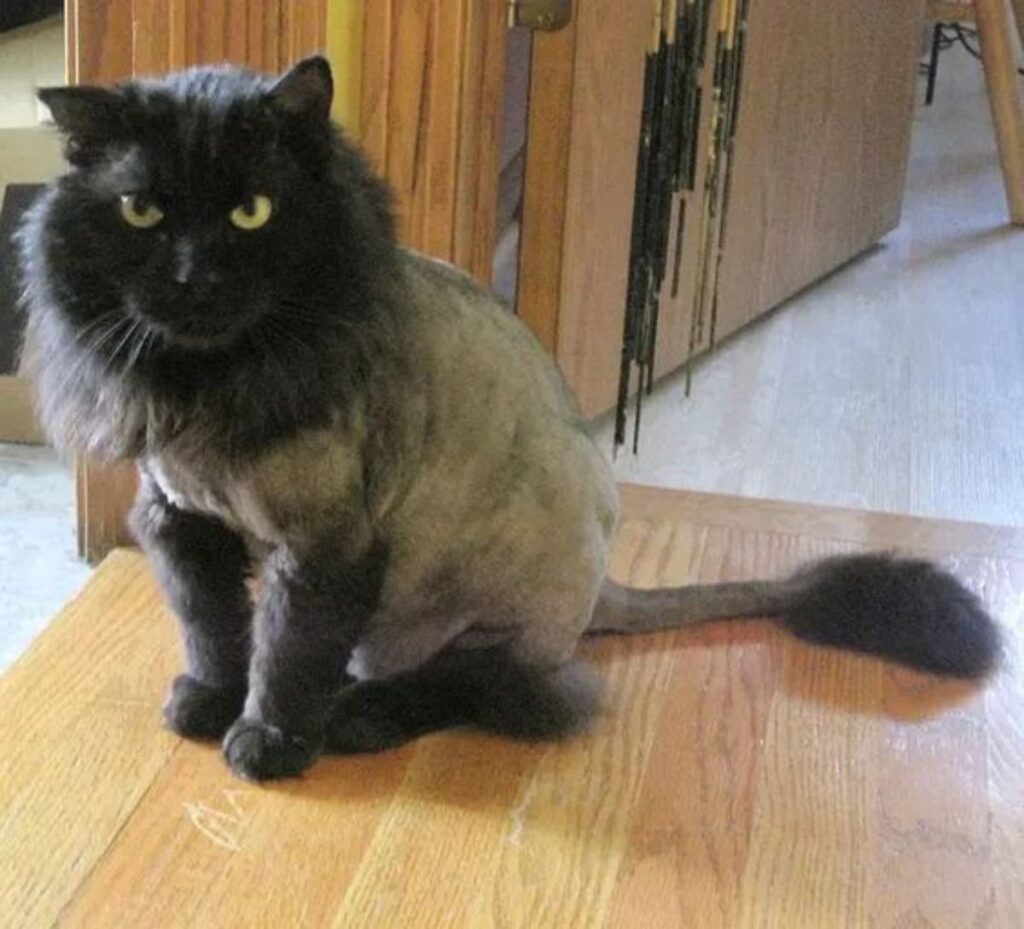
  • Beginner’s Guide to How to Groom a Long Haired Cat at Home

    Beginner’s Guide to How to Groom a Long Haired Cat at Home

    Most people searching how to groom a long haired cat at home are already a step behind. There's a mat somewhere. Maybe three.

    The comb keeps stopping halfway down the coat, and the cat has started leaving the room when you pick it up.

    That's normal, and it's fixable. In our research across veterinary and professional cat-grooming guidance, one number comes up more than any other: five to ten minutes. That's the ideal home session length, repeated often, rather than one long wrestling match.

    Everything else depends on what your cat's coat is actually doing right now, so that's where we start.

    Quick Answer

    Groom a long-haired cat at home using a metal greyhound comb. Work in five-minute sessions, combing from the skin outward. Loose tangles comb out with a detangling spray.

    Tight mats and pelted patches need clippers with a #10 blade. Never use scissors near skin. Never bathe a matted coat, because water tightens mats against the skin.

    how to groom a long haired cat at home

    Image source: Bing (Web (fair-use with source credit))

    Why Long-Haired Cats Mat So Fast (And Why It's Not Your Fault)

    Cats grow hair differently from dogs. Each follicle is compound, meaning several hairs push out through a single pore. One thick guard hair, then a cluster of finer awn and down hairs around it.

    That soft down layer is the problem. It sheds continuously, but the shed hair doesn't fall to the floor. It stays trapped in the coat, tangled around the guard hairs above it.

    Add friction and you get a mat. Friction happens wherever the coat rubs against something: the armpits, the back of the thighs, behind the ears, under the collar, along the belly where the cat lies down.

    The top-coat trap

    Here's the part that catches almost everyone out. You can brush a long-haired cat every single day, admire how glossy it looks, and still find a solid felted plate underneath a month later.

    A slicker brush glides over the surface. It smooths the guard hairs beautifully. It often never touches the down layer where the matting actually forms.

    That's why professional groomers reach for a metal comb, not a brush, to check their work. A brush makes a coat look done. A comb tells you whether it is.

    The other reasons mats appear

    • Seasonal coat blow. Temperate climates trigger heavy moults in spring (roughly March to May) and again in autumn. Indoor cats under artificial light shed more evenly but never fully stop.
    • The cat's own tongue. Those barbed papillae pull loose hair backwards into the coat before swallowing it, which is also why long-haired cats bring up more hairballs.
    • Damp. A cat that goes outside in the rain, or one that was bathed and not dried all the way to the skin, will mat within hours.
    • Age and weight. A cat that can't twist round to reach its own hips will mat there first, every time. More on that later, because it's a health signal.
    • Skin oils. Persians and some Maine Coons produce a greasier coat that binds loose hair faster than a dry, silky coat does.

    None of this means you've been careless. It means long coats need a system, not just goodwill.

    The 60-Second Comb Test: Read Your Cat's Coat Before You Touch a Single Tool

    Before any brushing, dematting, bathing, or clipping, run one test. It takes under a minute and it decides everything that follows.

    Take a metal greyhound comb. Start at the shoulder. Push the teeth all the way down until they touch skin, then draw the comb outward through the coat.

    Repeat across the whole cat in this order: shoulders, back, sides, chest, belly, armpits, britches (the trousers of fur on the back legs), and finally the tail. Note every spot where the comb stalls.

    Where the comb glides, you're fine. Where it stops, you have a decision to make.

    The Four Coat Grades: Loose Tangle, Mat, Tight Mat, Pelt

    matted cat fur

    Image source: Bing (Web (fair-use with source credit))

    Grading the coat is the single most useful skill in home cat grooming. Get this right and the rest of the article is just following the branch you land on.

    GradeWhat it feels likeCan you lift it off the skin?Home action
    Loose tangleComb snags, then pulls through with light pressureYes, easilyComb out with detangler
    MatFirm knot, roughly pea to grape sizedYes, you can slide a finger underSplit and comb, or clip if stubborn
    Tight matHard, dense, close to the skin, often warmBarely, skin lifts with itClip out with a #10 blade
    PeltCoat has fused into a solid sheet or plateNo, the coat moves as one pieceFull clip, usually a professional or vet job

    The finger test is the honest one. Slide a finger flat between the mat and the skin. If your finger goes under with room to spare, you can work on it.

    If the skin comes up with the mat, put the scissors down and reach for clippers.

    Pelting is not a brushing problem. No amount of combing will save a pelted coat, and trying will hurt. The coat has to come off.

    What the Skin Underneath Is Telling You

    Part the coat around each mat and look at the skin. This is the step almost everyone skips, and it's where the real risk sits.

    Healthy skin under a mat is pale pink, dry, and unremarkable. That's your green light.

    Stop and call a vet if you see any of the following:

    • Red, inflamed, or angry-looking skin with the mat sitting tight against it
    • Moist, weeping, or sticky skin, which suggests moist dermatitis and secondary infection
    • Open sores, scabs, or a raw patch where the mat has been pulling
    • A bad smell, which almost always means infection under the coat
    • Anything moving. In warm weather, soiled and matted rear coats can attract flystrike, and maggots are a same-day emergency
    • Broken or crusty hairs with circular scaly patches, a possible sign of ringworm (a fungal infection caused by Microsporum canis) which is contagious to people

    Tight mats create constant traction on skin. Left long enough, they cause bruising and, in severe cases, pressure sores. If the skin is already damaged, dematting at home turns a grooming job into a wound.

    The Decision Tree: Comb It, Clip It, or Call the Vet

    Now put the comb test and the skin check together. This is your whole workflow in one place.

    If the comb glides everywhere, with only a few snags → Branch 1. Routine comb-out. You're in maintenance mode.

    If you find isolated mats you can slide a finger under, and the skin beneath is healthy → Branch 2. Careful dematting, mat by mat.

    If mats are tight to the skin, or you've tried a mat three times without progress → Branch 3. Clip them out with a #10 blade. No scissors.

    If the coat has pelted over a large area, or the cat won't tolerate the work → Book a professional cat groomer or your vet. Large pelts often need sedation to remove safely.

    If the skin is red, weeping, smelly, or broken anywhere → Vet first, grooming second. Don't work over damaged skin.

    If your cat is elderly, arthritic, obese, or newly matting when it never used to → Vet appointment. Sudden coat neglect is a medical sign, not a laziness problem.

    One more branch: bathing

    Bathing sits outside this tree for a reason. You only bathe a coat that has already passed the comb test cleanly, top to tail.

    Wetting a matted coat is one of the most common home-grooming mistakes we see reported. Water shrinks the mat, tightens it against the skin, and turns a workable knot into a clipper job. If the comb doesn't run free everywhere, the bath waits.

    Your Cat's Coat Type Changes Everything

    "Long-haired cat" covers wildly different coats. A Ragdoll and a Persian need almost opposite routines, and treating them the same is why so many owners lose the battle.

    Here's the quick version, then the detail.

    Coat typeBreedsMats whereComb frequency
    Cotton (dense, soft undercoat)Persian, Himalayan, Exotic LonghairEverywhere, fastDaily
    Silky (low undercoat)Ragdoll, Turkish Angora, Balinese, BirmanArmpits, britches, behind ears2 to 3 times weekly
    Heavy double coatMaine Coon, Norwegian Forest, SiberianBritches, belly, ruff, tail baseEvery 2 to 3 days
    Mixed / domestic longhairDLH moggiesVaries by individualWeekly minimum, check twice weekly

    Cotton Coats (Persian, Himalayan, Exotic Longhair)

    This is the highest-maintenance coat in the domestic cat world. The undercoat is enormous, soft, and cotton-textured, and it grabs shed hair like Velcro.

    Persian coats can reach 6 inches at the ruff. Skip three days and you'll find mats. Skip two weeks and you may be looking at a pelt.

    Plan for daily line brushing, plus a bath roughly every four to six weeks to manage skin oils. Flat-faced breeds also need the eye area wiped daily, because tear staining and porphyrin buildup sit right in the facial folds.

    Silky Coats (Ragdoll, Turkish Angora, Balinese, Birman)

    Good news here. These coats carry little to no undercoat, so they mat far less than their length suggests.

    A Ragdoll's coat is famously forgiving. It's the friction zones that catch people out: armpits, the back of the thighs, and the ruff around the neck.

    A pin brush with ball-tipped pins works well on these coats, followed by a comb check. Aim for two to three sessions a week and check the armpits every time.

    Heavy Double Coats (Maine Coon, Norwegian Forest, Siberian)

    These are working coats built for cold, wet climates. Coarse water-resistant guard hairs sit over a thick, insulating undercoat.

    They rarely mat over the shoulders. They mat in the britches, the belly, around the tail base, and inside the ruff, exactly where the cat's own grooming reaches least.

    An undercoat rake earns its keep here during the spring blow. The volume of hair that comes out in April surprises most first-time Maine Coon owners.

    Never shave a healthy double coat purely for summer comfort. That coat insulates against heat as well as cold, and clipped double coats can regrow patchy and slow.

    Domestic Longhairs and Mixed Coats

    Most long-haired cats in homes are mixed-breed. Their coat can behave like any of the three types above, sometimes in different zones of the same cat.

    Don't guess from breed. Run the comb test, find where your individual cat mats, and build the routine around those zones.

    Weekly is the floor for any long coat. If you're consistently finding tangles between sessions, move to every other day.

    The Tools That Actually Earn Their Place in Your Kit

    You need fewer things than the pet aisle suggests. As of 2026, a genuinely capable home kit runs about $60 to $150 in the US or £50 to £120 in the UK, before clippers.

    ToolWhat it doesRoughly
    Greyhound combDiagnoses and finishes the coat$12 to $40
    Soft-flex slicker brushLifts and separates the top coat$10 to $25
    Pin brush (ball-tipped)Daily work on silky coats$10 to $30
    Undercoat rakeSeasonal shedding on double coats$12 to $30
    Detangling sprayAdds slip before dematting$8 to $18
    Clippers with #10 bladeRemoves tight mats safely$120 to $300
    Nail clippers + styptic powderNails, plus stopping a quick bleed$15 to $30

    The Greyhound Comb: Your Diagnostic Tool, Not Just a Brush

    greyhound comb

    Image source: Bing (Web (fair-use with source credit))

    If you buy one thing, buy this. A greyhound comb is a straight stainless steel comb with two tooth spacings on the same head: a coarse half at roughly 6 teeth per inch and a fine half at around 10 to 12.

    Use the coarse end to work through the bulk of the coat. Use the fine end to check whether you've genuinely cleared the undercoat.

    The comb is honest in a way a brush never is. It either passes to the skin or it doesn't.

    Buy solid stainless steel with rounded tooth tips. Skip plastic combs entirely. They generate static, the teeth snap, and burred plastic drags on the coat.

    Slickers, Pin Brushes, Rakes and What Each One Is Really For

    Each tool has one job. Using the wrong one is how coats end up looking groomed while quietly felting underneath.

    • Slicker brush. Fine bent wire pins on a flat or curved pad. Good for lifting and separating a dense coat before you comb. Buy a cat-specific soft-flex version, and never work it over bare skin or a shaved patch, because slicker burn on thin feline skin is genuinely painful.
    • Pin brush. Widely spaced pins, ideally ball-tipped. Best for silky, low-undercoat coats where a slicker would be overkill.
    • Undercoat rake. A single or double row of long, rotating teeth. Reaches the down layer on double coats during a moult. Use lightly and follow with the comb.
    • Rubber curry or grooming glove. Barely a grooming tool, more a bonding one. Useful for cats that hate combs, as a first step in desensitisation.
    • Flea comb. Very fine teeth. Worth running through the tail base and neck monthly, because flea dirt shows up there first.
    • Mat splitter. A handle with one or two shielded blades that cuts a mat vertically into strips. Useful in trained hands. Riskier than clippers for beginners, and always used pointing away from the body.

    When You Need Clippers (And Which Blade to Buy)

    cat clippers

    Image source: Bing (Web (fair-use with source credit))

    You need clippers the moment a mat sits tight against the skin. Not scissors. Clippers.

    A #10 blade is the standard choice for feline mat removal. It cuts to roughly 1.5 to 2 mm, which is short enough to slide under a mat but long enough to leave a protective layer of coat.

    Here's how the common blades compare:

    BladeCut lengthUse on cats
    #40~0.25 mmSurgical prep only, not home grooming
    #30~0.5 mmToo close for body work, risks razor burn
    #15~1.2 mmOccasionally used on sanitary areas by pros
    #10~1.5 to 2 mmThe safe default for mats and sanitary trims
    #7F~3.2 mmComb cuts on a mat-free coat
    #5F~6.3 mmLonger pet trims, needs a clear coat

    Look for a quiet, low-vibration clipper. Standard dog clippers can run around 65 to 75 dB, which many cats find genuinely distressing. Cat-friendly models sit closer to 50 to 60 dB.

    Cordless matters more than you'd think, because a trailing cord is one more thing to spook a cat mid-session. Manufacturer specifications for popular lithium-ion pet clippers typically list 60 to 120 minutes of run time per charge, which is far more than any home session needs.

    Whatever you buy, learn one habit before you switch it on: check blade heat against your inner wrist every 30 to 60 seconds. Blades heat fast, and clipper burn is one of the most common home-grooming injuries reported to veterinary practices.

    Tools to Leave on the Shelf

    • Scissors of any kind near a mat. Feline skin is thin and elastic, and it tents up into the mat as you pull. Veterinary and feline welfare bodies, including International Cat Care, consistently warn against cutting mats out with scissors for exactly this reason.
    • Human shampoo, washing-up liquid, or medicated dandruff shampoos. Wrong pH, and some contain ingredients cats shouldn't absorb.
    • Dog flea treatments. Many contain permethrin, which is highly toxic to cats and can be fatal. The ASPCA Animal Poison Control Center lists it among the most serious feline poisoning risks.
    • Essential oils, including tea tree. Cats lack the liver enzymes to process many of these safely.
    • Stiff plastic brushes and cheap deshedding blades. They break coat, scratch skin, and do nothing for the undercoat.

    Branch 1: The Routine Comb-Out for a Mat-Free Coat

    This is where you want to live. A coat that passes the comb test needs maintenance, not rescue, and maintenance is quick once you have a rhythm.

    Set up first. A non-slip towel, decent overhead light, tools within reach, and a few high-value treats or a lickable puree tube.

    If your cat is anxious, spray a synthetic feline facial pheromone on the towel about 15 minutes before you start. Not on the cat. On the surface.

    Then set a timer. Five to ten minutes, and you stop when it goes off, even if you're not finished. Finishing tomorrow costs you nothing.

    A cat that learns grooming means being pinned will fight you for years.

    Line Brushing, Step by Step

    Line brushing is the technique that separates people who groom long coats successfully from people who fight them. It sounds fussy. It takes about the same time as normal brushing once you've done it a few times.

    The idea is simple. You work one thin horizontal layer of coat at a time, from the skin outward, so nothing gets missed underneath.

    1. Part the coat. Use your free hand to push the hair up, creating a clean horizontal line. You should see skin along the parting.
    2. Support the base. Hold the hair just above the parting with your fingers. This takes the pull off the follicles when the comb hits a snag.
    3. Comb the exposed layer. Work the coarse end of the greyhound comb outward from the skin, in short strokes.
    4. Drop the parting down about half an inch and repeat.
    5. Work up the body in these layers until the whole panel is done.
    6. Verify with the fine end. Run the fine teeth through the finished panel. If it passes cleanly to the skin, that section is genuinely done.

    The slicker brush, if you use one, comes before the comb on dense coats. It lifts and separates so the comb has less work to do. It never replaces the comb.

    Keep the pressure light. You're combing hair, not scrubbing a pan.

    The Working Order That Keeps Cats Calm

    Start where the cat likes being touched. Finish where it doesn't. That's the whole principle.

    Most cats tolerate handling in this rough order, from easiest to hardest:

    OrderZoneNotes
    1Shoulders and upper backAlmost every cat accepts this. Build confidence here.
    2Sides and flanksWatch for skin ripple, which means back off.
    3Chest and ruffLift the chin gently, comb downward.
    4Behind the earsSmall mats hide here constantly.
    5Britches and rearCommon mat zone, moderate tolerance.
    6TailComb toward the tip, never yank.
    7BellyLow tolerance. Short bursts only.
    8ArmpitsThe worst zone for most cats and the fastest to mat.

    Split this across sessions. There's no rule saying the whole cat has to be done in one sitting.

    A practical pattern that works well: shoulders and back on Monday, sides and chest on Tuesday, rear and tail on Wednesday, belly and armpits on Thursday. Four short sessions beat one long one, and your cat stops dreading the comb.

    Troubleshooting a stalled routine. If your cat leaves as soon as you pick up the comb, you've moved too fast at some point. Go back to a rubber grooming glove or just your hands for a week. Pair every session with food.

    Then reintroduce the comb for 30 seconds at a time.

    Branch 2: Removing Isolated Mats Without Cutting Skin

    You're in this branch if you found a handful of discrete mats, you can slide a finger between the mat and the skin, and the skin underneath looks normal. Anything else, skip ahead.

    Work one mat at a time. Don't try to clear four mats in a single session, because the cat's patience runs out long before your enthusiasm does.

    Here's the sequence:

    1. Spray a detangling product or leave-in conditioner directly onto the mat. Let it sit two to three minutes. The slip agent is doing real work here.
    2. Hold the base of the mat between thumb and forefinger, right where it meets the skin. This anchors it so every pull goes into your fingers, not the cat's follicles.
    3. Split it with your fingers first. Pull the mat apart vertically, into two or three smaller sections. Fingers before tools, always.
    4. Comb from the outer edge inward. Tiny bites. Work at the tip of the mat and pick away at it. Never drive the comb into the middle of the mat.
    5. Alternate directions. A few strokes from one side, a few from the other, teasing it loose.
    6. Stop the moment the cat objects. Growl, tail thump, skin ripple, ears back. Session over.

    A little cornstarch dusted into the mat can add extra slip on greasy Persian coats. Groomers use it constantly. It's cheap and harmless.

    The Three-Attempt Rule

    If a mat hasn't shifted after three genuine attempts, stop combing and clip it out. That's the rule, and it exists to protect skin.

    Each attempt means a proper session with detangler, finger-splitting, and patient combing. Not three angry tugs.

    Why three? Because every attempt after that is repeated traction on the same patch of skin. Mats pull.

    The skin underneath bruises and inflames, and by attempt five you're causing more damage than the mat was.

    Signs you've already passed the limit:

    • The cat flinches or vocalises when you touch that spot
    • The skin under the mat has gone pink or red since you started
    • The mat feels warm compared with the surrounding coat
    • Loose hair is coming out in visible quantity around the mat
    • You've been at the same mat for more than about five minutes

    Clipping isn't a failure. It's the correct tool for a mat that has gone past the combing stage.

    Why Scissors Cause Most Home-Grooming Injuries

    Scissors cause more home-grooming lacerations than any other tool, and the reason is anatomy. Feline skin is thin and unusually elastic, with loose connective tissue underneath.

    Picture what happens when you pull a mat away from the body to cut it. The mat doesn't lift on its own. It brings a tent of skin up with it, and that skin sits directly in the blade path.

    The armpit, groin, and flank are the worst offenders. The skin there is loosest, and those are exactly the places mats form.

    Veterinary practices routinely treat these wounds, and they're rarely small nicks. A tented fold cut through gives you a long, deep laceration in an area that's hard to bandage and prone to infection.

    If you take one thing from this article, take this: never put scissors between a mat and your cat's skin. Not ball-tipped ones, not "safety" ones, not carefully. Clippers slide flat against the skin and physically cannot close on a fold.

    Branch 3: What to Do With a Pelted Cat

    A pelted coat has fused into a solid sheet. Grab the coat gently and the whole thing moves as one piece, like a jacket over the cat rather than hair growing out of it.

    There is no combing solution here. Attempting one causes pain and skin damage, and it will not work.

    The coat has to come off. Your only real decision is who does it.

    Do it yourself if: the pelting is limited to one or two areas, you have clippers and a #10 blade, your cat tolerates the noise, and the skin underneath looks healthy.

    Book a professional cat groomer if: the pelting covers a large area such as the whole back end or most of the body, or your cat is stressed but still handleable.

    Book a vet if: your cat won't allow handling, is elderly or unwell, the skin underneath is damaged, or the pelt is so tight you can't get a blade beneath it safely. Sedation is a veterinary procedure only, and a sedated dematting typically runs $180 to $450 in the US or £150 to £350 in the UK as of 2026.

    Never attempt home sedation. There is no safe over-the-counter option, and human medications like antihistamines or sleep aids can be lethal to cats. If your vet thinks pre-visit medication would help, they can prescribe something appropriate, usually gabapentin or trazodone, given at home before the appointment.

    Clipping Flat and Safe with a #10 Blade

    The whole technique comes down to one rule. The blade stays flat and parallel to the skin, and the skin stays stretched tight.

    Here's how it works in practice:

    1. Find an entry point. Look for an area of loose, unmatted coat next to the pelt. That's where the blade goes in.
    2. Stretch the skin flat. Use your free hand to pull the skin taut in the area you're about to clip. Flat skin can't fold into the blade.
    3. Slide the blade underneath. Lie the flat face of the blade against the skin and push forward, under the mat, not into it.
    4. Work in short passes. Let the clipper do the cutting. If you're pushing hard, the blade is dull or the coat is too dense for that angle.
    5. Lift the freed section away and move to the next.
    6. Never lift or pinch a skin fold. If you can't get flat contact, you've found a spot for a professional.

    Watch the danger zones. The nipples (both males and females have them), the skin flaps in front of the back legs, the loose fold at the armpit, and the genital area. These are where blades catch.

    Once you've clipped a mat away, the skin underneath will often look pink, thin, and slightly damp. That's normal for freshly exposed skin. Leave it alone, keep the cat indoors and warm, and check it daily for a week.

    Expect a strange-looking cat afterwards. Patchy, uneven, a bit moth-eaten. Coat cosmetics don't matter.

    Comfortable skin does.

    Blade Heat, Clipper Burn, and the Wrist Check

    Clipper blades heat up fast, and a hot blade held against thin feline skin causes a burn in seconds. This is the most preventable injury in home clipping.

    The check takes two seconds. Press the blade flat against the inside of your wrist every 30 to 60 seconds of running time. If it's uncomfortable on you, it's worse on your cat.

    Three ways to manage heat:

    • Blade coolant spray. Quick blast, keeps going. The cheapest fix.
    • Rotate blades. Two identical #10 blades, swap when one heats up, let the other cool.
    • Take breaks. Which you should be doing anyway for the cat's sake.

    Oil the blade every 10 minutes of run time. A dry blade drags, heats faster, and pulls coat. Manufacturer documentation from clipper makers like Andis and Wahl all specify regular oiling during use, not just at the end.

    Dull blades are the other heat culprit. If the clipper is snagging and the coat is coming away in tufts rather than a clean cut, the blade needs sharpening. Most pet blades need professional sharpening every 6 to 12 months with regular use.

    What clipper burn looks like: a red, irritated stripe or patch that appears within hours of clipping. The cat licks or scratches at it constantly. Mild cases settle in a few days.

    If it blisters, weeps, or the cat won't leave it alone, call your vet.

    Branch 4: Bathing, Only After the Coat Is Clear

    Baths come last for a reason. You've read it already, but it bears one more line: never bathe a matted cat, because water shrinks mats tight against the skin.

    Run the comb test one final time before the taps go on. Every zone, to the skin, no stalls.

    Most long-haired cats don't need frequent bathing. Here's the realistic schedule:

    Coat / situationBath frequency
    Persian, Himalayan (oily coat)Every 4 to 6 weeks
    Maine Coon, Norwegian ForestEvery 2 to 4 months, or when greasy
    Ragdoll, Turkish Angora, silky coatsOnly when actually dirty
    Outdoor cat with soilingAs needed
    Senior with rear-end soilingSpot washes, not full baths

    If your cat panics at water, a waterless foam shampoo or a damp microfibre cloth wipe-down handles most light grime. A terrified cat in a bath is not worth the clean coat.

    Water Temperature, Shampoo Choice, and the Rinse Rule

    Water should sit between 37 and 39°C, which is 99 to 102°F. That's roughly a cat's own body temperature. Anything hotter feels scalding to them, and cold water triggers panic.

    Use a sink or a shallow basin rather than a full bath. Put a rubber mat or a folded towel in the bottom so the cat has grip. Fill to about the height of the cat's knees, no deeper.

    Shampoo rules, short version:

    • Cat-formulated only. Feline skin pH differs from human skin, and human shampoo strips the barrier.
    • Degreasing shampoo first on greasy Persian coats or stud tail, then a regular shampoo after.
    • Medicated shampoos (chlorhexidine, miconazole) only on veterinary advice.
    • Never use dandruff shampoo, washing-up liquid, or anything containing tea tree oil.

    Then the rinse rule, which matters more than the shampoo choice. Rinse until the water runs completely clear, then rinse again.

    Shampoo residue left in a thick undercoat causes itching, flaking, and dermatitis. It also makes the coat sticky, which grabs shed hair and starts the matting cycle over. Aggregate feedback from professional groomers consistently points to under-rinsing as the most common home bathing error.

    Keep water out of the ears. A cotton ball in each ear canal works, or just angle the head so water runs backward. Never spray directly at the face.

    Drying to the Skin (Or You'll Be Back to Square One)

    A damp undercoat re-mats within hours. This is the step that decides whether the bath helped or hurt.

    Start with towels. Blot and squeeze, never rub, because rubbing a long coat is a fast route to tangles. Get through two or three towels before you reach for heat.

    Then dry with air and comb at the same time. A stand dryer or a pet dryer on low, ambient or barely warm air, held about a foot away. Comb the section you're drying so the airflow reaches the skin.

    High-velocity dryers blast water out of the coat quickly, but they're loud. Manufacturer specs put most HV pet dryers between 1 and 4 horsepower, and many cats find that terrifying. If you use one, introduce it slowly and never point it at the head.

    If your cat won't tolerate a dryer: keep the bath to a minimum, towel thoroughly, then put the cat in a warm, draught-free room and comb repeatedly as it air dries. Check the roots. If the base of the coat is still damp after an hour, keep combing.

    Watch for chilling, especially in kittens, thin cats, and seniors. Normal feline body temperature is 38.1 to 39.2°C (100.5 to 102.5°F). A wet cat loses heat fast, and shivering means you need to warm the room and speed up the drying.

    Sanitary Trims, Paw Pads, Nails and Ears

    These small jobs prevent most of the big problems. A five-minute tidy-up every few weeks saves you an emergency clip later.

    What is a sanitary trim on a cat?

    A sanitary trim is a short clip of the coat immediately around the anus and genitals. It stops faeces from catching in long fur, which is a genuine welfare issue in Persians, Maine Coons, and any cat with a heavy rear coat.

    Use clippers with a #10 blade. Clip a rough oval, roughly two to three finger-widths around the anus, and a small strip in front of the genitals.

    Hold the tail up and out of the way. Stretch the skin flat with your free hand, exactly as you would for mat removal. Go slowly, because this is the most sensitive skin on the cat.

    Trim the britches shorter too if your cat regularly gets soiling on the back of the legs. A "poopy pants" trim is standard in professional cat grooming for good reason.

    Paw pad tufts

    Long fur growing between the toe pads makes floors slippery. Older cats especially lose confidence on laminate and tile because of it.

    Trim the tufts level with the pads, no shorter. Curved shears with rounded tips work, or clippers with a #10 if the cat holds still. Never dig between the pads.

    Nail trimming without a fight

    Trim every 2 to 4 weeks. Long-haired breeds often have hairy toes that hide overgrown claws until they're hooking into the pad.

    • Press the toe pad gently to extend the claw.
    • Find the quick, the pink triangle inside the nail containing blood vessel and nerve.
    • Cut 2 to 3 mm clear of it, taking only the sharp hook.
    • Do one paw per session if that's all your cat allows.
    • Keep styptic powder within reach. If you nick the quick, press the powder against the nail for 30 seconds.

    Older cats need checking more often, because reduced scratching means the outer nail sheaths don't shed properly. Ingrown claws are common in cats over 12 and they're painful.

    Declawing is not a grooming option. It's illegal in the UK under the Animal Welfare Act 2006, and banned across New York, Maryland, Virginia, Washington and a growing list of US municipalities. It's an amputation, not a nail trim.

    Ears and eyes

    Check the ears at every session, but clean them rarely. Healthy cat ears are pale pink and mostly clean, and they self-maintain.

    Wipe only the visible outer ear with a cat-safe ear cleaner on cotton wool. Never push anything into the canal.

    Dark, crumbly, coffee-ground debris usually means ear mites (Otodectes cynotis), and that needs a vet, not a wipe. Same for a strong smell, redness, or head shaking.

    Flat-faced breeds need daily eye care. Tear staining builds up in the facial folds, and left alone it causes skin irritation and a persistent damp smell. Wipe with a damp cotton pad, one pad per eye, wiping outward from the corner.

    Reading Your Cat: Stopping Before the Session Goes Wrong

    Cats warn you long before they bite. The trouble is the warnings are small, and most people miss the first three.

    Learn the escalation ladder and you'll stop having bad sessions. Not fewer bad sessions. Basically none.

    Here's what to watch, in the order it usually appears:

    SignalWhat it meansYour move
    Tail tip twitchingMild irritation buildingChange zone, keep going
    Skin rippling along the backOverstimulationPause, stroke, restart in 30 seconds
    Ears rotating sideways or flatteningReal discomfortStop that zone entirely
    Head turning toward your handWarning shotStop and reward
    Pupils widening, whiskers forwardArousal spikeEnd the session now
    Growl, hiss, tail thumpLast warningSession is over
    Swipe or biteYou missed everything aboveWalk away, no punishment

    The mistake almost everyone makes is pushing through the middle rungs. You're nearly done with the britches, the cat's ears go back, and you think one more minute.

    That one minute costs you weeks of trust. Cats generalise badly from bad experiences, and a single painful session can make a cat comb-shy for months.

    Cooperative Care and the Five-Minute Session

    Cooperative care means the cat gets a say. It sounds soft. It's actually the most efficient approach available, because a cat that isn't fighting you gets groomed twice as fast.

    The core idea comes from the same behavioural principles the American Association of Feline Practitioners promotes in its feline-friendly handling guidance: reduce restraint, work with the cat's tolerance, stop before the threshold rather than after.

    How it works in practice:

    • Let the cat choose the spot. Groom where it already settles, not where it's convenient for you.
    • Start with a consent test. Touch the comb to the shoulder. If the cat stays, continue. If it moves away, that's your answer.
    • Pair every session with food. A lickable treat tube held in the free hand turns grooming into a food event.
    • Stop early, always. End while the cat is still relaxed, not when it's had enough.
    • Never chase. If the cat leaves, the session is done. Chasing teaches it that leaving doesn't work, which removes its only calm option.

    The five-minute session isn't a compromise. It's the actual technique. Six short sessions a week beat one 40-minute struggle in every measurable way: coat condition, cat stress, and your own scratched forearms.

    Kittens are worth investing in early. The primary socialisation window sits roughly between 3 and 9 weeks, though continued gentle handling keeps paying off well past that. A Persian kitten combed daily from 8 weeks old grows into a cat that falls asleep on the grooming towel.

    Towel Wraps, Restraint, and Why Scruffing Backfires

    Scruffing is out. Grabbing the loose skin at the back of the neck was standard advice for decades, and current feline welfare guidance has moved firmly away from it.

    Adult cats don't respond to scruffing the way kittens do. In adults it removes control, spikes stress, and creates a cat that fights harder next time. It also puts real strain on the neck in older or arthritic cats.

    The towel wrap is the safer alternative for necessary jobs like nail trims or a small mat near a sensitive area.

    1. Lay a large towel flat.
    2. Place the cat in the middle, facing away from you.
    3. Fold one side over the body and tuck it under.
    4. Fold the other side across and tuck.
    5. Leave out only the part you need to work on.

    Snug, not tight. The cat should be able to breathe easily and shift position. If it's panicking inside the towel, unwrap it and stop.

    A few other restraint notes worth knowing:

    • Two people beats one for anything fiddly. One handles and rewards, one grooms.
    • Grooming loops on tables are for dogs. Never leave a cat unattended in one, and many cat groomers skip them entirely.
    • Flat-faced breeds (Persian, Himalayan, Exotic) can struggle to breathe under pressure. Never press on the chest or hold the head down.
    • Elizabethan collars are occasionally used by professionals for bite-risk cats. That's a signal you're past home territory.

    If your cat needs heavy restraint for routine grooming, the answer isn't a better hold. It's a professional, or a vet-supervised plan.

    Mistakes That Turn a Groom Into a Vet Visit

    Some errors cost you a wasted afternoon. These ones cost money and hurt your cat.

    Cutting a mat with scissors. Already covered, and still the number one home-grooming injury. The wound is usually long, deep, and in a spot that's awkward to close.

    Bathing before dematting. Water shrinks mats. A cat with three workable knots goes into the sink and comes out needing a full clip.

    Brushing the top coat only. The coat looks immaculate for months while the undercoat felts underneath. You find out when the comb suddenly won't go through anything.

    Using a slicker on skin. Slicker burn is a real, painful abrasion. Never work a slicker over a clipped patch, a bald spot, or where you've just removed a mat.

    Applying dog flea treatment. Permethrin-based spot-ons are widely sold for dogs and are highly toxic to cats. Tremors and seizures can start within hours. This is an emergency vet call, not a wait-and-see.

    Essential oils on the coat. Tea tree, pennyroyal, citrus, wintergreen, and pine oil are all documented feline toxins. Cats lack the liver enzymes to process them, and they groom everything off their own fur.

    Clipping too short. A #30 or #40 blade on the body leaves almost nothing between blade and skin. Razor burn, folliculitis, and slow patchy regrowth all follow.

    Leaving the coat damp. A wet undercoat re-felts within hours. Half-dried cats are one of the most common causes of sudden overnight matting.

    Pulling mats out by hand. Tearing a mat free rips hair from the follicle. It's genuinely painful and it teaches the cat that grooming means being hurt.

    One long session instead of several short ones. The single biggest behavioural mistake. It's how owners create cats that hide when the comb appears.

    Grooming over damaged skin. If it's red, weeping, scabbed, or smells, the vet goes first. Combing an infected patch spreads bacteria and makes it worse.

    Sharing tools between cats without cleaning. Ringworm spores survive on brushes and clipper blades for a long time. In a multi-cat house, disinfect between animals.

    What This Costs at Home vs a Professional Groomer

    Home grooming pays for itself quickly, but the honest comparison depends on your cat's coat and your own tolerance for the job.

    Here's what the numbers look like as of 2026:

    ItemUSUK
    Basic home kit (comb, slicker, detangler, nail clippers)$60 to $150£50 to £120
    Quality cat clipper with #10 blade$120 to $300£100 to £250
    Blade sharpening (per blade, annual)$8 to $15£8 to £15
    Professional cat groom (full service)$60 to $130£40 to £85
    Lion cut$75 to $160£55 to £110
    Dematting surcharge$10 to $30 per 15 min£8 to £25 per 15 min
    Mobile cat groomer premium+$20 to $40+£15 to £30
    Veterinary sedated dematting$180 to $450£150 to £350

    Run the maths for a Persian. Professional grooming every six weeks at $95 works out to roughly $820 a year. A full home kit with clippers costs $250 to $400 once, then almost nothing.

    But that's not the whole picture. The real value of home grooming isn't the money. It's catching problems at the tangle stage instead of the pelt stage.

    Who should still use a professional?

    Use a professional groomer if your cat is severely matted, aggressive during handling, or if you simply can't get the routine to stick. There's no shame in it, and a stressed owner makes a stressed cat.

    Look for a cat-only groomer if you can find one. Cat-only salons are far more common in North America than the UK, where most groomers handle dogs and cats in the same space. A dog-free environment makes a genuine difference to feline stress levels.

    Questions worth asking a groomer before you book:

    • Do you handle cats separately from dogs?
    • Are you Fear Free certified, or trained through the National Cat Groomers Institute of America or a similar body?
    • What's your policy if my cat becomes distressed mid-groom?
    • Do you use sedation-free handling only?

    A good hybrid approach: professional grooming every 8 to 12 weeks for the heavy work, home comb-outs in between. That's what most Persian and Maine Coon owners settle into, and it keeps costs to roughly $300 to $500 a year.

    Safety Red Lines: Products, Restraint, and Zoonotic Risk

    A few things are simply not negotiable. These are the lines that turn a grooming session into a veterinary emergency or a trip to your own doctor.

    Products that must never touch your cat

    ProductWhy it's dangerous
    Dog flea treatments with permethrinPotentially fatal feline toxicity. Tremors, seizures.
    Tea tree, pennyroyal, citrus, pine, wintergreen oilsCats can't metabolise these. Liver damage and neurological signs.
    Human shampoo, dandruff shampooWrong pH, plus zinc pyrithione and coal tar are unsafe for cats.
    Washing-up liquidStrips the skin barrier, causes dermatitis.
    Human medication for sedationNo safe home option. Many are lethal to cats.
    Alcohol-based wipes near skinAbsorbed and irritant.

    The ASPCA Animal Poison Control Center maintains detailed toxicity information on all of these. If a cat has been exposed, call your vet immediately rather than waiting for symptoms.

    Restraint red lines

    • Never press on a cat's chest, especially in flat-faced breeds.
    • Never hold a cat down by the neck or head.
    • Never scruff an adult cat as a routine handling method.
    • Never continue a session when the cat is panting, drooling, or vocalising in distress.
    • Never leave a cat unattended in a grooming loop, harness, or restraint.

    Panting in a cat is not the same as in a dog. It signals serious stress or a respiratory problem, and it means stop immediately.

    Zoonotic risks worth knowing

    Ringworm (dermatophytosis) transfers from cats to humans easily, and grooming tools spread it. Circular scaly patches, broken hairs, and crusty skin are the classic signs. If you suspect it, see the vet, isolate the cat, and disinfect every tool with an appropriate product before it touches another animal.

    Cat bites are the bigger risk to you. Feline teeth are narrow and sharp, so they inject bacteria deep and the wound seals over fast. Pasteurella multocida infections from cat bites can escalate within 12 to 24 hours.

    Any cat bite that punctures the skin, particularly on the hand, needs medical attention the same day. The Centers for Disease Control and Prevention treats cat bite infections as a genuine medical concern, not a scratch to shrug off.

    Wash any scratch or bite immediately with soap and running water. Cat scratch disease, caused by Bartonella henselae, is another reason to take even minor scratches seriously if you're immunocompromised.

    Legal points

    Severe untreated matting isn't just a grooming failure. Under the UK Animal Welfare Act 2006, allowing a cat to suffer through neglected coat care can constitute unnecessary suffering, and welfare charities do act on it.

    If you groom cats commercially in England, the Animal Welfare (Licensing of Activities Involving Animals) Regulations 2018 may apply to your setup. For home grooming your own cat, they don't.

    When Sudden Matting Is a Health Signal, Not a Grooming Problem

    This is the branch most owners never consider, and it's the one that matters most.

    A cat that has always kept itself tidy and suddenly starts matting is telling you something. Healthy cats spend a large share of their waking hours grooming. When that stops, there's usually a reason.

    The pattern is the giveaway. Look at where the mats appear.

    Mat location as a diagnostic clue

    Where mats appearLikely cause
    Hips, lower back, base of tailCan't twist round. Arthritis, obesity, or spinal pain.
    Rear end and britches onlyReduced flexibility, or diarrhoea causing soiling.
    Whole coat, dull and greasySystemic illness. Reduced grooming overall.
    One localised patchPain in that area, or a skin lesion underneath.

    The lower back and hips are the classic arthritis signature. A cat needs to curl and reach to groom back there. Degenerative joint disease is far more common in older cats than most owners realise, and coat neglect is often the first visible sign.

    Other health flags to raise with your vet

    • Sudden weight gain. An obese cat physically cannot reach its own back end. Body condition score is worth checking at every groom.
    • Weight loss with a scruffy coat. Hyperthyroidism and chronic kidney disease both show up this way in older cats.
    • Excessive drinking plus a poor coat. Possible diabetes or kidney disease.
    • Bad breath and reduced grooming. Dental pain stops cats from using their mouths for grooming.
    • Over-grooming in one spot. Bald patches from licking suggest pain, allergy, fleas, or psychogenic alopecia. That's the opposite problem and it also needs investigating.
    • Frequent hairballs. More than one or two a month is worth mentioning, because trichobezoars occasionally cause genuine GI obstruction.

    What to do if you spot the pattern

    Book the vet before you book the groomer. Clipping the mats out helps the cat's comfort, but it doesn't fix the reason they appeared.

    Take specific information with you. When the matting started, where it is, whether the cat is jumping less, whether it's using higher perches, and any change in litter tray habits.

    Practical support while you wait for the appointment:

    • Groom the areas the cat can no longer reach, daily if tolerated.
    • Raise food and water bowls slightly for arthritic cats.
    • Provide a low-sided litter tray with a step.
    • Keep the sanitary area trimmed short to prevent soiling.
    • Ask your vet about omega-3 (EPA and DHA) supplementation for skin and joint support.

    An older cat with a neglected coat isn't being lazy. It's usually in pain, and grooming for it is one of the kindest things you can do while the underlying problem gets treated.

    Seasonal Coat Blows and Your Year-Round Maintenance Rhythm

    Long coats aren't static. They thicken, thin out, and dump undercoat on a schedule driven mostly by daylight, not temperature.

    Two heavy moults a year is the norm in temperate climates. Spring runs roughly March to May, autumn roughly September to November. Cats in the UK, northern US, Canada, and northern Europe show this most sharply.

    Indoor cats blur the pattern. Constant artificial light and central heating flatten the peaks, so they shed moderately all year instead. That's easier on your carpets but harder to plan around.

    The spring blow

    This is the one that catches Maine Coon, Norwegian Forest, and Siberian owners off guard. These are cold-climate coats built for Scandinavian winters, and the undercoat comes out in genuinely startling volume.

    Step up during a blow:

    • Move from every 2 to 3 days to daily combing.
    • Bring in the undercoat rake for the britches, belly, and ruff.
    • Add a carding pass to strip loose down after the rake.
    • Check friction zones twice as often, because shed undercoat mats fastest.

    Miss two weeks in April with a Maine Coon and you'll find felted plates behind the elbows. It happens that fast.

    Your year-round calendar

    PeriodFocusFrequency
    Spring (Mar to May)Undercoat removal, rake and cardDaily
    SummerSanitary trims, flystrike checks on outdoor catsEvery 2 to 3 days
    Autumn (Sep to Nov)Second blow, undercoat againDaily
    WinterStatic, dander, dry skin, thicker coatEvery 2 to 3 days

    Humid summers speed up mat formation and raise the flystrike risk on soiled rear coats. If your cat goes outdoors, check the britches and tail base every single day in warm weather.

    Winter brings the opposite problem. Dry heated air makes coats brittle and static-prone. A light mist of leave-in conditioner on the comb reduces static and stops hair snapping.

    The maintenance floor

    Whatever the season, these are the minimums that keep a long coat out of trouble:

    • Persian, Himalayan, Exotic Longhair: daily, no exceptions
    • Maine Coon, Norwegian Forest, Siberian: every 2 to 3 days
    • Ragdoll, Birman, Turkish Angora, Balinese: 2 to 3 times weekly
    • Domestic longhair: weekly minimum, twice weekly if you find tangles

    Add a monthly flea comb pass through the tail base and neck. Flea dirt shows up there before you ever see a live flea.

    Nail check every 2 to 4 weeks. Ear glance at every session. Full-body comb test once a week, even on a coat you think is fine.

    Cleaning and Maintaining Your Grooming Tools

    Neglected tools do worse work and, in a multi-cat home, spread disease. Ten minutes a month keeps everything sharp and safe.

    Combs and brushes

    Pull the trapped hair out after every session. It sounds obvious. Most people don't do it, and packed hair stops a slicker from reaching the coat at all.

    Wash combs and brushes weekly in warm water with a mild detergent. Rinse well, dry completely, and don't leave metal sitting wet.

    Check the physical condition monthly:

    • Comb teeth: run a fingernail down them. Any burr, bend, or roughness drags on coat. Replace it.
    • Slicker pins: bent pins scratch skin. Missing pins expose the hard backing plate. Replace the brush, don't try to fix it.
    • Pin brush tips: if the protective balls have come off, the bare wire ends will scratch. Same rule, replace it.
    • Rake teeth: these should rotate freely. Seized teeth pull hair.

    Cheap tools fail here. A $12 stainless greyhound comb outlasts three plastic ones and won't burr.

    Clippers and blades

    Blades need three things: oil, cleaning, and periodic sharpening.

    Oil every 10 minutes of run time. Three or four drops along the cutting teeth with the clipper running. Wipe off the excess. A dry blade drags, heats fast, and pulls coat.

    Clean after every use. Brush out the hair, then use a proper blade wash to lift grease and debris. Dry thoroughly and re-oil before storing.

    Sharpen every 6 to 12 months with regular use. A blade that snags, leaves tracks, or heats unusually fast is telling you it's blunt. Professional sharpening typically runs $8 to $15 per blade.

    Store blades dry, in a case or on a magnetic strip, never loose in a drawer where the teeth chip.

    Disinfecting between cats

    This matters more than most owners realise. Ringworm spores survive on brushes, combs, and clipper blades for months.

    If you have more than one cat, or you've groomed a rescue with unknown history:

    1. Remove all hair mechanically first. Disinfectant doesn't work through hair.
    2. Wash tools with detergent and hot water.
    3. Apply an appropriate veterinary disinfectant, following the contact time on the label.
    4. Rinse, dry fully, and re-oil metal.

    Diluted household bleach is effective against ringworm spores but corrodes clipper blades. Use a blade-safe product for clippers and save bleach for plastic-handled tools you don't mind degrading.

    If a cat has been diagnosed with ringworm or fleas, quarantine its tools completely until treatment finishes.

    Real Scenarios: Four Cats, Four Different Answers

    The same coat problem gets four different answers depending on the cat in front of you. Here's how the decision tree plays out in practice.

    Scenario 1: The Persian kitten, 5 months old, no mats yet

    Situation: Coat is soft, dense, and currently clear. Owner has never groomed a cat.

    Branch: Routine comb-out, plus behavioural investment.

    Plan: Five minutes daily, every day, starting with the shoulders. Pair with a lickable treat every time. Introduce the comb, then the slicker, then the sound of clippers (switched on, not used) over about three weeks.

    Why it matters: This is the cheapest grooming intervention available. A Persian conditioned at five months rarely becomes a matting problem at five years. Skip this window and you're looking at professional grooms every six weeks for 15 years.

    Scenario 2: The Maine Coon in April with britches mats

    Situation: Four firm mats behind the back legs, comb glides everywhere else. Skin underneath looks pink and normal. Cat is calm but wriggly.

    Branch: Dematting, one mat per session, plus a seasonal frequency increase.

    Plan: Detangler on mat one, three minutes dwell, split with fingers, comb from the outside in. Stop after that mat regardless of progress. Repeat tomorrow with mat two.

    Apply the three-attempt rule to each.

    Alongside it: Undercoat rake through the whole coat daily until the blow finishes, usually four to six weeks.

    Outcome to expect: Four mats cleared over four to six short sessions. Total handling time under 30 minutes across a week.

    Scenario 3: The rescue domestic longhair, pelted over the back and rear

    Situation: Coat moves as one plate. Can't get a finger under it anywhere. Unknown history, wary of handling.

    Branch: Straight to professional or veterinary.

    Why not home: Large-area pelting needs a full clip. A cat that's wary of handling won't tolerate 30 to 45 minutes of clipper work, and the risk of catching skin under a tight pelt is high.

    What to expect: A lion cut or full shave-down, probably $75 to $160 or £55 to £110. If the cat won't tolerate handling, a vet-supervised sedated groom at $180 to $450 or £150 to £350.

    Afterwards: Skin will look pink and thin. Keep the cat indoors and warm. Then start daily five-minute sessions on the short coat, building tolerance while the coat regrows over three to six months.

    Scenario 4: The 14-year-old Ragdoll, newly matting over the hips

    Situation: Never matted before. Now has tangles across the lower back and hips. Jumping onto the sofa less.

    Slightly overweight.

    Branch: Vet first, grooming second.

    Why: The location is the diagnostic clue. Hips and lower back are exactly where a cat can no longer reach when the spine and hips hurt. Degenerative joint disease in senior cats is common and treatable.

    Plan: Book the vet, and take notes on when the matting started and what movement has changed. In the meantime, comb the hips and lower back daily, keep the sanitary area trimmed, and add a step to the litter tray.

    The real fix: Pain management. Once that's in place, some cats resume grooming themselves. Others won't, and you take over that zone permanently.

    Either way, the mats were a symptom.

    Frequently Asked Questions

    How often should you groom a long-haired cat?

    Daily for Persians, Himalayans, and Exotic Longhairs. Every two to three days for Maine Coons, Norwegian Forest Cats, and Siberians. Two to three times weekly for silky coats like Ragdolls and Turkish Angoras.

    Weekly is the absolute minimum for any long coat. Increase to daily during spring and autumn moults.

    Can you cut mats out of a cat's fur with scissors?

    No. Feline skin is thin and elastic, and it tents up into the blade when you lift a mat. This causes long, deep lacerations, most often in the armpit, groin, and flank.

    Use clippers with a #10 blade instead, held flat against stretched skin. Clippers physically cannot close on a skin fold.

    What is the best brush for a long-haired cat?

    A stainless steel greyhound comb, with coarse teeth on one half and fine teeth on the other. It's the only tool that reliably tells you whether the undercoat is clear. A soft-flex slicker brush helps lift dense coats first, and a pin brush suits silky low-undercoat breeds.

    The comb always does the final check.

    Should I shave my long-haired cat in summer?

    Usually not. Double coats on Maine Coons, Norwegian Forest Cats, and Siberians insulate against heat as well as cold, and clipped double coats can regrow patchy and slowly. Shave only when the coat is severely matted or pelted, or when a vet advises it.

    Regular combing manages summer comfort far better.

    How do I groom a cat that hates being brushed?

    Go backwards before you go forwards. Drop the comb for a week and use a rubber grooming glove or just your hands, paired with food every session. Then reintroduce the comb for 30 seconds at a time.

    Keep sessions to five minutes, stop before the cat objects, and never chase a cat that walks away.

    Why does my cat mat even though I brush it every day?

    Because a brush glides over the surface without reaching the undercoat where matting forms. Slickers smooth guard hairs beautifully and often never touch the down layer beneath. Switch to line brushing, working one thin horizontal layer at a time from the skin outward.

    Then verify with the fine end of a greyhound comb.

    Your Grooming Decision Guide at a Glance

    Everything in one place. Run the comb test, find your row, follow the action.

    What you findWhat it meansDo this
    Comb glides to skin everywhereCoat is clearRoutine line brushing, 5 minutes daily or per breed schedule
    Occasional snags, comb pulls throughLoose tanglesDetangler, comb from the outer edge inward
    Firm knots, finger slides underneathMatsOne mat per session, three-attempt rule, then clip
    Hard mats tight to skin, warm to touchTight matsClip out with #10 blade, flat against stretched skin
    Coat moves as a single sheetPeltedProfessional groomer or vet. Do not comb
    Skin red, weeping, smelly, or brokenInfection or woundVet first, grooming after
    New matting over hips and lower backPossible arthritis or obesityVet appointment, plus daily combing of that zone
    Cat growls, hisses, or bites during groomingPast its thresholdStop. Rebuild tolerance, or book a cat-only groomer
    Cat won't tolerate handling at allBeyond home groomingVet-supervised groom, possibly with sedation

    Three rules carry most of the weight. Comb before you brush, clip before you cut, and stop before your cat asks you to.

  • Beginner’s Guide to How to Dry a Cat After a Bath

    Beginner’s Guide to How to Dry a Cat After a Bath

    Getting the bath over with is the easy part. Knowing how to dry a cat after a bath is where most owners get it wrong, and it's the stage that decides whether your cat ends up warm and fluffy or shivering under the bed with a matted undercoat. A wet cat isn't just inconvenient.

    A wet cat is a cat losing body heat fast.

    Here's the number that matters most. A healthy cat runs at 38.1 to 39.2 °C (100.5 to 102.5 °F), and hypothermia starts below roughly 37.2 °C (99 °F). Soaked fur strips out the insulating air layer that keeps that temperature stable, so the clock starts ticking the moment your cat leaves the water.

    Which is exactly why the drying method you pick matters more than the shampoo you used.

    how to dry a cat after a bath

    Image source: Pexels / Karin Chantanaprayura (Pexels License)

    Quick Answer

    Dry a cat after a bath by blotting, not rubbing. Press a microfibre towel firmly against each section for 10 to 15 seconds. Swap to a fresh dry towel once the first one saturates.

    Keep the room at 24 to 27 °C (75 to 80 °F) with no drafts. Use a no-heat pet dryer only if your cat tolerates noise. Never use a human hairdryer on a cat.

    Why a Wet Cat Is a Bigger Problem Than a Dirty One

    A dry cat with a bit of grubby fur is fine for another day. A wet cat is on a countdown.

    Cats lose heat quickly relative to their size because of a high surface-area-to-body-mass ratio. Their coat works by trapping a warm layer of air against the skin. Water collapses that layer completely.

    Evaporation then pulls even more heat out, the same reason you feel cold stepping out of a shower into a breeze.

    There's a second problem nobody warns you about. Long and semi-long coats that dry on their own almost always dry badly. The hairs set in whatever tangled position they landed in, then felt together into mats behind the ears, in the armpits, at the tail base, and along the trouser fur on the back legs.

    Once a mat sets, brushing it out hurts, and plenty of those cats end up needing a groomer's clippers.

    Then there's the ears, the belly, and the mood. Water that sits in the outer ear canal creates a warm, damp pocket that can tip into otitis externa. A damp cat that bolts under the bed sulks for hours and files the whole experience under "bathroom equals terror," which makes the next bath twice as hard.

    The mistake almost everyone makes: you towel the back and sides, the topcoat feels dry to the hand, and you let the cat go. Underneath, the down hair is still holding water. On a dense double coat, that hidden layer can stay wet for four to eight hours.

    What Happens Under That Coat When a Cat Gets Soaked

    Understanding coat structure is what separates a proper dry from a surface wipe. Cat fur isn't one type of hair. It's three, and they behave completely differently when wet.

    Topcoat vs. Undercoat: Why "Feels Dry" Lies to You

    The topcoat is made of guard hairs. These are the long, coarse, slightly oily hairs you see and stroke. They're semi water-repellent thanks to sebum, they shed water quickly, and they dry first.

    Beneath them sit awn hairs, which are shorter and finer.

    Under both of those is the down hair, the soft crimped undercoat. This layer behaves like a sponge. It has no meaningful oil coating and the fibres are fine and densely packed, so water wicks straight in and stays put.

    On a Maine Coon, Siberian, or British Shorthair, the undercoat holds most of the water in the coat.

    So here's the test that tells you the truth. Part the coat with your fingers, right down to the skin, on the flank and behind the shoulder blade. Press the back of your hand against the skin.

    • Skin feels dry and warm: you're genuinely done
    • Skin feels cool or damp, or the hair root feels slick: you're not close
    • Hair springs apart into fluffy sections when parted: dry
    • Hair stays clumped in a parting line: still wet

    Do this check in three places minimum. The chest, the belly, and the base of the tail are the last areas to dry and the first ones people skip.

    How Fast Cats Lose Body Heat

    Faster than you'd guess, and much faster in some cats than others. Post-bath chilling isn't a rare freak event. It's the single most common thing that goes wrong at home.

    Cat profileChill riskWhy
    Kitten under 4 weeksVery highCan't thermoregulate independently at all
    Kitten 4 to 12 weeksHighTiny body mass, minimal fat reserves
    Healthy adult, short coatLow to moderateDries fastest, good reserves
    Healthy adult, dense double coatModerateUndercoat holds water for hours
    Senior 11+ yearsHighReduced muscle mass, slower thermoregulation
    Thin, ill, or post-surgicalHighLittle insulation, compromised reserves
    Sphynx and hairless breedsHighNo coat, higher resting heat loss

    Watch for these signs during and after drying. Shivering is the obvious one, but it's not the first. Before that you'll usually see the cat curl into a tight ball with the tail wrapped over the paws, ear tips and paw pads going cool to the touch, and a general flatness or reluctance to move.

    If shivering doesn't stop within a few minutes in a warm room, or your cat turns lethargic, call your vet. The Cornell Feline Health Center is a solid, non-commercial reference for feline health basics.

    Hidden chill sources people forget: air conditioning, ceiling fans, a cracked window, an extractor fan left running, and cold tile or stone flooring. A cat lying belly-down on cold tile with a damp undercoat is losing heat through direct contact, not just evaporation. Turn the AC off before the bath, not after.

    The 6 Things That Change Your Drying Method

    There's no single correct way to dry a cat. Anyone who gives you one flat set of steps is ignoring the six variables that decide the answer. Run through these before you fill the sink.

    Coat Type

    This is the biggest branch by far. A Domestic Shorthair and a Persian are not the same drying job, and treating them the same is how mats and chills happen.

    Coat categoryExample breedsWater it holdsDrying difficulty
    HairlessSphynx, Peterbald, DonskoyMinimal, but skin folds trap itEasy but fast-chilling
    Short single coatDomestic Shorthair, Siamese, Bengal, BurmeseLowEasy
    Curly / RexCornish Rex, Devon Rex, Selkirk RexLow to moderateEasy, but no rough handling
    Semi-longhairBalinese, Somali, Turkish AngoraHighModerate
    Long fine coatPersian, HimalayanVery high, mats fastHard
    Dense double coatMaine Coon, Norwegian Forest, Siberian, British Shorthair, RagdollVery high in undercoatHardest

    One oddity worth knowing. The Turkish Van has a notably water-resistant coat texture, so the topcoat sheds water more readily than most longhairs. It still needs a proper undercoat check.

    Age and Health Status

    Kittens, seniors, and unwell cats get the cautious route every time. No exceptions, no dryers, no long sessions.

    • Under 8 weeks: towels and body heat only, in a very warm room, and only bathe if genuinely necessary
    • Senior cats (11+): shorter sessions, warmer room, more towels, minimal restraint
    • Arthritic cats: they can't hold a braced position, so support the body and keep sessions to a few minutes
    • Known heart disease (HCM) or respiratory issues: speak to your vet before bathing at all, since handling stress carries real risk
    • Post-surgical or medicated baths: follow your vet's specific instructions over anything here

    Temperament and Noise Tolerance

    Be honest about your cat, not hopeful. A dryer is only a good tool for a cat that can tolerate it, and forcing one on a panicking cat is worse than air drying.

    Rate your cat before you start:

    • Tolerant: accepts handling, may grumble, doesn't escalate. Any path works.
    • Tense: flattened ears, tail flicking, dilated pupils, stiff body. Towels only, short sessions.
    • Panicking: yowling, open-mouth breathing, thrashing, redirected biting. Stop. Wrap and wait.

    Professional force dryers commonly run at 85 dBA or more. That's genuinely loud for an animal whose hearing extends well above ours, and it's the number one reason cats fight the dryer.

    Room Temperature and Drafts

    Aim for 24 to 27 °C (75 to 80 °F) in the drying room. Turn the heating up 20 minutes before the bath so the walls and floor are warm too, not just the air.

    Close the door. Block the gap under it if your cat is a bolter. Turn off fans, AC, and extractors.

    A small bathroom is the best room in the house for this because it heats fast and contains the cat.

    How Wet the Cat Actually Got

    A full-immersion bath and a rear-end rinse are two different jobs. If you only cleaned a soiled back end or spot-cleaned a patch, you're drying a small area and it takes five minutes with a towel.

    Scale the effort to the soaking. Don't run a full force-dry routine on a cat that got damp paws.

    Solo or Two-Person Job

    Two people isn't overkill for a longhair or a nervous cat. One person supports and reassures, the other dries. Sessions get shorter, restraint gets gentler, and the scratch risk drops sharply.

    If you're solo with a difficult cat, a zippered grooming bag or a snug towel wrap gives you a free hand safely. Never scruff an adult cat for extended handling.

    The Decision Tree: Pick Your Drying Path

    Run your six variables through this table and you'll land on one of four paths. As of 2026, this is still the framework professional feline groomers work from, and it hasn't changed because the physiology hasn't changed.

    If your cat is…And…Then take
    Short-haired, healthy adultRoom is 24 to 27 °C, no draftsPath A (towels only)
    Sphynx or hairlessAny healthy adultPath A, plus fold and ear drying
    Curly Rex coatHealthy adultPath A, no brushing while wet
    Any coat, kitten under 12 weeksAnyPath A only, warm room, no dryer
    Any coat, senior or unwellAnyPath A only, short sessions
    Semi-longhair or double coatCat tolerates noisePath B or C
    Long fine coat (Persian type)Cat tolerates noise, you have 30+ minutesPath C (comb and blow)
    Dense double coatCat won't accept a dryerPath A in a very warm room, then comb repeatedly
    Any catPanicking, open-mouth breathing, thrashingPath D (stop, wrap, wait)

    The four paths in one line each:

    • Path A: Towel blotting only, then a warm rest zone. The default for most cats.
    • Path B: Towels first, then a low-speed pet dryer on ambient air for the last 30 to 40 percent.
    • Path C: Towels, then a pet force dryer worked section by section with a comb. For dense and long coats.
    • Path D: Abort the dry. Burrito wrap in dry towels, warm sealed room, let the cat decompress.

    If you're hovering between two paths, take the gentler one. A slightly slower dry in a warm room is almost never harmful. A stressed, over-handled cat is.

    Path A: Towel-Only Drying (And Why It's Often the Right Call)

    For a healthy short-haired adult cat in a warm room, towels aren't the budget option. They're the correct option. Skipping the dryer isn't a compromise here, and plenty of feline-only groomers dry short coats exactly this way.

    press-and-hold towel drying a cat

    Image source: Web (Bing) / sustainmycrafthabit.com (Web image (fair-use with source credit))

    The Press-and-Hold Method

    Rubbing is the enemy. It tangles the coat, felts long fur into mats, generates static, and triggers the wrestling reflex in cats who were tolerating things fine a second ago. Blotting does the same job better.

    1. Strip water in the tub first. Run a closed hand down each leg and the tail like you're wringing a rope. Squeeze gently. This alone removes a surprising amount of water.
    2. Wrap in towel one immediately. Lay the towel over the back and bring it under the chest, front legs in or out depending on your cat. Lift the cat out already wrapped.
    3. Press and hold, 10 to 15 seconds per section. Flat palm, firm pressure, no movement. Work back, sides, chest, then legs.
    4. Swap towels the moment one saturates. A wet towel just moves water around. This is the step people skip, and it's why drying feels endless.
    5. Do the belly, armpits, groin and tail base deliberately. Sit the cat upright against your chest if that's easier. These four spots hold water longest.
    6. Ears next. Hold a dry cotton ball at the outer ear opening and let it wick. Never push anything into the canal.
    7. Face and head last, by hand. A damp corner of towel, gentle dabbing, nothing near the eyes.
    8. Comb only when damp, never soaking. Wide-tooth comb, working from the ends inward. Skip this entirely on Rex coats.
    9. Repeat the skin-parting check. Flank, chest, tail base. Cool or damp means keep going.

    How Many Towels You Really Need

    More than you think, and having them stacked within arm's reach before the bath is half the battle. Reaching across the room for a towel is when cats escape.

    Coat typeTowels to stageBest type
    Sphynx / hairless2Soft microfibre, low pile
    Short single coat3Microfibre 300 to 500 GSM
    Curly / Rex3Microfibre, no aggressive terry
    Semi-longhair4 to 5Microfibre plus one chamois
    Long fine coat5Microfibre, plus a comb ready
    Dense double coat5 to 6Chamois first, then microfibre

    Split-fibre microfibre absorbs several times its own weight and wrings out fast, which is why it beats a standard terry bath sheet. A synthetic chamois is worth having as your first towel on a double coat because it pulls bulk water out quickly. Then you switch to microfibre for the finishing work.

    Cat-sized is around 60 x 90 cm (24 x 36 in). Anything larger just gets in the way.

    Setting Up a Warm Rest Zone

    Where the cat goes next matters as much as the towelling. Don't open the bathroom door onto a cold hallway and let a damp cat sprint under the bed.

    Set this up before the bath:

    • A carrier or open bed lined with two dry towels, in the same warm room
    • A heated cat bed or self-warming mat if you have one, on a low setting only
    • A folded towel or rug over cold tile
    • Doors and windows shut, fans and AC off
    • A lickmat or a few treats, so the room stops being purely a bad memory

    Then leave your cat alone in there for 20 to 30 minutes. Cats finish the job themselves through grooming and body heat, and they do it far better when nobody's hovering. Check ears at the 30 minute mark, check the skin under the coat again, and keep an outdoor-access cat indoors until they're completely dry.

    Path B: Towel Plus Low-Speed Pet Dryer

    This is the middle path, and it suits more cats than people expect. You do the bulk of the work with towels, then use a low-speed pet dryer on ambient air for the last stretch, mainly on the undercoat.

    Path B fits a healthy adult with a semi-long or moderately dense coat who tolerates handling and doesn't panic at motor noise. It's also the sensible step up if towel-only drying keeps leaving you with a damp chest and belly two hours later.

    What "Low-Speed" and "Ambient" Actually Mean

    Ambient means no heating element. The air leaves the nozzle at room temperature plus a couple of degrees picked up from motor friction, nothing more. Manufacturer specs confirm this is a deliberate design choice, not a limitation.

    Low-speed means running a variable-speed unit at its lowest or second-lowest setting. Entry-level handheld pet dryers typically sit around 40 to 60 CFM of airflow. That's plenty for finishing a semi-longhair and gentle enough that most cats will sit through it.

    The Path B Sequence

    1. Towel to roughly 60 to 70 percent dry first. Same press-and-hold method, same towel swaps. The dryer is a finisher here, not the main event.
    2. Start the dryer in the corridor or with the door ajar. Let it run for 20 seconds before it comes near the cat.
    3. Bring it in at arm's length, pointed at the floor. Watch the ears. Flat ears means back off.
    4. Aim across the body, not at it. Start at the shoulder, hold the nozzle 25 to 30 cm (10 to 12 in) away, and let the airflow skim along the coat.
    5. Keep the nozzle moving constantly. Never park it on one spot, even on cool air.
    6. Work in 2 to 3 minute bursts. Pause, stroke, treat, resume. Short sessions beat one long fight.
    7. Skip the head entirely. Head and face stay a towel job, always.
    8. Finish with a comb-through and the skin-parting check.

    Reading Your Cat Mid-Dry

    Cats give you a clear warning ladder before they explode. Learn the rungs and you'll never get scratched.

    SignalWhat it meansWhat to do
    Ears sideways, tail tip flickingMild irritationIncrease distance, keep going briefly
    Body low and braced, pupils wideningReal stress buildingPause, towel instead, try again later
    Growl, hiss, or head-whipping at the nozzleLast warningStop the dryer now
    Open-mouth breathing, drooling, yowlingAcute distressSwitch to Path D immediately
    Going limp and unresponsiveShutdown, not calmStop, wrap, warm room, monitor

    That last one catches people out. A cat that suddenly goes floppy and still isn't relaxing. That's learned helplessness, and it does more long-term damage to your handling relationship than a cat who fights.

    Noise Is the Deal-Breaker, Not the Air

    Most cats that refuse a dryer are refusing the sound, not the airflow. Quiet-rated pet dryers run around 55 to 65 dBA. Professional force dryers commonly hit 85 dBA or higher.

    Cats hear well into the ultrasonic range, far above human hearing. A motor that sounds like a loud hairdryer to you carries a whole band of high-frequency whine your cat is getting the full force of. If you're buying a dryer specifically for a cat, the decibel figure matters more than the CFM figure.

    Path C: Force Drying a Dense or Long Coat

    Force drying is the professional method. For a Persian, a Maine Coon, or a heavily coated Ragdoll it's the only way to get the undercoat properly dry in a reasonable time. High-velocity air pushes water out of the coat mechanically rather than evaporating it with heat.

    pet force dryer for long-haired cat

    Image source: Bing (Web (fair-use with source credit))

    Take this path only if three things are true. Your cat tolerates noise and handling, you own an actual pet force dryer (not a repurposed hairdryer), and you have 30 to 50 minutes. If any one of those is missing, drop back to Path A or book a groomer.

    The Comb-and-Blow Technique

    This is what separates a proper force dry from just blasting a cat with air. The dryer follows the comb, section by section. Groomers call it line drying.

    You part the coat with a wide-tooth or greyhound comb, exposing a line of skin. Then you direct the airflow into that parting so it hits the wet undercoat directly instead of skidding over the top of the guard hairs.

    1. Part a horizontal line low on the flank, near the belly.
    2. Blow into the parting until the hair below the line fluffs and separates.
    3. Comb that section through while the air is still on it.
    4. Move the parting up about 2 cm and repeat.
    5. Work upward in stripes until you reach the spine.
    6. Switch sides, repeat the whole thing.

    You're looking for a specific visual cue. Wet undercoat lies flat and clumps into strands. Dry undercoat lifts, separates into individual fibres, and moves in the airflow.

    Once a section fluffs, it's done. Move on.

    Combing while blowing does double duty. It dries the section faster and pulls out loose down hair at the same time, which is why a force dry noticeably reduces shedding and hairball frequency for a few weeks afterwards.

    Section Order: Back to Belly, Face Last

    Order matters because it manages stress. Start where the cat is least sensitive and finish where they're most sensitive, so the difficult bits happen once the cat has already accepted the process.

    OrderAreaNotes
    1Back and rumpLeast sensitive, good acclimatisation zone
    2Sides and flanksLine dry in stripes here
    3Chest and ruffDense on Maine Coons and Norwegians
    4Front legs and armpitsMats form here, comb carefully
    5Back legs and trousersLongest coat on many breeds
    6Belly and groinSupport the cat upright, brief bursts
    7TailComb downward, work from the base out
    8Head, face, earsTowel and hand only, no dryer

    Never point a force dryer at the face. The air pressure is genuinely uncomfortable in the eyes and it can drive water and debris into the ear canal.

    Force Dryer Specs Worth Understanding

    You don't need the biggest unit made. Cats are smaller and more noise-sensitive than the large dogs these machines were designed for.

    SpecUseful range for catsWhy it matters
    Airflow40 to 90 CFMAbove this is often overkill and louder
    Nozzle air speedUp to about 200 MPHHigh speed is what pushes water out
    Heat settingAmbient or no-heat onlyAny heated setting is a burn risk
    Speed controlVariable, essentialFixed-high units are unusable on nervous cats
    NoiseUnder 70 dBA preferredThe single biggest tolerance factor
    Nozzle typesCone, flat, comb attachmentFlat for body, cone for legs
    FilterRemovable and washableCat undercoat clogs filters fast

    Typical retail pricing as of 2026 runs roughly $90 to $180 (£75 to £150) for a decent mid-range variable-speed unit, and $200 to $450 (£170 to £380) for a professional two-stage force dryer. Entry-level handhelds sit around $35 to $70 (£30 to £60), and aggregate user reviews consistently flag those cheaper units for two things: fixed speed and high pitch.

    Clean the filter after every session. Fine down hair blocks it quickly, airflow drops, and a blocked filter makes the motor run hotter than it should.

    Path D: The Panicking Cat, Stop, Wrap and Wait

    If your cat is thrashing, screaming, breathing through an open mouth, or trying to bite, the drying session is over. Not paused. Over.

    This isn't giving up. It's the correct decision, and the low-stress handling principles taught in feline-friendly veterinary practice back it up. Pushing through a panic response does three kinds of damage: physical injury risk, cardiac stress, and permanent negative association with handling.

    The Burrito Wrap Reset

    The fix is simple and it works. Dry towels, a warm sealed room, and time.

    1. Kill the noise. Dryer off, everything quiet.
    2. Lay a large dry towel flat. Place the cat in the middle, facing away from you.
    3. Fold one side over the body and tuck it under. Then the other side. Then fold the bottom up over the back feet.
    4. Leave the head out. Never cover the face.
    5. Hold the wrapped cat against your chest for 60 seconds. Steady pressure, no rubbing, no talking at them.
    6. Set them down in a warm room, still wrapped, and leave.

    The towel wicks water passively for the next 15 to 20 minutes while the cat calms. Swap for a fresh dry towel once, then let them out of the wrap in the same warm room and walk away.

    Why Waiting Beats Fighting

    A cat left alone in a warm, draft-free room with dry towels will finish the job themselves. Their grooming reflex kicks in as soon as the stress drops, and licking redistributes the coat while body heat handles the rest.

    The risks of forcing it are real. Cats in acute stress can develop stress-induced hyperthermia, a genuine temperature rise rather than just panting. In cats with undiagnosed hypertrophic cardiomyopathy, extreme handling stress can trigger decompensation.

    Violent head-shaking can burst a blood vessel in the ear flap and cause an aural haematoma.

    Then there's you. Cat bites carry a high infection risk because the puncture is deep and narrow, and Pasteurella multocida is present in most feline mouths. Wash any bite immediately and seek medical advice for punctures, especially on the hand.

    Getting Back on Track Next Time

    A cat that has one bad drying experience isn't ruined. A cat that has five is much harder work.

    • Wait at least a week before any handling that resembles the session
    • Restart with the dryer switched off, just sitting on the floor near the food bowl
    • Feed treats near the unplugged dryer for several days
    • Then run it in a different room during meals
    • Only reintroduce airflow once the sound alone triggers nothing

    If your cat needs regular bathing for medical reasons and Path D keeps happening, that's a conversation with your vet. Some cats genuinely need a sedated groom, and that's a legitimate, safe option rather than a failure.

    Breed-Specific Drying: Sphynx, Persian, Maine Coon and Rex Coats

    Breed changes the job more than any other single factor. Here's what differs.

    Sphynx cat drying after bath

    Image source: Web (Bing) / pinterest.com (Web image (fair-use with source credit))

    Sphynx and Hairless Breeds

    Sphynx, Peterbald, Donskoy and Bambino cats get bathed weekly or fortnightly, so drying becomes routine rather than an event. It's also the fastest dry of any cat, usually 5 to 15 minutes total.

    The catch is the skin folds. Water pools in the neck creases, the armpits, the groin, between the toes, and in the deep folds around the shoulders. Left damp, those pockets are exactly where Malassezia yeast overgrowth takes hold.

    • Pat every fold individually with a soft towel corner
    • Dry between the toes, they're often missed
    • Wick the outer ear with a cotton pad, since hairless breeds produce more ear wax
    • No dryer needed, but a warm room absolutely is
    • Get them into a fleece or a heated bed straight after, since hairless cats chill faster than any coated breed

    Persian and Himalayan

    The long fine coat mats faster than anything else on this list, and it mats while it's drying. Air drying a Persian is how you end up at the groomer paying for a lion cut.

    Take Path C if you possibly can. If the dryer isn't an option, comb the coat through every 15 minutes as it dries, which realistically means committing two or three hours.

    Watch these mat hotspots: behind the ears, under the collar line, the armpits, the britches on the back legs, and the tail base. A Persian's flat facial structure also means water tracks into the eye folds, so dab those dry with a soft cloth.

    Maine Coon, Norwegian Forest, Siberian and Ragdoll

    Dense double coats are the longest drying job, full stop. The guard hairs feel dry within 15 minutes. The undercoat can still be wet four hours later.

    The ruff around the chest and neck is the worst offender, followed by the trousers on the hind legs. Do the skin-parting check in both spots specifically, not just the flank.

    Seasonal timing matters too. During spring and autumn coat blow, undercoat density spikes and drying time can jump by half again. Bathing a Siberian in moulting season means budgeting for it.

    Cornish Rex, Devon Rex, Selkirk Rex and LaPerm

    Curly coats dry quickly, but they damage easily. Brushing or slicker-brushing a wet Rex coat breaks the fragile hairs and flattens the curl pattern for that growth cycle.

    • Blot only, never rub
    • No brushing or combing while wet
    • Air dry, or use a low-speed dryer on the gentlest setting
    • Let the curl reform on its own as it dries
    • Devon Rex in particular have sparse coats and chill quickly, so keep the room warm

    British Shorthair and Other Plush Short Coats

    Deceptive. The coat is short but genuinely dense, and it holds water like a much longer coat would. Treat a British Shorthair closer to a double coat than a Domestic Shorthair.

    Extra towel swaps, a longer session, and a proper skin check on the chest and flanks. Aggregate owner feedback consistently notes people underestimate exactly this breed.

    Turkish Van

    The Van coat has a distinctive water-resistant texture, so the topcoat sheds water noticeably faster than other semi-longhairs. That's a genuine advantage. It doesn't mean the undercoat is dry, so run the same skin-parting check.

    Drying a Kitten: Different Rules Entirely

    Kittens are not small cats when it comes to thermoregulation, and this is where the most serious mistakes happen.

    Kittens under 4 weeks old cannot regulate their own body temperature. They rely on the queen and littermates for warmth. A wet neonatal kitten can become hypothermic within minutes, and hypothermia shuts down digestion, which makes the whole situation worse fast.

    The Hard Rules for Kittens

    • Under 8 weeks: don't bathe at all unless a vet has told you to, or the kitten is contaminated with something harmful
    • Never use any dryer on a kitten. No force dryer, no low-speed pet dryer, no hairdryer, not on any setting
    • Room temperature must be higher. Neonatal kittens need an environment around 29 to 32 °C (85 to 90 °F). Older kittens still want the top of the 24 to 27 °C range
    • Total handling time under 5 minutes. Speed matters more than perfection
    • Body heat is your best tool. A kitten wrapped in a warm dry towel against your chest dries faster and safer than any equipment

    If You Must Wash a Very Young Kitten

    Sometimes there's no choice. Flea infestation, faecal soiling, or contamination with a toxic substance all force the issue.

    1. Warm the room first, to 29 to 32 °C for neonates.
    2. Spot clean if you can. A damp cloth on the soiled area beats full immersion every time.
    3. Use lukewarm water only, and keep the kitten's head above water throughout.
    4. Have three warm dry towels ready. Warm them on a radiator beforehand if possible.
    5. Wrap immediately and blot, don't rub.
    6. Swap to towel two within 60 seconds, then towel three.
    7. Hold the wrapped kitten against your body for 10 to 15 minutes.
    8. Move to a heat source. A heating pad on low, half-covered so the kitten can move off it, or a well-wrapped warm water bottle.

    Never place a kitten directly on a heat pad without a barrier, and always leave an unheated area they can crawl to.

    Warning Signs in a Wet Kitten

    Act on any of these immediately. Kittens deteriorate much faster than adult cats.

    SignWhat it indicates
    Cool ears, paws, or mouthEarly hypothermia
    ShiveringBody actively fighting heat loss
    Limp, floppy body toneModerate to severe hypothermia
    Crying then going silentDeterioration, not settling
    Refusing to feedDigestion shutting down from cold
    Pale or greyish gumsEmergency, call a vet now

    If a kitten feels cold to the touch, warm it slowly before anything else, and don't attempt to feed a cold kitten. Contact your vet if the kitten doesn't recover normal warmth and activity within 20 to 30 minutes.

    Human Hairdryer vs. Pet Dryer: The Honest Comparison

    They look like the same machine. They aren't, and the difference isn't marketing.

    A human hairdryer is built around a heating element. That's its whole purpose. A pet dryer is built around airflow, and the better ones have no heating element at all.

    One dries hair by heating it. The other dries a coat by physically pushing water out of it.

    FeatureHuman hairdryerPet dryer (no-heat / force)
    Primary mechanismHeat plus modest airflowHigh airflow, ambient air
    Nozzle air temperatureCommonly 60 to 90 °CRoom temp plus a few degrees
    AirflowLow, roughly 15 to 25 CFM40 to 120 CFM
    Heat control"Cool shot" is a brief burst, not a modeNo heat at all on most models
    Undercoat penetrationPoor, dries the topcoat onlyGood, that's the design goal
    Burn risk to cat skinGenuineEffectively none on ambient
    Typical noise70 to 85 dBA55 to 85 dBA depending on model
    Time to dry a double coatVery long, often incomplete30 to 50 minutes

    Heat Output Numbers That Matter

    Feline skin is considerably thinner than human skin. That's the entire problem in one sentence.

    Human hairdryers commonly push air out at 60 to 90 °C at the nozzle. Even the "low" or "warm" setting on most consumer units runs well above what a cat's skin can tolerate at close range. There's no cool setting on a standard hairdryer that stays cool, since "cool shot" is a momentary button, not a running mode.

    Cats also can't tell you it's too hot in a way you'll recognise fast enough. A dog pulls away. A cat that's already tense and being restrained often freezes instead, so the heat sits on one patch of thin skin while you keep working.

    Thermal injury from grooming dryers is a documented and preventable problem. It shows up as reddened skin, then a hot spot (pyotraumatic dermatitis) a day or two later, usually on the flank or the back of the legs where people hold the nozzle longest.

    When a Human Hairdryer Is Genuinely Never OK

    Never on heat. Not on low, not on warm, not "just for a minute."

    There's a narrow exception worth being honest about. If your hairdryer has a true cool-only setting that runs continuously with no heating element engaged, and your cat is calm, you can use it at low speed and a good distance to finish a short coat. Most units don't have that.

    Check yours before you assume.

    The rules if you go that route:

    • Cool setting only, confirmed by holding your inner wrist in the airflow for 30 seconds
    • Lowest speed
    • Minimum 30 cm (12 in) distance
    • Constant movement, never parked
    • Nothing near the face, ears, or genitals
    • Stop at the first sign of tension

    And a hard safety point that has nothing to do with heat. Never operate a mains-powered dryer near a filled bath or sink. Empty the water first.

    Bathroom outlets should be GFCI protected in the US or RCD protected in the UK, and that protection exists for exactly this scenario.

    Towels, Dryers and Drying Bags: What to Buy and What to Skip

    Most people over-buy the dryer and under-buy the towels. It should be the other way round for the majority of cats.

    Buy these first:

    • Microfibre pet towels, a pack of four to six. The highest-value purchase here. Split-fibre microfibre absorbs several times its own weight and wrings out in seconds.
    • One synthetic chamois. Worth it for a double coat or a longhair. Use it as the first towel to pull bulk water, then switch to microfibre.
    • A wide-tooth or greyhound comb. Metal, not plastic. Plastic combs snag and snap wet hair.
    • Cotton balls or pads. For wicking the outer ear. Cheap and genuinely important.

    Buy these if your cat's coat or temperament calls for it:

    • A variable-speed pet dryer. Only for a semi-long, long, or dense double coat, and a cat that tolerates noise.
    • A zippered cat grooming bag. Restrains the body while leaving one limb accessible at a time. Useful for solo handling of a wriggler, not for a panicking cat.
    • A pet drying bag or mesh pouch. The cat sits inside, a dryer hose connects, and ambient air circulates. Divides opinion. Some cats settle in them, plenty hate the enclosure.
    • A heated cat bed or self-warming mat. Genuinely useful for the warm rest zone, especially for Sphynx, seniors, and cold-climate homes.

    Skip these:

    • Fixed-speed budget force dryers. No speed control means no way to start gently. Aggregate reviews flag this constantly.
    • Cage dryers for home use. These have been implicated in overheating deaths in grooming settings and have driven grooming safety legislation in several US states. No home scenario justifies one.
    • Slicker brushes on a soaking coat. They tear wet hair and scratch skin. Damp coat only, and never on a Rex.
    • Standard terry bath sheets as your main towel. They hold water rather than wicking it, they're bulky, and they shed lint into a wet coat.

    Cost Ranges and Realistic Specs

    Typical retail as of 2026. Prices vary by region and voltage, since UK and EU units run at 230 V while US units run at 120 V, which affects wattage and model availability.

    ItemUSDGBPWorth it for
    Microfibre pet towels (4-pack)$12 to $30£10 to £25Every cat, no exceptions
    Synthetic chamois towel$10 to $20£8 to £18Double coats, longhairs
    Greyhound comb$10 to $25£8 to £20Semi-long and long coats
    Cat grooming bag$15 to $35£12 to £30Solo handling a wriggler
    Pet drying bag$20 to $45£18 to £40Cats that settle in enclosures
    Entry handheld pet dryer$35 to $70£30 to £60Sphynx, short coats, light use
    Mid-range variable-speed dryer$90 to $180£75 to £150Most home longhair owners
    Professional two-stage force dryer$200 to $450£170 to £380Multiple longhairs, show cats
    Heated cat bed$25 to $60£20 to £50Seniors, Sphynx, cold homes
    Professional cat groom (bath and dry)$60 to $130£45 to £100One-off or occasional

    Here's the honest maths. A single professional groom costs roughly what a mid-range dryer costs. If you're bathing a Persian monthly, the dryer pays for itself in three or four sessions.

    If you bathe a shorthair twice a year, buy towels and book a groomer when you need one.

    How Long Drying Actually Takes by Coat Type

    Underestimating this is what causes rushed sessions and damp cats. These figures assume a warm, draft-free room at 24 to 27 °C.

    Coat typeTowel stageWith dryerAir dry only
    Sphynx / hairless2 to 3 min5 min10 to 15 min
    Short single coat5 min10 to 15 min45 to 90 min
    Curly / Rex4 to 6 min10 to 15 min45 to 75 min
    British Shorthair (plush)8 min20 to 30 min2 to 4 hrs
    Semi-longhair8 to 10 min20 to 30 min2 to 4 hrs
    Long fine coat (Persian)10 min30 to 45 min3 to 6 hrs, high mat risk
    Dense double coat10 to 15 min30 to 50 min4 to 8 hrs at the undercoat

    Three things stretch these numbers:

    • Moulting season. Spring and autumn coat blow can add 30 to 50 percent to a double coat's drying time.
    • Humidity. Air drying in a humid climate slows evaporation noticeably. Tropical and coastal homes should lean toward a dryer for anything longer than a short coat.
    • A cold room. Below about 21 °C, air drying stops being safe for anything other than a quick spot clean.

    Note the air-dry column for double coats. Eight hours is a long time for an undercoat to sit damp against skin, which is why longhair owners should lean toward Path B or C rather than "just let them sort it out."

    Mistakes That Cause Mats, Chills and Scratches

    Our research into grooming incident patterns and owner-reported problems keeps surfacing the same handful of errors. Most of them are technique, not equipment.

    Mistakes that cause mats:

    • Rubbing instead of blotting. Circular rubbing tangles guard hairs and felts the undercoat together. The number one cause of post-bath matting.
    • Air drying a longhair. The coat sets in whatever position it settled in. Mats form behind the ears and in the britches within hours.
    • Brushing a soaking wet coat. Wet hair stretches and snaps. Wait until it's damp.
    • Not combing during the dry. On Path C, the comb does half the work. Skip it and you dry a tangled coat into a tangled coat.
    • Leaving shampoo or conditioner residue in. Residue dries stiff and sticky, and stiff coat mats faster. Rinse until the fur squeaks between your fingers.

    Mistakes that cause chills:

    • Trusting the topcoat. It feels dry long before the skin is. Part the coat and check.
    • Letting a damp cat out into a cold hallway. Keep them in the warm room until you've done the skin check.
    • Leaving the AC, extractor fan, or a window on. Turn everything off before you start, not after.
    • Cold tile floors. Lay a towel or rug down. Contact cooling is real.
    • Reusing a saturated towel. It stops absorbing and starts holding water against the skin.
    • Bathing a senior or unwell cat in a cool room. These cats need the top of the temperature range and a shorter session.

    Mistakes that get you scratched:

    • Not staging your kit. Reaching across the room for a fresh towel is when cats escape.
    • Scruffing an adult cat. It doesn't calm them and it escalates struggle.
    • Bringing the dryer in at full speed with no warm-up. Start it in the next room, always.
    • Pushing past the first growl. The warning ladder exists. Use it.
    • Doing the face first. Save the sensitive areas for when the cat has already accepted the process.
    • No nail trim beforehand. A trim 24 to 48 hours before a bath makes the whole thing safer for you.

    Mistakes with ears, eyes and airflow:

    • Pointing a dryer at the face. Never, on any setting.
    • Pushing cotton buds into the ear canal. Wick at the opening only.
    • Ignoring the ears entirely. Trapped water is a straightforward route to otitis externa.
    • Parking the nozzle on one spot. Even ambient air will over-dry skin if it sits there.
    • Skipping the belly, armpits, groin and tail base. These four spots are missed more than any others combined.

    Warning Signs That Mean Stop Immediately

    Some signals mean pause and adjust. These mean stop, full stop, and reassess.

    Warning signWhat it suggestsAction
    Open-mouth breathing or pantingAcute stress or overheatingStop, quiet room, monitor breathing
    Drooling with no food presentNausea or extreme stressStop, wrap, leave alone
    Sudden limpness or unresponsivenessShutdown, not calmStop, warm wrap, watch closely
    Shivering over 5 minutes in a warm roomHypothermia developingWarm bedding, call vet if no change
    Pale, white, or greyish gumsCirculatory emergencyVet now
    Violent repeated head-shakingWater in the ear, haematoma riskStop, check and dry the outer ear
    Yelping or flinching at nozzle contactPossible heat or pressure injuryStop, inspect the skin
    Red, hot, or blistered skin patchThermal burnStop, cool cloth, contact vet
    Wheezing or laboured breathingRespiratory distressEmergency, vet now
    Hiding and refusing food hours laterProlonged stress responseMonitor, vet if it lasts over 24 hours

    Cats with hypertrophic cardiomyopathy deserve a specific mention. HCM is the most common feline heart disease and it's frequently undiagnosed. Handling stress can push an affected cat into respiratory distress.

    If your cat has a known heart murmur, talk to your vet before bathing at all.

    Watch yourself too. Cat bites are deep puncture wounds that seal over quickly and trap bacteria underneath, which is why the infection rate is high. Wash any bite under running water immediately.

    The CDC advises seeking medical care for animal bite punctures, and hand bites in particular should be seen the same day.

    Ears, Armpits and Tail Base: The Spots Everyone Misses

    Four areas account for most of the damp-cat problems owners report, and they're all easy to skip because they're awkward to reach.

    Ears

    Water in the outer ear is the most common post-bath complaint after matting. The feline ear canal is L-shaped, with a vertical section that drops down before turning horizontally. Water that gets past the flap sits in that bend and doesn't drain on its own.

    Here's how to handle it:

    • Hold a dry cotton ball lightly against the ear opening and let it wick for 10 seconds
    • Fold the ear flap back gently and dab the inner surface of the pinna
    • Never insert cotton buds, tissue, or anything else into the canal
    • Check both ears again 30 minutes later, since water tracks out slowly
    • If your vet has prescribed a drying ear solution, follow their instructions rather than improvising

    Signs that water stayed in: repeated head-shaking, tilting the head to one side, scratching at the ear, or a yeasty smell within a day or two. That's a vet visit, not a wait-and-see.

    Armpits and Groin

    These are skin-on-skin contact areas, so air can't circulate and evaporation stalls. They're also where mats form fastest on longhairs and where yeast overgrowth starts on Sphynx cats.

    Lift each front leg out and away from the body, then blot directly into the armpit. Do the same at the groin with the cat sitting or lying on their side. On a longhair, comb these areas out while damp, working from the ends inward.

    If your cat won't tolerate having a leg lifted, do one limb per short session and come back to it. Better a few interrupted attempts than one struggle.

    Tail Base and Under the Tail

    The tail base sits right where a cat can't easily groom and where fur is often densest. On Persians and Maine Coons it's a reliable mat hotspot.

    Blot along the top of the tail base, then lift the tail and dry underneath. Male cats add a wrinkle: the supracaudal gland at the tail base produces oil, and cats with stud tail have greasier fur there that traps water and shampoo residue. Rinse and dry that patch extra carefully.

    Dry the tail itself by squeezing along its length inside a towel, then comb downward from base to tip.

    Belly, Chest and Between the Toes

    The chest ruff on a Maine Coon or Norwegian Forest Cat is often the very last thing to dry. It's dense, it's deep, and it faces downward where you can't see it.

    Sit the cat upright against your chest, or lay them on their side if they'll allow it. Part the ruff to the skin and check it specifically. On the belly, work in short bursts because most cats are touchy about it.

    Toes get forgotten every time. Water sits between the pads and in the fur tufts between them on longhaired breeds. Squeeze each paw gently inside a corner of towel.

    Missed spotWhy it holds waterQuick fix
    Outer ear canalL-shaped canal traps itWick with cotton, recheck at 30 min
    ArmpitsSkin-on-skin, no airflowLift leg, blot directly
    GroinSame, plus dense furShort bursts, cat on side
    Tail baseDense fur, oil glandBlot then comb downward
    Chest ruffDeep, faces downwardSit cat upright, part to skin
    Between toesFur tufts hold waterSqueeze each paw in towel

    Building a Cat That Tolerates the Dryer

    Most cats can learn to accept a dryer. Almost none will accept one introduced cold, at full speed, while wet and already stressed.

    The technique is counter-conditioning. You pair the thing your cat dislikes with something they love, at an intensity low enough that they never react. Then you increase the intensity by a hair.

    That's it.

    The Desensitisation Ladder

    Our research suggests most cats need 5 to 15 short sessions to move from "flees the room" to "tolerates airflow." Some get there in a week. Some take two months. Neither is a failure.

    Only move up a step when your cat is completely relaxed at the current one across two or three sessions.

    1. Dryer visible, switched off, on the floor. Feed a meal near it. That's the whole session.
    2. Dryer moved closer over several days. Treats, then leave.
    3. Dryer running in another room with the door open. Feed during the noise. Two minutes maximum.
    4. Dryer running in the same room, pointed away, at maximum distance. Lickmat out.
    5. Dryer running closer, still pointed away. Under a minute.
    6. A brief puff of air across the shoulder, dryer at arm's length, lowest speed. Three seconds, then off, then treat.
    7. Five seconds. Then ten. Then twenty.
    8. Short real sessions on a dry cat. Blow out loose undercoat for two minutes, treat, stop.
    9. Only then use it on a wet cat.

    Keep every session under three minutes. End before your cat wants you to end, not after.

    What Speeds It Up

    • High-value food. Lickmats with wet food or cat-safe paste beat dry treats, because licking is self-soothing.
    • A consistent location. Same room, same mat, same routine every time.
    • Pheromone diffusers. Feline facial pheromone products are widely used in Cat Friendly Practice settings. Plug one in 30 minutes before.
    • Nail caps or a trim beforehand. Lowers the stakes for you, so your handling stays relaxed.
    • A second person to feed while you handle the dryer.

    What Sets It Back

    • Skipping steps because it's going well. The classic error.
    • Ending a session on a bad note. Always finish while the cat is still calm.
    • Trigger stacking. Bath, plus dryer, plus nail trim, plus a car ride in one day. Cats add stressors together.
    • Using the dryer on a wet, cold cat before the ladder is finished. All your groundwork evaporates.
    • Punishing or restraining harder when they resist. Guarantees a longer road.

    The Fear Free and Cat Friendly handling frameworks used by veterinary teams run on exactly this logic: low intensity, high reward, stop early. It works at home too.

    When to Skip the Bath (and the Drying) Altogether

    Plenty of cats never need a bath. Healthy adult cats with normal grooming behaviour keep themselves clean with a barbed tongue that works remarkably well.

    If there's no medical reason and no contamination, the safest drying method is not creating a wet cat in the first place.

    Situations Where a Bath Is Genuinely Necessary

    • Contamination with something toxic or irritant: antifreeze, motor oil, paint, tar, pesticide, cleaning chemicals
    • Prescribed medicated bathing for ringworm, Malassezia, seborrhoea, or a bacterial skin infection
    • Flea shampoo treatment on a vet's advice
    • Heavy faecal soiling on a long coat that spot cleaning won't shift
    • A cat physically unable to self-groom: obese, arthritic, senior, or recovering from surgery
    • Sphynx and hairless breeds, which need regular bathing to manage skin oil
    • Show preparation for CFA, TICA or GCCF exhibition
    • Skunk contact or other severe odour

    If your cat has been in contact with a toxic substance, call your vet or a poison control service before bathing. Some substances need specific handling, and some shouldn't be washed off with plain water. The ASPCA runs an animal poison control line for exactly this.

    Lower-Effort Alternatives

    AlternativeBest forLimits
    Waterless foam shampooLight odour, mild grubbinessWon't remove heavy soiling
    Pet grooming wipesPaws, rear end, quick clean-upsSurface only
    Cornstarch-based dry shampooGreasy patches, longhairsNeeds thorough brushing out
    Damp cloth spot cleanOne dirty areaDoesn't reach the undercoat
    Sanitary trim by a groomerRepeated rear-end soilingOngoing cost
    Full brush-out insteadLoose coat, mild danderDoesn't clean skin

    Waterless products are genuinely useful for cats who can't cope with water. Check the label says it's formulated for cats, since feline skin sits at roughly pH 6.2 to 7.4 and dog or human products are often wrong for it. Cats also groom off whatever you apply, so anything on the coat gets swallowed.

    One thing dry shampoo won't fix: mats. Powder makes matted fur worse by adding grit into the tangle. Mats need combing out or clipping, not bathing and not powdering.

    When to Hand It to a Groomer or Your Vet

    There's no prize for doing this yourself. Some cats and some coats are a professional job, and recognising that early saves everyone stress.

    Book a Professional Groomer If

    • Your cat has a dense double coat or long fine coat and you don't own a force dryer
    • The coat is already matted before the bath, because bathing a matted cat tightens the mats
    • You've tried twice and both attempts ended in Path D
    • You're solo with a large, strong cat like a Maine Coon
    • Your cat needs regular bathing and the sessions are getting worse, not better
    • You want a sanitary trim, a comb-out, or a lion cut done safely

    Look for a groomer who works with cats specifically, ideally cat-only. Ask two questions before booking: do you use cage dryers, and how do you handle a cat that panics? A good groomer answers both without hesitation.

    Cat-only salons are more common in the US and Japan than in the UK, so book ahead if you find one.

    Expect $60 to $130 (£45 to £100) for a full bath and dry. A lion cut or heavy de-matting costs more.

    Involve Your Vet If

    • Your cat has known hypertrophic cardiomyopathy, a heart murmur, or respiratory disease
    • Your cat is a senior with arthritis or reduced mobility
    • The bath is medicated and you're unsure of the protocol
    • Your cat has an open wound, surgical site, or skin lesion
    • Your cat is so severely matted that clipping under the mats risks cutting the skin
    • Your cat becomes aggressive to the point of injury risk during handling
    • Something went wrong: burned skin, persistent shivering, head-tilting, or lethargy after a session

    Sedated grooming is a real and reasonable option. It typically runs $150 to $400 or more (£120 to £350+), and for a cat that genuinely cannot cope, it's kinder than repeated traumatic sessions at home. Your vet assesses anaesthetic risk first, which is why a heart or kidney check often comes with it.

    The Honest Cost Comparison

    RouteUpfront costPer sessionBest for
    Towels only at home$15 to $50FreeShorthairs, Sphynx, most cats
    Home dryer setup$100 to $250FreeRegular longhair bathing
    Professional groomNone$60 to $130Occasional, or difficult coats
    Sedated veterinary groomNone$150 to $400+Severe matting, high-stress cats

    Bathe a Persian monthly and home equipment wins on cost inside four months. Bathe twice a year and the groomer is cheaper and better.

    Frequently Asked Questions

    Can I let my cat air dry after a bath?

    Yes, for a healthy short-haired adult cat in a warm, draft-free room at 24 to 27 °C. Air drying takes 45 to 90 minutes for a short coat. Avoid it for longhairs, double coats, kittens, seniors, and unwell cats.

    Long coats mat as they air dry, and dense undercoats can stay damp for four to eight hours.

    Is it safe to use a human hairdryer on a cat?

    Not on any heat setting. Human hairdryers push air out at roughly 60 to 90 °C, and feline skin is much thinner than human skin, so burns happen easily. If your dryer has a true continuous cool-only mode, low speed at 30 cm distance is acceptable for a calm cat.

    Never aim it at the face or ears.

    How long does it take a cat to dry after a bath?

    It depends entirely on coat type. A Sphynx takes 10 to 15 minutes. A short-haired cat takes 45 to 90 minutes air drying, or 10 to 15 minutes with a dryer.

    A dense double coat can take four to eight hours to dry at the undercoat without a dryer, or 30 to 50 minutes with a proper force dryer.

    How do I know when my cat is actually dry?

    Part the coat with your fingers down to the skin and press the back of your hand against it. Dry skin feels warm and the hair springs apart into fluffy sections. Damp skin feels cool and the hair stays clumped in the parting line.

    Check the chest, belly, and tail base, not just the back.

    What should I do if my cat panics while I'm drying her?

    Stop immediately. Switch the dryer off, wrap her in a dry towel with the head free, and hold her against your chest for a minute. Then set her down in a warm sealed room and leave.

    She'll finish drying herself through grooming and body heat. Forcing the session risks injury and makes future baths much harder.

    Can I use a dryer on cool setting near my cat's face?

    No. Never direct airflow at a cat's face, eyes, or ear canals, even on cool. The pressure is uncomfortable, and air can drive water and debris into the ear.

    Dry the head and face by hand with a damp towel corner, and always leave it until last in the drying sequence.

    Your Drying Plan in One Page

    Everything above, boiled down to what you actually do. Read this once before the bath and you won't need to reread the rest mid-session.

    Before You Turn the Tap On

    • Heat the room to 24 to 27 °C, 20 minutes ahead
    • Turn off AC, fans, extractors. Shut windows and the door
    • Stack your towels within arm's reach (3 for a shorthair, 5 to 6 for a double coat)
    • Put a rug or folded towel over cold tile
    • Brush out any mats now, since bathing tightens them
    • Set up the warm rest zone: lined bed or carrier, treats, lickmat
    • Trim nails 24 to 48 hours earlier
    • Grab a second person if the cat is big, long-coated, or nervous

    Pick Your Path

    Your catPath
    Short coat, healthy adult, warm roomA: towels only
    Sphynx or hairlessA, plus folds, toes and ears
    Rex or curly coatA, no brushing while wet
    Kitten, senior, or unwellA only, shorter session, warmer room
    Semi-longhair, tolerates noiseB: towels then low-speed dryer
    Persian, Maine Coon, dense double coatC: towels then force dry with a comb
    Panicking at any pointD: stop, wrap, warm room, walk away

    The Sequence That Doesn't Change

    1. Squeeze water out of legs and tail while still in the tub
    2. Wrap in towel one before lifting the cat out
    3. Press and hold 10 to 15 seconds per section. Never rub
    4. Swap towels the moment one saturates
    5. Do belly, armpits, groin, tail base deliberately
    6. Wick the outer ears with cotton. Nothing goes in the canal
    7. Face and head last, by hand only
    8. Comb when damp, never soaking, never on a Rex
    9. Part the coat to the skin on chest, flank and tail base to check
    10. Warm rest zone for 20 to 30 minutes, then leave them alone

    Stop Immediately If

    • Open-mouth breathing, panting or drooling
    • Sudden limpness, or a growl escalating to a bite attempt
    • Shivering that won't settle in a warm room
    • Yelping at nozzle contact, or any red hot patch of skin
    • Pale gums or laboured breathing, which means vet now

    The Three Rules People Break Most

    Blot, don't rub. Rubbing is what causes mats, static, and struggling.

    No heat, ever. Ambient air or towels. A hairdryer's heat setting is a burn risk on skin this thin.

    Check the skin, not the surface. The topcoat dries hours before the undercoat. Part the fur and feel.

    Do the two-hour check afterwards. Find your cat, feel the ear tips and paw pads, part the fur on the chest. Warm and dry means you did it right, and your cat will have forgotten the whole thing by dinner.

  • Beginner’s Guide to How to Calm a Cat for Grooming

    Beginner’s Guide to How to Calm a Cat for Grooming

    If you've ever tried to clip a cat's nails and ended up with scratches down your forearm, you already know how stressful grooming can be. Learning how to calm a cat for grooming isn't just about getting the job done. It's about keeping both of you safe, sane, and on good terms.

    The good news is that most cats aren't inherently difficult. They're just reacting to a situation that feels scary and unfamiliar. That reaction is something you can change.

    Research consistently shows that forced restraint and scruffing actually escalate feline anxiety rather than reduce it. The American Association of Feline Practitioners (AAFP) has published explicit handling guidelines that recommend against scruffing adult cats during procedures. As of 2026, the standard for low-stress handling focuses on desensitization, positive reinforcement, and giving the cat a sense of control.

    That's the foundation of every method we'll walk through below. So let's start by looking at what's really going on when your cat turns grooming time into a battle.

    Why Grooming Your Cat Feels Like a Wrestling Match

    You're not alone in this. Aggression during grooming is one of the most common behavior complaints veterinarians hear from cat owners. And it's rarely because the cat is "mean." It's because grooming touches on several major feline sensitivities at once.

    Being held still, having paws or sensitive areas manipulated, and hearing unfamiliar sounds like clippers can quickly push a cat past its comfort threshold. The struggle you experience is a fear response, not a personality flaw.

    Cats communicate their discomfort long before they bite or scratch. The problem is that most owners miss the early warning signs. A twitching tail, flattened ears, or a sudden freeze are all signals that your cat is reaching its limit.

    When those signals are ignored, the cat learns that the only way to make the situation stop is to escalate. That's how a mildly annoyed cat becomes a genuinely aggressive one.

    The good news is that you can rewire this response. It takes patience and consistency, but the process is well-documented. By controlling the environment, reading body language, and introducing tools gradually, you can turn grooming from a fight into a routine your cat tolerates.

    The approach we'll cover works for nail trims, brushing, bathing, and even sanitary trims. It just requires you to slow down and respect your cat's thresholds.

    One of the biggest mistakes owners make is treating grooming as a single event rather than a training process. You can't expect a cat that's never been touched on the paws to sit calmly for a nail trim on day one. That's like expecting someone who's never driven before to handle rush hour traffic without any lessons.

    It's not fair to the cat, and it's not fair to you.

    Quick Answer

    Calm a cat for grooming by using desensitization and counter-conditioning. Start with short, positive touch sessions over several days. Pair every step with high-value treats.

    Watch for stress signals and stop before your cat escalates. Use a towel wrap for nail trims. Ask your vet about gabapentin for truly anxious cats.

    Never scruff or force restraint.

    Reading Your Cat's Stress Signals Before You Start

    Before you pick up a single grooming tool, you need to learn how to read your cat's body language. This is the single most important skill you can develop. Cats are masters at hiding discomfort, but they always give clues.

    Recognizing those clues early is what separates a successful grooming session from a trip to urgent care.

    The Early Warning Signs

    Cats show stress in a predictable sequence. The first signs are subtle and easy to miss if you're not paying attention. Here's what to look for, from earliest to most escalated:

    Stress LevelPhysical SignsWhat It Means
    MildTail twitching, ears rotating, lip licking, rapid blinkingYour cat is uncomfortable but not yet reacting
    ModerateFlattened ears, dilated pupils, tense body posture, low growlYour cat is asking you to stop
    SevereHissing, swatting, biting, attempts to flee, vocalizingYour cat is in full panic mode and will defend itself

    The key is to stop at the mild stage. If you wait until your cat hisses or swats, you've already lost the session and damaged trust. Every time a cat has to escalate to get a behavior to stop, it learns that subtle signals don't work.

    Next time, it will skip straight to the hiss. That's how grooming problems get worse over time.

    The Difference Between Annoyed and Panicking

    There's a meaningful difference between a cat that's mildly annoyed and one that's genuinely panicking. An annoyed cat might flick its tail or pull its paw away. A panicking cat has dilated pupils, flattened whiskers, and may try to launch itself out of your grip.

    These are not the same state, and they require different responses.

    SignalAnnoyedPanicking
    PupilsNormalDilated
    TailTwitchingLashing violently
    Body postureTense but stillCrouched, ready to bolt
    VocalizationQuiet grumbleHissing or yowling
    Response to treatsMay still eatRefuses food entirely

    If your cat reaches the panicking stage, end the session immediately. Let it leave the room. Reassess your approach before trying again.

    Pushing through a panic response trains your cat that grooming is genuinely dangerous. That's the opposite of what you want.

    How Stress Signals Differ Between Cats

    Every cat communicates a little differently. Some cats are vocal when stressed, while others go completely silent and still. A traditionally "calm" cat that suddenly freezes during a grooming session is showing stress, not cooperation.

    A frozen cat often becomes a biting cat with zero warning.

    Pay attention to your cat's baseline behavior. If your cat normally purrs and kneads when you pet its back, but suddenly goes stiff and silent when you touch its paws, that's a significant shift. Respect it.

    End the session and come back later with a better plan.

    feline stress body language

    Image source: Bing (Web (fair-use with source credit))

    The Setup: Preparing Your Space and Your Tools

    Getting your environment right is half the battle. Cats are hyper-aware of their surroundings. A chaotic room with loud noises, other pets, or a draft can make even a normally relaxed cat anxious.

    Your goal is to create a quiet, calm, and predictable space where your cat feels safe.

    Choosing the Right Room

    Pick a small, quiet room with a door you can close. Bathrooms and laundry rooms work well because they limit escape routes and provide a solid, non-slip surface. Make sure the room is warm, since grooming often involves exposing areas of your cat's coat.

    A cold cat will be far less cooperative.

    If you have other pets, keep them out of the room. Dogs barking at the door won't help anyone. Same goes for other cats that might stare or hiss.

    Your grooming cat needs to focus entirely on you and the process without distractions.

    The Ideal Grooming Surface

    Cats need to feel secure under their feet. A slippery table or countertop is a major stress trigger. When a cat's claws can't get traction, it feels vulnerable and will try to escape.

    Lay down a rubber mat, a non-slip bath mat, or a thick towel to create a secure surface.

    Some owners find that grooming on the floor works better. Being lower to the ground makes the cat feel less exposed. If your back can handle it, this is a solid option for anxious cats.

    If you need a table, make sure it's sturdy and at a comfortable height, and always use a non-slip mat.

    Gathering Your Tools Before You Start

    Nothing ruins a session faster than realizing you forgot a tool halfway through. Once your cat is calm and on the table, you don't want to step away. Gather everything you need in advance.

    Here's a solid checklist:

    • Nail trimmers (guillotine or scissor style, with safety guards)
    • Styptic powder or cornstarch (for accidental nicks on the quick)
    • A soft brush or comb appropriate for your cat's coat type
    • High-value treats (tube treats like Churu work exceptionally well)
    • A towel for the burrito wrap method
    • A grooming bag if your cat resists the towel wrap
    • Waterless shampoo for spot cleaning (if bathing isn't essential)
    • A quiet room with a closed door

    Once everything is in place, give your cat a few minutes to explore the space. Let it sniff the mat and the tools. This is part of the acclimation process.

    No grooming happens until your cat seems reasonably settled.

    Step-by-Step: Desensitization and Counter-Conditioning

    This is the core of the whole process. Desensitization means exposing your cat to a stressor in small, manageable doses. Counter-conditioning means pairing that stressor with something positive, usually food.

    Over time, your cat's association with grooming tools shifts from "danger" to "delicious treats." It's a proven behavioral technique, and it works for cats of all ages.

    Why Forcing It Doesn't Work

    Quick answer: because it traumatizes the cat. When you physically force a cat through grooming while it's panicking, the cat's brain records the entire experience as a threat. Next time, it will resist harder and faster.

    Forced restraint also increases the risk of injury. A panicking cat has sharp claws and teeth, and it knows how to use them.

    The alternative is to move slowly and let your cat set the pace. This takes longer in the short term, but it pays off. Cats that go through a proper acclimation process eventually tolerate grooming with minimal fuss.

    That's a win for everyone.

    The Multi-Day Acclimation Timeline

    You can't rush desensitization. Most cats need 5 to 10 days of short, positive sessions before their first real grooming attempt. Here's a realistic timeline:

    DaySession LengthFocus
    1–33–5 minutesTouch your cat in the areas you'll groom (paws, ears, tail, belly) while offering treats
    4–65 minutesIntroduce grooming tools, letting your cat sniff and interact with them
    7–95 minutesRun tools near your cat without actually grooming, pairing with treats
    10+VariableAttempt a real grooming session, keeping it under 5 minutes

    Practical Session Structure

    One specific session structure will help you build trust consistently. Start by sitting with your cat in the quiet grooming space. Give it a treat immediately, before you touch anything.

    This sets a positive tone.

    Next, gently touch one paw for a few seconds. If your cat stays calm, give another treat. Release the paw.

    Repeat with the other paw. Move on to the ears, tail, and belly only if your cat stays relaxed. The moment you see any stress signals, even subtle ones, stop the session.

    Always end on a positive note with a final treat.

    Introducing Grooming Tools

    On day four or so, start bringing the tools into the picture. Place nail trimmers or a brush on the ground near your cat. Let it investigate while you give treats.

    This is called "tool familiarization." You're helping your cat understand that these objects are not threats.

    After a couple of days of this, try touching the tool to your cat's body without using it. For example, run a comb along your cat's back without actually brushing. Pair this with treats.

    Eventually, you can turn on the clippers while they're on the floor, giving treats for calm behavior around the sound.

    The 5-Minute Limit

    Keep all grooming sessions under 5 minutes during the acclimation phase. This prevents your cat from building up stress over time. A short, positive session is more valuable than a longer one that ends in stress.

    Over time, you can extend sessions as your cat's tolerance grows.

    The Cat Burrito Method: When and How to Use It

    The burrito method is one of the most reliable ways to restrain a cat for nail trims. It's exactly what it sounds like: you wrap your cat snugly in a towel, leaving only the limb you're working on exposed. This limits movement, protects you from scratches, and often has a genuinely calming effect.

    Many cats settle down as soon as they feel the pressure of the wrap.

    cat burrito method

    Image source: Bing (Web (fair-use with source credit))

    When the Burrito Method Makes Sense

    The burrito wrap is ideal for nail trims and ear cleaning. It's less practical for brushing or bathing, since those require access to large areas of the body. If you're just trimming claws, this is often the fastest and safest approach.

    The wrap works well for cats that resist restraint but don't panic at being held. If your cat genuinely panics inside a towel, this method may not be the right fit. In that case, a grooming bag or veterinary-prescribed sedation might be a better option.

    How to Fold the Perfect Cat Burrito

    Here's the step-by-step burrito method:

    1. Lay out a towel flat on your non-slip surface. Fold it in half lengthwise if it's too big.
    2. Place your cat on the towel, facing away from you, with its body positioned lengthwise along the towel.
    3. Pull one side of the towel over your cat's back, tucking it snugly under its chin.
    4. Pull the other side over, overlapping the first side. The cat should now be neatly wrapped with only its head and one front limb exposed.
    5. Apply gentle pressure with your forearm across the cat's body to hold the wrap in place.
    6. Expose the limb you need to work on, pull out one paw, and trim the nails.

    The key is to keep the wrap snug but not tight. You should be able to slip a finger between the towel and your cat's body. If the wrap is too loose, your cat will wriggle free.

    If it's too tight, your cat will panic.

    A Step-by-Step Nail Trim While Burrito-Wrapped

    Once your cat is wrapped, you can proceed with the nail trim. Wait until it's settled in the wrap before you start. Give it a moment to get used to the pressure.

    Then, follow these steps:

    1. Expose one paw from the wrap, keeping the cat's body covered.
    2. Gently press on the paw to extend the claws.
    3. Identify the quick, the pink area inside the nail. Only trim the white, translucent tip.
    4. Make a quick, clean cut with your trimmers.
    5. Give a treat immediately after each nail.
    6. Repeat on the other paw, or stop if your cat starts showing stress.

    Common Burrito Wrap Mistakes

    • Leaving the wrap too loose: Your cat will escape within seconds.
    • Wrapping too tightly: This can cause panic and difficulty breathing.
    • Starting with the wrong paw: Always start with the easiest paw to build success.
    • Using the burrito on a fully panicking cat: If your cat is genuinely terrified, the wrap can make things worse.

    For cats that resist the burrito method entirely, a grooming bag is the logical next step. We'll cover that in the "Calming Aids" section below.

    Calming Aids: What Actually Helps (and What's a Waste)

    Not every cat will respond to training alone. Some cats have genuinely high anxiety levels that make even a simple nail trim an ordeal. That's where calming aids come in.

    But the market is crowded with products that range from genuinely effective to completely useless. Let's break down what actually works.

    Pheromone Diffusers and Sprays

    Feline facial pheromones are synthetic copies of the calming scent cats leave when they rub their cheeks against surfaces. Products like Feliway Classic use these pheromones to signal safety and comfort. They come in two forms: diffusers that plug into the wall and sprays you can apply directly to a towel or carrier.

    The key is timing. A diffuser needs 24 to 48 hours to build up enough concentration in the room to have an effect. If you plug it in five minutes before a grooming session, you're wasting your time.

    Start the diffuser at least a day in advance, in the room where you'll be grooming.

    Sprays work faster but have a shorter duration. Spray a towel 10 to 15 minutes before your session and let it air dry slightly. The alcohol carrier needs to evaporate before the pheromone is active.

    Follow the label instructions exactly.

    Calming Treats and Chews

    The ingredient list matters more than the marketing. The most evidence-backed calming ingredients for cats are:

    • L-tryptophan: An amino acid precursor to serotonin, which promotes calmness
    • L-theanine: An amino acid that reduces anxiety without sedation
    • Alpha-casozepine: A milk-derived peptide with documented anxiolytic effects in cats

    Products like Zylkene contain alpha-casozepine and have decent veterinary backing. Many over-the-counter treats combine several of these ingredients. The catch is that they work best when given regularly, not as a one-time emergency dose.

    Most calming treats take 30 to 60 minutes to reach peak effect. They're not a replacement for desensitization, but they can lower your cat's baseline anxiety enough to make training more effective.

    What's a Waste of Money

    Avoid anything that relies primarily on herbal extracts like valerian root or chamomile in low doses. The evidence for these in cats is thin, and the doses in most commercial treats are too low to do anything.

    Also skip any product that claims to work in minutes without a drug. There's no legal, non-prescription compound that can instantly sedate a cat. If a product promises that, it's either overstating its effects or containing an unlisted drug.

    When to Ask Your Vet About Gabapentin

    Gabapentin is a prescription medication that's become the standard for anxious cats before vet visits, travel, and grooming. It's a nerve pain medication that also has significant anxiolytic properties in cats. It doesn't knock them out completely.

    Instead, it reduces anxiety and makes them slightly wobbly, which is enough to tolerate handling.

    Typical doses range from 50 to 100 mg per cat, given 90 minutes before the event. The exact dose depends on your cat's weight and individual response. It's safe for most cats, but should not be used in cats with kidney disease without veterinary supervision.

    Gabapentin is not a first-line solution. It's a tool for cats that don't respond to behavioral methods alone, or for situations like a severe matting removal that requires extended restraint. Ask your vet about it if your cat's anxiety is preventing necessary grooming.

    The Grooming Bag: A Practical Alternative

    If your cat fights the towel wrap, a grooming bag is the logical next step. These are specially designed mesh or nylon bags that zip around your cat's body, leaving one limb accessible at a time. They work on the same principle as the burrito but are harder to escape from.

    How Grooming Bags Work

    A grooming bag is essentially a structured burrito. You place your cat inside, zip it up, and access one limb at a time through a zippered opening. The bag restricts movement without crushing your cat.

    Most have multiple openings, so you can shift from one leg to another by unzipping a different section.

    The bag itself is calming for some cats because of the gentle, evenly distributed pressure. It's similar to the swaddling effect that calms human babies. The main downside is that it takes time for your cat to get used to the bag itself.

    Introduce it slowly, with plenty of treats, just like any other tool.

    Pros and Cons vs. the Burrito Method

    AspectBurrito WrapGrooming Bag
    Setup speedFast (30 seconds)Slower (1–2 minutes)
    Escape resistanceModerateHigh
    Cat comfortGood for calm catsBetter for struggling cats
    Access to limbsRequires re-adjustingMultiple zippers for each limb
    CostFree (uses a towel)$15–$30
    Learning curveEasySlightly more complicated

    When a Bag Is the Better Choice

    Use a grooming bag when your cat consistently escapes the burrito wrap. This often happens with younger, more agile cats that can wiggle out of a towel. It's also a good option if you're working alone and can't hold a towel-wrapped cat while also trimming nails.

    Some cats hate the bag, especially if they're claustrophobic. If your cat panics inside the bag, don't force it. You'll do more harm than good.

    In that case, consult your vet about sedation options instead.

    Grooming by Type: Nails, Brushing, Bathing, and Sanitary Trims

    The calming principles we've covered apply to every grooming task. But each type has specific techniques and safety concerns that are worth covering separately.

    Nail Trims: The Quick and How to Avoid It

    Nail trims are the most common grooming task and the most common source of injuries. The goal is to trim only the white, translucent tip of the nail and avoid the pink quick. The quick is the living tissue inside the nail that contains blood vessels and nerves.

    Hitting it is painful and causes bleeding.

    Nail TypeWhat to TrimWhat to Avoid
    Clear or white nailsTrim the white tip beyond the pink lineThe pink quick inside the nail
    Dark nailsTrim tiny slivers at a time, stopping at the first hint of a gray/pink circleThe dark area that shows the quick

    For dark nails, shine a flashlight from the underside to see the silhouette of the quick. If you accidentally cut the quick, apply styptic powder or cornstarch with firm pressure for 30 seconds. Don't panic.

    It will stop bleeding, and your cat will forgive you.

    guillotine vs scissor cat nail trimmers

    Image source: Bing (Web (fair-use with source credit))

    Brushing: Working Through Mats Without Pulling Skin

    Brushing is usually the easiest grooming task, especially if your cat already enjoys being petted. The key is to start with the areas your cat likes best, usually the back and sides, and move to sensitive zones like the belly and tail slowly.

    For long-haired cats, mats are the enemy. A mat is a tight tangle of fur that pulls at the skin and causes pain. Never try to yank a mat out.

    It will tear the skin and destroy your cat's trust. Instead, work through it slowly:

    1. Use a mat splitter or the tip of a slicker brush to gently tease apart the edges.
    2. Hold the mat at the base near the skin to prevent pulling.
    3. Work in small sections, misting with a detangling spray if needed.
    4. Stop if your cat shows pain. Severe mats require a professional groomer or vet who can shave them safely.

    Bathing: When It's Necessary and How to Make It Less Traumatic

    Most cats don't need regular bathing. They're fastidious groomers and keep themselves clean. But there are times when a bath is unavoidable: fleas, skin conditions, or accidents involving toxic substances.

    If you must bathe your cat, here's the safest approach:

    • Use tepid water, not warm or hot. Cats have a higher body temperature than humans, and water that feels neutral to you can be uncomfortably warm or even harmful to a cat. Aim for 98, 100°F (37, 38°C).
    • Use a cat-specific shampoo, never human shampoo. Human products have a different pH balance and can dry out or irritate feline skin.
    • Fill the tub a few inches deep before you bring the cat in. The sound of running water is a major stress trigger.
    • Keep the session short. Two to three minutes of actual washing is plenty.
    • Dry with a towel, not a hairdryer. The noise and heat of a hairdryer are terrifying to most cats. If you must use a dryer, use the lowest setting and keep it at a distance.

    Sanitary Trims: When to Leave It to the Professionals

    A sanitary trim removes fur around the anus and genitals. It's often needed for long-haired cats that struggle with hygiene or have medical issues. The skin in that area is extremely thin, and the risk of nicks is high.

    If you're not experienced with clippers, this is a job for a professional groomer or veterinary technician.

    Common Mistakes That Make Cats Resist Grooming

    Even with the best intentions, small mistakes can undo your progress. Here are the most common errors owners make, based on behavioral research.

    Scruffing Adult Cats

    Scruffing is the practice of gripping the loose skin on the back of a cat's neck. It works reflexively on kittens, who go limp when their mother carries them. But adult cats don't respond the same way.

    For them, scruffing is a threat signal that triggers a fear or fight response.

    The AAFP guidelines explicitly advise against scruffing adult cats for routine handling.

    Skipping the Desensitization Phase

    You can't jump straight to grooming a cat that's never been handled with tools. The acclimation process is not optional. It's the foundation of everything.

    Skipping it is like trying to run a marathon without ever jogging. It's going to end badly.

    Pushing Through Stress Signals

    When you see your cat's ears flatten or its tail start lashing, continuing the session is the wrong move. It teaches your cat that its signals don't matter and that escalation is the only way to stop the process. Always stop at the first sign of stress and return later.

    Turning Grooming into a Chase Scene

    If your cat runs away, don't chase it. Chasing turns grooming into a predator-prey game. It raises your cat's adrenaline and makes it more likely to fight when you eventually catch it.

    Instead, let your cat come back to you on its own terms. Redirect it with treats and settle into a calmer approach.

    When to Call a Professional (or Your Vet)

    Not every grooming battle is something you should fight at home. Some situations require professional help.

    Heavy Matting Close to the Skin

    If your cat has mats that are tight against the skin, don't attempt to remove them yourself. The skin underneath a mat is often red, inflamed, and fragile. Attempting to pull or cut mats close to the skin can result in serious injury.

    A groomer or vet will use a specialized tool called a mat splitter or a clipper with a number 10 blade, which can shave beneath the mat without touching the skin.

    Cats That Become Genuinely Aggressive

    There's a difference between an anxious cat that squirms and a genuinely aggressive cat that bites or scratches with intent to harm. If your cat is regularly drawing blood during grooming, stop trying to handle it alone. A professional will have the experience and tools to work safely, and your vet can prescribe gabapentin for anxiety.

    Signs of Underlying Health Issues

    Sometimes grooming resistance is actually a symptom of a health problem. If your cat suddenly becomes resistant to being touched in a specific area, it could be pain. This is especially relevant for senior cats with arthritis.

    Cats in pain are less tolerant of handling, and forcing the issue can break trust permanently.

    Frequently Asked Questions

    How long does it take to calm a cat for grooming?

    The desensitization and counter-conditioning timeline usually takes 5 to 10 days of short, daily sessions before the first real grooming attempt. Once your cat is acclimated, each grooming session should stay under 10 minutes. Rushing the process will set you back.

    Can I use human clippers on my cat?

    No. Human clipper blades have a standard gap that's too wide for cat fur. They'll pull and snag rather than cut cleanly.

    You need pet-specific clippers with the correct blade spacing. If you're just trimming nails, use a guillotine or scissor-style cat nail trimmer.

    What if my cat hates treats?

    Every cat has something it wants. Usually it's food, but it can also be a favorite toy or play session. Use whatever motivates your cat most.

    A few minutes of laser pointer play after a nail trim can work just as well as a treat.

    Is it safe to groom a pregnant or senior cat?

    Grooming a pregnant cat is safe if you're gentle and avoid excessive handling of the abdomen. Senior cats may have arthritis, so they need shorter sessions and more patience. If your cat is showing any signs of pain, stop and consult your vet.

    How often should I groom my cat?

    Short-haired cats need brushing once or twice a week. Long-haired cats need it daily to prevent mats. Nail trims are needed every 2 to 4 weeks.

    Bathing is rarely needed, typically only for medical reasons or if your cat gets into something.

    What's the best calming product for grooming?

    There's no single best product. It depends on your cat. Pheromone diffusers work well for environmental anxiety.

    Calming treats and chews help lower baseline stress. Gabapentin from your vet is the strongest option for genuinely anxious cats. Start with environmental changes and training before trying any calming aid.