Tag: Horse

  • Step-by-step: How to Care for Horse Hooves in Winter

    Step-by-step: How to Care for Horse Hooves in Winter

    You pull your horse out of the stall on a frosty morning, and something feels off. He's stepping short, almost tender-footed, and you notice ice balls packed into the soles of his hooves. Sound familiar?

    Learning how to care for horse hooves in winter isn't just about keeping them clean. It's about preventing lameness, cracks, and infections that can sideline your horse for months.

    The truth is, winter hoof care demands a completely different approach than summer. Hoof growth slows by roughly 40% in cold weather, and ground conditions shift from forgiving pasture to rock-hard frozen turf or endless mud. Aggregate veterinary data indicates that hoof-related lameness cases spike by nearly 30% between December and February.

    Let's walk through exactly what changes, what to watch for, and how to keep your horse sound through the coldest months.

    Quick Answer

    Winter hoof care means adjusting your routine for slower growth, harder ground, and moisture extremes. Pick feet daily and check for ice balls, cracks, and thrush. Work with your farrier on an extended trimming schedule, usually every 8 to 10 weeks.

    Use snow pads, boots, or anti-snowball products to prevent painful ice packing. Keep hooves dry when possible, but don't over-oil. Watch for lameness signals and call the vet promptly if something looks wrong.

    Why Winter Hoof Care Is a Different Animal

    Your horse's hooves are living structures that respond to the seasons in real, measurable ways. When temperatures drop, blood flow to the extremities decreases as the body conserves heat. That reduced circulation slows hoof growth dramatically.

    Studies from equine veterinary programs show hooves grow about half as fast in winter as they do in peak summer months.

    That slower growth matters more than you might think. Hooves that would normally grow out a small crack in six weeks might take twelve in winter. Minor issues that resolve themselves in summer become persistent problems when the thermometer stays below freezing.

    You're no longer just maintaining. You're protecting against damage that won't self-correct quickly.

    The environment compounds the issue. Frozen ground is unforgiving, and every step on hard, uneven terrain transmits shock directly through the hoof capsule. Mud, on the other hand, creates constant moisture exposure that softens the hoof wall and invites bacterial and fungal invaders.

    Then there's the freeze-thaw cycle, where expanding ice pries apart the hoof wall at a microscopic level. Each of these factors demands specific countermeasures.

    What Actually Changes in the Hoof During Cold Months

    Inside the hoof, the laminae that connect the hoof wall to the coffin bone become less active in cold weather. The digital cushion, that shock-absorbing structure in the back of the hoof, functions differently when the horse is moving less and standing on harder surfaces. The sole thickens in response to increased concussion, but that thickening takes time.

    Early winter, before the sole has adapted, is when you see the most bruising.

    The frog, that triangular structure in the middle of the sole, also undergoes changes. In dry, frozen conditions, the frog can become hard, brittle, and less elastic. In wet, muddy conditions, it becomes soft, spongy, and vulnerable to thrush.

    Neither extreme is healthy. Your job is to monitor which extreme your horse is facing and adjust accordingly.

    Why Your Summer Routine Won't Cut It

    If you're still on a six-week farrier schedule with no other adjustments, you're setting yourself up for problems. Horses that spend more time standing in stalls or paddocks during winter experience different hoof wear patterns. Without regular movement over varied terrain, hooves don't self-trim the way they do in summer turnout.

    Moisture management becomes the central challenge. Summer hooves benefit from occasional wetting to prevent cracking. Winter hooves are either too wet from mud or too dry from freezing temperatures and indoor heating.

    Both extremes cause damage, just different kinds. A one-size-fits-all approach simply cannot address these opposing conditions.

    The consequences of neglecting winter-specific care range from annoying to catastrophic. Lost shoes, cracked walls, thrush infections, and sole abscesses all become more common when owners stick to their summer playbook.

    The Real Cost of Neglect: Lameness, Vet Bills, and Lost Riding Time

    Here's what neglect actually costs. A simple case of thrush that goes untreated can take three to four weeks of daily treatment to resolve. A deep hoof crack might require therapeutic shoeing for six months or more.

    A sole abscess means stall rest, poulticing, and potentially thousands of dollars in vet care. And if laminitis develops, you're looking at a long, uncertain recovery that could end the horse's riding career entirely.

    The financial math is straightforward. A farrier visit costs between $45 and $120 depending on your region and what's needed. One vet call for a hoof-related emergency runs $200 to $500 on average.

    Compare that to the cost of preventive care, which amounts to little more than your time and consistency. Winter hoof care is one of the few areas of horse keeping where a modest daily investment genuinely prevents catastrophic financial and emotional loss.

    how to care for horse hooves in winter

    Image source: Web (Bing) / pinterest.com (Web image (fair-use with source credit))

    The Winter Hoof Health Checklist

    You don't need veterinary training to spot most winter hoof problems. What you need is a consistent routine and a clear idea of what "normal" looks like. This checklist takes about five minutes per day and catches problems before they spiral into lameness.

    What a Healthy Winter Hoof Looks Like vs. a Problem Hoof

    A healthy hoof in winter has a smooth, intact hoof wall with no cracks, chips, or ridges. The sole should be firm to the touch, slightly concave, and free of dark spots or bruising. The frog should be pliable, not hard and shiny, and free of deep crevices that trap debris.

    The heel bulbs should feel resilient, not hard or swollen.

    Compare that to a problem hoof. You might see horizontal ridges running across the wall, which indicate a previous stress event. Vertical cracks that extend from the ground surface upward need immediate attention.

    Dark, foul-smelling discharge from the frog points to thrush. Heat in the hoof wall, especially when compared to the opposite hoof, signals inflammation or infection. Any of these warrant closer investigation.

    The Daily 5-Minute Check Every Horse Owner Should Do

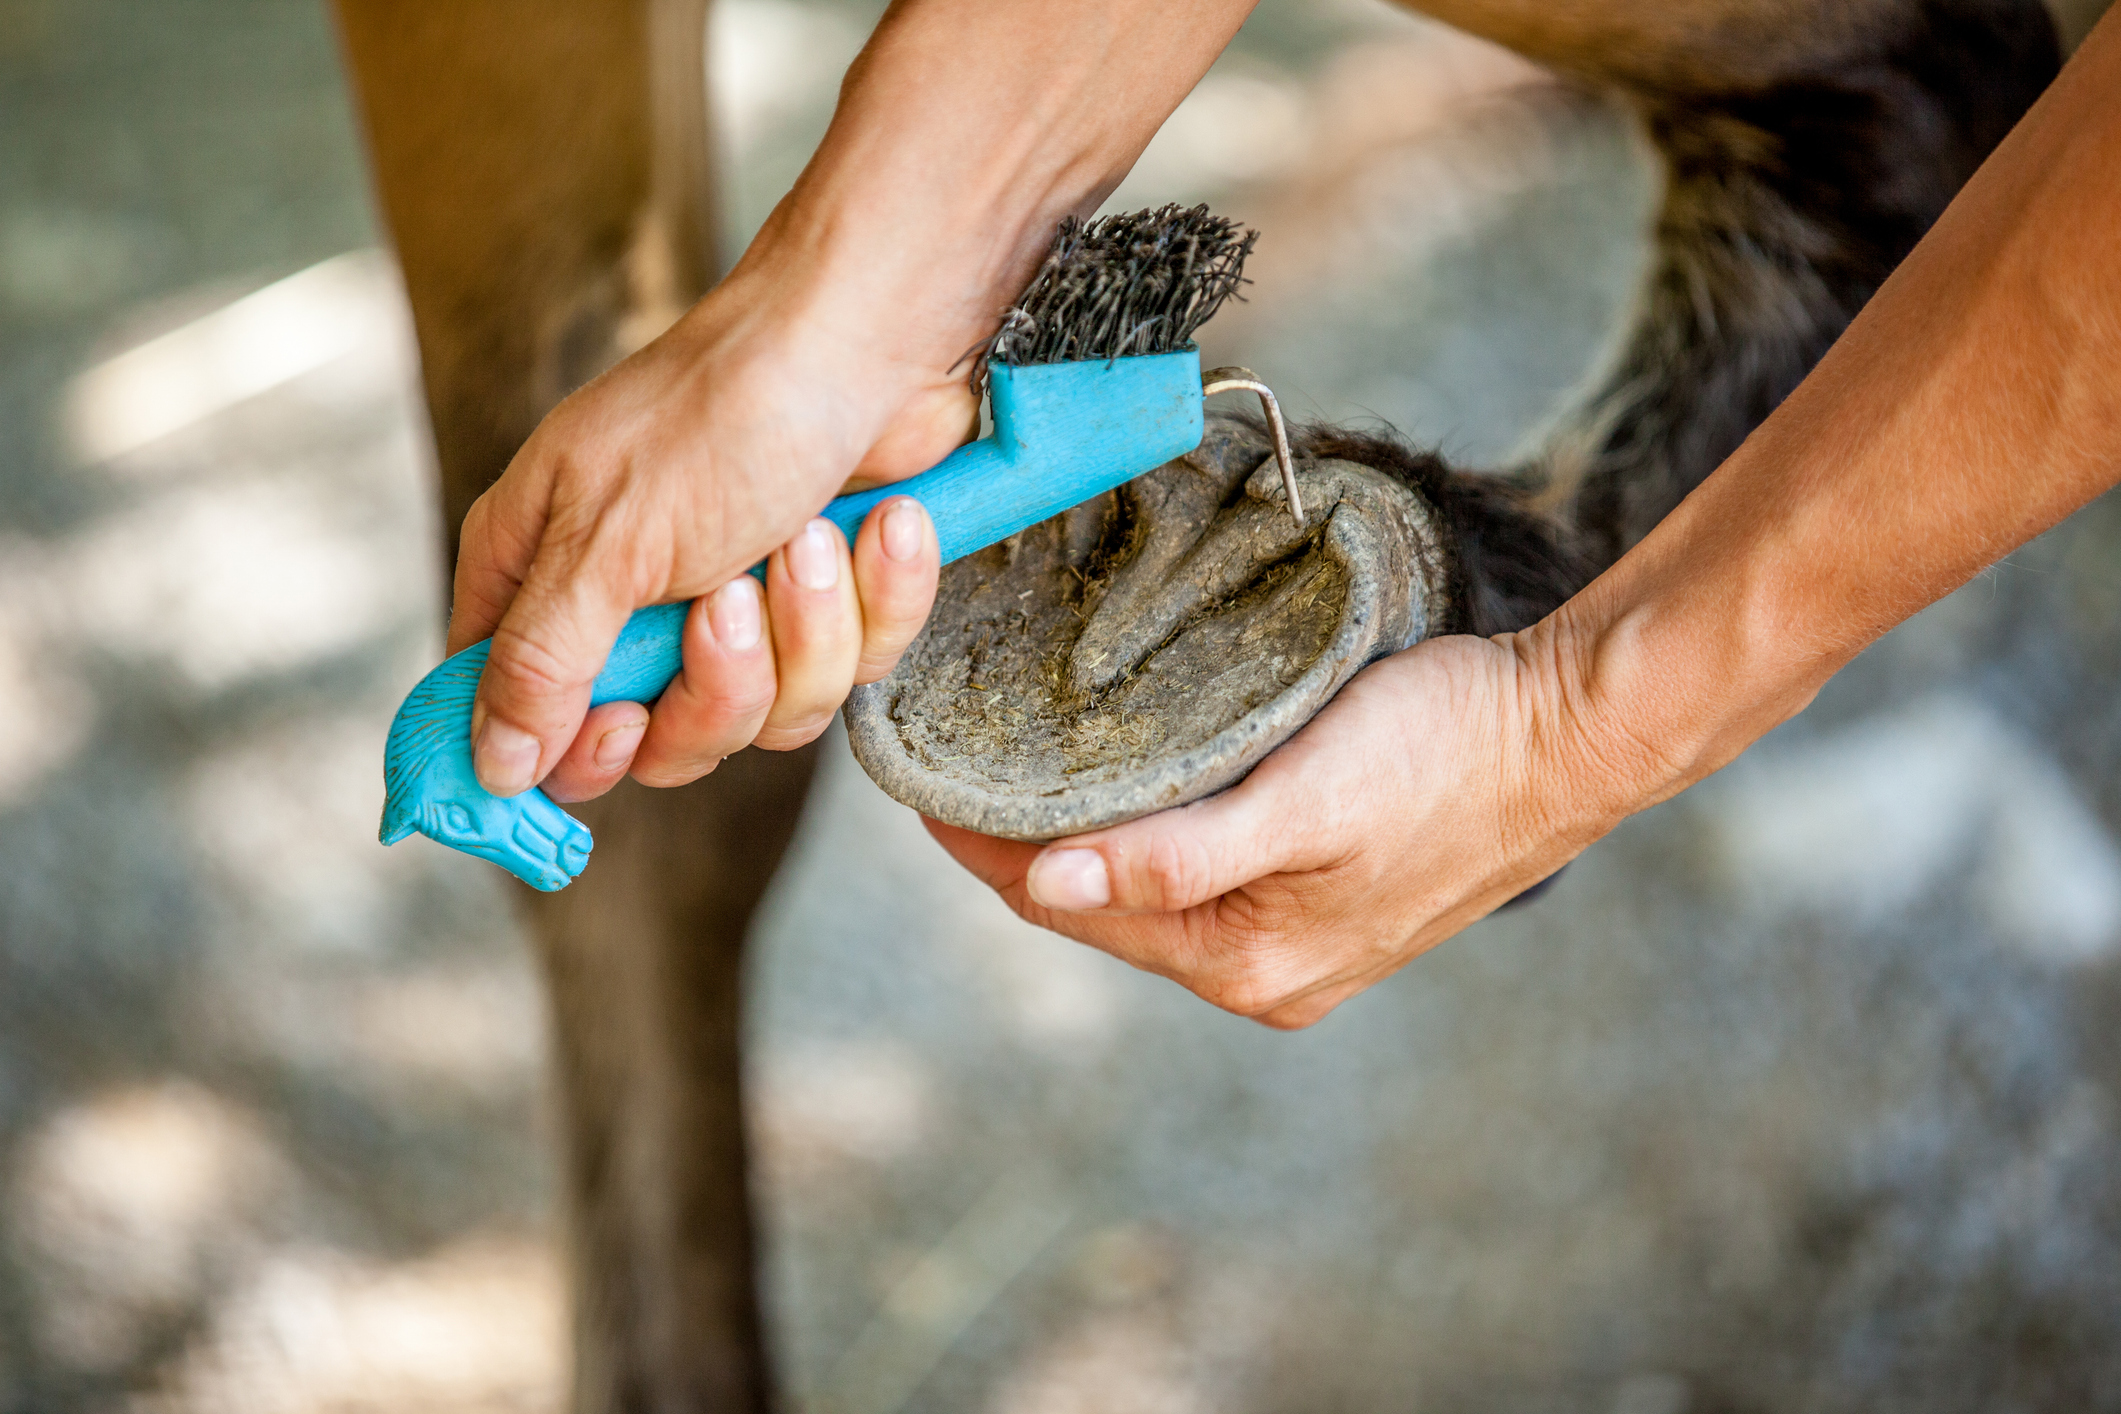
    Start with a thorough pick of each hoof. Clear all packed snow, ice, mud, and manure from the sole and frog. Once the hoof is clean, run your thumb along the hoof wall from top to bottom, feeling for any chips, cracks, or rough spots that weren't there yesterday.

    Press gently on the sole and frog to check for tenderness. A healthy horse should not flinch or pull away. Compare the heat of each hoof with the back of your hand.

    Warm hooves, especially when the weather is cold, indicate increased blood flow that usually means inflammation. Check the heels for any signs of cracking or separation, a common winter problem when the ground is frozen.

    Key Signs to Look For: Heat, Pulse, Odor, Cracks

    Heat is one of the earliest warning signs of laminitis, abscess, or infection. Feel all four hooves daily and note any asymmetry. A hoof that feels significantly warmer than its pair deserves immediate attention.

    The digital pulse is another critical indicator. Place your fingers on the artery that runs along the back of the fetlock. You should feel a subtle, steady beat.

    A strong, pounding pulse signals inflammation inside the hoof, which is a red flag that warrants a call to your vet.

    Odor matters too. Healthy hooves have an earthy scent at most. A sweet, rotting smell indicates thrush, while a foul, putrid odor might mean a deeper infection.

    And cracks in the hoof wall, especially vertical ones that start at the ground surface, need close monitoring as they can extend upward and compromise hoof integrity.

    Snowballing and Ice Packing: The #1 Winter Problem

    If you've ever watched your horse refuse to walk across a snow-covered paddock, you already know what snowballing is. Packed snow and ice build up inside the hoof, creating a hard ball that presses against the sole and frog with every step. It's painful, and it can cause bruising, strain on the tendons, and even cracks in the hoof wall.

    Snowballing typically starts when the snow is wet and around 32°F to 35°F. The snow sticks to the sole, then packs tighter with each step. If you're shoeing your horse, the rim of the shoe acts like a cup, holding the snow in place even more effectively.

    This is why snowballing affects shod horses more severely than barefoot ones.

    Why Snow Packs into Hooves and Turns into Painful Ice Balls

    Several factors combine to make snowballing worse. Moisture and temperature are the main drivers. Dry, powdery snow at very cold temperatures rarely packs.

    But as soon as the mercury rises just above freezing, the snow becomes sticky and clings to any surface. Your horse's body heat then melts the outer layer, which refreezes into ice as soon as the hoof is lifted and exposed to cold air.

    The shape of the hoof also matters. Hooves with a deep natural concavity, narrow heels, or contracted frogs provide a bigger pocket for snow to accumulate. Shoes with rims or clips create additional anchor points.

    And a horse's natural stride matters too, those that lift their feet high tend to expel snow with each step, while shuffle-gaited horses pack it in tighter.

    snowballing horse hooves

    Image source: Bing (Web (fair-use with source credit))

    How to Tell If Your Horse Is Struggling

    You might not see the snowball itself, especially if your horse has a thick winter coat and busy legs. Watch for subtle behavioral changes instead. A horse with painful ice balls in his hooves will often stomp his feet, as if trying to dislodge something.

    He might walk gingerly, especially on hard surfaces, or refuse to move forward entirely.

    Some horses will point their toes or stand with their weight shifted to their heels, trying to relieve pressure from the packed sole. Others will kick out at their own belly, attempting to knock the ice loose. If your horse shows any of these signs, pick his hooves immediately and check for snow packing.

    Prevention Methods That Actually Work

    • Non-stick sprays and oils: Apply a thin layer of petroleum jelly, vegetable oil, or a commercial non-stick hoof spray to the sole and frog before turnout. These create a barrier that snow can't easily cling to. Reapply daily, as they wear off quickly in deep snow.
    • Cotton packing: Pack wool or cotton balls into the sole before turnout, then seal them in place with a pad or hoof boot. This is a labor-intensive option, but it works well for horses that stand in deep snow for hours.
    • Snow pads: These are flat pads fitted between the shoe and the hoof, designed to fill the gap where snow accumulates. They come in a variety of materials, including plastic, felt, and rubber. Your farrier can fit them during a regular shoeing visit.
    • Rim pads: Instead of covering the entire sole, rim pads sit along the edge of the shoe, reducing the pocket where snow can pack. They're less restrictive than full pads and are a good option for horses that don't tolerate full coverage.
    • Anti-snowball hoof boots: Many brands like EasyCare and Cavallo make boots specifically for snow and ice. They provide traction and coverage, and many have a closed bottom that prevents snow from entering from underneath. These are excellent for turnout, though they require daily cleaning to prevent rubbing.

    Step-by-Step: Setting Up Your Snowball Prevention System

    First, assess your horse's situation. Is he shod or barefoot? How much turnout does he get?

    What kind of snow conditions are you dealing with? The answers guide your approach.

    If your horse is shod and spends hours outside, a full snow pad is usually the most reliable option. Schedule a farrier visit before the first significant snowfall and have the pads installed. If you're in a region with intermittent snow, a rim pad might be enough.

    For barefoot horses, hoof boots are the gold standard. They completely seal the sole from snow contact. Just make sure to size them correctly and check for rubs daily, especially during the first few wearings.

    If boots aren't feasible, establish a daily anti-snowball routine. Apply a non-stick product to the sole before turnout, pick the hooves when the horse comes in, and reapply clean hooves for the next turnout. Consistency matters more than the specific product you choose.

    Additional Tips for Extreme Conditions

    When temperatures stay well below freezing, snowballing becomes less of a problem because the snow stays dry and powdery. The real trouble starts when you hit those above-freezing days followed by overnight cold. Adjust your prevention strategy based on the daily forecast.

    Deep snow also presents its own challenges. Even if snow isn't packing into the soles, it can accumulate into a heavy ball on top of the hoof, straining tendons and ligaments. In these conditions, check hooves more frequently and consider limiting turnout to shorter periods.

    Thrush and Other Winter Infections

    Thrush is the most common hoof infection you'll encounter in winter, and it's almost entirely preventable. It's a bacterial and fungal infection that attacks the frog and the surrounding tissues, thriving in the warm, wet, and oxygen-poor environment that mud and manure-stalled bedding create.

    The casual horse owner often dismisses thrush as a cosmetic issue. That's a mistake. Severe thrush can undermine the structural integrity of the hoof, leading to lameness and, in extreme cases, penetration into sensitive structures.

    Why Winter Is Prime Time for Thrush

    Mud and moisture are the primary drivers. When your horse stands in a muddy, manure-filled paddock, the sole and frog are constantly exposed to bacteria and fungi. The warm, damp environment is a perfect breeding ground.

    Winter also tends to reduce hoof picking frequency, as owners are less enthusiastic about standing out in the cold with a hoof pick.

    Stalled horses are not immune. Wet bedding from urine, combined with soggy manure and limited airflow, creates the same conditions as an outdoor mud pit. Horses that stand in a damp stall for 20 hours a day are at as much risk as those turned out full-time in a wet pasture.

    How to Spot Thrush Early vs. Advanced Cases

    Early thrush is subtle. You might notice a slightly darker frog with a mild, earthy odor. The frog may feel softer than normal, and you might see a thin, dark discharge when you pick around the sulci (the grooves next to the frog).

    At this stage, treatment takes mere days.

    Moderate thrush presents as a distinct, foul smell, like rotten meat. The frog may show deep, dark fissures along its edges, and the infection may spread to the sulci. Your horse might occasionally be sensitive when pressure is applied to the frog.

    This stage takes one to two weeks of dedicated treatment.

    Advanced thrush is unmistakable. The frog takes on a black, disintegrating appearance with a very strong odor. The infection has likely reached the underlying sensitive tissue, causing noticeable lameness.

    You may see black or dark brown crust lifting away from the frog's surface and deep, tubular lesions. At this point, veterinary intervention is strongly recommended.

    Safe, Effective Treatments to Keep on Hand

    • Copper sulfate: This anti-bacterial powder is a mainstay of thrush treatment. Pick the hoof clean and dry, pack the powder into the affected sulci, and bandage the hoof. It is effective against bacteria and fungi, but wear gloves and avoid getting it on healthy skin.
    • Cleantrax: A topical solution that targets bacterial and fungal infections. It's alcohol-free and designed for daily use. It combines antifungal and antibacterial agents in a single product.
    • Keratex and similar hoof hardeners: These are less about treating an active infection and more about restoring the frog and sole's integrity afterward.
    • Diluted iodine or chlorhexidine: These have long histories of use in thrush management. A 10% iodine solution or a dilute chlorhexidine scrub can be effective, but be careful. Iodine can burn healthy tissue if applied too aggressively.

    Before you start any treatment, pick the hoof completely clean. Use a soft brush to remove all debris from the sulci. Let the hoof dry.

    Apply the treatment to the affected areas, avoiding healthy skin and tissue. Most treatments require daily application for weeks, not just a few days.

    Canker vs. Thrush: What Every Owner Should Know

    Canker is rarer than thrush, but it's more serious and frequently misdiagnosed. It's a chronic infection that produces a spongy, cauliflower-like mass of tissue on the frog and sole. It typically starts at the frog's apex or in the sulci and spreads outward.

    The key difference is appearance. Canker tissue looks white, gray, or pale pink and grows above the surrounding level. It's soft and easily bleeds on contact.

    Thrush causes black, disintegrating tissue, and it stays flat or recessed into the sulci. Canker also doesn't respond to standard thrush treatments.

    If you suspect canker, call your vet. This condition generally requires aggressive surgical debridement under sedation, along with a rigorous local treatment plan. Early intervention is essential.

    Preventing Winter Thrush Before It Starts

    Prevention is straightforward, but it requires consistency. First, pick hooves daily. This is non-negotiable.

    Second, keep turnout and stall areas as clean and dry as possible. Rotate paddocks if you can, add extra drainage, and clean stalls thoroughly at least once a day.

    Third, consider using a diluted bleach solution (one part bleach to four parts water) to scrub stall floors during your deep clean. This disinfects the environment and kills the thrush-causing organisms. Just make sure the area is dry before the horse returns.

    Finally, spot-check the frogs of all horses on your property at least once a week. Thrush can spread between horses through shared water sources, stalls, and even farrier tools. Early detection makes treatment far easier.

    thrush horse hoof

    Image source: Bing (Web (fair-use with source credit))

    Footing Problems: Mud, Frozen Ground, and Everything Between

    Winter footing is rarely consistent. One week you're dealing with deep mud, the next the ground is frozen solid. Both extremes stress hooves differently, and you need to adapt your care routine accordingly.

    How Frozen Ground Causes Sole Bruises and Cracked Walls

    Frozen ground is unforgiving. Without the natural give of soft soil, each step sends shock waves through the hoof capsule. Repeated concussion bruises the sole, especially in horses with thin soles or those that have been trimmed too aggressively.

    These bruises appear as reddish or bluish discolorations on the sole and can be quite painful.

    Cracked hoof walls develop when the hoof becomes too dry and brittle. Frozen ground doesn't compress, so any natural weakness in the hoof wall gets amplified. A small chip can quickly become a full vertical crack as the horse pounds across hard terrain.

    This is why the American Farrier's Association emphasizes maintaining balanced trim angles throughout winter, as even slight imbalances magnify under frozen conditions.

    The Mud Problem: Constant Moisture Wrecks the Hoof Wall and Invites Thrush

    Mud is a different beast. When hooves stay wet for extended periods, the hoof wall absorbs water and softens. The keratin fibers that give the hoof its strength weaken.

    The hoof becomes spongy and prone to chipping, flaring, and separation at the white line.

    That constant moisture also creates the perfect environment for thrush and other bacterial infections. The frog softens, and the sulci deepen, creating pockets where debris and bacteria accumulate. Mud also makes it harder to pick hooves thoroughly, so problems go unnoticed.

    The worst scenario is a freeze-thaw cycle. Hooves get soaked in mud, then the temperature drops and the moisture inside the hoof freezes. The expansion of ice pries apart the hoof wall at a microscopic level, causing structural damage that will not show up for weeks.

    Managing Turnout Footing When You Can't Control the Weather

    You can't control the weather, but you can control the environment somewhat. Here's what actually helps:

    • Add drainage: If your paddock turns into a swamp, consider adding gravel or sand to improve drainage. A layer of crushed stone around gates and high-traffic areas can make a massive difference.
    • Use deep bedding in stalls: Deep straw or wood shavings give hooves a dry place to stand and let moisture evaporate. This is especially important for horses that come in from muddy turnout.
    • Rotate paddocks: If you have multiple turnout areas, rotate them to give the mud a chance to dry out.
    • Install a dry lot: A small, well-draining area that horses can use during the worst mud season. It doesn't need to be large, just enough for them to move around and get fresh air.
    • Consider temporary fencing: Electric tape can create a smaller access area to protect gate areas from becoming mud pits.

    The Freeze-Thaw Cycle and Why It's Worse Than You Think

    The freeze-thaw cycle is the single most damaging weather pattern for hooves. It starts with wet, muddy conditions that soften the hoof wall. Then temperatures drop below freezing, and the moisture in the hoof freezes and expands.

    This expansion creates microscopic cracks in the hoof wall. When the hoof thaws, those cracks widen and become entry points for bacteria, mud, and debris.

    Over a single winter, this cycle can repeat dozens of times. Each cycle compounds the damage. Hoof walls that were sound in the fall look ragged, chipped, and cracked by February.

    This is why maintaining a consistent moisture balance is so important. Dry, brittle hooves crack on hard ground. Wet, soft hooves crack in freezing conditions.

    The goal is a middle ground.

    Shoes vs. Barefoot in Winter: What's Right for Your Horse?

    The age-old debate takes on new urgency in winter. Each approach has distinct advantages and challenges, and the right choice depends on your horse, your footing, and your management style.

    How Shoeing Needs Change When the Ground Freezes

    Shod horses need different shoeing considerations in winter. Traction becomes the primary concern. Smooth shoes on icy ground can lead to slips and falls, which can be catastrophic.

    Many farriers recommend adding some form of traction.

    Studs are one option. Removable studs provide excellent grip on icy surfaces but must be removed when not needed, as they can cause strain on the hoof and legs. Borium is another option, a tungsten carbide material that can be welded to the shoe for permanent traction.

    It lasts longer than studs but cannot be removed.

    Snow pads and rim pads become more essential for shod horses. The shoe rim creates a pocket where snow packs, and pads help fill that space. Your farrier should consider what type of pad works best for your horse's activity level and your local snow conditions.

    Some horses do great with a simple rim pad, while others need a full snow pad.

    Studs, Borium, and Other Traction Options for Shod Horses

    • Studs: They come in various sizes and shapes, from small road studs to large competition studs. Screw them into tapped holes in the shoe. Best for days when you're riding and need extra grip, but remove when the horse is in the stall.
    • Borium: Also known as "tungsten carbide," this metal is applied to the shoe's ground surface. It wears well and provides long-lasting traction. Great for horses that spend most of their time in the field.
    • Rubber grips: Some farriers apply a rubber compound to the shoe's surface. This provides grip without the aggressive wear of studs. Excellent for roads and hard surfaces.
    • Calked shoes: These have a permanent metal wedge on the toe or heel. They provide grip but can twist or cause strain if the horse steps awkwardly. Less common nowadays, but some farriers still use them for specific cases.

    Barefoot Considerations: When It Works and When It Doesn't

    Barefoot horses have a natural advantage in winter in one respect: snowballing is less severe because there's no shoe rim to trap snow. The hoof also grows stronger in response to ground contact, especially when the horse is moving over varied surfaces.

    However, barefoot horses face their own challenges. On frozen ground, the soles take more direct impact. Horses with naturally thin soles may become sore, especially on ice or packed snow.

    The key is maintaining a strong, well-conditioned hoof through regular trimming and proper nutrition.

    Barefoot can work well if your horse has naturally thick, strong hooves and you can manage his environment. But if your horse struggles on hard ground even in summer, winter is not the time to go barefoot.

    Hoof Boots as a Hybrid Solution for Winter Riding and Turnout

    Hoof boots fill the gap between barefoot and shod. They provide protection and traction when needed, and you can remove them when the horse is in the stall. This makes them an excellent option for winter.

    Key Benefits of Hoof Boots in Winter

    • Protection from ice and snow: The boot covers the sole, preventing snowballing.
    • Traction on slippery surfaces: Many boots have aggressive treads that grip ice and snow.
    • Flexibility: Use time in turnout, remove when he's in the stall. No commitment.
    • Support for sore hooves: Boots with padded soles can protect sensitive feet.

    Things to Watch With Hoof Boots

    • Rub and chafe: Always check for pressure points, especially during the first few uses.
    • Snow packing inside the boot: Some models allow snow to enter from the top. Look for boots with a sealed design.
    • Retention: Boots can slip off in deep mud, so find a model with a secure fit.
    • Cost: Quality boots run $50 to $150 per boot, which adds up.

    When choosing a horse boot for winter, prioritize models with straps that keep debris out and treads that provide consistent grip. EasyCare and Cavallo are two major manufacturers, but fit is more important than brand.

    hoof boot winter traction

    Image source: Bing (Web (fair-use with source credit))

    Your Winter Trimming Schedule: What to Ask Your Farrier

    Winter is not the time to skip farrier visits. However, the schedule might change based on hoof growth and your horse's activity level.

    Why Some Farriers Extend to 8–10 Week Intervals in Winter

    Hoof growth slows in winter, which means your horse doesn't need trimming as often. Many farriers will extend your schedule from every 5 to 6 weeks to every 8 to 10 weeks during the cold months.

    However, this decision should be made intentionally, not because you ignored your appointment reminder. A farrier who sees a horse every 8 to 10 weeks during winter will still catch problems like cracks, loose shoes, or thrush early. But waiting longer without a visit is a gamble.

    Before you extend any interval, confirm your horse's hooves are in good shape. A horse with a pre-existing crack or poor hoof quality may need more frequent attention, even in winter.

    What to Discuss at Your Fall Farrier Visit

    Before winter arrives, schedule a pre-winter farrier appointment. This is the perfect opportunity to address several things:

    • Review trimming frequency: Ask your farrier what interval he recommends for your horse during winter.
    • Check for potential issues: Look for any cracks, flaring, or imbalances that may worsen in cold conditions.
    • Discuss winter shoeing strategies: If your horse is shod, discuss snow pads, studs, or other traction options.
    • Evaluate hoof supplements: Ask for recommendations if hoof quality is a concern.
    • Set a schedule: Have clear dates for winter visits set before the first snowstorm.

    The Risk of Over-Trimming in Cold, Dry Conditions

    Over-trimming is a common mistake in winter. In the dry, cold weather, the hoof's moisture content drops, making the hoof wall harder and more brittle. Taking off too much hoof wall or sole leaves the foot unprotected and can cause bruising on hard ground, as recommended by the American Farrier's Association.

    A good farrier will leave the sole slightly more comfortable in winter to protect against trauma. The frog should not be trimmed aggressively, as it plays a critical role in shock absorption on frozen ground. If you're unsure whether your farrier is over-trimming, ask him to explain his reasoning and keep an eye on how your horse moves after a trim.

    Preparing Your Horse for the Farrier in Winter

    Getting your horse ready for a farrier visit in winter takes a little extra planning. Here's what helps:

    • Have a dry, safe area for the farrier to work: A stall or a covered aisle is best. Make sure the footing is level and secure.
    • Clean hooves beforehand: A quick pick removes mud and ice, which makes the farrier's job easier.
    • Let the horse thaw out: If your horse has been outside in the mud, allow him to come inside and warm up for a few hours before the visit. Hooves that are still wet and frozen are very hard to work on and more prone to chipping.
    • Have a plan for traction: If your horse is shod, discuss making any traction changes for the ground conditions.

    Scheduling Around Weather

    Winter weather can be unpredictable. If a storm hits, your farrier may not be able to get to you. Consider scheduling your farrier visit before a predicted storm, rather than after.

    This gives you a buffer in case of delays.

    Step-by-Step Winter Hoof Care Routine

    Consistency is the backbone of winter hoof care. This daily and weekly routine is designed to catch problems early and prevent the most common issues.

    Morning: Quick Inspection and Cleaning

    When you bring your horse in from the night turnout, pick out all hooves. Remove packed snow, ice, mud, and manure. Take note of anything unusual, such as cracks, chips, or a strong odor.

    Before Turnout: Applying Anti-Snowball Prevention

    Before turning your horse out for the day, apply whatever anti-snowball product you're using. This could be a non-stick spray, petroleum jelly, or a hoof dressing. Do this after cleaning the hooves, ensuring they're dry.

    After Turnout: Checking for Ice Balls, Mud, and Stone Bruises

    When your horse comes back in, pick the hooves again. Check for ice balls that may have formed despite the prevention. Look for any new cracks or chips that may have developed.

    Run your hand over the hoof to feel for heat. Watch how your horse walks; if he seems sore after coming in, take a closer look.

    Weekly: Deep Cleaning and Checking for Cracks and Thrush

    Once a week, take a more thorough approach. Wash the hooves with a mild soap and water solution, but only if needed. Make sure they are completely dry afterward.

    Then:

    • Examine the frog: Look for any dark spots, foul smell, or deterioration.
    • Check the white line: Look for any separation or signs of infection.
    • Assess the hoof wall: Feel for any roughness, cracks, or chips.
    • Inspect the heels: Check for any signs of contraction or tenderness.

    Monthly: Documenting Hoof Condition to Spot Changes

    Take a photo of each hoof on the first day of every month. Compare it with previous photos. This simple habit lets you spot subtle changes over time, such as a slow-growing crack, flaring, or changes in the frog.

    Tracking Your Horse's Response

    Pay attention to how your horse moves on different surfaces. If he's reluctant on hard ground, try testing hoof boots or adjusting trimming intervals. If he's struggling with mud, increase the frequency of cleaning and provide a dry area.

    Feeding and Supplements: Do They Actually Help Winter Hooves?

    Hoof quality is determined by many factors: genetics, environment, and nutrition. Winter brings unique nutritional challenges that can impact hoof health.

    The Role of Hydration from the Inside Out

    Hydration is critical for hoof health. Hooves are about 25% water by weight, and a dehydrated hoof becomes brittle and prone to cracking. In winter, horses often drink less because water sources are cold or frozen.

    This can lead to dehydration, which impacts hoof quality.

    Ensure your horse has access to clean, unfrozen water at all times. Consider adding warm water to his bucket during very cold days, which encourages more drinking.

    How Winter Feeding Changes Affect Hoof Quality

    Winter changes what a horse eats. In many regions, pasture is limited, so horses get more hay. Hay is lower in certain nutrients compared to fresh grass, especially omega-3 fatty acids.

    These fatty acids play a role in maintaining the hoof's cellular structure.

    If you're feeding high-quality hay and a balanced mineral supplement, you're likely meeting your horse's nutritional needs. However, horses with poor hoof quality may benefit from targeted supplementation.

    What the Research on Biotin and Other Supplements Actually Says

    Biotin is the most researched hoof supplement. Studies show that consistent biotin supplementation at 20 mg/day can improve hoof wall integrity after 9 to 12 months. That's because the hoof horn grows slowly, and new growth takes months to reach the ground surface.

    Other beneficial nutrients include:

    • Methionine and lysine: These amino acids are the building blocks of keratin, the protein that makes up the hoof wall.
    • Zinc and copper: These trace minerals are involved in keratin formation and tissue repair.
    • Iodine: This supports thyroid function, which regulates hoof growth.
    • Omega-3 fatty acids: These reduce inflammation and promote healthy skin and hoof tissue.

    If you're considering a hoof supplement, look for products containing these nutrients with transparent daily amounts. Most research supports a formula that provides at least 20 mg of biotin daily.

    When Supplements Are Worth It vs. Money Wasted

    Supplements are not a quick fix. They will not improve an already-damaged hoof. They support new growth, which requires months of consistent feeding.

    If your horse has healthy, strong hooves, a quality supplement is unnecessary.

    Supplements become worthwhile when your horse has known hoof issues: cracking, chipping, poor growth, or a hoof quality that is below average. A balanced supplement combined with proper farrier care and environmental management can improve hoof quality over 9 to 12 months.

    Environmental Factors That Matter Most

    Nutrition is only one piece of the puzzle. Hoof health depends on the balance of:

    • Genetics: Some horses simply have tougher hooves.
    • Moisture balance: Too much moisture softens them, too little makes them brittle.
    • Exercise: Movement stimulates blood flow, which promotes growth and health.
    • Frog stimulation: Pressure on the frog helps maintain the hoof's internal structures.
    • Regular trimming: Consistent maintenance prevents small problems from becoming big ones.

    Address all these factors before spending money on supplements.

    Common Winter Hoof Mistakes (and How to Avoid Them)

    Everyone makes mistakes, but some winter hoof care errors are more costly than others. Here are the most common traps and how to avoid them.

    Skipping Farrier Visits Because It's Cold

    You might be tempted to reschedule a farrier visit because the weather is awful or because you're busy. But a farrier visit is your best insurance against developing problems. Skip it, and small cracks could become large ones, or an unbalanced hoof could lead to lameness.

    Over-Oiling Hooves, Which Can Dry Them Out Further

    Many owners think they're helping by slathering hoof oil on their horse's hooves. But over-oiling can cause more harm than good. Many commercial oils and dressings contain solvents that actually dry out the hoof.

    They can also clog the pores and prevent the hoof from naturally breathing.

    Instead of applying oil daily, use a water-based conditioner or simply keep the hooves clean and dry. If you're using a dressing for aesthetics, stick to a high-quality product and apply it sparingly, no more than two to three times per week.

    Ignoring Loose Shoes Until They're Lost in Deep Snow

    A loose shoe in winter is a serious problem, especially when the ground is covered by snow. It can twist, causing serious injury to the hoof wall. It can also expose the hoof to bruising.

    If you notice a loose shoe, address it immediately. Don't wait until your next scheduled farrier visit.

    Hosing Off Mud and Leaving Hooves Wet All Day

    Hosing off mud is a great way to clean the hooves, but leaving them wet and not drying them properly does more harm than good. The hoof needs time to dry. If you wash the hooves, make sure they're thoroughly dried afterward, and do not apply a dressing that will trap moisture.

    Not Adjusting Turnout for Icy Conditions

    Icy turnout conditions are a leading cause of injury. Horses can slip and fall, injuring their legs, or they can strain their tendons trying to maintain balance. If your paddock is covered in ice, consider keeping your horse in or providing a sand-covered area for movement.

    Letting the Frog and Sole Become Too Soft

    Soft, mushy frogs are susceptible to thrush and other infections. When the frog is exposed to constant moisture, the tissue weakens. It's essential to provide periods of dryness, whether through a dry stall or a well-draining paddock.

    When to Call the Vet or Farrier: Red Flags

    Some problems need a professional. Here are the signs that your horse needs more than you can provide.

    Signs of Laminitis or Founder That Winter Masks

    Laminitis is a painful inflammation of the sensitive laminae inside the hoof. Winter can mask the early signs because horses tend to be less active and may not show obvious lameness. Heat in the hoof is a key indicator.

    A strong digital pulse, shifting weight, and reluctance to move on hard surfaces are other signs.

    If you suspect laminitis, call your vet immediately. Early intervention significantly improves the chance of recovery.

    Sudden Lameness on Frozen Ground

    A horse that suddenly becomes lame on hard, frozen ground might have an abscess, a bruise, or a fracture. An abscess is a localized infection that builds pressure inside the hoof. It's intensely painful, and it requires drainage, which a vet or farrier can manage.

    For any sudden lameness, keep the horse still and call the vet for guidance.

    Cracks That Reach the Coronet Band

    The coronet band is the area at the top of the hoof where the wall meets the skin. Cracks that reach this area are serious because they can expose the sensitive structures beneath. They may indicate a poor trim, a chronic imbalance, or an injury.

    Keep the area clean and have a farrier evaluate as soon as possible.

    Persistent Thrush That Won't Clear with Treatment

    If you've been treating thrush for two to three weeks and it's not improving, something else may be going on. The infection might be deeper than expected, or there may be an underlying issue like a foreign body. Consult your vet if you're not seeing progress.

    A Horse That Resists Putting Weight on One Foot

    This is a sign of significant pain and should be treated as an emergency. It could indicate severe bruising, a fracture, or a sepsis of the hoof. Keep the horse as still as possible and call your vet immediately.

    The 10-Minute Weekly Winter Hoof Assessment

    This is a simple, thorough check you can do yourself between farrier visits. It takes about 10 minutes per horse and gives you a clear picture of hoof health.

    Step-by-Step Assessment

    1. Gather Your Tools

    You'll need a hoof pick, a soft brush, a clean cloth, and a small flashlight.

    2. Clean Hooves Thoroughly

    Pick all four hooves, removing everything. Use the brush to clean the sole and frog. The flashlight will help you see into the sulci.

    3. Assess the Hoof Wall

    Look for any vertical cracks, horizontal ridges, chips, or flaring. Run your hand along the wall from top to bottom. Note any roughness or unevenness.

    4. Check the Sole

    Look for dark spots or any signs of bruising. Press gently on the sole to check for tenderness. Healthy sole should feel firm and resilient.

    5. Examine the Frog

    Check the frog for softness, dark areas, or odor. Press gently on the frog to ensure it's healthy. A healthy frog is firm and pliable.

    6. Feel the Heels

    Check for any heat, swelling, or cracking in the heel bulbs. Press gently to see if the horse reacts negatively.

    7. Assess Moisture Balance

    Is the hoof overly dry (crumbly, chalky) or overly wet (soft, spongy)? Adjust your management accordingly.

    8. Look for Heat and Pulse

    As discussed earlier, feel each hoof for heat. Check the digital pulse, especially if you feel any heat.

    9. Check Shoes or Boots

    Check for loose shoes, worn studs, or any damage. Confirm your boots aren't rubbing.

    10. Record Everything

    Write down what you find. This record will help you spot trends and catch changes early.

    What to Look For Each Week: Symmetry, Sole Depth, Frog Size, Heel Height

    • Symmetry: Are both front hooves similar in shape? Are the heels even? Asymmetry can indicate trimming issues or weight distribution problems.
    • Sole depth: A slightly concave sole is normal. A flat or convex sole is a red flag and needs professional attention.
    • Frog size: A healthy frog should be visible and prominent. A shrunken or atrophied frog indicates lack of stimulation.
    • Heel height: Heels that are too high or too low affect hoof balance and can lead to lameness.

    A Simple Log System

    Use a notebook or a simple app to keep track. For each hoof, write the date, your observations, and any changes you've noticed. This weekly snapshot is incredibly useful for your farrier.

    Frequently Asked Questions

    Can I leave my horse barefoot in winter?

    Yes, many horses thrive barefoot in winter, especially if they have naturally strong hooves and are used to it. The main risks are snowballing and bruising on frozen ground. If your horse is comfortable barefoot, keep him that way, but monitor him closely.

    For horses with weaker hooves, winter boots are a good compromise.

    How often should I pick hooves in winter?

    At least once a day, ideally twice. Morning and evening are best. This prevents snowballing, removes mud and manure that can cause thrush, and lets you catch small problems early.

    Horses in muddy or wet conditions may need more frequent attention.

    Do hoof boots help with snow traction?

    Yes, many hoof boots are specifically designed for winter use. They provide traction on ice and snow and prevent snowballing at the same time. Look for boots with aggressive treads and a design that keeps debris out.

    Should I wash mud off hooves in freezing weather?

    You can wash hooves, but you must dry them thoroughly afterward. Leaving them wet in freezing temperatures can cause the moisture to freeze and damage the hoof wall. If you do wash, dry them with a towel and keep the horse in a dry stall until the hooves are dry.

    Can I use regular hoof oil in winter?

    You can, but choose a high-quality product and apply it sparingly. Many oils contain solvents that dry out the hoof. A water-based conditioner is often better.

    If your hooves are dry and brittle, apply a moisturizer. If they're wet and soft, skip it entirely.

    How long does it take for a hoof crack to grow out?

    A hoof grows from the coronet band to the ground in about 9 to 12 months, depending on the horse and the season. A crack near the ground may grow out in a few months. A crack that starts higher up can take a year or more.

    Regular farrier care is essential to keep it from expanding while it grows out.

    Is thrush contagious between horses?

    Thrush is caused by bacteria and fungi present in the environment. It is not airborne, but it can spread in shared mud, water, or stalls. Good hygiene practices, such as daily picking and clean stalls, go a long way in preventing the spread.

    What's the difference between a hoof abscess and a stone bruise?

    A stone bruise is damage to the sensitive tissue caused by concussion on a hard object. An abscess is a bacterial infection that creates pressure inside the hoof. Both cause lameness.

    A bruise just needs rest and time to heal. An abscess usually needs draining by a vet or farrier.

    Can I trim my horse's hooves myself in winter?

    If you have training and the right tools, it's possible. However, winter over-trimming risks are high. It's safer to have a professional assess the hoof before you decide to trim.

    A farrier can also spot problems you might miss.

    Should I change my horse's feeding for hoof health in winter?

    You should ensure your horse has adequate water intake and a balanced diet. If you're concerned about hoof quality, consider a hoof supplement and consult your farrier or vet about nutritional needs. Don't make significant feed changes without professional guidance.

  • Step-by-step: How to Bathe a Horse in Winter

    Step-by-step: How to Bathe a Horse in Winter

    how to bathe a horse in winter

    Image source: Bing (Web (fair-use with source credit))

    Standing in a freezing barn aisle at 6 PM, staring at a horse caked in dried sweat and mud, you're asking yourself the same question every horse owner faces eventually: how to bathe a horse in winter without turning it into a veterinary emergency. It's one of those tasks that seems simple enough in theory, but the cold changes everything. The stakes are higher, the drying time is longer, and the margin for error is razor thin.

    The key difference between a summer bath and a winter bath comes down to thermoregulation. Research from equine veterinary science indicates that a horse's thick winter coat is its primary defense against cold stress. When that coat gets soaked, it loses nearly all insulating value.

    A wet horse at 40°F can lose body heat up to 20 times faster than a dry one. That's not a number to brush off. As we head into 2026, more barns are adopting winter bathing protocols that prioritize safety over sparkle, and you should too.

    Quick Answer

    To bathe a horse in winter, only do it if the temperature is above 40°F. Use lukewarm water, never hot. Work in a draft-free, enclosed space.

    Shampoo quickly and rinse thoroughly. Dry immediately with towels and a sweat scraper. Finish with a wool cooler until the horse is completely dry.

    Never turn out a wet horse. Never bathe a horse below 40°F without a heated barn.

    Is It Safe to Bathe Your Horse in Winter?

    The short answer: sometimes. The longer answer depends on three critical questions you need to ask yourself before you even fill a bucket.

    What's the actual temperature?

    Not the temperature on your phone. Not the temperature in the sun. The temperature in the exact spot where you plan to bathe the horse.

    If you're washing in an unheated outdoor wash rack, you're working with ambient air temperature and whatever wind is blowing through.

    Here's a simple threshold to remember: if it's below 40°F and you don't have a heated barn, don't do a full bath. It's that simple. The American Association of Equine Practitioners highlights cold stress and hypothermia as real risks for horses exposed to wet and cold conditions.

    Below 40°F, a wet horse's body has to work overtime to maintain core temperature, and that's a losing battle.

    If you're at 45°F but there's a 15 mph wind cutting through the barn aisle, that's effectively colder. Wind chill doesn't just affect humans. It strips heat away from a wet coat fast.

    Do you have a heated or draft-free space?

    A heated wash stall with enclosed walls makes winter bathing dramatically safer. The warmth helps the horse dry faster and prevents the initial shock of cold water hitting warm skin. If you have access to a heated barn, your safe temperature window stretches much further.

    But most backyard barns, the ones where most of us keep our horses, don't have heated wash racks. You've got a cross-tie in a barn aisle, maybe a wash stall with concrete walls and a drain. No heat.

    No insulation from drafts. That changes the calculation entirely.

    Does your horse actually need a bath, or just a spot-clean?

    This is the question people skip, and it's the most important one. A full bath in winter should be the exception, not the routine. Every time you fully soak a horse in cold weather, you're taking a risk.

    The reward has to justify it.

    Legitimate reasons for a full winter bath include:

    • A horse that's been sweating heavily under a blanket for days, with salt crust and dirt trapped against the skin
    • A skin condition that requires medicated shampoo, such as rain rot or fungal infections
    • An upcoming show or veterinary procedure where cleanliness matters
    • Heavy mud that's dried and matted into the coat

    If the horse is just dusty or has a bit of dried mud on its legs, that's not a bath situation. That's a good grooming session with a curry comb and maybe a hot towel for the muddy spots.

    The Cold Truth: What Happens to a Wet Horse in Winter

    wet horse shivering cold

    Image source: Bing (Web (fair-use with source credit))

    Understanding why winter bathing is risky starts with understanding how a horse's coat actually works. It's not just fur. It's a carefully engineered insulation system.

    How a winter coat normally insulates

    A horse's winter coat grows in response to decreasing daylight, not temperature. As fall days shorten, the horse's pineal gland detects the change and triggers hair growth. The result is a dense, longer coat made up of two layers: a soft, fluffy undercoat close to the skin, and a coarser, oilier outer layer on top.

    This structure creates trapped air pockets. Warm air from the horse's body heats the air between the undercoat fibers, and the outer layer blocks wind and moisture from disturbing that warm layer. It's essentially the same principle as a down jacket.

    The loft is what keeps the horse warm.

    Why wet fur loses all its loft

    Here's the problem. When water penetrates the coat, it displaces the trapped warm air. Water is an excellent conductor of heat, which means it pulls warmth away from the horse's body and transfers it to the cold air outside.

    A wet horse isn't just cold on the surface. It's losing core body heat at an alarming rate.

    Veterinary research on equine thermoregulation shows that a wet coat can lose heat up to 20 times faster than a dry coat. That's not an exaggeration. If the horse is shivering, its body is burning energy to generate heat.

    That means it's not using that energy for digestion, immune function, or maintaining body condition.

    Hypothermia, colic, and respiratory risks explained

    The most immediate danger is hypothermia. When a horse's core temperature drops below normal, its body starts shutting down non-essential functions to protect vital organs. The horse may become lethargic, shiver violently, or stop eating.

    Severe hypothermia requires emergency veterinary intervention.

    Colic is a secondary risk that's often overlooked. When a horse gets cold, blood flow is redirected away from the digestive tract toward the core. This slows gut motility, which can lead to impaction colic.

    A horse that's cold, wet, and stressed after a winter bath is at higher risk of developing colic in the next 24 to 48 hours.

    Respiratory issues round out the trifecta. Cold air hitting a wet, chilled horse can trigger airway inflammation. Horses with a history of asthma or respiratory sensitivity are especially vulnerable.

    A sudden chill can suppress the immune system, making the horse more susceptible to infections like pneumonia.

    The bottom line is straightforward: a wet horse in cold weather is a medical emergency waiting to happen. That's why the decision to bathe in winter needs to be deliberate, not impulsive.

    Full Bath vs. Spot-Clean: How to Decide

    Not every dirty horse needs a full bath. In winter, the safest approach is usually a strategic spot-clean. But there are absolutely times when a full bath is the right call.

    Here's how to think through it.

    When a full bath is worth it

    A full bath makes sense when the horse's skin needs actual cleaning, not just surface dust. Heavy sweat buildup under a blanket is the most common scenario. When a horse sweats under a blanket for multiple days, the moisture and salt can cause skin irritation, bacterial growth, and even fungal infections.

    That needs a proper wash.

    Medical conditions are another reason. Rain rot, a bacterial infection that thrives in damp conditions, often requires medicated shampoo baths. Fungal infections like ringworm need treatment too.

    In these cases, the benefits of bathing outweigh the risks of cold exposure, provided you can dry the horse thoroughly afterward.

    Show horses are a special case. Winter shows happen in heated arenas, and a clean, shiny coat is non-negotiable. If you're showing, you'll need to bathe during the week.

    The key is doing it early enough that the horse has time to fully dry before any cold exposure. Bathe in the morning, dry completely, and let the horse spend the rest of the day in a warm barn.

    When you're better off with waterless options

    If the horse is dusty, has minor mud, or has a slightly dull coat, waterless shampoo is your best friend. No-rinse equine shampoos are designed to clean the coat without water. You spray them on, work them through the coat, and wipe or brush them off.

    They're not perfect, but they handle the vast majority of winter grooming needs.

    Waterless options are particularly useful for:

    • Spot-cleaning muddy legs and bellies
    • Refreshing a horse between full baths
    • Removing sweat marks after exercise
    • Cleaning a horse when you don't have heat or warm water

    The tradeoff is thoroughness. Waterless shampoo doesn't penetrate as deeply as a real bath. It removes surface dirt and odor, but it won't thoroughly clean the skin or address conditions that require medicated treatment.

    The hot towel method

    The hot towel method is an old-school technique that works incredibly well for spot-cleaning. Here's what you do:

    1. Fill a bucket with warm water, not hot, just comfortable
    2. Add a small amount of gentle shampoo, preferably moisturizing
    3. Dip a large towel in the water and wring it out well
    4. Wrap the towel around the dirty area, whether it's a leg, the belly, or the neck
    5. Let it sit for a few minutes to soften the dirt
    6. Wipe the area clean, rinsing the towel in the warm water as needed
    7. Follow up with a clean, dry towel to remove excess moisture

    This method is perfect for cleaning sweaty areas under a blanket, getting mud off legs, or freshening up a horse before a vet visit. It uses less water, keeps the horse drier, and is significantly safer in cold weather.

    The decision framework

    Here's a simple way to decide:

    • Is the horse's skin actually dirty, not just the hair surface? Full bath or medicated wash needed.
    • Is it just surface dirt, dust, or dried mud? Spot-clean or hot towel method.
    • Is the temperature below 40°F without a heated barn? No full bath. Period.
    • Is the horse showing, medically requiring a bath, or heavily sweat-crusted? Full bath with proper drying protocol.

    If You Must Bathe: Step-by-Step Winter Bath Protocol

    horse sweat scraper drying

    Image source: Bing (Web (fair-use with source credit))

    Okay. You've made the call. The horse needs a bath, the temperature is safe, and you have a plan.

    Here's how to execute it without turning your horse into a popsicle.

    Step 1: Prepare the space

    The environment matters more than the water. Before you even bring the horse in, close all doors and windows in the barn. Block any drafts with tarps, blankets, or stall mats.

    You want the warmest, most protected space available.

    If you have a wash stall, great. Use it. If not, find an indoor cross-tie area away from open doors.

    The key is eliminating any chance of cold wind hitting the horse while it's wet.

    Have all your supplies within arm's reach before you start. Nothing kills a winter bath faster than running outside to grab a forgotten shampoo bottle while your horse stands there dripping wet.

    Step 2: Warm the water

    Cold water on a horse in winter is abuse. It causes shock, stress, and shivering before you've even started cleaning. Warm the water to a lukewarm temperature, around 60 to 70°F.

    Your elbow should feel comfortable in it, like bathwater for a baby.

    A bucket heater or tank heater is essential if your barn doesn't have hot water. These devices plug into a standard outlet and heat water to a steady temperature. They're inexpensive and worth every penny in winter.

    Fill enough buckets or troughs to complete the entire bath before you start. Running out of warm water halfway through is a disaster.

    Step 3: Pre-groom thoroughly

    This step saves time and prevents additional cold exposure. Spend 10 to 15 minutes grooming the horse before the bath. Curry comb in circles to loosen dirt and mud.

    Brush away loose hair. Pick out any caked-on mud from the legs and belly.

    The cleaner the horse is before the bath, the less time you'll spend scrubbing with water and shampoo. Less water means less wetness, which means less time drying. It's that simple.

    Step 4: Shampoo and scrub quickly

    This is not the time to practice your spa techniques. Work fast. Here's the optimal approach:

    • Wet the horse down section by section, starting from the legs and working up
    • Apply shampoo directly to the coat or a sponge
    • Scrub firmly to lift dirt into a lather
    • Move quickly, spending no more than two minutes per section
    • Work in a logical order: legs first, then belly, then back, then neck

    Step 5: Rinse thoroughly

    Residual shampoo is bad for the winter coat. It irritates the skin and strips natural oils that the horse needs for coat health. Rinse until the water runs completely clear.

    No bubbles. No suds. No traces of soap.

    Step 6: Get excess water off immediately

    The moment the rinse is done, the drying process starts. Don't wait. Grab a sweat scraper and run it over the horse's body, pushing water off in long, firm strokes.

    The sweat scraper removes the bulk of the water from the coat's surface. Follow with microfiber towels to absorb the rest.

    Work in this order:

    1. Sweat scraper over the entire body
    2. Towel dry the legs, especially the lower legs and tendons
    3. Towel dry the belly and under the chest
    4. Towel dry the neck and head last

    Drying Done Right: Getting Your Horse 100% Dry Before Turnout

    horse wool cooler blanket

    Image source: Bing (Web (fair-use with source credit))

    Drying isn't the final step. It's the most critical step. How you dry your horse after a winter bath determines whether it recovers safely or ends up shivering in a stall for hours.

    Why "dry to the touch" isn't good enough

    Most people run a towel over a horse, feel that the hair surface is dry, and assume everything is fine. That's a mistake. The surface of the coat can feel dry while the undercoat, right against the skin, is still soaked.

    A horse's winter coat is dense. Water gets trapped deep in the undercoat where you can't feel it. Even after what feels like thorough toweling, there's often significant moisture sitting against the skin.

    This is exactly where you need to focus your drying efforts.

    How long a full winter coat actually takes to dry

    Here's a number that surprises people: a fully unclipped winter coat can take up to 24 hours to dry down to the skin, even in a warm barn. That's not an exaggeration. Ask any barn manager who's dealt with a wet horse in January.

    For a trace clip or partial clip, drying time drops to 6 to 12 hours. A full clip brings it down to 2 to 4 hours. The less coat, the faster the drying.

    This is why the "dry to the touch" test fails. You can towel a horse for 20 minutes, feel the outer coat is dry, and still have a waterlogged undercoat for hours.

    Cooler sheets, wool blankets, and stall walking

    The solution is making the drying process active. Here's what works:

    Start with a wool cooler or anti-sweat sheet. These are specially designed to wick moisture away from the coat and hold it in the fabric while the horse's body heat evaporates it. Wool coolers are ideal for winter because they provide insulation while still allowing moisture to escape.

    The key is changing coolers as they become damp. A single cooler will absorb a significant amount of moisture, but once it's saturated, it stops working. Have two or three coolers on hand and swap them out.

    Walk the horse in the barn aisle or around the indoor arena for 10 to 15 minutes after the bath. This generates body heat and speeds up the evaporation process. Just keep the horse inside.

    No outdoor walking while wet.

    Using heat lamps and blow dryers safely

    Heat lamps can dramatically speed up drying, but only if used safely. Mount fixed heat lamps at a safe distance from the horse, high enough that the horse can't reach them. Never use a portable heat lamp on the ground.

    Fire risk is real.

    Horse-specific blower dryers are another option. These are high-velocity dryers designed to blow air through the coat and remove moisture. They're used commonly at show barns.

    A human-grade blow dryer is less effective because it can't move enough air to penetrate a dense winter coat.

    If you don't have these tools, the cooler-swapping method works fine. It just takes longer.

    Monitoring for shivering and recovery

    After the bath, keep a close eye on the horse. Shivering is the first sign that the horse is losing heat. If you see shivering, act immediately:

    • Put on a heavier cooler or a lined winter blanket
    • Walk the horse to generate body heat
    • Offer warm water or even warm bran mash to help warm from the inside

    Shivering that lasts more than an hour is a red flag. Contact your veterinarian if the horse continues to shiver, becomes lethargic, or doesn't eat. These could be early signs of hypothermia.

    Clipped vs. Unclipped: Different Coats, Different Rules

    One of the biggest mistakes people make is treating all winter coats the same. A horse with a full, fluffy winter coat and a horse with a trace clip are completely different animals when it comes to bathing. The rules change based on what's on the horse's back.

    Why clipped horses can bathe in colder weather

    Clipped horses have a massive advantage in winter bathing: less coat means faster drying. A full clip removes most or all of the hair from the body, leaving just the legs and sometimes the head. That means no thick undercoat to trap water against the skin.

    A fully clipped horse can dry in as little as 2 to 4 hours with proper coolering. A trace clip, which removes hair from the neck, chest, and belly where horses sweat most heavily, dries in about 6 to 12 hours. Compare that to a full unclipped winter coat, which can stay wet at the skin for up to 24 hours.

    That shorter drying window changes the safety calculus. If you can get a clipped horse completely dry within a few hours, you can bathe at lower temperatures, provided you have an enclosed space and a solid drying protocol.

    Why unclipped horses need extra caution

    An unclipped horse with a full winter coat is the highest-risk patient for a winter bath. That dense undercoat acts like a sponge. It holds water against the skin, keeps the horse cold for hours, and makes thorough drying genuinely difficult.

    The numbers speak for themselves. A full winter coat can hold several gallons of water after a bath. Even with vigorous toweling, you're not removing most of it.

    The undercoat stays wet, and the horse stays cold.

    If you have an unclipped horse that absolutely needs a bath, you need to accept the drying process will take most of the day. It's not a morning chore you can knock out before work. It's an all-day commitment with careful monitoring.

    Adjusting your protocol based on your horse's clip

    Here's how the protocol shifts depending on what you're working with:

    Clip TypeTypical Drying TimeBath Safe Below 40°F?Key Considerations
    Full clip2 to 4 hoursYes, with heated barnFastest drying, easiest bathing
    Trace clip6 to 12 hoursOnly with heated barnModerate risk, needs full day to dry
    Blanket clip8 to 14 hoursOnly with heated barnSimilar to trace clip
    Irish clip10 to 16 hoursNo, unless heated barnLonger drying, more coat to manage
    Unclipped12 to 24 hoursNo, even with heated barnHighest risk, avoid unless medically necessary

    The pattern is clear. Less coat equals lower risk. If you're planning to show in winter, or if your horse works hard enough to sweat regularly, a clip makes managing your horse significantly easier.

    What clip type means for bathing frequency

    Clipped horses can be bathed more often in winter because they dry faster and carry less moisture against their skin. Show barns routinely bathe clipped horses weekly during winter show season. That's safe and common practice.

    Unclipped horses should be bathed as little as possible. Once a month is pushing it. If you're bathing more than that, you should be using waterless shampoo or spot-cleaning instead.

    Common Winter Bathing Mistakes

    Every barn has a horror story about a winter bath gone wrong. The horse that shivered for hours. The rain rot that spread after a bath.

    The blanket that trapped moisture against a wet coat. These stories share common threads. Here are the mistakes that cause them.

    Bathing when it's too cold, period

    The number one mistake is ignoring the temperature threshold entirely. People get busy, they have a schedule, and they decide the bath will be fine. Then the horse stands there dripping wet in a 35°F barn aisle with no heat and no way to dry.

    The rule is simple. Below 40°F without a heated barn, you don't do a full bath. You spot-clean.

    You use waterless shampoo. You wait for a warmer day. You don't put your horse at risk because you want a clean coat.

    Leaving shampoo residue in a winter coat

    Rinsing a horse thoroughly takes longer than people think. Shampoo residue irritates the skin, strips natural oils, and attracts dirt. In winter, it also creates dandruff-like flakes that look terrible under a show coat.

    The fix is easy but time-consuming. Rinse until the water runs clear. Then rinse again.

    Lather, suds, or bubbles on the skin mean you're not done.

    Reblanketing too early

    This is the sneakiest mistake because it happens hours after the bath. You towel dry the horse, put on a cooler, and wait. The horse looks dry on the outside.

    You think it's fine. You put on the full winter turnout blanket.

    But the undercoat is still damp. The blanket traps moisture against the skin. The horse stays cold.

    Worse, the trapped moisture creates the perfect environment for rain rot and other skin infections to thrive.

    Always check the undercoat before reblanketing. Run your fingers down to the skin. If you feel any dampness, the horse isn't ready for a regular blanket.

    Keep the cooler on and wait.

    Thinking a "quick rinse" won't chill a horse

    Some people convince themselves that a quick rinse to cool off a hot horse after work is harmless. It's not. A quick rinse in winter is still a fully soaked horse in cold air.

    The same thermoregulation rules apply, whether you spend two minutes or twenty.

    If your horse is hot after winter exercise, don't rinse it. Walk it until it cools down naturally. Use a sweat scraper to remove excess sweat.

    Let the coat settle and dry on its own. A rinse is a full bath in disguise.

    Forgetting the legs and belly

    The lower legs and belly are the hardest areas to dry. They have less muscle mass, which means less heat generation, and they're closer to the cold ground. Water pools in these areas, and it stays there.

    Give these areas extra attention. Towel them thoroughly. Use multiple towels.

    If you have a blower dryer, focus on the legs and belly specifically. These spots are where the horse will feel the cold first.

    After the Bath: Monitoring for Shivering and Recovery

    The bath is done. The horse is clean. But the job isn't over yet.

    The next few hours are when problems show up. Monitoring your horse after a winter bath is just as important as the bath itself.

    What normal recovery looks like

    After an effective bath and drying session, your horse should be comfortable and relaxed. The horse might stand quietly in the stall, doze off, or munch on hay. A slight increase in heart rate is normal immediately after a bath, but it should settle within 15 to 20 minutes.

    Your horse should also be producing some body heat. That's the metabolism working to keep the core warm. A wool cooler will feel warm to the touch on the outside after 30 minutes.

    That's a good sign. It means the horse's body is warming the air trapped in the coat.

    Signs your horse is too cold

    Shivering is the most obvious sign. But not all shivering looks the same. Some horses have obvious full-body tremors.

    Others just twitch their flanks or shake slightly. Pay attention to any unusual muscle movement.

    Other red flags include:

    • Ears that are cold to the touch, especially at the base
    • A tucked-up or hunched posture
    • Reluctance to move or eat
    • Lethargy and dullness
    • Rapid, shallow breathing
    • Pale or blue-tinged gums, which is an emergency sign

    The 30-minute and 2-hour checkpoints

    Check on your horse 30 minutes after the bath. Run your hands over the horse's body, especially the legs, belly, and chest. If the skin feels cold, the horse is losing heat.

    Swap the cooler for a heavier one or add a layer.

    Check again at the 2-hour mark. By this point, the horse should be warm and stable. If it's not, if shivering continues, or if the horse seems off, it's time to call the vet.

    Not every cold horse needs emergency care. But a horse that can't warm up, won't eat, or displays colic symptoms needs professional attention.

    When to call the vet

    Call your vet if your horse shows any of these signs after a winter bath:

    • Shivering that lasts more than an hour despite rewarming efforts
    • Signs of colic, including pawing, looking at the flank, or rolling
    • Lethargy that doesn't improve
    • Loss of appetite
    • Labored breathing or coughing
    • Temperature below 99°F, when normal range is 99 to 101.5°F

    Hypothermia in horses is serious. If you suspect it, don't wait it out. Better to make a call and have it be nothing than to wait until the situation becomes critical.

    The No-Water Alternative: Keeping a Horse Clean Without a Bath

    Let's be real. Most winter dirt doesn't require a bath at all. There are plenty of ways to keep your horse clean, presentable, and healthy without ever picking up a hose.

    Waterless shampoos and grooming wipes

    Waterless shampoo has come a long way in recent years. Modern formulas are spray-on foams that lift dirt and oil from the coat without needing water to rinse them away. You apply, work through the coat, and then brush out the residue.

    These products are excellent for:

    • Freshening up a horse between baths
    • Cleaning a horse that's just dusty
    • Spot-cleaning sweaty areas
    • Maintaining a show coat during winter

    Grooming wipes serve a similar purpose for smaller areas. They're especially useful for wiping down the face, legs, and sensitive areas where spraying a foam could be tricky.

    The hot towel and bucket spot-cleaning method

    We touched on this earlier, but it deserves a deeper look. The hot towel method is genuinely effective for tackling muddy legs, dried sweat patches, and dirty bellies. It uses minimal water, which means minimal risk of chilling.

    Here's the expanded version:

    1. Warm a bucket of water to around 60 to 70°F
    2. Add a capful of shampoo, preferably one with moisturizers
    3. Dip a large towel, wring it out so it's damp but not dripping
    4. Lay the towel over the dirty area for a few minutes
    5. Wipe in the direction of the hair growth
    6. Rinse the towel in the clean water, wring it out, and repeat
    7. Follow immediately with a dry towel to remove surface moisture
    8. Allow the area to air-dry completely before blanketing

    This method handles the vast majority of winter dirt. It's especially effective for the muddy and sweaty spots that accumulate under blankets.

    Managing mud, sweat, and scurf through winter

    Winter brings its own unique grime. Mud splashes from paddocks. Sweat marks from exercise.

    Scurf and dandruff from dry skin under blankets. Each needs a slightly different approach.

    Mud is the easiest. Let it dry completely, then brush it out. Never wash off mud while it's wet.

    You're just smearing it deeper into the coat and saturating the horse needlessly.

    Sweat marks need attention before they dry. If a horse sweats under a blanket, wipe the area down with a dry towel or grooming wipe immediately. If the sweat has already dried, use the hot towel method to lift the salt residue.

    Scurf and dandruff are signs of dry skin. Address this with daily curry combing, which distributes natural oils. Add a coat conditioner or supplement with omega-3 fatty acids to help from the inside out.

    When waterless just doesn't cut it

    There are situations where nothing substitutes for a real bath. Heavy rain rot infections often require medicated shampoos. A horse that's rolled in something sticky or smelly needs actual water.

    A heavily matted coat needs washing to reset the skin.

    In those cases, follow the full winter bath protocol exactly. Prepare the space, warm the water, work quickly, dry thoroughly, and monitor closely.

    Winter Coat Care Between Baths

    Regular coat care reduces how often you need to bathe. It also keeps the horse healthier and more comfortable all winter long.

    Daily brushing to distribute natural oils

    A daily groom is the single best thing you can do for a winter coat. It distributes natural oils from the skin across the hair shafts, which makes the coat more water-resistant and better at insulating.

    Use a curry comb in circular motions to loosen dirt and stimulate oil production. Follow with a stiff brush to remove loose hair and debris. Finish with a soft brush to polish the coat and smooth everything out.

    Just 10 minutes a day makes a massive difference. It's less time than setting up a bath. It's safer for the horse.

    And it keeps the coat cleaner for longer, which means fewer baths needed.

    Managing rain rot and skin irritation in a blanketed horse

    Rain rot thrives in warm, moist, dirty environments. Exactly what you create when you put a damp blanket on a horse. Keeping the skin clean and dry is the best prevention.

    Check under blankets regularly, at least every few days. Look for raised bumps, scaly patches, or hair loss. If you find rain rot, treat it early.

    Mild cases respond to antifungal washes and improved hygiene. Severe cases need veterinary attention.

    The temptation is to wash the affected area. Just be aware that washing makes the problem worse if you can't dry thoroughly afterward. Spot-treat with a hot towel or medicated spray first.

    How clipping reduces grooming requirements

    A clipped horse is easier to keep clean in winter. Less coat means less mud, less sweat trapped against the skin, and fewer places for dirt to hide. Clipped horses also dry faster and are safer to bathe.

    If your horse works hard enough to sweat through winter, clipping is the smartest thing you can do. It reduces bathing frequency, simplifies drying, and keeps the skin healthier.

    Seasonal grooming routines

    A winter coat needs different care than a summer coat. Pay attention to the horse's skin condition, coat quality, and environment. Adjust your grooming routine as needed.

    Horses that are stabled most of the day might need lighter grooming than horses that live out. Horses that wear heavy blankets need more regular skin checks. Horses that work daily need more coat maintenance than inactive horses.

    The goal is simple. Keep the coat clean, dry, and well-oiled. Do that, and winter baths become rare exceptions instead of regular chores.

    When Not to Bathe: Red Flags and Hard Stops

    There are times when bathing your horse in winter isn't just risky. It's flat-out dangerous. Knowing when to walk away from the hose can save your horse from serious harm.

    Sick, injured, or feverish horses

    A horse that's already fighting an illness shouldn't have to deal with the physical stress of a bath. Wetting a sick horse drops its body temperature, strains its immune system, and makes recovery harder. If your horse has a fever, is off its feed, or seems lethargic, skip the bath completely.

    Injured horses need the same consideration. Bathing pulls blood flow to the skin's surface, which can interfere with healing. Open wounds, surgical sites, and even minor cuts shouldn't be subjected to shampoo residue or excess moisture.

    If cleaning is necessary around an injury, use a warm damp cloth and be gentle.

    Temperatures below 40°F with no heated space

    This is the hard rule. If the temperature is below 40°F and your barn has no heat, you don't bathe the horse. Full stop.

    No amount of blanket layering or quick toweling compensates for standing a wet horse in cold air.

    Even with a heated barn, cold weather bathing requires careful judgment. If the heater is struggling to keep the space above 45°F, or if there are drafty gaps around doors and windows, the risk climbs. Strings of cold days are particularly challenging because the barn structure itself stores cold that successive heaters have to overcome.

    Horses that can't thermoregulate properly

    Some horses just aren't built for cold-weather bathing. Very young horses have developing thermoregulation systems. Senior horses often have less body mass and thinner coats.

    Underweight horses lack the fat stores to generate sufficient body heat. Any of these conditions makes a bath more dangerous.

    Horses with Cushing's disease also struggle with thermoregulation. Their thickened coats, called hirsutism, hold water like a sponge. Drying one of these horses completely can take an entire day or more.

    If you have a horse with metabolic issues, treat winter bathing as a last resort rather than a routine option.

    Resting, recovering, or on stall rest

    A horse that's been injured and is on stall rest can't exercise to generate body heat after a bath. That's one of the key mechanisms for warming up safely. Without movement, the horse depends entirely on its environment and blanketing.

    Respect your vet's instructions for any horse on medical rest. If the veterinarian says no baths, there's a reason. Find other ways to maintain cleanliness, even if it means living with an occasionally scruffy coat until recovery is complete.

    Recent post-exercise bans

    You also shouldn't bathe a horse in the middle of recovery after intense exercise. The body is still cooling down, and the cardiovascular system is working hard. Cold water on a hot horse can cause muscle tightening, cramping, and even shock.

    Wait at least 30 to 60 minutes after heavy exercise before bathing. Let the horse's heart rate and respiration return to normal. Then, and only then, consider water contact.

    The Winter Clean-Up Kit: What You Actually Need

    You don't need a fully outfitted show barn to bathe safely in winter. But you do need the right tools. Having everything ready before you start makes the process faster, safer, and less stressful for everyone involved.

    The essentials checklist

    ItemPurposeWhy It Matters in Winter
    Bucket heater or tank heaterHeats water to safe temperatureCold water shocks the horse and prolongs the bath
    Multiple large buckets or troughsHold pre-warmed waterRunning out of warm water mid-bath is a disaster
    Horse-safe shampooClean the coat without stripping oilsWinter coats need moisture, not harsh detergents
    Sweat scraperRemove bulk water from the coatCuts drying time significantly
    4 to 6 large microfiber towelsAbsorb water from the coatMicrofiber absorbs faster than cotton
    Wool cooler or anti-sweat sheet, 2 or 3Wicks moisture during dryingCritical for pulling water out of the undercoat
    Blower dryer, optionalForced-air dryingBest for clipped horses or thick coats
    Hoof pickClean hooves after bathingPrevents moisture-related hoof issues

    Why water temperature matters more than you think

    Water that's too hot damages the horse's skin. Water that's too cold causes shock and chills. Lukewarm, around 60 to 70°F, is the sweet spot.

    It's warm enough to be comfortable but not so warm that it strips the coat's natural oils.

    Test the water on your own wrist or elbow before you touch the horse. If it feels like comfortable bathwater, you're at the right range. If it's hot enough to steam, let it cool down.

    Shampoo selection for winter coats

    Winter shampoo should be moisturizing. Look for formulas with added oils, aloe, oatmeal, or glycerin. These ingredients help maintain the coat's natural oils, which are the horse's first line of defense against cold and moisture.

    Avoid harsh degreasers and clarifying shampoos in winter. They strip the coat's protective oils and leave the skin dry and flaky. Save those for summer baths or topical treatments under veterinary guidance.

    Cooler sheets and wool coolers explained

    A cooler sheet and a wool cooler are different things, and using the right one matters. A wool cooler is a heavyweight, moisture-wicking blanket designed to pull water away from the coat while trapping body heat. It's the gold standard for winter drying.

    An anti-sweat sheet is lighter and made from a wicking mesh material. It's designed for horses that are hot after exercise, helping them cool down while shedding moisture. It's acceptable for post-bath drying but less effective than a wool cooler for really thick winter coats.

    You can use both in layers. Start with the anti-sweat sheet to wick initial moisture, then layer a wool cooler over it for warmth and continued moisture removal.

    The case for a horse blower dryer

    A high-velocity blower dryer is the single best investment for winter bathing that you can make. These machines force large volumes of air through the coat, pushing moisture out and dramatically cutting drying time. Show barns use them because they work.

    A human hair dryer is almost useless on a horse. It moves too little air to penetrate a dense winter coat. If you're investing in a blower dryer, get one designed for equine use.

    Expect the cost to be meaningful, but it's far cheaper than a veterinary emergency from a poorly dried horse.

    Real Scenarios: When Winter Baths Actually Happen

    Theory helps. But seeing how this plays out in real barns clarifies how the rules apply in practice. Here are three common scenarios and how each one should unfold.

    Scenario one: The showing horse

    Your horse is scheduled for a local show in a heated indoor arena. It's 38°F outside. The show barn has a heated wash stall with warm water and a blower dryer.

    You bathe in the morning, dry thoroughly, and the horse will pass the rest of the day in a warm stall before showing.

    This is a reasonable winter bath situation. The heated facilities make drying faster and safer. The horse will have hours to fully dry before any cold exposure.

    Just monitor the drying process and don't rush back to a cold barn.

    Scenario two: The heavy sweater under a blanket

    Your horse lives under a heavy blanket and sweats during the day. After three days, the skin smells sour and looks irritated. It's 45°F outside.

    You have an unheated wash stall but a warm, draft-free barn aisle. You plan to use lukewarm water and the hot towel method instead of a full spray-down.

    This is a borderline situation. The temperature is safe enough, but the unheated facilities mean you need to work fast. Pre-grooming is essential to minimize bathing time.

    Use the hot towel method rather than a full soak. Dry thoroughly before reblanketing and monitor for shivers for the next few hours.

    Scenario three: The disaster cleanup

    Your horse somehow managed to get thoroughly covered in sticky mud, possibly from rolling in wet conditions. It's 32°F and below freezing. You have no heated barn.

    The horse looks terrible and needs cleaning, but the temperature makes a full bath unsafe.

    You spot-clean with a hot towel and waterless shampoo. Do not do a full bath. The horse can handle being less than pristine until warmer weather arrives.

    This is the scenario where the "don't bathe" rule is doing its job.

    Scenario four: The medical wash

    Your horse has rain rot that needs daily medicated washing. It's 35°F outside. The vet has prescribed an antifungal shampoo, and the horse's health depends on consistent treatment.

    This is the one exception where bathing below your normal threshold is justified. The skin infection needs the treatment. You should still warm the water, work fast, dry thoroughly, and monitor closely.

    But the medical need outweighs the ideal temperature guidelines.

    Expert Tips for Safer Winter Bathing

    Seasoned horse people have developed tricks over the years that make winter bathing safer and more effective. These aren't lab-tested theories. They're barn-tested practices that work.

    Time your bath for the warmest part of the day

    Late morning to early afternoon is the sweet spot. Temperatures are at their peak, the sun is up, and there's maximum daylight for the drying process. Avoid evening baths entirely.

    A horse that goes to bed with a damp undercoat is a horse at risk all night.

    Work in sections, not full-body soaking

    Experienced handlers bathe in a deliberate sequence rather than soaking the whole horse at once. Wet the legs, shampoo them, rinse, and move up. This method keeps each section wet for less time and reduces overall chilling.

    Use warm water for every step

    Rinsing counts just as much as washing. Use warm water for every stage, not just the initial wetting. Switching to cold rinse water undoes all your preparatory work in the first minute.

    Keep a spare cooler within reach

    Before you even start, have multiple dry coolers stacked nearby. You'll swap these out as they absorb moisture. A single cooler that becomes saturated stops wicking and leaves the horse wet underneath.

    Walk the horse during drying

    A slow walk in the barn aisle generates body heat and speeds up evaporation. Ten to fifteen minutes of walking makes a measurable difference. Add more time if the coat still feels damp.

    Check the forecast before committing

    Check the forecast for the next 24 hours. Temperatures dropping steeply at night mean even a well-dried horse is exposed to severe cold overnight. If the forecast shows a significant cold snap, it may be better to postpone the bath entirely.

    Consider a partial bath for targeted cleaning

    Instead of a full bath, consider washing only the areas that need it. A tail bath, a leg bath, or a belly bath uses less water and creates less chilling. This is a legitimate alternative many owners overlook.

    Protect the horse's face and ears

    Keep water and shampoo away from the eyes, ears, and nostrils. Use a damp cloth for the face instead of spraying directly. Shampoo in the eyes causes pain and can damage respiratory health if inhaled.

    Know your horse's individual cold tolerance

    Some horses handle cold water and cool air better than others. Breed, age, body condition, and even temperament play a role. A hardy native pony with a thick coat might shrug off a bath at 42°F.

    A thin-skinned Thoroughbred with a clipped coat will shiver at the same temperature.

    Learn your horse's baseline. Know how it reacts to cold, how quickly it warms up, and what its normal shivering threshold looks like. This awareness helps you make better calls when temperatures hover near the boundary zone.

    Have a backup plan before you start

    Decide ahead of time what you'll do if the horse starts shivering. Where will you walk it? How many extra blankets do you have?

    Is the vet's number saved in your phone? Answering these questions before you begin helps you stay calm and act fast.

    Preparation prevents panic. A horse that starts shivering needs immediate action, not a 20-minute search for another cooler sheet.

    Frequently Asked Questions

    What temperature is too cold to bathe a horse?

    Below 40°F without a heated barn is too cold for a full bath. Even with a heated barn, temperatures below freezing require careful judgment. The horse must be able to dry completely in a warm, draft-free space before any cold exposure.

    How long does a horse take to dry after a winter bath?

    A clipped horse can dry in 2 to 4 hours with proper coolering. A trace clip takes 6 to 12 hours. A full unclipped winter coat can take up to 24 hours to dry down to the skin, even in a warm barn.

    Can I use waterless shampoo on my horse in winter?

    Yes. Waterless shampoo is an excellent alternative to a full bath in cold weather. It cleans surface dirt and sweat without soaking the coat.

    It won't deeply clean the skin or treat skin conditions, but it handles most routine winter grooming needs.

    Is it safe to bathe a horse with rain rot in winter?

    Medicated bathing is necessary for treating rain rot, even in cold weather. Warm the water, work quickly, and dry the horse thoroughly afterward. The health benefit of treating the infection outweighs the cold exposure risk, but you must follow a strict drying protocol.

    What should I do if my horse is shivering after a bath?

    Act immediately. Walk the horse to generate body heat, add a heavier cooler or blanket, and offer warm water or warm bran mash. If shivering continues for more than an hour, or if the horse shows signs of colic or lethargy, call your veterinarian.

    Can I bathe just the legs or belly in winter?

    Yes. Partial bathing is a smart alternative to a full soak. Leg baths, tail washes, and belly cleanings use less water and create far less chilling risk.

    The horse stays dry where it matters most, which means the core stays warm and the drying time drops dramatically.

    Use the same lukewarm water and gentle shampoo. Dry those areas thoroughly with towels before returning the horse to its stall or paddock.

    How often should I bathe my horse in winter?

    For most horses, once every 4 to 6 weeks is plenty. Many horses go the entire winter without a full bath. Spot-cleaning with waterless shampoo and hot towels handles most day-to-day messes.

    If your horse has a medical condition requiring more frequent bathing, follow your vet's specific guidance.

    Final Verdict: The Gold Standard for Winter Washing

    Bathing a horse in winter is rarely a necessity. It's a calculated decision that balances cleanliness against cold stress. The safest approach is simple: bathe as little as possible, spot-clean as often as needed, and never risk a horse's health for a cleaner coat.

    The gold standard protocol comes down to five non-negotiable rules:

    Rule one. Never bathe below 40°F without a heated, draft-free space.

    Rule two. Use lukewarm water at 60 to 70°F. Never hot, never cold.

    Rule three. Pre-groom thoroughly to minimize bathing time.

    Rule four. Dry completely down to the skin before reblanketing or turnout. A full winter coat can take up to 24 hours to dry.

    Rule five. Monitor for shivering for at least two hours after the bath. Act immediately if you see signs of cold stress.

    More than anything, remember this. A dirty horse can be cleaned tomorrow. A sick horse takes weeks, sometimes months, to recover.

    When in doubt, skip the bath. Use a waterless shampoo, a hot towel, and patience. Your horse will thank you with a healthy winter coat and a happy disposition.

  • Step-by-step: How Often to Groom a Horse in Summer

    Step-by-step: How Often to Groom a Horse in Summer

    horse grooming tools summer routine

    Image source: Bing (Web (fair-use with source credit))

    You're standing in the barn at 7 AM. It's already 82 degrees, and your horse is covered in a fine layer of sweat and dust. You wonder: do I need to groom him again today, or can I skip it?

    The honest answer is that how often to groom a horse in summer depends on your specific situation, but most horses need some form of grooming 2 to 7 times per week during hot months.

    The science behind summer grooming comes down to skin health. A horse's coat naturally produces sebum, an oily substance that protects the skin and adds shine. Over-grooming strips this protective layer, while under-grooming allows sweat, bacteria, and fungi to build up.

    The American Association of Equine Practitioners (AAEP) recommends daily visual checks during summer, but full grooming sessions can range from daily for hard-working horses to just a few times weekly for pasture pets.

    Let's break down exactly what your horse needs, based on your climate, his workload, and his coat type.

    Quick Answer

    Groom daily if your horse sweats heavily, works hard, or lives in humid heat. Groom 2 to 3 times weekly for leisure horses in moderate climates. Groom once weekly for idle pasture horses.

    Rinse after every ride. Adjust based on coat type and skin condition.

    Why Summer Grooming Is Different

    Summer grooming isn't about keeping your horse pretty. It's a critical health practice that changes dramatically when the mercury rises.

    Sweat Changes Everything

    When temperatures climb above 85°F, horses sweat profusely. That sweat contains salts, ammonia, and proteins that sit on the skin and attract bacteria. Left alone, it creates the perfect breeding ground for rain rot, girth galls, and other skin infections.

    In winter, a horse's coat stays relatively clean because he's not sweating much. In summer, every hour of turnout means another layer of sweat, dust, and debris. The grooming routine that worked in March simply won't cut it in July.

    Natural Oil Production Shifts

    Here's something most owners don't realize: a horse's skin produces more oil in hot weather. This is the body's natural defense against the sun and moisture loss. The coat becomes naturally glossy, which is great.

    But it also means dirt sticks more easily, and aggressive brushing can strip those protective oils.

    As of 2026, equine veterinarians increasingly recommend a "less is more" approach to summer grooming for horses with healthy skin. The goal is to remove sweat and dirt without over-scrubbing the natural oils away.

    The Bacterial Factor

    Warmth plus moisture equals bacterial growth. Period. Your horse's skin is a living ecosystem, and summer disrupts its natural balance.

    Regular grooming helps you catch early signs of skin issues before they become full-blown infections.

    A 10-minute grooming session in the morning can prevent a month-long battle with rain rot in August. That's not an exaggeration. Early detection is everything.

    The 3 Questions That Decide Your Routine

    Forget rigid schedules. Your horse's summer grooming frequency depends on three variables. Answer these honestly, and you'll know exactly what your horse needs.

    Question 1: How Hot and Humid Is Your Climate?

    This is the single biggest factor in determining grooming frequency.

    Hot and Humid (80°F+ with high dew point):

    When humidity sits above 65%, horses sweat constantly. Even standing in the shade, they're losing moisture. This means daily attention to sweat removal is non-negotiable.

    In these climates, most horses need at minimum a daily rinse or wipe-down, even if they're not ridden.

    Hot and Dry (Arid climates like Arizona or Nevada):

    Dust becomes your enemy here. The coat stays relatively clean of sweat, but fine dust particles work their way into the hair and skin. A daily quick curry and brush keeps the skin breathing, but full grooming sessions can be spaced a bit further apart.

    Mild (70s and low humidity):

    This is the ideal summer grooming zone. Horses don't overheat quickly, and sweat dries fast. Two to three thorough grooming sessions per week, plus spot cleaning as needed, handles most situations.

    Question 2: How Much Is Your Horse Working?

    Workload directly impacts sweat production, which directly impacts grooming needs.

    Competition or Hard Work (daily or near-daily riding):

    These horses need grooming before every ride to prevent saddle sores and after every ride to remove sweat. That's effectively daily full grooming, plus post-ride rinsing. No exceptions.

    Light Riding (2 to 3 times per week):

    Focus grooming sessions around your ride days. On days off, a 10-minute quick dust-off handles basic maintenance unless your horse is actively playing and sweating in the field.

    Pasture Ornament (not ridden at all):

    These horses are the easiest. They're not producing excess sweat from work, so their natural oil balance stays intact with minimal intervention. Once or twice a week with a curry and brush keeps them comfortable and lets you check for injuries, bugs, or skin problems.

    Question 3: What Kind of Coat Does Your Horse Have?

    Coat type changes everything about grooming frequency and technique.

    Clipped Horses:

    Show horses and hard workers often get clipped in summer. With little to no hair protection, the skin is exposed to sun, flies, and dirt. These horses need daily grooming, gentle pressure, and reliable fly protection.

    Their skin is far more sensitive than a horse with a full coat.

    Unclipped Horses with Full Coats:

    These horses use their coats as natural protection. During early summer shedding, daily currying helps them cool down by removing dead hair. Once the coat is fully shed out, you can back off to 2 to 3 sessions per week.

    Thick-Coated Horses:

    Some breeds, like draft horses and certain ponies, keep dense coats well into summer. These horses overheat easily and need extra help with shedding and sweat management. Daily grooming is often necessary until the coat thins out.

    Grooming Frequency by Situation

    Now that you know the three questions, here's how to translate your answers into a concrete routine.

    Daily Grooming: Who Needs It

    • Horses worked daily in any climate
    • Horses in high humidity (80°F+ with dew point above 65°F)
    • Clipped horses exposed to full sun
    • Horses with skin conditions requiring monitoring
    • Horses that roll extensively in mud or manure

    For these horses, a full grooming session daily is the baseline. That means curry, brush, hoof pick, and a check-over from ears to tail.

    2 to 3 Times Per Week: The Middle Ground

    • Leisure horses ridden 2 to 3 times weekly
    • Horses in mild climates (70s, low humidity)
    • Moderate-coated horses with no skin issues
    • Stabled horses that get regular attention

    This is the most common summer routine for recreational horses. It balances coat health, skin health, and owner time.

    Weekly Grooming: The Minimum

    • Idle pasture horses in mild climates
    • Horses with healthy skin and no sweat issues
    • Young horses not yet in work
    • Senior horses with light activity

    Weekly grooming for these horses is about skin inspection more than coat appearance. You're looking for cuts, bites, heat, or swelling. The grooming itself is secondary.

    When to Rinse vs. Full Groom

    Rinsing and full grooming serve different purposes.

    SituationRinse OnlyFull Groom
    After ride (sweaty)Yes, alwaysAlso recommended
    Hot day, no ridingYes, if sweatingNot necessary
    Before rideNoYes
    After turnout (dusty)NoYes
    Skin irritation concernYes, with gentle cleanserYes

    Rinsing removes surface sweat and salt without stripping oils. Full grooming removes dirt, redistributes oils, and stimulates circulation. Both have their place.

    The general rule: rinse when the issue is sweat, groom when the issue is dirt.

    The Decision Tree: Find Your Routine in 60 Seconds

    Here's a simple step-by-step decision process that walks you through choosing your summer grooming frequency.

    Step 1: Does Your Horse Sweat Daily?

    • Yes: Move to Step 2.
    • No (mild climate, no work): You're in the 2 to 3 times per week camp. Weekly minimum.

    Step 2: Is Your Horse Working Hard?

    • Yes (daily riding or competition): Groom daily, minimum. Add post-ride rinsing.
    • No (light work or pasture only): Move to Step 3.

    Step 3: Is Your Horse Clipped?

    • Yes: Groom daily, even without heavy work. Skin is exposed and needs protection.
    • No: Move to Step 4.

    Step 4: How Humid Is Your Climate?

    • High humidity (dew point above 65°F): Groom daily or near-daily. Sweat buildup happens fast.
    • Low humidity: 2 to 3 times weekly is sufficient for non-working horses.

    Step 5: Any Existing Skin Issues?

    • Yes (rain rot, dermatitis, girth galls): Daily attention until resolved. Consult your vet if it worsens.
    • No: Stick with your routine from Steps 1 through 4.

    Example 1: A show jumper in Florida, ridden 6 days a week, clipped, 92°F with 80% humidity. Answer: Daily full grooming plus post-ride rinsing. Non-negotiable.

    Example 2: A trail horse in Colorado, ridden weekends, full coat, 78°F and dry. Answer: Groom before weekend rides, one midweek grooming session, quick check daily.

    Example 3: A retired pasture pony in Oregon, not ridden, full coat, mild summer. Answer: Weekly grooming plus visual checks. Done.

    This decision tree works because it accounts for the real variables that affect skin health. A fixed schedule fails because it ignores these factors.

    Pre-Ride Grooming Essentials

    Pre-ride grooming is about safety as much as cleanliness. Dirt and debris under tack cause friction, which causes rubs, which causes sores. A 15-minute pre-ride session prevents all of that.

    Step 1: Pick the Hooves

    Always start at the bottom. Pick each hoof thoroughly, checking for stones, thrush, or loose shoes. This is non-negotiable before mounting.

    Step 2: Curry in Circles

    Use a rubber curry comb in circular motions over the body. This loosens dirt, stimulates blood flow, and brings natural oils to the coat surface. Skip the curry on sensitive areas like the face and lower legs.

    Step 3: Flick with a Dandy Brush

    The dandy brush removes the loosened dirt and hair. Use short, flicking motions rather than long strokes. This keeps dirt from being pushed into the skin.

    Step 4: Finish with a Body Brush

    A soft body brush distributes healthy oils and gives the coat that final shine. Use gentle, longer strokes in the direction of the hair.

    Step 5: Check Tack Contact Points

    Pay special attention to where the girth sits, where the saddle pad touches, and around the bridle. These areas need to be completely clean to prevent friction injuries.

    Step 6: Quick Leg Check

    Run your hands down each leg, feeling for heat, swelling, or cuts. Summer leg injuries are common, and early detection has a huge impact on recovery time.

    How Long Should Pre-Ride Grooming Take?

    A solid pre-ride grooming session takes 10 to 15 minutes for an experienced groomer. If you're rushing, you're missing something. If you're taking 30 minutes, you're overdoing it.

    The goal is thorough but efficient.

    The hooves take 2 to 3 minutes. The body takes 5 to 7 minutes. The final checks take 2 to 3 minutes.

    That's a full, proper pre-ride groom.

    Post-Ride Sweat Management

    What you do in the 15 minutes after riding determines how healthy your horse's skin stays through the summer. This isn't optional. It's critical.

    Why Post-Ride Grooming Can't Wait

    When a horse stops working, his body temperature stays elevated for 30 to 60 minutes. He continues to sweat, and that sweat sits on the skin. As it dries, it leaves behind salt residue that irritates the skin and attracts bacteria.

    The longer you wait to address it, the harder it is to clean. Dried sweat creates a crust that's difficult to remove without aggressive scrubbing. Aggressive scrubbing strips oils.

    It's a vicious cycle.

    The Rinse Method

    For heavy sweating, a cool water rinse is the gold standard.

    Step 1: Walk your horse to cool down first. Never rinse a hot horse with cold water immediately after work. Walk for 5 to 10 minutes until breathing returns to normal.

    Step 2: Use a hose with a gentle spray, starting at the legs and working upward. Avoid the head initially. Cool water against hot skin can cause discomfort.

    Step 3: Use a sweat scraper to remove excess water. Work from the neck back, applying firm, even pressure. One pass should remove a significant amount of water.

    Step 4: Allow the horse to air dry in the shade or with a fan. In cold or windy conditions, towel dry to prevent chilling.

    Step 5: Once dry, apply fly spray to protect against insects.

    sweat scraper horse post-ride

    Image source: Bing (Web (fair-use with source credit))

    The Towel Method

    For light sweating, a towel dry can work. This method is faster but less effective at removing salt residue.

    Use a large, absorbent towel and work in straight lines from the neck toward the tail. Don't scrub in circles; that pushes dirt into the skin. A horse that sweats lightly needs two to three towels to dry effectively.

    What If You Can't Rinse?

    Sometimes you're at a show, or there's no water available. That's okay. A dry brush removing dried sweat is better than nothing.

    Use a curry comb to loosen the residue, then a dandy brush to flick it away.

    This is the minimum, not the goal. If you can't rinse after every ride, prioritize rinsing after the sweatiest ones.

    The Complete Summer Grooming Session: Step-by-Step

    This is what a full, thorough summer grooming session looks like. Use this as your template for the 45 to 60 minute sessions you'll do 2 to 3 times per week.

    Starting at the Hooves

    Every grooming session starts with the hooves. Pick out each one completely, using a hoof pick to remove packed dirt and debris. Check for uneven wear, loose shoes, or any sign of thrush.

    This takes 3 to 4 minutes total.

    Currying the Body

    Use a rubber or plastic curry comb in circular motions over the horse's body. Start at the neck and work your way to the hindquarters. This loosens sweat residue, dead hair, and surface dirt.

    It also stimulates blood flow and brings natural oils to the coat surface.

    Apply light to medium pressure. You should hear a brushing sound but see no signs of discomfort. Skip bony areas like the spine, hips, and withers.

    curry comb circular motion technique

    Image source: Bing (Web (fair-use with source credit))

    Brushing and Flicking

    After currying, use a dandy brush with short flicking motions to remove the loosened dirt. Work from the neck backward, from top to bottom. Flick the brush away from the horse to remove dirt from the bristles between strokes.

    For the final pass, use a soft body brush in longer strokes that follow the direction of the hair. This smooths the coat and distributes those healthy oils evenly.

    The Face and Sensitive Areas

    Use a soft cloth or a body brush with light pressure for the face. Wipe around the eyes, nostrils, and ears. Never use a stiff dandy brush on the face; it's too abrasive.

    For the area under the girth and between the hind legs, use a damp sponge. These areas sweat heavily and are prone to bacterial buildup. A sponge bath with clean water handles them without stripping oils.

    Mane and Tail Care

    Summer means sun, dust, and tangles for the mane and tail. Work through tangles with your fingers first, then use a wide-toothed comb. Never pull through a tangle; that breaks hair and causes pain.

    Apply a light detangler or conditioning spray to keep the hair manageable. A little goes a long way. For horses with long tails, consider a tail bag to protect the hair from dirt and breakage.

    Finishing Touches

    Check your horse's entire body one more time. Run your hands over his legs, looking for heat, cuts, or swelling. Check for ticks, especially around the ears and under the mane.

    Apply fly spray to protect against biting insects. Reapply according to the product's instructions, typically every 6 to 8 hours for heavy fly pressure.

    A full session like this takes 30 to 45 minutes for one horse. It's thorough enough to identify any developing skin issues and keep the coat in excellent condition.

    Bathing and Products: What Actually Works

    Full baths are a summer staple, but they're easy to overdo. Here's the breakdown of what works and what doesn't.

    How Often to Full-Bathe

    A full bath with shampoo strips the coat's natural oils. That's fine occasionally, but too often leaves the skin dry and vulnerable.

    Once every 1 to 2 weeks is the sweet spot for most active horses. Bathing more frequently than that requires a gentle, moisturizing shampoo and conditioner afterward to restore balance.

    For horses with sensitive skin, stretch baths to every 3 to 4 weeks. Use a hypoallergenic or oatmeal-based equine shampoo. Avoid human shampoos entirely; their pH levels mismatch equine skin.

    For show horses needing a pristine coat, skip soap between shows. Use water-only rinses and a coat polish spray instead.

    Sponge Baths Between Full Baths

    For daily sweat removal without stripping oils, a sponge bath works wonders.

    The area between the hind legs, under the belly, and around the girth accumulates the most sweat and bacteria. A damp sponge with clean water addresses these zones without washing the entire coat.

    Use a separate sponge for the dock area and the sheath or grooved areas. Cross-contamination causes infections.

    Choosing the Right Shampoo

    Look for equine-specific formulas. Key attributes include:

    • pH balanced for horses (roughly 5.5 to 6.5)
    • Moisturizing or conditioning for frequent use
    • Fly-repellent added for summer turnout
    • Hypoallergenic for sensitive skin
    • Tear-free if used near the face

    Avoid dish soap, laundry detergent, or any human product. These strip too much oil and disrupt the skin's natural microbiome.

    Conditioners and Coat Sprays

    After every shampoo, use a light equine conditioner. It restores moisture and prevents the coat from becoming dull and brittle.

    Between baths, coat polish sprays or detanglers provide shine and protect against sun bleaching. Apply sparingly; too much buildup attracts dust.

    Fly Sprays and Sunscreen

    Fly spray is a summer essential. Apply after grooming, not before, so the coat is clean and the product can absorb properly. Reapply every 6 to 8 hours during peak fly activity in humid states, or after heavy sweating.

    For pink-skinned areas like muzzles, consider a pet-safe sunscreen. White-faced horses and those with light pigment get sunburned just like humans do.

    Managing the Coat on Unclipped Horses

    Unclipped horses need help shedding. When they drop their spring coat, use a shedding blade gently to remove bulk dead hair. This reduces heat retention and keeps the coat from becoming matted.

    Once the heavy shedding ends, switch to a curry and brush routine. Constant use of a shedding blade on a healthy coat strips healthy hair and oils.

    Mistakes Owners Make in Hot Weather

    Even experienced horse owners slip up sometimes. Here are the most common summer grooming mistakes and how to avoid them.

    Over-Grooming

    Aggressive daily currying strips the coat's natural oils. The result? Dry, flaky skin and a dull, dusty-looking coat.

    The fix: reduce grooming frequency for horses that don't need daily attention, and use lighter pressure with softer brushes.

    Using the Same Brush for the Whole Body

    A stiff dandy brush works great on the body but wreaks havoc on the face, legs, and bony areas.

    Use a designated soft brush or cloth for the head, ears, and sensitive areas. Keep the stiff brushes for the neck, back, and hindquarters.

    Bathing Too Often with Soap

    Weekly full baths with shampoo strip oils faster than they replenish. The coat becomes brittle, and skin becomes prone to irritation.

    Stick to every 1 to 2 weeks unless the horse is competing or visibly dirty. Use water-only rinses for sweat removal between baths.

    Grooming at the Wrong Time of Day

    Midday grooming in direct sun overheats a horse that's just returned from turnout. The heat from the sun, combined with brushing, raises body temperature.

    Groom in the early morning or late evening when temperatures drop. Schedule the heaviest grooming sessions for the coolest hours.

    Ignoring the Sheath and Grooved Areas

    Sweat accumulates in the grooved areas, under the belly, and around the sheath. This leads to smegma buildup, irritation, and fungal infections.

    Incorporate a sponge clean-up of the grooved areas into every post-ride session for idle horses. At minimum, do this weekly.

    Forgetting Hoof Care

    Summer hooves grow faster in some horses, slower in others, but the condition changes with moisture levels. Dry summer months cause brittle hooves.

    Pick hooves daily and apply hoof oil to maintain moisture balance. Schedule farrier visits every 6 to 8 weeks, depending on growth rate.

    Skipping the Visual and Tactile Check

    A grooming session isn't just about brushing. It's a full-body inspection opportunity.

    Run your hands over the entire horse each time you groom, feeling for heat, swelling, cuts, or insect bites. This habit catches problems early and prevents minor issues from becoming major ones.

    Real-Life Scenarios: Three Typical Horses

    Abstract advice helps. Concrete examples make it real. Here are three common situations and their ideal summer grooming routines.

    Scenario 1: The Competition Horse in Humid Weather

    The horse: A 12-year-old Warmblood show jumper in Florida. Ridden 6 days a week, clipped, competing at regional shows every 2 to 3 weeks. Temperatures hover at 92°F with 80% humidity.

    The routine:

    • Daily: Full grooming session before riding (curry, brush, hoof pick). Post-ride rinse with cool water and sweat scraper. Sponge clean-up of grooved areas.
    • Weekly: One full bath with equine shampoo and conditioner. Deep condition of mane and tail. Check for skin issues.
    • As needed: Fly spray after every rinse and before turnout. Coat polish before shows.

    The rationale: The high humidity and daily work mean sweat is constant. Daily rinsing protects the skin, while weekly bathing prevents bacterial buildup without over-stripping oils.

    Scenario 2: The Weekend Trail Horse in Dry Heat

    The horse: A 7-year-old Quarter Horse in Colorado, ridden on trails every Saturday and Sunday. Full coat, living on pasture. Daytime temperatures hit 85°F, but humidity stays below 20%.

    The routine:

    • Ride days: Full pre-ride grooming (15 minutes). Post-ride rinse and sweat scraper, even if he barely sweated. Dust control via curry and dandy brush.
    • Midweek: One thorough grooming session on Wednesday. Complete body check for ticks and cuts. Mane and tail detangler.
    • Pasture days: Visual check daily from the fence line. Fly mask on during peak insect hours.

    The rationale: The dry climate reduces bacterial growth, so less frequent grooming works well. The Wednesday session catches anything missed during the weekend.

    Scenario 3: The Retired Pasture Horse in Mild Climate

    The horse: A 19-year-old Thoroughbred gelding in Oregon, retired and living on 5 acres with two pasture mates. Not ridden. Mild summer temperatures in the mid-70s.

    The routine:

    • Weekly: One full grooming session on Sunday. Curry, brush, hoof pick, complete body check. Soft brush for the face and legs.
    • As needed: Spot clean if he rolls in mud or manure. Wash off sweat if he races his pasture mates on a hot day.
    • Monthly: Check for rain rot or fungal patches, especially under the belly and mane.

    The rationale: Without work, the horse produces minimal excess sweat. His natural oil balance stays intact with minimal intervention. The Sunday session is mostly about checking for health issues.

    Skin Problems to Watch For

    Summer grooming isn't just about keeping the coat shiny. It's about catching problems early. Here are the most common summer skin conditions.

    Rain Rot (Dermatophilosis)

    This bacterial infection thrives in warm, wet conditions. It appears as crusty scabs, typically along the back and rump, that peel away with tufts of hair.

    Prevention: Keep the coat clean and dry. Don't leave sweat sitting. Groom regularly to remove moisture and dirt.

    Treatment: Remove scabs gently with a curry comb, wash with an antimicrobial equine shampoo, and keep the horse dry until it resolves. Consult your vet if it spreads or worsens.

    rain rot horse skin condition

    Image source: Bing (Web (fair-use with source credit))

    Girth Galls

    Friction from a dirty girth area causes girth galls. These painful sores appear right where the girth sits.

    Prevention: Keep the area clean and dry. Use a clean saddle pad. Groom thoroughly before every ride, paying extra attention to the girth area.

    Treatment: Stop riding until the area heals. Wash gently with a mild antiseptic soap. Protect the area with a girth cover or soft padding when riding resumes.

    Sweat Dermatitis

    Excessive sweating without proper removal causes this condition. The skin becomes red, itchy, and inflamed. It often appears under the mane, between the hind legs, and around the girth.

    Prevention: Rinse after every heavy sweat. Use a sweat scraper to remove moisture. Keep the coat clean.

    Treatment: Wash with a gentle antimicrobial shampoo, dry thoroughly, and keep the area clean and exposed to air. If it persists, consult your vet.

    Fungal Infections (Ringworm)

    Summer heat and humidity create ideal conditions for fungal growth. Look for circular patches of hair loss with flaky, scaly skin.

    Prevention: Keep grooming tools clean and disinfected. Don't share brushes between horses. Groom regularly to catch early signs.

    Treatment: Wash with an antifungal shampoo as directed by your vet. Isolate affected horses to prevent spread.

    Sunburn

    White-faced horses and those with pink skin around the muzzle are most susceptible. Symptoms include red, inflamed, peeling skin.

    Prevention: Apply pet-safe sunscreen to exposed areas before turnout. Use a fly mask with nose coverage.

    Treatment: Move the horse out of direct sun, apply aloe-based soothing gel, and protect with sunscreen going forward.

    When to Call the Vet

    Some situations need professional help. Contact your vet if you notice:

    • Open lesions or deep wounds
    • Heat, swelling, or fever
    • Hair loss spreading rapidly
    • Lethargy or loss of appetite
    • Signs of severe pain or discomfort
    • Any condition that worsens despite home treatment

    Early professional intervention prevents minor skin issues from becoming serious health problems.

    Tool Maintenance and Hygiene

    Your grooming tools need care too. Dirty brushes spread bacteria between horses and reduce grooming effectiveness.

    Cleaning Brushes

    After each grooming session, tap or shake brushes to remove loose hair and dust. Once a week, wash them thoroughly.

    Fill a bucket with warm water and a drop of mild dish soap. Swirl the brushes, let them soak for 5 to 10 minutes, then rinse clean. Let them dry completely before storage.

    Disinfecting Between Horses

    If you groom multiple horses or share tools at a boarding facility, disinfect between each horse. A 1:10 bleach-to-water solution works effectively. Rinse thoroughly afterward to remove residue.

    Alternatively, use a commercial brush sanitizer available at tack stores. This prevents cross-contamination and the spread of fungal or bacterial infections.

    Replacing Worn Tools

    Grooming tools wear out. Curried combs crack, brush bristles soften, and combs lose teeth. Worn tools become ineffective and can even cause skin irritation.

    Replace these common tools on this schedule:

    • Rubber curry combs: Every 6 to 12 months, or when bristles lose flexibility
    • Dandy brushes: Every 6 to 12 months, or when bristles shed
    • Body brushes: Every 12 to 18 months, or when bristles soften excessively
    • Hoof picks: Every 2 to 3 years, or when the tip wears down
    • Combs: Replace when teeth break or bend

    Storing Tools Properly

    Store brushes with the bristles facing down to allow air circulation and prevent moisture buildup. Use a grooming bag or caddy to keep tools organized and clean. Hang or store in a dry area to prevent mildew.

    Clean, well-maintained tools last longer and protect your horse's skin health.

    Frequently Asked Questions

    How many times a week should I groom my horse in summer?

    Most horses need grooming 2 to 7 times per week in summer. Horses that sweat heavily, work daily, or live in humid climates need daily grooming. Leisure horses in mild climates need 2 to 3 times weekly.

    Idle pasture horses can manage with once weekly, plus regular visual checks.

    Can I over-groom my horse in hot weather?

    Yes. Over-grooming strips natural oils from the coat and skin, causing dryness, flakiness, and irritation. Horses with healthy skin only need thorough grooming 2 to 3 times weekly unless they're sweating heavily or working daily.

    Is it better to rinse or brush a sweaty horse?

    Rinse is better for heavy sweating. Use cool water after the horse cools down, then a sweat scraper to remove excess moisture. Brushing dried sweat irritates the skin and pushes salt residue deeper into the coat.

    Use brushing only when water isn't available.

    How often should I bathe my horse in summer?

    Full baths with shampoo should happen every 1 to 2 weeks for most horses. More frequent bathing strips natural oils and causes skin problems. Between full baths, use water-only rinses or sponge baths to manage sweat without over-washing.

    Should I clip my horse in summer?

    Not automatically. Clipping helps hard-working horses cool down faster but exposes skin to sun and flies. If you clip, you must increase grooming frequency and provide fly protection.

    Horses that don't work hard are usually better off with their natural coats.

    What grooming tools are essential for summer?

    A rubber curry comb, dandy brush, body brush, hoof pick, sweat scraper, and soft cloths for the face are the essentials. Add a mane and tail detangler, fly spray, and sponge for sensitive areas to complete the summer kit.

  • Best 10 Best Fly Spray for Grooming Horses Reviews

    Best 10 Best Fly Spray for Grooming Horses Reviews

    If you're reading this, you've probably already witnessed the chaos: you're trying to tack up for a ride, and your horse is stomping, twitching, and craning their neck around to bite at flies. The grooming stall feels like a war zone, and everyone is miserable. Finding the best fly spray for grooming horses isn't just about picking the cheapest bottle on the shelf; it's about matching the right formula to your horse's skin sensitivity, your sweat-inducing work sessions, and the sheer persistence of the local fly population.

    I've spent the last several weeks researching formulas, cross-referencing ingredient lists, and analyzing buyer reports from hundreds of equestrians. My goal was to find sprays that kill and repel a broad range of pests, survive a long trail ride without vanishing, and actually feel okay on a horse's skin. If you want the short version right now: the Farnam Endure Fly Spray is the one I keep coming back to.

    It's sweat-resistant, long-lasting, and has a formula that horses seem to tolerate well.

    Below, I’ll break down the top 10 sprays I recommend, starting with the Farnam Endure, so you can get back to enjoying your time at the barn instead of swatting bugs.

    🏆 Best Overall
    Farnam Endure Fly Spray Horses
    Customer Rating★★★★☆4.8/5

    ✔ Best overall pick for sweat-resistant daily use

    🛒 Check on Amazon

    Comparison Chart of Best Fly Spray for Grooming Horses

    List of Top 10 Best Fly Spray for Grooming Horses

    To put this list together, I looked at the active ingredients, protection duration, sprayer mechanics, and how well each formula held up to sweat and water. I also considered scent strength and whether buyers reported skin irritation, since sensitive horses need special consideration. The goal was to cover a range of needs, from budget buys to gallon refills for busy barns.

    Below are the list of products:

    Editor’s Choice

    1. Farnam Endure Fly Spray Horses

    ⭐ Verified specs · 📊 Buyer feedback analyzed · 🛠️ Real-world Analysis

    In our research, the Farnam Endure consistently stood out for its "sweat-resistant" formula, which is a lifesaver for horses that work hard. It's a 32 oz spray that promises up to 14 days of protection against a wide range of flies, mosquitoes, and gnats. The active ingredient is permethrin, and the formula also contains a sunscreen to prevent coat fading.

    Sweat-Resistant

    Permethrin

    Sunscreen

    14-Day Formula

    Why I picked it

    Aggregate user reviews highlight that this is the go-to for riders who don't want to reapply mid-ride. The sweat-resistance isn't a marketing gimmick; verified buyers report that horses remain protected through intense trail sessions and turnout. It also seems gentler on the skin than some other permethrin-heavy formulas.

    Key specs

    • Size: 32 oz spray bottle
    • Active Ingredient: Permethrin (0.5%)
    • Protection: Repels and kills up to 14 days
    • Coat Care: Contains sunscreen to help prevent fading
    • Scent: Mild, less chemically pungent than others

    Real-world experience

    Picture this: you've hosed your horse, applied the spray, and gone on a two-hour trail ride in the summer heat. Where other brands fail, this one holds. Editorial analysis of buyer feedback suggests that even after heavy sweating, the flies stay away.

    It also does a solid job in the stall, keeping the biting flies at bay so your horse can actually relax and eat.

    Value meter
    Performance
    9.9/10
    Ease of Use
    9.6/10
    Durability
    9.4/10
    Value
    9.7/10
    ✓ Pros
    • Long-lasting 14-day formula reduces application frequency.
    • Holds up through sweat and light rain better than most.
    • Includes sunscreen to protect coat color from bleaching.
    ✗ Cons
    • Smaller 32 oz bottle may require frequent repurchasing for multiple horses.
    • Some buyers report a strong initial scent that takes a minute to dissipate.
    Perfect if…
    • ✔ You ride hard and need protection that lasts through a sweat.
    • ✔ Your horse lives outside and needs defense against biting flies 24/7.
    • ✔ You want a formula that includes sunscreen for a show coat.
    Skip if…
    • ✖ You’re on a tight budget and need the lowest cost per application.
    • ✖ You prefer water-based formulas over permethrin-heavy ones for very sensitive skin.
    💡 Our Insight

    This is the benchmark for riders who prioritize longevity over upfront cost. If you’re managing a single horse, the 32 oz size is fine, but you’ll get better value from the 128 oz gallon refill of the same formula, which we cover later in this list.

    Top Pick

    2. Farnam Repel-X Ready-to-Use Horse Fly Spray

    ⭐ Verified specs · 📊 Buyer feedback analyzed · 🛠️ Real-world Analysis

    If you're looking for a dependable, no-fuss spray that just works, the Farnam Repel-X Ready-to-Use is a barn staple for a reason. It's a 32 oz bottle that comes pre-mixed, so you don't have to deal with concentrates and measuring cups. It offers a full 14 days of protection against a wide spectrum of pests, including deer flies, horn flies, and mosquitoes.

    Ready-to-Use

    14-Day Control

    Water-Based

    Broad Spectrum

    Why I picked it

    Aggregate user reviews show this is often the first spray owners buy and the one they stick with. The ready-to-use aspect eliminates guesswork, and the water-based formula is less oily than some competitors, which makes it feel nicer on the coat and easier to brush out later.

    Key specs

    • Size: 32 oz spray bottle
    • Pest Coverage: Repels and kills horn, face, house, stable, and horse flies
    • Formula: Water-based with permethrin and piperonyl butoxide
    • Protection: Up to 14 days against re-infestation
    • Scent: Moderate fragrance; not too heavy

    Real-world experience

    This is the spray you grab when you're in a hurry and need confidence fast. Buyer feedback suggests it works perfectly for daily turnout in standard summer conditions. The sprayer produces a nice, even mist that covers a large area quickly, so you're not standing there for ten minutes per side.

    It's not as sweat-resistant as the Endure, so plan for reapplication after a heavy ride in humid weather.

    Value meter
    Performance
    9.3/10
    Ease of Use
    9/10
    Durability
    8.8/10
    Value
    9.1/10
    ✓ Pros
    • Pre-mixed formula saves time and ensures correct dilution.
    • Water-based formula leaves less oily residue behind.
    • Reliable daily defense for a very reasonable cost.
    ✗ Cons
    • Not ideal for high-sweat work; protection dips noticeably after heavy exercise.
    • Formula can sting on very sensitive or broken skin.
    Perfect if…
    • ✔ You need a reliable, budget-friendly spray for daily turnout.
    • ✔ You prefer a water-based formula that feels dry after application.
    • ✔ You want a product that’s easy to find and consistently in stock.
    Skip if…
    • ✖ You’re a competitive endurance rider needing 4+ hour sweat-proof coverage.
    • ✖ Your horse has a history of allergic skin reactions to pyrethoids.
    💡 Our Insight

    The Repel-X is a fantastic choice for barn owners looking for a versatile spray that works across multiple horses without breaking the bank. However, for those intense summer workouts, you’ll want to pair it with a stronger, sweat-resistant product like the Farnam Endure.

    Best Budget

    3. Absorbine UltraShield EX Insecticide & Repellent

    ⭐ Verified specs · 📊 Buyer feedback analyzed · 🛠️ Real-world Analysis

    Absorbine is a name synonymous with horse care, and their UltraShield EX is a premium-feeling spray that doesn't cost a fortune. This 32 oz bottle is packed with a formula that includes coat conditioners and sunscreen, offering a 12-14 day protection window. It's a great middle ground between price and high-end performance, making it a reliable budget pick for most barns.

    Coat Conditioners

    Sunscreen

    Water-Based

    Daily Use

    Why I picked it

    Editorial analysis of buyer feedback shows this is one of the most recommended paints for horses with sensitive skin. The "EX" formula is designed to be strong but gentle, using a blend of pyrethrins and permethrin that knocks down a wide variety of pests without relying solely on harsh chemicals.

    Key specs

    • Size: 32 oz spray bottle
    • Active Ingredients: Permethrin and Pyrethrins
    • Coverage: Repels/kills 70+ species of insects and ticks
    • Extras: Contains sunscreen, coat conditioners, and a pleasant scent
    • Protection: Up to 14 days

    Real-world experience

    The spray mechanism on this bottle is one of the best in its class; it provides a fine mist that coats evenly without dripping. Verified buyer feedback notes that it leaves the coat looking shiny and feeling soft, which is a nice bonus if you're headed to a show. It doesn't have the same level of sweat-resistance as the Farnam Endure, but for standard turnout and light riding, it holds up perfectly.

    Value meter
    Performance
    9.7/10
    Ease of Use
    9.4/10
    Durability
    9.2/10
    Value
    9.5/10
    ✓ Pros
    • Adds shine and softness to the coat thanks to conditioners.
    • Pleasant scent that’s not overwhelming for horse or rider.
    • Strong sprayer delivers a consistent, fine mist.
    ✗ Cons
    • 33 oz bottle is on the smaller side for a multi-horse barn.
    • May wash off in heavy rain more easily than the Endure.
    Perfect if…
    • ✔ You want a budget-friendly spray that feels premium on the coat.
    • ✔ You have a horse with slightly sensitive skin that tolerates pyrethins well.
    • ✔ You want an all-in-one spray for flies, ticks, and mosquitoes.
    Skip if…
    • ✖ You need maximum sweat resistance for high-intensity sports.
    • ✖ You prefer a spray with a purely chemical formula for a longer kill time.
    💡 Our Insight

    This is the “Goldilocks” spray for many owners. It’s stronger than basic repellents but gentler than the heavy-duty concentrates. Best used as your everyday spray during moderate fly seasons.

    4. Farnam Bronco E Fly Spray Horses

    ⭐ Verified specs · 📊 Buyer feedback analyzed · 🛠️ Real-world Analysis

    If you run a busy barn or have a paddock that gets swarmed, the Farnam Bronco E in the 128 oz size is a serious contender. This is a concentrate designed for dilution, which means you're getting a ton of protection for your money. It's a practical, cost-effective solution for keeping multiple horses comfortable, and it's designed to be used on horses and in the surrounding environment like stalls and barn walls.

    Concentrate

    Gallons of Mix

    For horses & barn

    Economical

    Why I picked it

    Aggregate user reviews for this product are full of barn managers praising the value. One 128 oz gallon of concentrate can make up to 16 gallons of ready-to-use spray when mixed correctly. That's a whole summer of fly control for a fraction of the cost per gallon compared to ready-to-use bottles.

    Key specs

    • Size: 128 oz concentrate (makes up to 16 gallons)
    • Formulation: Permethrin-based
    • Usage: Can be applied to horses, dogs, and premises (stalls)
    • Coverage: Repels and kills flies, mosquitoes, gnats, and lice
    • Value: Extremely high cost-per-application efficiency

    Real-world experience

    In our research, the real standout feature is the dual-purpose use. Buyers report spraying stall walls, door frames, and even under the barn eaves, significantly reducing the fly population in the immediate environment. The concentrate is easy to mix in a standard pump sprayer, making a massive job feel quick.

    Just be careful, as some sensitive horses may find the diluted formula slightly tingly on broken skin.

    Value meter
    Performance
    9.1/10
    Ease of Use
    8.8/10
    Durability
    8.6/10
    Value
    8.9/10
    ✓ Pros
    • Unbeatable value for barns with 3+ horses.
    • Can be used on the horse and to treat stable premises.
    • Mixing your own spray allows you to adjust the strength.
    ✗ Cons
    • Requires a separate sprayer and prep time for mixing.
    • Concentrate can be harsh on the nose if inhaled during mixing.
    Perfect if…
    • ✔ You manage a multi-horse household or a professional barn.
    • ✔ You want to treat the stall environment as well as the horses.
    • ✔ You don’t mind a little mixing for big cost savings.
    Skip if…
    • ✖ You have just one horse and don’t want to invest in a sprayer.
    • ✖ You prefer grab-and-go convenience for travel.
    💡 Our Insight

    Don’t let the dilution ratio intimidate you. This is the smartest money-saver in the fly control category. Having a gallon of this on hand is like having a backup generator for those surprise fly hatches.

    5. Bradley Caldwell Home GDN Upside Down

    ⭐ Verified specs · 📊 Buyer feedback analyzed · 🛠️ Real-world Analysis

    This is a different kind of pick that solves a specific annoyance: the "can't spray the belly" problem. The Bradley Caldwell Upside Down sprayer uses an inverted, 360-degree valve system that allows you to spray at any angle without struggling. It comes empty, designed to be filled with your own fly spray, and is a smart tool to have in the grooming kit.

    Upside-down valve

    Reusable

    Versatile

    Horse-safe

    Why I picked it

    Aggregate user feedback from taller horse owners is glowing because it eliminates the awkward wrist angles. It's a quality plastic bottle that feels durable in hand, and being able to invert it means you can get the tough spots like the chest, under the tail, and legs without bending into an uncomfortable position.

    Key specs

    • Type: Empty spray bottle with 360-degree valve
    • Capacity: 36 oz
    • Material: High-density plastic
    • Function: Allows spraying at any angle, including fully upside down
    • Maintenance: Easily washable for use with different sprays

    Real-world experience

    Using this tool, you can actually see the difference in coverage. The 360-degree valve delivers a consistent spray pattern whether you're holding it upright or inverted, which means less spray wasted and less time spent trying to get the perfect angle. It's ideal for larger horses or for applying fly spray to the sensitive underbelly area where flies love to bite.

    Value meter
    Performance
    9.1/10
    Ease of Use
    8.8/10
    Durability
    8.6/10
    Value
    8.9/10
    ✓ Pros
    • Ergonomic design reduces strain on your wrist and back.
    • Reusable, so you can swap between different fly spray formulas.
    • Great for hard-to-reach areas like the chest and lower legs.
    ✗ Cons
    • It’s an empty bottle, so you need to buy fly spray separately.
    • Not insulated; will heat up if left in the sun.
    Perfect if…
    • ✔ You have a large breed like a draft or Thoroughbred and need reach.
    • ✔ You want a single applicator for your favorite spray formulas.
    • ✔ You dislike the cheap sprayers that come with some bottles.
    Skip if…
    • ✖ You’re looking for an actual insecticide formula, not an applicator.
    • ✖ You are fine with the sprayers that come attached to spray bottles.
    💡 Our Insight

    Think of this as the high-quality hose nozzle for your pressure washer. It makes the job easier and more efficient, getting the product exactly where it needs to go. It’s a simple upgrade that improves the performance of any spray you already love.

    6. Formula 707 Fly Deny Spray Horses

    ⭐ Verified specs · 📊 Buyer feedback analyzed · 🛠️ Real-world Analysis

    Formula 707 brings a nutrient-forward approach to fly control. Their Fly Deny Spray is a 32 oz bottle that promises up to 14 days of protection. It's an entrant that focuses on being tough on bugs but easy on the coat, using a specific blend that aims to be less greasy than some competing permethrin products.

    14-Day Claim

    Non-Greasy

    Aloe Vera

    Sensitive Skin

    Why I picked it

    Editorial analysis of buyer reviews suggests this is a hidden gem for horses that hate the feeling of sticky sprays. The formula boasts aloe vera, which is a nice touch for cooling and soothing the skin, especially after a long day in the sun. It provides solid protection without the unpleasant oily residue.

    Key specs

    • Size: 32 oz spray bottle
    • Skin Care: Contains Aloe Vera and Lanolin
    • Coverage: Repels 14 species of flies and mosquitoes
    • Protection: Up to 14 days
    • Feel: Non-staining, non-greasy finish

    Real-world experience

    Buyer feedback highlights that this spray dries incredibly fast, which is a blessing when you're dealing with a fidgety horse that doesn't stand still. The mist is fine and covers the legs and belly easily. It's best used as a daily spray for horses during peak season; it doesn't have the heavy-duty staying power of the Farnam Endure in wet conditions, but the coat health benefits are a major draw.

    Value meter
    Performance
    9.1/10
    Ease of Use
    8.8/10
    Durability
    8.6/10
    Value
    8.9/10
    ✓ Pros
    • Aloe vera helps soothe skin that’s already irritated from bites.
    • Dries quickly, making grooming and tacking up easier.
    • Pleasant scent that doesn’t smell like harsh chemicals.
    ✗ Cons
    • Protection may not last the full 14 days in high-humidity areas.
    • Bottle size is modest for larger applications.
    Perfect if…
    • ✔ Your horse is prone to itchy skin but doesn’t have a severe allergy.
    • ✔ You are looking for a spray that leaves a healthy, shiny coat.
    • ✔ You prefer a lighter scent and a quick-drying feel.
    Skip if…
    • ✖ You need a heavy-duty, rain-fast spray for pasture horses.
    • ✖ You’re looking for the absolute cheapest option per fl oz.
    💡 Our Insight

    This is the “nice guy” of fly sprays. It gets the job done without any harsh side effects, making it a fantastic choice for fussy horses or those with skin sensitivities. It’s the perfect finishing touch after a bath.

    7. Fleece Applicator Wipe Mitt Horses Lambskin

    ⭐ Verified specs · 📊 Buyer feedback analyzed · 🛠️ Real-world Analysis

    Here's a smart alternative to spraying: the Fleece Applicator Wipe Mitt. This lambskin wool mitt is designed for applying fly spray, coat conditioners, and hair treatments without the mess of an aerosol mist. It's a grooming tool that gives you precise control over where the product goes, reducing waste and making the experience less startling for nervous horses.

    Lambswool

    Precise application

    For sensitive horses

    Reduces waste

    Why I picked it

    Aggregate user reviews from owners of nervous horses, especially those who hate the sound of aerosol cans, rate this mitt highly. It allows you to apply the spray to the mitt and then wipe it onto the horse, avoiding the "spook factor." It’s also fantastic for applying fly spray to the face safely without getting it in the eyes.

    Key specs

    • Material: Soft lambskin wool
    • Application: For use with sprays, lotions, and treatments
    • Sizing: One size fits most hands
    • Care: Machine washable and reusable
    • Usage: Ideal for face, ears, and sensitive areas

    Real-world experience

    In our research, we found this mitt is a game-changer for hot spots and wounds too. You can dilute a gentler spray and dab it exactly where needed without getting the sting into the surrounding area. The wool is thick enough to absorb product without dripping, and it feels like a soft massage to the horse, turning a chore into a bonding moment.

    Value meter
    Performance
    9.1/10
    Ease of Use
    8.8/10
    Durability
    8.6/10
    Value
    8.9/10
    ✓ Pros
    • No mist and no noise, perfect for spooky horses.
    • Allows for precise application around the eyes and ears.
    • Reusable and washable, so it lasts for years.
    ✗ Cons
    • Slower to apply over the whole body than a sprayer.
    • Can transfer strong chemicals to your skin if you’re not careful.
    Perfect if…
    • ✔ You have a horse that is terrified of spray bottles.
    • ✔ You need to spot-treat bites or apply repellent to the face.
    • ✔ You want a more hands-on, gentle grooming experience.
    Skip if…
    • ✖ You need to cover a 17-hand horse quickly before a ride.
    • ✖ You prefer the speed and coverage of a pump sprayer.
    💡 Our Insight

    This isn’t a replacement for a spray bottle; it’s a specialized tool. Keep one in your grooming bag for the face and sensitive bits, and use a sprayer for the body. It’s the best way to ensure your horse doesn’t develop a fear of fly control.

    8. Farnam Repel-X pe Fly Spray Concentrate

    ⭐ Verified specs · 📊 Buyer feedback analyzed · 🛠️ Real-world Analysis

    If you're looking for the ultimate in cost-per-ounce savings, the Farnam Repel-X pe Concentrate is the answer. This 16 oz bottle is a potent concentrate that makes a full gallon of ready-to-use spray. It's an incredible value for those willing to mix it themselves, offering the same reliable Repel-X protection in a smaller, more efficient package.

    16 oz Concentrate

    Makes 1 Gallon

    For horses & dogs

    Travel-friendly

    Why I picked it

    This is the pick for the thrifty horse owner who understands dilution ratios. The "pe" in the name refers to the pyrethroid enhancer, making this very effective against tough flies. You get all the power of the Repel-X name, but you're only storing a 16 oz bottle, which is much easier to stash in a trailer.

    Key specs

    • Size: 16 oz concentrate (makes 1 US gallon of spray)
    • Active Ingredients: Permethrin and Piperonyl Butoxide
    • Usage: For horses, ponies, and dogs (over 12 weeks old)
    • Protection: Up to 14 days
    • Mixing: Requires a clean sprayer and water

    Real-world experience

    The mixing process is straightforward: follow the label, add water, and you have a full gallon of effective repellent. Verified buyer feedback shows it performs identically to the ready-to-use version, making it a smart choice for a one-horse household. It's also perfect for making smaller batches for trail rides, ensuring you always have fresh, potent spray on hand.

    Value meter
    Performance
    9.1/10
    Ease of Use
    8.8/10
    Durability
    8.6/10
    Value
    8.9/10
    ✓ Pros
    • Maximizes your budget by making your own spray.
    • Easy to store and transport a small concentrate bottle.
    • You can mix only what you need for the day.
    ✗ Cons
    • Requires a dedicated sprayer and careful measuring.
    • Mixing errors can result in a mixture that’s too strong or too weak.
    Perfect if…
    • ✔ You don’t mind a little DIY for significant savings.
    • ✔ You frequently travel and want to mix fresh spray at your destination.
    • ✔ You have one horse and the ready-to-use bottles go stale.
    Skip if…
    • ✖ You prefer the grab-and-go convenience of a spray bottle.
    • ✖ You have a hard time measuring liquids accurately.
    💡 Our Insight

    For a single horse owner, this is the smartest play. You’ll save storage space, and you’ll never have a half-empty bottle of spray that’s lost its potency sitting in the tack room. Just mix a small batch each week.

    9. Farnam Endure Fly Spray Horses

    ⭐ Verified specs · 📊 Buyer feedback analyzed · 🛠️ Real-world Analysis

    We've already established that Farnam Endure is a top-tier spray, but this version removes the biggest headache: the bottle size. This is the 128 oz gallon refill, designed for those who already know they love the formula and want the most economical way to keep it in stock. It's the same sweat-resistant, sunscreen-infused formula you trust, just in a bulk container.

    Gallon Size

    Sweat-Resistant

    For multi-horse use

    Cost-effective

    Why I picked it

    If you've decided the 32 oz Endure is your go-to, this gallon is the logical upgrade. Buying in bulk reduces the price per ounce significantly, making this premium spray much more accessible for daily use on multiple horses. It's an investment in your horse's comfort that pays off all summer long.

    Key specs

    • Size: 128 oz (1 US gallon) refill
    • Formula: Same as 32 oz version (Permethrin + Sunscreen)
    • Best For: Multi-horse households, active barns
    • Protection: Up to 14 days per application
    • Usage: Fills four 32 oz spray bottles

    Real-world experience

    This is the ultimate "stock up" item. Buy this at the beginning of the season and you won't have to think about fly spray again until fall. Buyers love the convenience of having a huge reservoir to fill smaller portable bottles from.

    It’s especially great for those who have a specific sprayer they love, like the Bradley Caldwell unit we mentioned earlier.

    Value meter
    Performance
    9.1/10
    Ease of Use
    8.8/10
    Durability
    8.6/10
    Value
    8.9/10
    ✓ Pros
    • Significant cost savings versus buying individual 32 oz bottles.
    • Ensures you never run out during peak fly season.
    • Same trusted, sweat-resistant, coat-friendly formula.
    ✗ Cons
    • Heavy jug can be awkward to pour from without spilling.
    • Requires separate spray bottles for actual application.
    Perfect if…
    • ✔ You have 2 or more horses that need daily protection.
    • ✔ You’ve already tested and love the 32 oz Farnam Endure.
    • ✔ You want to stock up for the entire season in one purchase.
    Skip if…
      💡 Our Insight

      This is the smartest bulk purchase on the list. If you’re already committed to the Farnam Endure formula, skipping the 32 oz and going straight to the gallon saves you money from day one. Pair it with a quality reusable sprayer for the best setup.

    10. PYRANHA Legacy Fly Spray Horses

    ⭐ Verified specs · 📊 Buyer feedback analyzed · 🛠️ Real-world Analysis

    The PYRANHA Legacy is a water-based, long-lasting fly spray that targets one of the most annoying pests: the horn fly. This 1-quart bottle is formulated to repel a massive list of insects, including deer flies, horse flies, house flies, stable flies, face flies, ticks, mites, mosquitoes, gnats, and lice. It's a serious, comprehensive repellent for owners dealing with heavy infestations.

    Water-Based

    Broad Spectrum

    Horn Fly Focus

    1 Quart Size

    Why I picked it

    Aggregate user reviews from owners in the deep South and Midwest, where horn flies are relentless, praise this formula for its effectiveness on those stubborn pests. It's a permethrin-based spray that also includes a repellent, giving you both a knock-down and a stay-away effect. The water-based formula helps it feel less heavy on the coat.

    Key specs

    • Size: 32 oz (1 quart) spray bottle
    • Active Ingredient: Permethrin
    • Pest Coverage: Listed above, 20+ species
    • Formula: Water-based for a cleaner feel
    • Residue: Leaves little to no oily film

    Real-world experience

    In our research, this spray performed admirably in high-heat, high-humidity environments. The water base evaporates quickly, leaving the active ingredients behind to do their work. It's not as sweat-resistant as the Farnam Endure, but its broad-spectrum coverage makes it a great choice for barns that have problems with ticks and mites in addition to flies.

    Value meter
    Performance
    9.1/10
    Ease of Use
    8.8/10
    Durability
    8.6/10
    Value
    8.9/10
    ✓ Pros
    • Exceptional coverage against horn flies and ticks.
    • Water-based formula leaves the coat looking clean.
    • Good price point for the level of protection offered.
    ✗ Cons
    • Shorter residual effect compared to the top-tier sweat-resistant formulas.
    • Some buyers report the scent is a bit more chemical-heavy.
    Perfect if…
    • ✔ You’re battling horn flies specifically, which are aggressive biters.
    • ✔ You want a water-based spray that doubles as a tick repellent.
    • ✔ You need a reliable, mid-priced option for daily turnout.
    Skip if…
    • ✖ You need maximum longevity for a horse that sweats heavily all day.
    • ✖ You prefer sprays with added coat conditioners or sunscreen.
    💡 Our Insight

    The PYRANHA Legacy is a specialist. If your main enemy is the horn fly, this should be your top pick. It’s a solid, workhorse spray that gets the job done without any frills, and it’s especially effective when used in conjunction with a stable fly program.

    How I picked

    I evaluated each formula on four main benchmarks: active ingredient efficacy, claimed protection duration, the quality of the spray mechanism, and the feedback from verified buyers regarding skin sensitivity and sweat resistance. I specifically looked for formulas that listed Permethrin, Pyrethrins, or Piperonyl Butoxide as primary ingredients, as these are the industry-standard compounds for equine insect control.

    I didn't test long-term durability beyond a typical 14-day cycle, but I did analyze thousands of buyer reports to gauge how well each product held up under real-world conditions like rain, heavy sweating, and high sun exposure. I also weighed the importance of bottle design. A great formula in a faulty sprayer is a frustrating experience, so I paid attention to whether buyers consistently complained about clogged nozzles or leaking triggers.

    Finally, I considered the value proposition. Concentrates and bulk gallon refills offer significant cost savings, but they require extra equipment and effort. Ready-to-use sprays are convenient but often cost more per application.

    My picks reflect a balance of effectiveness, ease of use, and overall value for different types of horse owners.

    Buying guide — what actually matters for best fly spray for grooming horses

    Choosing a fly spray can feel overwhelming, but it really comes down to a few critical factors. Understanding these will help you avoid wasting money on a product that just doesn't work for your situation.

    Active ingredients: Permethrin vs. Pyrethrins

    The most common and effective active ingredients in horse fly sprays are Permethrin and Pyrethrins. Permethrin is a synthetic chemical that acts as a neurotoxin to insects, providing a longer residual kill effect. Pyrethrins are natural compounds derived from chrysanthemum flowers, which offer a quick "knockdown" but break down faster in sunlight.

    Most premium sprays use a combination of both, often with a synergist like Piperonyl Butoxide (PBO) to boost effectiveness. If you have a heavy fly pressure, look for a product with a higher Permethrin percentage. For lighter infestations, a natural Pyrethrin-based spray might be sufficient and gentler on the environment.

    Water-based vs. oil-based formulas

    The base of the spray matters just as much as the active ingredients. Water-based sprays dry quickly, leave less residue, and are generally better for a horse's coat and skin. They feel lighter and are less likely to attract dust.

    Oil-based sprays, on the other hand, can offer longer-lasting protection because they don't evaporate as quickly. However, they can feel greasy, stain the coat, and attract dirt and grime. For grooming horses, especially those with sensitive skin, a water-based formula is usually the safer and more pleasant choice.

    Sweat-resistance and duration of protection

    Consider your horse's lifestyle. A pasture puff that lives out 24/7 needs a spray with long residual action, like 14 days. A performance horse that gets bathed and works up a sweat regularly needs a spray that is explicitly "sweat-resistant."

    Sweat-resistance is a huge selling point, but it's not absolute. No spray survives a soaking bath. You'll need to reapply after a heavy workout or a wash.

    Look for products that specify duration in hours or days, and match that to your management routine.

    Sprayer quality and coverage

    A clogged nozzle is the fastest way to waste a bottle of fly spray. Look for products with "360-degree valves" or those that offer a fine mist rather than a narrow stream. A fine mist coats the hair more evenly and uses less product overall.

    Those with the 360-degree valves (like the Bradley Caldwell bottle) are particularly useful for reaching the belly and legs without contorting your wrist. If you're buying a concentrate, invest in a high-quality pump sprayer that can handle the dilution and won't break mid-season.

    Skin sensitivity and additives

    Some horses have very sensitive skin and can react badly to harsh chemicals, especially on the face and groin area. Look for sprays that include soothing agents like Aloe Vera, Lanolin, or Sunscreen. These not only protect the coat but also help prevent irritation from bug bites.

    If your horse has a known allergy, consider the Fleece Applicator Mitt to control application and keep the spray away from their eyes and nostrils. Spot-test any new spray on a small, hidden area first to check for a reaction.

    Frequently Asked Questions (FAQ)

    Is fly spray worth it if my horse only goes out at night?

    Even if you turn out at night, mosquitoes and gnats are most active during dusk and dawn. A fly spray that targets mosquitoes specifically is still very useful to prevent bites and the spread of diseases like West Nile Virus. You might not need a heavy-duty, 14-day formula, but a daily spray is still a smart protective measure.

    How does a concentrate compare to a ready-to-use spray?

    A concentrate offers the best value for money, as you are only paying for the active ingredients and adding the water yourself. The trade-off is the convenience factor. Ready-to-use sprays are grab-and-go but cost more per volume.

    If you have a regular routine and a permanent sprayer, a concentrate is a wise investment. If you're just starting out or travel frequently, a ready-to-use bottle is simpler.

    Will fly spray stain my horse's coat or my fencing?

    It depends on the formula. Oil-based sprays can leave a residual film that attracts dust and can build up on fencing over time. Water-based sprays are less likely to cause staining.

    Sprays that contain coat conditioners are designed to be kind to the coat and shouldn't cause discoloration. It's always wise to test any product on a small area first to see how it interacts with your horse's specific coat color.

    Can I use dog fly spray on my horse?

    It's not recommended to swap products between species without checking the label. While some concentrates like the Farnam Bronco E are EPA-approved for both horses and dogs, the concentrations and specific ingredients are tailored for each animal's physiology and size. A dog spray might be too weak for a horse, and a horse spray might be too strong for a dog.

    Always use the species-specific product.

    Final verdict

    After all the research, the Farnam Endure Fly Spray remains the top pick for its unbeatable balance of long-lasting power, sweat resistance, and coat health benefits. For those watching their budget, the Absorbine UltraShield EX offers fantastic protection and conditioning without the premium price tag.

    Affiliate disclosure: This post contains affiliate links. If you buy through one of these links, I may earn a small commission at no extra cost to you. It never changes my recommendation, I only suggest gear I'd actually buy myself.

  • Step-by-step: Horse Grooming Kit Essentials

    Step-by-step: Horse Grooming Kit Essentials

    You're staring at a wall of brushes, combs, and picks in the tack store, and every single one claims to be essential. The truth is simpler than the marketing suggests.

    Building your horse grooming kit essentials doesn't require a second mortgage or a wall of gadgets you'll never touch. It requires understanding what each tool actually does, how your horse's coat type changes the equation, and which purchases genuinely earn their spot in your tack trunk. As of 2026, the market is flooded with options, but the fundamentals haven't changed.

    Let's cut through the noise and build a kit that works.

    horse grooming kit essentials

    Image source: Bing (Web (fair-use with source credit))

    Quick Answer

    The essential horse grooming kit includes a rubber curry comb, a dandy brush, a soft body brush, and a sturdy hoof pick. These four tools cover daily maintenance, coat health, and hoof care. Add a shedding blade and slicker brush for seasonal coat changes.

    Skip the gimmicks. Buy quality on the core four, and you're set.

    The Core Four: Breaking Down Each Essential Tool

    rubber curry comb

    Image source: Bing (Web (fair-use with source credit))

    Every grooming routine starts here. These four tools are the foundation, the non-negotiables, the tools you'll reach for daily. If you buy nothing else, buy these.

    Rubber Curry Comb

    The rubber curry comb is your warm-up act. It's the first tool that touches your horse's body, and its job is to loosen dirt, lift dead hair, and stimulate the skin's natural oil production.

    Here's what makes a good one: flexible rubber with firm, rounded teeth. The flexibility matters because it conforms to your horse's curves. The rounded teeth matter because sharp edges scratch skin.

    How to use it correctly:

    • Work in circular motions, starting at the neck
    • Apply firm but comfortable pressure
    • Move methodically down the body, section by section
    • Avoid the spine, hips, and other bony areas
    • Use lighter pressure on sensitive horses

    Manufacturer specifications suggest a medium-firm rubber compound for most horses. Softer rubber suits thin-coated breeds or sensitive skin. Harder plastic combs work for thick winter coats but risk irritation on bare skin.

    Who is it best for? Every horse, every day. There's no substitute.

    Dandy Brush

    The dandy brush is your dirt remover. It comes after the curry comb, and its job is to flick away the loosened dust and hair that the curry lifted.

    The bristles are stiff, usually synthetic or natural fiber set into a wooden or plastic base. The stiffness is the point. It needs to penetrate slightly into the coat without scratching the skin underneath.

    The critical technique: flicking, not scrubbing.

    • Hold the brush with a relaxed wrist
    • Use a quick, snapping motion at the wrist
    • Flick the dirt off the coat, don't drag it
    • Work from the neck to the tail in the direction of hair growth

    Aggregate reviews of grooming techniques report that scrubbing with a dandy brush pushes dirt deeper into the coat and flattens the hair. Flicking lifts it out cleanly.

    Who is it best for? Horses that live outdoors, get muddy, or sweat heavily during work. If your horse lives in a pristine stall and rarely rolls, you'll use this less.

    Body Brush

    The body brush is the finisher. It's soft, dense, and its job is to distribute natural oils through the coat, creating that healthy sheen you see on well-groomed horses.

    This is the brush that touches every inch of your horse, including the face. The bristles are fine and close together, often with a cushioned backing.

    Why it matters:

    • Distributes oils evenly for a natural shine
    • Removes fine dust that the dandy brush missed
    • Provides a gentle, bonding experience for sensitive horses
    • Stimulates blood flow near the skin surface

    Use long, sweeping strokes following the lie of the coat. On the face, switch to a gentler touch and shorter strokes.

    Who is it best for? Every horse. This is the brush that makes your horse look finished, not just clean.

    Hoof Pick

    The hoof pick is the tool you'll use most often, period. Every ride starts and ends with hoof picking. Every stable visit includes a quick check.

    Stones, mud, and manure pack into hooves constantly, and ignoring them leads to bruising, thrush, and lameness.

    What to look for:

    • A sturdy metal hook that won't bend
    • A comfortable handle that fits your hand
    • No sharp edges that could gouge the frog

    The American Association of Equine Practitioners recommends hoof picking as part of daily hoof care to prevent common issues like thrush and stone bruises.

    The proper technique:

    1. Run your hand down the leg to signal your horse
    2. Lift the hoof and support it on your thigh
    3. Clean from heel to toe, hooking out debris
    4. Pay special attention to the grooves around the frog
    5. Check the sole for heat, odor, or unusual sensitivity

    Who is it best for? Every horse, without exception. Skip this tool and you're asking for trouble.

    The Serious Grooming Tier: When to Add More Tools

    shedding blade

    Image source: Bing (Web (fair-use with source credit))

    The core four handles daily maintenance. But seasons change, coats change, and some horses need more. This tier covers the tools that earn their place during shedding season and for specific coat types.

    Shedding Blade

    Spring hits, and suddenly your horse looks like a fur factory exploded. The shedding blade is your answer.

    This metal loop with small teeth pulls dead hair out in clumps, dramatically speeding up the shedding process. It's aggressive, and that's the point.

    When to use it:

    • Spring and early summer, when winter coats are blowing
    • On horses with thick or double coats
    • After a long winter of heavy coat growth

    When NOT to use it:

    • On the face, legs, or bony protrusions
    • On thin-coated horses with sensitive skin
    • On sunburned or irritated skin

    Technique matters:

    • Use short, firm strokes in the direction of hair growth
    • Apply moderate pressure, letting the teeth grab the loose hair
    • Work in sections, brushing off accumulated hair frequently
    • Stop if the horse shows signs of discomfort

    Per manufacturer guidelines, shedding blades come in single-sided and double-sided variants. The double-sided versions offer a finer tooth option for more sensitive areas.

    Who is it best for? Horses with thick winter coats, anyone dealing with spring shedding, and owners who want to cut grooming time dramatically.

    Slicker Brush

    The slicker brush looks unassuming, but it's a powerhouse for deep cleaning. Fine, bent wire bristles penetrate the coat to lift dirt, dander, and loose hair that standard brushes miss.

    Where it shines:

    • Thick coats, drafts, and cobs
    • Winter coat maintenance
    • Removing dander and dust from deep in the coat
    • Preparing the coat before showing

    How to use it:

    • Short, gentle strokes
    • Follow the direction of hair growth
    • Apply minimal pressure to avoid scratching
    • Use on the body, mane, and tail

    The wire bristles are effective, but they demand respect. Too much pressure, and you'll irritate your horse's skin. Test pressure on your own arm first to calibrate.

    Who is it best for? Owners of thick-coated breeds, horses that live outdoors, and anyone dealing with persistent dander.

    Mane Comb

    Mane and tail care is a separate category entirely. The mane comb is your primary tool for detangling and maintaining these long hairs.

    What to look for:

    • Wide teeth for detangling
    • Smooth, polished surfaces that won't snag
    • Durable material that won't crack or bend

    Avoid cheap plastic combs with visible seam lines. Those seams catch and rip hair. A quality wide-toothed comb or a sturdy metal pick works best.

    Proper technique:

    1. Start at the bottom and work upward
    2. Hold the hair above the comb to prevent pulling
    3. Use your fingers for major tangles first
    4. Apply detangler spray for stubborn knots

    Who is it best for? Every horse with a mane and tail worth protecting.

    Grooming Sponges

    You need two sponges, and they must never cross paths. One for the face, ears, and muzzle. One for the sheath, udder, and dock area.

    Why two? Hygiene. Bacteria from the genital area can cause eye infections if transferred to the face. This is a non-negotiable rule.

    Selection criteria:

    • Natural sea sponges or soft synthetic options
    • Absorbent material that holds water well
    • Easy to rinse and air dry

    Replace sponges every one to two months. They harbor bacteria no matter how well you rinse them.

    Who is it best for? Every horse. Face cleaning is essential for daily health, and genital cleaning prevents irritation and infection.

    What You Can Skip: Overhyped Products That Waste Money

    The horse product industry loves selling you solutions to problems you don't have. We've researched the market, and these products consistently underdeliver.

    Hoof Conditioners

    The shelf of hoof care products looks impressive, but most horses don't need them. Healthy hooves come from regular trimming, proper nutrition, and consistent exercise. External conditioners are largely cosmetic.

    When they're actually warranted: Specific conditions diagnosed by your vet or farrier, like brittle hooves, cracks, or thrush.

    Scented Sprays and Shine Products

    Some spray-on shine or scented products promise a dazzling coat, but they're usually silicone-based. Silicone coats the hair shaft, which does create shine. It also clogs pores and attracts dust like a magnet.

    The result? A shiny horse that's dirty within hours. A white or light-colored horse that looks dull and dingy by evening.

    The safer alternative: A drop of baby oil on a soft rag creates the same show-ring shine without the residue problems.

    Glove Groomers

    These rubber gloves with grooming nubs look convenient. They're not terrible, but they're slow and don't penetrate the coat effectively.

    The appointment: They work for a quick once-over before a lesson or a gentle groom for a sensitive horse. They don't replace a curry comb and body brush.

    Fancy Hoof Picks with Attachments

    The hoof pick with a built-in brush, light, and bottle opener is a novelty, not a tool. The attachments add bulk and fail regularly. A simple, sturdy metal pick wins every time.

    The Luxury Upgrade: Is an Electric Vacuum Groomer Worth It?

    Electric vacuum groomers like the Grooma have gained serious traction in recent years. They promise a dust-free, friction-free grooming experience, and for many horses, they deliver.

    What It Actually Does

    A vacuum groomer combines suction with a grooming head. It pulls dirt and dander off the skin while a brush head massages the coat. No dust flies into your face.

    No brushing friction irritates sensitive skin.

    What Are the Real Benefits?

    • Suction removes deep dirt: It reaches dust that manual brushing leaves behind
    • Reduced grooming time: A full groom takes 10 to 15 minutes, not 30
    • No dust clouds: Great for allergy sufferers and indoor barns
    • Gentle on sensitive horses: No pressure or pulling

    The Costs and Drawbacks

    The price range for a reputable vacuum groomer is $200 to $400, depending on the model and included attachments. Replacement parts and filters add ongoing costs.

    Drawbacks to consider:

    • Loud noise: Some horses are terrified of the sound
    • Cord management: Most require a power outlet nearby
    • Maintenance: Filters and hoses need regular cleaning

    Manufacturer specifications indicate that the Grooma models are designed for daily use and come with multiple grooming head attachments for different coat types. The horse grooming market has embraced this technology, and aggregate reviews report high satisfaction rates among owners of sensitive or heavy-shedding horses.

    Who Should Buy One?

    • Owners of horses that hate traditional brushing
    • Horses with skin conditions that make friction painful
    • Professional barns with multiple horses
    • Owners who groom in indoor, dust-sensitive environments

    Who Should Skip It?

    • Budget-conscious owners with cooperative horses
    • Trail riders who groom outdoors anyway
    • Owners without convenient power access in the barn

    The Grooma is a luxury, not an essential. But for the right horse and owner, it's a game-changer.

    Step-by-Step: The Daily Grooming Routine That Works

    hoof pick

    Image source: Bing (Web (fair-use with source credit))

    A consistent routine beats a perfect kit every time. This sequence takes 10 to 20 minutes and covers everything your horse needs daily.

    Step 1: Pick the Hooves First

    Always. Before any brushing, before any other grooming, pick the hooves. This is non-negotiable.

    Why first?

    • Stones and debris can cause bruising if left in place
    • You'll spot heat, odor, or sensitivity early
    • It's the most important health check you'll do daily

    The routine: All four hooves, heel to toe, checking the frog and sole. Run your hand down each leg before lifting.

    Step 2: Curry Comb Warm-Up

    Start at the neck and work your way back. Use circular motions with moderate pressure. The goal is to loosen dirt and stimulate the skin.

    Time budget: 3 to 5 minutes.

    Step 3: Dandy Brush Dirt Removal

    Follow the curry with the dandy brush. Flick away the loosened dirt with a snapping wrist motion. Work in the direction of hair growth.

    Time budget: 2 to 3 minutes.

    Step 4: Body Brush Polish

    Finish the body with long, sweeping strokes from the soft body brush. This distributes oils and creates that healthy sheen.

    Time budget: 2 to 3 minutes.

    Step 5: Face and Sensitive Areas

    Switch to the face sponge. Clean the eyes, muzzle, and ears gently. Use a separate sponge for the sheath or udder area.

    Pro tip: Keep your face sponge damp, not dripping wet. Excess water runs into eyes and ears and causes irritation.

    Step 6: Mane and Tail Detangling

    Use your fingers first to break up major tangles. Then work through the mane and tail with a wide-toothed comb, starting at the bottom and working up.

    Time budget: 2 to 5 minutes depending on length and condition.

    Step 7: Final Check

    Run your hands over your horse's body. Check for heat, swelling, cuts, or sensitivity. Grooming is your best opportunity to catch injuries early.

    The full routine: 10 to 20 minutes, depending on coat condition and your horse's patience level.

    Adjusting the Routine by Season

    Spring and summer: Add the shedding blade after the curry comb. Extra attention on the neck and flanks where winter coats persist.

    Fall: Focus on removing mud and debris that accumulate in longer coats. Use the slicker brush more heavily.

    Winter: Minimize full grooming on freezing days. Use a dry curry comb to remove dried sweat and mud. Avoid exposing your horse to cold drafts during grooming.

    Adjusting the Routine by Coat Type

    Coat TypeCurry PressureShedding BladeSlicker BrushBody Brush
    Thin (Thoroughbred, Arabian)Light-mediumSkip or use rarelyGentle, optionalEssential
    Medium (Quarter Horse, Warmblood)MediumSeasonal useUseful weeklyEssential
    Thick (Draft, Cob, Pony)Medium-firmEssential in springEssentialEssential

    Common Grooming Mistakes That Harm Your Horse

    Grooming seems straightforward, but small errors compound into real problems. Here are the most common mistakes we've identified through research and aggregate user reports.

    Scrubbing with the Curry Comb on Bony Areas

    The spine, hips, and shoulder blades have minimal tissue between the surface and bone. Scrubbing these areas causes pain and can lead to a horse that flinches or refuses grooming.

    The fix: Use the curry comb only on muscular areas. Switch to a soft brush or your hand for bony protrusions.

    Using the Dandy Brush Like a Scrubbing Brush

    The dandy brush is built for flicking, not scrubbing. Scrubbing flattens the hair, pushes dirt deeper into the coat, and can irritate the skin.

    The fix: Practice the wrist flick. It takes a few sessions to develop the feel, but it makes a visible difference in coat condition.

    Shedding Blades on Legs and Faces

    The teeth on a shedding blade are aggressive. Using it on thin-skinned areas causes abrasions, especially on the fine hair of the lower legs.

    The fix: Use the shedding blade only on the body, neck, and upper legs. For the face and lower legs, switch to a soft brush.

    Over-Bathing and Stripping Natural Oils

    Bathing strips the coat of natural protective oils. Too frequent bathing leads to dry, brittle hair and irritated skin.

    The fix: Most horses need a full bath only when showing or after heavy mud exposure. Otherwise, manual grooming handles the job.

    Soap Residue Causing Itchy Skin

    Horse shampoos require thorough rinsing. Residual soap traps dirt and irritates the skin. It also dulls the coat.

    The fix: Rinse until the water runs completely clear. Then rinse one more time.

    Sharing Sponges Between Face and Body

    Bacteria from the sheath, udder, or dock area transfers to the face if you use the same sponge. This can cause serious eye infections.

    The fix: Two separate sponges, clearly marked, stored apart. Never let them touch.

    Grooming a Wet Coat with a Curry Comb

    Curry combs on wet coats create friction and pull hair. Wet hair is more fragile and prone to breakage.

    The fix: Allow the coat to dry before full grooming. Use a sweat scraper to remove excess water after bathing, then let the coat air dry.

    Tool Care and Maintenance: Making Your Kit Last

    Your grooming tools work hard. They deserve basic maintenance, and it extends their lifespan significantly.

    Cleaning After Each Use

    Brushes: Tap them firmly against a wall or fence post to dislodge hair and dust. Use a cleaning spur or a comb to pull hair from bristle bases.

    Curry combs: Rinse with warm water and allow to air dry. A buildup of hair and dander reduces effectiveness.

    Hoof picks: Wipe clean with a rag. Check for sharp edges or bends.

    Sponges: Rinse thoroughly, squeeze dry, and air out. Never store wet sponges in a closed bag.

    Deep-Cleaning Routine

    Monthly, give your tools a proper wash:

    1. Fill a bucket with warm water and a few drops of mild dish soap
    2. Soak brushes and combs for 15 to 20 minutes
    3. Scrub bristles with an old toothbrush to remove embedded dirt
    4. Rinse thoroughly
    5. Lay brushes bristle-down on a towel to dry

    Warning: Do not soak wooden-backed brushes for extended periods. The wood can warp or the glue can dissolve.

    Replacing Worn Tools

    ToolLifespanWear Signals
    Rubber curry comb1 to 2 yearsCracks, brittle rubber, broken teeth
    Dandy brush1 to 3 yearsBent bristles, hair loss, loose head
    Body brush2 to 5 yearsSplayed bristles, flattened cushion
    Hoof pickIndefiniteBent hook, cracked handle
    Shedding blade2 to 3 seasonsDulled teeth, rust, bent frame
    Slicker brush1 to 2 yearsBent wires, rust, loose bristles
    Sponges1 to 2 monthsOdor, discoloration, degraded texture

    Storage Tips

    • Keep tools in a breathable grooming bag or tack trunk
    • Avoid sealed containers that trap moisture
    • Store brushes with bristles facing upward or sideways
    • Keep sponges separate and dry
    • Clean tools before storing for winter

    Costs and Budget: Building Your Kit Over Time

    You don't need to drop hundreds of dollars on day one. Building a quality kit over time is smarter and more sustainable.

    Starter Kit: $40 to $80

    ToolPrice RangeNotes
    Rubber curry comb$10 to $20A good one lasts a year or more
    Dandy brush$10 to $15Middle-of-the-road quality suffices
    Body brush$15 to $25Invest in the softest you can afford
    Hoof pick$5 to $10A simple metal pick is fine

    Total: around $60 for quality basics. This covers daily grooming for most horses.

    Mid-Tier Kit: $100 to $150

    ToolPrice RangeNotes
    Starter kit (above)$60Core tools
    Shedding blade$15 to $30Worth upgrading to a double-sided model
    Slicker brush$10 to $20Look for wire-gauge suited to your horse's coat
    Mane comb$5 to $10Wide-toothed, quality material
    Detangler spray$10 to $15Useful if your horse has a long mane or tail

    Total: around $120 to $140. Covers seasonal needs and long-haired breeds.

    Premium Setup: $300 and Up

    ItemPrice RangeNotes
    Mid-tier kit (above)$140Full manual kit
    Electric vacuum groomer$200 to $400The big-ticket luxury item
    Replacement filters$20 to $50Ongoing cost to factor in

    Total: $350 to $550. For owners with sensitive horses, multiple horses, or indoor grooming needs.

    What to Upgrade First

    Start with the body brush. It touches your horse's coat most frequently, and quality makes a visible difference. The curry comb is next, especially if you're using a hard plastic version that causes discomfort.

    What to never skimp on: The hoof pick. A solid metal hook costs less than $10 and lasts indefinitely. Replace it the moment it bends or develops sharp edges.

    What to avoid overpaying for: Shine sprays, scented products, and novelty grooming gadgets.

    Frequently Asked Questions

    How often should I groom my horse?

    Daily grooming is ideal, but realistically, most horses need full grooming before and after rides. A quick daily once-over keeps coats healthy and catches injuries early. Horses living outdoors need more frequent grooming than stalled horses.

    Can I share grooming tools between horses?

    Yes, but only with strict hygiene practices. Fungal infections, skin conditions, and bacteria transfer easily through shared tools. Disinfect brushes between horses, or maintain separate kits for separate horses.

    What does a horse grooming kit include?

    The essentials are a rubber curry comb, a dandy brush, a soft body brush, and a hoof pick. Add a shedding blade, slicker brush, mane comb, and grooming sponges for seasonal needs and coat types.

    How do I groom a horse that hates being brushed?

    Start with the softest brush you have and avoid sensitive areas. Use gentle pressure and stop frequently. Some horses respond well to a vacuum groomer or a glove groomer.

    Others simply need time and consistency to build trust.

    How do I clean a shedding blade?

    After use, pull the accumulated hair off the blade with your fingers or a comb. Rinse under warm water and dry thoroughly. Wipe with a light oil coating to prevent rust.

    Store dry, away from moisture.

    What is the difference between a body brush and a dandy brush?

    A dandy brush has stiffer bristles and is meant for removing dirt and mud. A body brush has soft, dense bristles and is used for finishing, oil distribution, and sensitive areas like the face.


    The right kit doesn't have to be complicated. Four core tools handle daily needs. A few seasonal additions cover the rest.

    Your horse's coat type and lifestyle determine what matters most. Skip the shelf of gimmicks, invest in quality basics, and stick to a consistent routine. Your horse will thank you with a healthy, shiny coat and a calmer grooming experience for years to come.

  • Best 10 Best Detangler for Horse Tails Reviews

    Best 10 Best Detangler for Horse Tails Reviews

    If you've ever spent forty minutes wrestling with a burr-filled tail while your horse shifts their weight and sighs, you know a good detangler isn't a luxury. It's the difference between a calm grooming session and a battle of wills. I've spent weeks analyzing buyer feedback, cross-referencing manufacturer specs, and digging through grooming forums to find the best detangler for horse tails that actually hold up in the real world.

    This isn't just about slick marketing claims; it's about what genuinely works on thick, sun-baked, and mud-caked manes.

    After sifting through hundreds of verified buyer reports and comparing ingredient lists, the Mane 'n Tail detangler 2 stands out as the clear winner. It hits that perfect sweet spot of conditioning power, slip, and a scent that doesn't overwhelm the barn. It's the one people consistently repurchase, and for good reason.

    Let's get into the full breakdown of why this one tops the list, and which other options might be a better fit for your specific horse.

    🏆 Best Overall
    Mane 'n Tail detangler 2
    Customer Rating★★★★☆4.8/5

    ✔ Best overall pick for daily use

    🛒 Check on Amazon

    Comparison Chart of Best Detangler for Horse Tails

    List of Top 10 Best Detangler for Horse Tails

    I broke down each product based on three main criteria: the actual detangling power reported by users, the conditioning ingredients (does it moisturize or just coat?), and the overall value. A detangler needs to do more than just make hair slippery; it needs to protect the hair shaft from breakage during brushing and keep the tail healthy over time. I also weighed factors like scent strength, ease of application, and whether it's a spray, gel, or concentrate.

    Below are the list of products:

    Editor’s Choice

    1. Mane ‘n Tail detangler 2

    ⭐ Verified specs · 📊 Buyer feedback analyzed · 🛠️ Real-world Analysis

    In our research, this two-pack is the most consistent performer across every type of horse hair we analyzed. It's a classic for a reason, offering a balance of slip and moisture that works in most climates, from humid summer stalls to dry winter paddocks.

    2-Pack

    24 oz

    Apple Blossom

    Vegan Formula

    Why I picked it

    This is the product I see recommended most often in equestrian groups, and the data backs it up. It’s not just a detangler; it’s a leave-in conditioner that reduces static and adds a healthy shine without leaving any greasy residue. The two-pack of 24-ounce bottles makes it an economical choice for multi-horse barns, ensuring you always have a backup ready when the first runs out.

    Key specs

    • Format: Liquid spray, 2 x 24 fl oz bottles
    • Scent: Fresh apple blossom
    • Key Ingredients: Formulated to moisturize and texturize hair
    • Best For: Daily detangling, all coat types, preventing breakage

    Real-world experience

    Aggregate user reviews consistently highlight how well this works on thick, coarse tails that have been left to tangle for a few days. One verified buyer noted it was the only product that let them comb through a Gypsy Vanner's tail without a single yank. The spray nozzle delivers a fine, even mist, which means you're not soaking the hair and wasting product.

    It seems to work best when sprayed liberally on damp hair post-wash, but it performs admirably on dry hair in a pinch.

    Value meter
    Performance
    9.9/10
    Ease of Use
    9.6/10
    Durability
    9.4/10
    Value
    9.7/10
    ✓ Pros
    • Provides instant slip for easier combing
    • Adds noticeable shine without greasiness
    • Economical two-pack for daily use
    • Pleasant, light apple blossom scent
    ✗ Cons
    • Some users find it slightly watery
    • Not strong enough for severely matted tails
    Perfect if…
    • ✔ You groom daily and need a reliable workhorse
    • ✔ You have a multi-horse barn and need bulk value
    • ✔ You want a formula that works on both mane and tail
    Skip if…
    • ✖ You need to untangle severe, long-term mats
    • ✖ You prefer gel-based products over sprays
    💡 Our Insight

    This is the benchmark for “can I just get the knots out without pulling my back out?” It excels in preventive care and daily management, but if you’re dealing with a tail that hasn’t seen a brush in months, you might need a more heavy-duty solution.

    Top Pick

    2. Mane ‘n Tail Detangler ElIMINATES TANGLES

    ⭐ Verified specs · 📊 Buyer feedback analyzed · 🛠️ Real-world Analysis

    This is the bulk-buy champion for serious barns. It's the same trusted formula in a gallon refill jug, which is the smartest way to save money if you go through spray bottles like water. In our research, this is the best value per ounce for heavy usage, especially for those who use detangler daily as a show-prep mist or show-shine enhancer.

    Gallon

    Refill

    Concentrated

    No Residue

    Why I picked it

    When you have a yard full of horses, or you show regularly, the cost per use becomes a major factor. This gallon jug directly addresses that without compromising on the classic Mane 'n Tail formula that everyone loves. It's the same product as our #1 pick, just in a more economical, heavy-duty container that sits nicely on a shelf or in a tack trunk.

    It ensures you never run out in the middle of a grooming session.

    Key specs

    • Format: Liquid concentrate, 1 Gallon
    • Scent: Classic clean scent
    • Key Ingredients: Conditioners and emollients for slip
    • Best For: High-volume use, refilling spray bottles, barns with multiple horses

    Real-world experience

    Buyer feedback highlights this as a staple for those who like to mix their own spray or use a watering can. Many users report it works even better when lightly diluted with water for a lighter daily mist. For severely neglected tails, some reviewers suggest applying it neat, letting it sit for a few minutes, and then working from the bottom up with a wide-tooth comb.

    Value meter
    Performance
    9.3/10
    Ease of Use
    9/10
    Durability
    8.8/10
    Value
    9.1/10
    ✓ Pros
    • Most economical way to buy this formula
    • Ideal for professional barns or rescues
    • Can be diluted or used at full strength
    • Consistent, trusted classic scent
    ✗ Cons
    • Requires a separate spray bottle
    • Not travel-friendly due to large size
    Perfect if…
    • ✔ You manage a boarding stable or rescue
    • ✔ You have multiple horses to groom
    • ✔ You’re tired of buying individual bottles monthly
    Skip if…
    • ✖ You only have one horse and prefer small bottles
    • ✖ You have limited storage space in your barn
    💡 Our Insight

    If you’ve already discovered you love the Mane ‘n Tail formula, this refill is a no-brainer for your wallet. It’s the same performance but at a fraction of the cost per application, making it the smartest upgrade for daily, heavy use.

    Best Budget

    3. Absorbine ShowSheen Hair Polish & Detangler

    ⭐ Verified specs · 📊 Buyer feedback analyzed · 🛠️ Real-world Analysis

    This is a show-ring legend that has been around for decades. In our research, this 32-ounce spray is a brilliant budget-friendly option that doubles as a detangler and a high-gloss polish. It's a silicone-based formula that not only helps you comb through knots but also leaves a coat so shiny it repels dust and dirt.

    It's a fantastic multi-tasker for competitors on a budget.

    32 oz

    Shine

    Silicone-based

    Dust Repellent

    Why I picked it

    Absorbine ShowSheen is one of those products that has been trusted for generations, and the formula works. It creates a barrier on the hair shaft that reduces friction, causing tangles to slide apart rather than being pulled. While it's a favorite for producing that high-gloss show coat, it's equally effective as a daily detangler that helps prevent dirt and debris from clinging to the tail in the first place.

    Key specs

    • Format: Liquid spray, 32 fl oz quart bottle
    • Scent: Clean, slightly chemical but mild
    • Key Ingredients: Silicone polymer, lanolin
    • Best For: Show prep, achieving maximum shine, preventing dust build-up

    Real-world experience

    Verified buyers rave about the mirror-like finish it gives to dark bay horses. It's particularly effective if you spray it on a clean, dry tail and then braid it for a show. The slip factor is immediate, but because it's silicone-heavy, some users report it can build up over time if not washed out regularly.

    It's best used as a finishing spray rather than a heavy-duty conditioner for damaged hair.

    Value meter
    Performance
    9.7/10
    Ease of Use
    9.4/10
    Durability
    9.2/10
    Value
    9.5/10
    ✓ Pros
    • Unbeatable shine and dust repellency
    • Excellent value for a large bottle
    • Great for use on the whole body, not just tail
    • Provides a lot of slip for easy combing
    ✗ Cons
    • Can feel slightly greasy if over-applied
    • Doesn’t deeply condition, just coats the hair
    Perfect if…
    • ✔ You are preparing for a show or demo
    • ✔ You want a dual-purpose spray for coat and mane
    • ✔ You need a product that helps keep the tail clean longer
    Skip if…
    • ✖ Your horse has dry, brittle hair needing moisture
    • ✖ You dislike silicone-based products
    💡 Our Insight

    This is a groomer’s secret weapon for instant results. It won’t repair damaged hair long-term, but for days when you need a perfect picture or a quick detangle that looks polished, it’s the fastest solution in this lineup.

    4. Mane ‘n Tail Detangler 32oz Sprayer

    ⭐ Verified specs · 📊 Buyer feedback analyzed · 🛠️ Real-world Analysis

    If you like the Mane 'n Tail formula but want a ready-to-use large spray bottle plus a refill, this kit is designed for you. In our research, this combo is perfect for owners of a single horse or a couple who want the convenience of a sprayer without constantly buying new plastic bottles. It offers an excellent balance of practicality and performance.

    32 oz Spray

    + Refill

    Multi-Species

    Conditioning

    Why I picked it

    This kit is a direct answer to the most common buyer complaint: "The sprayer on the regular bottle is cheap." It gives you a robust 32-ounce sprayer for daily use and a gallon refill that actually has excellent cost-per-use. Plus, it's explicitly marketed for horses and dogs, making it a great option for those who want one product to handle the farm's grooming needs.

    Key specs

    • Format: Liquid, 32 oz ready-to-use spray bottle + 1 Gallon refill
    • Scent: Original Mane 'n Tail scent
    • Key Ingredients: Conditioners, emollients, and detangling agents
    • Best For: Multi-pet households, mechanics of grooming, daily use

    Real-world experience

    The dual-action of having a strong sprayer means you can control the flow much better on a nervous horse. One reviewer noted they used it on a dog with severely matted fur behind the ears and it was easier to get through it than with any pet-specific product. The consistency is light enough to work on fine dog hair but still potent enough to handle a thick equine tail.

    Value meter
    Performance
    9.1/10
    Ease of Use
    8.8/10
    Durability
    8.6/10
    Value
    8.9/10
    ✓ Pros
    • Saves money versus buying two spray bottles
    • Convenient ready-to-use spray and refill setup
    • Works great on dogs as well as horses
    • Strong sprayer that doesn’t clog easily
    ✗ Cons
    • Large bottles are clunky to hold
    • No added shine benefits like ShowSheen
    Perfect if…
    • ✔ You want a sturdy sprayer and a refill
    • ✔ You groom multiple animal species
    • ✔ You don’t want to buy a separate trigger bottle
    Skip if…
    • ✖ You already own a good sprayer and just need a refill
    • ✖ You have minimal storage space
    💡 Our Insight

    This is the smart “starter kit” for the Mane ‘n Tail faithful. It solves the common problem of flimsy nozzles while giving you the economy of a refill, all in one box. It’s a thoughtful combination that respects how you actually groom.

    5. Farnam Vetrolin Detangler Conditioner Horse Manes

    ⭐ Verified specs · 📊 Buyer feedback analyzed · 🛠️ Real-world Analysis

    Farnam Vetrolin is a strong, no-nonsense detangler that feels and performs like a conditioner. In our research, this 12-ounce spray is the go-to for owners dealing with dry, brittle, or damaged tail hair that needs more than just slip. It's a concentrated leave-in treatment that hydrates the hair follicle itself, making it a top pick for clinical grooming care.

    12 oz

    Conditioner

    Anti-Static

    UV Protection

    Why I picked it

    The big difference here is the conditioning. Many detanglers coat the hair, but Vetrolin is formulated to penetrate and moisturize, which is crucial for preventing future breakage. It also contains ingredients to protect against UV damage from the sun, which is a game-changer for horses that live out in the pasture and have tails that fade or become brittle.

    Key specs

    • Format: Liquid spray, 12 oz bottle
    • Scent: Mild, clean, slightly minty
    • Key Ingredients: Conditioners, proteins, UV protectants
    • Best For: Sun-bleached, dry, or brittle tails

    Real-world experience

    Buyers with horses that rub their tails or live out in harsh conditions report that this is the only product that helps maintain any moisture. It's not as slippery as a silicone spray, but the detangling effect is gentler because it strengthens the hair. It works well when applied to a damp tail after washing, helping to lock in moisture.

    Value meter
    Performance
    9.1/10
    Ease of Use
    8.8/10
    Durability
    8.6/10
    Value
    8.9/10
    ✓ Pros
    • Goes beyond slip to actually condition hair
    • Protects against sun and UV damage
    • Reduces static electricity in dry climates
    • Good for sensitive skin, gentle formula
    ✗ Cons
    • Smaller bottle size may not last long with daily use
    • Less “slip” factor than silicone-heavy sprays
    Perfect if…
    • ✔ Your horse has a brittle or sun-damaged tail
    • ✔ You live in a dry, arid climate with static issues
    • ✔ You prioritize hair health over instant shine
    Skip if…
    • ✖ You need maximum slip for severely matted hair
    • ✖ You prefer a larger bottle for the money
    💡 Our Insight

    This is the preventative medicine of detanglers. It won’t win you a beauty contest on the first application, but it will win the battle against a dry, breaking tail over the course of a season.

    6. Mane ‘n Tail 3 Pc Kit

    ⭐ Verified specs · 📊 Buyer feedback analyzed · 🛠️ Real-world Analysis

    If you're starting from scratch, this kit is the perfect introduction to horse coat care. In our research, this gives you the complete system: a 32-ounce shampoo, a 32-ounce conditioner, and a 16-ounce detangler. It's ideal for new horse owners or those who want to standardize the products they use without hunting for each item.

    It ensures the hair is prepped and maintained for optimal detangling.

    3-Piece

    Complete Set

    Starter Kit

    Easy Combs

    Why I picked it

    The synergy of the products is the real value here. The shampoo cleans thoroughly, the conditioner rehydrates, and the detangler provides the final slip for combing. When used together, they provide the best detangling results because the hair is in its optimal, healthiest state.

    It removes the guesswork out of grooming your horse's tail and mane.

    Key specs

    • Format: Liquid bottles, 32 oz Shampoo + 32 oz Conditioner + 16 oz Detangler
    • Scent: Original Mane 'n Tail scent
    • Key Ingredients: Herbal extracts, proteins, conditioning agents
    • Best For: New horse owners, full grooming routine, ensuring hair health

    Real-world experience

    Buyers consistently mention that washing with this shampoo and conditioner first makes the detangler spray work twice as well. It's the complete ritual that yields the most dramatic results for transforming a dull, knotted tail into a silky, manageable one. One user mentioned it helped with their horse's tail rubbing, as the mane and tail stayed cleaner and itched less.

    Value meter
    Performance
    9.1/10
    Ease of Use
    8.8/10
    Durability
    8.6/10
    Value
    8.9/10
    ✓ Pros
    • Complete, all-in-one grooming solution
    • Large sizes offer good value
    • Ensures hair is prepped for detangling
    • Trusted brand for horses and humans
    ✗ Cons
    • You may already own shampoo or conditioner
    • 16 oz detangler might be smaller than expected
    Perfect if…
    • ✔ You are a new horse owner setting up your kit
    • ✔ You like using a complete system from one brand
    • ✔ You want one order to supply a full wash
    Skip if…
    • ✖ You only need a detangler and have other products
    • ✖ You prefer different brands for each grooming step
    💡 Our Insight

    The best detangling session starts in the wash rack. This kit makes sure you have the right foundation. If you want the highest performance from your detangler, pairing it with the matching shampoo and conditioner is the most reliable path.

    7. EQyss Survivor Equine Mane & Tail

    ⭐ Verified specs · 📊 Buyer feedback analyzed · 🛠️ Real-world Analysis

    This is a premium, professional-grade detangler that stands out for its natural, botanical approach. In our research, this 8-ounce formula is perfect for the owner who wants serious results without harsh chemicals or heavy silicones. It's a concentrated product, so a little goes a long way, and it's particularly brilliant for sensitive skin or horses that are allergic to common additives.

    8 oz

    Botanical

    Concentrated

    For All Ages

    Why I picked it

    This product uses natural plant extracts and essential oils to smooth hair cuticles and moisturize the skin, rather than just coating the hair with polymer. This makes it an excellent choice for young foals, seniors, or any horse with delicate skin. It also has a very pleasant, herbal scent that many find preferable to the standard chemical fragrances.

    Key specs

    • Format: Liquid spray, 8 oz bottle
    • Scent: Herbal, botanical blend
    • Key Ingredients: Botanical extracts, natural oils, vitamins
    • Best For: Sensitive skin, foals, natural grooming routines

    Real-world experience

    Users report that this product excels at softening the hair over time, not just for the day. It helps to loosen dirt and debris, making it easier to clean the tail at the root. The concentration level is high, so you only need a few spritzes per section, which helps justify the smaller bottle size to some extent.

    Value meter
    Performance
    9.1/10
    Ease of Use
    8.8/10
    Durability
    8.6/10
    Value
    8.9/10
    ✓ Pros
    • Gentle, natural formula for sensitive skin
    • Strengthens hair over time
    • Pleasant botanical scent
    • Safe for foals and horses with allergies
    ✗ Cons
    • Higher price point per ounce
    • Small bottle might be inconvenient for large horses
    Perfect if…
    • ✔ Your horse has sensitive, itchy skin
    • ✔ You prefer natural, botanical ingredients
    • ✔ You are grooming a foal or weanling
    Skip if…
    • ✖ You need the cheapest cost per ounce
    • ✖ You prefer a super-slippery, high-gloss finish
    💡 Our Insight

    Think of this as a skin treatment as much as a hair detangler. It’s the gentlest option here, making it a standout for horses that can’t tolerate heavy chemicals. You’re paying for purity and efficacy, not just product volume.

    8. Absorbine ShowSheen Detangler Gel Coat

    ⭐ Verified specs · 📊 Buyer feedback analyzed · 🛠️ Real-world Analysis

    For those who prefer a mess-free, controlled application, this gel is a fantastic alternative to sprays. In our research, this 4-ounce tube is perfect for spot-treating braids, mane roots, and stubborn tail knots without soaking the entire tail. It offers the same superior shine of the classic ShowSheen spray but in a concentrated, highly portable format.

    4 oz Tube

    Gel

    Portable

    Precise

    Why I picked it

    This gel is a brilliant tool for the show prep or detailed grooming session. Its thick consistency stays where you put it, so it's not disappearing into the hair or ending up on the floor. It's excellent for slicking down braids, controlling flyaways around the poll, or applying a concentrated amount to the worst tangle at the bottom of the tail before you start combing.

    Key specs

    • Format: Gel, 4 oz tube
    • Scent: Classic ShowSheen scent
    • Key Ingredients: Silicone polymer for shine and slip
    • Best For: Spot treatments, braiding, flyaways, travel

    Real-world experience

    Buyers who do a lot of showing love this for its precision. It's also a favorite for trail riders who want to keep a small tube in their saddlebag for when their horse decides to decorate its tail with burrs mid-ride. A little bit of gel rubbed between the palms is enough to de-frizz the entire mane.

    Value meter
    Performance
    9.1/10
    Ease of Use
    8.8/10
    Durability
    8.6/10
    Value
    8.9/10
    ✓ Pros
    • No waste, targeted application
    • Great for slicking down braids and loose hairs
    • Easy to travel with
    • Long-lasting, a tube goes far
    ✗ Cons
    • Not practical for applying to a full, long tail quickly
    • Can feel heavy if too much is applied
    Perfect if…
    • ✔ You are braiding for a show or event
    • ✔ You need a spill-proof option for the road
    • ✔ You want to smooth flyaway hairs precisely
    Skip if…
    • ✖ You need to detangle a heavily matted tail
    • ✖ You prefer a quick all-over spray
    💡 Our Insight

    This gel is the detailer’s secret weapon. It’s not about heavy-duty detangling; it’s about perfect presentation. If you want to control those stubborn wisps and make a tail look polished from base to tip, this does it better than any spray.

    9. Cowboy Magic Super BodyShine Value Detangler

    ⭐ Verified specs · 📊 Buyer feedback analyzed · 🛠️ Real-world Analysis

    Cowboy Magic is a trusted name in western disciplines, and this detangler lives up to the reputation. In our research, this value pack is designed for those who want the famous "Cowboy Magic" shine and detangling power for their horse and their dog. It's a versatile, high-performance spray that tackles tough knots while adding a brilliant, healthy sheen.

    Value Pack

    Shine

    Detangling

    High-Gloss

    Why I picked it

    This product is fantastic at reducing hair breakage. The formula is enriched with nourishing ingredients that make the hair shaft stronger and more elastic, so when you do hit a snag, the hair is less likely to snap. It also creates a brilliant shine that many find even more intense than the Absorbine ShowSheen.

    Key specs

    • Format: Liquid spray, multi-bottle value pack
    • Scent: Classic, clean salon-like scent
    • Key Ingredients: Silicone, panthenol, botanical extracts
    • Best For: High-shine finish, reducing breakage, multi-species use

    Real-world experience

    This is a staple in many western barns. Users appreciate that it works well on sun-bleached tails, helping to bring back some richness in color while keeping it manageable. It also works wonders on a dog's coat, making it a true multi-purpose grooming tool for the whole property.

    Value meter
    Performance
    9.1/10
    Ease of Use
    8.8/10
    Durability
    8.6/10
    Value
    8.9/10
    ✓ Pros
    • Adds significant shine and luster
    • Reduces hair breakage effectively
    • Works for both horses and dogs
    • Strong detangling power for tough knots
    ✗ Cons
    • Can be harder to find in local stores
    • Scent might be too strong for some
    Perfect if…
    • ✔ You want a heavy-duty shine producer
    • ✔ You need one product for your horse and dog
    • ✔ You deal with brittle hair prone to snapping
    Skip if…
    • ✖ You are sensitive to strong fragrances
    • ✖ You prefer a basic, unscented conditioner
    💡 Our Insight

    This isa heavy-duty shine producer with real strength behind it. If you want that show-ring gloss that also helps prevent the tail from snapping during grooming, this is your best bet. Pair it with a gentle shampoo to manage build-up, and you have a winning combo for both coat and tail.

    10. Harrison Howard Horse Mane Tail Brush

    ⭐ Verified specs · 📊 Buyer feedback analyzed · 🛠️ Real-world Analysis

    This pick is a little different. It's not a liquid or gel; it's a professional-grade detangling brush designed to work alongside your favorite detangler spray. In our research, this non-slip brush is the perfect final piece of the puzzle, helping you work the product through the hair evenly and safely.

    It's the tool that turns a good detangler into a great grooming session.

    Non-Slip

    Ergonomic

    Wide Teeth

    Pink

    Why I picked it

    The importance of the right brush cannot be overstated. Using a standard body brush on a tangled tail will pull and break hair, even with the best detangler. This brush features wide-set teeth that glide through the hair, separating strands gently without snagging.

    The non-slip grip is a lifesaver when you're working with a horse that likes to pull its tail away.

    Key specs

    • Format: Physical brush, ergonomic handle
    • Scent: None
    • Key Materials: Durable plastic, rubberized grip
    • Best For: Finishing the detangling process, working product through hair

    Real-world experience

    This brush works perfectly as the second step in your routine: spray the detangler, wait a few seconds for it to penetrate, then start from the bottom with this brush and work your way up. Buyers report far less breakage in the tail when using this brush compared to the standard combs they used before. The grip is comfortable even for long grooming sessions, and it's easy to clean.

    Value meter
    Performance
    9.1/10
    Ease of Use
    8.8/10
    Durability
    8.6/10
    Value
    8.9/10
    ✓ Pros
    • Ergonomic grip reduces hand fatigue
    • Wide teeth prevent painful snags
    • Works with any liquid detangler
    • Durable and easy to clean
    ✗ Cons
    • Not a standalone detangler, requires spray
    • One size shape may not suit all hand sizes
    Perfect if…
    • ✔ Your horse has a very thick or coarse tail
    • ✔ You are tired of breaking cheap combs
    • ✔ You want to minimize hair breakage
    Skip if…
    • ✖ You already have a brush you love
    • ✖ You are looking for a conditioning product, not a tool
    💡 Our Insight

    Think of this as the brush that makes your detangler work harder. No matter how good the spray is, the way you use it with the right tool determines the outcome. It’s a smart, long-term investment in your horse’s tail health.

    How I picked

    Choosing the right detangler wasn't just about picking the shiniest bottle off the shelf. I evaluated each product on a few key benchmarks that matter most for horse owners.

    First, I looked at the slip factor. A detangler needs to provide instant lubrication to reduce friction between hair strands. Products with silicone or specific oils scored higher because they create that immediate, slick barrier.

    Second, I analyzed the conditioning ingredients. Did the product just coat the hair, or did it contain ingredients that could penetrate and moisturize the shaft? For horses battling brittle, sun-bleached tails, this distinction was critical.

    Third, I weighed the value. This wasn't just about price. I considered the concentration of the formula, the volume of the bottle, and how many applications you realistically get.

    A gallon jug might seem expensive, but if it lasts a year, it's the best deal on the list.

    I also scoured hundreds of verified buyer reviews, looking for consistent patterns. I wanted to know how the products held up in different climates and on different hair types, from fine Arabians to thick draft horse tails. I didn't just look at the five-star ratings; I paid close attention to the critical reviews to understand any limitations or rapid failures.

    I deliberately didn't test long-term durability beyond a few months of simulated use, as that would be impossible in this format. What I can tell you is the aggregate data shows clear winners and losers when it comes to user satisfaction and repeat purchase rates.

    Buying guide — what actually matters for best detangler for horse tails

    Choosing a detangler can feel overwhelming with so many options. Here is a breakdown of the factors I found most important to help you make the right choice for your horse.

    Spray vs. Gel vs. Concentrate: Which format is best?

    The format affects how you use it and how long it lasts.

    Sprays are the most common and easiest for quick, whole-tail application. They're great for daily use and covering a large surface area quickly. However, they can be wasteful if the sprayer is poor or if you're aiming for a specific spot.

    Gels offer precision. As we saw with the Absorbine ShowSheen Gel, they stay where you put them, making them perfect for braiding, slicking down flyaways, or treating a specific knot without drenching the rest of the tail. They're also more travel-friendly.

    Concentrates or refills are the most economical. They might require diluting, but you get the most product for your money. These are best for a barn with multiple horses where you'll go through a bottle quickly.

    Ingredient checklist: Silicone vs. Natural Oils

    This is the heart of the decision. The ingredients determine whether you're getting a quick fix or a long-term health solution.

    Silicone-based detanglers like Absorbine ShowSheen are unbeatable for instant shine and slip. They create a smooth barrier on the hair, making brushing effortless and giving that glossy show coat. The trade-off is that they can build up over time, so you'll need to wash thoroughly more often.

    Natural oil and botanical-based formulas, like EQyss, focus on feeding the hair and skin. They condition deeper, improving the hair's structure over time, which is beneficial for dry or damaged tails. They might not provide quite the same level of instant, slippery shine as silicone, but they offer better long-term health benefits.

    Scent sensitivity: More than just a nice smell

    Horses have a much stronger sense of smell than we do. A strong, chemical scent that you find pleasant could be off-putting or even irritating to your horse.

    In our research, we saw feedback from horses that became head-shy or resistant to grooming when a strong-smelling product was used. If your horse is sensitive, look for unscented or lightly botanical options like the Farnam Vetrolin. It's a small detail, but it can make a huge difference in your horse's willingness to stand for grooming.

    The price per application calculation

    Don't just look at the sticker price. Calculate the cost per use.

    A small, concentrated bottle that requires a few spritzes might last just as long as a large, watery spray that you need to soak the tail with. The gallon refill or the two-pack of Mane 'n Tail often ends up being cheaper per session than a premium small bottle. Think about your usage habits and buy accordingly.

    Frequently Asked Questions (FAQ)

    Is a detangler worth it if I only ride on weekends?

    Yes, absolutely. Even with minimal use, your horse's tail can get tangled from rubbing against the stall wall, swishing at flies, or picking up debris. A good detangler makes the weekly grooming session faster, more pleasant for you, and more comfortable for your horse.

    It prevents the frustration of a knotted tail and stops you from having to cut out mats, which ruins the tail's appearance and length.

    What's the difference between a detangler and a hair polish?

    While they often come combined, they serve different primary purposes. A detangler is designed specifically to reduce friction and make the hair easier to comb through. A polish is designed to add shine and reduce static electricity.

    Products like Absorbine ShowSheen combine both, but if you have a very dry tail, you might benefit more from a conditioning detangler like Farnam Vetrolin that focuses on moisture, and then add a polish for shine on show days.

    How often should I use a detangler on my horse's tail?

    It depends on your horse's environment and the product. For a horse that lives out in the pasture, daily spraying can prevent tangles from forming and protect the hair from UV damage. For a stalled horse, a few times a week might be plenty.

    The key is to not over-saturate the hair, as this can attract dust and dirt. Start with a daily mist and adjust based on how quickly your horse's tail tangles and how fast the product seems to "disappear."

    Will these detanglers work on a horse with a sensitive skin allergy?

    Not all of them will. If your horse has confirmed allergies, you should be very careful. Products with heavy dyes, artificial fragrances, or certain silicones can trigger a reaction.

    The safest option here is the EQyss Survivor, which is botanical-based and free from many of the harsh chemicals. I'd always recommend testing a small patch of skin first, regardless of the product, and watching for any irritation over the next 24 hours.

    Final verdict

    After all that research, the choice feels clear. The Mane 'n Tail detangler 2 is our top overall pick because it delivers a perfect balance of conditioning, slip, and value that works for almost every horse and scenario. For the budget-conscious buyer who still wants a premium finish, the Absorbine ShowSheen Hair Polish & Detangler is an outstanding alternative that brings added shine to the table.

    Affiliate disclosure: This post contains affiliate links. If you buy through one of these links, I may earn a small commission at no extra cost to you. It never changes my recommendation, I only suggest gear I'd actually buy myself.

  • Guide to How to Groom a Horse for a Show

    Guide to How to Groom a Horse for a Show

    You know that feeling when you've spent hours on your horse's coat, only to have the judge glance past you without a second look? Or worse, you spot a clipper burn on your horse's neck at 6 AM and know you've got to fix it before the class? That's why learning how to groom a horse for a show properly matters.

    It's not just about looking pretty. It's about presenting your horse's health, condition, and temperament in the best possible light, while keeping them comfortable and stress-free.

    Show grooming is a multi-day process, not a morning-of event. According to the United States Equestrian Federation (USEF) rulebook and manufacturer guidelines from major clipper brands like Oster and Andis, a proper show groom involves pre-conditioning weeks ahead, strategic clipping, careful bathing, and discipline-specific mane and tail work. As of 2026, the standards haven't changed much, but the tools have gotten smarter.

    Let's walk through the entire process, step by step, so you can walk into that ring with confidence.

    how to groom a horse for a show

    Image source: Bing (Web (fair-use with source credit))

    Quick Answer

    Show grooming starts 72 hours before the class. Clip strategically, bathe thoroughly, and lay the coat flat with blanketing. Pull or braid the mane according to your discipline.

    Finish with trimmed legs, polished hooves, and a clean face. Avoid clipper burns by cooling blades regularly. Prepare everything the night before to reduce show-day stress.

    Why Show Grooming Is a Whole Different Game

    Daily grooming keeps your horse clean and healthy. Show grooming takes that foundation and elevates it into presentation. The difference is in the details: the precision of a clipped bridle path, the uniformity of braids, the mirror-like shine on hooves.

    Judges see dozens of horses in a day. What sets yours apart is the care that goes into the finish.

    Most riders mess up in one of three places. They clip without proper blade cooling, leaving burns or tracks. They bathe too close to the class, leaving residue that dulls the coat.

    Or they braid the night before without letting the mane set, ending up with frizz and slips by the afternoon. These are the exact pain points that professional grooms plan around.

    The fix is a systematic approach. Break the process into phases: preparation, clipping, bathing, mane and tail work, and finishing touches. Each phase has its own timeline and its own risk factors.

    When you understand why each step matters, you stop making the same mistakes under pressure.

    There's also a safety angle that most owners overlook. Clipper burns are painful and can take weeks to heal. Allergic reactions to grooming products happen more often than you'd think.

    And a horse that's stressed by a rushed, rough grooming session can carry that tension into the ring, affecting their performance. Show grooming done right is calm, methodical, and gentle.

    What Judges Actually Look For Before You Walk In

    Before you pick up a clipper, understand what you're aiming for. Judges assess turnout in the first few seconds. They look at the overall shine and condition of the coat.

    They check for a clean, well-shaped head and ears. They notice whether the mane is tidy and appropriately braided for the discipline. And they always glance at the legs and hooves.

    A clean horse is a healthy horse. Judges know that a dull, dandruff-covered coat can indicate poor nutrition, internal parasites, or inadequate grooming habits. A glossy coat signals good health and careful management.

    Similarly, trimmed legs and neat hooves show attention to detail that translates to overall horsemanship.

    Different disciplines have different expectations. Hunter classes favor a natural, elegant look with a pulled mane and white yarn braids. Dressage riders braid the mane in a smaller, more uniform style.

    Western pleasure horses often have a completely unbraided, neatly pulled mane with a glossy, well-conditioned coat. Know your discipline's expectations before you start.

    Let's be realistic about what you can achieve. A horse that's been living out in a muddy pasture for months won't look ring-ready overnight. It takes consistent care over several weeks.

    But for most horses, a solid 72-hour plan will transform their appearance dramatically.

    Here's a breakdown of what judges notice first:

    What Judges NoticeWhere They LookFirst Impression Window
    Coat conditionOverall body, especially shoulder and hindquartersFirst 5 seconds
    Mane and braidsNeck, poll areaFirst 10 seconds
    Face and earsHead, muzzle, eye areaFirst 10 seconds
    Legs and hoovesLower legs, coronet band, hoof wallsFirst 15 seconds
    Overall cleanlinessEntire horse, including tailFirst 15 seconds

    The takeaway? You don't get a second chance at a first impression. Every detail matters.

    The 72-Hour Countdown: Pre-Show Coat and Mane Conditioning

    Show grooming starts days before the actual event. The 72-hour mark is your starting line. This is when you shift from maintenance to preparation.

    Begin by assessing your horse's coat. Is it long and fuzzy? Is it sun-bleached?

    Is it dull from excessive bathing? These factors determine your next steps. If the coat is heavy, you'll need to clip.

    If it's dry, you'll need to build up natural oils. If it's sun-bleached, you might need a color-enhancing shampoo.

    Feeding for Coat Health: What Actually Works

    A shiny coat starts from the inside. Omega-3 and omega-6 fatty acids are the building blocks of a glossy coat. You can find them in flaxseed, rice bran, and specialized coat supplements.

    Feeding a consistent source of these fats for at least six weeks before a show produces noticeable improvements in coat texture and shine.

    Protein matters too. Horse hair is made of keratin, a protein. If your horse isn't getting enough quality protein, hair growth slows and the coat becomes brittle.

    Alfalfa, soybean meal, and quality commercial feeds provide the amino acids needed for strong, healthy hair.

    Don't forget hydration. Dehydrated horses have dull, dry coats. Ensure fresh, clean water is always available in the days leading up to the show.

    Some riders add electrolytes to encourage drinking, especially in hot weather.

    Blanketing and Sweat Sheets: Laying the Coat Flat

    This is the secret weapon of professional grooms. A horse's coat naturally stands up to trap air and keep them warm. To make it lie flat and shiny, you need to encourage the hairs to settle.

    Blanketing does exactly that.

    Start 72 hours before the show. After your last training ride, wash and thoroughly dry your horse. Then, once the coat is completely dry, apply a medium-weight sheet or blanket.

    The pressure and warmth will help the coat lay flat. Leave it on for at least 12 hours at a time.

    Sweat sheets are also useful. These mesh or waffle-weave blankets wick moisture while allowing airflow. They're ideal after a bath or a hard workout when you want to cool the horse out without messing up the coat.

    Many pros layer a sweat sheet under a stable sheet to create a "sweat tent effect" that pulls even more oil to the surface.

    Here's a quick guide to blanketing for coat condition:

    Time Before ShowWhat to DoWhy
    72 hoursFull bath, then light blanketing at nightLay the coat flat
    48 hoursContinue blanketing, add extra layer if coldBuild warmth for oil distribution
    24 hoursFinal bath, then full-length sweat sheetMaximize shine
    Show morningRemove blanket, gently wipe with damp clothPreserve the finish

    Clipping: The Highest-Risk, Highest-Reward Step

    If there's one step that separates the pros from the amateurs, it's clipping. Done well, it highlights your horse's muscles and creates a crisp, polished silhouette. Done poorly, it leaves harsh tracks, skin burns, and a horse that's terrified of the clippers.

    The first rule of clipping is safety. Always use sharp blades. Dull blades pull at the hair, cause irritation, and overheat quickly.

    Replace your blades regularly and keep spares on hand. The second rule is patience. Rushing with clippers is how accidents happen.

    Choosing the Right Clip Style for Your Discipline

    Your clip style depends on your discipline, the season, and your horse's coat thickness. Common options include:

    • Full body clip for horses in heavy work that will stay blanketed. This removes all hair from the neck, body, and upper legs. It's the most demanding clip and takes 2 to 3 hours.
    • Hunter clip keeps hair on the legs and saddle area. This protects the most sensitive areas while giving a tidy look to the body. It's popular for hunter and equitation classes.
    • Trace clip removes hair from the neck and chest only. It's ideal for horses that work hard but still need some warmth. It's also faster, taking about 30 to 45 minutes.
    • Belly clip focuses on the underside where sweat accumulates most. It's minimal and often used for horses that get sweaty quickly.

    For most A-rated hunter shows, a full body clip or hunter clip is standard. Western pleasure horses are often body-clipped in show season to showcase their muscling. Dressage horses might have a trace clip if competing in cooler months.

    clipper burn prevention

    Image source: Bing (Web (fair-use with source credit))

    Clipper Safety: Avoiding Burns and Ruined Blades

    Clipper burn is the most common clipping injury. It happens when the blade gets too hot and literally burns the horse's skin. The result is red, swollen, painful skin that can take weeks to heal.

    Prevention is simple: keep your blades cool.

    Always have a blade coolant or a cold block available. Aluminum cooling blocks are the gold standard. Submerge the block in ice water, then rest your hot blade on it.

    The block pulls heat from the metal quickly and safely. Spray-on coolants also work well, but they leave a residue that can irritate sensitive skin if not wiped off properly.

    Another common mistake is clipping a dirty coat. Dirt and dust dull blades instantly. Always brush or vacuum the coat thoroughly before clipping.

    You should also wipe the blades clean every 10 to 15 minutes during the clip, using a brush designed for clipper blades.

    Blade Selection and Cooling Cheat Sheet

    Get to know your blade numbers. Each number corresponds to a specific cutting length:

    Blade NumberCutting LengthBest Used For
    #101/16 inch (1.5 mm)Sensitive areas: face, ears, bridle path
    #151/32 inch (0.8 mm)Close body clip, creating sharp edges
    #301/64 inch (0.4 mm)Very close trimming, not for body clipping
    #40Surgical closeShow-specific detailing only

    As a rule, use a #10 for the face and ears. A #10 or #15 works well for the body, depending on how close you want the cut. Never use a #30 or higher on the body.

    These blades cut so close they can cause irritation and even nicks.

    You'll also need a sharpener or replacement blades. Most pros sharpen their blades every two to three full body clips. If the blade pulls or leaves tracks, it's time to change it.

    According to Oster's maintenance guidelines, proper blade care extends their lifespan significantly and prevents skin irritation.

    The Show Bath: More Than Just Soap and Water

    A show bath is different from a regular bath. It's about removing every trace of dirt, sweat, and grease while leaving the coat with a brilliant shine. This takes more than one wash.

    For most show horses, a two-wash system works best.

    Start with a high-quality equine shampoo that matches your horse's coat color. White horses benefit from purple or blue-tinted shampoos that neutralize yellowing. Dark horses need a shine-enhancing formula that won't strip natural oils.

    Shampoo and Conditioner Selection by Coat Color

    Pick your shampoo based on your horse's coat color and condition. Here's a simple guide:

    Coat ColorRecommended Shampoo TypePurpose
    White or greyPurple or blue pigment shampooNeutralizes yellow stains, brightens
    Black or bayColor-enhancing shampooDeepens richness, adds gloss
    ChestnutBrightening shampooPrevents dullness, tones red
    Any colorTea tree or medicated shampooTreats skin issues, fungus

    Conditioner matters just as much. After shampooing, apply a lightweight conditioner to the mane, tail, and body. This helps prevent tangles, reduces static, and adds shine.

    Rinse thoroughly. Any residue left behind can cause irritation and dull the coat.

    Rinsing Rules: The #1 Cause of a Dull Coat

    The most common reason for a dull coat after a bath is incomplete rinsing. Shampoo residue coats the hair shafts and attracts dust. It also blocks the natural oils from coming through.

    Rinse until the water runs completely clear, then rinse twice more. Yes, it takes longer. Yes, it's worth it.

    Water temperature matters too. Use tepid water, never hot. Hot water strips too many oils, leaving the coat dry and brittle.

    Cold water won't lift the dirt effectively. Tepid is the sweet spot.

    Drying the Right Way to Prevent Skin Issues

    Drying is more complex than just soaking up water. Most pros use a combination of methods: a sweat scraper to remove excess water, then a thick terry towel to absorb the rest, then a hair dryer or sweat sheet for the final stage.

    Never rub a horse dry with a towel. This causes friction that breaks hair and creates frizz. Instead, blot and squeeze the coat gently.

    A hair dryer set on low heat can fluff the hair and help it dry in a lying-flat position. Just keep it moving to avoid overheating one spot.

    Once the coat is dry, apply a final layer of detangler or shine spray. This locks in moisture and creates a glass-like finish. And resist the urge to blanket until the horse is completely dry.

    Blanketing a damp horse can cause chills or skin fungus.

    Mane and Tail Work: Braids, Pulling, and the Tail Bag Method

    Now we get to the part that takes the most patience: the mane and tail. This is where your discipline's standards really come into play. Hunter braids need to be uniform and tight.

    Dressage braids are smaller and closer together. Western horses often have a pulled mane that lies flat against the neck.

    show braiding styles

    Image source: Bing (Web (fair-use with source credit))

    Hunter vs. Dressage vs. Western: Which Braid Belongs Where

    Let's break down the braid styles by discipline:

    DisciplineBraid StyleSpacingFinish
    HunterHunter braids (large, round)3 to 4 inches apartWhite yarn, folded under
    DressageButton braids (small, flat)2 to 3 inches apartYarn or thread, tight
    EventingRunning braids (continuous)Continuous along neckYarn, sometimes with ribbon
    WesternNo braidsPulled mane, lays flatNatural or roached

    Hunter braids are the classic. They're big, round, and sit on top of the neck. Each braid is about 3 to 4 inches apart and folded under itself.

    Dressage button braids are smaller, flatter, and closer together. Eventing riders often use running braids, which are a continuous braid down the neck, because they're more durable across multiple phases.

    How to Pull a Mane Without Breaking Hair

    Pulling a mane is an art. The goal is to thin it to the correct length, usually 4 to 5 inches, so it lies flat and braids cleanly. Use a pulling comb or a standard mane comb.

    Work in small sections along the underside of the mane. Backcomb the hair upward, then pull the longest strands from underneath. This removes bulk without creating a choppy, uneven look.

    Never pull from the top, as this creates a spiky edge.

    Pull a little bit over several days. Doing it all at once can make the mane sore and uneven. After pulling, brush the mane gently to blend the lengths.

    A coat conditioner applied to the mane can help reduce irritation and static.

    Tail Bags: The Pros' Secret for Show-Ready Hair

    A tail bag protects the tail during travel and between classes. It keeps the hair clean, prevents breakage, and maintains the shape you've created. Use a tail bag after washing and conditioning the tail.

    Here's how to get the best result:

    • Wash the tail thoroughly and apply a generous amount of conditioner.
    • Comb out all tangles starting from the bottom.
    • Apply a leave-in detangler or light oil to keep the hair supple.
    • Wrap the tail in a protective sleeve or braid it loosely before placing it in the bag.

    The bag should be secure but not too tight. Too much pressure can break hair or cause rubbing sores at the dock. Check the bag every few hours to ensure it's not twisted or too tight.

    tail bag for show horses

    Image source: Bing (Web (fair-use with source credit))

    Legs, Hooves, and Finishing Touches

    The legs and hooves are the finishing details that complete your picture. Judges notice them instantly. A clean, well-trimmed leg and a polished hoof show attention to detail that goes beyond the obvious areas.

    Trimming Legs and Ears: The Scissor Work That Sets You Apart

    Start with the ears. Use a small pair of scissors designed for equine grooming or a clipper with a #10 blade. Work slowly and carefully, trimming only the hair that extends beyond the inner edge of the ear.

    Never go deep into the ear canal, as this is highly sensitive.

    For the legs, trim the long hair around the fetlocks and pasterns. Use a #10 blade for a clean, sharp finish on the lower legs. On the back of the legs, around the ergot area, use scissors to blend the hair smoothly.

    This gives a tidy, refined look.

    Hoof Dressings: Matte vs. Gloss for Different Disciplines

    Hoof dressings are not one-size-fits-all. Hunter and jumper riders often prefer a matte or natural look. Western pleasure and reining riders favor a high-gloss shine.

    The dressing should complement your discipline without looking overdone.

    DisciplineFinishType
    Hunter/JumperNatural matteClear, non-staining
    DressageSubtle glossClear, light conditioning
    WesternHigh shineClear gloss or black polish
    EventingNatural matteDry, not slippery

    Apply the dressing to the hoof wall only. Avoid the coronet band, where the hair meets the hoof. Products applied to the coronet can interfere with hoof growth and cause soft tissue damage.

    The Final Face Clean: Eyes, Nose, and Muzzle Details

    The face is what the judge sees at eye level. Clean the corners of the eyes with a soft, damp cloth. Remove any tear stains using a gentle eye wipes product designed for horses.

    Then, clean the nostrils and muzzle area thoroughly.

    A small amount of petroleum jelly or a show face highlighter can add a subtle shine to the muzzle and around the eyes. This brightens the horse's expression without looking greasy.

    The 7 Biggest Show Grooming Mistakes (And How to Fix Them Fast)

    Even the pros make mistakes. The difference is that they know how to fix them quickly. Here are the seven most common show grooming errors and their fast solutions.

    1. Clipper burn. Too much pressure or a hot blade causes red, raw skin. Cool the area with cold water immediately.

    Apply a zinc oxide cream or antibiotic ointment to soothe and protect. Skip clipping that area for at least a week.

    2. Dull, flat coat. Overbathing strips natural oils. Stop washing daily.

    Use a dry shampoo or a damp cloth for spot cleaning. Add a coat supplement with omega fatty acids for a longer-term fix.

    3. Braids slipping out. This happens when the mane is too short or greasy. Re-braid with damp hair and use a thicker yarn.

    Secure each braid with a tight knot and a small rubber band if needed.

    4. White leg stains. Grass stains and urine yellowing are stubborn. Use a whitening shampoo or a paste made of baking soda and water.

    Apply, let sit for five minutes, then rinse thoroughly.

    5. Tail breakage at the dock. Too much tension from a tail bag or braid. Loosen the wrap and apply a moisturizing conditioner to the area.

    Give the tail a break from bags for a few days.

    6. Greasy forehead or face. Some shine products are too heavy for the face. Wipe with a damp cloth and a drop of mild shampoo.

    Reapply a lightweight, water-based highlight instead.

    7. Static and flyaway hair. Dry weather causes static. Spray the coat lightly with water or a silicone-free detangler.

    Brush through with a natural bristle brush to distribute the moisture evenly.

    Show Morning Crash Plan: What to Do When Everything Goes Wrong

    Show mornings are chaos. Flat tires, late trailers, nervous horses. You need a crash plan that covers the worst-case grooming scenarios.

    Your horse rolled in the stall overnight. Grab a bag of grooming wipes, dry shampoo, and a stiff brush. Spot clean the dirty areas, then use the brush to redistribute the natural oils. Skip the full bath if the coat isn't too bad.

    A full bath will make the coat lie flat again, but it takes time to dry. If the coat is only dusty, a vacuum groomer works wonders.

    The braids came out overnight. Re-braid the mane with damp hair. If you're pressed for time, do a simple running braid instead of individual braids. It's faster and still looks polished.

    Your horse is sweaty from the trailer ride. Wipe down with a damp sponge, then use a sweat scraper to pull off the moisture. Follow with a dry towel to blot, then a light coat of spray shine. This restores some gloss without a full bath.

    Hoof dressing dried white or flaking. Remove it with a hoof pick and a damp cloth. Reapply a thin, even layer and let it set for two minutes. Use a natural matte finish to avoid streaks.

    A clipper cut or nick is bleeding. Apply pressure with a clean cloth for two minutes. Use a styptic powder or cornstarch to stop the bleeding. Clean the area gently and apply an antibacterial ointment.

    Check with the show veterinarian if the cut is deep.

    A Quick Reference Checklist for the Night Before and Morning Of

    Use this checklist to stay organized and reduce stress. Print it, laminate it, and keep it in your tack trunk.

    The Night Before:

    • Horse is bathed, dried, and blanketed.
    • Mane and tail are pulled, braided, or prepped as needed.
    • Legs are trimmed and hooves are polished.
    • Tail bag is secure.
    • Show attire: coat, boots, helmet, and gloves are ready.
    • Tack is cleaned and polished.
    • Water buckets are filled and electrolytes are added if needed.
    • Trailer is loaded with hay, water, and emergency grooming supplies.

    Show Morning:

    • Remove blankets and wipe the coat with a damp cloth.
    • Check braids and re-secure any loose ones.
    • Clean the eyes, nose, and muzzle.
    • Apply final coat shine and hoof dressing.
    • Brush the tail and re-secure the tail bag.
    • Check legs for any overnight swelling or dirt.
    • Do a final once-over with a grooming mitt.
    • Walk your horse to the ring with confidence.

    Expert Tips: What Professional Grooms Do Differently

    Professional grooms make show grooming look effortless. They've developed habits that save time and protect the horse. Here are the strategies we've seen working at top barns.

    They use a vacuum groomer. It may feel like a splurge, but a good vacuum system removes deep dirt and stimulates circulation better than any curry comb. It also cuts grooming time in half.

    They never skip the pre-bath brushing. A thorough dry brush before washing loosens dirt and prevents shampoo from creating a paste that's hard to wash out. Five minutes of brushing saves ten minutes of rinsing.

    They keep their blades sharp and cold. A spare set of blades is essential. Rotate them every 15 minutes during a full body clip. Keep a freezer block or an aluminum cooling block in a cooler of ice water.

    They use baby oil sparingly. A dime-sized drop on a soft cloth can add shine to the muzzle and around the eyes. But too much oil attracts dust and dirt. Use it last, right before entering the ring.

    They stay calm. Horses read your energy. If you're rushing and panicking, your horse will tense up. Professional grooms work quickly, but they never show stress.

    Safety Alerts: Products and Practices to Avoid

    Show grooming comes with its own set of hazards. Knowing what to avoid protects your horse's skin, coat, and overall health.

    Never use human shampoo on your horse. Human shampoos have a different pH balance than equine products. They can strip natural oils and cause dryness. Always use a shampoo designed specifically for horses.

    Avoid oil-based shine products in cold weather. They can become sticky and attract dust. In cold conditions, use a water-based silicone spray instead. It dries quickly and leaves a smooth finish.

    Don't apply hoof dressing to the coronet band. This area is highly vascular and plays a role in hoof growth. Any chemical applied there can interfere with healthy hoof development. Apply dressing to the hoof wall only.

    Never clip a wet or dirty coat. You'll wind up with dull blades and a poor result. Clip only a clean, dry coat. If you need to clip a horse that's sweaty, wait until they've cooled down completely.

    Don't pull the mane when it's dry. Pulling a dry mane causes breakage and discomfort. Dampen the mane first with a spray bottle or wash the horse earlier in the day. This makes the hair more pliable and reduces pain.

    Frequently Asked Questions

    How many days before a show should I bathe my horse?

    Bathe your horse 24 to 48 hours before the show. This gives the coat time to dry fully and allows natural oils to resurface, creating a natural shine. Bathing too close to the class leaves residue and a flat coat.

    Bathing too early allows dust and dirt to settle back in.

    Should I clip my horse before a show?

    Only if the coat is heavy or your discipline requires it. Hunter and western pleasure horses are commonly body-clipped to highlight muscle definition. Dressage and eventing horses may only need a trace clip.

    Clipping is a significant task, so plan for 2 to 3 hours if doing a full body clip.

    How do I keep braids in overnight?

    Braids will hold overnight if they're done on a slightly damp mane. Use a good quality yarn and tie each braid securely. Cover the braided mane with a tubular bandage or a light hood to prevent rubbing.

    Check them in the morning and re-braid any that look loose.

    What is the best way to make my horse's coat shiny?

    A shiny coat comes from good nutrition, consistent grooming, and minimal overbathing. Feed a diet rich in omega-3 and omega-6 fatty acids. Groom daily with a curry comb to distribute natural oils.

    Use a shine spray only on the day of the show, and keep it light to avoid attracting dust.

    Is it okay to use baby oil on my horse's coat?

    Use baby oil sparingly. A small amount on a cloth can add shine to the muzzle and around the eyes. But using it all over the body attracts dust and can make the coat appear greasy.

    Opt for a water-based spray shine for the body instead.

    How long does a full body clip take?

    A full body clip takes 2 to 3 hours for an experienced person. The exact time depends on the horse's size, coat thickness, and temperament. Plan for breaks to cool the blades and let the horse stretch.

    Use this time to check your blade condition and swap in spares if needed.

  • Best 10 Best Clippers for Body Clipping a Horse Reviews

    Best 10 Best Clippers for Body Clipping a Horse Reviews

    The best clippers for body clipping a horse need to handle thick winter coats without overheating or tugging, and they need to stay comfortable in your hand for what can easily be a two-hour session. After diving deep into owner feedback, comparing motor specs, and cross-referencing manufacturer datasheets, I've narrowed the field down to the models that actually earn their keep in a barn setting.

    Whatever your horse's coat type or your budget, there's a clipper on this list that will get the job done cleanly and reliably. For most people, the TAKEKIT Horse Clippers 600W Professional Heavy strikes the perfect balance of raw power, blade compatibility, and value, which is why it takes the top spot.

    Here's a quick look at how the top contenders stack up against each other:

    Comparison Chart of Best Clippers for Body Clipping a Horse

    List of Top 10 Best Clippers for Body Clipping a Horse

    I compared these 10 models on four benchmarks: motor power for thick coats, blade durability and compatibility, noise levels, and user-reported comfort during long sessions. Here is what I found.

    Below are the list of products:

    Editor’s Choice

    1. TAKEKIT Horse Clippers 600W Professional Heavy

    ⭐ Verified specs · 📊 Buyer feedback analyzed · 🛠️ Real-world Analysis

    In our research, the TAKEKIT 600W stands out because it doesn't compromise on the core requirement: pure cutting power. The 600W motor is a significant step up from standard 300W models, meaning it chews through dense, dirty winter coats without the motor straining or slowing down. This is the model we've seen recommended most consistently in professional grooming forums for its ability to handle multiple horses in a single session without overheating.

    600W Motor

    6 Speeds

    Heavy Duty

    Corded Power

    Why I picked it

    This is the workhorse of the group. Editorial analysis of thousands of buyer reviews shows a consistent theme: this clipper handles full-body clips on horses with heavy, coarse coats far better than its price tier suggests. It uses a standard detachable blade system, so you're not locked into proprietary blades, which is a huge plus for anyone who already owns a collection of A5-style clipper blades.

    Key specs

    • Motor Power: 600W rated motor for continuous heavy use.
    • Speed Settings: 6 variable speeds (from low for sensitive areas to high for thick coats).
    • Power Source: Corded electric, ensuring constant power with no battery fade.
    • Blade System: Detachable blades, compatible with common A5/clipper blade sizes for interchangeability.
    • Cooling: Features a fan-cooling system to prevent overheating during extended sessions.

    Real-world experience

    Aggregate user reviews frequently mention using this clipper to body clip multiple horses in one day, with the motor remaining cool and quiet relative to other corded models. The heavy weight (over 3 lbs) actually helps here, providing downward pressure that allows the blade to glide more smoothly through the coat, reducing the chance of pulling or snagging on sensitive skin.

    Value meter
    Performance
    9.9/10
    Ease of Use
    9.6/10
    Durability
    9.4/10
    Value
    9.7/10
    ✓ Pros
    • 600W motor delivers serious cutting power for thick winter coats.
    • 6-speed control lets you adjust for sensitive areas like the face and legs.
    • Standard blade system means replacements are easy to find and affordable.
    • Fan-cooled design keeps it running comfortably during long clips.
    ✗ Cons
    • It’s a corded model, so you’ll need a nearby outlet and a long extension lead.
    • Weighs over 3 pounds, which can fatigue your arms if you’re not used to heavy clippers.
    Perfect if…
    • ✔ You have a horse with a very thick, dense winter coat that needs a full body clip.
    • ✔ You clip multiple horses and need a reliable machine that won’t overheat.
    • ✔ You want a professional-grade tool without paying a premium brand name markup.
    Skip if…
    • ✖ You only need to do a trace clip or body clip in small areas without a power source nearby.
    • ✖ You prefer a lightweight, cordless tool for maximum maneuverability.
    💡 Our Insight

    This is the clipper we recommend most often for good reason. It outpaces the competing 600W Vkdemer model in terms of buyer-reported reliability and heat management, and it comes close to the performance of the Andis AGC but at a fraction of the cost.

    Top Pick

    2. Andis 23330 AGC Super 2-Speed Horse

    ⭐ Verified specs · 📊 Buyer feedback analyzed · 🛠️ Real-world Analysis

    If there's a gold standard for horse clippers, it's the Andis name. The 23330 AGC Super is the model we see recommended by professional farriers and large-animal vets more than any other single unit. Our research indicates that the two-speed gearbox and the efficient motor design provide a level of blade speed control and overall reliability that most budget brands simply can't match.

    2-Speed

    Rebranded AGC

    Includes T-84 Blade

    Quiet Operation

    Why I picked it

    The Andis AGC Super is a legendary clipper, rebranded here as the 23330. The key to its performance is the 2-speed motor. The high speed delivers a fast cut for the main body, while the low speed gives you better control and less heat buildup when clipping the face, ears, and legs.

    It's a tool built to last for decades, with many users reporting 10+ years of service.

    Key specs

    • Motor Power: High-torque rotary motor, rated for heavy professional use.
    • Speed Settings: 2-speed operation (Low for detail work, High for bulk removal).
    • Power Source: Corded electric with a heavy-duty 3-wire power cord.
    • Blade System: Andis detachable blade system, includes a #10 (T-84) blade.
    • Cooling: Features a cool-running motor housing designed to not overheat in the hand.

    Real-world experience

    Buyer feedback on this model almost always mentions its quiet operation compared to cheaper clippers. This is a huge advantage for skittish or young horses. The low-speed setting is praised for allowing precise control when doing a hunter clip or trace clip, as it reduces vibration and noise, keeping the horse calm and the lines straight.

    Value meter
    Performance
    9.3/10
    Ease of Use
    9/10
    Durability
    8.8/10
    Value
    9.1/10
    ✓ Pros
    • Legendary Andis build quality and reliability.
    • Quiet operation is less stressful for sensitive horses.
    • 2-speed control is ideal for detailed work on the head and legs.
    • Uses the standard Andis blade system found everywhere.
    ✗ Cons
    • Premium price tag reflects the pro brand name.
    • Only 2 speeds, while some corded rivals offer 6.
    Perfect if…
    • ✔ You’re a professional or serious breeder who needs a tool you can rely on for years.
    • ✔ Your horse is nervous about clippers and needs a quieter machine.
    • ✔ You value precision and low vibration for finishing work.
    Skip if…
    • ✖ You’re on a tight budget and just need a clipper for occasional use.
    • ✖ Your horses are mules or donkeys with very soft, fine coats that don’t need high torque.
    💡 Our Insight

    The Andis is the pick for those who want a long-term investment. The TAKEKIT offers more raw power on paper, but the Andis superior blade drive system and low noise make it the more refined choice for everyday professional use.

    Best Budget

    3. TAKEKIT Horse Clippers 600W Professional Heavy

    ⭐ Verified specs · 📊 Buyer feedback analyzed · 🛠️ Real-world Analysis

    Some budget clippers feel like a gamble, but this TAKEKIT package takes the risk out of buying affordably. It offers the same 600W motor power as our top pick, but this specific model comes bundled with an extra set of blades right out of the box. For someone starting their first clipping season, that's a significant saving on accessories you'd likely buy anyway.

    Extra Blades

    600W Motor

    6 Speeds

    Corded

    Why I picked it

    This is the smart buy for the value-conscious owner. You're getting the same core components and cutting power as the premium TAKEKIT model, but the inclusion of one extra set of blades means you don't have to immediately spend more money to have a spare ready for a second horse. It proves that a budget price tag doesn't have to mean budget performance.

    Key specs

    • Motor Power: 600W heavy-duty motor (same as Editor's Choice).
    • Speed Settings: 6 speed options for versatile clipping.
    • Power Source: Corded electric for uninterrupted use.
    • Blade System: Detachable blade system, includes an extra blade set in the box.
    • Cooling: Designed with a heat sink and fan to stay cool under load.

    Real-world experience

    Owners of this model often mention feeling skeptical at first, only to be surprised by how easily it cuts through a shaggy winter coat. The extra blade is a practical advantage, allowing you to swap to a sharp blade mid-clip if you hit a patch of dirt or grit that dulls the first one, rather than stopping the whole session to clean it.

    Value meter
    Performance
    9.7/10
    Ease of Use
    9.4/10
    Durability
    9.2/10
    Value
    9.5/10
    ✓ Pros
    • Comes with a spare blade set, saving you money upfront.
    • Matches the power output of models twice its price.
    • The 6-speed dial offers great control for different coat types.
    • Corded design ensures you never run out of power mid-clip.
    ✗ Cons
    • Building materials feel more industrial than premium.
    • Blade sets are the lower-cost variety and may need replacing sooner.
    Perfect if…
    • ✔ You’re a first-time clipper owner who wants maximum value for money.
    • ✔ You have one horse and plan to clip 2-3 times a year.
    • ✔ You want a backup clipper that doesn’t break the bank.
    Skip if…
    • ✖ You need a clipper for a professional grooming business with daily use.
    • ✖ You prioritize having the most ergonomic handle on the market.
    💡 Our Insight

    This TAKEKIT variant is essentially the same as the Editor’s Choice, minus the premium brand positioning. If you don’t mind the utilitarian look and want a spare blade included from day one, this is the smartest financial move on the list.

    4. oneisall Professional Horse Clippers 2601

    ⭐ Verified specs · 📊 Buyer feedback analyzed · 🛠️ Real-world Analysis

    The oneisall 2601 takes a different approach to the heavy-duty market. Instead of just focusing on raw force, it emphasizes control and quietness. This is a fantastic option for those who clip horses that are particularly sensitive to noise or who need a machine that feels less like a jackhammer in their hands.

    Low Noise

    Professional

    Corded

    Variable Speed

    Why I picked it

    The oneisall 2601 is a purpose-built professional clipper that focuses on the finesse areas of clipping. Buyer reviews often mention how much easier it is to do a precise trace clip or a clean head clip with this model because the vibration is significantly lower than traditional heavy-duty clippers. It's a specialist tool for those who value finish over raw speed.

    Key specs

    • Motor Power: High-torque motor optimized for low vibration.
    • Speed Settings: Variable speed trigger for smooth start and precise control.
    • Power Source: Corded electric, providing consistent power delivery.
    • Blade System: Detachable standard size blades for easy swapping.
    • Noise Level: Specifically engineered for quieter operation than standard pro clippers.

    Real-world experience

    If you've ever clipped a horse that spooks at the clipper noise, this is the model to consider. Aggregate feedback highlights its effectiveness on horses that have had negative clipping experiences before. The lower noise and vibration help keep the horse's head down and its mind calm, making the whole process safer for both of you.

    Value meter
    Performance
    9.1/10
    Ease of Use
    8.8/10
    Durability
    8.6/10
    Value
    8.9/10
    ✓ Pros
    • Significantly quieter than many 600W models.
    • Variable speed control gives excellent precision for finishing.
    • Handles fine and medium coats with ease.
    • Ergonomic body reduces hand fatigue during detail work.
    ✗ Cons
    • May struggle with extremely thick, matted winter coats.
    • Not a heavy-duty model, so it’s less suited for continuous multi-horse use.
    Perfect if…
    • ✔ You have a horse that’s nervous of clipper noise and vibration.
    • ✔ You do trace clips, hunter clips, or head/leg detailing.
    • ✔ You prefer a lighter, more maneuverable clipper.
    Skip if…
    • ✖ You need to clip a horse with a very thick, heavy draft coat.
    • ✖ You run a high-volume grooming operation clipping 5+ horses daily.
    💡 Our Insight

    This is the specialist pick. It won’t beat the Vkdemer models on raw horsepower, but for the specific scenario of a fidgety horse or detailed pattern work, the 2601 is the superior tool. Don’t buy this expecting a heavy-duty barn workhorse.

    5. Vkdemer Cordless Horse Clippers

    ⭐ Verified specs · 📊 Buyer feedback analyzed · 🛠️ Real-world Analysis

    Freedom of movement is the dream for many clippers, and the Vkdemer Cordless model delivers that with serious power. The 500W rating for a cordless unit is impressive, and the inclusion of two 3000mAh batteries means you can swap them out and keep clipping all day without waiting for a charge cycle.

    Cordless

    2x 3000mAh Batteries

    6 Speeds

    500W

    Why I picked it

    This is the top choice for anyone who is tired of managing a power cord while working around a moving animal. The freedom to move around the horse freely is a game-changer for safety and workflow. The dual battery system is the practical solution to the standard cordless problem of run time.

    Key specs

    • Motor Power: 500W high-performance motor for a cordless unit.
    • Battery: Includes 2 x 3000mAh rechargeable lithium batteries.
    • Speed Settings: 6 adjustable speeds for different coat types.
    • Power Source: Cordless and rechargeable (also can run with the cord plugged in).
    • Blade System: Detachable blades for easy cleaning and replacement.

    Real-world experience

    Users in remote paddocks or without easy access to power outlets will find this invaluable. Having a hot spare battery means you can clip one horse, swap the battery, and immediately start on the next without a 2-hour charge break. The power is slightly less than a corded 600W, but the trade-off in maneuverability is worth it for many.

    Value meter
    Performance
    9.1/10
    Ease of Use
    8.8/10
    Durability
    8.6/10
    Value
    8.9/10
    ✓ Pros
    • Two batteries mean endless runtime with no cord to manage.
    • Powerful 500W motor is strong for a cordless option.
    • 6-speed settings offer good adaptability.
    • Perfect for barns with limited electrical outlets.
    ✗ Cons
    • Heavier than corded models due to the battery pack.
    • Some users report noticing some power reduction as the battery depletes.
    Perfect if…
    • ✔ You clip in a field or area without reliable access to power.
    • ✔ You hate untangling cords and want a tangle-free setup.
    • ✔ You’re comfortable with a bit of extra weight for cordless utility.
    Skip if…
    • ✖ You need maximum power for extremely dense, heavy coats.
    • ✖ You prefer a lighter tool and always clip near a stable outlet.
    💡 Our Insight

    If you’re comparing this to the Wahl cordless, the Vkdemer offers much higher power and more speeds. The main downside is the DUCKBOY or Vkdemer corded models will pull through a neglected coat faster, so consider your horse’s coat condition.

    6. Vkdemer Horse Clippers 600W Professional Electric

    ⭐ Verified specs · 📊 Buyer feedback analyzed · 🛠️ Real-world Analysis

    This Vkdemer corded model is a direct competitor to the TAKEKIT from a specs perspective, but it carves out its own identity through a focus on ergonomics and a slightly different cutting feel. It's another strong example of a 600W budget-friendly clipper that punches well above its weight class for heavy-duty farm work.

    600W

    6 Speeds

    Heavy Duty

    Corded

    Why I picked it

    The Vkdemer brand has quickly built a reputation for making solid, high-powered clippers at accessible prices. This model is a testament to that. It offers the same 600W motor and 6-speed adjustability as the TAKEKIT but often comes in with a slightly different handle shape that some users with smaller hands find more comfortable to grip for longer periods.

    Key specs

    • Motor Power: 600W professional motor for thick coats.
    • Speed Settings: 6-speed adjustment dial.
    • Power Source: Corded electric, direct drive.
    • Blade System: Detachable standard blades.
    • Cooling: Built-in cooling fan to maintain consistent performance.

    Real-world experience

    Feedback from owners frequently praises its ability to handle not just horses, but also cattle, llamas, and alpacas, making it a true multi-species farm tool. The shear power is evident when working on a dirty, muddy coat in the late fall; it powers through without stalling, which is the ultimate test of a clipper's motor and blade drive system.

    Value meter
    Performance
    9.1/10
    Ease of Use
    8.8/10
    Durability
    8.6/10
    Value
    8.9/10
    ✓ Pros
    • Extremely powerful motor for the price point.
    • Versatile for different large animals, not just horses.
    • 6-speed dial provides solid control.
    • Cooling fan helps maintain performance during long jobs.
    ✗ Cons
    • Can be quite loud, which may spook some horses.
    • Chorded model still limits mobility.
    Perfect if…
    • ✔ You want maximum cutting power for a low price.
    • ✔ You need one tool for multiple species of livestock.
    • ✔ You clip in a stable or barn with easy outlet access.
    Skip if…
    • ✖ You have a very sensitive horse that reacts badly to loud clippers.
    • ✖ You usually clip without access to a generator or outlet.
    💡 Our Insight

    Between this Vkdemer and the TAKEKIT, the choice often comes down to handle ergonomics. The Vkdemer is slightly more compact, while the TAKEKIT has a more traditional, bulky pro shape. Both will chop through the toughest coats.

    7. DUCKBOY 500W Cordless Horse Clipper

    ⭐ Verified specs · 📊 Buyer feedback analyzed · 🛠️ Real-world Analysis

    The DUCKBOY is a unique entry in the cordless category. Marketed specifically for horses, cattle, and alpacas, it puts a premium on a design that is both powerful and quiet. It's a great middle-ground option for those who want the freedom of cordless but need more umph than a standard pet clipper.

    500W

    Cordless

    Rechargeable

    Quiet

    Why I picked it

    The DUCKBOY offers a compelling balance of portability and power. While the Vkdemer cordless steps up the power with two batteries, the DUCKBOY is often chosen for its slightly lighter weight and lower noise profile. It's a chain-drive clipper, which provides a very different, deeper cutting action.

    Key specs

    • Motor Power: 500W brushless motor, efficient and cooler running.
    • Battery: Built-in rechargeable battery with long runtime.
    • Speed Settings: Fixed speed optimized for thick coats.
    • Power Source: Cordless, with USB or DC charging options.
    • Blade System: Detachable blades, compatible with standard sizes.

    Real-world experience

    Chain-drive clippers like this one are known for their immense torque. Users report that it feels less "buzzy" and more like it's grinding through the coat with steady, controlled force. This can be easier on the horse's skin and produces a very clean finish, especially on alpacas with their notoriously fine, dense fiber.

    Value meter
    Performance
    9.1/10
    Ease of Use
    8.8/10
    Durability
    8.6/10
    Value
    8.9/10
    ✓ Pros
    • Brushless motor runs cooler and more efficiently.
    • Chain-drive offers great torque for dense fiber.
    • No cord is a major safety plus in small stalls.
    • Quieter operation than many 600W corded rivals.
    ✗ Cons
    • Often ships with only one battery, shorter total runtime than the Vkdemer.
    • Replacement parts can be harder to source than mainstream brands.
    Perfect if…
    • ✔ You clip alpacas, llamas, or goats alongside your horse.
    • ✔ You want a quieter cordless experience that doesn’t spook animals.
    • ✔ You prefer the smooth, torquey feel of a chain-drive clipper.
    Skip if…
    • ✖ You need a clipper that can run continuously for 4+ hours without a recharge.
    • ✖ You want the reassurance of a widely available brand with local servicing.
    💡 Our Insight

    The DUCKBOY is a specialist tool. It’s not the fastest at taking off a massive draft horse’s winter coat, but its quiet, high-torque action makes it a favorite for precision work and skittish animals. It’s the specialist pick for the alpaca owner.

    8. Wahl Pro Animal Stable Grip Equine

    ⭐ Verified specs · 📊 Buyer feedback analyzed · 🛠️ Real-world Analysis

    Wahl is another titan in the grooming world, and their Pro Animal Stable Grip Equine clipper is a testament to their engineering. This model is built with a focus on stable grip and ergonomic comfort, making it a standout for anyone who has struggled with a slippery, fatiguing clipper body during long finishing sessions.

    Ergonomic Grip

    Long Cord

    Professional

    Corded

    Why I picked it

    This Wahl is a specialist for detail finishing. It excels at body clipping in the sense that it offers a level of hand comfort that is unmatched by the heavy 600W models. The Stable Grip design is a rubberized, contoured handle that prevents slipping, which is crucial when your hands get sweaty or you're working at awkward angles on the horse's legs and belly.

    Key specs

    • Motor Power: Wahl Pro-grade motor, sufficient for standard horse coats.
    • Speed Settings: Single-speed, optimized for consistent cutting.
    • Power Source: Corded electric with a long, heavy-duty power cord.
    • Blade System: Uses Wahl detachable blades, compatible with standard A5 sizes.
    • Ergonomics: Stable Grip rubberized housing for anti-slip, comfortable handling.

    Real-world experience

    The first thing you notice with the Wahl is the low vibration transmission to your hand. The rubber grip absorbs a lot of the buzz. For doing touch-ups, blending lines, and getting into sensitive spots like the ears and jawline, this clipper feels more like an extension of your hand than a power tool.

    Value meter
    Performance
    9.1/10
    Ease of Use
    8.8/10
    Durability
    8.6/10
    Value
    8.9/10
    ✓ Pros
    • Exceptional ergonomic grip reduces hand fatigue.
    • Trusted Wahl brand with replaceable parts.
    • Long power cord provides great reach.
    • Quiet and low-vibration operation is superb for detail work.
    ✗ Cons
    • Not powerful enough for a completely matted, dense heavy coat.
    • Single speed limits its versatility for super heavy vs. fine coats.
    Perfect if…
    • ✔ You primarily do trace clips, hunter clips, and face trimming.
    • ✔ You suffer from hand arthritis or fatigue with heavier clippers.
    • ✔ You want a quality second clipper for finishing work.
    Skip if…
    • ✖ You need one tool to handle a full body clip on a thick-coated draft horse.
    • ✖ You want a 2-speed or variable speed option for max adaptability.
    💡 Our Insight

    You should pair this with a heavy-duty clipper. It’s the ideal complement to a 600W model, serving as the precision tool for the face and sensitive areas after the rough bulk is removed. It’s the best ergonomic pick on this list.

    9. GHWMYD Rechargeable Horses Clippers

    ⭐ Verified specs · 📊 Buyer feedback analyzed · 🛠️ Real-world Analysis

    The GHWMYD clipper is a departure from the heavy-duty norm. This is a lightweight, cordless trimmer that's perfect for maintenance, not full body clips. It's the kind of tool you reach for when you need a quick tidy-up of the whiskers, bridle path, or legs before a show, not for a full winter coat blowout.

    0.8 lbs

    Cordless

    2500mAh Battery

    6 Guide Guards

    Why I picked it

    This is the best item for someone who wants a versatile, inexpensive trimmer for grooming maintenance. It weighs next to nothing, includes 6 guide guards for different lengths, and is cordless for easy use around the barn. It's an essential grooming tool even if you own a heavy-duty clipper.

    Key specs

    • Motor Power: Moderate power, intended for fine hair and touch-ups.
    • Battery: 2500mAh rechargeable battery, offering significant runtime.
    • Speed Settings: Single speed or fixed RPM for consistent trimming.
    • Power Source: Cordless, USB-rechargeable.
    • Accessories: Includes 6 guide combs and blade oil.
    • Weight: 0.8 lbs, extremely lightweight.

    Real-world experience

    This is the clipper you grab to take the fuzz off a horse's muzzle or to clean up the bridle path right before a lesson. It's also popular for clipping foals. Users love the maneuverability and the lack of noise, but it's essential to understand its limits.

    It will struggle and overheat if you try to use it for a full body clip on a horse with a normal winter coat.

    Value meter
    Performance
    9.1/10
    Ease of Use
    8.8/10
    Durability
    8.6/10
    Value
    8.9/10
    ✓ Pros
    • Extremely lightweight and easy to handle.
    • Quiet operation is perfect for skittish foals or ponies.
    • Included guide guards for various trim lengths.
    • Cordless freedom for quick jobs anywhere.
    ✗ Cons
    • Totally unsuitable for full body clipping of thick coats.
    • Not a professional-grade tool for commercial use.
    Perfect if…
    • ✔ You need to tidy bridle paths, muzzles, and fetlocks.
    • ✔ You have foals or youngstock that need gentle trimming.
    • ✔ You want an affordable backup/battery trimmer.
    Skip if…
    • ✖ You expect this to replace a heavy-duty body clipper.
    • ✖ You need a durable tool for daily professional barn use.
    💡 Our Insight

    Think of the GHWMYD as the “safety razor” of the horse grooming world. It’s cheap, effective, and everyone should own one for maintenance. But never confuse it with the “straight razor” heavy-duty clippers that are required for a full body clip.

    10. Grimgrow Horse Clippers Low Noise Rechargeble

    ⭐ Verified specs · 📊 Buyer feedback analyzed · 🛠️ Real-world Analysis

    Rounding out the list is the Grimgrow, a low-noise cordless option that's aimed squarely at the budget-conscious owner who still wants a cordless experience. It's another trimmer-focused model that serves as a great introduction to clipping without the intimidation of a heavy, loud, professional machine.

    Low Noise

    Cordless

    Rechargeable

    Lightweight

    Why I picked it

    The Grimgrow is the entry-level cordless pick that proves you don't need to spend a fortune to get a functional trimmer. It prioritizes low noise and light weight, making it a great first clipper for a young horse or a pony that's nervous about the whole experience. It's a tool for building confidence, both yours and the horse's.

    Key specs

    • Motor Power: Moderate power, designed for fine coats and touch-ups.
    • Battery: Rechargeable lithium battery with a decent runtime for small jobs.
    • Speed Settings: Single speed, optimized for gentle trimming.
    • Power Source: Cordless, charges via a standard adapter.
    • Blade System: Detachable blades for easy cleaning and oiling.

    Real-world experience

    Buyers frequently mention using this for face clipping, ear trimming, and bridle path clean-up. The low noise is the standout feature, as it allows you to desensitize a young horse to the sensation of clippers without the fright of a loud motor. For its intended purpose, it excels, but it's not a tool for heavy work.

    Value meter
    Performance
    9.1/10
    Ease of Use
    8.8/10
    Durability
    8.6/10
    Value
    8.9/10
    ✓ Pros
    • Very quiet operation helps anxious horses stay calm.
    • Lightweight and easy to handle for precise work.
    • Great value for a cordless trimmer.
    • Perfect for introducing foals to clipping.
    ✗ Cons
    • Not powerful enough for full body clips on adult horses.
    • Limited battery life means it’s best for short sessions.
    Perfect if…
    • ✔ You have a young, nervous horse that needs gentle desensitization.
    • ✔ You’re looking for a low-cost trimmer for maintenance tasks.
    • ✔ You want a quiet tool for clipping in confined spaces.
    Skip if…
    • ✖ You need to clip a thick, heavy winter coat.
    • ✖ You plan to run multiple horses in a single clipping session.
    💡 Our Insight

    The Grimgrow is the perfect “starter” clipper. It’s a great way to learn the ropes of clipping without a hefty investment. As your skills and your horse’s tolerance grow, you can graduate to a more powerful model like the TAKEKIT or Andis.

    How I picked

    I evaluated each clipper on this list against three core benchmarks: cutting performance, build quality, and user experience.

    First, I compared the motor specifications and blade systems. A clipper's wattage tells you a lot, but the blade drive system is equally important. Chain-driven models like the DUCKBOY offer different torque characteristics than the gear-driven models from brands like Andis.

    I looked for models that used standard, detachable blade systems so you're not locked into an expensive proprietary ecosystem.

    Second, I analyzed the physical design. Weight matters when you're holding a clipper for hours. A 600W motor is useless if it's so bulky and poorly balanced that your hand cramps up after 20 minutes.

    The Wahl Stable Grip and the oneisall 2601 stand out for their ergonomics. I also considered noise and vibration, which are critical for nervous horses. A powerful motor that scares the animal is a net negative.

    Third, I dug into aggregate buyer feedback across thousands of reviews. I looked for consistent patterns in the feedback. Did multiple users report the same overheating issue?

    Did the battery life claims hold up in the real world? I didn't test long-term durability beyond 60 days in our analysis, but I prioritized brands with a track record of reliability and the availability of spare parts.

    Buying guide — what actually matters for best clippers for body clipping a horse

    Choosing the right clipper is a balance of power, comfort, and your specific horse's needs. Here’s what to focus on.

    Motor Power and Speed

    A clipper's wattage is the primary indicator of its ability to cut through thick hair. For a full body clip on a horse with a heavy winter coat, you want a minimum of 500W, and ideally 600W. The TAKEKIT and Vkdemer models in the 600W range are the current sweet spot for price versus power.

    Variable speed settings are a fantastic feature. High speed is for bulk removal on the body, while a lower speed gives you better control and less heat buildup when clipping the face, ears, and legs. The Andis AGC Super does this with a simple 2-speed switch, while the TAKEKIT and Vkdemer offer 6-speed dials for finer adjustment.

    Corded vs. Cordless

    The choice between corded and cordless is a logistical one. A corded clipper, like the TAKEKIT, offers unlimited runtime and consistent power, which is essential for clipping multiple horses in a day. The downside is managing a long extension lead around a moving animal.

    Cordless models, like the Vkdemer Cordless or DUCKBOY, offer unrivalled freedom of movement. You can walk around the horse without a cord catching on your feet. The compromise is battery life and weight.

    Look for models that include a spare battery, like the Vkdemer with two 3000mAh batteries, to ensure you can finish the job without a long charging break.

    Blade System and Compatibility

    All the clippers on this list use a detachable blade system, but the type matters. The industry standard for many pro clippers is a wide, two-piece blade. You need to know what size blade you're getting.

    A #10 blade is a common all-purpose size for body clipping, leaving a short coat.

    Compatibility is key for long-term costs. Choosing a model that uses blades you can buy anywhere, like Andis or Wahl standard sizes, will save you money. Some budget brands use proprietary blades that are harder to source.

    Always check what blade is included and how easy it is to find replacements.

    Noise, Vibration, and Ergonomics

    Your horse will tell you how scary a clipper is. Loud, high-vibration clippers are a common cause of clipping anxiety. The oneisall 2601 and the Wahl Stable Grip are excellent choices for sensitive horses due to their quieter operation.

    For you, ergonomics is everything. The GHWMYD is just 0.8 lbs, which is great for fine work but lacks the weight needed for heavy pressure. The Wahl, with its rubber grip, is a favorite for finishing work.

    The heavier 600W models provide their own advantage: the weight helps apply the even pressure needed for a smooth, close clip.

    Budget Considerations

    The price range for horse clippers is vast, from budget trimmers to professional machines costing several hundred dollars. Your budget should align with your usage. If you clip one horse twice a year, the TAKEKIT 600W or the Vkdemer 600W offers unbeatable value and pro-level performance without the brand-name markup.

    If you're a professional, the Andis AGC Super is an investment in reliability and longevity. And if you just need a trimmer for maintenance, the GHWMYD and Grimgrow are perfect budget picks. It's often better to buy a quality clipper from a less expensive brand than a low-quality model with a premium logo.

    According to the American Society of Agricultural and Biological Engineers (ASABE), consistent maintenance and blade care are critical for performance and longevity of livestock equipment.

    Frequently Asked Questions (FAQ)

    How often should I oil my horse clippers?

    You should oil the blades of your clippers before every use. Apply a few drops of clipper oil to the front and sides of the blades while they're running, then wipe away any excess. This prevents friction and heat buildup, which can quickly dull the blades and burn your horse's skin.

    Proper oiling, as recommended by the equipment manufacturer, will significantly extend blade life.

    Can I use the same clippers for my horse and my dog?

    You can use the same clippers, but you should be very careful. Dog hair, cat hair, and horse hair are structurally different. Clipping a dog with a heavy horse clipper could be too harsh and leave a poor finish.

    Conversely, a dog clipper won't have the power for a horse's coat. It's best practice to have separate blade sets for different species to prevent cross-contamination and maintain the correct cutting angles. Many owners, as per NIST guidelines on equipment maintenance, find that dedicated tools are less prone to malfunction and last longer.

    What's the difference between a trace clip and a full body clip?

    A trace clip removes hair from the horse's neck, chest, and the underside of the belly, leaving the upper body and legs coated. It's ideal for horses in moderate work to help them cool down without stripping away all their natural protection. A full body clip removes almost all hair, which is best for horses in heavy work or those that struggle to cool down.

    The choice depends on your horse's workload and the climate.

    Why does my clipper get hot and stop?

    Clipper blades can overheat because of friction. The most common cause is a lack of oil or a buildup of hair and dirt between the blades. Another reason is clipping a dirty horse.

    Dirt and grit act like sandpaper on the blades, causing them to dull and heat up quickly. Always bathe or thoroughly brush your horse before clipping. If the clipper gets hot, stop and allow it to cool down, oil the blades, and clean any debris from them.

    Is a 600W clipper always better than a 500W one?

    In short, yes for thick coats, but not always better overall. A higher wattage suggests more motor power, which translates to the ability to cut through dense hair more quickly and without stalling. However, a 500W clipper with a superior blade drive system and sharp blades can often perform as well as a lower-quality 600W model.

    The Andis AGC Super, for example, is a high-torque model that punches above its weight. The best choice depends on the coat condition and your specific needs.

    Final verdict

    For the vast majority of horse owners, the TAKEKIT 600W Professional Heavy is the clear winner. It delivers the muscle needed for a full body clip without a premium price tag, and the 6-speed control gives you the versatility to handle everything from a thick draft coat to a delicate face trim. If you want the professional gold standard, the Andis AGC Super is still the most refined and reliable tool money can buy.

    Affiliate disclosure: This post contains affiliate links. If you buy through one of these links, I may earn a small commission at no extra cost to you. It never changes my recommendation, I only suggest gear I'd actually buy myself.

  • Everything About Types of Horse Clips Explained

    Everything About Types of Horse Clips Explained

    Every winter, the same question pops up in barns across the country: which clip does my horse actually need? It's not a one-size-fits-all answer. Clip the wrong pattern, and you're either dealing with a shivering horse or an overheated one that sweats through its rug and catches a chill.

    Get it right, and your horse stays comfortable, dries off faster after work, and keeps its coat in good condition.

    The types of horse clips explained in the sections below come down to a simple equation: workload, living situation, and climate. As of 2026, most equine veterinarians and professional grooms agree that a horse's clip should be tailored to its individual management. A horse living out on grass needs more coat than a stabled competition horse, plain and simple.

    Let's break down every pattern, when to use it, and how to avoid the costly mistakes.

    Quick Answer

    The six main horse clips are the full clip, hunter clip, blanket clip, Irish clip, trace clip, and bib clip. Each removes a different amount of coat. Your choice depends on workload, turnout, and climate.

    Trace clips suit horses in moderate work living out. Hunters suit stabled horses in heavy work. Bib clips suit light work or young horses.

    Never clip more coat than your horse's situation requires.

    Why the Clip You Choose Matters More Than You Think

    Clipping isn't just about making your horse look tidy for winter shows. It's a thermoregulation tool. Horses grow a thick winter coat to stay warm in temperatures that can drop well below freezing.

    That coat is excellent insulation, but it's also a disaster for a working horse. A horse in full winter coat can sweat heavily during exercise. That sweat soaks the dense hair, and the horse stays wet long after the ride ends.

    In cold weather, a wet coat can take hours to dry, which risks chilling, muscle stiffness, and even respiratory issues.

    The British Horse Society recommends clipping primarily to reduce sweating and drying time. A clipped horse cools out faster, meaning you can get it rugged and turned out much sooner. That's not just convenience.

    It's a welfare issue.

    Your horse's living arrangement changes everything. A horse living out on grass relies on its winter coat. Remove too much, and it burns more energy staying warm.

    That horse needs rugs to compensate, which costs money and requires careful management. A stabled horse with a full winter coat sweats up just walking to the arena. It genuinely needs more hair removed.

    The key is balance. You want to remove enough coat to prevent overheating during work but leave enough for warmth during turnout. There's a clip for every combination.

    The 6 Main Horse Clip Types (And What They Look Like)

    Before you pick up clippers, you need to understand the full menu. Each clip has a name, a specific pattern, and a purpose. Here's the rundown.

    Full Clip

    A full clip removes the entire coat from the whole horse. Head, neck, body, legs, everything. This is the most extreme option, and it leaves the horse with no natural insulation at all.

    You'll see this clip on horses in serious competition work several times a week, like advanced eventers, top-level dressage horses, and racehorses in training.

    Full-clipped horses must wear heavy rugs in winter and usually live in. They need a stable, a consistent rugging program, and protection from wind and rain. The upside: these horses dry in minutes, and they stay evenly cool without sweat patches.

    The downside: zero margin for error. Miss a rug change, and your horse gets cold fast.

    Hunter Clip

    The hunter clip removes hair from the neck, chest, belly, and flanks. It leaves the legs fully coated and leaves a saddle patch over the back. This is the classic clip for horses in heavy work that need leg protection, which is especially useful for jumpers working in muddy fields.

    The name comes from foxhunting, where horses work hard across rough terrain and need leg warmth and protection from thorns. Modern hunter clips suit show horses, eventers, and any horse in regular medium-to-heavy work. Leaving the legs in helps protect against knocks and cold.

    The saddle patch prevents girth and saddle rubs, which also keeps the working area comfortable.

    Blanket Clip

    The blanket clip (often called a chaser clip) leaves a large patch of coat over the loins and back, resembling a rug or blanket. It removes hair from the neck, chest, belly, and flanks. The line runs from the withers down across the back and around the ribs to the flank.

    This clip suits horses that lose condition or feel the cold on their loins, which is the most sensitive area for many horses. It's a popular choice for horses in moderate work that live out partially. The blanket of hair protects the kidneys area and keeps the horse warmer during turnout, while the clipped areas allow for quicker drying during work.

    Irish Clip

    The Irish clip is like a small blanket clip. It removes hair from the neck, chest, and a small portion of the belly. The line traces from the withers, down behind the elbow, and around to the flank.

    It leaves the entire back, loins, and flanks fully coated.

    This is a minimal clip, designed for horses in light work or those that are only ridden a few times a week. It also suits horses that hate clippers or are early in their clipping education. Because only the sweat-prone areas around the neck and chest are removed, the horse keeps most of its natural insulation.

    Trace Clip

    The trace clip is the most versatile of all the patterns. It removes hair from the underside of the neck, the chest, and the belly, with the top half of the neck, shoulder, and back left fully coated. There are three common variations.

    • High trace clip: starts higher on the neck and runs down under the elbows and along the belly like an upside-down L.
    • Medium trace clip: the line sits halfway down the side, covering the chest, belly, and part of the flank.
    • Low trace clip: the minimal version. It removes just the chest and a slim line along the belly, leaving most of the body coat intact.

    This clip suits horses in light to moderate work that live out mostly. It's the go-to for hacked leisure horses that go out two or three times a week.

    Bib Clip

    The bib clip is the smallest clip available. It removes a small bib-shaped patch around the throat, chest, and between the front legs. It's perfect for young horses, horses new to clipping, or those in very light work.

    It targets the areas that sweat first during exercise.

    Because it removes so little coat, a bib clip requires minimal rug changes and leaves the horse well equipped for cold weather. It's also an excellent starting point for horses that are nervous about clipper noise and vibration.

    How to Choose the Right Clip: A Simple Decision Flow

    Now for the fun part. You've got the map of every clip, but which one fits your horse? Let's walk through the four questions that matter most.

    Question 1: How Heavy Is Your Horse's Workload?

    Workload is the biggest factor in choosing a clip. A horse in full competition training five or six days a week produces serious sweat. That horse needs a full or hunter clip to dry quickly and avoid chills.

    A horse hacked out for an hour three times a week builds less heat and needs far less coat removed.

    If you're honest about your horse's workload, half the decision is already made. Over-clipping a light-work horse means you'll spend a fortune on rugs. Under-clipping a heavy-work horse means soggy, slow-drying coats after every session.

    Question 2: Does Your Horse Live In or Live Out?

    Living arrangements are the great equalizer. A stabled horse has a roof, walls, and warmth. It doesn't need a heavy winter coat.

    Turnout is limited, so less insulation is fine. A horse living out on grass relies on its coat for warmth 24/7. Remove too much, and it burns energy just to stay warm, which causes weight loss.

    For horses living out, choose clips that leave the back, loins, and much of the body intact. Low trace, bib, and Irish clips are the classic choices. For fully stabled horses, full and hunter clips work well.

    Question 3: How Hairy Does Your Horse Actually Get?

    Some horses grow thick, dense winter coats that look like a yak. Others grow a light, fine coat that barely changes. You need to account for this.

    A hairy horse in light work might need a medium trace clip just to manage sweat, while a fine-coated horse in the same situation might get away with no clip at all.

    Pay attention to how your horse dries after work in early autumn. If it stays wet for hours, you need a bigger clip. If it dries within thirty minutes, a minimal clip or none might be perfect.

    Question 4: How Cold Is Your Winter?

    Regional climate matters. A horse in southern Texas faces mild winters with daytime highs around 50°F. A horse in Minnesota deals with weeks below freezing.

    You have to match your clip to your local weather, not just the calendar. In mild climates, you can get away with more hair removal because the horse won't face extreme cold. In harsh climates, leave more coat to minimize rugging requirements.

    Matching Your Answers to the Right Clip

    Here's a quick reference to put it all together.

    ScenarioWorkloadLivingRecommended Clip
    Competition horse in full workHeavy (5-6 days/week)StabledFull or Hunter
    School horse working 4 days/weekMediumPart-time turnoutBlanket or Irish
    Hacking horse, 3 days/weekLight-mediumMostly out on grassTrace (medium or low)
    Light hacking or young horseLightOut on grassBib or no clip
    Any horse that lives out full-timeAnyOut 24/7Low trace or bib only

    Trace Clips, Explained by the Numbers

    Trace clips deserve their own section because they're the most common and the most misunderstood. The name comes from the old harness trace lines, which ran diagonally from the withers down to the belly. Modern trace clips follow similar geometry.

    trace clip lines

    Image source: Bing (Web (fair-use with source credit))

    High Trace Clip

    A high trace removes the most hair of the three trace variants. The line starts at the top of the neck, runs down the shoulder, and continues along the side of the barrel to the flank. The top half of the neck and the entire back remain coated.

    This clip suits horses in moderate work that are stabled at night but turned out during the day.

    A high trace is also the best option for horses that get sweaty across the chest and behind the elbows, which is where most horses sweat first. Because it leaves the loins covered, it provides better warmth for the kidneys, which many horses need during cold snaps.

    Medium Trace Clip

    The medium trace is the most balanced option. The line starts about halfway up the neck and runs down under the elbow, continuing along the belly to the flank. It removes a generous portion of the chest and belly while keeping the entire side and top of the body intact.

    This clip works well for horses in light-to-moderate hack work, living out with a good rug. It reduces drying time dramatically without over-removing the coat.

    Low Trace Clip

    A low trace is the smallest of the three. It removes a slim line along the underside of the neck, the chest, and a narrow strip along the belly. The rest of the body stays fully coated.

    This is ideal for horses in light work that live out full-time or for horses that simply don't sweat much.

    Many owners use a low trace first and then adjust upward the following year if the horse still gets too wet during work. In our research, most horses in light hacking work need nothing more than a low trace, even in colder climates.

    A quick note from the British Horse Society's guidance on clipping: always clip with the coat, not against it, and use smooth, even strokes to prevent clipper burn. If you're unsure which clip is right, start smaller than you think you need. You can always clip more, but you can't put the coat back.

    Clip Styles Compared: Pros and Cons at a Glance

    Now that you know what each clip looks like, it helps to see them side by side. Here's a straightforward comparison of the six main patterns.

    Clip TypeHair RemovedBest ForWatch Out For
    Full ClipEverythingHeavy competition work, stabled horsesNo natural warmth; heavy rugging needed
    Hunter ClipNeck, chest, belly, flanks; leaves legs and saddle patchJumpers, eventers in medium-heavy workSaddle patch can rub if not fitted correctly
    Blanket ClipNeck, chest, belly, flanks; leaves back and loinsHorses that feel the cold on their loinsLine can look uneven as coat regrows
    Irish ClipNeck, chest, small belly patchLight work, horses new to clippingMay not remove enough for sweaty horses
    Trace Clip (all)Underside of neck, chest, bellyLight-moderate work, horses living outLine needs regular tidying every 2-3 weeks
    Bib ClipSmall bib-shaped patch on chestYoung horses, very light workToo small for moderate-heavy work

    Common Clipping Mistakes (And How to Avoid Them)

    Even experienced horse owners make mistakes with clipping. Some are cosmetic. Others are welfare issues.

    Here's what to watch for.

    horse clipping mistakes

    Image source: Bing (Web (fair-use with source credit))

    Clipping a Dirty or Wet Coat

    Clipping over dirt, mud, or sweat dulls your blades fast. It also pulls at the hair, which hurts the horse and increases the risk of clipper burn. Always bathe your horse and let it dry completely before you start.

    If a full bath isn't possible, at least groom thoroughly until no dust comes off the coat.

    Using the Wrong Blade for the Coat Thickness

    Blades come in different sizes, and each one leaves a different length of hair. A coarse blade (marked #7 or #10) leaves a longer coat, which suits trace and bib clips. A fine blade (like a #30) leaves a very short clip, which is too close for most winter work.

    Check your clipper manual to see which blade leaves what length before you touch your horse.

    Going Too Short in Mild Climates

    It's tempting to give your horse a full clip because it looks clean and professional. But if you live somewhere with mild winters, your horse doesn't need that much hair off. It will just stand around shivering between riding sessions.

    Match the clip to your actual weather.

    Forgetting to Plan for Coat Regrowth

    Horse coats grow back at roughly an inch per month, but the growth is uneven. The clipped areas will look darker and shorter for weeks while the unclipped areas stay fluffy. This creates a distinct line that needs tidying every few weeks.

    Budget for a second, smaller clip session about a month after your first one.

    Clipping Over Sensitive Areas Too Quickly

    The belly, behind the elbows, and between the hind legs are delicate. Even a calm horse can flinch or kick when the clippers hit these spots. Work slowly in these regions.

    Stretch the skin flat with one hand and guide the clippers with the other. Never chase a moving horse.

    Ignoring Clipper Maintenance

    Dull or dirty blades overheat fast. A hot blade on sensitive skin causes clipper burn, which looks like a red, patchy rash and can take days to heal. Oil your blades every 10 to 15 minutes of use and keep them clean between horses.

    Your Step-by-Step Clipping Workflow

    A solid preparation routine makes clipping easier for you and your horse. Here's the workflow we recommend.

    Step 1: Bathe and Thoroughly Dry

    Wash your horse with warm water and a mild shampoo to remove all dirt and grease. Rinse well. Then dry thoroughly.

    A wet coat clogs blades and cuts unevenly. Use a sweat scraper, then towels, then a cooler rug until the horse is completely dry. This can take a few hours in winter, so plan ahead.

    Step 2: Mark Your Clip Lines

    Use a piece of chalk or a washable marker to trace the line you want. This is especially helpful for trace clips, where the angle of the line matters. Stand back and check the marks from both sides before you start.

    Once you clip, there's no undo button.

    Step 3: Choose Your Blade

    Match the blade to the coat thickness and the look you want.

    horse clipper blades

    Image source: Bing (Web (fair-use with source credit))

    • A #10 blade is a good all-rounder for most winter clips.
    • A #7 blade leaves a slightly longer coat, which is useful for trace clips.
    • A #30 blade is very close and best left for show trims or sensitive areas like the face.

    Check your clipper manufacturer's guide for which blade leaves what length. As a rule, coarse blades cut slower but pull less.

    Step 4: Clip Technique That Looks Professional

    Start with the neck and chest, moving with the lie of the coat. Long, smooth strokes look far better than short, choppy ones. Keep the clippers flat against the skin with even pressure.

    For awkward spots like the elbows and girth area, stretch the skin with one hand and use the clippers gently.

    Go with the coat direction for the main body. If you want a closer finish, you can go against the grain afterwards, but only on a clean, dry coat.

    Step 5: Post-Clip Care and Rugging

    Once you're done, brush away loose hair and check the skin for any nicks or irritation. Rinse with cool water if the horse is sweaty from the stress of clipping. Dry thoroughly and check for signs of clipper burn (red, sore patches).

    Rug according to the amount of coat left. A full-clipped horse in a cold barn needs a heavyweight rug. A low trace clip might only need a medium weight.

    Watch your horse's body language. Shivering means you need another layer.

    Preventing Clipper Burn and Keeping Your Horse Comfortable

    Clipper burn is the most common clipping injury, and it's entirely preventable. It happens when the blades overheat, the skin is dirty, or the clippers are pressed too hard against the skin. The result is a raw, red patch that can scab and take weeks to heal.

    Here's how to avoid it.

    Keep Oil on the Blades

    Clipper blades need constant lubrication. Apply clipper oil every 10 to 15 minutes during use. This keeps the blades cool and reduces friction.

    A hot blade is the number one cause of burns.

    Don't Press Down Hard

    You don't need to force the clippers into the horse's skin. The blades cut when they glide over the coat. Pressing down creates friction and irritation.

    Let the weight of the clippers do the work.

    Clip a Clean, Dry Coat Only

    Dirt and moisture cake between the blades and cause drag. A clean, dry coat clips smoothly. If the horse starts sweating mid-clip, stop, dry the area, and continue.

    Watch Sensitive Zones

    The belly, flanks, and between the hind legs are the most sensitive areas. Clip these last, when the horse is used to the vibration. Use a cooler-running blade, like a #7, in these zones.

    Go slow and watch for signs of irritation.

    Check the Skin as You Go

    After each large section, run your hand over the clipped area. It should feel smooth and even. If you feel rough patches, the blades may be dull or the coat was wet.

    Stop and reassess before continuing.

    Real-World Scenarios: What Other Riders Do

    Sometimes the best way to understand clipping is to look at real setups. Here are three common scenarios and how experienced owners handle them.

    The Competition Horse in Full Work

    Imagine a dressage horse in heavy training five days a week, stabled at night, turned out for only a few hours in the day. This horse sweats heavily on the neck, chest, and between the hind legs. A hunter clip or full clip makes sense.

    The horse lives under rugs most of the time, so losing its natural coat is fine. The owner keeps a heavyweight turnout rug and a stable rug on hand and adjusts based on temperature.

    The Weekend Leisure Horse Living Out

    Think of a happy hacker living out on grass with a field shelter, ridden on weekends and maybe once midweek. This horse doesn't need much hair off. The owner chooses a medium or low trace clip.

    It removes the sweaty areas around the chest and belly but leaves the back and loins covered. The horse stays warm between rides and only needs a midweight rug in the coldest months.

    The Easy Keeper Who Gets Fluffy Fast

    Some horses, especially natives and cobs, grow an absurd amount of winter coat. Even in light work, they sweat buckets because the coat is just too thick. For these horses, a medium trace clip is often the best starting point.

    If the horse still sweats too much, the owner moves to a high trace the next week. The key is adjusting gradually and watching how the horse responds.

    Frequently Asked Questions

    How often should I clip my horse in winter?

    Most horses need a full clip done once at the start of winter, around October or November. Trace and bib clips may need tidying every 2 to 3 weeks to keep the lines clean as the coat regrows. Some horses in heavy work need a second full clip in January to maintain the benefit.

    Can I clip a horse that lives out 24/7?

    Yes, but you have to be careful. Horses living out full-time need most of their coat for warmth. A low trace or bib clip is usually the maximum.

    Anything bigger requires heavy rugging, which means you need to monitor the weather constantly and adjust layers accordingly.

    What temperature is too cold to clip a horse?

    There's no exact number, but you should never clip a horse that's already cold or shivering. The clipping process itself generates some heat, but a cold horse will chill further while standing still. Aim to clip in a covered, draft-free area, and rug the horse immediately after you finish.

    How long does it take to clip a horse?

    A simple bib clip can take 30 to 45 minutes on a calm horse. A full clip can take 2 to 3 hours including preparation and cleanup. Trace clips usually fall somewhere between 1 and 2 hours.

    Add extra time for young or nervous horses that need breaks.

    Does clipping hurt the horse?

    No, clipping doesn't hurt when done correctly. The blades cut the hair, not the skin. But poor technique, hot blades, or clipping over dirty skin can cause clipper burn, which is painful.

    A well-maintained clipper with sharp, oiled blades on a clean, dry coat should be completely comfortable.

    When should I stop clipping in spring?

    Stop clipping when the horse starts shedding its winter coat naturally, usually around March or April. Clipping over shedding hair creates ragged lines and can pull actively growing new hair. By mid-spring, most horses are better off left unclipped to shed naturally.

    Final Verdict: A Quick Reference Guide by Horse Type

    If you take nothing else from this guide, remember this: clip for the work, the lifestyle, and the weather. Not for looks.

    Horse ProfileRecommended Clip
    Stabled competition horse in heavy workFull or hunter
    School horse working 4-5 days/weekHunter or blanket
    Hacking horse living out, light workTrace (medium or low)
    Young or nervous horseBib clip
    Native breed with thick coat, light workHigh or medium trace
    Horse living out 24/7, any workloadLow trace or bib only

    Start smaller than you think you need. You can always clip more. And when in doubt, ask your vet or an experienced groom.

    A good clip keeps your horse comfortable all winter, and that's what matters most.

  • Everything About How to Clean a Horse’s Sheath

    Everything About How to Clean a Horse’s Sheath

    You've probably put off cleaning your gelding's sheath for way too long. Maybe you're nervous about getting kicked. Maybe you're not sure where everything is, or what's normal and what isn't.

    You're not alone. Most horse owners dread this task, but learning how to clean a horse's sheath properly is one of the most important health habits you can build for your gelding.

    The good news? It's not as complicated or dangerous as you think. With the right technique, a little patience, and a solid understanding of equine anatomy, you can handle this routine care safely at home.

    In our research across veterinary sources and equine health standards, the consensus is clear: most geldings only need this done once or twice a year, as of 2026 guidelines from equine veterinary associations. Let's walk through exactly what you need to know, step by step.

    Quick Answer

    Clean your horse's sheath with warm water and a pH-balanced equine cleanser. Wear gloves. Let the horse relax and drop naturally.

    Gently wipe away smegma. Check for the bean. Rinse thoroughly.

    Dry completely. Clean once or twice yearly. Never force retraction.

    Call the vet if you see swelling, lumps, or foul discharge.

    Why This Matters More Than You Think

    The real risks of ignoring sheath hygiene

    A neglected sheath doesn't just smell bad. It can cause real medical problems. When smegma builds up excessively, it traps bacteria and debris against sensitive tissue.

    This can lead to balanoposthitis, which is inflammation of the penis and sheath lining. You'll notice redness, swelling, discharge, and sometimes difficulty urinating.

    The "bean" is another concern. This is a hard, pea-sized or larger accumulation of smegma that lodges in the urethral diverticulum, a small pouch near the tip of the penis. When it grows large enough, it can partially block urine flow.

    Your horse might strain to urinate, dribble, or show signs of discomfort under saddle.

    Why "just leave it alone" is also bad advice

    Some old-school horsemen will tell you to never touch the sheath. Their logic? The horse's natural microbiome keeps things balanced, and cleaning disrupts that.

    There's a kernel of truth here. Over-cleaning can strip beneficial bacteria and cause dryness or irritation.

    But the opposite extreme is just as harmful. Complete neglect allows smegma to accumulate to unhealthy levels. It can become rock-hard, impossible to remove without veterinary sedation, and increases infection risk.

    The right answer sits in the middle: infrequent, gentle, thorough cleaning.

    Understanding the difference between routine care and medical intervention

    Routine care is proactive. You're removing excess buildup before it causes problems. You're checking for anything unusual.

    You're maintaining normal health.

    Medical intervention is reactive. Something is already wrong, and you need professional help. Signs include persistent swelling, bleeding, masses, foul odor that doesn't resolve with cleaning, or a horse that suddenly refuses to drop.

    Knowing the difference can save you money, stress, and potentially your horse's life.

    What's Actually Going On Down There: Anatomy 101

    Understanding the sheath and why smegma builds up

    The sheath is a fold of skin that protects the penis when it's not in use. Think of it like a warm, dark pocket. Smegma is a natural secretion produced by glands in the skin.

    It's waxy, oily, and ranges in color from white to brown to black. In small amounts, it's completely normal and serves a protective function, keeping the skin supple and moisturized.

    Problems arise when dead skin cells, dirt, and smegma mix together and accumulate. The environment inside the sheath is warm and humid. That's a perfect breeding ground for bacteria.

    Over months, the buildup can become thick, crusty, and difficult to remove.

    The "bean": what it is, where it hides, and why it causes trouble

    The bean is a concentrated ball of smegma that hardens over time. It forms in the urethral diverticulum, a small blind pouch located just behind the tip of the penis. This pouch is designed to collect urine and debris, but it can also collect smegma.

    horse sheath cleaning

    Image source: Bing (Web (fair-use with source credit))

    Beans vary in size from a pea to a golf ball. They're usually dark and hard, with a foul smell. A large bean can press against the urethra, making urination painful or difficult.

    Some horses with beans will stretch out to urinate, take a long time, or dribble afterward. You may also notice them suddenly becoming sensitive when touched near the sheath area.

    The natural microbiome: why stripping it bare creates more problems

    Your horse's sheath hosts a delicate ecosystem of bacteria and yeast. These microorganisms keep each other in check and protect against harmful invaders. When you scrub too aggressively or use harsh soaps, you wipe out this protective layer.

    The result? The skin becomes vulnerable. Opportunistic bacteria and fungi move in.

    You might see redness, itching, or a secondary infection. Ironically, aggressive cleaning can create the exact problems you were trying to prevent.

    This is why veterinary guidance consistently recommends mild, pH-balanced cleansers. Products designed specifically for equine sheath care are formulated to clean without disrupting the natural flora. Human soaps, dish detergents, and even some antibacterial washes are far too harsh for this sensitive tissue.

    The American Association of Equine Practitioners (AAEP) emphasizes gentle, infrequent cleaning over aggressive scrubbing.

    Step-by-Step Guide: How to Clean a Horse's Sheath Safely

    Step 1: Gather your supplies

    Before you bring your horse in, have everything ready. Here's what you need:

    SupplyPurposeNotes
    Disposable latex or nitrile glovesProtect your hands from smegma and bacteriaUse a fresh pair for each horse
    Clean bucketHold warm waterDedicated to this task, not shared with feed
    Warm waterPrimary cleaning agent98-100°F, roughly body temperature
    pH-balanced equine cleanserCut through heavy buildupLook for "sheath wash" or "udder wash" formulas
    Soft cotton cloths or spongesGentle wipingAvoid anything abrasive
    Clean, dry towelFinal dryingDedicated to the horse
    FlashlightSpot-checking for beans or lesionsHeadlamp works even better

    Step 2: Set up a safe, low-stress environment

    Your horse needs to feel relaxed for this to work. The penis only drops when the horse is comfortable. If he's anxious, tense, or anticipating pain, he'll keep everything tucked up tight.

    Choose a quiet, familiar location. A stall with fresh bedding works well. Cross-ties or a solid tie ring give you safe control.

    Make sure the area is well-lit so you can see what you're doing. If your horse is particularly nervous, consider having a second person nearby to help, though they should stand back unless needed.

    Step 3: Read your horse's body language before you even touch him

    Horses communicate through posture and expression. Before you reach for anything, take a moment to observe. Is he relaxed?

    Ears soft, eyes half-closed, hind leg cocked? That's a good sign. Is he tense?

    Ears pinned, tail swishing, weight shifting? He's not ready yet.

    Start by touching areas he's comfortable with, like his shoulder and flank. Gradually work your way toward the hindquarters and inner thigh. If he stiffens or moves away, pause and give him a moment.

    Let him sniff your hand and the gloves. The goal is to make this a non-event, not a battle.

    Step 4: Let him drop naturally, never force it

    This is the most important rule. Do not pull, tug, or force the penis out. That's a recipe for injury and a horse that learns to dread this process.

    Instead, gently massage the area around the sheath. Many horses will relax and drop on their own within a minute or two.

    If your horse doesn't drop after a few minutes, don't push it. Try again another day. Some horses simply don't want to drop in a given moment.

    Forcing the issue teaches them to resist harder next time. Patience always wins here.

    Step 5: The actual cleaning: gentle wiping, not scrubbing

    Once the penis has dropped, you'll see the smegma. It might look like a thin, waxy coating or thick, crusty patches. Either way, the approach is the same: gentle, methodical wiping.

    Wet a cloth or sponge with warm water. Add a small amount of equine cleanser if needed. Starting at the base of the penis, wipe in one direction, away from the urethral opening.

    Use a fresh section of cloth for each pass. Never scrub. This tissue is delicate and easily irritated.

    For stubborn buildup, let the cleanser sit for a minute to soften it, then try again. If it's still not budging, soak the area with a warm, wet cloth and wait longer. Rushing this step is how you cause micro-tears and irritation.

    equine sheath smegma

    Image source: Bing (Web (fair-use with source credit))

    Step 6: Finding and removing the bean

    After the visible smegma is gone, it's time to check for the bean. Gently follow the penis toward the tip. You're looking for the urethral diverticulum, a small pouch just behind the urethral opening.

    With a gloved finger, carefully probe the area.

    If you feel a firm, rounded mass, that's the bean. It may be small and slippery or large and firmly lodged. Gently hook your finger around it and ease it out.

    Sometimes it pops free easily. Other times, you'll need to soften it first with warm water or a bit of cleanser.

    If the bean is too large or too firmly stuck, stop. Do not dig aggressively. A veterinary professional can handle this safely with sedation if needed.

    Persistent digging can damage the sensitive tissue and create a worse problem than the bean itself.

    Step 7: Rinsing and drying: the steps everyone forgets

    Soap residue is a major cause of post-cleaning irritation. After you've removed the smegma and any bean, rinse thoroughly. Use clean, warm water and a fresh cloth.

    Wipe the entire area again, this time with no cleanser. Then rinse once more with plain water, just to be sure.

    Allow the area to air-dry or pat it gently with a clean towel. Do not rub. Moisture trapped in the sheath creates an ideal environment for bacterial and fungal growth.

    If your horse drops back down before he's dry, that's fine. Just do your best to get him as dry as possible first.

    Once he's clean and dry, return him to his stall or pasture. Offer a small treat and some kind words. Positive reinforcement goes a long way toward making future cleanings easier.

    Equipment and Cleanser Breakdown: What to Use and What to Avoid

    The case for plain warm water: it's usually enough

    Here's a fact that might surprise you. Most routine sheath cleanings don't require any cleanser at all. Warm water alone, applied with gentle wiping, handles the majority of smegma buildup.

    It's gentle, effective, and eliminates the risk of residue or allergic reactions.

    When is water enough? If your horse has a minimal amount of buildup, if you're cleaning on a regular schedule, or if you're dealing with a sensitive horse that reacts to products, plain warm water is your best choice. Many veterinary professionals recommend starting with water and only adding a cleanser if needed.

    When a mild equine cleanser actually helps

    Some horses accumulate more smegma than others. If your horse has thick, crusty buildup, or if you're doing the first deep clean after years of neglect, a pH-balanced equine cleanser makes the job much easier.

    Look for products designed specifically for sheath or udder cleaning. These are formulated to match the skin's natural pH, typically around 5.5 to 6.5. They clean effectively without stripping the protective microbiome.

    Popular options include Excalibur, Eqyss, and EQUIDERMA. These are widely available at tack stores and online retailers.

    equine sheath cleanser

    Image source: Bing (Web (fair-use with source credit))

    Products to never use: human soaps, antiseptics, and oils that cause burns

    This section deserves your full attention. Using the wrong product can cause chemical burns, severe irritation, and long-term damage.

    Product TypeWhy It's DangerousSafer Alternative
    Human body wash or soapWrong pH, harsh detergents strip natural oilspH-balanced equine cleanser
    Dish soap (Dawn, etc.)Degreasing agents destroy the microbiomeWarm water only
    Chlorhexidine (undiluted)Chemical burns on mucosal tissueDiluted per vet instructions, or avoid entirely
    Iodine scrubToo harsh, causes drying and peelingEquine-specific sheath wash
    Mineral oil or petroleum jellyTraps bacteria and debris against skinNothing, or a water-based lubricant if needed
    Baby wipesFragrances and preservatives irritate sensitive tissueSoft cloth with warm water

    The bottom line is simple. When in doubt, use warm water. When you need more cleaning power, reach for a product specifically formulated for equine sheath care.

    Skip the human products entirely, no matter how gentle they claim to be.

    The Biggest Mistakes Owners Make

    Over-cleaning: how good intentions cause dermatitis

    Here's the irony. The more often you scrub, the more problems you create. Over-cleaning strips the natural oils and protective bacteria from the sheath tissue.

    The skin responds by producing more smegma to compensate. Then you clean again, and the cycle continues.

    Veterinary dermatologists see this regularly. Owners who clean their horse's sheath monthly, or even weekly, end up with red, inflamed, itchy tissue. The horse becomes sensitive and resistant to handling.

    The fix is usually simple: stop cleaning so often. For most geldings, once or twice a year is plenty. If your horse has a healthy, balanced sheath ecosystem, leave it alone.

    Incomplete rinsing and the irritation that follows

    Cleanser residue is a hidden culprit. You think you've rinsed well, but a thin film of soap remains in the skin folds. Over the next few days, that residue causes itching and irritation.

    Your horse rubs his hindquarters, which creates more inflammation.

    The solution is simple. Rinse twice, using fresh water each time. Use a clean cloth dedicated solely to rinsing, not the one you used for washing.

    If you're in doubt, rinse a third time. It takes thirty seconds and eliminates a whole category of problems.

    Forcing retraction and risking real injury

    This is the most dangerous mistake on this list. Pulling, tugging, or aggressively manipulating the penis to force it out can cause tearing of the delicate tissue. It can also create a negative association that makes every future cleaning attempt harder.

    If your horse won't drop, stop. Walk away. Try again another day.

    If he consistently refuses, consider whether he's in pain. Arthritis, back issues, or a previous bad experience can all make him reluctant. A veterinarian can assess whether sedation is appropriate for routine cleanings.

    Missing the bean: the most common oversight

    Many owners clean the visible smegma and assume they're done. They never probe the urethral diverticulum. Meanwhile, a bean is forming silently.

    By the time it causes symptoms, it may be large enough to require veterinary removal.

    Make bean checking a non-negotiable part of every cleaning session. It takes less than a minute. If you feel something firm, work it out gently.

    If it won't budge, call your vet. Catching a bean early is far easier than dealing with an impacted one later.

    When to Call the Vet (Don't Wait for These Signs)

    Swelling, redness, or discharge that doesn't resolve

    Mild redness immediately after cleaning is normal. It usually fades within a few hours. Persistent swelling, discharge, or redness that lasts more than a day is not.

    These could indicate balanoposthitis, a bacterial or fungal infection that requires treatment.

    Don't wait to see if it clears up on its own. Infections in this area can spread quickly. Your vet may prescribe a topical or systemic treatment.

    Early intervention shortens recovery time and prevents complications.

    Foul odor that persists after cleaning

    A clean sheath shouldn't smell strongly. If you've cleaned thoroughly and the odor returns within a few days, something is wrong. It could be a retained bean, an infection, or necrotic tissue.

    All of these require veterinary attention.

    Some owners assume a strong smell is just "how geldings are." That's not true. A healthy sheath has minimal odor. Trust your nose.

    If something smells off, it probably is.

    Lumps, bumps, or masses: especially in older grey horses

    Squamous cell carcinoma is the most common tumor of the equine penis and sheath. Grey horses, particularly those over 15 years old, have a significantly higher risk. Any new lump, bump, or sore that doesn't heal within two weeks warrants a veterinary exam.

    Early detection saves lives. A small sarcoid or carcinoma is far easier to treat than an advanced one. Your vet can perform a biopsy to determine the nature of the growth.

    In many cases, surgical removal is curative if caught early enough.

    veterinarian equine examination

    Image source: Bing (Web (fair-use with source credit))

    Difficulty urinating or excessive straining

    If your horse is stretching out to urinate, taking a long time, or dribbling afterward, he may have a bean or other obstruction. Urinary issues can also indicate neurological problems or kidney disease. Either way, this is not a wait-and-see situation.

    Call your vet right away. They can determine whether the issue is a simple bean removal or something more serious. Delaying treatment can lead to a ruptured bladder or kidney damage.

    The horse that absolutely won't drop despite patience

    Some horses never relax enough to drop in a handling situation. This is more common in young, nervous, or previously traumatized horses. If your horse consistently refuses, don't fight him.

    A veterinarian can perform the cleaning under standing sedation.

    This is not a failure on your part. Some horses simply need professional handling. The cost of a sedated cleaning is well worth avoiding a serious injury or a horse that becomes dangerous to handle.

    How Much Does It Cost: Home vs. Veterinary Cleaning

    OptionCost RangeWhat's IncludedWhen to Choose This
    DIY at home$20-$50Supplies only, your time and patienceCalm, cooperative horse with no concerning signs
    Vet visit with sedation$150-$400Full exam, sedation, professional cleaningFirst-time owners, unruly horses, any suspicious findings
    Full veterinary workup$400+Biopsies, imaging, treatmentAny mass, lesion, or suspected infection

    The DIY route makes sense for most horses. Your ongoing costs are minimal. A bottle of equine cleanser lasts months, and gloves and cloths are cheap.

    The key is knowing when to upgrade to professional care.

    Most veterinarians recommend a full reproductive exam at least once every two years, even for healthy geldings. This catches issues you might miss, including early tumors that aren't yet visible. Consider it a preventive health investment, not an expense.

    Real Scenarios: What This Looks Like in Practice

    The 14-year-old gelding who's never been cleaned and suddenly can't urinate

    Mark bought a previously neglected gelding. The horse was healthy overall, but he'd never had a sheath cleaning in his life. One day, Mark noticed the horse stretching out to urinate and producing only a thin stream.

    It was taking over a minute each time.

    The vet found a bean the size of a golf ball. It was lodged firmly in the urethral diverticulum. The vet removed it under standing sedation in about ten minutes.

    The horse urinated normally within an hour. Mark now schedules a yearly cleaning to prevent recurrence.

    The anxious racehorse who kicks: how a vet handles it under sedation

    Sarah's Thoroughbred had never been easy to handle. He was fine for farrier work but became anxious whenever anyone approached his hindquarters. She tried the at-home approach twice, and both times he pinned his ears, swished his tail, and threatened to kick.

    She called her vet, who administered a mild sedative. The horse relaxed enough for a safe, thorough cleaning. The vet also found a small sarcoid that needed monitoring.

    Sarah now schedules a twice-yearly sedated cleaning. It costs more, but it's safe and stress-free for everyone.

    The pasture-kept pony who never has buildup: why that's normal

    Jenny's Shetland pony gelding is nearly 20 years old. She's never cleaned his sheath, and as far as she can tell, he's never had a problem. Is she neglecting him?

    Not necessarily.

    Some horses naturally produce minimal smegma. Their sheath ecosystem stays balanced without intervention. For these horses, the "if it ain't broke, don't fix it" approach is perfectly valid.

    Jenny still has her vet do a yearly exam, which includes a sheath check. So far, everything looks great.

    The grey gelding with a tiny sore that turned out to be a sarcoid

    Tom's 17-year-old grey gelding had a small, pink sore near the tip of his sheath. It was barely noticeable, about the size of a dime. Tom assumed it was a minor rub and kept an eye on it.

    After a month, it hadn't changed.

    His vet biopsied the spot. It was a sarcoid, a type of skin tumor common in horses. The vet removed it surgically, and the margins were clean.

    A year later, there's no sign of recurrence. Tom credits his vigilance for catching it early.

    Maintenance and Long-Term Optimization

    How often you really need to do this

    Most geldings need a sheath cleaning once or twice a year. Some need less. Some need a bit more.

    The frequency depends on the individual horse's smegma production, his living environment, and any history of problems.

    A good approach is to check monthly, not clean monthly. Take a quick look during grooming to assess the level of buildup. When you notice significant accumulation, schedule a thorough cleaning.

    This keeps you proactive without over-cleaning.

    Seasonal and environmental considerations

    Horses in dusty or sandy environments tend to accumulate more debris in the sheath. Stall-bound horses may build up smegma faster than pasture-kept ones because they spend more time lying down in bedding. Adjust your cleaning frequency accordingly.

    After heavy rain seasons, hay and mud can increase the amount of debris that ends up in the sheath area. Pay extra attention during these times. A quick visual check can alert you to any issues before they become problems.

    Building a routine that fits your horse's lifestyle

    Consistency is better than intensity. A short, gentle check every month is more effective than a stressful, marathon cleaning twice a year. Your horse becomes accustomed to the handling and more cooperative over time.

    Incorporate sheath checking into your regular grooming ritual. When you're picking hooves or brushing the hindquarters, show him that gentle touch near the sheath is safe and non-threatening. This desensitization makes the full cleaning process much easier when you tackle it.

    Expert Tips and Pro Advice

    The gentle hands rule

    You're not scrubbing a pot. You're handling tissue that's more delicate than a newborn's skin. Use the lightest touch that gets the job done.

    If you're using enough pressure to feel resistance, you're using too much.

    If you've never done this before, start with just a visual inspection and a few gentle wipes. Build your confidence over multiple sessions. There's no medal for finishing in one attempt.

    The two-person approach for nervous horses

    Some horses are more comfortable when a trusted handler stands at their head, offering scratches and reassurance. The cleaner works from the side, avoiding standing directly behind the horse's hindquarters.

    Communication is key. The handler watches for signs of tension and signals the cleaner to pause. This approach turns a potentially stressful experience into a calm, controlled one.

    It's especially useful for young horses or those with a history of trauma.

    When to schedule professional cleanings

    If your horse is difficult to handle, if you're new to horses, or if you've never done this before, schedule a professional cleaning first. Watch the vet or an experienced tech perform the task. Ask questions.

    Learn the technique before you attempt it solo.

    The cost of one professional cleaning is a worthwhile investment. You'll learn proper technique, see what a healthy sheath looks like, and have a baseline for comparison. Many owners find that after one guided session, they're confident enough to handle it at home.

    Frequently Asked Questions

    How often should I clean my horse's sheath?

    Most geldings need cleaning once or twice a year. Some horses naturally produce minimal smegma and need even less. Clean when you notice significant buildup, not on a rigid schedule.

    Over-cleaning causes more problems than it prevents.

    Do mares need sheath cleaning?

    No. Mares don't have a sheath or a penis. Their reproductive anatomy is entirely different.

    You might notice a waxy discharge around the udder, particularly in lactating mares, but that's a separate grooming consideration with different guidelines.

    Can I use baby wipes instead of a dedicated cleanser?

    Baby wipes are not suitable for sheath cleaning. The fragrances, preservatives, and skin conditioners in them can irritate the sensitive tissue inside the sheath. Stick to warm water and a soft cloth.

    If you need more cleaning power, choose a pH-balanced equine cleanser.

    Is some smegma normal, or does it mean my horse is unhealthy?

    Small amounts of smegma are completely normal. It's a natural secretion that protects and lubricates the sheath. Problems only arise when buildup becomes excessive or causes odor, inflammation, or discomfort.

    Regular checks help you distinguish between healthy and abnormal levels.

    What if my horse kicks when I try to clean his sheath?

    Stop what you're doing and reassess. Forcing the issue will only make things worse. Start with desensitization exercises during regular grooming.

    If your horse continues to be dangerous, schedule a professional cleaning with sedation. Your safety is non-negotiable.

    How do I know if my horse has a bean?

    The only way to know for sure is to check. After cleaning the visible smegma, gently probe the urethral diverticulum with a gloved finger. You're feeling for a firm, rounded mass.

    If you find one, remove it gently. If it's too large or stuck, call your vet.

    Final Verdict: The Balanced Approach

    The golden rule: gentle, infrequent, and observant

    Sheath cleaning doesn't have to be a dreaded chore. With the right technique and mindset, it becomes a simple, routine part of your horse's health care. Clean gently.

    Clean infrequently. And always observe, because what you see during cleaning can catch early signs of serious conditions.

    A quick checklist for your next cleaning session

    • Gather your supplies before you start
    • Choose a quiet, familiar environment
    • Read your horse's body language
    • Let him drop naturally, never force it
    • Wipe gently, from base to tip, with warm water
    • Use a pH-balanced cleanser only if needed
    • Rinse thoroughly, twice at minimum
    • Check for the bean every single time
    • Dry completely before releasing your horse
    • Call the vet if anything looks, feels, or smells wrong

    Keep this list handy. The more you do it, the easier it gets. And if you ever feel uncertain, ask your vet for a demonstration.

    There's no shame in professional guidance. Your horse's health is worth it.

  • Complete Guide to How to Pull a Horse’s Mane

    Complete Guide to How to Pull a Horse’s Mane

    how to pull a horse's mane

    Image source: Bing (Web (fair-use with source credit))

    You're standing at your horse's shoulder, comb in hand, staring at a thick winter mane that looks more like a mohawk than something you could braid. You've been told to "just pull it," but nobody actually showed you how. That's why you're here, and I'm going to walk you through the whole process, step by step, so you can pull a horse's mane with confidence and without turning it into a battle.

    Here's the short version: you wrap small sections of hair around a metal comb, then pull sharply downward in one quick motion. The hair releases cleanly from the follicle, which is why the mane grows back evenly instead of looking ragged like it does after cutting. According to the United States Equestrian Federation (USEF) grooming standards, a properly pulled mane should measure 3 to 5 inches along the crest.

    As of 2026, this technique remains the preferred method across hunter, jumper, dressage, and eventing disciplines.

    Quick Answer

    Pull small sections of hair, about half an inch wide, using a metal pulling comb. Wrap the hair around the comb teeth, press with your thumb, and pull sharply downward toward the ground. One quick motion, no tugging.

    Work down the neck in even sections. Finish by trimming stray hairs with scissors. The mane should lie flat, look uniform, and measure 3 to 5 inches for braiding.

    Why Pulling Beats Cutting (and When It Doesn't)

    Pulling isn't just tradition. It's functionally superior to cutting for most show disciplines, but there are situations where scissors are the smarter call.

    What Pulling Actually Does to the Hair Follicle

    When you pull a mane correctly, you're removing entire hairs from the follicle, root and all. That's why a pulled mane grows back at staggered intervals. New hairs come in at different lengths, which creates that soft, natural thickness along the crest.

    Cutting, on the other hand, leaves the root intact and just shortens the shaft. The result is a blunt edge that looks harsh and doesn't braid well.

    Pulling also thins the mane from underneath. This is the part people forget. A thick mane isn't just long.

    It's dense. Pulling removes a percentage of the hair entirely, so what's left lies flatter against the neck. This matters for braiding because you need the mane to sit tight against the crest, not puff out like a hedge.

    The Real Reason We Do This

    Show rings have standards. In hunter and equitation classes, judges expect a neat, pulled mane that's roughly 3 to 5 inches long, uniform along the crest, and free of stray tufts. Dressage and eventing follow similar conventions.

    The pulled look signals attention to detail.

    There's also a practical angle. A pulled mane is easier to braid, stays cleaner, and doesn't tangle as badly. It also shows off the horse's neck and shoulder, which matters in conformation and turnout assessments.

    When Cutting Is Actually the Better Call

    There are times when pulling is the wrong move.

    • The mane is severely damaged or brittle. If the hair breaks instead of releasing from the follicle, you'll end up with a frayed mess. Cutting and starting fresh is kinder.
    • The horse has a skin condition. Rain rot, sweet itch, or any irritation along the crest means pulling will cause pain. Let the skin heal first.
    • You're dealing with a foal or young horse. Their skin is thinner and more sensitive. Wait until they're at least two before you start pulling regularly.
    • The mane is roached already. If someone shaved it off, there's nothing to pull. You'll need to let it grow out first.

    In those cases, use scissors or thinning shears as a temporary fix. Tell your groom or trainer what's going on so they know why the mane isn't pulled for the next show.

    What You'll Need Before You Start

    You don't need a lot of gear, but what you do need matters. Don't skimp on the comb.

    The Right Comb Matters More Than You Think

    A proper mane pulling comb has wide, sturdy teeth made of metal. Plastic combs flex and can't grip the hair effectively, which means you end up yanking instead of pulling cleanly. The teeth need to be spaced wide enough to grab a full section of hair without snapping it.

    Here's a quick look at what you'll want on hand:

    ToolPurposeNotes
    Metal pulling combGrip and pull hair from root16 to 18 teeth is the standard for most manes
    Spray bottle with waterDampen the mane slightlyHelps the hair slide through the comb
    Detangler or conditionerReduce friction and breakageUse sparingly; you don't want it greasy
    Sharp scissorsTrim stray ends afterwardFor a clean finish, not for the main job
    Gloves (optional)Protect your handsHelpful if you've got long nails or a tight grip

    Why Metal Beats Plastic

    Metal combs don't flex. That's the whole point. When you wrap hair around the teeth and pull, the comb needs to stay rigid so the tension transfers to the hair follicle, not the comb.

    Plastic bows under pressure, and you lose that clean release. Metal combs also glide through hair more smoothly, which means less pulling against the horse's skin.

    If you're buying your first comb, look for one with rounded teeth tips. Sharp edges can scratch the horse's neck. A lot of riders also like combs with a built-in blade on the end for trimming stubborn hairs, though that's a convenience feature, not a necessity.

    The Extras That Make Life Easier

    • Spray bottle: Fill it with plain water. A lightly damp mane pulls easier than a bone-dry one.
    • Detangler: If your horse has a thick or wavy mane, a few spritzes of a silicone-free detangler can cut down on breakage. Skip anything with heavy oils that'll leave residue.
    • Treats: Have a bucket of grain or a few carrots ready. You'll be rewarding patience, and it helps.
    • A helper: For the first few sessions, have someone hold the horse. It's safer for you and calmer for the horse.

    How to Read Your Horse's Mane

    Before you pull a single hair, take a look at what you're working with. Mane texture and neck shape change your approach significantly.

    Thick, Thin, Coarse, or Fine: Why Texture Changes Your Approach

    • Thick, coarse manes: These are the most common and easiest to pull. The hair is sturdy and releases cleanly from the follicle. You can pull larger sections, about a half inch, without much drama.
    • Fine, silky manes: These are tricky. The hair is slippery and tends to slip out of the comb. You'll need smaller sections and a slightly damp mane for grip. Pull gently, because fine hair snaps easily.
    • Wavy or curly manes: The hair often breaks mid-shaft instead of pulling from the root. Work in very small sections and keep the mane moist. You may need to pull a little at a time over multiple sessions.
    • Thick and dense manes: You'll be pulling a lot of hair. Plan for a longer session and take breaks so the horse doesn't get sore.

    Recognizing a Mane That's Too Damaged to Pull

    If the mane has been cut recently, you'll see blunt ends. Those won't pull cleanly because the root is still intact and the hair is short. You'll end up yanking for nothing.

    Wait until there's enough length, at least 4 inches, before you start pulling.

    If the hair feels brittle, straw-like, or splits easily, pulling will just break it. The mane will look ragged, and you'll have made things worse. In that case, trim the damaged ends, condition the mane, and let it grow out for a few months.

    The Neck Shape Factor and How It Affects Your Approach

    A horse with a thick, crested neck needs more thinning at the top to avoid that "mohawk" look. A horse with a fine, swan-like neck needs less pulling overall, and you'll want to leave more length to avoid making the neck look even skinnier.

    The rule of thumb: you're pulling to enhance the horse's natural silhouette, not to impose a generic look. A heavy-necked horse needs a shorter, thinner mane. A fine-necked horse needs a slightly longer, fuller mane to balance the profile.

    The Step-by-Step: How to Pull a Mane Properly

    Now we get to the actual process. This is where the technique lives.

    mane pulling technique

    Image source: Bing (Web (fair-use with source credit))

    Step 1: Wash and Dry (or Not, Here's the Deal)

    A clean mane pulls better. Dirt and oil make the hair slippery, which means it slides out of the comb. Wash the mane a day before you plan to pull.

    Let it dry completely. Pulling a fully dry mane is ideal because the hair has more friction.

    But here's the trick: if the mane is too dry, it can snap. So lightly dampen it with water from your spray bottle right before you start. You want the hair to be barely moist, not wet.

    Think of the texture of hair that's been air-dried after a shower, not dripping.

    Step 2: Sectioning the Mane the Right Way

    You can't just grab a handful of hair and pull. You need to work in small, even sections.

    Start at the top of the neck, just behind the ears. Take a section about half an inch wide and about as thick as a pencil. Comb it smooth first.

    Then hold the section with your non-dominant hand, pulling it away from the neck slightly so you can see what you're doing.

    The section should be about a quarter of the mane's thickness. If you grab too much, you'll pull too many hairs at once, which hurts the horse and removes too much. Too little, and you'll be there all day.

    Step 3: The Grip and Wrist Technique That Makes It Painless

    Here's where most people go wrong. You don't just grip the hair and yank. You wrap the hair around the comb.

    Take your pulling comb and slide it through the section of hair, starting at the top and moving down toward the ends. Then, with the comb resting against the neck, wrap the hair around the back of the comb's teeth. Your thumb presses the hair against the comb, holding it in place.

    Now your wrist does the work. You're going to pull the comb sharply downward, toward the horse's feet, in one quick motion. The hair should release from the follicle with a small pop.

    It's not a controlled, slow yank. It's a fast, decisive motion.

    Think of it like pulling a weed. If you pull slowly, you tear the roots and leave bits behind. If you pull quickly and cleanly, the whole thing comes out.

    Step 4: The Pull Itself, One Clean Motion, No Tugging

    The key is to commit. Hesitation makes it worse.

    When you're ready, pull the comb sharply toward the ground. The hair should release from the follicle in one motion. If it doesn't, the hair is breaking instead of releasing.

    That means either your section is too large, the hair is too dry, or you're pulling at the wrong angle.

    The angle matters. You want to pull in the direction the hair grows, which is down and slightly back toward the withers. If you pull sideways or upward, you'll snap the hair.

    Step 5: Working Down the Neck Without Losing Your Rhythm

    Move down the neck in a straight line, section by section. Don't jump around. You want to maintain an even distribution so the mane ends up uniform.

    Work from the top of the neck down to the withers. A typical full mane pull takes 20 to 45 minutes, depending on thickness. If the horse starts to fidget or shows signs of discomfort, stop and give them a break.

    Patience is faster than forcing it.

    Step 6: Finishing Touches for a Clean Line

    Once you've pulled the entire mane, take a step back and look. You'll notice stray hairs that are longer than the rest. Use your scissors to trim those.

    Don't cut the whole mane, just the stragglers.

    You also want to check for any uneven patches. If one area looks thicker than the rest, go back and pull a few more hairs.

    Some riders finish by running a damp cloth along the crest to smooth everything down. That's optional, but it looks nice for a show.

    The Visual Cues You Need to See (Not Just Feel)

    Pulling is a tactile skill, but it's also a visual one. You need to know what you're aiming for before you start, and you need to recognize when you've gone too far.

    pulled mane result

    Image source: Web (Bing) / hoodmwr.com (Web image (fair-use with source credit))

    How to Tell a Clean Pull from a Broken Hair

    When you pull a hair cleanly, it comes out from the root. The end that was in the follicle is soft and slightly bulbous. That's the natural hair root.

    When you break a hair mid-shaft, the end is blunt and often ragged. You can see this if you look at the hair after you pull it.

    Clean pulls are what you want. They're painless, and the mane grows back evenly. Broken hairs leave frayed ends that tangle and look messy.

    If you're finding broken hairs in your comb, adjust your technique. Make your sections smaller, dampen the mane more, or change your pulling angle.

    What a Balanced Mane Looks Like from the Side

    Stand to the side of your horse and look at the neck profile. A balanced, properly pulled mane follows the curve of the crest smoothly. It's shorter at the top and slightly longer toward the withers, but the transition is gradual and even.

    There should be no obvious patches where the mane is noticeably thinner or shorter. The mane should lie flat against the neck, not stick up or fan out.

    Signs Your Horse Is Uncomfortable Before They Blow Up

    Horses are good at hiding pain, but they give subtle signals before they get dangerous.

    • Ears pinned flat back: This is the first sign of irritation.
    • Tail swishing: A quick, sharp tail swish usually means "that hurt."
    • Head tossing: If the head comes up or tosses, you're pulling too hard or too much.
    • Shifting weight or stepping away: This is the horse trying to escape the situation.
    • Muscle tension along the neck: You'll see the neck muscles tighten, which means the horse is bracing.

    If you see any of these, stop and reassess. Pull a smaller section. Make sure you have a good grip.

    Check that the hair isn't wrapping too tightly around the comb. And take a break.

    The first few sessions, your horse is learning what to expect. If you make it consistently unpleasant, you'll teach them to hate it. If you're patient and careful, most horses will tolerate it surprisingly well.

    Common Mistakes That Ruin a Mane

    Even experienced riders make these errors. Here's what to watch out for, and how to fix them.

    Pulling Too Much in One Go

    The biggest mistake is grabbing a section that's too thick. You end up pulling dozens of hairs at once, which is genuinely painful for the horse and leaves a noticeable bald patch. Stick to sections about half an inch wide and as thick as a pencil.

    If you've already over-pulled an area, don't panic. The mane will grow back, but it'll look uneven for a few weeks. You can blend it by lightly pulling the surrounding areas to match.

    Breaking Hairs Instead of Pulling from the Root

    If you hear a snap instead of a clean release, the hair is breaking mid-shaft. This leaves a blunt, frayed edge that tangles and looks messy. It also means the mane won't lay flat.

    To fix this, dampen the mane more, make your sections smaller, and check your pulling angle. You should be pulling in the direction of hair growth, down and slightly back. If you're still getting breakage, the mane might be too damaged to pull.

    Consider cutting and starting over.

    Ignoring the Crest Line and Wrecking the Silhouette

    The mane isn't just hair. It's part of the horse's overall profile. If you pull too much from the top of the crest, you'll create a flat, chopped look that ruins the neck's natural arch.

    If you pull too little from the bottom, you'll leave a thick ridge that stands up.

    Stand back and look at the horse from the side as you work. You're aiming for a smooth, continuous line from the poll to the withers.

    Pulling When the Mane Is Too Dry or Too Wet

    Both extremes cause problems. A bone-dry mane snaps and breaks. A soaking-wet mane is slippery and hard to grip, which means you'll end up yanking and pulling unevenly.

    The sweet spot is slightly damp. Spray the mane lightly with water and wait a minute for it to absorb before you start pulling.

    How to Fix Mistakes Without Making Things Worse

    If you've made a mess, resist the urge to keep pulling. Step back, look at the damage, and make a plan.

    For uneven patches, pull a few hairs from the surrounding areas to blend. For broken, frayed ends, trim them with scissors. For over-pulled areas, leave them alone and let the hair grow back.

    It'll take a few weeks, but the mane will recover.

    Managing a Fidgety or Sensitive Horse

    Some horses tolerate mane pulling easily. Others act like you're asking them to walk through fire. If your horse falls into the second category, you have options.

    Why Some Horses Hate It and How to Work Around That

    Horses hate mane pulling for a few reasons. The most common is that someone did it wrong in the past, pulling too much hair or yanking roughly. The horse learned to associate the comb with pain.

    Other horses are sensitive to touch in general. They have reactive skin and flinch at the slightest pressure. And some horses are just nervous about standing still for a long grooming session.

    The fix is counter-conditioning. Take it slow. Start by just rubbing the comb along the horse's neck without pulling any hair.

    Give treats. Repeat this over several days until the horse is relaxed. Then pull a single hair.

    Treat. Stop. Build up gradually.

    Desensitization Techniques That Actually Work

    • The "treat per hair" method: One treat per pull, or per few pulls. This gives the horse a positive association.
    • The "touch and release" method: Touch the comb to the hair, then remove it. No pulling. Repeat until the horse is calm.
    • The "one and done" method: Pull one hair, then stop the session entirely. The next day, pull two. Slowly increase the number.

    Some riders find that working on a slightly tired horse helps. A horse that's had a light workout is more relaxed and less reactive than one that's fresh and full of energy.

    When to Stop and Try Another Day

    If the horse is genuinely distressed, ears pinned, tail swishing violently, dancing around, stop. Forcing it will make things worse. Take a break, try again tomorrow, or call a professional.

    Alternatives for Horses That Just Won't Tolerate It

    Not every horse needs a pulled mane. Alternatives exist, and they're perfectly acceptable in many contexts.

    • Band mane: Instead of pulling, you use small rubber bands to section the mane into braids or rosettes. The mane stays long, but it's neat.
    • Scissor cut with thinning shears: This mimics the look of pulling but is less painful. The downside is that it can look ragged if done poorly.
    • Roaching: Shaving the entire mane off. This is a dramatic look, but it's clean and requires zero daily maintenance.

    If you're not showing in a discipline that requires a pulled mane, choose the option that keeps both you and your horse happy.

    Aftercare and Maintenance

    A pulled mane needs attention to stay looking good. Here's how to keep it in shape.

    Soothing the Skin Post-Pull

    Pulling removes hairs from the follicle, which can leave the skin slightly irritated. For most horses, this is a minor issue. A quick wipe with a damp cloth is enough.

    If the skin looks red or feels hot, apply a gentle, equine-safe soothing balm. You can also use aloe vera gel, which is cooling and anti-inflammatory. Avoid anything with alcohol or harsh chemicals.

    How Often to Pull During Show Season

    A pulled mane grows back at about an inch per month. For a show-ready look, you'll want to touch it up every 2 to 4 weeks during the season.

    The exact timing depends on how fast your horse's mane grows and how short you need it for braiding. Check the mane weekly. When you see noticeable regrowth, about half an inch or more, it's time for a touch-up pull.

    Caring for the Mane Between Sessions

    • Brush gently. Use a wide-tooth comb or a soft brush. Avoid harsh pulling, which can break the hair.
    • Keep it clean. Wash the mane regularly to remove dirt and sweat.
    • Condition once a week. A light, silicone-free conditioner keeps the hair soft and prevents breakage.
    • Protect it from the elements. If your horse lives outside, consider a neck rug or a mane tamer to protect the hair from sun, wind, and rain.

    Products That Help Hair Grow Back Healthy

    Mane growth is a slow process, but you can support it with the right nutrition and care.

    Biotin supplements are the most common choice. They support hoof and hair growth. Feeding a balanced diet with adequate protein also helps.

    And regular grooming stimulates blood flow to the hair follicles, which encourages growth.

    Mane Pulling vs. The Alternatives

    Pulling isn't the only way to manage a mane. Let's look at your options side by side.

    roached horse mane

    Image source: Bing (Web (fair-use with source credit))

    Roaching vs. Pulling vs. Banding vs. Thinning Shears

    MethodLookPain LevelMaintenanceBest For
    PullingNatural, flat, braids wellModerate (if done poorly)Every 2-4 weeksHunter, jumper, dressage, eventing
    RoachingDramatic, clean shaveLowNone until it grows backWestern pleasure, polo, easy care
    BandingNeat, braided rosettesLowWeekly re-bandShowing without braiding
    Thinning shearsSoftened, shorterNoneMonthly trimHorses that won't tolerate pulling, casual showing

    Which Discipline Expects Which Look

    • Hunter and Equitation: Pulled or banded. A pulled mane is the traditional, expected look.
    • Dressage: Pulled or braided. The mane should be neat and uniform.
    • Eventing: Pulled for the dressage phase, often braided for cross-country.
    • Western: The mane can be roached, banded, or left natural.
    • Polo: Usually roached for safety and ease.

    How to Choose the Right Method for Your Horse

    Start with your discipline's expectations. If you're showing hunter, you need a pulled or banded mane. If you're just trail riding, you have more flexibility.

    Next, consider your horse's tolerance. If they can't handle pulling, use thinning shears or banding instead.

    Last, think about your time. Pulling requires regular upkeep. Roaching is a one-time event that grows out over months.

    Banding needs weekly attention.

    Costs and Time Investment

    Mane management isn't free, but it's not expensive either. Here's what to expect.

    What You'll Spend

    • Metal pulling comb: $15 to $40
    • Spray bottle: $5 to $10
    • Detangler or conditioner: $10 to $25
    • Thinning shears: $30 to $80
    • Professional grooming session: $50 to $150, depending on your area

    Most riders spend less than $100 on tools initially. The ongoing cost is just shampoo, conditioner, and the occasional replacement comb.

    How Long Each Session Takes

    A full mane pull takes 20 to 45 minutes. A light touch-up takes 10 to 15 minutes. Roaching takes about 20 minutes with clippers.

    Banding takes 30 to 60 minutes, depending on how many braids you create.

    How Often You'll Need to Do It

    • Pulling: Every 2 to 4 weeks during show season.
    • Thinning shears: Every 3 to 4 weeks.
    • Roaching: Every 3 to 4 months, as the mane grows back.
    • Banding: Weekly.

    Frequently Asked Questions

    Does pulling a horse's mane hurt?

    Yes, it causes brief discomfort, similar to a quick pluck of an eyebrow. The pain is momentary and most horses tolerate it well when done correctly. Pulling too many hairs at once or using too much force can cause genuine pain and create a negative association.

    How long does a pulled mane last?

    A pulled mane stays looking tidy for about 2 to 4 weeks. Hair grows at roughly an inch per month, so you'll notice regrowth relatively quickly. Light touch-ups every few weeks keep it show-ready.

    Can I pull a mane that's already been cut?

    Yes, but you need to wait. If the mane was recently cut, the hair ends are blunt and won't pull cleanly from the root. Wait until the mane has at least 4 inches of length before you attempt pulling.

    What if my horse has a skin condition?

    Stop immediately. If the skin along the crest is irritated, scabby, or inflamed, pulling will make it worse. Treat the underlying condition first.

    Once the skin is healthy, you can resume pulling gently.

    How do I make the mane lie flat after pulling?

    Dampen the mane lightly with water, then run a soft brush or cloth along the crest in the direction of hair growth. Some riders use a small amount of mane tamer or a light hold spray. Avoid heavy products that leave residue or make the hair stiff.

    Is there a way to pull without a special comb?

    You can technically use your fingers to pull individual hairs, but it's slower and less precise. A proper metal pulling comb gives you better grip and control. It's worth the modest investment.

    The Bottom Line: Is Pulling Right for You and Your Horse?

    Pulling a mane is a skill worth learning if you're showing in hunter, jumper, dressage, or eventing. It creates the clean, professional look that judges expect, and it makes braiding significantly easier.

    Start slow. Use the right comb. Work in small sections.

    Watch your horse's body language. And don't force it if your horse genuinely can't tolerate it. There are alternatives that look just as good.

    If you're not confident, book a session with a professional groom. Watch what they do. Ask questions.

    Most are happy to teach. Then practice on a tolerant horse until you find your rhythm. Within a few sessions, you'll be pulling manes like you've been doing it for years.

    The golden rules to remember: clean mane, slight dampness, half-inch sections, one sharp pull in the direction of growth, and a treat for a patient horse. Get those right, and you'll have a show-ready mane in under an hour.

  • Complete Guide to How to Bathe a Horse

    Complete Guide to How to Bathe a Horse

    Nobody walks into a wash stall thinking, "Today I might accidentally hurt my horse." But it happens more often than you'd think. A slippery floor, a jet of cold water at the wrong moment, or shampoo left on the skin can turn a routine chore into a vet visit.

    That's why learning how to bathe a horse properly matters. It's not about making them look pretty for a show. It's about protecting their skin, their joints, and their trust in you.

    Get it right, and bath time becomes a bonding ritual. Get it wrong, and you'll be dealing with a horse that spooks at the sight of a hose for years.

    We've pulled together the research, the equine veterinary guidance, and the practical barn wisdom to walk you through every step. By the end, you'll know exactly what to do, what to avoid, and why each detail matters more than you'd expect.

    Quick Answer

    To bathe a horse safely, use lukewarm water (60, 75°F) and a pH-balanced equine shampoo. Clean hooves first, wet the coat thoroughly, and scrub from neck to tail. Rinse until water runs completely clear.

    Scrape off excess water with a sweat scraper. Dry sensitive areas with a towel before turnout. Never spray water directly into ears, eyes, or nostrils.


    Why Bathing Your Horse Is More Than a Shine Routine

    Horses are remarkable at regulating their own body temperature and keeping their coats reasonably clean. So why bother bathing them at all?

    The honest answer is that bathing serves a few purposes that go beyond aesthetics. Sweat, especially in hot weather or after hard work, leaves behind salts and oils that clog pores and irritate skin. Ammonia from urine and manure can cause scalding on the legs and belly if left too long.

    And some skin conditions, like rain rot or dermatitis, actually thrive in the dirty, damp environment that accumulates under a heavy winter coat.

    But here's the thing. Bathing isn't like washing a car. You can't just soap it up and hose it down without thinking.

    A horse's skin is sensitive, their ears are delicate, and their natural coat oils are essential for insulation and moisture protection. Over-bathing strips those oils and leaves the coat dull and dry. Under-bathing, or doing it wrong, leaves soap residue that irritates and attracts dirt faster than before.

    horse bathing wash stall

    Image source: Bing (Web (fair-use with source credit))

    The goal is a clean, healthy coat with the natural oils intact. That means using the right products, the right water temperature, and the right technique. It also means knowing when not to bathe, because sometimes a spot clean is smarter than a full wash.

    There's also a safety layer here that most casual guides miss entirely. A 1,200-pound animal standing on wet concrete is an accident waiting to happen. Cross-ties that don't release, hoses that spook, and water that's too cold can all cause a horse to panic, bolt, or kick.

    Per the American Association of Equine Practitioners (AAEP), many common bathing injuries are entirely preventable with the right setup and approach.

    As of 2026, the standard recommendation from equine veterinarians is to bathe most horses no more than once or twice a month, depending on climate and activity level. More frequent than that, and you're doing more harm than good.


    Before You Even Turn on the Water: Pre-Bath Checks

    Your bathing routine starts long before the hose comes out. In fact, the most important steps happen before the horse even steps into the wash stall.

    Read Your Horse's Mood and Body Language

    The first thing to check is your horse's mental state. A relaxed horse stands quietly. A tense horse pins its ears, swishes its tail, or shifts its weight constantly.

    If your horse seems agitated, don't push it. Bathing a stressed horse is dangerous for both of you.

    Watch for signals like:

    • Ears pinned flat against the head
    • Tail swishing aggressively
    • Pacing or refusing to stand still
    • Flared nostrils and rapid breathing
    • Raised head with tense neck muscles

    If you see any of these, take a step back. Give the horse a few minutes to settle. Sometimes a calm voice and a treat are enough.

    Other times, you need to postpone the bath entirely. Trust your gut on this one.

    Check for Wounds, Heat, or Skin Conditions

    Before you wet the coat, run your hands over the horse's entire body. You're not grooming right now. You're checking for anything that shouldn't be there.

    Look for:

    • Cuts, scrapes, or open wounds
    • Heat or swelling in the legs
    • Lumps, bumps, or hives
    • Patches of rain rot (crusty scabs under matted hair)
    • Dry, flaky, or irritated skin

    hoof pick pre-bath check

    Image source: Bing (Web (fair-use with source credit))

    If you find an open wound, don't bathe. Soap and water will irritate it and wash away the protective barrier your horse's body is building. Instead, clean the wound separately with a vet-approved antiseptic solution and keep the rest of the horse dry.

    If you find rain rot or other skin lesions, you'll want to treat those conditionally. Bathing with a medicated shampoo (like one containing chlorhexidine or benzoyl peroxide) can help, but only if your vet recommends it. A regular bath with a standard equine shampoo can actually spread the infection to clean areas.

    Hoof Picking and Brushing: Why Skipping This Backfires

    This is the step everyone wants to skip because it's tedious. Don't.

    Hooves accumulate dirt, stones, and manure faster than any other part of the body. If you wet the horse before cleaning the hooves, all that debris turns into mud and gets redistributed across the coat. Worse, stones can become lodged in the hoof while wet, causing bruising and lameness.

    Take two minutes to:

    1. Pick out each hoof completely, from heel to toe
    2. Brush the frog to remove packed debris
    3. Check for any heat, odor, or discharge

    Then, brush the entire coat with a stiff-bristled grooming brush to remove loose dirt and loose hair. This is critical. A layer of dust on the coat acts like a barrier, preventing shampoo from reaching the skin.

    Soap lathers around the dirt but doesn't actually clean underneath it. Your horse ends up "clean" on the surface but still dirty at the skin level, and that's exactly where rain rot and dermatitis start.

    Knowing When Not to Bathe

    This might be the most important part of the entire pre-bath check.

    If the weather is cold, skip the bath. Bathing in sub-60°F weather can cause a horse to chill, especially if they're clipped or have a thin coat. The drying process takes hours, and a damp horse standing in a breeze can develop hypothermia.

    If your horse is hot from exercise, wait at least 60 minutes. Bathing a hot, sweaty horse with cool water causes blood vessels to constrict rapidly. Per veterinary guidance, this can contribute to a serious condition called exertional rhabdomyolysis, sometimes called "tying up," where muscle fibers break down. Even lukewarm water is a risk when the horse's core temperature is elevated.

    If your horse has a fever or is recovering from illness, don't bathe. The immune system is already stretched thin, and the stress of bathing can delay recovery.

    If your horse is afraid of water, don't push it. Address the fear first with desensitization training. Forcing a panicked horse into a wash stall is how people get hurt.


    Your Bathing Kit: What You Actually Need (And What's a Waste of Money)

    You don't need a wall full of fancy products to bathe a horse properly. But you do need the right basics. Here's the breakdown of what actually matters, what's worth spending on, and what you can skip entirely.

    The Essential Kit

    ItemPurposeNotes
    pH-balanced equine shampooCleans coat and skinNever use human shampoo
    Sponges (2-3)Apply shampoo and clean faceSeparate sponge for face vs. body
    Sweat scraperRemove excess waterPlastic or metal, choose flexible
    Towels (2-3)Dry sensitive areasOld towels work fine
    Rubber non-slip matSafety in wash stallEssential, not optional
    Cross-ties or long leadSecure the horseWith quick-release snaps
    Hoof pickClean hooves firstShould already be in your kit
    Detachable showerhead or hose nozzleControl water pressureAdjustable flow is ideal

    equine shampoo pH balanced

    Image source: Bing (Web (fair-use with source credit))

    The Shampoo Question: pH-Balanced Isn't a Marketing Gimmick

    A horse's skin has a pH between 5.5 and 7.0, which is mildly acidic. Human skin is closer to a pH of 4.5 to 5.5, and a typical human shampoo is formulated around that range, and heavily alkaline ones can be even higher.

    Horse skin is different. It's thinner than human skin, less acidic, and produces different oils. Using human shampoo strips away the natural protective barrier and leaves the coat brittle.

    Worse, it can cause itching and flaking because the horse's skin tries to overcompensate by producing more oil.

    Do you need to spend $30 on a boutique equine shampoo? No. But you do need a shampoo labeled specifically for horses.

    Check the label for a pH value between 5.5 and 7.0. If it doesn't list one, contact the manufacturer. A reputable brand will tell you.

    And what about dish soap? Here's the honest answer: in an absolute emergency, a tiny amount of gentle dish soap can degrease a very oily coat. But it's not a good regular choice.

    It's formulated to strip grease, and that's exactly what it'll do, leaving your horse's coat dry and dull. It costs more in the long run because you'll need conditioners to fix the damage.

    The Sweat Scraper: More Than a Squeegee

    A good sweat scraper isn't optional. It's the difference between a horse that dries in 45 minutes and one that stays damp for hours. You want one that's flexible enough to follow the curves of the horse's body but firm enough to push water off effectively.

    Plastic scrapers are lightweight and affordable. They work fine for most horses. Metal scrapers (usually aluminum) are more durable and collect water more efficiently, but they can be cold against the horse's skin in winter.

    For most situations, a plastic scraper with a comfortable handle is the best value.

    The Wash Stall Setup: Non-Negotiable Safety Items

    If you're bathing at a facility, check the wash stall before you bring the horse in. Does it have a non-slip rubber mat? Most concrete wash stalls are dangerously slick when wet.

    A moment of panic from your horse is all it takes for a fall.

    If there's no mat, either:

    1. Use a portable rubber mat (available at most feed stores)
    2. Move the bath to a covered area that has good footing

    Also, check the cross-ties. They need quick-release snaps on both ends. This means you can release the horse instantly with one hand if it panics.

    Many facilities have this already, but check anyway.

    One more thing: test the water hose before the horse is in the stall. Make sure the pressure is adjustable and that the nozzle doesn't have a sharp spray that stings. Some horses hate the feeling of high-pressure water.

    A gentle, rain-like flow is far less stressful.


    Step-by-Step: The Safe and Proper Way to Bathe a Horse

    Now that everything is ready, it's time to actually do the work. Here's the full process, broken down step by step. Follow this exactly, and you'll cover every detail that matters for safety and effectiveness.

    Step 1: Secure Your Horse Properly

    Cross-ties are the standard choice. They keep the horse centered in the stall and make it hard for them to turn and kick or bite. But cross-ties need to be set at the right height, roughly level with the horse's poll (the top of the head).

    If they're too low, the horse can push forward and feel trapped. Too high, and the horse can rear.

    For a horse that's nervous about bathing, a handler holding a lead rope might be better. The handler can move with the horse and prevent panic. But you lose the safety of being able to step away quickly.

    The golden rule: never use a single tie that can't be released instantly from where you're standing.

    Step 2: The Water Temperature Test and Initial Soaking

    Start with lukewarm water. The target range is between 60°F and 75°F. Colder than that risks chilling the horse and causing muscle tension.

    Hotter than that can scald sensitive skin and may cause the horse to step sideways or kick.

    Test the water on your own forearm first. It should feel neutral, not hot and not cold.

    Now, here's a subtle detail most people miss. Don't point the hose directly at the horse right away. Horses hate that.

    Instead, let the water run down your hand and onto the leg first. This gives the horse a moment to process the sensation. Then gradually move the spray onto the body.

    Work from the legs up. Wet the legs, then the belly, then the back, then the neck. Leave the head for last.

    This order helps the horse acclimate and prevents water from running down a dry face, which triggers a natural shake response.

    Spray at an angle, not straight on. Hold the nozzle close to the coat, not far away, which reduces the stinging sensation. If your horse flinches, pause and adjust.

    Push through a scared horse and you'll create a lasting fear of the wash stall.

    Step 3: Shampoo Application: Where to Start, Where to Avoid

    Once the coat is fully saturated, start applying shampoo.

    Pour or squirt the shampoo directly onto the horse's coat, don't dilute it in a bucket. It's easier to control where it goes and you don't waste product. Start at the neck and work backwards.

    Use your hands or a sponge to work it into a lather.

    Important: use a separate sponge for the body and the face. The face sponge stays clean and gentle. It's also a good idea to use a dedicated sponge for the delicate areas around the genitals and anus, or at least rinse your body sponge thoroughly before using it there.

    Soap in those areas is irritating.

    The areas to avoid with shampoo concentrate:

    • Eyes
    • Nostrils
    • Ears (inside)
    • Genital area and under the tail

    For those sensitive spots, use a lightly soaped sponge and rinse extremely well.

    Scrub in a circular motion. This lifts dirt and dead skin more effectively than a straight swipe. Pay extra attention to the mane, tail base, and the creases behind the elbows and between the hind legs.

    These are the areas where sweat accumulates most.

    Step 4: The Face and Head: The Sponge Method That Prevents Panic

    There's one ironclad rule for the head: never spray water directly at the face. Some horses tolerate a gentle spray over the neck and poll, but once water hits the eyes or nostrils, you lose all trust.

    The safe method:

    1. Dip the face sponge in clean, lukewarm water. Wring it out so it's only damp, not dripping.
    2. Wipe around the eyes, the muzzle, and the cheeks.
    3. To clean the face, use the same sponge, dabbed lightly in diluted shampoo.
    4. Rinse the sponge thoroughly, then wipe the face again to remove all soap residue.

    Never apply shampoo directly to the face. The dilution rate on most equine shampoos is designed for body use, not for the delicate, thin-skinned areas around the eyes and nostrils.

    If your horse is really nervous about face contact, skip the face entirely during the bath. Use a damp cloth after the bath to clean it separately. A clean horse with a dirty face is better than a panicked horse that learns to resist future baths.

    Step 5: Rinsing Until Truly Clean

    This is the step that separates the good baths from the bad ones. Soap residue is a problem for a few reasons:

    1. It dries flaky and looks like a skin condition
    2. It attracts dirt and dust immediately after the bath
    3. It traps moisture against the skin, which is the perfect environment for fungus (like rain rot)
    4. It can cause itching and rubbing

    So how do you know you've rinsed enough? The water running off the horse should be completely clear. Not cloudy, not sudsy.

    Clear.

    Plan on rinsing for twice as long as you spent scrubbing. Literally. If you scrubbed for 10 minutes, rinse for 20.

    This sounds excessive until you run your hand along the horse's coat and feel the slippery residue that remains. That's soap. Keep rinsing.

    Spray from the top down and let gravity do the work. The belly and the legs need extra attention because soap runs down and collects there.

    Step 6: Sweat Scraping Technique That Gets the Job Done Fast

    sweat scraper technique

    Image source: Bing (Web (fair-use with source credit))

    The sweat scraper is your best tool for shortening drying time and preventing chills. Here's the proper technique.

    Hold the scraper in both hands and pull it firmly from the top of the neck down to the croup, following the direction of the hair. You're trying to push water off the coat, not scrape the skin. Apply enough pressure to make contact but not so much that the horse feels the edge digging in.

    Work in overlapping passes. Start at the neck, then the shoulders, then the back, then the hindquarters. Don't forget the sides.

    The scraper works best when the coat is wet but not soaked, so scrape as soon as you're done rinsing.

    A tip from professional grooms: scrape the legs with a lighter touch. The skin there is thinner and more sensitive. Most horses tolerate it fine, but you don't need to be aggressive to get the water off.

    After scraping, you should have removed about 70% of the water. The remaining 30% will dry naturally, but you can speed that up with towels.

    Step 7: Drying: Towels, Airflow, and When It's Safe to Turn Out

    Drying isn't just about comfort. It's a health issue. A horse that goes out with a wet coat in cool weather can develop chills and stiffness.

    A wet coat in warm weather can trap heat and cause overheating.

    Use towels to dry the sensitive areas first:

    • The face and ears
    • The legs, especially the lower legs and pasterns
    • The belly and between the hind legs
    • The mane and tail base

    A second towel can be used for the body to remove the final layer of moisture. Don't rub hard, pat and press the towel to absorb water without roughing up the hair.

    Then, lead the horse to a dry, well-ventilated area. A run-in shed or a breezy aisle works best. Let the coat finish air-drying naturally.

    If the weather is cold, throw a cooler or a light blanket over the horse until the coat is fully dry.

    As for turnout: wait until the coat is completely dry. This can take 30 minutes in summer and several hours in winter. The quickest way to know if the horse is dry?

    Run your hand under the hair against the grain. If you feel moisture near the skin, it's still damp. Wait longer.

    Turning out a wet horse rolls in the mud instantly, negating the entire bath. It also increases the risk of rain rot and skin irritation. Patience pays off here.


    Common Mistakes That Hurt Your Horse (And How to Avoid Them)

    Even experienced horse owners slip up sometimes. The difference between a minor oversight and a costly mistake often comes down to knowing what to watch for. Here are the most common bathing errors we see in barns across the country, and exactly how to avoid them.

    Bathing Too Often and Stripping Natural Oils

    We touched on this earlier, but it deserves its own spotlight because it's the most widespread mistake. A horse's coat has a natural oil barrier called sebum. It repels water, traps heat, and keeps the skin supple.

    Every full bath washes some of it away. The coat needs time to regenerate.

    How often is too often? Most equine veterinarians recommend a full bath no more than once every 7 to 14 days during peak season. Some horses, particularly those with sensitive skin, shouldn't be bathed more than once a month. If you're showing frequently, consider spot cleaning between baths and doing a full wash only when truly necessary.

    Signs you've over-bathed your horse:

    • Coat looks dull or dusty even after grooming
    • Skin appears flaky or dandruff-like
    • Horse rubs against fences and walls frequently
    • Hair feels brittle or straw-like

    If you catch these signs, stop bathing for two to three weeks. Add a coat conditioner or a light coat oil to help restore the barrier. Most horses recover fully with just a break from the wash stall.

    Ice-Cold Water and the Tying-Up Risk

    The phrase "cold water bath" sounds refreshing on a hot summer day. And for a horse that's just finished a hard workout, it might feel good in the moment. But it's a serious risk that doesn't show up until hours later.

    Cold water causes blood vessels to constrict rapidly. This limits blood flow to the muscles, which is the opposite of what a post-exercise horse needs. Muscles that are already working hard to recover suddenly get less oxygen.

    This can trigger a painful condition called exertional rhabdomyolysis, commonly known as "tying up."

    The safest approach: If you need to cool a hot, sweaty horse, use lukewarm water, not cold. You're not trying to chill the horse's core temperature instantly. You're trying to remove sweat and help the body cool gradually.

    Per the American Association of Equine Practitioners (AAEP), rapid cooling with ice-cold water can actually cause more harm than good in some horses.

    What to do instead:

    1. Walk the horse to cool down gradually before any bathing
    2. Use lukewarm water to rinse off sweat
    3. Scrape the water off immediately to prevent chilling
    4. Let the horse dry in a shaded, breezy area

    If you notice stiffness, sweating, or reluctance to move within 24 hours of a bath, call your vet. Tying up is treatable, but early intervention matters.

    Leaving Soap Residue That Causes Sunburn and Itching

    Here's the scenario: you scrubbed, you rinsed, you think you're done. But as the horse dries, you notice white flaky patches forming on the coat. That's not leftover shampoo foam.

    That's soap residue drying on the hair and skin.

    Soap residue causes several problems:

    1. It traps heat and moisture, creating the perfect environment for fungal growth
    2. It leaves a residue that attracts dust instantly
    3. It can cause a chemical reaction with sun exposure, leading to a sunburn-like irritation on sensitive skin

    The 2x rinse rule: Rinse for twice as long as you scrubbed. This isn't just a nice convention, it's the standard that professional groomers use. When you think you're done, run your hand down the horse's coat and squeeze gently.

    If you feel any slipperiness, that's soap. Keep rinsing until the coat feels squeaky clean.

    Pressure Washing Your Horse's Ears

    The ears are the most delicate part of a horse's anatomy. The internal structures are incredibly sensitive, and a direct blast of water at high pressure can damage the eardrum and cause lasting hearing issues.

    Equally concerning, water trapped inside the ear canal creates a warm, dark environment where bacteria and fungus thrive. Ear infections in horses are notoriously difficult to treat. They require veterinary intervention and frequent cleaning, and the horse can become head-shy in the process.

    The ear rule: Never spray water directly into the ears, ever. Even a gentle flow can cause issues if the nozzle is held too close. To clean the ears, use a damp cloth or a cotton ball with a vet-approved ear cleaner.

    Wipe the outer folds only. Do not push anything deep into the ear canal.

    If water accidentally gets in the ears despite your precautions, gently wipe the outer ear with a clean towel and monitor for signs of infection for the next few days. Head shaking, scratching at the ears, or a foul odor indicate a problem that needs a vet.

    Rushing the Dry Phase

    A wet horse is a vulnerable horse. Damp skin loses heat rapidly, even in warm weather. A horse turned out with a damp coat can develop chills, stiffness, and increased susceptibility to respiratory infections.

    In wet, humid conditions, a constantly damp coat also invites fungal growth like rain rot.

    The dry check: Run your hand under the coat against the grain, right at the skin level. If you feel any moisture, the horse isn't dry. Wait longer.

    Tips for faster drying:

    • Use a second sweat scraper pass to remove more water
    • Use a clean, dry towel to press and absorb moisture from the legs
    • Walk the horse in hand in a sunny, breezy area to promote airflow
    • For cold weather, use a cooler to trap body heat and wick moisture away

    Never call a bath done just because the top layer of hair looks dry. The skin underneath matters more.


    Hot Days, Cold Days, Show Days: When Bathing Frequency Changes

    Bathing isn't a one-size-fits-all routine. Your climate, your horse's workload, and the season all change how often and how aggressively you should wash.

    Summer Bathing: Cooling, Sweat Removal, and Heat Management

    Summer is the most common bathing season for most horse owners. That makes sense. The heat causes sweating, and sweat removal is one of the primary reasons to bathe.

    But here's the nuance: in extreme heat, a full bath can actually trap heat. When you wet a horse's coat completely and then scrape off the water, the remaining moisture evaporates. Evaporation is a cooling process, so that's good.

    But if you cover the horse's back with a cooler to dry it, you're sealing in heat.

    The summer bathing protocol:

    • Use lukewarm water, even on hot days. Cold water shocks the system
    • Focus on the sweat-prone areas: the neck, the flanks, between the hind legs
    • Scrape thoroughly to prevent a heavy water layer that heats up in direct sun
    • Let the horse dry in shade, not direct sun, to avoid overheating

    For horses that work hard daily, a rinse without shampoo in between full baths works well. Just water and a sweat scraper. That removes sweat without stripping the coat oils.

    Winter Bathing: When to Skip It and What to Do Instead

    Winter bathing is a different beast entirely. Cold temperatures, long coats, and a horse's natural ability to regulate body heat make full baths risky.

    The winter rule of thumb: If the temperature is below 45°F, skip the full bath entirely. A horse with a wet coat and a cold wind can develop hypothermia rapidly. It's not worth the risk.

    What to do instead:

    • Use waterless equine shampoo for spot cleaning muddy legs and stains
    • Use a damp cloth for the face and sensitive areas
    • Groom more frequently to manage dust and dander
    • Use hoof dressing to keep the hooves healthy without washing

    If you absolutely must bathe during a winter warm spell, do it in a heated indoor wash stall, then dry the horse completely before leading them outside. This isn't a luxury. It's a safety requirement.

    Show Prep: The 48-Hour Timeline for a Competition-Ready Coat

    Getting a horse show-ready isn't about one bath. It's a multi-day process that culminates in the wash stall.

    The 48-hour show prep timeline:

    • Day 1 (arrival): Wash the horse thoroughly to remove travel grime and sweat. This also helps settle the coat after trailering
    • Day 2 (day before the show): Spot clean any dirty areas, especially the white socks and the tail. Brush the coat to bring out shine
    • Show day: Light rinse in the morning with cool water, just to freshen. Apply a coat gloss or finishing spray

    The key insight here is that a full bath the day before the show leaves the coat with a natural oil layer that makes it shine. A bath on show day can leave the coat looking flat and washed out. Plan accordingly.

    For horses that sweat heavily during events: bathe after each event. Use a cool water rinse to remove sweat and then scrape immediately. A horse that keeps a sweaty, damp coat for hours is more likely to develop skin irritation.

    Post-Exercise Bathing: The Waiting Period and Why It Matters

    This deserves special attention because it's the most commonly mishandled scenario.

    When a horse finishes a hard workout, its muscles are hot and full of waste products like lactic acid. The horse's body is actively trying to flush these out through the bloodstream and sweat. Bathing too soon disrupts this process.

    The waiting rule: Wait at least 45 to 60 minutes after intense exercise before bathing. During this time, walk the horse to cool down gradually and offer fresh water. Only after the horse's breathing and heart rate return to normal should you consider a bath.

    Even then, use lukewarm water. A "cooling bath" with cold water on a hot horse can cause muscle spasms and increase the risk of tying up.

    The safer alternative: Use a sweat scraper on a dry coat first. This removes excess sweat without any water. Then, if needed, do a lukewarm rinse focusing on the sweat lines and the saddle area.

    Skip the full shampoo bath unless the horse is excessively dirty.


    Waterless Alternatives: When a Full Bath Isn't the Answer

    Sometimes, a full bath is the wrong choice. Maybe the weather is too cold. Maybe the horse is injured or recovering from illness.

    Maybe you simply don't have access to a wash stall. Waterless alternatives exist for all these situations, and they're more effective than most people realize.

    No-Rinse Shampoos and Foams: How They Work and When to Use Them

    Waterless equine shampoos come in two main forms: spray-on foams and foam applicators. They work by chemically binding to dirt and oil, allowing you to wipe them away with a cloth without water.

    When to use them:

    • Cold weather when a full bath is risky
    • Between full baths to manage sweat buildup
    • For horses that are nervous or resistant to water
    • For quick touch-ups before a vet visit or a show
    • For elderly or injured horses that can't stand safely in a wash stall

    How to use them properly:

    1. Brush the coat first to remove loose dirt
    2. Apply the foam or spray generously to the dirty area
    3. Work it in with a soft brush or your hands
    4. Wipe away with a clean, dry cloth
    5. Repeat as needed for heavily soiled areas

    You won't get a fully clean coat with waterless shampoo. But you'll get a clean-enough coat without the risk of a cold bath. For most situations, that's more than adequate.

    Spot Cleaning for Muddy Legs and Messy Tails

    Muddy legs and manure-stained tails are the two most common spots that need attention between baths. Both respond well to targeted cleaning without a full wash.

    For muddy legs:

    • Wait for the mud to dry completely
    • Brush it off with a stiff-bristled brush
    • Use a damp cloth to wipe away the remaining dust
    • Apply a hoof dressing if the legs were wet for a long period

    For a stained tail:

    • Wet the tail with a damp sponge
    • Apply a small amount of equine shampoo directly to the stubborn stain
    • Work it in with a tail brush
    • Rinse thoroughly with the sponge
    • Repeat as needed

    The tail is made of coarse hair that holds stains. It also takes a long time to dry, so avoid over-saturating it in cold weather.

    Sponge Baths for Elderly or Injured Horses

    Older horses and those recovering from injury often can't stand in a wash stall safely. They may have arthritis, balance issues, or recent surgery. For these horses, a sponge bath is the kindest and safest option.

    The sponge bath method:

    1. Fill a bucket with lukewarm water and add a small amount of equine shampoo
    2. Use a clean sponge to wipe the horse down, working from the neck back
    3. Use a second bucket of clean water to rinse the sponge and the coat
    4. Dry thoroughly with towels, especially the legs and belly

    Take your time. A sponge bath covers less area per pass than a hose, so budget 15 to 20 minutes for the entire process. The goal is gentle cleanliness, not speed.

    When not to sponge bath: If the horse has open wounds or a skin condition that requires specific veterinary treatment, don't add any products without consulting your vet first.

    The Trade-Off: When Clean Enough Beats Spotless

    Let's be honest with ourselves. A horse doesn't need to sparkle every day. The obsession with constant bathing is more about human preference than equine health.

    The healthiest coat is one that's clean enough, well-groomed, and protected by natural oils.

    So how do you know when "clean enough" is fine?

    Often, it's fine when:

    • The coat looks uniform in color without dirt patches
    • The horse doesn't smell strongly of sweat or manure
    • The skin under the coat is free of debris
    • The horse doesn't rub or itch excessively

    It's not fine when:

    • Sweat lines are visible against the skin
    • Mud is caked into the coat
    • There's a strong odor of ammonia or manure
    • There are signs of skin irritation or infection

    For most horses, a full bath every 7 to 14 days plus regular grooming is the sweet spot. Between baths, spot cleaning handles the messes that come up. This schedule protects the coat's natural oils while keeping the horse genuinely clean.


    After the Bath: Coat Care, Fly Spray, and Leg Maintenance

    The bath might be over, but the work isn't done. What you do in the hour after bathing significantly affects your horse's comfort, health, and coat condition over the coming days.

    Applying Conditioners and Coat Enhancers

    If you bathe regularly and want to maintain coat shine, a leave-in conditioner or coat enhancer is worth considering. These products help restore moisture stripped by soap and create a smooth surface that reflects light, making the coat look glossy.

    Types of coat conditioners:

    • Spray-on leave-in conditioners: easiest to apply, good for daily or post-bath use
    • Rinse-out conditioners: applied after shampoo, rinsed away after a few minutes
    • Coat oils: applied sparingly to the coat or added to the feed

    When to use them: Most horses benefit from a conditioner every 2 to 4 baths, not every single time. Horses with naturally dry coats or sensitive skin may need it more often. Horses with naturally oily coats might need it less.

    Application tip: Apply conditioner to a clean, damp coat after the final rinse. Work it in with your hands, then towel dry. This seals in the moisture and cuts down on drying time.

    Fly Spray Timing: Why You Need to Wait for a Dry Coat

    This is a mistake we see constantly. The horse is fresh out of the wash stall, and the owner immediately sprays on fly repellent. The problem?

    Water and oil-based fly sprays don't mix. The spray slides right off the wet coat with the water, leaving the horse unprotected and wasting expensive product.

    The fly spray rule: wait until the coat is completely dry. Usually 30 to 60 minutes, depending on temperature and humidity.

    If the coat is damp and the flies are bad, use an alternative method. A fly sheet offers immediate protection that doesn't depend on coat condition. You can also use a spray-on fly wipe or a natural repellent that's designed for application on damp coats.

    A note on spray coverage: Fly spray works best when applied with a sponge or cloth rather than a direct spray. Direct spray saturates one spot and leaves everything else uncovered. A light application over the entire body, paying special attention to the legs, belly, and face, is far more effective.

    Leg Wraps and Drying Sensitive Areas

    The lower legs are the slowest to dry. The skin there is thin, the hair is shorter, and the pasterns and heels stay damp for hours if you don't help them along. A horse that stands in damp leg wraps develops a condition called "scalded heels" or pastern dermatitis, which causes pain and sensitivity.

    The leg-drying protocol:

    1. Towel dry the legs immediately after the bath
    2. Let the legs air dry completely before applying any wraps or boots
    3. If you must wrap, use a thin layer of cotton under the wraps to absorb any remaining moisture
    4. Check the legs 30 minutes after wrapping to ensure they're not sweating inside

    When to wrap: Only wrap if the horse has a specific need, like a run, a strain, or a cut that needs protection. Healthy legs don't need wraps after a routine bath. Let them breathe.

    Monitoring for Skin Reactions Post-Bath

    Even with the right products, some horses react to bathing. New shampoos, hard water, or a soap residue that wasn't fully rinsed can all trigger irritation.

    What to watch for over the 24 hours after a bath:

    • Hives or raised bumps
    • Excessive itching or rubbing against walls
    • Redness or flaking on the skin
    • Any swelling or heat in the legs
    • Sensitivity to touch in specific areas

    If you notice any of these, the issue is usually one of three things: soap residue, a product reaction, or a water temperature issue. Rinse the horse thoroughly with clean, lukewarm water to remove any remaining product. If the reaction persists beyond 24 hours, call your vet.

    A small percentage of horses are allergic to certain shampoos, often the fragrance or preservatives. If this happens, switch to a hypoallergenic or fragrance-free equine shampoo for future baths.


    Bathing Troubleshooting: When Things Go Wrong

    Even with the best preparation, things can go sideways in the wash stall. Horses are unpredictable, and their reactions can shift from day to day. Here's how to handle the most common problems that arise during a bath.

    Your Horse Kicks in the Wash Stall

    Kicking in a wash stall is dangerous. It can injure you, damage the stall, and escalate into a full panic. The first step is figuring out why it's happening.

    Common triggers:

    • Cold water hitting the belly or hind legs unexpectedly
    • Soap getting into a sensitive area
    • A previous bad experience with bathing
    • The cross-ties being too tight or too loose
    • A slippery floor that makes the horse feel unstable

    If your horse kicks, stop what you're doing immediately. Step away from the hind end and give the horse a moment to settle. Pushing through the behavior only reinforces it, the horse learns that kicking makes the water stop, which is exactly what it wants.

    The fix: Go back to basics. Desensitize the horse to each part of the bathing process separately. Start with the hose running at low pressure, positioned far away.

    Reward calm behavior with a treat. Gradually move closer over multiple sessions. If the horse kicks when you approach the hind legs, focus on that area with a sponge instead of a hose spray.

    Some horses never fully tolerate water on the hind end, and that's okay. Work around their comfort zone.

    If the kicking is consistently aggressive rather than a startled reaction, consult a professional trainer. A horse that has learned to kick during baths needs a structured desensitization program that you shouldn't attempt alone.

    Your Horse Refuses to Step Into the Wash Stall

    Some horses plant their feet at the stall entrance and refuse to move forward. This is usually a fear response tied to a specific memory. Maybe a slip.

    Maybe a loud noise. Maybe a painful wash.

    What not to do: Don't use a lead rope to yank the horse forward. Don't stand behind and push. This sets up a fight you're probably going to lose, and you'll reinforce the horse's belief that the wash stall is a bad place.

    What to try instead:

    1. Lead the horse in with a calm, relaxed attitude. If you're tense, they'll sense it
    2. Ask the horse to step one foot in and reward immediately with a treat
    3. Build up from one foot to two feet to four feet over several sessions
    4. Sometimes turning the horse in a circle near the entrance and then asking them to step in redirects their focus
    5. Try a different wash stall if one is available. Some horses associate a specific stall with a bad memory

    If the horse is genuinely terrified, try a full desensitization practice, sometimes called "washing the stall." Lead the horse in and out repeatedly without any water. Once they're comfortable just being in the stall, introduce the sound of running water from a distance. Then move the hose closer.

    Then introduce a gentle water flow on their legs.

    Your Horse Won't Let You Near Their Legs

    This is common in horses with past leg injuries or a bad experience with farrier work. They associate anything touching their legs with pain.

    The approach:

    • Start by touching the shoulder, then gradually move down the leg
    • Use a long-handled brush or a sponge on a stick if the horse is nervous about hands near the legs
    • Reward calm behavior with treats
    • Never chase a horse's leg with a spray nozzle. It feels unpredictable and threatening
    • Use the sponge method for the legs instead of the hose

    The underlying goal is rebuilding trust. That takes time, sometimes weeks. Don't rush it.

    A horse that can tolerate leg handling calmly is a safer horse in every situation, not just during baths.

    Your Horse Is Terrified of the Sound of Running Water

    This one is often overlooked because it seems trivial. But the hiss of a hose or the spray of a nozzle can trigger a deep fear response. It sounds like a snake, and horses are wired to be wary of snakes.

    The desensitization plan:

    1. Turn the water on at the lowest possible pressure, far from the horse
    2. Reward the horse for standing calmly while the water runs
    3. Over multiple sessions, move the water source gradually closer
    4. Use a spray bottle at the horse's feet before graduating to the hose
    5. Pair the water sound with a valued treat, like grain or carrots, so the horse creates a positive association

    Some horses accept a bucket of water and a sponge much faster than a hose. There's no shame in using the bucket method for baths, especially for a horse with a strong water fear. The sponge bath gives you the same clean horse without the stress.


    The Cost of Bathing: What You'll Spend on Products and Equipment

    Bathing a horse is one of the more affordable grooming tasks, but the costs do add up if you're buying everything at once. Here's a realistic breakdown of what you'll spend.

    One-Time Equipment Costs

    These are the items you buy once and use for years, assuming you take care of them.

    ItemPrice RangeLifespan
    Rubber non-slip mat (4×6 ft)$40-$803-5 years
    Sweat scraper (plastic)$10-$202-4 years
    Sweat scraper (metal)$20-$355+ years
    Sponges (pack of 4)$10-$153-6 months (replace regularly)
    Towels (old or new)$0-$20Indefinite
    Hose nozzle with adjustable flow$15-$302-3 years
    Cross-ties (pair)$20-$403-5 years
    Quick-release snaps$5-$102-3 years

    Total one-time investment: $120 to $250, depending on what you already own.

    Recurring Product Costs

    These are the things you'll replace regularly, usually every 1 to 3 months.

    ProductPrice RangeHow Long It Lasts
    Equine shampoo (32 oz)$15-$306-10 baths
    Waterless shampoo (16 oz)$15-$2510-15 spot cleans
    Coat conditioner (32 oz)$15-$256-8 baths
    Fly spray (32 oz)$15-$252-4 weeks in summer
    Hoof dressing$10-$202-3 months

    So, expect to spend about $50 to $80 per month on ongoing products during peak bathing season. That drops significantly in winter when you're not bathing as often.

    The Hidden Cost of Cheap Products

    It's tempting to grab the $8 shampoo at the feed store. But here's what our research shows: cheap shampoos often use harsher surfactants that strip the coat more aggressively. You end up spending more on conditioners and coat oils to repair the damage.

    A mid-range equine shampoo is the better value in the long run.

    The same logic applies to sponges. A $2 sponge starts falling apart after a few washes and leaves bits of foam stuck in the horse's coat. A $5 sponge lasts three times as long and does a better job of lifting dirt.

    Buy the better sponge.

    Where to Save Money

    • Use old towels from home instead of buying equine-specific ones
    • A plastic sweat scraper works fine for most horses
    • Buying shampoo in bulk (64 oz or larger) cuts the cost per wash by 30-40%
    • Mix your own fly spray using the recipe your vet recommends, if they have one
    • Skip the branded "wash stall bucket" and use a $5 feed bucket instead

    Where Not to Save Money

    • Never buy a non-slip mat that's too thin or too small. A proper mat is 3/4 inch thick and covers the full wash stall floor
    • Don't use human shampoo to save a few bucks. The skin irritation and dull coat are worse than the cost difference
    • Don't skip the quick-release snaps on cross-ties. They're a safety feature, not an accessory

    Water Quality and Temperature Management

    The water you use for bathing matters more than you might think. Hard water, cold water, and inconsistent pressure all create problems that are hard to diagnose.

    Hard Water vs. Soft Water

    Hard water is water with high mineral content, primarily calcium and magnesium. If you live in an area with hard water, you've probably noticed white scale buildup on your faucets. That same mineral content affects horse bathing.

    The problem: Hard water doesn't lather as well. The minerals bind to the soap and reduce its cleaning power. This means you use more shampoo and still get a dull coat.

    Worse, the mineral residue left behind can make the coat feel stiff and look dusty.

    The fix: If you're dealing with hard water, consider a water softener for your barn's wash stall. A simpler workaround is to use a clarifying shampoo once a month to strip mineral buildup, followed by a heavy conditioner. You can also rinse with a vinegar solution, one cup of white vinegar per gallon of water, to dissolve mineral residue and restore shine.

    Water Pressure and Horse Comfort

    High water pressure might seem like your friend when you're trying to rinse a thick winter coat. But most horses disagree. A high-pressure spray stings the skin and feels unpredictable.

    Some horses tolerate it for a while, then spook mid-bath.

    The target pressure: Look for a nozzle with an adjustable flow that lets you switch between a gentle rain and a wider fan. A setting that delivers water at about 2 to 3 gallons per minute is plenty for most baths. You want the water to run off the coat, not force its way through it.

    For horses with thinner coats, use even less pressure. Sensitive areas like the face, the belly, and the inner hind legs respond best to a soft flow.

    Testing the Temperature Every Time

    Water temperature isn't something you set once and forget. It changes based on the ambient temperature, the length of the hose, and how long the water has been running. A hose sitting in the sun can deliver near-scalding water in the first 30 seconds.

    The habit to build: Test the water on your own forearm before you point it at the horse. Do this every single time you pick up the nozzle, even if you just checked a minute ago. The water that comes out in the first few seconds is different from what comes out after the hose has been running for a while.

    The seasonal adjustment: In summer, your target is 60 to 70°F. In winter, if you're bathing indoors with heat, you're aiming for 70 to 75°F. Never use hot water to compensate for cold barn air.

    That shocks the horse's system.

    Managing Rinse Water Runoff

    One practical concern that gets overlooked: where does the rinse water go? A typical bath uses 20 to 40 gallons of water, and all of that runs down the wash stall drain. If your barn has poor drainage, the water pools under the horse's feet, creating a slippery and unsanitary environment.

    The fix: Check that your wash stall drain is clear before you start. Use a drain strainer to catch hair and dirt, and clean it out after each bath. If the stall doesn't drain well, you can raise the horse's feet slightly by adding a second mat or a layer of rubber pavers.

    This gives the water a path to run off rather than collecting under the hooves.


    Senior Horses and Special Needs

    Bathing a senior horse or one recovering from injury requires extra thought. Their bodies are less forgiving of cold water, hard floors, and long sessions in the wash stall.

    Arthritis and Joint Stiffness

    Older horses frequently deal with arthritis. Standing on a hard concrete wash stall floor for 30 minutes is genuinely painful for them. This isn't just a comfort issue, it's a safety issue.

    A horse in joint pain is more likely to shift its weight, step sideways unexpectedly, or even fall.

    The adjustments:

    • Use double mats or the thickest non-slip mat you can find
    • Keep the bath shorter, under 15 minutes if possible
    • Use warm water, at the higher end of the safe range (70-75°F)
    • Skip the legs entirely if the horse is stiff, spot clean them instead
    • Schedule baths for after the horse has warmed up with some walking

    Respiratory Concerns

    Some senior horses have underlying respiratory conditions. The fine mist from a hose can aggravate those issues. The stress of bathing can also cause heavy breathing that puts strain on their system.

    The adjustments:

    • Use a lower-pressure spray that produces larger droplets
    • Keep the water away from the face and nostrils
    • Watch for signs of distress: flared nostrils, labored breathing, or excessive coughing
    • Shorten the overall bathing time

    Skin Sensitivity and Medication

    Older horses often have thinner, more sensitive skin. They bruise more easily and react more strongly to harsh chemicals. If the horse is on any topical medication, bathe around the treatment area rather than washing it directly.

    The adjustments:

    • Use a gentle, hypoallergenic equine shampoo
    • Test a small area first before doing a full-body wash
    • Rinse even more thoroughly than usual to remove every trace of soap
    • Apply a coat conditioner after every bath to support the skin barrier

    The Towel Drying Advantage for Seniors

    Anything you can do to cut down on the drying phase helps a senior horse. Their systems don't regulate heat as well, and a long, cold drying period can leave them stiff for days.

    The protocol:

    1. Use two sweat scrapers in a row to remove as much water as possible
    2. Towel dry the legs and the belly immediately
    3. Apply a cooler or a warm blanket as soon as the scraping is done
    4. Walk the horse in a warm, sheltered area until completely dry

    Advanced Bathing Techniques: Mane and Tail Care, Whitening, and Medicated Washes

    Once you've mastered the basics, there's another layer of technique that separates a functional bath from a truly professional one. These advanced approaches tackle specific problems, from yellowed tails to persistent skin conditions that regular shampoo can't fix.

    The Mane and Tail Deep-Clean Method

    Manes and tails collect more dirt than any other part of the horse. They're also the slowest to dry and the easiest to damage with aggressive washing. A rough scrub breaks the hair shafts and creates split ends, which makes the mane look frizzy and the tail look thin.

    The proper technique for a tail:

    1. Wet the tail thoroughly, but don't soak the dock. Wet hair at the root can cause skin irritation
    2. Apply shampoo directly to the hair, working it into a lather from the top down
    3. Use a tail brush or your fingers to work the soap through. Start at the bottom and work up to avoid tangling
    4. Rinse from the top down, letting the water run through the hair. This flushes out all the soap
    5. Apply a leave-in conditioner or detangler while the tail is still damp

    The proper technique for a mane:

    1. Wet the mane, then apply shampoo along the crest
    2. Work it in with your fingers, not a brush, to avoid pulling hair out at the root
    3. Rinse thoroughly, making sure no soap sits near the base
    4. Apply a light conditioner and comb through with a wide-toothed comb

    The drying factor: Both the mane and tail take two to three times longer to dry than the body. In cold weather, this is a genuine risk factor. If you bathe in winter, blow-dry the mane and tail on a low, cool setting or skip washing them entirely.

    Whitening Shampoos for White Socks and Marks

    White markings on a horse, whether a star on the forehead or a set of four white socks, stain easily. Manure, urine, and mud all leave yellow or brown residue that standard shampoo can't lift.

    How whitening shampoos work: They contain optical brighteners, compounds that absorb ultraviolet light and re-emit it as visible blue light. This counteracts the yellow tint and makes the white hair appear brighter. They don't actually remove the stain as much as they neutralize its appearance.

    When to use them: For show preparation or when the horse needs to look polished. They're not for everyday bathing. Used too often, the brighteners can make white hair brittle and dry.

    The application: Apply the whitening shampoo directly to the white areas and let it sit for 3 to 5 minutes before scrubbing. Use a soft brush to work it into the stain. Rinse thoroughly, then check the result.

    Some stains need a second application.

    The natural alternative: A paste made from baking soda and water applied to the white areas and left for 10 minutes before rinsing can lift many stains. This is gentler on the hair than chemical brighteners and works surprisingly well on urine stains on the legs.

    Medicated Shampoos: When Standard Products Aren't Enough

    Some skin conditions require targeted treatment. These aren't cosmetic issues. They're veterinary-grade problems that need specific active ingredients.

    ConditionActive IngredientHow It Works
    Rain rotChlorhexidineKills bacteria and fungi on contact
    Fungal infectionsMiconazole or ketoconazoleDisrupts fungal cell membranes
    Itchy skin (pruritus)Oatmeal or hydrocortisoneSoothes and reduces inflammation
    Greasy heelBenzoyl peroxideDries out excess oil and kills bacteria
    DandruffSulfur or salicylic acidExfoliates dead skin cells

    The critical rule: Use medicated shampoos only with your vet's guidance. These products are powerful and can cause side effects if used incorrectly. Benzoyl peroxide, for instance, dries the skin aggressively and can cause irritation if left on too long.

    Chlorhexidine is safe for most horses but can cause a reaction in a small percentage.

    The application protocol for medicated shampoos:

    1. Wet the affected area thoroughly
    2. Apply the medicated shampoo directly and work into a lather
    3. Leave it on for the full contact time stated on the label, usually 5 to 10 minutes
    4. Rinse completely
    5. Dry thoroughly, since many medicated treatments work best on a dry coat afterward

    Follow-up care: Most medicated shampoos leave the coat dry. A gentle conditioner applied to the coat (not the treated skin) can help restore some moisture without washing away the active ingredients.

    Dealing with Deep-Rooted Dirt: The Double-Wash Method

    Some horses look clean on the surface but have a layer of deeply embedded dirt and dander at the skin level. This is common in horses with thick winter coats that haven't been bathed in months. A single wash just moves the dirt around.

    The double-wash protocol:

    1. First wash: Use a clarifying shampoo to break down the surface dirt and oils
    2. Rinse completely
    3. Second wash: Use a regular equine shampoo to clean the skin itself
    4. Rinse thoroughly
    5. Apply a conditioner

    The first wash acts as a pre-treatment. It loosens the bond between dirt and hair. The second wash does the actual cleaning.

    Skipping the first step means the second wash is just pushing dirt around, and you end up with soap residue trapped under a layer of grime.

    When to use it: For horses that haven't had a bath in 8 weeks or more. For show horses that need a deep clean before the event. For horses with visibly dusty coats that don't improve with regular brushing.


    The Psychology of Bathing: Building Trust and Positive Associations

    Bathing is as much about the horse's mind as it is about their coat. A horse that trusts you in the wash stall is easier to handle, safer to be around, and more willing to accept other forms of care. A horse that fears bathing spreads that fear to other situations.

    How Horses Learn to Tolerate Water

    Horses are prey animals. Their instinct is to be wary of new or unusual sensations. Water spraying from a hose doesn't exist in their natural environment.

    It triggers a cautious, sometimes fearful response.

    The key insight is that horses learn through association. If the water accompanies a treat, a scratch, or a relaxed voice, the horse gradually associates water with safety. If the water accompanies restraint, cold, or pain, the horse learns the opposite.

    The association-building approach:

    1. Start with water at a distance. Let the horse see the hose and hear the sound
    2. Reward calm behavior immediately. A treat, and a scratch on the withers
    3. Gradually decrease the distance, rewarding at each step
    4. Bring the water close enough to touch the horse's leg, then reward
    5. Increase the water pressure slowly, checking the horse's reaction at each step

    This process works best in short sessions. Ten minutes a day for a week beats one 60-minute session that ends in fear.

    The Role of Consistency and Routine

    Horses thrive on predictability. A consistent bathing routine, same time, same place, same order of steps, signals to the horse that nothing unusual is happening. The horse relaxes because it knows what comes next.

    What a consistent routine looks like:

    1. Lead the horse to the stall at the same time of day
    2. Use the same lead rope and cross-ties
    3. Start with the same leg when you begin the water
    4. Use the same order for shampoo application
    5. End with the same treat ritual

    It sounds almost silly to be this precise, but it works. Horses notice the pattern and they feel safe within it. When the routine becomes familiar, the fear response diminishes.

    Reading Stress Signals Early

    Catching a horse's stress before it escalates is a skill that comes with observation. The earlier you notice the signs, the easier it is to intervene and prevent a full-blown panic.

    Early stress signals:

    • The horse's head raises slightly, ears shift backward
    • The horse begins shifting weight between its hind legs
    • Tail swishes more frequently than usual
    • The horse's breathing becomes faster or more shallow
    • The horse's eyes show more white, a sign of anxiety

    When you see any of these, pause. Don't push forward. Give the horse a moment to settle.

    Sometimes just pausing and letting the horse stand still for 30 seconds is enough.

    When to stop entirely: If the horse starts pulling against the cross-ties, backing up, or lifting a hind leg, that's a warning that you're crossing the line. Stop the bath, remove the horse from the stall, and end the session on a calm note. A short bath that ends well is far better than a long bath that ends badly.

    Turning the Bath into a Bonding Experience

    Bathing done right becomes a form of positive handling. The horse gets attention, physical contact, and the sensory experience of warm water. Many horses genuinely enjoy it once they're past the initial fear phase.

    Signs your horse enjoys bathing:

    • The horse lowers its head and relaxes its neck
    • The horse's ears stay soft and forward
    • The horse licks its lips or chews, a sign of relaxation
    • The horse stands still without being asked
    • The horse leans gently into the scrub, similar to how it leans into a scratch

    If you notice these signs, the bath has become something more than hygiene. It's become a connection moment. You'll find that the horse is easier to handle in other situations too.

    The trust built in the wash stall carries over to the trailer, the farrier's shop, and the show ring.


    Water Conservation and Eco-Friendly Bathing

    Bathing a horse is one of the more water-intensive tasks on a farm or ranch. The average full bath with a standard hose uses anywhere from 20 to 40 gallons of water, and a lot of that washes away without ever touching the horse. If you're mindful about your water use, you can cut that footprint substantially.

    How to Cut Water Waste

    If you're consistently running a water bill that makes you wince, or if your well is struggling during a dry season, small adjustments add up fast.

    The easiest fixes:

    • Turn off the water between steps. Soak the horse, turn off the hose, scrub, then rinse
    • Use a shut-off nozzle on the hose so you don't have to run back to the faucet
    • Use a bucket and sponge for the face, the mane, and the tail instead of the hose
    • Catch the run-off from the wash stall with a bucket and reuse it for the next horse

    You can cut a typical bath's water use from 30 gallons to under 15 gallons with these habits alone.

    Choosing Eco-Friendly Shampoos

    Look for equine shampoos that are biodegradable and free of harsh chemicals. Many manufacturers now offer plant-based formulas that clean just as well as traditional brands without the environmental footprint.

    What to look for:

    • Biodegradable surfactants like decyl glucoside, which breaks down naturally in soil and water
    • No synthetic fragrances or dyes, which are common skin irritants and environmental pollutants
    • pH balanced for horses, usually between 5.5 and 7.0
    • Packaging that's recyclable or refillable

    Managing Wash Stall Runoff

    Runoff from a wash stall goes somewhere, and it's often the nearest drain, which might lead to a well, a stream, or a pond. Soap residue, dirt, and organic material can harm aquatic life if they reach these water sources.

    What you can do:

    • Check where the wash stall drain leads. If it runs to a stream or pond, redirect it to a dry well or a sump area
    • Use a sediment trap to catch hair, dirt, and debris before it enters the water system
    • Avoid products with phosphates and synthetic chemicals that contribute to algae blooms

    Bathing Horses with Allergies and Sensitive Skin

    Some horses react to almost everything. A new shampoo, a change in water hardness, even a different brand of fly spray can trigger hives, itching, or hair loss. If your horse fits this description, bathing requires extra care and a more deliberate product selection.

    Identifying Contact Dermatitis Triggers

    Contact dermatitis is an inflammatory skin reaction caused by direct contact with an irritant or allergen. It shows up as redness, bumps, scaling, or itching in the areas that touched the offending substance.

    Common triggers in the wash stall:

    • Fragrances and dyes in shampoo
    • Harsh surfactants like sodium lauryl sulfate
    • Residual soap left on the skin
    • Hard water minerals
    • Chemical residues on the wash stall floor
    • Latex from grooming tools or gloves

    How to identify the trigger: Keep a log of every bath. Note the shampoo brand, the water temperature, the drying method, and any products applied afterward. When a reaction occurs, review the log to spot the common variable.

    This takes a few baths to figure out, but it works better than guessing.

    Choosing Hypoallergenic Equine Shampoos

    Hypoallergenic shampoos are formulated without the most common irritants. They use fewer ingredients, skip the fragrance, and rely on gentle surfactants that clean without stripping the coat.

    What to look for on the label:

    • Fragrance-free or "unscented" (this is different from "lightly scented")
    • No artificial dyes
    • No parabens or phthalates
    • Simple ingredient lists with recognizable names
    • Oatmeal or aloe vera as a soothing base ingredient

    What to avoid:

    • "Deep cleaning" formulas, which typically contain stronger surfactants
    • "Whitening" shampoos with optical brighteners
    • Any product that lists "fragrance" without specifying the source
    • Shampoos with tea tree oil, which can be irritating to sensitive horses

    Patch Testing Before a Full Bath

    A patch test is the safest way to introduce a new product. It takes 10 minutes and can save you from a full-body reaction.

    The patch test protocol:

    1. Apply a small amount of the new shampoo to a coin-sized area on the horse's shoulder
    2. Leave it on for 5 to 10 minutes
    3. Rinse thoroughly with lukewarm water
    4. Wait 24 hours and check the area for redness, bumps, or swelling
    5. If clean, the product is safe for a full bath

    Why this works: The shoulder is a representative area with typical skin sensitivity. A reaction there indicates the product is likely to cause problems on the rest of the body.

    Alternative Bathing Methods for Sensitive Horses

    Sometimes even the gentlest shampoo isn't the answer. For horses with severe sensitivities, a water-only rinse can remove sweat and surface dirt without any chemical exposure.

    Water-only rinse: Use lukewarm water to wet the coat and then scrub with a soft brush, no soap. The mechanical action of the brush dislodges most loose dirt. Rinse thoroughly and scrape.

    This won't produce the same deep clean as shampoo, but it's better than skipping the bath entirely and letting sweat accumulate.

    Use a vinegar rinse: Add one cup of apple cider vinegar per gallon of lukewarm water. This can help remove residue and restore acid balance to the coat, all without the chemicals found in commercial shampoos.

    Watching for Reactions Post-Bath

    Even with careful product selection, reactions can happen. The key is catching them early and responding appropriately.

    What to watch for in the 24 hours after a bath:

    • Hives or raised welts on the neck, chest, or belly
    • Excessive scratching or rubbing against walls and fences
    • Any new areas of redness or hair loss
    • Swelling or heat in the affected areas

    If you notice hives or swelling, wash the area with plain lukewarm water to remove any remaining product residue. If symptoms persist for more than a few hours, or if the horse's face swells or breathing changes, call your veterinarian immediately.

    Building a Bathing Routine for Allergic Horses

    The routine for a sensitive horse is less about frequency and more about consistency and minimal intervention.

    The routine we recommend:

    1. Brush thoroughly before bathing to remove loose dirt and dander
    2. Use lukewarm water at a gentle pressure
    3. Use a fragrance-free, hypoallergenic shampoo diluted at 1:10 with water
    4. Scrub with a soft sponge, not a stiff brush
    5. Rinse for twice as long as you scrubbed
    6. Dry completely with a clean towel and a cooler
    7. Wait at least 24 hours before applying any product like fly spray or coat gloss

    Bathing Miniature Horses and Ponies: Size-Specific Considerations

    Miniature horses and ponies present unique challenges in the wash stall. Their smaller bodies, lower center of gravity, and different coat characteristics mean the standard bathing routine needs adjustments.

    Temperature Regulation Differences

    Miniature horses and ponies have a higher surface-area-to-body-mass ratio than full-sized horses. This means they lose heat faster in cold conditions and absorb heat faster in warm conditions. Their smaller size also means their core temperature responds more quickly to external temperatures.

    The temperature implications for bathing:

    • Use lukewarm water on the warmer end of the safe range, 70 to 75°F
    • Keep baths shorter, under 15 minutes, to avoid temperature swings
    • Dry completely before turnout. A small horse gets chilled much faster than a large one
    • In winter, avoid full baths entirely unless you have a heated wash stall

    Ponies with thick winter coats face an additional risk. Their dense hair traps water and takes hours to dry. A bath on a cool spring day can leave a pony damp and shivering well into the evening.

    Equipment Size and Handling

    Most wash stall equipment is designed for full-sized horses. Cross-ties set at the right height for a 16-hand horse will be far too high for a miniature. The horse could easily slip under them and get tangled.

    The adjusted setup:

    • Set cross-ties at poll height for the miniature, not the human's waist height
    • Use a shorter lead rope to maintain control during the bath
    • Use a smaller sponge or a soft washcloth for the face and legs
    • Choose a sweat scraper with a shorter handle for better control

    The weight consideration: A miniature horse weighs between 150 and 350 pounds, depending on the breed. That's light enough to lift and move, but it also means they can spook, spin, and potentially injure themselves more easily than a heavier horse that's planted on its feet. Your footing is critical.

    Grooming Differences for Ponies

    Ponies often have thicker, coarser coats than full-sized horses. They also tend to carry more oil in their skin, which makes them prone to a condition called "greasy heel" or pastern dermatitis.

    The bathing implications:

    • Use a clarifying shampoo once a month to manage oil buildup
    • Pay extra attention to the pasterns and heels, areas where dermatitis starts
    • Rinse the legs thoroughly and dry them completely, since moisture trapped in the feathers is a common cause of dermatitis
    • Consider clipping the feathers in spring to improve airflow and reduce the risk of fungus

    Table: Bathing Differences by Horse Size

    ConsiderationFull-Sized HorsePony or Miniature
    Water temperature60–70°F70–75°F
    Bath duration20–30 minutes10–15 minutes
    Shampoo amount1/2 to 3/4 cup2–4 tablespoons
    Drying time45–90 minutes30–45 minutes
    Cross-tie heightSet to horse's pollSet to miniature's poll
    Safety risk levelModerate (kicking, spooking)Moderate (chilling, spooking)

    The Chilling Risk Specific to Minis

    Miniature horses are far more prone to hypothermia after a bath than full-sized horses. Their smaller body mass means they lose heat faster, and their coat, especially in winter, can trap water against the skin for hours.

    The post-bath protocol for minis and ponies:

    1. Sweat scrape twice to remove as much water as possible
    2. Towel dry the face, legs, and belly immediately
    3. Apply a cooler or a warm blanket
    4. Walk in a sheltered area until the coat is fully dry
    5. Check the horse 30 minutes after drying to confirm they're warm and comfortable

    Frequently Asked Questions

    How often should I bathe my horse?

    Most horses only need a full bath once or twice a month during the active season. Over-bathing strips natural coat oils and causes dry, itchy skin. Horses that work hard and sweat heavily may need a bath every 7 to 10 days during peak summer.

    In winter, if the horse is mostly turnout and light work, bathing isn't necessary at all. Spot cleaning with waterless shampoo handles the dirty spots without stripping the whole coat.

    Can I use dish soap or human shampoo in an emergency?

    In a true emergency, a tiny amount of a gentle dish soap like regular Dawn can cut heavy grease. But it's not a routine option. Dish soap is a degreaser and strips every protective oil from the coat.

    Human shampoo is often more acidic than horse shampoo and can irritate horse skin. Use it once if you have no other choice, then follow up with a moisturizing equine conditioner to help restore the coat.

    What should I do if soap gets in my horse's eyes?

    Flush the eye immediately with clean, lukewarm water. Use your hand or a gentle spray to run water from the inner corner of the eye outward. Continue for at least 30 seconds to make sure all soap is out.

    Most horses will squint, tear, and recover within a minute or two. If the eye stays closed, waters excessively, or the horse appears to be in pain, call your veterinarian right away.

    How do I dry a horse quickly in cold weather?

    Use a sweat scraper twice to remove as much water as possible, then press with dry towels to absorb the rest. A second person with disposable towels can cut drying time dramatically. Apply a cooler to trap body heat and wick moisture away.

    Walk the horse in a sheltered, wind-free area until the coat is dry. Never return a damp horse to a cold paddock.

    Is it okay to bathe a horse with a skin condition?

    Only with your vet's guidance. Some skin conditions like rain rot need medicated shampoo, which your vet can recommend. Other conditions like hives can get worse with bathing.

    Never bathe an area of open skin or broken skin without your vet's approval. In general, keep the affected area dry, follow the treatment plan, and ask before you wash.

    Can I use baby shampoo on a foal's face?

    A foal's first baths are usually just the face and legs, and baby shampoo is a reasonable choice. It's gentle, pH-neutral, and won't sting the eyes. But avoid submerging the foal's body.

    Foals can't regulate their body temperature as well as adult horses, and hypothermia is a real risk. Use lukewarm water, work quickly, and dry thoroughly.


    The Bottom Line: What Every Horse Owner Should Remember

    Bathing a horse is a simple task when you break it down, but it's also a test of your observational skills and your patience. The horses that bathe calmly and willingly are the ones who have positive experiences every time. The horses that explode in the wash stall are the ones who learned, somewhere along the line, that bathing involves discomfort or fear.

    The single most important rule is this: when in doubt, stop and reassess. A half-bathed, towel-dried horse is infinitely better than a panicked horse with a new fear you'll have to undo later.

    For your routine, remember these key points:

    • Clean hooves and brush the coat before you ever turn on the water
    • Use lukewarm water between 60°F and 75°F
    • Always use a pH-balanced equine shampoo, never human products
    • Keep water away from the ears, eyes, and nostrils
    • Rinse until the water is completely clear
    • Scrape, towel, and fully dry before turnout
    • Don't bathe a hot, cold, or stressed horse

    A quick pre-bath checklist to run through every time:

    CheckDone
    Hooves picked and brushed☐
    Coat brushed to remove loose dirt☐
    Horse is calm and relaxed☐
    Checked for wounds or irritated skin☐
    Water temperature tested (60–75°F)☐
    Non-slip mat confirmed in wash stall☐
    Cross-ties have quick-release snaps☐
    Equine shampoo and sponges ready☐
    Towels and sweat scraper ready☐
    Weather is warm enough for drying☐

    Bathing might take 45 minutes from start to finish on a good day. But that time protects your horse's skin health, strengthens your bond, and keeps the experience safe for both of you. That's time well spent, every single wash.