Tag: Cat

  • Step-by-step: How Often Should You Bathe a Cat

    Step-by-step: How Often Should You Bathe a Cat

    Most cats never need a bath. That's the honest answer to the question of how often should you bathe a cat, and it surprises a lot of first-time owners who assume grooming works the same way it does for dogs. A healthy shorthaired indoor cat can go its entire life without seeing a drop of shampoo.

    The exceptions are real, though, and they matter.

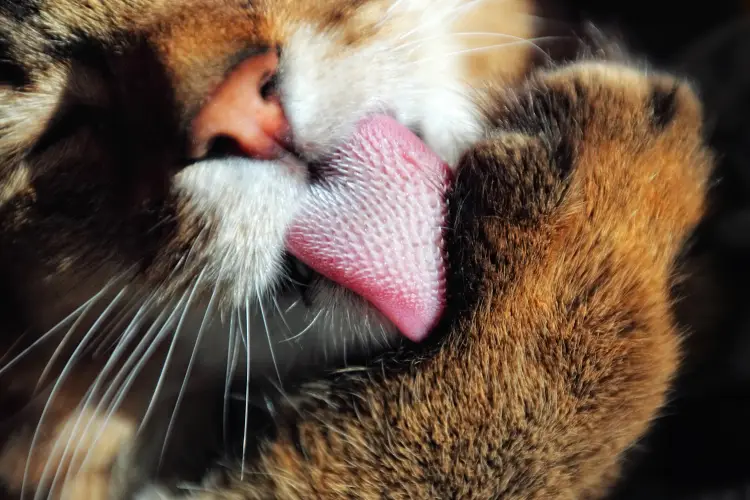
    The reason comes down to biology. Cats spend a large share of their waking hours grooming, and their tongues are covered in backward-facing keratin spines called filiform papillae that work like a built-in comb. Feline skin also sits at a higher pH than ours, roughly 6 to 7 against our 5.5, and the epidermis is thinner.

    Wash it too often and you strip the protective oils faster than the skin can replace them. So the real question isn't "how often," it's "does my cat actually fall into a bathing category at all?"

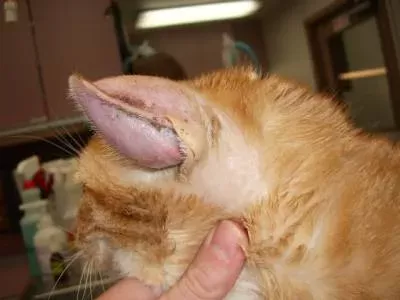
    how often should you bathe a cat

    Image source: Bing (Web (fair-use with source credit))

    Quick Answer: Most Cats Don't Need Baths at All

    Most healthy cats never need a bath. Shorthaired indoor cats groom themselves clean without help. Bathe only when triggered: filth, fleas, matting, or vet orders.

    Hairless breeds like the Sphynx need washing every one to two weeks. Long-haired and senior cats fall around every four to six weeks.

    Why "Every Few Weeks" Is the Wrong Advice for Most Cats

    Search this question and you'll find a lot of confident "every four to six weeks" advice. For the average domestic shorthair, that number is wrong, and following it damages the coat you're trying to look after.

    Cats aren't dogs. Dogs roll in things, swim in ponds, and have coats that trap dirt and odour. Cats are obligate self-groomers with a coat structure built to shed debris.

    In our research across feline veterinary guidance, the consistent position is that routine bathing is unnecessary for the vast majority of cats. Grooming support should mean brushing, not shampoo.

    cat self-grooming with barbed tongue

    Image source: Web (Bing) / deviantart.com (Web image (fair-use with source credit))

    How self-grooming actually works

    Those barbed papillae on a cat's tongue do three jobs at once. They pull out loose dead hair, they spread sebum from the skin down the hair shaft, and they lift dirt out of the coat.

    Saliva does something clever too. As it evaporates off the fur, it cools the cat, which is part of why cats groom more in warm weather. The sebum spread along each hair gives a healthy coat its slight water resistance and that soft, faintly glossy feel.

    Cats also groom each other. Allogrooming between bonded cats covers the head and neck, the two areas a cat can't reach with its own tongue. In a two-cat household you'll often see one cat's face stay noticeably cleaner than a solo cat's.

    What over-bathing does to feline skin

    Strip that sebum layer repeatedly and the skin responds badly. The usual sequence looks like this:

    • Week one to two: coat feels dry and slightly static, more visible dander after brushing
    • Week two to four: flaking along the spine and tail base, mild itch
    • Ongoing: scratching, overgrooming, or barbering as the cat tries to soothe the irritation
    • Longer term: compensatory oil production, so the coat ends up greasier than before you started

    That last one catches people out. Someone bathes a cat because the coat looks greasy. The sebaceous glands overproduce to compensate.

    The coat looks greasy again, so they bathe more often. It's a loop.

    The other cost is behavioural, and it's harder to undo. A cat that's had four unnecessary stressful baths will fight the fifth one. That fifth one might be the medicated bath it genuinely needs.

    Save the bath card for when you actually need to play it. The Cornell Feline Health Center publishes solid owner-facing material on feline skin and coat care if you want the clinical detail.

    The 5 Things That Decide Your Cat's Bathing Schedule

    There's no universal number because five variables move the answer. Run your cat through each one. If any of them flags, you've got your schedule.

    Coat type

    This is the biggest single factor. Hairless breeds have no coat to absorb and spread sebum, so the oil sits on the skin and collects in folds. Dense double coats trap debris.

    Standard shorthairs need nothing.

    Age, weight and mobility

    A cat that can't physically reach its own hindquarters can't keep itself clean. Arthritis, spinal pain, obesity and old age all restrict the twisting motion grooming requires. This is the most common reason an otherwise ordinary cat suddenly needs bathing help at twelve years old.

    Skin and health conditions

    Ringworm, Malassezia overgrowth, seborrhoea and flea allergy dermatitis all come with prescribed bathing protocols. Here the bath isn't hygiene, it's drug delivery. Frequency comes from your vet, not from a general guide.

    Indoor versus outdoor access

    An indoor-only cat encounters almost nothing that needs washing off. An outdoor cat in a rural area can come home covered in mud, engine oil, or road grit. In the UK, where outdoor access is far more common than in the US, this variable carries more weight.

    One-off contamination events

    Sometimes the answer to "how often" is "right now, once." Anything sticky, oily, or toxic on the coat becomes an ingestion risk the moment your cat starts licking. That's an immediate bath regardless of every other rule on this list.

    Here's how those variables translate into a working schedule:

    VariablePoints toward "never bathe"Points toward "scheduled baths"
    CoatStandard shorthair, single coatHairless, Rex, dense longhair
    Age and mobilityUnder 8, normal weight, agileSenior, arthritic, BCS 8 to 9 of 9
    Skin healthClean, no odour, no flakingGreasy, flaky, infected, diagnosed condition
    EnvironmentIndoor only, clean litter setupOutdoor, farm, or messy household
    Recent eventsNothing on the coatFleas, faecal matting, chemical contact

    Bathing Frequency by Coat Type: Sphynx to Shorthair

    Sphynx hairless cat coat type

    Image source: Web (Bing) / gifdb.com (Web image (fair-use with source credit))

    Coat type does most of the heavy lifting, so start here. The numbers below assume a healthy adult cat with no skin condition and no contamination. Adjust if any of those change.

    Cat typeTypical wet bath cadenceWhat triggers itBrushing instead
    Domestic shorthair, indoorRarely or neverContamination only2 to 3 times weekly
    Bengal, Siamese, AbyssinianRarely or neverContamination onlyWeekly rubber brush
    British Shorthair, Russian Blue8 to 12 weeks, or neverHeavy moult, greasy patches2 to 3 times weekly
    Persian, Himalayan4 to 6 weeksMatting, faecal dags, oily face foldsDaily comb
    Maine Coon, Ragdoll, Siberian6 to 8 weeks, or as neededMatting behind ears and armpitsDaily to alternate days
    Devon Rex, Cornish Rex2 to 4 weeksOil buildup on thin coatLight weekly wipe
    Sphynx, Donskoy, Peterbald1 to 2 weeksRoutine oil controlWipes between baths

    A few notes the table can't carry on its own.

    Hairless cats are a genuine commitment. Sphynx skin produces the same sebum a coated cat does, but there's no hair to wick it away. It pools in the armpits, neck folds, between the toes, around the nail beds, and at the tail base. Skip washes and you get blackheads, a waxy brown film, sticky bedding, and eventually skin fold dermatitis.

    Most Sphynx owners settle into a weekly bath with wipe-downs in between.

    Long-haired cats need de-matting before water, never after. A wet mat tightens. Bathe a matted Persian and you'll come out the other side with a pelt that needs clipping under sedation. Comb first, always.

    Rex coats sit in the middle. Devon and Cornish Rex cats have sparse, fine coats with reduced guard hairs. They show oil buildup faster than a normal shorthair but slower than a Sphynx. Watch the coat, not the calendar.

    Show cats are a separate case. Pre-show bathing is presentation work, not welfare. As of 2026, the schedules used by show breeders (often a bath three to five days before judging so the coat settles) shouldn't be copied by pet owners.

    When Age, Arthritis or Weight Changes Everything

    This is the branch most owners land on eventually, and it's the one generic advice misses completely. Your cat's coat didn't change. Its ability to reach the coat did.

    Grooming is a physical act. A cat has to arch its spine, twist its neck, and hold a position long enough to work an area over. Take away flexibility and hygiene collapses from the back end forward.

    The warning signs your cat has stopped grooming properly

    Look for these, in roughly the order they appear:

    • Dull, spiky, or clumped fur along the lower back and spine
    • Dandruff concentrated above the tail base, an area cats reach last
    • A greasy, sticky patch at the tail base (stud tail, common in unneutered males but seen in others too)
    • Faecal staining or dags on the fur under the tail
    • Mats forming in the armpits and hind trousers
    • A general unkempt look you can't quite pin down

    That dandruff pattern above the tail is the classic early tell. If you see it on a cat over ten, or on a cat carrying extra weight, mobility is the likely cause.

    Who this affects

    SituationWhy grooming failsRealistic bathing approach
    Senior cat with osteoarthritisSpinal and hip pain limits twistingSpot-clean weekly, full bath every 4 to 6 weeks
    Obese cat (BCS 8 to 9 of 9)Body mass blocks the reachRear-end spot-clean, bath as needed
    Post-surgical or cone-wearingPhysically prevented from groomingDamp cloth only until cleared
    Dental disease or oral painGrooming hurts the mouthTreat the teeth first, then reassess
    Chronic diarrhoea or IBDSoiling outpaces self-cleaningSanitary trim plus frequent rear washes
    Blind, neurological, or three-leggedCoordination or balance lossRegular assisted grooming

    What to do instead of a full bath

    For most senior and overweight cats, a full immersion bath is more stress than the situation warrants. A targeted clean does the job:

    1. Spot-clean the rear and lower back with a warm damp cloth or a cat-safe grooming wipe, two or three times a week.
    2. Book a sanitary trim. Clipping the fur around the anus and back of the thighs stops faecal matting before it starts. It's a ten-minute job for a groomer or a confident vet nurse.
    3. Brush daily with a soft slicker or rubber curry. You're doing the sebum distribution the cat can no longer do.
    4. Save the full bath for every four to six weeks, or whenever spot-cleaning stops keeping up.

    One important caveat. Arthritis in cats is heavily underdiagnosed, and a cat that's stopped grooming is often telling you it's in pain. Get it checked.

    Pain relief frequently restores grooming behaviour on its own, and then you're back to a cat that doesn't need bathing at all.

    Medical Reasons Your Vet Will Put Your Cat on a Bathing Schedule

    Sometimes the bath is medicine. When a vet prescribes a wash, frequency stops being a lifestyle choice and becomes part of a treatment plan. Follow the label, not your instinct.

    The key difference: a medicated bath needs contact time. You're not rinsing dirt off, you're holding an active ingredient against the skin long enough to work. Most veterinary shampoos specify five to ten minutes of lather sitting on the coat before rinsing.

    Rinse after thirty seconds and you've wasted the bath.

    Ringworm, Malassezia and seborrhoea protocols

    Dermatophytosis, better known as ringworm, is the big one. It's a fungal infection, not a worm, and it's transmissible to humans. Topical treatment is a core part of clearing it because it kills spores on the coat and cuts environmental contamination.

    Typical protocols involve twice-weekly washing or dipping until two consecutive fungal cultures come back negative. That usually means six to twelve weeks of treatment, sometimes longer in long-haired cats. Lime sulfur dip and miconazole-chlorhexidine shampoos are the two most commonly used topicals.

    Lime sulfur smells appalling and can temporarily stain white coats yellow, but it works.

    Malassezia dermatitis is a yeast overgrowth. It shows up as a greasy, musty-smelling coat, often with redness in the skin folds, and it's more common in Sphynx and Devon Rex cats. Antifungal shampoos containing miconazole or ketoconazole are usually prescribed two to three times weekly at first, then tapered.

    Seborrhoea produces either a dry flaky coat or a greasy one, depending on type. Treatment shampoos often use phytosphingosine or colloidal oatmeal to restore the skin barrier rather than strip it. Frequency here is typically weekly, dropping to fortnightly once the skin settles.

    ConditionCommon topicalStarting frequencyTypical duration
    Ringworm (dermatophytosis)Lime sulfur dip, miconazole plus chlorhexidineTwice weeklyUntil 2 negative cultures, often 6 to 12 weeks
    Malassezia dermatitisMiconazole or ketoconazole shampoo2 to 3 times weekly3 to 4 weeks, then taper
    SeborrhoeaPhytosphingosine, colloidal oatmealWeeklyOngoing maintenance
    Bacterial pyodermaChlorhexidine shampoo2 to 3 times weekly2 to 4 weeks
    Feline acne (chin)Benzoyl peroxide, chlorhexidine, spot use onlyDaily to alternate days on the chinUntil lesions clear

    Never buy a medicated shampoo off the shelf and start a course yourself. Benzoyl peroxide at dog-strength concentrations is too harsh for feline skin. Chlorhexidine concentration matters too.

    Get the diagnosis first.

    Fleas and Cheyletiella

    A flea bath is a decontamination event, not a treatment plan. It knocks down the adult fleas on the cat that day. It does nothing about the eggs, larvae and pupae in your carpet, which make up the overwhelming majority of the infestation.

    Modern flea control has largely made flea shampoos redundant. Isoxazoline products and selamectin spot-ons work systemically and keep working for weeks. A shampoo gives you a few hours of relief and a wet, stressed cat.

    There are two situations where a flea bath still earns its place:

    • Heavy infestation in a kitten too young or too small for licensed spot-on products, where physical removal is the only safe option
    • Flea dirt and blood staining on a rescue cat that's genuinely filthy, where you're washing for hygiene as much as parasites

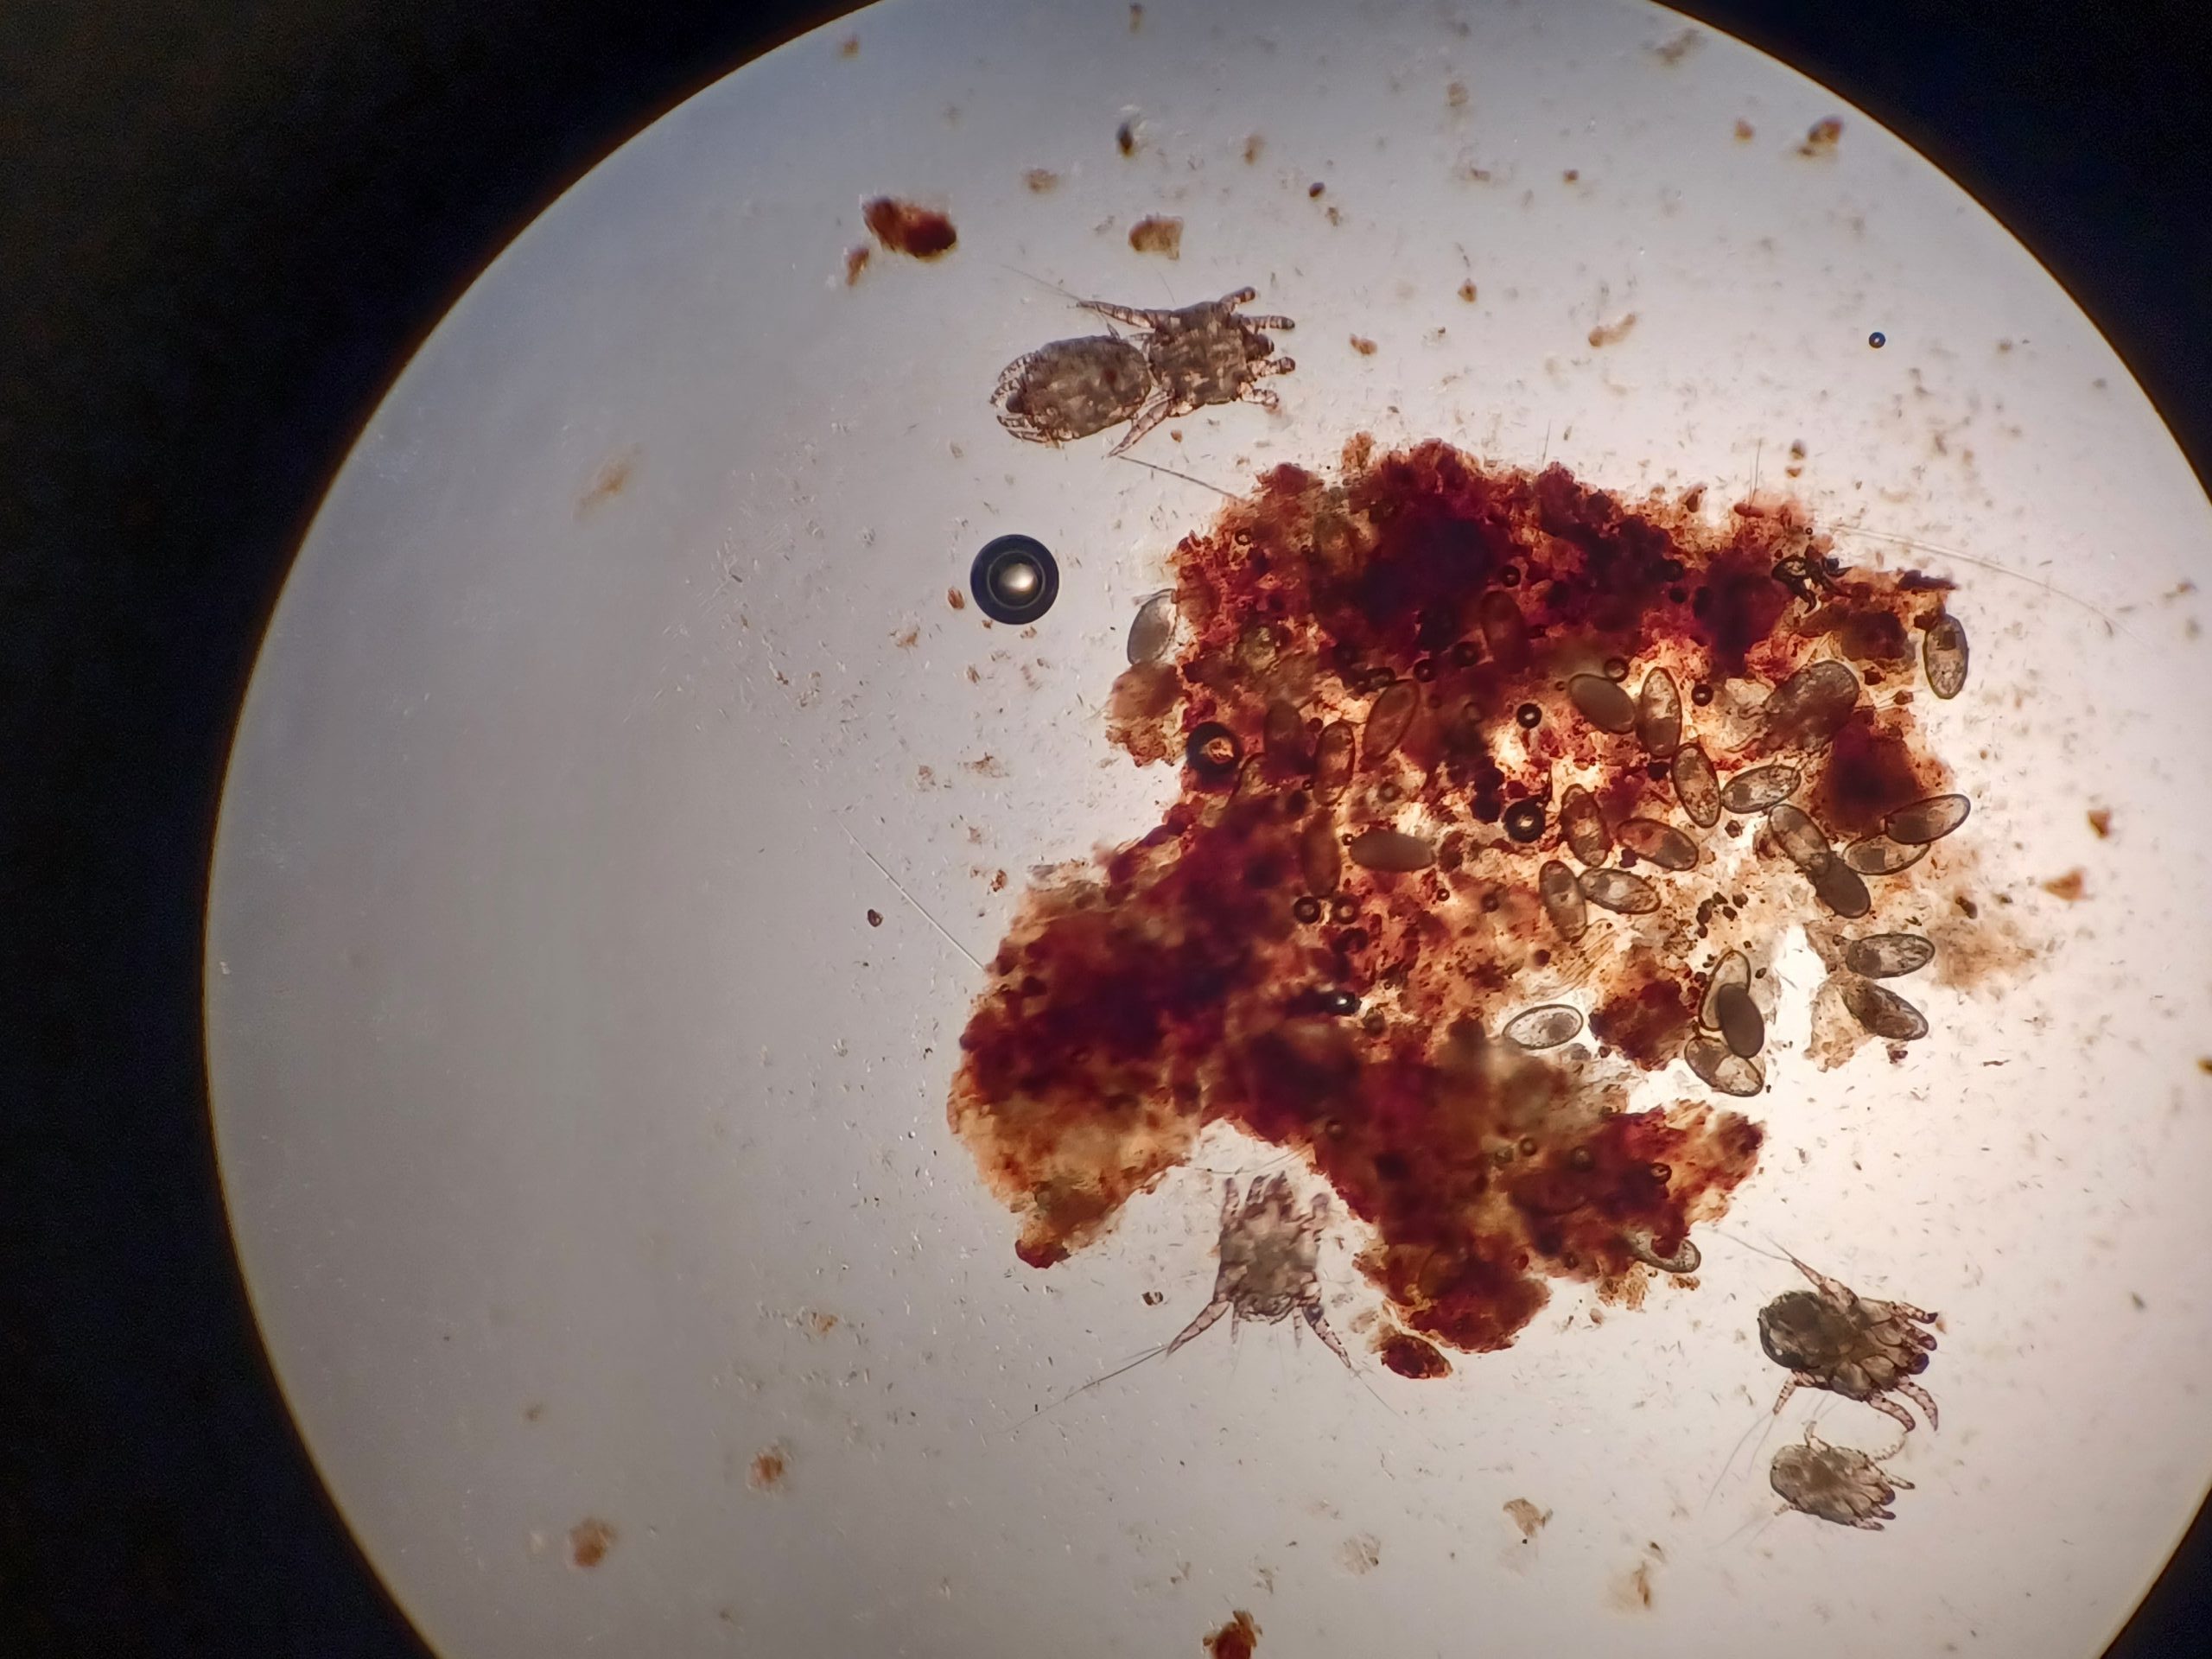
    Cheyletiella, known as walking dandruff, is a surface mite that looks like moving flakes along the spine. Treatment usually combines a systemic parasiticide with weekly baths to remove mites and scale. It's contagious to other pets and can cause a temporary itchy rash in humans.

    If you're checking for fleas, use the wet paper test. Comb debris out of the coat with a fine flea comb onto damp white paper. Flea dirt is digested blood, so it dissolves into rusty red streaks.

    Ordinary dandruff stays white.

    When bathing replaces nothing

    Bathing doesn't fix an underlying cause. That's the trap owners fall into most often.

    A greasy coat in a middle-aged cat is usually a grooming failure, and grooming failures point to pain, obesity, dental disease, or systemic illness. Hyperthyroidism, diabetes and chronic kidney disease all reduce grooming. So does depression after losing a companion cat.

    A cat with flea allergy dermatitis needs year-round parasite control, not a monthly wash. A cat with food-responsive atopic dermatitis needs a diet trial. Bathe the symptom and you'll be bathing forever.

    Our read of the veterinary dermatology literature is consistent on this. Topical therapy is an adjunct. It speeds things up, reduces contagion and makes the cat more comfortable, but it rarely resolves a condition on its own.

    Emergency Baths: When You Wash Your Cat Immediately

    Some situations override every rule in this guide. If your cat has something on its coat that it could swallow while grooming, you wash it off now. Not tomorrow.

    Not after checking whether the coat type calls for it.

    The reason is simple. A cat's first response to anything on its fur is to lick it clean. Skin contact becomes oral ingestion within minutes.

    The immediate-bath list

    • Antifreeze (ethylene glycol). Sweet-tasting and lethal in tiny amounts. Even paw contact is an emergency.
    • Motor oil, petrol, diesel, brake fluid
    • Paint, paint stripper, varnish, wood preservative
    • Tar, roofing compound, driveway sealant
    • Pesticides, herbicides, rodenticide dust, slug pellet residue
    • Household cleaners, bleach, oven cleaner
    • Glue traps and sticky fly paper adhesive
    • Road salt and grit, common on outdoor cats in winter
    • Dog flea treatment applied to a cat by mistake

    That last one deserves its own paragraph. Permethrin, the active ingredient in many dog spot-ons and sprays, is severely toxic to cats. Cats lack the liver enzyme pathway to process it efficiently.

    Signs of permethrin toxicity include muscle tremors, twitching, drooling, disorientation, hyperthermia and seizures. Onset can be within a few hours. This is life-threatening and needs a vet immediately, alongside decontamination.

    Don't wait to see if it settles. The ASPCA Animal Poison Control Center maintains guidance on feline toxicity cases and takes emergency calls.

    How to handle a contamination bath

    The order matters here, and it's different from a routine wash:

    1. Call the vet or a poison control line first. Some substances need specific handling. Some need veterinary decontamination rather than a home bath.
    2. Stop the licking. An Elizabethan collar or a loosely wrapped towel buys you time while you get set up.
    3. Clip, don't scrub, for sticky substances. Tar, glue trap adhesive and dried paint come off far more safely with clippers than with solvents. Never use turpentine, white spirit, petrol, or acetone on a cat.
    4. Use a plain grease-cutting approach for oil. Vets commonly recommend a small amount of mild dish soap for petroleum contamination, worked in and rinsed thoroughly. Follow with a cat shampoo to restore some balance.
    5. Rinse far longer than you think you need to. Residue is the thing that gets ingested.
    6. Warm the cat properly afterwards. A contaminated cat is often already stressed and cold.

    For glue traps specifically, vegetable oil or smooth peanut butter softens the adhesive enough to work fur free. It's messy, but it beats pulling. Wash the oil out afterwards with a cat shampoo.

    One thing to skip entirely: home remedies involving essential oils. Tea tree (melaleuca), pennyroyal, citrus and pine oils are all toxic to cats through skin absorption and grooming. Cats lack the glucuronidation pathway needed to clear phenolic compounds.

    "Natural" flea sprays containing these are a genuine poisoning risk.

    Your Decision Flowchart: Bath, Spot-Clean, or Just Brush?

    Run your cat down this list from the top. Stop at the first line that matches. That's your answer.

    Step 1. Is there a toxic, oily or sticky substance on the coat?

    If yes, call your vet, then bathe immediately. Skip everything below.

    Step 2. Has a vet prescribed a medicated wash?

    If yes, follow the prescribed frequency and contact time exactly. Nothing in this guide overrides the label.

    Step 3. Is your cat hairless or Rex-coated?

    If yes, set a routine. Sphynx and similar breeds every one to two weeks. Rex coats every two to four weeks.

    Wipes in between.

    Step 4. Are there active fleas, mites, or visible skin disease?

    If yes, book a vet appointment. Bathing may be part of the plan, but it won't be the whole plan.

    Step 5. Is there faecal matting, urine soiling, or visible filth on the coat?

    If yes, spot-clean the affected area. If it's widespread or repeated, add a sanitary trim and consider a full bath.

    Step 6. Are there mats you can't comb out?

    If yes, do not bathe. De-mat first, or book a groomer. Water turns mats into pelts.

    Step 7. Is your cat over ten, arthritic, overweight, or recovering from illness?

    If yes, assisted grooming becomes routine. Daily brushing, twice-weekly rear spot-cleans, full bath every four to six weeks if spot-cleaning isn't keeping up.

    Step 8. Is your cat long-haired with a greasy or clumped coat?

    If yes, bathe every four to eight weeks and comb daily between baths.

    Step 9. None of the above?

    Then don't bathe. Brush two or three times a week and leave the shampoo in the cupboard.

    Here's the same logic in table form for quick reference:

    If this is trueThen do thisFrequency
    Toxic or sticky contaminationVet call, then immediate washOnce, as needed
    Vet-prescribed protocolFollow label exactlyPer prescription
    Hairless or Rex breedRoutine bath plus wipes1 to 4 weeks
    Fleas or skin diseaseVet first, bathe as directedPer treatment plan
    Localised soilingSpot-clean onlyAs needed
    Matting presentDe-mat before any waterGroomer if severe
    Senior, arthritic, obeseAssisted grooming plus periodic bath4 to 6 weeks
    Long coat, greasy or clumpedFull bath, daily combing4 to 8 weeks
    Healthy indoor shorthairBrush onlyNever

    Waterless Shampoo, Wipes and Spot-Cleaning: What Actually Works

    For most cleaning jobs, you don't need a full bath. The gap between "do nothing" and "immerse the cat in water" is where the practical solutions live.

    Grooming wipes

    Cat-specific grooming wipes handle small jobs well. Muddy paws, a dirty rear, a greasy chin, a bit of litter dust on the coat. They're the go-to between-bath tool for Sphynx owners.

    Buy wipes formulated for cats, not baby wipes. Human baby wipes often contain fragrance, propylene glycol, or preservatives that aren't ideal on skin a cat will immediately lick. The pH is wrong too.

    Wipes don't degrease properly. On a Sphynx, they'll manage the surface film for a few days but won't clear oil out of skin folds or nail beds. They extend the gap between baths, they don't replace them.

    Waterless and rinse-free foam shampoo

    These are mousses or sprays you work into the coat and towel off without rinsing. They're genuinely useful for cats that panic around water, and for post-operative cats that can't get wet.

    The honest assessment: they clean lightly and deodorise well, but they leave residue on the coat by design. Since the cat then grooms that residue off, ingredient quality matters. Stick to products made specifically for cats.

    Best uses:

    • Freshening a long coat between full baths
    • Cleaning a senior cat that can't tolerate handling for long
    • A cat with a cast, drain, or surgical site that must stay dry
    • Any cat where the stress of a real bath outweighs the benefit

    Worst uses:

    • Removing a toxic or oily contaminant (you need water and rinsing)
    • Medicated treatment (contact time and rinse-off are part of the protocol)
    • Routine Sphynx degreasing

    Damp cloth spot-cleaning

    The cheapest option and often the best. A warm, well-wrung flannel handles the majority of everyday feline messes.

    For a soiled rear end, work in short sessions. Wipe, let the cat move away, come back later. Trying to finish the job in one go is what turns a two-minute task into a wrestling match.

    Follow with a dry towel. Damp fur on a cat's underside chills quickly, particularly in an unheated bathroom in winter.

    MethodBest forNot suitable forRough cost
    Damp flannelEveryday soiling, paws, rear endGrease, contaminantsFree
    Cat grooming wipesBetween-bath Sphynx care, quick tidy-upsDegreasing, medicated needs£4 to £8 per pack
    Waterless foamWater-phobic cats, post-op, long coatsToxins, oils, prescribed washes£8 to £15 per bottle
    Full wet bathContamination, medicated protocols, hairless breedsMatted coats (de-mat first)£6 to £14 per bottle of shampoo
    Sanitary trimRecurring faecal mattingGeneral coat cleaning£15 to £30 at a groomer

    The one thing that beats all of them

    Brushing. Consistent brushing removes far more dirt, loose hair and dander than any wipe, and it does it without stress or stripped oils.

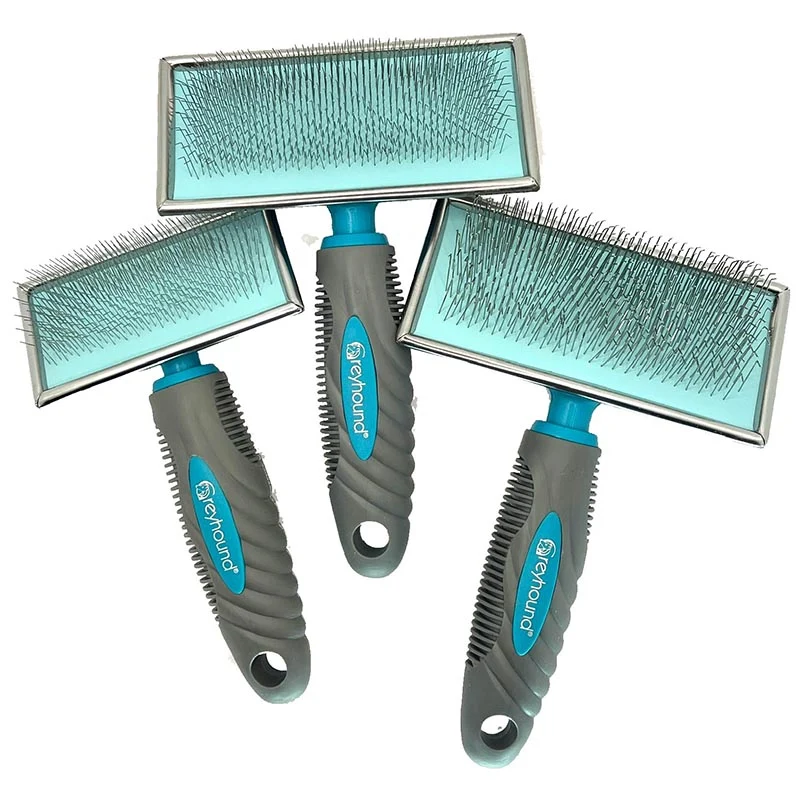
    A rubber curry brush on a shorthair pulls out a surprising amount of dead coat. A greyhound comb and slicker on a long-haired cat prevents the mats that cause bathing problems in the first place. Three sessions a week on a shorthair, daily on a longhair, and most bathing questions solve themselves.

    How to Bathe a Cat Without It Turning Into a Fight

    If your decision flowchart landed on "bathe", the execution matters as much as the frequency. A calm, fast, well-prepared bath is a completely different experience from a chaotic one, for both of you.

    The single biggest predictor of how a cat bath goes is preparation. Cats panic when you're fumbling, reaching for things, or changing your grip. Have everything within arm's reach before the cat enters the room.
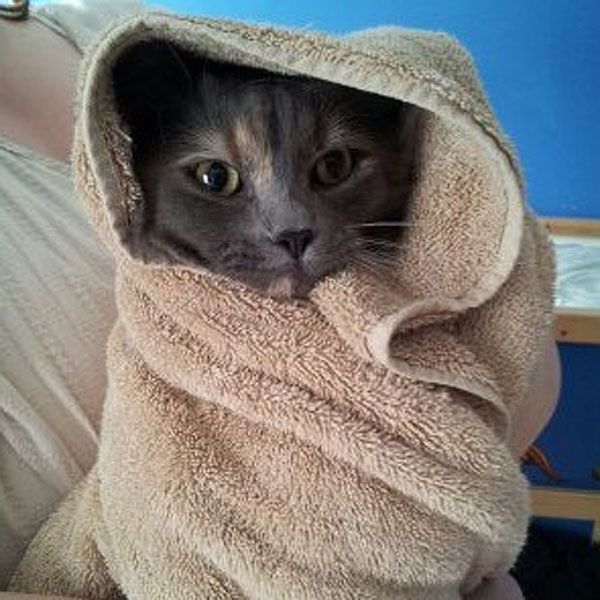
    towel drying a cat after a bath

    Image source: Bing (Web (fair-use with source credit))

    Prep before a drop of water touches the cat

    Do these in order, ideally spread over a day or two rather than all at once:

    1. Trim the claws 24 to 48 hours beforehand. Blunt tips reduce injury to you and reduce snagging on towels. Don't do it right before the bath, that's two stressful events stacked together.
    2. Brush and de-mat the coat completely, dry. Every mat, every knot. If you can't get one out, stop and book a groomer.
    3. Warm the room. Aim for a genuinely warm bathroom with the door shut and no draughts. Cats lose heat fast when wet, and a normal feline body temperature runs 38.1 to 39.2 °C (100.5 to 102.5 °F).
    4. Set up the basin. A sink is easier than a bath for most people because it's at working height. Put a non-slip mat or a folded towel in the bottom. Nothing frightens a cat faster than slipping on wet ceramic.
    5. Pre-fill to 5 to 10 cm (2 to 4 inches) of lukewarm water, roughly body temperature. Test it on the inside of your wrist. It should feel neutral, not warm.
    6. Line everything up: cat shampoo (pre-diluted if it's a concentrate), a jug for rinsing, two or three towels, a cotton pad for the face, and treats.
    7. Optional but effective: spray a feline pheromone analogue on the towels 15 minutes before you start. Aggregate owner feedback reports it takes some edge off, though it won't transform a genuinely water-phobic cat.
    8. Get a second pair of hands if you can. One person holds, one person washes. It halves the time.

    Two things to skip. Don't run taps while the cat is in the sink, the noise is a major stressor. And don't scruff.

    Current feline handling guidance from the American Association of Feline Practitioners moved away from scruffing years ago because it increases fear rather than inducing calm. Support the chest and hindquarters instead.

    The wash itself

    Work quickly. Target five to ten minutes in the water for a routine bath, longer only if a medicated product needs its contact time.

    • Lower the cat in back feet first. Let it feel the bottom of the sink before the rest of the body goes in.
    • Wet from the neck backwards using a jug or a low-pressure handheld sprayer held close to the coat. Close contact is less alarming than spraying from a distance.
    • Never pour water over the head or face. Water in the ear canal risks otitis externa. Water over the nose triggers panic.
    • Clean the face with a damp cotton pad or cloth only. No shampoo near the eyes.
    • Lather along the direction the coat lies, not against it. Working against the grain creates tangles in long coats.
    • Pay attention to the trouble spots: tail base, armpits, groin, between the toes, and skin folds on hairless breeds.
    • Observe contact time for medicated products, usually five to ten minutes. Keep the cat warm during the wait by draping a warm damp towel over the body.
    • Rinse. Then rinse again. Residue is the most common mistake in home cat baths. The coat should feel squeaky, not slippery. On a long-haired cat, budget twice as long for rinsing as you did for washing.
    • Conditioner is optional and only worth it on long coats. Rinse it out just as thoroughly.

    If your cat is genuinely losing it, stop. A partial bath you can repeat calmly is better than a complete bath that creates a lifelong phobia.

    Drying without chilling or scaring your cat

    Drying is the stage most people rush, and it's the one that carries the real risk. A wet cat sheds body heat quickly, and small, old, thin and hairless cats are especially vulnerable.

    Start with the towel burrito. Wrap the cat firmly but comfortably, leaving the head out, and blot rather than rub. Rubbing creates tangles and static in long coats.

    Swap to a second dry towel once the first is soaked.

    For the dryer, the rules are strict:

    • Use the lowest heat setting, or no heat at all
    • Hold it at least 30 cm from the coat and keep it moving
    • Never aim at the face or ears
    • Stop if the cat's skin feels warm to the touch
    • Expect refusal, plenty of cats won't tolerate the noise, and that's fine

    Realistic drying times run about 10 to 20 minutes for a shorthair and 30 to 45 minutes or more for a Maine Coon or Persian. Comb through the coat as it dries, not after. A long coat left to air-dry unattended mats as it goes.

    Finish with a quick dry of the outer ear using a cotton pad. Don't push anything into the canal.

    Then let the cat go. Give it a high-value treat, a warm quiet spot, and time alone. Most cats will groom obsessively for the next hour, which is normal.

    That's them putting the coat back the way they like it.

    Log the date and the reason somewhere. Over six months, that log tells you whether you're bathing on a real trigger or drifting into an unnecessary routine.

    Shampoo Rules: What's Safe and What Can Kill a Cat

    Product choice carries more risk than frequency does. A slightly over-bathed cat gets dry skin. A cat washed in the wrong product can end up in emergency care.

    Start with the non-negotiable: use a shampoo formulated for cats. Not for dogs, not for humans, not "for pets" without a species named on the label.

    Why human shampoo is the wrong tool

    Human shampoo is built for skin at pH 5.5 and for hair that's washed constantly. Feline skin sits closer to neutral, around 6 to 7, and the epidermis is thinner with fewer cell layers than ours.

    Human surfactants strip that thin barrier fast. The result is flaking, itch, and a coat that feels rough within days. Baby shampoo isn't a safe workaround either.

    It's gentler on eyes, not gentler on feline skin chemistry.

    The dog shampoo problem

    Some dog shampoos are chemically fine on a cat. Many are not, and you often can't tell from the front of the bottle.

    The danger is permethrin and related synthetic pyrethroids in dog flea shampoos, sprays and spot-ons. Cats can't metabolise these compounds efficiently. Exposure causes tremors, twitching, drooling, hyperthermia and seizures, and it can be fatal without treatment.

    Also avoid anything containing:

    • Tea tree oil (melaleuca), pennyroyal, citrus (d-limonene, linalool), pine oil, wintergreen
    • Phenol-based disinfectants of any kind
    • Coal tar, common in canine anti-seborrhoeic products
    • High-concentration benzoyl peroxide at dog strengths
    • Alcohol-heavy formulas that dry the skin

    If a product says "for dogs" and doesn't also say "and cats", leave it. Veterinary product labelling exists for a reason. In the UK, antiparasitic products are regulated by the Veterinary Medicines Directorate.

    In the US, topical pesticide products are registered with the Environmental Protection Agency, which publishes species restrictions on the label.

    What to use instead

    PurposeLook forAvoid
    Routine wash, generalpH-balanced cat shampoo, mild surfactantsHuman shampoo, dish soap, dog products
    Dry or flaky skinColloidal oatmeal, phytosphingosine, ceramidesSulphate-heavy formulas, fragrance
    Hairless breed degreasingCat degreasing shampoo, gentle cleanserAnything with alcohol or strong solvents
    Fungal or yeast issuesVet-prescribed miconazole, ketoconazole, chlorhexidineOff-the-shelf "antifungal" pet washes
    Oil or petroleum on coatSmall amount of mild dish soap, vet-directed, then cat shampooSolvents, turpentine, white spirit, acetone
    FleasModern systemic or spot-on parasiticidePermethrin-based dog flea shampoo

    Concentrates are common in veterinary shampoos and need diluting exactly as instructed. Guessing the ratio wastes product at best and irritates skin at worst.

    The dish soap question

    Dish soap comes up constantly and it deserves a straight answer. It's a degreaser, and it's used by wildlife rehabilitators to remove petroleum from oiled animals. That's the context it belongs in.

    It's not a substitute for cat shampoo on a routine bath. Repeated use strips the coat aggressively. Use it once for a genuine oil contamination, rinse it out completely, and go back to a proper cat product afterwards.

    Kittens have separate rules

    Most flea shampoos and antiparasitic washes carry a minimum age or weight on the label, often eight weeks or a set body weight. Below that threshold, physical removal with a flea comb and a warm damp cloth is the safe approach.

    Neonatal kittens under four weeks shouldn't be bathed at all. They can't regulate their own body temperature. Spot-clean with a warm damp cloth, dry them immediately, and keep them on a heat source.

    Mistakes That Wreck Coats and Trust

    Most bathing problems come from a short list of repeatable errors. Here's what goes wrong most often and what to do instead.

    Bathing before de-matting

    The classic. Water shrinks and tightens a mat, and shampoo binds it further. What was a loose knot before the bath becomes a solid pelt after it.

    Comb the coat out completely, dry, before any water. If a mat won't yield to a comb and a mat splitter, book a groomer for a clip-out.

    Skipping the second rinse

    Shampoo residue is the most common cause of post-bath itching and flaking. It also gets swallowed the moment the cat starts grooming, which can cause mild GI upset.

    Rinse until the coat feels squeaky between your fingers, not slippery. On long coats, expect rinsing to take longer than washing did.

    Using water that's too hot

    What feels pleasantly warm to your hand is too hot for a cat. Feline body temperature runs about 1.5 °C higher than ours, so the comfortable range feels neutral or slightly cool to us.

    Test on the inside of your wrist. If you can feel warmth, cool it down.

    Blow-drying on high heat

    Cat skin burns before the cat reacts, because fur masks the sensation until it's too late. Groomer guidance and aggregate owner reports both point to low heat or no heat, held at a distance, moving constantly.

    Plenty of cats won't tolerate a dryer at all. Towels and a warm room are a perfectly good alternative.

    Getting water in the ears or over the face

    A soaked ear canal is an otitis risk. Water over the nose is a panic trigger, and a panicked cat is one that fights every future bath.

    Wash from the neck backwards. Face and ears get a damp cloth, nothing more.

    Scruffing to restrain

    Scruffing doesn't calm an adult cat. Modern feline handling guidance moved away from it because it increases fear responses and makes handling harder next time.

    Support the chest with one hand and the hindquarters with the other. If the cat won't tolerate that, stop the bath.

    Bathing on a calendar instead of a trigger

    Setting a monthly reminder for a healthy indoor shorthair creates the exact dry-skin cycle described earlier. Bathe when something has happened, not when the date says so.

    Treating grease as a coat problem

    A suddenly greasy coat is usually a grooming failure, and grooming failure usually means pain or illness. Washing it hides the signal.

    If a cat that used to groom well has stopped, book a vet appointment before you buy shampoo.

    Doing it alone with a difficult cat

    Two people halve the bath time and cut injury risk sharply. Cat bites and deep scratches carry real infection risk, including Bartonella henselae and bite-wound abscesses. Any bite that breaks the skin, particularly on the hand, needs medical attention.

    Pushing through panic

    If your cat is screaming, thrashing, or has gone still and rigid, the bath is over. Wrap, dry, release.

    A partial wash you can repeat calmly next week beats a completed wash that costs you the cat's cooperation permanently.

    When to Call a Feline Groomer or Book a Sedated Groom

    There's a point where home bathing stops being the right call. Recognising it early saves the cat stress and saves you a hospital visit.

    Signs it's a groomer job

    • Pelting. Mats that have joined into a solid sheet over the back, sides, or hindquarters.
    • Mats close to skin. Anything tight enough that you can't slide a comb underneath.
    • Faecal matting that recurs. A sanitary trim solves this properly.
    • A long coat past your skill level. Persians and Maine Coons need technique, not enthusiasm.
    • A cat that fights hard. If you've been scratched or bitten during a previous attempt, don't repeat it.
    • Skin you can't see. Under a pelt there's often sore, inflamed, sometimes infected skin. A groomer or vet needs to look.

    Not all groomers are comfortable with cats. Look for someone who works cat-only, or who holds feline-specific credentials. In the US, the National Cat Groomers Institute of America certifies feline specialists.

    In the UK, look for a groomer advertising cat-only sessions or a City and Guilds feline grooming qualification.

    Ask two questions before booking: do you handle cats separately from dogs, and what's your policy if my cat becomes distressed? A good answer to the second one is "we stop".

    When sedation is the right answer

    Groom under anaesthetic (GUA) sounds extreme until you see the alternative. For a severely pelted cat, clipping while conscious is painful and frightening.

    Sedation is appropriate when:

    • The coat is pelted over a large area
    • The cat has a skin infection under the mats that needs examination
    • The cat is aggressive or extremely fearful with handling
    • There's an underlying condition making restraint unsafe
    • A medicated clip and treatment need to happen in one session

    It's done at a veterinary practice, not a grooming salon, with a pre-anaesthetic health check. For senior cats, that usually includes bloods to check kidney and liver function.

    Never use human sedatives, over-the-counter calming tablets, or leftover medication from another pet. Dosing and drug choice in cats is narrow, and getting it wrong is dangerous.

    The middle option

    Some vet practices offer a nurse-led grooming clinic with light sedation, or gabapentin given at home beforehand. Gabapentin is commonly prescribed as a pre-visit anxiolytic in cats, given two to three hours ahead, and it takes considerable edge off handling stress.

    Ask your vet whether that's available. It sits neatly between "impossible at home" and "full anaesthetic".

    What It Costs: DIY, Professional and Sedated Grooming

    Bathing costs are modest for most owners. The expense arrives when neglect turns into a clip-out.

    OptionUK costUS costWhat you get
    Cat shampoo (250 to 500 ml)£6 to £14$8 to $1810 to 30 baths depending on coat size
    Grooming wipes (100 pack)£4 to £8$6 to $12Between-bath maintenance
    Waterless foam shampoo£8 to £15$10 to $2015 to 25 applications
    Slicker brush and greyhound comb£12 to £30$15 to $40Lasts years
    Flea comb£3 to £6$5 to $10Diagnostic and removal tool
    Non-slip mat and towels£10 to £20$12 to $25One-off
    Professional bath and blow-dry£35 to £60$50 to $90Full wash, dry, comb-out
    Full groom with sanitary trim£45 to £75$60 to $110Bath, dry, trim, nails, ears
    Lion cut (long-haired cat)£55 to £90$75 to $130Full body clip
    Groom under anaesthetic£180 to £400+$250 to $500+Vet exam, sedation, clip, monitoring
    Vet consult for skin condition£40 to £70$60 to $100Diagnosis before treatment
    Medicated veterinary shampoo£15 to £30$20 to $40Prescribed course

    Prices as of 2026, and they vary widely by region. Urban practices and cat-only groomers sit at the upper end. Rural and mobile groomers often come in lower.

    The maths worth noting: a £20 comb and ten minutes a day prevents a £300 sedated clip-out. Long-haired cat owners who let combing slip are the ones paying for anaesthetic.

    For Sphynx owners, budget realistically. Weekly bathing at roughly 20 to 30 ml of shampoo per bath works out to a bottle every two to three months, plus wipes. Call it £80 to £150 a year in skin care alone.

    One cost people forget: your time. A full bath and dry on a Maine Coon is a solid hour once you include prep and comb-out. Factor that in before committing to a schedule you won't keep.

    Building a Long-Term Routine That Beats Bathing

    The goal isn't a better bath. It's needing fewer of them.

    Almost every bathing problem traces back to something upstream. Mats come from missed combing. Greasy coats come from untreated pain or weight gain.

    Faecal dags come from a coat that needed a trim three months ago. Fix upstream, and the bath question mostly disappears.

    Set a brushing cadence and stick to it

    Coat typeFrequencyTools
    Domestic shorthair2 to 3 times weeklyRubber curry brush, soft slicker
    Dense shorthair (British Shorthair, Chartreux)3 times weekly, daily in moultSlicker, deshedding tool sparingly
    Semi-longhair (Maine Coon, Ragdoll)Daily or alternate daysGreyhound comb, slicker
    Longhair (Persian, Himalayan)Daily, no exceptionsGreyhound comb, mat splitter
    Rex coatsWeekly, gentleSoft brush or grooming glove
    HairlessWeekly wipe-downGrooming wipes, soft cloth

    Two minutes a day beats twenty minutes on a Sunday. Cats tolerate short sessions far better than long ones, and daily contact means you spot problems early.

    Do a monthly hands-on check

    Run your hands over the whole cat once a month and note:

    • Any new lumps, scabs, or bald patches
    • Flaking, especially above the tail base
    • Grease at the tail base or on the chin
    • Mats forming in the armpits, groin, and behind the ears
    • Fleas or flea dirt (comb onto damp white paper)
    • Whether the cat objects to being touched anywhere new

    Write it down. A three-month pattern is far more useful to your vet than "he seems a bit off".

    Treat the underlying causes

    • Keep weight in the ideal range. A body condition score of 5 out of 9 means a cat can still reach its own back end. Obesity is the most fixable cause of grooming failure.
    • Stay on year-round parasite control. It removes the single most common reason for a flea bath.
    • Get arthritis assessed in cats over ten. Pain relief often restores grooming behaviour within weeks.
    • Keep dental disease under control. A sore mouth means a cat stops grooming.
    • Book a sanitary trim proactively on long-haired and overweight cats rather than waiting for the mess.
    • Manage litter tray hygiene. Cats that step in soiled litter track it into their coat.

    Build bath tolerance before you need it

    If your cat falls into a category that will need regular baths, start young and start dry. Kittenhood is the window, but adult cats can learn too.

    A workable desensitisation ladder:

    1. Feed treats in the empty bathroom, door open, no handling.
    2. Place the cat in the empty dry sink for five seconds. Treat. Release.
    3. Add a non-slip mat. Repeat over several sessions.
    4. Add a shallow layer of lukewarm water, two fingers deep. Feet only.
    5. Introduce a damp cloth over the back. Treat.
    6. Add a jug pour over the shoulders. Treat.
    7. Only then attempt a full wash.

    Move at the cat's pace. If any step produces flat ears, a lashing tail, or a frozen posture, drop back a step. Progress is measured in weeks, not one afternoon.

    This is standard cooperative care technique and it works. The cats that scream through baths are almost always the ones whose first experience was a full immersion with no preparation.

    Reassess every few months

    Your answer isn't permanent. A cat that needed nothing at six years old may need weekly help at fourteen.

    Re-run the decision flowchart twice a year, or any time something changes: a new diagnosis, weight gain, a house move that gives outdoor access, or a coat that suddenly looks different. The right frequency is the one that matches the cat in front of you today.

    Frequently Asked Questions About Bathing Cats

    Do indoor cats ever need a bath?

    Rarely. A healthy indoor shorthair keeps itself clean through self-grooming and may never need washing. Bathe only if something lands on the coat, if fleas or a skin condition appear, or if age or weight stops the cat grooming its own back end.

    Brushing two or three times a week covers everything else.

    Is it bad to bathe a cat too often?

    Yes. Frequent bathing strips sebum from the skin faster than the sebaceous glands can replace it. You'll see dry, flaky skin within a week or two, then itching and overgrooming.

    Some cats overproduce oil in response, leaving the coat greasier than before. Bathe on a trigger, never on a calendar reminder.

    What can I use to wash my cat if I have no cat shampoo?

    Nothing, ideally. Wait and buy a proper cat shampoo rather than reaching for human or dog products. For an urgent clean, a warm damp cloth removes most everyday mess safely.

    The only exception is petroleum or oil contamination, where a small amount of mild dish soap is used under veterinary direction, then rinsed thoroughly.

    How do I bathe a cat that hates water?

    Don't force it. Try a waterless foam shampoo or grooming wipes first. If a real bath is unavoidable, prepare everything in advance, use a shallow sink with a non-slip mat, and work fast.

    Build tolerance separately through short dry sink sessions with treats over several weeks before attempting a full wash.

    Does bathing my cat help with allergies?

    It reduces surface dander and Fel d 1 allergen temporarily, but the effect fades within days. Bathing alone won't solve a cat allergy. Combining regular brushing, HEPA filtration, frequent bedding washes, and keeping cats out of bedrooms works better than repeatedly washing a cat that doesn't need it.

    At what age can you bathe a kitten?

    Around eight weeks for a full bath, and check any product label for its own minimum age or weight. Kittens under four weeks can't regulate body temperature and should only be spot-cleaned with a warm damp cloth, then dried immediately. Flea combing is safer than flea shampoo for very young kittens.

    Your Cat-Specific Bathing Verdict

    Match your cat to one of these profiles and you've got your answer.

    Your catYour scheduleYour main job
    Healthy indoor shorthair, under 8No bathsBrush 2 to 3 times weekly
    Long-haired, healthy, indoorEvery 4 to 8 weeksDaily combing, watch armpits and tail
    Sphynx or other hairlessEvery 1 to 2 weeksDegrease folds, wipe between baths
    Devon or Cornish RexEvery 2 to 4 weeksWatch the coat, not the calendar
    Senior, arthritic, or overweightEvery 4 to 6 weeks plus spot-cleansGet the pain or weight treated
    Diagnosed skin conditionExactly as prescribedRespect the contact time
    Outdoor or farm catAs neededCheck the coat weekly for contaminants
    Any cat, contaminatedImmediately, onceCall the vet first

    Three principles hold across every profile.

    Bathing is a response, not a routine. Something has to trigger it: a substance on the coat, a diagnosis, a coat type that produces more oil than it can shed, or a cat that physically can't reach itself. No trigger, no bath.

    The brush does more than the bath. Consistent combing prevents mats, removes loose hair and dander, spreads sebum properly, and gives you a monthly health check for free. Most owners who think they have a bathing problem actually have a brushing gap.

    A change in grooming behaviour is a medical signal. A cat that used to keep itself immaculate and suddenly doesn't is telling you something. Arthritis, dental pain, hyperthyroidism, diabetes and obesity all show up first as a scruffy coat. Book the appointment before you buy the shampoo.

    Get those three right and the frequency question mostly answers itself. Your cat's coat will tell you when it needs help, and for most cats, that day never comes.

  • Best 10 Best Flea Shampoo for Cats Reviews

    Best 10 Best Flea Shampoo for Cats Reviews

    Fleas are the worst. You spot one, then another, and suddenly you're wondering if your cat's frantic scratching is going to lead to a full-blown infestation in your home. Picking the right shampoo can stop that cycle fast, but with so many options, it's hard to know which one is actually safe and effective for your feline friend.

    I've spent weeks researching the market, analyzing buyer feedback, and cross-referencing manufacturer specifications to find the best flea shampoo for cats. The clear winner for most households is the Veterinary Formula Flea Tick Shampoo, which offers a potent, vet-recommended formula at a budget-friendly price. Let's dive into the top 10 and figure out which one is the perfect fit for your situation.

    🏆 Best Overall
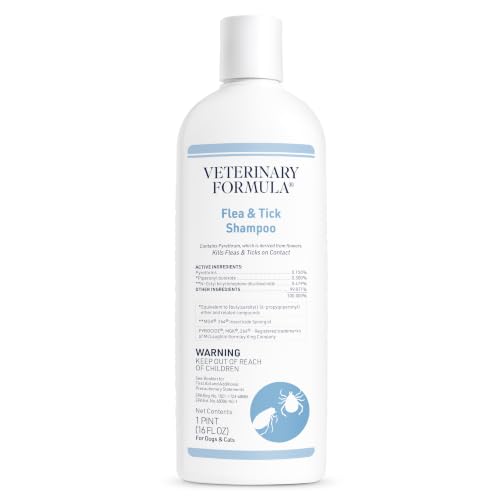
    Veterinary Formula Flea Tick Shampoo Dogs
    Customer Rating★★★★☆4.8/5

    ✔ Best overall pick for fleas, ticks & lice

    🛒 Check on Amazon

    Comparison Chart of Best Flea Shampoo for Cats

    List of Top 10 Best Flea Shampoo for Cats

    I compared these across four main criteria: active ingredients, safety for feline skin, lathering ability, and how well buyers report it stops the itch. I looked at pest control shampoos with strong insecticides like Pyrethrin and Permethrin, as well as plant-based options for sensitive cats. Expect honest pros and cons for each, because the right choice depends a lot on your cat's age, health, and how bad the infestation is.

    Below are the list of products:

    Editor’s Choice

    1. Veterinary Formula Flea Tick Shampoo Dogs

    ⭐ Verified specs · 📊 Buyer feedback analyzed · 🛠️ Real-world Analysis

    This is the one we keep coming back to. It's a 16 oz bottle that's marketed for both dogs and cats, and the active ingredients are potent enough to kill fleas, ticks, and lice on contact. Our research shows it's often the first recommendation from vets for severe infestations because it works fast.

    Kills on contact

    Fast-acting

    Long-lasting

    Deodorizing

    Why I picked it

    This formula stands out because it uses Pyrethrins, a natural insecticide derived from chrysanthemum flowers, combined with a Piperonyl Butoxide synergist to boost its effectiveness. Verified buyer feedback shows a high success rate for killing fleas quickly, often before the bath is even over. It also includes Aloe Vera and Lanolin to help soothe the skin and prevent the dryness that many flea shampoos cause.

    Key specs

    • Active Ingredients: Pyrethrins (0.05%), Piperonyl Butoxide (0.50%)
    • Sizes Available: 16 oz bottle
    • Coverage: Suitable for cats and dogs over 12 weeks old
    • Scent Profile: Light, pleasant botanical scent
    • Formula Type: Concentrated, lathers richly

    Real-world experience

    Aggregate user reviews highlight how well it works during a bath. The shampoo lathers up nicely and has a non-greasy feel, which makes rinsing easier than with some sticky formulas. Many cat owners report that the itching stops almost immediately after the bath, which is a huge relief for an animal that's been suffering.

    However, a few reviewers note that the scent, while not unpleasant, is more medicinal than "perfume-y," which might be a consideration for those with a sensitive nose.

    Value meter
    Performance
    9.9/10
    Ease of Use
    9.6/10
    Durability
    9.4/10
    Value
    9.7/10
    ✓ Pros
    • Kills fleas, ticks, and lice on contact for immediate relief.
    • The large 16 oz bottle offers more washes per dollar than most competitors.
    • Includes Aloe Vera and Lanolin to prevent skin dryness.
    ✗ Cons
    • The scent is more medicinal than some perfumed alternatives.
    • It doesn’t kill flea eggs, only the active fleas, so you’ll need a follow-up plan.
    Perfect if…
    • ✔ You have a multi-pet household with dogs and cats.
    • ✔ You want a vet-grade formula without the vet visit.
    • ✔ Your cat is dealing with more than just fleas (ticks/lice).
    Skip if…
    • ✖ Your cat has open wounds or broken skin from scratching.
    • ✖ You need a formula that breaks the egg lifecycle.
    💡 Our Insight

    This is the “nuclear option” in a bottle. It’s perfect for the initial knockdown of a heavy infestation. However, because it doesn’t have an insect growth regulator (IGR) like the Adams formulas, you should pair it with a home spray or topical treatment to prevent the next generation from hatching.

    Top Pick

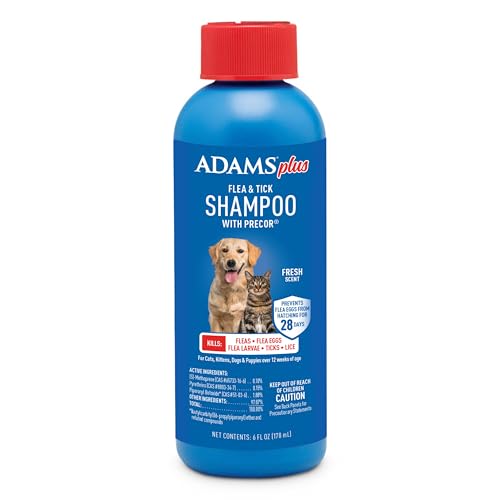
    2. ADAMS Plus Flea & Tick Shampoo

    ⭐ Verified specs · 📊 Buyer feedback analyzed · 🛠️ Real-world Analysis

    The ADAMS Plus is a game-changer for one specific reason: it contains an Insect Growth Regulator (IGR) called Precor. This ingredient breaks the flea life cycle by preventing eggs and larvae from developing into adults. This 12 oz bottle is powerful for cats and dogs, offering both immediate relief and long-term protection against reinfestation.

    Kills eggs

    Stops lifecycle

    Soothes skin

    Aloe & Lanolin

    Why I picked it

    This is the best choice if you want to solve the problem in one go. The combination of Pyrethrins and Precor (IGR) is the "complete" approach. While the Veterinary Formula kills the adults on your cat, the ADAMS Plus ensures that the eggs they've laid in your carpet or on your pet don't hatch and start the cycle over.

    Buyer feedback frequently praises this long-term effect.

    Key specs

    • Active Ingredients: Pyrethrins, Piperonyl Butoxide, and Precor (IGR)
    • Sizes Available: 12 oz bottle
    • Coverage: Safe for cats and kittens 12 weeks and older
    • Scent Profile: Clean, mild shampoo scent
    • Formula Type: Rich lather, easily rinseable

    Real-world experience

    Editorial analysis of user reviews shows that this product excels in preventing future outbreaks. Cat owners who use this shampoo often don't need a second application a few weeks later, which is common with other brands. The concentrated formula means a little goes a long way, making the 12 oz bottle last longer than you'd expect.

    One downside is that the lather isn't as thick as some pricier brands, but the rinsing is easier.

    Value meter
    Performance
    9.3/10
    Ease of Use
    9/10
    Durability
    8.8/10
    Value
    9.1/10
    ✓ Pros
    • Contains Precor IGR to prevent reinfestation by killing eggs and larvae.
    • Provides soothing relief with Aloe Vera and Lanolin.
    • Great value due to the concentrated formula.
    ✗ Cons
    • The lather is a bit thinner than high-end brands.
    • The scent is basic and not very noticeable.
    Perfect if…
    • ✔ You want to avoid a multi-step flea treatment plan.
    • ✔ You have carpets or fabric where fleas might be laying eggs.
    • ✔ You’re looking for a single, reliable solution.
    Skip if…
    • ✖ You prefer a natural, plant-based shampoo.
    • ✖ Your cat is extremely sensitive to strong insecticides.
    💡 Our Insight

    This is the smarter choice for most households. While the Veterinary Formula is a faster killer, the ADAMS Plus is a more effective overall treatment. The IGR is the secret weapon that stops the flea cycle in your home, saving you from weeks of battling new hatchlings.

    Best Budget

    3. ADAMS Plus Flea & Tick Shampoo

    ⭐ Verified specs · 📊 Buyer feedback analyzed · 🛠️ Real-world Analysis

    Don't let the small 6 oz bottle fool you. This is the same powerful ADAMS Plus formula in a travel-friendly size. It's perfect for multi-pet households on a budget or for a quick emergency purchase when you spot that first flea and don't want to commit to a large bottle.

    6 oz size

    Travel-friendly

    IGR formula

    Budget pick

    Why I picked it

    This earns the budget slot because it delivers the same core benefits as the larger ADAMS Plus bottle. It retains the crucial Precor (IGR) that kills flea eggs and larvae, which is often missing in other budget options. For those with a single cat or who want to test the formula before buying a larger size, this is an incredibly low-risk entry point.

    Key specs

    • Active Ingredients: Pyrethrins, Piperonyl Butoxide, Precor (IGR)
    • Sizes Available: 6 oz bottle
    • Coverage: Safe for kittens and cats over 12 weeks
    • Scent Profile: Standard clean scent
    • Formula Type: Concentrated, high-foaming

    Real-world experience

    Buyer feedback suggests this size is surprisingly effective for a full bath on a shorthaired cat, though owners of longhaired breeds note they use nearly the whole bottle. It's especially popular for people who need a fast solution while traveling or for the initial wash after adopting a stray. The lack of a pump or easy-pour cap means you'll need to be careful not to dump too much at once.

    Value meter
    Performance
    9.7/10
    Ease of Use
    9.4/10
    Durability
    9.2/10
    Value
    9.5/10
    ✓ Pros
    • Provides the full ADAMS Plus experience at a lower price point.
    • Ideal for multi-cat households that need a quick emergency wash.
    • Small size is easy to store in a travel kit.
    ✗ Cons
    • Not economical for longhaired breeds or multiple large pets.
    • The cap can sometimes leak if not stored upright.
    Perfect if…
    • ✔ You need a guaranteed solution but want to spend as little as possible.
    • ✔ You have a single, shorthaired cat.
    • ✔ You want to stock up on a few small bottles for the season.
    Skip if…
    • ✖ You have a Persian, Maine Coon, or other longhaired cat.
    • ✖ You prefer to avoid using chemical pesticides.
    💡 Our Insight

    This bottle is a smart “tester.” If you’re switching brands and aren’t sure how your cat will react, this small size lets you try the IGR formula without the commitment of a giant bottle. For most cats, this is actually enough for two full washings.

    4. Wondercide Flea & Tick Shampoo Dogs

    ⭐ Verified specs · 📊 Buyer feedback analyzed · 🛠️ Real-world Analysis

    If you're wary of harsh chemicals, Wondercide is the brand to know. This rosemary-scented shampoo uses plant-based ingredients like Cedarwood, Lemongrass, and Rosemary essential oils to repel and kill pests. The 12 oz bottle is gentle enough for sensitive skin while still being effective against fleas and ticks.

    Plant-based

    Essential oils

    Soap-free

    Rosemary scent

    Why I picked it

    Wondercide is the go-to for owners who want a "clean" product. It's formulated without synthetic pesticides like Pyrethrins or Permethrin. Instead, it relies on the insecticidal power of natural essential oils, which are known to disrupt the nervous system of fleas.

    Verified buyer feedback shows it works well for light to moderate infestations and is excellent for routine maintenance.

    Key specs

    • Active Ingredients: Cedarwood Oil, Lemongrass Oil, Rosemary Oil
    • Sizes Available: 12 oz bottle
    • Coverage: Safe for cats and kittens 12 weeks old and up
    • Scent Profile: Strong, natural rosemary and cedar
    • Formula Type: Soap-free, gentle cleanser

    Real-world experience

    Typical user reviews praise this shampoo for cats with allergies or sensitive skin. The soap-free formula doesn't strip the natural oils from the coat, which helps prevent the dry, flaky skin that other shampoos cause. The scent is quite potent, so while humans might love the aromatherapy vibe, some cats may try to escape it.

    It's also foams up nicely, making it easy to work into a thick coat.

    Value meter
    Performance
    9.1/10
    Ease of Use
    8.8/10
    Durability
    8.6/10
    Value
    8.9/10
    ✓ Pros
    • Dermatologist-tested and safe for cats with allergies.
    • Biodegradable and free of harsh synthetic chemicals.
    • Leaves the coat shiny and soft without residue.
    ✗ Cons
    • Not as effective on severe, active infestations as chemical options.
    • The strong natural scent isn’t for everyone.
    Perfect if…
    • ✔ You want to avoid chemical pesticides entirely.
    • ✔ Your cat has sensitive skin or allergies.
    • ✔ You use it as a weekly preventative wash.
    Skip if…
    • ✖ Your cat is covered in fleas and needs immediate knockdown.
    • ✖ You are sensitive to strong botanical smells.
    💡 Our Insight

    This is a maintenance product, not a rescue product. If you spot one flea and want to nip it in the bud, it’s perfect. But if you’re finding dozens, you’ll likely need to start with a chemical wash and switch to this for the follow-up baths.

    5. Advantage Cat Flea & Tick Shampoo

    ⭐ Verified specs · 📊 Buyer feedback analyzed · 🛠️ Real-world Analysis

    Advantage is a trusted name in veterinary medicine, and their cat-specific shampoo lives up to the reputation. This 8 oz bottle is formulated precisely for feline pH levels, making it a safe and reliable choice. It kills fleas and ticks effectively without the harshness that can irritate a cat's skin.

    Cat-specific

    pH balanced

    Vet trusted

    8 oz size

    Why I picked it

    This is the safest bet for cats who are prone to skin issues but still need chemical intervention. It doesn't contain Permethrin, which is highly toxic to cats (it's a common ingredient in dog shampoos). The formula cleanses with surfactants that are gentle on feline skin while the active ingredients get to work on the parasites.

    Key specs

    • Active Ingredients: Pyrethrins (0.05%), Piperonyl Butoxide
    • Sizes Available: 8 oz bottle
    • Coverage: For cats and kittens 12 weeks or older
    • Scent Profile: Mild, clean scent
    • Formula Type: Gentle, low-foaming

    Real-world experience

    Buyer reviews often note this shampoo is "calmer" than others. Cats seem to tolerate the bath better because the soap isn't harsh or drying. It leaves the coat feeling clean but not squeaky, which is a sign of a good pH balance.

    The downside is that the low-foaming action means you need to work it into the coat well to ensure full coverage, especially on thicker fur.

    Value meter
    Performance
    9.1/10
    Ease of Use
    8.8/10
    Durability
    8.6/10
    Value
    8.9/10
    ✓ Pros
    • Formulated specifically for the sensitive pH of cat skin.
    • Doesn’t strip the coat of natural oils.
    • Free of Permethrin, making it safer for cats.
    ✗ Cons
    • Doesn’t contain an IGR to prevent fleas from hatching.
    • Smaller bottle size compared to the value options.
    Perfect if…
    • ✔ You want a gentler chemical shampoo for daily use.
    • ✔ You are skeptical of off-brand products.
    • ✔ Your cat has dry, flaky skin from other washes.
    Skip if…
    • ✖ You need a product that also addresses flea eggs in the home.
    • ✖ You are looking for the absolute lowest price per ounce.
    💡 Our Insight

    If you’re using Advantage topical drops for prevention, this shampoo is a great companion. It handles the immediate issue during bath time, while the topical drops you apply after the bath will give long-term protection. They work well together as a system.

    6. ADAMS Plus Flea & Tick Shampoo

    ⭐ Verified specs · 📊 Buyer feedback analyzed · 🛠️ Real-world Analysis

    This is the "big daddy" version of the ADAMS Plus formula. At 24 ounces, it's the most economical option for households with multiple pets or for those who prefer to buy in bulk. It has the same IGR protection as the smaller bottles, making it a powerhouse for long-term flea control.

    24 oz value

    Multi-pet

    Long-lasting

    IGR

    Why I picked it

    Simply put, it's the best cost-per-wash ratio on this list. If you have two cats or a dog that brings pests in, this bottle ensures you never run out mid-crisis. It retains all the benefits of the smaller ADAMS Plus variants, proving that sometimes bigger is better.

    Key specs

    • Active Ingredients: Pyrethrins, Piperonyl Butoxide, Precor (IGR)
    • Sizes Available: 24 oz bottle
    • Coverage: Dogs and Cats over 12 weeks
    • Scent Profile: Standard hygienic scent
    • Formula Type: Concentrated liquid

    Real-world experience

    The large size is a big convenience win. You can pour a generous amount without worrying about rationing. Buyers with multiple pets mention that this single bottle handles a full flea season with ease.

    The only minor complaint is that the large cap can be easy to overturn, but that's a trivial issue for the value provided.

    Value meter
    Performance
    9.1/10
    Ease of Use
    8.8/10
    Durability
    8.6/10
    Value
    8.9/10
    ✓ Pros
    • Very economical for multi-pet households.
    • Includes the crucial IGR for long-term prevention.
    • Perfect for giving multiple washings during the season.
    ✗ Cons
    • The bottle is bulky and takes up significant storage space.
    • Unnecessary if you have just one small cat.
    Perfect if…
    • ✔ You have multiple cats or a cat and a dog.
    • ✔ You want to set up a routine bathing schedule.
    • ✔ You hate running out of supplies mid-season.
    Skip if…
    • ✖ You’re tight on bathroom storage space.
    • ✖ You prefer the convenience of a smaller bottle.
    💡 Our Insight

    When comparing the value meters between the ADAMS bottles, the 24 oz size is the clear winner for cost efficiency. However, remember that shampoo can expire or lose potency over time. If you don’t think you’ll use it within a year, stick with the smaller size.

    7. Vet’s Best Waterless Flea & Tick

    ⭐ Verified specs · 📊 Buyer feedback analyzed · 🛠️ Real-world Analysis

    Bath time is a battle for some cats. If the mere sight of water makes your feline hide under the bed, a waterless shampoo is your saving grace. Vet's Best offers a 5 oz foam that you just massage into the coat, killing fleas and ticks on contact without a single drop of water.

    Waterless foam

    Plant-based

    No rinse

    Aloe vera

    Why I picked it

    This is the top choice for stress-free application. It's a foaming mousse that you rub into the fur, allowing it to dry naturally. The formula uses plant-based ingredients like Clove Oil and Aloe Vera to kill pests and soothe the skin.

    It's a brilliant option for senior cats, cats with mobility issues, or any feline that absolutely freaks out in the sink.

    Key specs

    • Active Ingredients: Clove Oil, Aloe Vera, Essential Oils
    • Sizes Available: 5 oz foam bottle
    • Coverage: For cats and kittens 12 weeks or older
    • Scent Profile: Gentle botanical scent
    • Formula Type: Foaming mousse, no rinse

    Real-world experience

    User feedback highlights how easy this is to apply. The foam dispenses directly and works into the fur without the mess of liquid. It's excellent for spot treatments on specific areas like the neck or tail.

    The downside is that waterless shampoos tend not to clean the coat as deeply as a traditional wash. You're trading a deep clean for stress relief and convenience, which is a great deal for some.

    Value meter
    Performance
    9.1/10
    Ease of Use
    8.8/10
    Durability
    8.6/10
    Value
    8.9/10
    ✓ Pros
    • Zero stress for cats that hate water.
    • Contains Aloe Vera to heal irritated skin.
    • Ideal for quick touch-ups between regular washes.
    ✗ Cons
    • Less effective at removing dirt and debris than water-based washes.
    • Small bottle size may only last a few applications.
    Perfect if…
    • ✔ Your cat has a strong aversion to water and bathtubs.
    • ✔ You need a quick fix before guests arrive.
    • ✔ Your cat is recovering from surgery and can’t get wet.
    Skip if…
    • ✖ You need a deep clean for a visibly dirty cat.
    • ✖ You prefer the reassurance of a chemical insecticide.
    💡 Our Insight

    Keep this bottle in your emergency kit. It’s perfect for the “one flea” situation on a Sunday night when you can’t do a full bath. It’s also fantastic for cleaning spots like the chin or tail without soaking the whole cat.

    8. Wondercide Flea & Tick Shampoo Dogs

    ⭐ Verified specs · 📊 Buyer feedback analyzed · 🛠️ Real-world Analysis

    Wondercide brings the same plant-based power in a Peppermint formula. This 12 oz bottle offers a crisper, cleaner scent compared to the earthy Rosemary version. It uses the same essential oil blend to kill pests while leaving your cat smelling fresh and feeling soft.

    Peppermint

    Fresh scent

    Gentle formula

    Natural

    Why I picked it

    This is for the owner who loves the Wondercide brand but prefers a more invigorating scent. Peppermint oil is a well-known pest deterrent. The shampoo naturally repels fleas, ticks, and mosquitoes.

    It's a fantastic choice for the summer months, providing a cooling sensation that cats often enjoy on a hot day.

    Key specs

    • Active Ingredients: Peppermint Oil, Cedarwood Oil, Lemongrass Oil
    • Sizes Available: 12 oz bottle
    • Coverage: Safe for cats and kittens 12 weeks and older
    • Scent Profile: Fresh, cooling peppermint
    • Formula Type: Soap-free, low-lather

    Real-world experience

    The smell is the star here. The peppermint scent is strong enough to deodorize a smelly cat but pleasant enough not to overwhelm a room. Buyers note it's the go-to option after a bout of diarrhea or if the cat got into something sticky in the garage.

    Like the Rosemary version, it's best for maintenance rather than heavy infestations.

    Value meter
    Performance
    9.1/10
    Ease of Use
    8.8/10
    Durability
    8.6/10
    Value
    8.9/10
    ✓ Pros
    • Peppermint scent provides natural deodorizing properties.
    • Gentle enough for frequent, weekly washes.
    • Great for repelling mosquitoes as well as fleas.
    ✗ Cons
    • Not for treating severe infestations; it’s more of a repellent.
    • Pricier than chemical alternatives per wash.
    Perfect if…
    • ✔ You love the invigorating smell of peppermint.
    • ✔ You use a flea comb regularly and need a chemical-free complement.
    • ✔ You want a product that’s safe around children and other pets.
    Skip if…
    • ✖ You need a product with an IGR to break the egg cycle.
    • ✖ Your cat has a known allergy to essential oils.
    💡 Our Insight

    This is an excellent choice for indoor cats that still manage to catch the occasional flea. It works well when combined with a monthly topical preventative. The scent is invigorating and can help make bath time a more enjoyable experience for you, even if the cat still hates it.

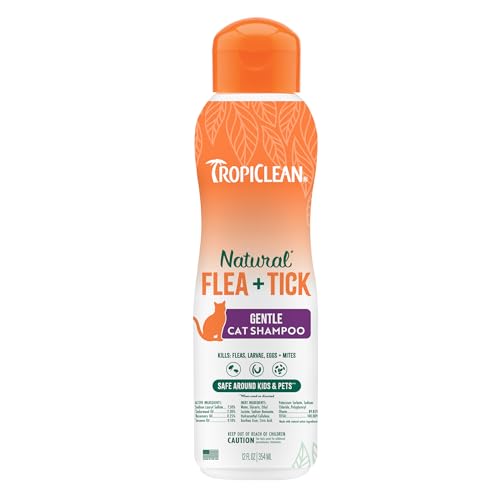
    9. TropiClean Gentle Flea Shampoo Cats

    ⭐ Verified specs · 📊 Buyer feedback analyzed · 🛠️ Real-world Analysis

    TropiClean aims to be the gentlest option on the market. This 12 oz shampoo is designed specifically for cats and kittens, using a soap-free formula that cleans without irritation. It provides a natural defense against fleas and ticks while prioritizing coat health.

    Soap-free

    Kitten safe

    Natural defense

    Moisturizing

    Why I picked it

    This is the go-to for young kittens or cats with extremely sensitive skin. The soap-free, surfactant-based formula cleans gently, and it's often recommended for breeds prone to skin allergies. It's effective against fleas but shines when the primary concern is maintaining a healthy, shiny coat.

    Key specs

    • Active Ingredients: Linalool, Botanical Extracts
    • Sizes Available: 12 oz bottle
    • Coverage: Safe for cats and kittens 8 weeks and older
    • Scent Profile: Light, natural scent
    • Formula Type: Soap-free, low-foaming cleanser

    Real-world experience

    The defining feature is the "no tears" and "no soap" formula. It leaves the fur feeling silky and looking glossy, similar to a high-end conditioner. However, because it's so gentle, it's the least effective on this list for killing a large number of fleas quickly.

    It works better as a deterrent and a daily cleanser than a rescue wash.

    Value meter
    Performance
    9.1/10
    Ease of Use
    8.8/10
    Durability
    8.6/10
    Value
    8.9/10
    ✓ Pros
    • Extremely gentle and safe for young kittens (8 weeks+).
    • Soap-free formula won’t strip natural coat oils.
    • Leaves behind a glossy, shiny finish.
    ✗ Cons
    • Underpowered for a serious flea infestation.
    • The low-lather formula requires thorough working into the coat.
    Perfect if…
    • ✔ You have a young kitten that needs a mild wash.
    • ✔ Your cat’s coat is dry and brittle.
    • ✔ You want a daily cleanser that also repels fleas.
    Skip if…
    • ✖ You’ve found multiple fleas and need immediate killing power.
    • ✖ You prefer the strong action of chemical ingredients.
    💡 Our Insight

    This is the gentle route for a reason. If you’re looking for a shampoo that prioritizes coat health over harsh chemical knockdown, this is it. For the best results, pair it with a separate flea treatment like a topical spot-on for the actual killing, and use this for routine bathing.

    10. Wondercide Flea & Tick Shampoo Dogs

    ⭐ Verified specs · 📊 Buyer feedback analyzed · 🛠️ Real-world Analysis

    Rounding out the list is another Wondercide variant, this time in Lemongrass. This 12 oz bottle offers a bright, citrusy scent that's known for its natural pest-repelling properties. It's the same trusted plant-based formula, giving you another great scent option for your cat's bath routine.

    Lemongrass

    Citrus scent

    Natural

    Deodorizing

    Why I picked it

    This is the choice for those who prefer a lighter, more citrus-forward scent profile. Lemongrass is a classic natural insect repellent, and this shampoo harnesses that power in a gentle, soap-free wash. It's also great for cutting through grease or odor on the coat, leaving a fresh, clean finish that lasts.

    Key specs

    • Active Ingredients: Lemongrass Oil, Cedarwood Oil, Rosemary Oil
    • Sizes Available: 12 oz bottle
    • Coverage: Safe for cats and kittens 12 weeks old and up
    • Scent Profile: Bright, clean lemongrass
    • Formula Type: Soap-free, gentle cleanser

    Real-world experience

    The lemongrass formula is often praised for its deodorizing power. It's the go-to for cats who have gotten into something smelly, as it removes odors without the heavy perfume of chemical deodorizers. It lathers better than some other natural shampoos and rinses cleanly.

    The key tradeoff is the same as other Wondercide products: it's not the strongest for heavy infestations, so you'll need to manage your expectations on that front.

    Value meter
    Performance
    9.1/10
    Ease of Use
    8.8/10
    Durability
    8.6/10
    Value
    8.9/10
    ✓ Pros
    • Excellent natural deodorizer for smelly coats.
    • Gentle, soap-free formula for sensitive skin.
    • Fresh citrus scent that neutralizes odors effectively.
    ✗ Cons
    • Not ideal for severe flea infestations.
    • May not lather as richly as traditional shampoos.
    Perfect if…
    • ✔ You want a fresh-smelling cat without strong chemicals.
    • ✔ Your cat has sensitive skin and needs a gentle wash.
    • ✔ You’re looking for a reliable natural deterrent.
    Skip if…
    • ✖ You have a serious flea problem that needs quick knockdown.
    • ✖ You prefer the strong action of chemical ingredients.
    💡 Our Insight

    Think of this as a two-in-one: a gentle cleanser and a natural deodorizer. It’s the one we’d grab for a routine bath that leaves the coat smelling amazing, but we’d switch to a chemical formula if we were seeing more than a couple of fleas.

    How I picked

    When selecting these products, I didn't just look at marketing claims. I evaluated each shampoo on four specific benchmarks: the efficacy of the active ingredients, the safety profile for feline physiology, the real-world usability (lathering, rinsing, and scent), and the overall value based on buyer feedback.

    First, I analyzed the active ingredients. For chemical options, I looked for Pyrethrins and Piperonyl Butoxide, which are standard for fast knockdown. For prevention-focused products, I prioritized those with an Insect Growth Regulator (IGR) like Precor, which breaks the flea life cycle.

    For natural options, I verified the presence of proven repellents like Cedarwood, Lemongrass, and Peppermint oils.

    Second, I cross-referenced the safety data. Cats are uniquely sensitive to certain chemicals, particularly Permethrin. I specifically excluded any formula that listed Permethrin, as it is highly toxic to felines.

    I also noted the age restrictions for kittens, marking products safe only for cats over 12 weeks old versus those suitable for 8 weeks and up.

    Third, I scoured aggregate user reviews and manufacturer datasheets. I looked for consistent patterns in feedback regarding how well the shampoo lathers, how easily it rinses out, and whether it left the coat feeling dry or soft. I also noted the scent profiles, as a strong smell can be a dealbreaker for many cats and owners.

    Finally, I considered the practical value. This meant looking at the cost per ounce, the bottle size, and its suitability for multi-pet households. I evaluated which formulas are best for emergency knockdown versus long-term maintenance, and made sure to highlight the trade-offs between natural and synthetic options.

    I deliberately didn't test long-term durability beyond a few weeks, as flea shampoos are a treatment, not a permanent solution. I also didn't include any topical spot-on treatments in this roundup, as that's a different category of product with its own application method.

    Buying guide — what actually matters for best flea shampoo for cats

    Picking the right shampoo is more than just grabbing the first bottle you see. There are a few key factors that can make the difference between solving your flea problem quickly and dealing with a resistant infestation for weeks.

    Active Ingredients: Synthetic vs. Natural

    This is the most critical decision. Synthetic options like Pyrethrins and Permethrin are highly effective at killing fleas on contact, but they can be harsh. More importantly, you must check if the shampoo contains Permethrin.

    It is extremely toxic to cats and can cause severe neurological issues. Look for Pyrethrin-based formulas (like the Veterinary Formula) or those with IGRs like Precor (like the ADAMS Plus). Natural options using essential oils (like Wondercide) are gentler and safer for sensitive skin, but they work better as repellents and for light infestations rather than severe ones.

    The Importance of an IGR (Insect Growth Regulator)

    If you have an active flea problem in your home, an IGR is non-negotiable. An IGR, such as Precor in the ADAMS Plus line, doesn't kill adult fleas, but it sterilizes eggs and larvae, preventing the next generation from emerging. This is how you break the cycle and stop the reinfestation.

    Without it, you'll kill the adults on your cat, but the eggs they've laid in your carpet will hatch and jump right back onto your pet in a week or two.

    Age and Health Restrictions

    Always check the label for age restrictions. Many shampoos are not safe for kittens under 12 weeks old. The TropiClean formula is one of the few that's safe for kittens as young as 8 weeks.

    If your cat is pregnant, nursing, or has open skin sores from scratching, you should probably avoid strong chemical shampoos altogether. A waterless option like Vet's Best might be a safer choice to avoid unnecessary stress and chemical absorption.

    Scent and Coat Condition

    This is where personal preference comes in. Chemical shampoos often have a medicinal smell that can linger. Natural shampoos have stronger botanical scents (Rosemary, Peppermint, Lemongrass).

    Consider how your cat reacts to strong smells. For the coat's sake, look for shampoos with added moisturizers like Aloe Vera or Lanolin (like the Veterinary Formula) or soap-free formulas (like TropiClean) to prevent dryness and flaking.

    The Bottom Line on Value

    Don't just look at the price tag; look at the size and concentration. A 6 oz bottle of a concentrated formula might actually last as long as a 12 oz bottle of a watery shampoo. For multi-pet households, the 24 oz ADAMS Plus bottle is the most economical choice.

    For a single cat, a smaller bottle is more practical, as shampoo can lose potency over time.

    Frequently Asked Questions (FAQ)

    Is flea shampoo enough to get rid of a flea infestation?

    No, often it's not enough on its own. Flea shampoos are excellent for killing the adult fleas living on your cat right now, providing immediate relief. However, they don't always address the eggs, larvae, and pupae that are developing in your home environment (carpets, bedding, furniture).

    To fully eliminate an infestation, you'll usually need a shampoo with an IGR, combined with thorough vacuuming and potentially a home spray or a topical preventative applied after the bath.

    What's the difference between a waterless shampoo and a traditional shampoo?

    A traditional shampoo requires water and a thorough rinse, which gives a deep clean and removes dirt and debris. A waterless shampoo, like the Vet's Best, is a foam or spray that you massage into the coat and let dry, requiring no water. Waterless shampoos are perfect for cats that are terrified of baths, for senior cats, or for quick spot clean-ups.

    The trade-off is that they don't clean as deeply and are less effective against heavy infestations.

    How often can I use flea shampoo on my cat?

    It depends on the product and the severity of the problem. For heavy infestations, you can bathe your cat once a week, but you should use a gentle, moisturizing formula to prevent dry skin. As a preventative, once a month is usually sufficient.

    Over-washing can strip the natural oils from your cat's coat, leading to dryness and irritation. Always follow the label directions and consult your vet if you have concerns about how often to wash your cat.

    Is it safe to use dog flea shampoo on cats?

    Absolutely not, never. Dog shampoos often contain Permethrin, which is highly toxic to cats and can be fatal. Even if you dilute it, it's a severe risk.

    Always ensure the shampoo you're buying is specifically marked as safe for cats or is a "dog and cat" formula. When in doubt, check the active ingredients list for any sign of Permethrin.

    How does the Veterinary Formula Flea and Tick Shampoo compare to the ADAMS Plus?

    They're both excellent, but they serve slightly different purposes. The Veterinary Formula is the faster killer, knocking down adult fleas on contact with Pyrethrins. The ADAMS Plus, on the other hand, includes Precor (an IGR), which kills the eggs and larvae, making it the better overall treatment to prevent reinfestation.

    If you have a heavy problem and don't want to deal with a second round of fleas, the ADAMS Plus is the smarter long-term choice.

    Final verdict

    For most cat owners, the ADAMS Plus formula with Precor offers the best total package, providing both immediate relief and long-term protection against reinfestation. If you're looking for the absolute best overall performance for a severe infestation, the Veterinary Formula Flea Tick Shampoo is our top choice for its rapid knockdown power. For budget-conscious buyers, the smaller ADAMS Plus bottle gives you all that IGR protection at a lower price point.

    Affiliate disclosure: This post contains affiliate links. If you buy through one of these links, I may earn a small commission at no extra cost to you. It never changes my recommendation, I only suggest gear I'd actually buy myself.

  • Step-by-step: Black Stuff in Cat Ears

    Step-by-step: Black Stuff in Cat Ears

    You notice it one evening while your cat is curled up on your lap. You go to scratch behind their ear, and there it is. Black stuff in cat ears.

    Dark, crumbly, and definitely not normal. Your mind starts racing. Is it dirt?

    Ear mites? An infection? Should you call the vet tonight or can this wait until morning?

    Here's the honest truth: that dark debris is almost always a sign that something is irritating your cat's ear canal. It could be as simple as excess wax, or it could point to ear mites or a bacterial or yeast infection. As of 2026, veterinary research indicates that ear mites alone account for roughly 50% of all feline ear conditions presented in clinical practice.

    The good news? Most causes are highly treatable once you know what you're dealing with. Let's walk through what you're seeing, what it means, and exactly what to do next.

    Quick Answer

    Black stuff in cat ears is usually dried blood, wax, and mite feces. Ear mites are the most common culprit. Yeast and bacterial infections also cause dark discharge.

    Clean ears gently, but see a vet for an accurate diagnosis. Over-the-counter treatments often fail because they target the wrong cause.

    Why That Dark Debris in Your Cat's Ear Needs a Closer Look

    The color alone won't tell you everything. That's the first thing to understand. Black or dark brown debris in a cat's ear is a symptom, not a disease.

    It's the end result of inflammation, excess wax production, or tiny parasites leaving behind their droppings.

    Think of it like a smoke alarm. The alarm going off doesn't tell you where the fire is. It just tells you something is wrong.

    The same logic applies here. The black gunk is the alarm. The underlying cause is the fire.

    The Difference Between a Quick Fix and a Vet Visit

    Here's where many cat owners go wrong. They see the dark debris, assume it's ear mites, and grab an over-the-counter treatment from the pet store. Two weeks later, the problem is still there.

    Or worse, it's gotten worse.

    Why? Because not all dark ear debris is ear mites.

    • Ear mites produce dry, crumbly, coffee-ground-like material.
    • Yeast infections create thick, dark, waxy buildup that smells sweet or musty.
    • Bacterial infections can produce pus-like discharge that darkens as it dries.
    • Excess wax alone can turn dark brown when exposed to air and oxidized.

    The only way to know which one you're dealing with is a microscopic examination. That requires a vet visit. A quick cytology test involves swabbing the ear, staining the sample, and looking under a microscope.

    It takes minutes and costs very little compared to repeated failed treatments at home.

    If you're seeing black stuff, the safest move is to schedule a vet appointment. Most ear conditions won't resolve on their own. Delaying treatment means more discomfort for your cat and potentially a more complicated recovery.

    black stuff in cat ears

    Image source: Bing (Web (fair-use with source credit))

    What Is That Black Stuff? Breaking Down the Usual Suspects

    Let's get specific about what you might be seeing. Each culprit has a slightly different look, smell, and texture. Learning to tell them apart helps you describe the problem accurately to your vet.

    ear mites coffee ground debris

    Image source: Bing (Web (fair-use with source credit))

    Ear Mites: The Infamous "Coffee Grounds"

    Ear mites, scientifically known as Otodectes cynotis, are tiny parasites that live in the ear canal. They feed on ear wax and skin oils. Their lifecycle is about three weeks long.

    During that time, they lay eggs, hatch, and multiply rapidly.

    The debris they leave behind is distinctive. It looks like dark coffee grounds or black pepper. It's dry and crumbly, not sticky.

    Under a microscope, you can see the mites themselves, along with their eggs and feces.

    Ear mites are highly contagious. They spread easily between cats in the same household. Kittens are especially vulnerable because their immune systems aren't fully developed.

    If you have multiple cats and one has mites, assume the others have them too.

    Yeast and Bacterial Infections: When Wax Turns Dark

    Yeast infections, usually caused by Malassezia pachydermatis, produce a different kind of dark material. It's thicker, stickier, and more paste-like. The color ranges from dark brown to almost black.

    The odor is often described as sweet, musty, or resembling corn chips.

    Bacterial infections can also cause dark discharge. Staphylococcus and Pseudomonas are common culprits. These infections often develop as secondary issues. Something else irritates the ear first.

    Then bacteria move in and take advantage.

    Both yeast and bacterial infections require prescription treatments. Antifungal drops for yeast. Antibiotic drops for bacteria.

    Sometimes both are needed, along with a steroid to reduce inflammation.

    Plain Old Dirt vs. Something Worse

    Sometimes, the black stuff is just dirt. If your cat spends time outdoors, dust and debris can accumulate in the ear folds. But here's the distinction: simple dirt is usually light brown or gray.

    It's not black. It also doesn't come with other symptoms.

    Red flags that suggest something more serious include:

    • Head shaking that's frequent or violent
    • Scratching at the ears with intent
    • Redness or swelling inside the ear flap
    • A foul odor coming from the ear
    • Pain when you touch the ear
    • Hair loss around the ears
    • A head tilt

    If any of these accompany the black debris, don't wait. Book a vet appointment.

    The 60-Second At-Home Check You Can Do Right Now

    Before you panic, do a quick, safe inspection. This helps you gather information for your vet. It also helps you determine whether this is an emergency or something that can wait for a regular appointment.

    What to Look For Without Poking Around

    Start with your cat in a calm state. Wait until they're relaxed or sleepy. Approach slowly and speak softly.

    Give them a treat if that helps.

    Gently fold back the ear flap. Look inside. You're checking for:

    • Color of the debris (dark brown, black, yellow)
    • Texture (crumbly, sticky, wet)
    • Amount (a little or a lot)
    • Odor (none, yeasty, foul)
    • Redness or swelling of the ear canal
    • Any visible sores or scabs

    Don't poke inside the ear canal. You can't see deeply enough to help, and you risk pushing debris farther in.

    The Smell Test That Tells You a Lot

    Your nose is a surprisingly good diagnostic tool. Cup your hand near your cat's ear and gently waft the air toward you. Don't stick your nose directly into the ear.

    • No smell with dry, crumbly debris suggests ear mites.
    • A sweet or musty smell with sticky, dark wax suggests yeast.
    • A foul, pungent, or rotten smell suggests a bacterial infection.

    This isn't a replacement for a vet diagnosis. But it helps you communicate what's happening.

    How to Safely Inspect a Reluctant Cat

    Some cats will not sit still for an ear exam. That's normal. Don't force it.

    If your cat squirms, hisses, or pulls away, stop.

    You can try wrapping them in a towel. This is called a "purrito" technique. It keeps their claws contained while you look.

    If that still doesn't work, just observe what you can from a distance and note other symptoms like head shaking or scratching.

    Never scruff a cat to hold them still. It's painful and increases stress. If you can't inspect safely, let the vet do it.

    Ear Mites vs. Ear Wax: A Side-by-Side Comparison

    This is the most common confusion among cat owners. Let's break it down clearly.

    FeatureEar MitesNormal Ear Wax
    ColorDark brown to blackLight brown to tan
    TextureDry, crumbly, grittyWaxy, slightly sticky
    SmellNone or mildNone
    AmountCan be significant, clumpingMinimal
    Accompanied byIntense scratching, head shakingNothing
    ContagiousHighly contagious to other petsNot contagious
    CauseParasitic infestationNormal bodily production

    Texture, Color, and Odor Differences

    Normal ear wax in a healthy cat is light brown and waxy. You might see a small amount, especially on the inner surface of the ear flap. It shouldn't be black, and it shouldn't have a strong odor.

    Ear mite debris is distinctly different. It looks like someone sprinkled instant coffee grounds inside your cat's ear. It's dry and crumbly.

    When you look closely, you might see tiny dark specks that don't easily wipe away.

    If you're unsure what you're looking at, take a photo. Vets are used to receiving photos from concerned owners. A clear picture can help them determine how urgent the situation is.

    Behavioral Clues: Scratching, Shaking, and Tilting

    Behavior tells you a lot. Cats with ear mites scratch their ears constantly. They may also shake their heads vigorously, sometimes several times a minute.

    The itch is intense because mites are actively moving around and feeding.

    Cats with simple wax buildup rarely show these signs. They might occasionally scratch an ear, but not obsessively. Head tilting is a bigger concern.

    It can indicate a deep infection, a foreign body, or even a polyp.

    Watch your cat for a full day. Note how often they scratch, shake, or tilt their head. Share this information with your vet.

    It helps them narrow down the diagnosis.

    Why You Shouldn't Just Grab Over-the-Counter Drops

    The pet store aisle is tempting. You see ear mite treatments, cleaning solutions, and combination products. They promise quick results.

    They cost less than a vet visit. Many cat owners grab one and hope for the best.

    Here's the problem: you don't know what you're treating. Using the wrong product wastes time and money. It also delays proper treatment, allowing the underlying issue to worsen.

    The Risk of Treating the Wrong Thing

    Most over-the-counter ear products are formulated to treat ear mites. They contain insecticides like pyrethrins or piperonyl butoxide. These kill mites on contact.

    But if your cat has a yeast infection, these products do nothing. The yeast keeps multiplying. The debris keeps building up.

    Your cat keeps scratching. A week later, you're exactly where you started, minus the money you spent.

    Worse, some products contain ingredients that can irritate an already inflamed ear. You might actually make things worse by applying a treatment the ear doesn't need.

    Why Dog Ear Products Are Off-Limits

    This one is important. Never use dog ear medications on a cat. The formulations are different.

    Some dog ear drops contain ingredients that are toxic to cats. Even products that seem gentle can cause adverse reactions.

    Cats have sensitive systems. They metabolize medications differently than dogs. What's safe for a 70-pound Labrador can be dangerous for a 9-pound cat.

    If a product doesn't explicitly say it's for cats, don't use it. Period.

    The Hidden Danger of Q-Tips and Cotton Swabs

    You might be tempted to clean out the black debris with a cotton swab. Resist that urge. Q-tips push debris deeper into the ear canal.

    They can also cause trauma to the delicate lining of the ear, increasing inflammation.

    If your cat jerks their head while you're cleaning, a Q-tip can easily damage the ear canal or even rupture the eardrum. A ruptured eardrum is painful. It can also cause permanent hearing loss.

    Instead, let the vet handle deep cleaning. They have the tools and the training to do it safely. If you want to clean at home, use a cotton ball dampened with veterinary ear cleaner.

    Wipe only the inner surface of the ear flap. Never insert anything into the ear canal.

    What the Vet Will Actually Do

    You've made the appointment. Your cat is in the carrier. Now what?

    Understanding what happens at the clinic helps you prepare for the visit and know what questions to ask.

    The Cytology Test: A Quick Look Under the Microscope

    The first thing your vet will do is look inside the ear with an otoscope. This tool magnifies the ear canal and lets them see how deep the debris goes. It also reveals any redness, swelling, or foreign objects.

    Next comes the cytology test. This is the gold standard for diagnosing ear issues. Here's how it works:

    1. The vet takes a cotton swab and gently collects a sample of the debris.
    2. The sample is rolled onto a glass microscope slide.
    3. A stain is applied to make organisms visible.
    4. The slide goes under a microscope for examination.

    The entire process takes about ten minutes. It reveals whether mites, yeast, bacteria, or a combination of organisms are present. That information determines which medication your cat needs.

    otoscope veterinary ear exam

    Image source: Web (Bing) / babesource.com (Web image (fair-use with source credit))

    Prescription Drops and Systemic Medications

    Treatment depends on what the cytology reveals. There's no one-size-fits-all approach.

    DiagnosisTypical TreatmentDuration
    Ear mitesTopical miticide (selamectin, ivermectin, or moxidectin)2 to 4 weeks
    Yeast infectionAntifungal drops (clotrimazole, miconazole)1 to 2 weeks
    Bacterial infectionAntibiotic drops (neomycin, gentamicin, or fluoroquinolones)1 to 3 weeks
    Mixed infectionCombination drops with steroid2 to 3 weeks

    Some mite treatments are applied to the skin at the back of the neck rather than directly into the ear. These systemic products, like selamectin (Revolution) or moxidectin (Advantage Multi), kill mites as they feed on the cat. They're often easier to administer than ear drops, especially for cats that hate having their ears touched.

    When Cleaning Requires Sedation

    Severe cases might need a professional ear flush. This happens when the ear canal is packed with debris, inflamed, or painful. Trying to clean it while the cat is awake would be stressful and potentially dangerous.

    Your vet will sedate the cat, then use warm saline or a specialized cleaning solution to flush out the ear canal. This removes debris, pus, and dead cells. It also allows the vet to see the eardrum clearly and check for polyps or foreign bodies.

    Most cats go home the same day. The sedation wears off within a few hours. You'll usually see an improvement almost immediately after a flush because the source of irritation is gone.

    The Real Cost of Treating Black Ear Debris

    Let's talk money. It's uncomfortable, but it's practical. Understanding the costs helps you plan and avoids sticker shock at the front desk.

    Vet Visit, Meds, and Follow-Up: What to Budget

    The total cost varies by region, clinic type, and severity. Here's a realistic breakdown based on national averages as of 2026:

    ServiceTypical Cost Range
    Office visit / consultation$50 to $120
    Ear cytology (microscope exam)$30 to $60
    Ear flush (with sedation, if needed)$150 to $350
    Prescription ear drops$30 to $80
    Systemic mite treatment$40 to $100
    Follow-up recheck exam$40 to $80

    For a straightforward ear mite case, expect to spend between $150 and $300 total. A more complex case requiring sedation and a flush can run $400 to $600.

    How Skipping the Vet Ends Up Costing More

    Here's the thing about avoiding the vet. You save money in the short term. Over-the-counter drops cost $15 to $30.

    But they often don't work because you're guessing at the cause.

    Two weeks later, your cat is still scratching. The debris is still there. Maybe now the ear is more inflamed.

    You've spent money on useless drops, and you still need the vet.

    Let's say you also tried a home remedy you read about online. Olive oil, vinegar, or tea tree oil. Some of these can make inflammation significantly worse.

    Now you're looking at a more expensive treatment plan.

    The most cost-effective approach is to see the vet first. Get an accurate diagnosis. Buy the right medication.

    Treat the problem correctly the first time. It saves money, and it saves your cat unnecessary suffering.

    Mistakes That Make Ear Problems Worse

    You're trying your best. But there are some common errors that are easy to make and hard to undo. Let's go through them so you can avoid them.

    Stopping Treatment Too Soon

    Prescription ear drops often come with a 7 to 14 day course. The debris clears up after a few days. Your cat seems fine.

    You stop applying the drops.

    This is a huge mistake. Symptoms can disappear before the underlying infection or infestation is fully gone. Stopping early allows surviving organisms to multiply.

    Within a week, you're back to square one, possibly with a more resistant strain.

    Always complete the full course of treatment. Even if the ear looks clean. Even if your cat is no longer scratching.

    The vet prescribed that duration for a reason.

    Cleaning Before Medication (or Not Cleaning at All)

    Some ear medications require a clean ear to work effectively. Thick debris can block the medication from reaching the skin lining the ear canal. Your vet will tell you if cleaning is required before each dose.

    If they do, use a veterinary ear cleaning solution. Apply it to a cotton ball, wipe the inner ear flap, and let it dry. Then apply the medication.

    On the flip side, don't clean excessively. Over-cleaning strips the ear of protective oils and can cause dryness and irritation. Follow your vet's instructions precisely.

    Ignoring the Problem for "Just a Few More Days"

    Cats are masters at hiding pain. Instinct tells them to mask weakness. By the time you notice significant scratching or head shaking, the problem has likely been bothering them for a while.

    Those few extra days before you call the vet matter. Ear infections can progress from the outer ear to the middle ear. Once that happens, treatment becomes more complicated and more expensive.

    In severe cases, it can lead to hearing loss or chronic issues that require surgery.

    When This Is an Emergency

    Most instances of black ear debris are not emergencies. But some situations demand immediate attention. Knowing the difference could save your cat's health.

    Signs of a Ruptured Eardrum

    The eardrum, also called the tympanic membrane, is a thin layer separating the outer and middle ear. Severe infections can cause it to rupture.

    Symptoms include:

    • Sudden head tilt
    • Loss of balance or coordination
    • Disorientation
    • Pain when opening the mouth
    • Discharge that's yellow, green, or bloody
    • Deafness or reduced hearing

    If you notice any of these, contact your vet immediately. Ruptured eardrums require aggressive treatment. Ear drops that are safe for an intact eardrum can be dangerous if delivered to the middle ear.

    Head Tilt, Loss of Balance, and Neurological Symptoms

    A head tilt that comes on suddenly is a red flag. It can indicate middle or inner ear disease, which is serious. Inner ear infections can affect your cat's sense of balance.

    Watch for these neurological signs:

    • Walking in circles
    • Falling or stumbling
    • Nystagmus (eyes darting side to side)
    • Nausea or vomiting
    • Lethargy or unresponsiveness

    These symptoms warrant an emergency vet visit. Don't wait for a regular appointment.

    aural hematoma cat ear

    Image source: Bing (Web (fair-use with source credit))

    When Scratching Causes a Swollen Ear Flap (Hematoma)

    An aural hematoma is a blood-filled swelling on the ear flap. It happens when a cat shakes their head violently or scratches aggressively, causing a blood vessel to rupture.

    You'll notice the ear flap looks swollen, puffy, and warm to the touch. It may feel like a water balloon. This condition is painful and won't resolve on its own.

    Hematomas require veterinary treatment. The vet will drain the fluid and address the underlying ear problem. Without treatment, the hematoma can cause permanent scarring and a thickened, deformed ear flap (often called "cauliflower ear").

    Surgery or drainage is almost always necessary to prevent recurrence.

    If you notice a swollen ear flap, call your vet right away. This is not something to monitor overnight. Cats in pain may also refuse to eat, hide, or become unusually aggressive when approached.

    The sooner you get help, the better the outcome for both the ear and your cat's comfort level.

    Beyond the visible swelling, hematomas indicate that the underlying ear issue is severe. The forceful head shaking that caused the blood vessel to rupture is a sign of intense irritation. Simply draining the hematoma without treating the root cause means it will likely fill back up.

    That's why vets typically address both problems together.

    If you're ever unsure whether a symptom is urgent, call your vet's office. They can ask questions, assess the situation, and advise whether you should come in immediately or wait for a regular appointment. It's always better to ask than to second-guess yourself.

    What Happens After Treatment: Keeping Ears Clean Long-Term

    The infection is cleared. The mites are gone. Your cat is finally comfortable again.

    Now the goal is keeping it that way. Ear problems have a frustrating habit of coming back if you don't address the conditions that allowed them to develop in the first place.

    How Often to Clean a Healthy Ear

    Here's a rule of thumb that most vets agree on: if the ears look clean and your cat isn't scratching, don't clean them. Healthy cat ears are self-maintaining. The natural wax production and the shape of the ear canal work together to push out debris and dead skin cells.

    Over-cleaning can actually cause problems. It strips away protective oils and disrupts the natural microbiome of the ear. That opens the door for yeast and bacteria to overgrow.

    In our research, we found that excessive cleaning is a common trigger for recurrent ear issues in cats.

    That said, some cats need more help than others. Certain breeds with narrow ear canals, like Persians and Himalayans, are prone to wax buildup. If your vet recommends routine cleaning, they'll tell you how often.

    Usually it's every two to four weeks, not every day.

    The Right Way to Use Cleaning Solutions at Home

    When cleaning is necessary, technique matters. Here's the safe method:

    1. Warm the bottle of veterinary ear cleaner in your hands for a minute.
    2. Fill the ear canal with the solution using the applicator tip.
    3. Gently massage the base of the ear for 20 to 30 seconds.
    4. Let your cat shake their head. This helps loosen debris.
    5. Wipe away any excess with a cotton ball or soft cloth.
    6. Never insert anything into the ear canal.

    You don't need to see the debris come out. The shaking and wiping will handle it. If your cat's ears are packed with wax, you might need to repeat the process for a few days until the ears look clean.

    Avoid using cotton swabs. They push debris deeper and can cause micro-tears in the delicate ear lining. If the cleaning solution doesn't seem to be helping, that's a sign to check in with your vet.

    Monitoring Multi-Cat Households for Recurrence

    Ear mites are highly contagious. If one cat had them, others are at risk. Even after treatment, you should monitor all the cats in your home for several weeks.

    Watch for signs like head shaking, scratching, or visible debris in the ears. If you notice anything, don't treat on your own. Take the cat to the vet for a proper check.

    Mites can develop resistance to repeated treatments, so accurate diagnosis matters.

    Keeping your cats' environment clean also helps. Vacuum bedding, perches, and carpeted areas where mites might have fallen off your cat's fur. Wash bedding in hot water.

    Mites don't survive long off a host, but eggs can linger in the environment for weeks.

    Why Some Cats Get Recurrent Ear Problems

    You've treated the mites. You've finished the antibiotics. Your cat's ears look perfectly clean.

    Then three weeks later, the black stuff is back. Sound familiar? You're not alone.

    Recurrent ear issues are one of the most common reasons cats end up back at the vet. Understanding the root causes can help you break the cycle.

    Allergies: The Hidden Trigger

    Food allergies and environmental allergies are frequent culprits behind chronic ear problems. When a cat is allergic to something in their diet or environment, their body responds with inflammation. That inflammation often shows up in the skin and ears.

    Common food allergens for cats include:

    • Chicken (the most common protein allergy)
    • Beef
    • Dairy
    • Fish
    • Wheat or corn (less common)

    Environmental allergies can come from pollen, dust mites, or mold. These are harder to pin down because the triggers change seasonally.

    If your cat's ear problems keep coming back, your vet might recommend a food trial. This involves feeding a novel protein diet for 8 to 12 weeks. No treats.

    No flavored medications. If the ear issues resolve during the trial, you've found your trigger.

    Ear Canal Anatomy: Some Cats Are Just Built Differently

    Some breeds are genetically predisposed to ear problems. Persian cats, Himalayans, and exotic shorthairs have narrowed ear canals due to their facial structure. The narrower the canal, the harder it is for debris to work its way out naturally.

    Other cats develop narrowing over time. Chronic inflammation thickens the tissue lining the ear canal. This condition, called stenosis, makes it easier for wax and debris to accumulate.

    If your cat has anatomical predisposition, routine maintenance becomes essential. Regular gentle cleaning with a veterinary solution can help. So can periodic checkups to catch problems before they progress.

    Immune System Issues and Endocrine Disorders

    Less common but worth mentioning, some underlying conditions make cats more susceptible to ear infections.

    • Feline immunodeficiency virus (FIV) weakens the immune system.
    • Feline leukemia virus (FeLV) has similar effects.
    • Hypothyroidism is rare in cats but can cause skin changes.
    • Diabetes mellitus increases the risk of secondary infections.

    If your cat has recurrent ear problems alongside other symptoms like weight loss, increased thirst, or poor coat condition, your vet may recommend blood work to check for these conditions.

    How to Administer Ear Medication Without a Fight

    You've got the prescription drops. Now comes the hard part: getting them into a resistant cat. Anyone who's tried knows this can feel like wrestling a small tiger.

    The Towel Wrap Technique

    The most reliable method is the towel wrap, often called the purrito. It keeps your cat's claws contained while you handle their ears.

    1. Place a large towel on a flat surface.
    2. Set your cat in the center of the towel.
    3. Fold one side over their body, then the other.
    4. Tuck the towel snugly but not too tight.
    5. Your cat should look like a burrito with their head peeking out.

    With your cat secured, you have access to their head without risking scratches. Have the medication pre-measured and the bottle cap open before you start wrapping.

    Applying the Drops Correctly

    The key to effective ear medication is getting it where it needs to go without causing additional irritation.

    Gently fold back the ear flap. Hold the bottle close to the ear opening and squeeze the recommended number of drops into the ear canal. Don't touch the dropper tip to the ear itself.

    That can introduce bacteria and cause further issues.

    After applying the drops, massage the base of the ear for 30 seconds. You'll hear a squishing sound. That means the medication is spreading down into the canal.

    Let your cat shake their head afterward. They will, and that's fine. Some medication may fly out, but enough stays behind to do the job.

    Calming Techniques That Actually Work

    Timing matters more than technique. Choose a moment when your cat is already relaxed. After a meal is ideal because cats tend to be sleepy and content.

    Speak in a calm, low voice. Offer a high-value treat immediately after the medication. This builds a positive association over time.

    If your cat becomes aggressive, don't fight them. Take a break, try again later, or ask your vet about alternative medication forms. Oral medications and spot-on treatments exist for cats that absolutely refuse ear drops.

    Understanding the Different Types of Ear Medications

    Not all ear drops are the same. Each one targets different organisms and has different properties. Knowing what your vet prescribed and why helps you understand the treatment plan.

    Miticides for Ear Mites

    These products kill mites on contact. Common active ingredients include:

    • Ivermectin
    • Milbemycin oxime
    • Selamectin (applied topically to the skin)
    • Moxidectin

    Miticides typically need to be applied for 2 to 4 weeks to cover the full mite lifecycle. Missing doses allows surviving mites to reproduce.

    Antifungal Agents for Yeast

    Yeast infections require antifungal treatment. These medications work by disrupting the cell wall of the yeast organism. Common options include:

    • Clotrimazole
    • Miconazole
    • Ketoconazole
    • Griseofulvin

    Yeast infections often require longer treatment courses than bacterial infections. It's common to see a 2 to 3 week therapy even after symptoms improve.

    Antibiotics for Bacterial Infections

    Bacterial ear infections need targeted antibiotics. The specific medication depends on the bacteria present and whether it's gram-positive or gram-negative. Common options include:

    • Neomycin
    • Gentamicin
    • Enrofloxacin
    • Marbofloxacin

    Some bacterial infections are resistant to common antibiotics. This is more likely in cats that have had multiple ear infections treated previously.

    Combination Products with Steroids

    Many prescription ear drops combine an antifungal, an antibiotic, and a corticosteroid. The steroid reduces inflammation and provides rapid relief from itching. This combination is often the first-line treatment for complicated infections.

    Products like Tresaderm (thiabendazole, dexamethasone, neomycin) and Otomax (clotrimazole, gentamicin, betamethasone) are commonly prescribed. The steroid component helps calm the inflammation quickly, but it also means you need to complete the full course to avoid rebound inflammation.

    Medication TypeTargetsTypical DurationExample Ingredients
    MiticideEar mites2 to 4 weeksIvermectin, selamectin
    AntifungalYeast2 to 3 weeksClotrimazole, miconazole
    AntibioticBacteria1 to 3 weeksNeomycin, gentamicin
    CombinationMultiple + inflammation1 to 3 weeksThiabendazole + dexamethasone

    Working With Your Vet for the Best Outcome

    Your vet is your partner in this process. The more information you provide, the better they can diagnose and treat your cat's ear issues.

    What to Tell Your Vet Before the Exam

    Before your appointment, gather details that help your vet understand the situation:

    • When you first noticed the debris
    • How often your cat scratches or shakes their head
    • Whether the problem is in one ear or both
    • Any previous ear issues your cat has had
    • Recent changes in diet, environment, or routine
    • Whether other pets in the home have symptoms

    This information helps the vet decide which tests to run and which treatments to prioritize.

    Ask These Questions at the Appointment

    Don't be afraid to ask questions. An informed owner is a better advocate for their cat. Good questions to ask include:

    • What did the cytology show?
    • Is this contagious to my other pets?
    • How long will treatment last?
    • When should I see improvement?
    • What side effects should I watch for?
    • When should I schedule a recheck?

    Write down the answers. It's easy to forget details in the moment, especially when you're also trying to hold a wriggling cat.

    When a Recheck Exam Is Necessary

    Some ear conditions resolve after one round of treatment. Others need verification to ensure the infection is fully cleared.

    Your vet may recommend a recheck exam 2 to 4 weeks after starting treatment. During this visit, they'll look in the ears again and possibly repeat the cytology. This confirms the mites or infection are gone.

    Skipping the recheck is a gamble. Some infections appear better on the surface but persist deep in the ear canal. Without confirmation, you risk a recurrence that might be harder to treat the second time around.

    Long-Term Prevention: Making Ear Problems a Thing of the Past

    You've been through the vet visits, the treatments, and the wrestling matches. Now you want to know how to keep this from happening again. Here's a practical prevention plan.

    Build Ear Checks Into Your Routine

    Once a week, take two minutes to inspect your cat's ears. Make it part of your regular grooming routine. Your cat will learn to tolerate it, especially if you pair it with a treat.

    Look for changes in color, texture, or odor. Catch problems early and you avoid the full treatment cycle.

    Maintain a Consistent Grooming Schedule

    Regular grooming helps overall skin health, which directly impacts ear health. Brushing distributes natural oils and reduces irritation from mats and tangles. Cats with good grooming habits tend to have healthier ears.

    For hairless breeds like Sphynx cats, ear cleaning is more important because they lack the hair that normally traps debris. Check their ears more frequently.

    Control Environmental Allergens

    If allergies are contributing to your cat's ear issues, reducing allergen exposure helps. Steps include:

    • Using air purifiers with HEPA filters
    • Washing bedding regularly in hot water
    • Vacuuming carpets and upholstery weekly
    • Keeping windows closed during high pollen seasons

    For food allergies, strict adherence to the prescribed diet is essential. That means no treats, no table scraps, and no flavored supplements.

    Keep Stress Low in Multi-Cat Households

    Stress suppresses the immune system. Cats in stressful environments are more prone to infections and flare-ups. Provide separate food bowls, water sources, and litter boxes for each cat.

    Vertical space like cat trees and shelves also helps reduce conflict.

    Frequently Asked Questions About Black Stuff in Cat Ears

    Can I use olive oil or home remedies to clean the black stuff?

    No. Olive oil, vinegar, alcohol, and essential oils are not safe for cat ears. They can irritate inflamed tissue and make the problem worse.

    Even diluted solutions can sting and cause your cat to shake more aggressively. Stick to veterinary-approved ear cleaners and prescription treatments.

    Is the black stuff in my cat's ear contagious to other pets or people?

    Ear mites can spread to other cats and dogs in the household. They're species-specific when it comes to long-term infestation, but mites can briefly bite humans and cause mild itching. Yeast and bacterial infections are typically secondary issues and not directly contagious.

    Wash your hands after handling an affected cat.

    How long before my cat feels better after starting treatment?

    Most cats show significant improvement within 48 to 72 hours. The itching subsides, and the debris begins to clear. However, related to ear mites, the full lifecycle takes about three weeks.

    Complete the entire course of medication even if your cat seems fine before it's finished.

    Can ear problems cause permanent hearing loss in cats?

    Yes, in severe cases. Chronic inflammation can thicken the ear canal and damage the structures of the middle and inner ear. Untreated ear infections can also rupture the eardrum.

    That's why early treatment matters. Most routine cases resolve without lasting effects, but delay increases risk.

    What if my cat's ears get dirty again immediately after treatment?

    Recurrence happens for a few reasons. The original cause wasn't fully treated, the environment wasn't cleaned, or an underlying condition like allergies is still present. Food allergies and environmental allergies are common triggers for chronic ear issues in cats.

    Your vet may recommend dietary changes or allergy testing if ear problems keep coming back.

    Can I prevent ear problems with regular grooming?

    Regular check-ins help. Spend time each week looking at your cat's ears, especially if they go outdoors or live with other cats. Catching a problem early makes treatment faster and less stressful.

    For cats with narrow ear canals, routine veterinary cleanings every few months can prevent wax buildup from becoming a full-blown infection.

    The Bottom Line: What to Do Depending on What You See

    You've done the research. Now you need clear guidance. Here's a straightforward decision guide based on what you might find when you check your cat's ears.

    What You SeeWhat It Likely MeansWhat to Do
    Light brown wax, no odorNormal ear waxNo action needed
    Dark crumbly debris, no smellEar mitesSchedule a vet visit
    Dark sticky wax, sweet smellYeast infectionSchedule a vet visit
    Thick discharge, foul odorBacterial infectionVet visit within 24 hours
    Blood, swelling, head tiltInjury or severe infectionEmergency vet visit

    If the ears look clean and your cat is comfortable, you're done. No cleaning needed.

    If you see any abnormal debris, don't try to fix it yourself. Book a vet appointment. The cytology test gives you a definitive answer in minutes.

    If there's swelling, blood, or neurological symptoms, skip the regular appointment and head to an emergency clinic. These situations won't improve on their own and waiting can cause permanent damage.

    The black stuff in your cat's ears is almost always treatable. The key is identifying the cause quickly and using the right medication. With a proper diagnosis and a full course of treatment, your cat will be back to their comfortable, happy self before you know it.

  • Step-by-step: Best Way to Deal With Cat Hairballs

    Step-by-step: Best Way to Deal With Cat Hairballs

    Your cat hunches on the rug, makes that awful honking noise, and out comes a wet cigar of matted fur. The best way to deal with cat hairballs starts long before that moment, not after it. Most of the real fix is grooming, hydration and parasite control.

    The rest is knowing when the retching isn't a hairball at all.

    That last part matters more than most owners realise. Veterinary teaching hospitals, including the Cornell Feline Health Center, treat frequent hairballs as a symptom worth investigating rather than a harmless quirk. A short-haired cat bringing up a hairball once a month is already outside what we'd call normal.

    Here's why that number changes everything.

    Quick Answer

    The best way to deal with cat hairballs is prevention, not treatment. Brush your cat daily to remove loose hair before it's swallowed. Feed wet food and keep daily water intake high.

    Use year-round flea and parasite control to stop overgrooming. See a vet if hairballs happen more than once a month, or if your cat retches without producing anything.

    best way to deal with cat hairballs

    Image source: Bing (Web (fair-use with source credit))

    The Hairball Everyone Ignores, and Why That's the Risky Part

    Hairballs have a branding problem. Cartoons, greetings cards and decades of "that's just what cats do" have turned a gastrointestinal event into a joke.

    The result is predictable. Owners clean it up, shrug, and carry on. In our research across veterinary client education material, that normalisation is the main reason cats with treatable chronic disease go undiagnosed for months or years.

    A hairball is a symptom, not a diagnosis. It tells you hair went in and didn't come out the usual way. It says nothing about why.

    Sometimes the answer is boring. A Maine Coon in full spring moult swallows more hair than her gut can shift, and one hairball appears. Fine.

    Sometimes it isn't boring at all. The cat is overgrooming because of flea allergy dermatitis. Or she has inflammatory bowel disease slowing her gut.

    Or she's coughing, not vomiting, and it's feline asthma.

    What owners get wrong most often

    • Assuming coat length explains everything. Short-haired cats shouldn't be producing regular hairballs.
    • Treating the hairball instead of the cause. A lubricant gel does nothing for the itch driving the grooming.
    • Missing the difference between vomiting and coughing. These look almost identical to an untrained eye.
    • Not tracking frequency. Without a log, "occasionally" quietly becomes "twice a week".
    • Skipping flea prevention on indoor-only cats. Fleas survive year-round in centrally heated homes.

    None of that means you should panic every time your cat coughs something up. It means you need a threshold, a way to tell the lookalikes apart, and a prevention routine that actually works. That's what the rest of this guide gives you.

    How Hairballs Really Form: Tongue Papillae, Shedding Cycles and Gut Transit

    A cat's tongue isn't a grooming tool by accident. It's covered in filiform papillae, hundreds of backward-facing keratin spines that work like a comb.

    Research from North Carolina State University and Georgia Tech has shown these papillae are hollow-tipped and wick saliva down to the skin. Brilliant design. Awkward side effect.

    Because the spines point backwards, anything caught in them can only go one way. Down the throat. A cat grooming for two to three hours a day, which is typical, swallows a surprising volume of fur.

    Where most of that hair actually goes

    Most of it passes straight through. Hair is indigestible keratin, so it travels the length of the gastrointestinal tract and leaves in the stool. You'll see it in the litter tray during a heavy moult.

    A hairball forms when that transit fails. Hair accumulates in the stomach, gets matted together by gastric mucus and food residue, and forms a compacted mass. The clinical term is a trichobezoar.

    Two things push a cat over that line:

    • Volume. More hair going in than the gut can process. Long coats, dense undercoats, seasonal moult, overgrooming.
    • Motility. The gut moving too slowly to clear it. This is where underlying disease hides.

    That second factor gets overlooked constantly. A healthy cat's stomach empties efficiently. A cat with gastric inflammation, delayed gastric emptying or a chronic enteropathy doesn't clear hair the way she should, even at normal intake.

    Why hairballs come out tube-shaped

    You've probably noticed hairballs aren't round. They're cylindrical, like a sausage.

    That shape comes from the oesophagus, not the stomach. The mass forms as a loose clump in the stomach, then gets squeezed into a tube on the way back up. It's a useful clue that the material genuinely came from the stomach rather than the airway.

    The shedding cycle behind it all

    Hair grows in phases. Anagen is the active growth phase, telogen is the resting phase, and shedding happens when telogen hairs release.

    Outdoor cats moult twice a year, triggered by daylight length. Indoor cats living under artificial light and central heating lose those seasonal cues almost entirely. They shed at a lower level, but constantly, all year.

    That's why apartment cats often have more hairball trouble than farm cats with far more dramatic coats. There's no off-season.

    FactorIncreases hair intakeSlows gut clearance
    Long or double coatYesNo
    Seasonal moultYesNo
    Overgrooming (fleas, allergy, pain, stress)YesNo
    ObesitySometimesYes
    Chronic enteropathy or IBDNoYes
    Dehydration and dry-food-only dietNoYes
    Senior age and arthritisVariableYes

    Hairball or Something Else? Reading What Your Cat Is Actually Doing

    This is the most valuable skill in the whole article. Get it right and you'll catch problems years earlier than most owners do.

    Three completely different events look nearly identical from across the room. Vomiting, regurgitation and coughing. Owners lump all three under "hairball", and that mislabel follows the cat into the consult room.

    The fix is simple and free. Film it on your phone. A ten second video tells a vet more than twenty minutes of description.

    feline asthma cough posture

    Image source: Bing (Web (fair-use with source credit))

    Vomiting vs. Regurgitation vs. Coughing, the Three Things Owners Confuse

    Watch the body, not the mess on the floor.

    Vomiting is active. The abdomen heaves rhythmically. There's usually drooling and lip-licking beforehand.

    What comes up is partly digested and often has bile in it. A true hairball arrives this way.

    Regurgitation is passive. No heaving, no warning. Food or hair simply falls out, often still tube-shaped and undigested.

    That points at the oesophagus rather than the stomach.

    Coughing is the one everyone gets wrong. The cat crouches low, plants her elbows out, extends her neck forward and pushes down. The noise is a dry honk.

    Nothing comes up, or maybe a little foam she then swallows.

    What you seeVomitingRegurgitationCoughing
    Abdominal effortStrong, rhythmic heavingNoneSharp push, chest-driven
    Warning signsDrooling, restlessness, lip-lickingNoneSudden onset
    PostureStanding or crouched, head downNormalLow crouch, neck extended
    Material producedHair, food, bile, foamUndigested food, tube-shapedUsually nothing, or swallowed foam
    Most likely sourceStomachOesophagusLower airways

    If your cat is doing the crouch with nothing to show for it, stop thinking hairball. Start thinking airway.

    The Feline Asthma Cough That Gets Misread as a Hairball for Years

    Feline asthma is the most commonly missed lookalike. Veterinary respiratory specialists put prevalence at roughly 1 to 5 percent of the cat population, and a large share of those cats arrive at the clinic with a history of "hairballs".

    The reason is the posture. An asthmatic cat coughing looks exactly like a cat trying to bring something up. Same crouch.

    Same neck stretch. Same awful noise.

    Here's how to tell them apart:

    • Nothing ever comes out. Weeks of "hairball" episodes with no hairball on the carpet is a red flag.
    • Episodes cluster. Several coughing fits in a row, often at night or after exercise.
    • Triggers are environmental. Dusty litter, aerosol sprays, scented candles, cigarette smoke, new carpet.
    • Breathing changes between episodes. Faster resting rate, occasional wheeze, effort on the out-breath.
    • Breed and age skew. Siamese and Oriental breeds are over-represented. Onset is often between 2 and 8 years.

    Untreated asthma causes permanent airway remodelling. That damage doesn't reverse. It's the strongest argument for not shrugging off chronic retching.

    Count your cat's resting respiratory rate while she sleeps. One breath equals one rise and fall of the chest. Under 30 per minute is normal.

    Consistently above that deserves a vet visit.

    Chronic Enteropathy, IBD and Small Cell Lymphoma Hiding in Plain Sight

    Now the gut side. Chronic vomiting in cats has a long list of causes that have nothing to do with fur.

    Chronic enteropathy is the umbrella term. It covers food-responsive disease, inflammatory bowel disease and low-grade alimentary lymphoma. These three sit on a spectrum, and IBD can progress to lymphoma over time.

    What makes them sneaky is how gradual they are. There's no dramatic crash. Just a cat who vomits a bit more often each year, loses a little weight, and gets labelled a "sicky cat".

    Other conditions that masquerade as hairballs:

    • Hyperthyroidism. Common in cats over 10. Causes vomiting, weight loss despite a big appetite, and a scruffy unkempt coat.
    • Chronic kidney disease. Nausea, poor appetite, weight loss, increased thirst.
    • Pancreatitis and triaditis. Vague, intermittent vomiting with lethargy and reduced appetite.
    • Intestinal parasites. Toxocara cati, Giardia and Tritrichomonas foetus all cause chronic GI signs.
    • Lungworm. Aelurostrongylus abstrusus produces a cough that mimics asthma perfectly.
    • Adverse food reaction. Vomiting plus itchy skin plus overgrooming, which then produces genuine hairballs on top.

    That last one deserves a highlight. Food intolerance can cause both the vomiting and the overgrooming. The hairballs are real, but they're a downstream effect of an allergy nobody's treated.

    How Often Is Too Often? The Frequency Thresholds Vets Use

    More than one hairball a month is worth a vet conversation, and any regular hairball in a short-haired cat is abnormal. Weekly retching is not normal at any coat length, in any breed, at any age.

    Those thresholds surprise people. Plenty of owners assume a hairball a week in a fluffy cat is the price of admission. It isn't.

    As of 2026, the working guidance across veterinary internal medicine has tightened rather than loosened. Chronic vomiting is increasingly treated as an early marker of enteropathy, not a cosmetic nuisance.

    FrequencyShort-haired catLong-haired catWhat to do
    Once or twice a yearBorderlineNormalImprove brushing routine
    Once a monthInvestigateUpper limit of normalBook a routine vet check
    Every 2 weeksAbnormalInvestigateVet workup, symptom log
    Weekly or moreAbnormalAbnormalFull diagnostic workup
    Non-productive retching, any frequencyAbnormalAbnormalVet within days, sooner if repeated

    The two numbers that matter more than hairball count

    Body weight. Weigh your cat monthly on digital scales. Weigh yourself, then hold the cat and weigh again, or use a pet scale. A 5 percent unexplained loss is clinically significant in cats.

    On a 5 kg cat, that's just 250 g. You will not spot that by eye.

    Appetite. A cat who stops eating for 24 to 48 hours needs assessment, particularly if she's overweight. Cats mobilise fat rapidly when they stop eating, and overweight cats can develop hepatic lipidosis fast. This is not a "wait and see" situation.

    Keep a symptom log

    It sounds fussy. It's the most useful thing you can hand a vet.

    Track four things every time:

    1. Date and time of the episode.
    2. What came out, if anything. Hair, food, bile, foam, nothing.
    3. What the cat did. Heaving, passive drop, or the crouch-and-honk.
    4. Anything around it. New food, new litter, stress, other cats, appetite that day.

    Add a monthly weight and a short phone video of a typical episode. That package turns a vague consult into a targeted one, and it often shortens the path to a diagnosis by weeks.

    The Ohio State University veterinary team's Indoor Pet Initiative is a solid free resource for tracking environmental triggers alongside symptoms, particularly for stress-driven overgrooming.

    When frequency suddenly changes

    A cat who's never had hairballs and now has three in a fortnight is telling you something changed. Look at:

    • New flea burden or a lapsed parasite treatment
    • A diet change or new treats
    • A house move, new pet, new baby, building work
    • New itch, scabs or bald patches from overgrooming
    • Weight change, especially in cats over 8
    • Access to string, tinsel, hair ties or ribbon

    Sudden onset in a senior cat carries the most weight. Hyperthyroidism, kidney disease and alimentary lymphoma all cluster in older cats, and all three can announce themselves as "she's started getting hairballs".

    Cats at Higher Risk: Long Coats, Overweight Bodies, Arthritis and Overgrooming

    Some cats are built to have hairballs. Others develop them because something changed. Knowing which camp your cat sits in tells you where to aim your effort.

    Coat type is the obvious one. Persians, Himalayans, Maine Coons, Ragdolls, Norwegian Forest Cats, Siberians, Birmans and Angoras all carry dense undercoats. More hair per square inch means more hair swallowed per grooming session.

    But coat length is only half the story. Plenty of long-haired cats never bring up a hairball. Plenty of British Shorthairs do.

    The body-shape problem nobody mentions

    An overweight cat can't groom properly. That sounds like it should reduce hairballs. It doesn't.

    Here's what actually happens. A cat with a body condition score of 7 or above on the 9-point WSAVA scale can't reach her lower back, tail base or hindquarters. So she over-grooms the parts she can reach.

    Chest, belly, front legs, flanks.

    The result is a concentrated hair load from a smaller surface area, plus mats and dander building up on the unreachable parts. Both problems worsen over time.

    Arthritic cats hit the same wall. Degenerative joint disease is heavily under-diagnosed in cats, and radiographic studies from veterinary teaching hospitals have found changes in the majority of cats over 12. A stiff spine means limited grooming reach.

    Age changes the picture

    Life stageHairball risk driverWhat to watch for
    Kitten (under 1)Low. Hairballs are unusualAny hairball warrants a parasite check
    Adult (1 to 7)Coat length, moult, fleas, stressSudden increase in frequency
    Mature (7 to 10)Early weight gain, reduced flexibilityWeight trend, grooming reach
    Senior (11+)Hyperthyroidism, CKD, arthritis, IBDNew-onset vomiting is never "just age"

    That kitten row matters. Kittens shouldn't be producing hairballs. If yours is, think roundworms first, then coat and grooming behaviour.

    Why Fleas, Allergies, Pain and Stress Put More Hair in the Gut

    This is the section that changes outcomes. Most persistent hairball cases described in veterinary client material aren't hair problems. They're itch problems.

    The chain is simple. Something makes the cat uncomfortable. She grooms more.

    More hair goes down. Hairballs follow.

    Treat the hairball and you're mopping the floor with the tap running.

    Fleas. Flea allergy dermatitis is the most common cause of overgrooming in cats, full stop. And here's the catch: an allergic cat can react to a handful of bites. You'll often find no fleas at all, because she's eaten them during grooming.

    Indoor-only cats are not exempt. Fleas overwinter happily in centrally heated homes.

    Food and environmental allergy. Feline atopic skin syndrome and adverse food reactions both produce itch without an obvious rash. Cats often show it as barbering, symmetrical hair loss on the belly and inner thighs, or scabby lesions around the head and neck.

    Pain. Cats over-groom painful areas. Arthritic hips, a bladder problem, an old injury. Focal overgrooming above a joint or on the lower belly deserves a proper exam, not a hairball gel.

    Stress. Psychogenic alopecia is real, though it's diagnosed less often than owners assume. Vets rule out medical causes first. Common triggers include a house move, a new baby, building work, a new cat in the household, or an outdoor cat visiting the garden and staring through the window.

    Allogrooming. In multi-cat homes, one cat may groom another obsessively. Check all your cats, not just the one being sick.

    Look for these physical signs of overgrooming:

    • Bald or thin patches, especially on the belly, inner thighs and forelegs
    • Hair that feels stubbly and broken rather than smooth
    • Scabs or crusts along the back and around the neck
    • Hair loss in a symmetrical pattern
    • Excessive grooming you can actually hear at night

    If any of those are present, the hairball is a side effect. Fix the itch and the hairballs usually stop on their own.

    The Prevention That Does the Heaviest Lifting: Brushing, Combs and Deshedding Tools

    Brushing is the single highest-value thing you can do. It costs nothing after the tool, has no side effects, and physically removes hair before it ever reaches the stomach.

    There's no medication that beats it. Not one.

    cat deshedding brush and comb

    Image source: Bing (Web (fair-use with source credit))

    How often should you brush a cat?

    Daily for long-haired and double-coated cats. Two to three times a week for short-haired cats. Every day for any cat during a heavy moult, regardless of coat length.

    Five to ten minutes is enough. Consistency beats duration by a mile.

    Short daily sessions also stop the whole thing becoming a battle. A cat brushed for two minutes every evening tolerates it. A cat wrestled for twenty minutes once a fortnight learns to hide.

    Which tool for which coat

    ToolBest forWhat it doesWatch out for
    Metal greyhound combAll coats, especially longFinds mats early, reaches undercoatWork slowly through tangles
    Slicker brushMedium to long coatsLifts loose undercoatLight pressure only, bent pins scratch skin
    Rubber curry or grooming mittShort coats, nervous catsPulls loose hair, feels like strokingLimited undercoat reach
    Moulting comb or deshedding bladeDense double coats in moultRemoves bulk undercoat fastEasy to overuse, causes brush burn
    De-matting rakeExisting matsSplits mats safelyNever yank, work from the outside in
    Grooming gloveCats who hate brushesGentle introductionSurface hair only

    Aggregate owner feedback on deshedding blades is consistently split for a reason. They work brilliantly for a fortnight in spring, then start irritating the skin if used daily year-round. Treat them as a seasonal tool.

    The brushing sequence that actually works

    1. Comb first. Run a greyhound comb through to find mats before you brush over them.
    2. Work with the coat direction. Against the grain feels unpleasant to most cats and pulls at the skin.
    3. Start where she likes it. Cheeks, chin, along the spine. Save the belly and back legs for later.
    4. Section long coats. Behind the ears, armpits, groin and the base of the tail mat first. Do those deliberately.
    5. Stop before she asks you to. End on a good note with a treat. Two short sessions beat one that ends in a swipe.
    6. Wipe with a damp cloth. Picks up the last of the loose hair the brush lifted but didn't capture.

    Dealing with mats

    Never scissor a mat. Cat skin is thin and lifts with the mat, and vet clinics repair lacerations from this every year.

    Split the mat with your fingers or a de-matting tool, working from the outer edge inward. If it's tight against the skin, or if there's more than one, book a groomer or vet clinic. Clippers with a guard are the safe answer.

    For badly matted cats, a sanitary trim or a full lion cut under sedation is sometimes the kindest option. It resets the coat and gives you a clean starting point. Just remember: shaving doesn't fix the reason she stopped grooming properly.

    Grooming as a health check

    Every brushing session is a free body scan. You'll pick up:

    • Flea dirt at the tail base (black specks that turn rust-red on wet tissue)
    • New lumps, scabs or thin patches
    • Weight changes you can feel before you see them
    • Sore spots she flinches away from
    • Dental smell when she's close to your face

    That's genuine surveillance, and it's why we rate daily brushing above every product in this article.

    Diet and Fibre: Hairball Formulas, Psyllium, Wet Food and Where They Fall Short

    Hairball control diets work by adding fibre. That's the whole mechanism. Extra fibre bulks the stool and helps carry swallowed hair through the gut instead of letting it pool in the stomach.

    For some cats it makes a real difference. For others it makes things worse. The difference comes down to what's actually wrong.

    Insoluble vs. Fermentable Fibre, Why the Wrong One Makes Things Worse

    Insoluble fibre adds bulk and speeds transit. Fermentable fibre feeds gut bacteria and produces short-chain fatty acids that support the intestinal lining. They do different jobs.

    Most supermarket hairball formulas lean heavily on insoluble fibre. Powdered cellulose, pea fibre, beet pulp. Crude fibre typically sits around 5 to 10 percent versus 1 to 3 percent in a standard maintenance diet.

    Fibre typeCommon sourcesWhat it doesBest suited to
    InsolubleCellulose, pea fibre, wheat branBulks stool, speeds transitHealthy cats with a purely mechanical hair problem
    FermentablePsyllium, inulin, FOS, beet pulpFeeds microbiome, softens stoolCats with constipation or mild dysbiosis
    Mixed-fibre therapeuticVeterinary GI dietsBalanced approach, high digestibilityCats with diagnosed enteropathy

    Here's the trap. If your cat's real problem is intestinal inflammation, piling on insoluble fibre gives an already irritated gut more work to do. Stools get bulkier and drier.

    Some cats end up more constipated, not less.

    That's why "she's been on hairball food for six months and she's no better" is such a common story. The food isn't failing. It's treating the wrong thing.

    Does wet food help with hairballs?

    Yes, and it's underrated. Canned food runs around 75 to 80 percent moisture versus 6 to 10 percent for dry kibble.

    Cats evolved as desert hunters with a weak thirst drive. They don't compensate well for a dry diet by drinking more. Total daily water requirement sits around 50 ml per kg of body weight from all sources, which is roughly 250 ml for a 5 kg cat.

    Better hydration means better gut motility and softer stool. Hair moves through instead of sitting.

    Practical ways to lift water intake:

    • Feed at least some wet food daily, even one pouch alongside kibble
    • Add a splash of warm water to wet food to make a gravy
    • Offer water bowls away from the food and litter tray
    • Use wide, shallow ceramic or steel bowls so whiskers don't touch the sides
    • Try a pet water fountain, since many cats prefer moving water
    • Keep multiple water stations in multi-cat and multi-storey homes

    When an Elimination Diet Trial Beats Any Hairball Product

    If your cat has chronic vomiting plus itchy skin, overgrooming or soft stools, a proper elimination diet trial is worth more than every hairball product combined.

    Food-responsive enteropathy is common, and it's the most fixable form of chronic GI disease. The diet does the diagnosing and the treating at the same time.

    How a real trial works:

    1. Choose one diet with your vet. Either a hydrolysed protein diet (proteins broken into fragments too small to trigger a reaction) or a strict novel protein the cat has never eaten.
    2. Feed it exclusively for 6 to 8 weeks. Some cases need up to 12.
    3. Nothing else. At all. No treats, no dental chews, no flavoured medications, no licking the other cat's bowl, no scraps.
    4. Keep the log going. Vomiting frequency, stool quality, itch level, weight.
    5. Challenge at the end. Reintroduce the old food. If signs return within days to weeks, you've confirmed it.

    The most common reason trials fail is contamination. One flavoured worming tablet or a handful of treats from a well-meaning neighbour resets the clock.

    In multi-cat households, separate feeding is non-negotiable. Feed in different rooms and pick bowls up afterwards.

    Transitioning food without causing more vomiting

    Switch over 7 to 10 days. Start at roughly 25 percent new food, then move up every few days.

    Cats are neophobic about food. A hard switch often triggers refusal, and a cat who stops eating for 24 to 48 hours is a genuine risk, especially if she's carrying extra weight.

    Check the label for an AAFCO nutritional adequacy statement in the US, or a FEDIAF compliance statement in the UK and EU. That tells you the food is complete and balanced for the life stage, which "hairball control" on the front of the bag does not.

    Lubricants, Laxatives and Supplements: Safe Use, Dosing Timing and Limits

    Hairball gels are the product most owners reach for first. They're petrolatum-based lubricants, usually flavoured with malt, tuna or chicken, designed to coat the hair mass so it slides through.

    They work. They're also widely overused, and the way most people give them reduces their effect.

    How to use a hairball gel properly

    • Give it between meals, not with food. Petrolatum can interfere with absorption of fat-soluble vitamins A, D, E and K. Spacing it away from meals reduces that overlap.
    • Follow the label dose. Typical maintenance is a small ribbon a few times a week, with a higher dose for a short period when clearing an active hairball. Check the specific product.
    • Apply to a paw or nose. Most cats will lick it off. Forcing it into the mouth risks a mess and a stressed cat.
    • Use it short term. A few weeks around a heavy moult is sensible. Daily for years is not.

    That last point is the one vets care about. A cat who needs a lubricant every single day to stay comfortable doesn't have a hairball problem. She has an undiagnosed problem.

    What about mineral oil?

    Never syringe mineral oil or liquid paraffin into a cat's mouth. This is one of the few hard rules in this article.

    Mineral oil is tasteless. Cats don't trigger a swallow reflex properly for it, so it can easily go down the wrong way. Aspiration causes lipoid pneumonia, which is serious and sometimes fatal.

    Petrolatum-based pastes are flavoured specifically so the cat licks and swallows deliberately. That's the difference.

    Supplements worth considering

    SupplementWhat it doesRealistic expectation
    Omega-3 (EPA/DHA) fish oilSupports skin barrier, reduces inflammationBetter coat quality, less shedding over 8 to 12 weeks
    Psyllium huskAdds fermentable fibre and moisture to stoolHelpful for constipation-prone cats, dose with vet guidance
    Probiotics (feline-specific strains)Supports gut microbiomeModest benefit, best alongside a diet plan
    Plain pumpkin puréeSmall fibre and moisture boostMild effect, useful as a food topper
    Cobalamin (B12)Corrects deficiency in chronic enteropathyOnly relevant if bloodwork shows low levels

    Pumpkin deserves a note. Plain cooked pumpkin is safe in small amounts, a teaspoon or so mixed into food. Pumpkin pie filling is not.

    It contains sugar and spices including nutmeg, which cats shouldn't have.

    Prescription options your vet may reach for

    If a workup finds a motility or inflammatory cause, the treatment changes entirely:

    • Prokinetics such as compounded cisapride, which improve gastric emptying
    • Anti-nausea medication such as maropitant, which reduces the vomiting itself
    • Corticosteroids for confirmed inflammatory bowel disease
    • Chlorambucil alongside steroids for low-grade alimentary lymphoma
    • Appetite stimulants including transdermal mirtazapine for cats eating poorly
    • Cobalamin injections or oral supplementation where levels are low

    These are prescription-only veterinary medicines. In the UK they fall under POM-V rules and the Veterinary Medicines Directorate cascade. In the US, prescribing and compounding sit under the FDA Center for Veterinary Medicine.

    None of them belong in a self-medicating routine.

    Home Remedies That Are Genuinely Dangerous for Cats

    Some advice circulating about hairballs isn't just useless. It's harmful. Cats have an unusual liver metabolism and a narrow safety margin for substances dogs and humans handle fine.

    Never give these to a cat

    • Paracetamol / acetaminophen. Toxic at tiny doses. Causes methaemoglobinaemia and liver failure. Often fatal.
    • Ibuprofen and other human NSAIDs. Cause kidney damage and gastric ulceration. No safe home dose exists.
    • Permethrin-based dog flea products. Cats can't metabolise permethrin. Causes tremors, seizures and death. Never use a dog spot-on on a cat, and keep treated dogs separate until dry.
    • Tea tree oil and most essential oils. Cats lack a key liver enzyme pathway for processing phenols. Toxic by ingestion, skin contact and sometimes diffusion.
    • Human laxatives. Stimulant laxatives and many osmotic products aren't dosed for cats. Some cause dangerous dehydration and electrolyte shifts.
    • Milk. Most adult cats are lactose intolerant. You'll swap a hairball for diarrhoea.
    • Garlic, onion or garlic supplements. Cause haemolytic anaemia in cats. Sometimes marketed as natural flea remedies. Don't.

    Popular remedies that don't do what people think

    Olive oil, butter and coconut oil. The theory is lubrication. The reality is that digestible fats get absorbed in the small intestine, so they don't coat and carry hair the way petrolatum does. What they do add is calories and, in some cats, diarrhoea or a pancreatitis flare.

    Slippery elm. Widely recommended online with very little feline evidence behind it. It also coats the gut lining, which can interfere with absorption of other medications. Run it past your vet first and space it from any prescriptions.

    Vaseline straight from the tub. Same base as commercial gels, but no flavouring, no measured dose, and no veterinary formulation oversight. Cats often refuse it, and force-feeding it creates the same aspiration risk as any unflavoured oil.

    Raw fibre like bran. Unmeasured insoluble fibre can tip a cat into constipation, particularly a dehydrated cat on dry food. If fibre is the answer, use a formulated diet or a vet-guided psyllium dose.

    One more thing on "natural" flea remedies

    Overgrooming from fleas causes hairballs, so people reach for natural flea control. Diatomaceous earth, essential oil sprays, garlic, ultrasonic collars.

    None of them reliably work, and several are dangerous. Aggregate veterinary dermatology guidance is consistent: use a licensed, vet-recommended product, and treat every pet in the house year-round.

    If you're trying to reduce your cat's hairballs and she's not on effective flea prevention, start there before you buy anything else.

    Red Flags That Mean Same-Day Veterinary Care

    Most hairballs are a nuisance. A few are the opening scene of an emergency. The difference is usually obvious if you know the signs.

    Call your vet the same day if you see any of these:

    • Repeated non-productive retching. The cat keeps trying and nothing comes up. Three or four attempts in an hour is enough to make the call.
    • Not eating for 24 hours. Faster if she's overweight. Cats mobilise fat quickly and can develop hepatic lipidosis within days.
    • Straining in the litter tray. Could be constipation. Could be a urinary blockage, which kills male cats in under 48 hours.
    • Blood in the vomit. Fresh red streaks or a coffee-ground appearance.
    • Lethargy or hiding. Cats hide pain. A cat under the bed all day who normally isn't is a sick cat.
    • Abdominal pain. She flinches, growls or tenses when you touch her belly.
    • Laboured or open-mouth breathing. This is an emergency, not a hairball.
    • Distended, hard abdomen.
    • Any string or thread visible at the mouth or anus.

    That last one has its own section, because the instinct everyone has is exactly the wrong move.

    Linear Foreign Bodies: Why You Never Pull the String

    If you see string, thread, tinsel, dental floss or an elastic hair tie hanging from your cat's mouth or bottom, do not pull it. Cut it if it's tangled around something, then go straight to a vet.

    Here's what's happening inside. A linear foreign body typically anchors at one end, most often looped under the tongue. The rest travels down into the intestine.

    The gut keeps trying to move it along. Since one end is fixed, the intestine bunches up along the string like a curtain on a rail. This is called plication.

    The string then acts like a cheese wire. It saws through the bunched intestinal wall from the inside, causing perforation and septic peritonitis. Pulling from your end accelerates that damage in seconds.

    Surgery for a linear foreign body often means multiple incisions along the bowel. Delay makes it worse, and a perforated gut carries a serious mortality risk.

    High-risk items to keep locked away:

    • Christmas tinsel and ribbon (December is peak season for these cases)
    • Sewing thread, especially with a needle attached
    • Dental floss
    • Elastic hair ties and scrunchies
    • Fishing line
    • Toy mice with string tails
    • Corn on the cob string and cooked meat netting
    • Curtain and blind cords

    A cat who's ingested string often shows the exact pattern owners misread as hairballs. Repeated retching with nothing produced, off her food, hunched posture. The distinguishing feature is that it doesn't settle.

    It gets steadily worse over 24 to 72 hours.

    Check under the tongue if you can do it safely. A quick look, no force. If you spot a loop, that's your answer and it's an emergency.

    What a Proper Vet Workup Looks Like: Bloods, Imaging and Biopsy

    Knowing what's coming makes the vet visit less daunting and helps you spend your money in the right order. A chronic vomiting workup is a sequence, not a single test.

    feline abdominal ultrasound examination

    Image source: Bing (Web (fair-use with source credit))

    Stage one: history, exam and basic bloods

    Your vet starts with a physical exam, a body condition score and a weight compared against previous visits. That weight trend is often the first real clue.

    Then baseline diagnostics:

    • Complete blood count. Looks for anaemia, infection and inflammatory changes.
    • Serum biochemistry. Kidney and liver values, protein levels, electrolytes.
    • Total T4. Screens for hyperthyroidism in cats over 7. Non-negotiable in seniors.
    • Urinalysis. Assesses kidney concentrating ability and rules out urinary disease.
    • Faecal analysis. Float for roundworms and Giardia, plus a Baermann test if lungworm is suspected.

    Plenty of cases get solved right here. Hyperthyroidism, parasites and early kidney disease all show up in stage one.

    Stage two: imaging

    If the bloods are clean and the vomiting continues, imaging is next.

    Radiographs. Abdominal films look for obstruction patterns, foreign material and constipation. Thoracic films check the lungs, which is how a lot of asthma cases finally get identified. Classic asthma shows a bronchial pattern with thickened airway walls.

    Abdominal ultrasound. The more informative test for chronic vomiting. It shows intestinal wall thickness, layering, lymph node size, pancreas and liver.

    One finding matters a lot. Thickening of the muscularis propria layer of the small intestine is strongly associated with chronic enteropathy and small cell lymphoma. A normal X-ray does not rule that out.

    Ultrasound does the heavy lifting.

    Bronchoalveolar lavage or tracheal wash. Used when airway disease is suspected. Samples cells from the lungs to confirm the eosinophilic inflammation typical of asthma.

    Stage three: GI blood panels and biopsy

    Two extra blood tests get run before anyone reaches for a scope:

    • Feline pancreatic lipase (fPL). Screens for pancreatitis.
    • Cobalamin (B12) and folate. Low cobalamin points at distal small intestinal disease and needs correcting regardless of the underlying cause.

    Then the definitive step. Endoscopy or surgical biopsy.

    MethodWhat it getsProsLimitations
    Endoscopic biopsyMucosal samples from stomach and upper small intestineNon-surgical, faster recoverySuperficial samples, can miss deeper lymphoma
    Surgical full-thickness biopsyComplete gut wall, plus lymph nodes and liverBest diagnostic accuracyAnaesthesia and recovery, higher cost

    Full-thickness biopsy is the only reliable way to separate inflammatory bowel disease from low-grade alimentary lymphoma. That distinction changes the treatment entirely, so it's worth doing properly if you've come this far.

    What this typically costs

    Costs vary enormously by region, clinic type and whether you're at a first-opinion practice or a referral hospital.

    StageWhat's involvedRelative cost
    Consult and basic bloodsExam, CBC, biochemistry, T4Low
    Faecal testingFloat, BaermannLow
    RadiographsAbdomen and chest, often sedatedModerate
    Abdominal ultrasoundSpecialist or trained GP vetModerate to high
    EndoscopyAnaesthesia plus biopsiesHigh
    Exploratory surgeryAnaesthesia, surgery, histopathologyHighest

    A note on insurance. Chronic vomiting logged in your cat's notes can later be treated as a pre-existing condition. If you're planning to insure, do it before the investigations start, not after.

    Mistakes That Keep Cats Retching for Months

    The same handful of errors repeat across veterinary client education material and owner forums. Each one costs the cat time.

    Treating the hairball instead of the cause

    The biggest one. A cat gets a lubricant gel and hairball kibble, and the itch, the fleas, the pain or the inflammation goes untouched.

    If you've done six to eight weeks of solid prevention and nothing's improved, stop buying products. Book the workup.

    Using a lubricant gel every day, indefinitely

    Short-term use around a moult is sensible. Daily use for years masks a problem and risks fat-soluble vitamin interference.

    Think of a hairball gel like a painkiller. Fine for a bad week. Not a lifestyle.

    Giving fibre to a cat who needs less of it

    Piling insoluble fibre onto a cat with gut inflammation or dehydration makes stools bulkier and harder. Some cats end up constipated on hairball food, which is the opposite of the goal.

    If stools get drier or the cat starts straining after a diet switch, change approach.

    Skipping flea prevention on an indoor cat

    Fleas get carried in on shoes, on dogs, and on you. Central heating means no winter die-off indoors.

    Year-round licensed prevention for every pet in the house. No exceptions, no seasonal breaks.

    Abandoning the elimination diet trial early

    Six weeks feels long when the cat's grumbling about the new food. Cutting it to three weeks tells you nothing.

    Same with contamination. One dental treat, one flavoured wormer, one bowl of the other cat's food and the trial is void.

    Not weighing the cat

    Owners consistently miss slow weight loss. A fluffy coat hides a lot.

    Monthly weigh-ins on digital scales catch a 250 g drop that your eyes never will.

    Reaching for scissors on a mat

    Cat skin tents up into the mat. Vet clinics repair these lacerations regularly, and they're deep.

    Clippers with a guard, or a groomer. Never blades near a tented mat.

    Assuming a senior cat is "just getting old"

    New-onset vomiting in an 11-year-old cat isn't ageing. It's hyperthyroidism, kidney disease, IBD or lymphoma until proven otherwise.

    Older cats deserve more investigation, not less.

    Not filming the episode

    Describing a cough as "she coughed up a hairball but nothing came out" sends the whole consult down the wrong path. Ten seconds of video prevents that.

    Ignoring the other cats

    In a multi-cat household, one cat can over-groom another into hairballs. Or the sick cat isn't the one you think, because you've only seen the aftermath on the floor.

    Check every cat's coat. Watch who grooms whom.

    Building a Long-Term Routine: Weigh-Ins, Symptom Logs and Parasite Control

    Prevention only works if it's boring and repeatable. Here's a routine that takes about ten minutes a day and catches problems early.

    The daily five minutes

    • Brush for five to ten minutes, longer for double coats in moult
    • Run a hand over the belly, tail base and back legs while you're at it
    • Check the food bowl. Note anything left
    • Glance in the litter tray. Stool quality, volume, any straining
    • Refresh water in every station

    The weekly check

    • Comb through mat-prone zones: behind the ears, armpits, groin, tail base
    • Flea comb over the rump and check the debris on wet tissue
    • Look for scabs, thin patches or broken stubbly hair
    • Clean water fountains and bowls properly

    The monthly routine

    • Weigh the cat and record it
    • Apply or administer flea and worm prevention on schedule
    • Review the symptom log. Count hairballs, retching episodes, soft stools
    • Rotate or clean grooming tools

    The annual and biannual

    • Full veterinary health check, twice yearly for cats over 8
    • Bloods and total T4 from around age 7, then annually
    • Dental assessment
    • Body condition scoring against the WSAVA 9-point chart

    A simple log template

    DateEpisode typeMaterialWeightNotes
    04 MarVomit, heavingHairball, tube-shaped4.8 kgHeavy moult, brushed 3x this week
    11 MarCough, crouchedNothingHappened after litter change
    02 AprVomit, heavingFoam and bile4.6 kgAte less than usual

    Three months of that beats any verbal history. The weight column alone tells a story.

    Parasite control that actually works

    Use a licensed veterinary product, matched to your cat's weight, applied on time. That last part is where most plans fail.

    • Set a phone reminder for the same date each month
    • Treat every pet in the household, including dogs
    • Continue through winter
    • Vacuum and wash bedding at 60 degrees when treating an active infestation
    • Treat the environment as well as the cat, since around 95 percent of the flea population lives off the animal

    Roundworm control matters too. Toxocara cati is common, transmissible to humans, and causes GI signs that mimic hairball trouble.

    Environmental enrichment for stress-driven grooming

    If the overgrooming is behavioural, the environment is the treatment.

    • Vertical space: cat trees, shelves, window perches
    • One litter tray per cat plus one spare, in separate quiet locations
    • Separate food, water and resting spots in multi-cat homes
    • Puzzle feeders and food-dispensing toys to redirect energy
    • Predictable routine for feeding and play
    • Two short play sessions daily with a wand toy
    • Block visual access to intruding outdoor cats with window film at the bottom of the glass
    • Synthetic pheromone diffusers as a supporting measure, not a fix on their own

    Real Scenarios: Four Cats, Four Very Different Answers

    Same presenting sign. Four completely different roads. This is what the decision-making looks like in practice.

    Case one: the seasonal moult in a Maine Coon

    The picture. Six-year-old neutered male, indoor and outdoor access, one hairball in April and one in May. Eating well, stable weight at 6.4 kg, glossy coat, no bald patches.

    What's likely. Straightforward mechanical overload from a seasonal moult. Coat length plus volume, nothing more.

    The plan. Daily combing with a greyhound comb plus a moulting comb during the moult. Wet food added to the diet. A hairball gel two or three times a week for four to six weeks, given between meals.

    No workup needed unless frequency climbs.

    The outcome to expect. Hairballs stop within a few weeks and don't return until autumn.

    Case two: the short-haired cat with "hairballs" that aren't

    The picture. Four-year-old spayed female Domestic Shorthair, indoor only. Episodes two or three times a week for six months. Crouches, extends her neck, honks.

    Nothing ever comes up.

    What's likely. This isn't a hairball. Nothing is being produced, the coat is short, and the posture is the airway cough. Feline asthma is top of the list.

    The plan. Film an episode. Count resting respiratory rate at home. Thoracic radiographs, faecal Baermann for lungworm, and likely a bronchoalveolar lavage.

    Switch to a low-dust litter, remove aerosols and scented candles.

    The outcome to expect. Confirmed asthma responds well to inhaled corticosteroids via a feline spacer. Untreated, the airway damage becomes permanent, which is exactly why the six months of "hairballs" mattered.

    Case three: the overgrooming cat with an itch nobody treated

    The picture. Three-year-old spayed female, long-haired, indoor only. Hairballs roughly every ten days. Thinning hair on the belly and inner thighs.

    Owner has never seen a flea.

    What's likely. Flea allergy dermatitis or an adverse food reaction. The bald pattern is classic barbering. No visible fleas means nothing, since an allergic cat reacts to a handful of bites and eats the evidence.

    The plan. Licensed flea prevention for every pet, year-round, for at least three months. Environmental treatment. If the itch persists, a strict 8-week hydrolysed protein elimination diet trial with a reintroduction challenge at the end.

    The outcome to expect. Once the itch settles, grooming normalises and the hairballs stop without any hairball-specific product. That's the tell that you found the real cause.

    Case four: the senior cat with a new problem

    The picture. Thirteen-year-old spayed female, short-haired. Started "getting hairballs" four months ago, now weekly. Weight down from 4.9 kg to 4.3 kg.

    Appetite looks good, maybe better than before. Coat has gone slightly unkempt.

    What's likely. Nothing to do with hair. Weight loss with a strong appetite in a senior cat points hard at hyperthyroidism. Chronic kidney disease, IBD and low-grade alimentary lymphoma sit alongside it on the list.

    The plan. Full senior workup. CBC, biochemistry, total T4, urinalysis, blood pressure. If thyroid is normal, abdominal ultrasound looking at intestinal wall layering, plus cobalamin and folate.

    Biopsy if the ultrasound is suggestive.

    The outcome to expect. Hyperthyroidism is very treatable with medication, prescription diet, radioiodine or surgery. Small cell lymphoma responds well to chlorambucil and prednisolone, with median survival often measured in years when caught early. Both hinge on somebody not writing off the vomiting.

    The through-line across all four. Coat length, frequency, what actually comes out, and the cat's weight trend. Those four data points sort almost every case into the right lane before you've spent a penny.

    Your Action Plan, Ranked by What Matters Most

    Not every intervention carries the same weight. Here's the order we'd work through, from highest impact to lowest.

    Tier one: do these first

    1. Rule out the lookalikes. Before you spend anything on products, work out whether you're dealing with a hairball at all. Watch the posture.

    Note whether anything actually comes up. Film an episode. If nothing is ever produced, stop and book a vet appointment.

    2. Count and log. Frequency is your diagnostic tool. More than one a month, or any regular hairball in a short-haired cat, means a vet conversation rather than a shopping trip.

    3. Weigh monthly. A 250 g drop on a 5 kg cat is clinically meaningful and invisible to the eye. This single habit catches more disease early than anything else on this list.

    Tier two: the prevention that works

    4. Brush daily. Five to ten minutes. Comb first, then brush.

    This removes hair before it's swallowed, and nothing else in this article beats it.

    5. Sort the parasite control. Licensed, vet-recommended flea and worm prevention, every pet in the house, year-round, on a phone reminder. Skip this and the overgrooming continues no matter what else you do.

    6. Raise water intake. Add wet food, spread water stations around the house, use wide bowls. Aim for roughly 50 ml per kg per day from all sources.

    Tier three: targeted adjustments

    7. Trial a fibre-adjusted diet, carefully. If the cat is otherwise healthy and the problem is mechanical, a hairball formula may help. If stools get drier or she starts straining, stop and rethink.

    8. Use a petrolatum gel short term. Between meals, for a few weeks around a moult. Not daily, not forever.

    9. Run a proper elimination diet trial if there's itch, soft stools or overgrooming alongside the vomiting. Six to eight weeks, zero contamination, reintroduction challenge at the end.

    Tier four: environment and long game

    10. Fix the stressors. Vertical space, litter tray count, separate resources, daily play, blocked sightlines to intruding cats.

    11. Book the workup if six to eight weeks of solid prevention hasn't moved the needle. That's the honest cut-off. Past that point, more products just delay a diagnosis.

    The decision shortcut

    What you're seeingYour next move
    One or two hairballs a year, long-haired cat, stable weightBrush daily. No further action needed.
    Monthly hairballs, short-haired catVet check. Bloods and faecal testing.
    Retching with nothing producedFilm it. Vet visit. Think airway, not hair.
    Hairballs plus bald patches or scabsFlea control first, then allergy investigation.
    Hairballs plus weight loss, any ageFull workup. Do not wait.
    Hairballs plus straining, hiding or not eatingSame-day veterinary care.
    String visible at mouth or bottomEmergency. Do not pull.

    Frequently Asked Questions About Cat Hairballs

    How many hairballs a month is normal for a cat?

    Fewer than one a month is the working benchmark for a healthy long-haired cat. Short-haired cats shouldn't produce regular hairballs at all. Weekly episodes are abnormal at any coat length.

    If your cat crosses those thresholds, book a vet check rather than reaching for another hairball product.

    Can a hairball actually kill a cat?

    Yes, though it's uncommon. A large trichobezoar can cause a gastric outflow or intestinal obstruction, which needs surgery. The bigger risk is misdiagnosis.

    Chronic retching blamed on hairballs is often untreated feline asthma, inflammatory bowel disease or a linear foreign body, and those cause far more harm than the fur itself.

    Is olive oil or butter safe for cat hairballs?

    They're not dangerous in tiny amounts, but they don't work. Digestible fats get absorbed in the small intestine, so they never coat and carry hair the way petrolatum-based gels do. What you get instead is extra calories, sometimes diarrhoea, and in susceptible cats a risk of triggering pancreatitis.

    Skip them.

    Does hairball control cat food really work?

    It helps some cats and hinders others. These diets add insoluble fibre, usually cellulose or pea fibre, to bulk stool and push hair through faster. That suits a healthy cat with a purely mechanical hair problem.

    In cats with gut inflammation or poor hydration, the extra bulk can cause constipation instead.

    Why has my cat suddenly started getting hairballs?

    A sudden change means something else changed. Check for lapsed flea treatment, a new diet, a house move, new pets or building work. Look for bald patches or scabs suggesting overgrooming.

    In cats over eight, new-onset vomiting points at hyperthyroidism, kidney disease or intestinal disease and needs bloodwork.

    My cat keeps gagging but nothing comes out. What does that mean?

    Non-productive retching is a red flag, not a hairball. It suggests either an airway cough, usually feline asthma, or an obstruction such as swallowed string. Film an episode on your phone.

    If it repeats several times in an hour, or comes with lethargy or loss of appetite, seek same-day veterinary care.

  • Step-by-step: Are Cat Nail Caps Worth It

    Step-by-step: Are Cat Nail Caps Worth It

    cat nail caps application

    Image source: Bing (Web (fair-use with source credit))

    Your cat means well. They really do. But that new leather sofa has become a scratching post, your curtains are fraying at the bottom, and you're tired of playing "dodge the claws" every time you reach down for a cuddle.

    So, the question you're asking is: are cat nail caps worth it?

    The short answer is yes, but only under the right conditions. They aren't a magic fix for every cat, and they require more upkeep than most people expect. In this guide, we'll break down exactly what they are, how they actually work, who they're best for, and where they fall short.

    Manufacturer specifications and aggregate user reviews indicate that a standard set of nail caps lasts between four and six weeks before needing reapplication. That timeline alone dictates whether this solution fits your lifestyle.

    Quick Answer

    Nail caps are worth it for indoor cats that scratch furniture but tolerate paw handling. They're not worth it for cats that chew, hide, or violently resist having their feet touched. The average pack costs $15 to $25 and covers one full application cycle of 20 caps.

    Success depends entirely on correct sizing, proper gluing technique, and consistent maintenance. If you can't commit to reapplication every four to six weeks, skip the caps and invest in better scratching posts instead.

    Why This Comparison Matters

    What we're really weighing: caps vs. the alternatives

    Here's the thing about scratching: it's not optional for cats. It's a hardwired behavior tied to claw health, territory marking, and muscle stretching. You can't train it out of them, and punishing it just makes them anxious.

    So the real question isn't "how do I stop my cat from scratching?" It's "how do I let my cat scratch without destroying my home?"

    Nail caps sit at one end of the solution spectrum. At the other end, you have surgical declawing, which is now banned or heavily restricted in over 25 countries and several US cities because of the pain and behavior problems it causes. Then there's the middle ground: regular nail trims, scratching posts, pheromone sprays, and furniture protectors.

    Each option has its own trade-offs. Caps are the only non-surgical solution that preserves the full scratching motion while making it harmless. That's their real appeal, and it's why they've gained so much traction among indoor cat owners as of 2026.

    But that appeal comes with a caveat. Caps only work if they're applied correctly, sized perfectly, and refreshed on schedule. Miss one of those pieces and you'll be picking vinyl caps off your rug within a week.

    The American Veterinary Medical Association discourages declawing as a routine procedure, which makes caps an increasingly popular middle ground for owners who want to protect their furniture without surgery.

    How Cat Nail Caps Actually Work

    What's in the pack, how the glue bonds, and what the cat feels

    Let's start with the physical object. A nail cap is a tiny, hollow vinyl cone. It fits over the cat's claw like a thimble on a finger.

    The blunt tip replaces the sharp point, so when your cat scratches, the surface feels the pressure but not the puncture.

    Most brands, including the original Soft Paws and its competitors, use a medical-grade vinyl or polyurethane blend. The caps come in sizes ranging from kitten to extra-large, based on the width of the claw at its base. A typical pack includes 20 to 40 caps plus a tube of cyanoacrylate adhesive, which is the same family of glue used in surgical wound closure and super glue.

    The application process is straightforward, but the devil is in the details. You trim the nail, clean the surface with an alcohol pad, fill the cap about halfway with adhesive, then press it over the nail and hold for 10 to 15 seconds. The glue bonds to the nail surface, not the skin, and the cap stays put as the nail grows out.

    Now, the part most people don't think about: what does it feel like for the cat?

    The caps are lightweight, typically less than half a gram each. Most cats adjust within a few hours and go back to normal behavior. Some cats, however, notice the change immediately and spend a day or two walking oddly, flicking their paws, or trying to chew the caps off.

    This is why temperament matters so much in the "worth it" calculation.

    One more critical detail: the caps rely on the natural nail growth cycle. As the claw grows, the cap moves forward with it. Eventually, it falls off on its own, usually around the four to six week mark.

    That's the maintenance window. You can't just apply them once and forget.

    The Pros and Cons, Honestly Weighed

    What caps genuinely do well

    • They're non-surgical. Caps involve no pain, no anesthesia, and no recovery period. Compared to declawing, they're a humane alternative.
    • They preserve natural behavior. Your cat still scratches, still stretches, still marks territory. The only difference is the damage is gone.
    • They protect people, too. If you have kids, elderly parents, or thin skin, caps eliminate accidental scratches during play or handling.
    • They're visible. You can see when a cap is loose or missing, which makes monitoring easier than you'd think.
    • They work on kittens. Most manufacturers recommend them for kittens 8 to 12 weeks and older, which means you can establish the habit early.

    Where they fall short

    • They need reapplication. Every four to six weeks, you're back to trimming, cleaning, gluing, and holding. That's 8 to 12 full reapplications a year.
    • They fail on stressed cats. If your cat panics during paw handling, you'll both end up frustrated, and the caps will end up glued to the wrong things.
    • They can cause infections if misapplied. If the cap sits too deep, it can press against the quick and cause pain. If moisture gets trapped underneath, you're looking at a potential bacterial or fungal issue.
    • They're a choking hazard. Some cats chew caps off, and swallowing one can cause intestinal blockage. It's rare, but it happens.
    • They change grip. Wood floors and climbing surfaces get trickier for cats wearing caps. Some cats adapt; some don't.

    The honest take: caps are a tool, not a cure. They work brilliantly for the right cat and the right owner. For everyone else, they become a recurring chore with marginal results.

    Side-by-Side: Nail Caps vs. The Alternatives

    Declawing, regular trims, scratching posts, and behavior training compared

    This is where the decision really gets made. Let's lay everything out side by side so you can see where caps fit in the broader landscape of claw management.

    nail cap sizes comparison

    Image source: Bing (Web (fair-use with source credit))

    MethodCost Per YearMaintenancePain or RiskPreserves Scratching
    Nail caps$60 to $100 (plus supplies)Every 4-6 weeksLow if applied correctlyYes
    Declawing$200 to $800 (one-time)NoneHigh, irreversible, behavior risksNo
    Regular nail trims$0 to $120 (if groomer)Every 2-4 weeksLowYes, but less effective
    Scratching posts$30 to $80 per postReplace as neededNoneYes
    Pheromone spray + deterrents$50 to $150Weekly reapplicationNoneYes

    Now, let's be clear about what each option actually delivers.

    Declawing is the most extreme choice. It's not a simple nail removal; it's an amputation of the last bone in each toe. The AVMA discourages it, and many countries have outright banned it.

    The behavioral fallout, which includes litter box avoidance and increased biting, is well documented in veterinary literature. Skip it. The only reason it appears on this table is that some owners still consider it.

    Regular nail trims are the cheapest and safest baseline. They blunt the claw's sharp tip, reducing damage. But they require more frequent attention, every two to four weeks, and they don't stop the scratching motion itself.

    The claw still grips and pulls at fabric; it just doesn't penetrate as deeply.

    Scratching posts are the gold standard for redirecting behavior. If you can train your cat to scratch a sisal post instead of your sofa, you don't need caps at all. The catch is placement, texture, and consistency.

    Most owners give up too early and blame the cat.

    Pheromone sprays and deterrents like Feliway or double-sided tape work in conjunction with other methods, rarely alone. They reduce stress-related scratching but don't stop the behavior entirely.

    So where do caps fit? They're the best middle ground for cats that scratch furniture despite having good posts. They're also a strong option for multi-cat households where play aggression gets too rough.

    And they're genuinely the only humane way to make scratching completely harmless.

    The trade-off is maintenance. Caps demand active ownership. Trims also demand it, but they're quicker and require no glue.

    Posts require an upfront behavioral investment but then run on autopilot.

    If you're the kind of owner who handles routine grooming without drama, caps will feel easy. If you dread the idea of pinning your cat down once a month, posts and trims are better allies. There's no universal right answer, only the answer that matches your actual situation.

    Best For: Who Should (and Shouldn't) Use Caps

    Ideal candidates: indoor cats, kittens, multi-cat homes

    Let's get specific about which cats actually thrive with nail caps. This is where most online advice goes vague, and where the real decision gets made.

    Indoor-only cats are the sweet spot. They don't need their claws for climbing, defense, or hunting. Their scratching serves a behavioral purpose, not a survival one. Caps let them scratch to their heart's content without turning your arm into a pincushion.

    Kittens between 8 and 16 weeks are surprisingly good candidates. Their nails are still soft and their growth rate is fast, which means caps fall off sooner, but their adaptability is higher. A kitten that grows up wearing caps accepts them as normal. Several owners report that kittens trained this way never fight the application process as adults.

    Multi-cat households see real benefits too. Play aggression between cats can get rough, and accidental scratches are common. Caps reduce the damage during wrestling matches and resource disputes. They're particularly useful if one cat is elderly or has thin skin.

    Skip them if: your cat chews, hides, or hates paw handling

    Now the hard truths. Caps are a non-starter for certain personalities.

    Cats that chew or bite at anything on their body will destroy caps. Some cats see the caps as a foreign object and immediately try to gnaw them off. Chewed caps are a choking hazard and a digestive risk. If your cat has a history of eating string, rubber bands, or plastic, caps are a gamble you shouldn't take.

    Cats that panic during paw handling are a lost cause. The application process requires you to hold each paw, press on the nail to extend the claw, and keep pressure for 15 seconds while glue dries. A cat that's thrashing, hissing, or biting during nail trims will make this impossible. You'll both end up stressed, and the caps will be applied poorly.

    Senior cats with mobility issues may struggle. Caps change the friction between paw and floor. Older cats already navigating arthritis or joint pain can find the altered grip disorienting. If your cat is already hesitant to jump or slip-prone, caps can make things worse.

    Here's a simple decision test. Trim one of your cat's nails. If the cat allows it with minimal fuss, caps are viable.

    If you're wrestling, wrapping in a towel, or chasing, caps will be a monthly nightmare. Trust that signal.

    Step-by-Step: Applying Caps Without Losing a Finger

    Prepping the nails, sizing, gluing, and holding still

    The first application takes about 20 minutes. The process gets faster with practice, down to around 10 minutes once you've done it a few times. Here's the full sequence.

    nail cap application process

    Image source: Bing (Web (fair-use with source credit))

    Before you start, gather everything. You'll need the caps, the adhesive, an alcohol pad or cotton ball with rubbing alcohol, a nail trimmer, and a towel for wrapping if your cat gets squirmy. Have it all within arm's reach. You don't want to be holding a cat with glue-wet caps and searching for the alcohol pad.

    Step 1: Size the caps. Each cap has an opening diameter measured in millimeters. Hold the cap next to the nail and compare. The cap should fit snugly over the nail without being forced.

    If you have to press hard to seat it, it's too small. If it slides on without any resistance, it's too loose.

    Step 2: Trim the nails. Caps fit best on short nails. Trim each nail to the quick, just like you would for a normal trim. Shorter nails mean the cap sits closer to the paw and has a better grip.

    Step 3: Clean the nail surface. Wipe each nail with an alcohol pad to remove any oils or debris. This is critical. The adhesive bonds to a clean, dry surface.

    A single greasy spot can cause the cap to pop off within days.

    Step 4: Fill the cap with adhesive. Squeeze a small amount of glue into the cap, filling it about a third to halfway. Too much glue and it will seep out around the edges and stick to fur. Too little and the cap won't hold.

    Step 5: Press and hold. Slide the cap onto the nail and seat it fully. Hold it in place for 10 to 15 seconds. The glue needs time to set.

    Don't rush this step.

    Step 6: Let the cat be. Once all caps are applied, let the cat roam free. Avoid touching their paws for at least 10 minutes while the adhesive cures fully.

    One pro trick: apply caps to the front paws only. The front paws do the vast majority of damage, and they're much easier to work with. Hind paws are rarely the problem.

    Another tip: have a helper hold the cat while you apply. One person wraps the cat in a towel and exposes one paw at a time. The other person handles the trimming and gluing.

    This cuts the stress for everyone involved.

    Common Mistakes That Make Caps Fail

    Sizing errors, overfilling glue, and skipping the "hold" phase

    Most cap failures trace back to a handful of mistakes. Here's what goes wrong and how to avoid it.
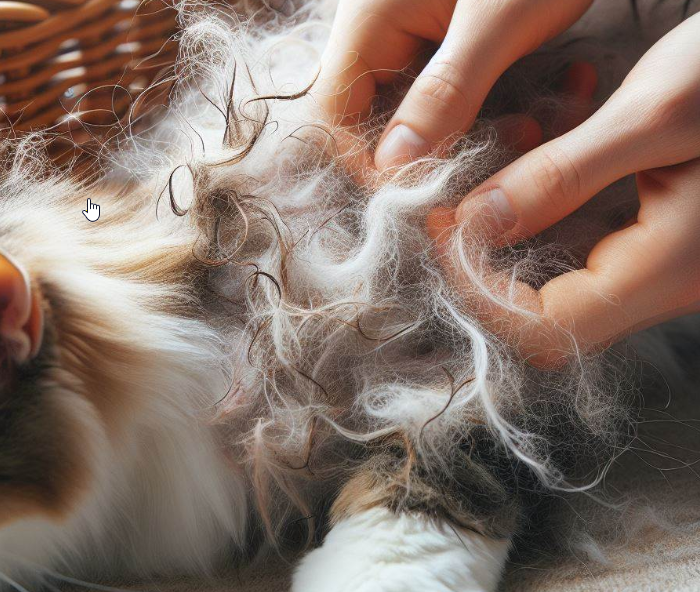
    Wrong size is the number one culprit. Caps that are too small crack or fall off within days. Caps that are too large slide off or trap moisture against the nail. Measure carefully.

    When in doubt between two sizes, go with the larger one. A snug fit beats a tight fit.

    Overfilling the glue causes a mess. Excess adhesive seeps out and bonds to the fur around the nail. This is painful for the cat and creates a matted mess you'll have to cut out. It also prevents the cap from seating fully, which means it'll fall off early.

    Skipping the alcohol wipe is a silent killer. Natural oils on the nail prevent the glue from bonding properly. The cap looks fine for the first few days, then pops off during a vigorous scratch session. Clean every nail right before application.

    Rushing the hold time. Ten seconds feels long when you're holding a squirming cat. But cutting it short means the caps aren't fully bonded. Wait the full 15 seconds for each cap.

    Applying caps to damp nails. A cat that's been grooming or just had a drink won't have dry nails. The moisture interferes with the adhesive. Always apply caps in a dry environment, away from water bowls and humid bathrooms.

    Forgetting to check caps weekly. Caps can loosen as the nail grows. A quick weekly check catches loose caps before they fall off in a dangerous place. It takes 10 seconds and prevents most problems.

    Using the caps as a declawing alternative without acknowledging the maintenance. This is the biggest mistake of all. Caps don't end scratching maintenance. They shift it from nail trims to cap reapplication.

    If you go in expecting a zero-maintenance solution, you'll be disappointed by week four.

    Maintenance: The 4-6 Week Cycle You Can't Skip

    What re-application looks like, and how to spot trouble early

    Once the caps are on, the clock starts ticking. Here's what the full maintenance cycle looks like.

    cat scratching scratching post

    Image source: Bing (Web (fair-use with source credit))

    Weeks 1 and 2 are smooth sailing. The caps are bonded, the cat has adjusted, and you're enjoying a scratch-free sofa. Enjoy it. This is the payoff phase.

    Week 3 brings the first loose caps. As nails grow, the caps move away from the paw. The fit becomes looser. You'll start finding caps on the floor, usually near scratching posts or favorite lounging spots.

    Weeks 4 to 6 is reapplication time. The timeline varies per cat. Kittens need new caps every three to four weeks. Adult cats stretch to five or six weeks.

    Senior cats with slower nail growth can sometimes go seven weeks.

    You have two options at this point. Remove the remaining caps and start fresh, or wait for all caps to fall off naturally and then reapply. Most owners go with the second option, since pulling off caps that are still partially bonded is uncomfortable for the cat.

    Watch for these warning signs during the cycle:

    • Redness or swelling at the nail base. This signals infection or irritation. Remove the cap immediately.
    • Excessive licking of the paws. The cat may be reacting to trapped debris or an allergic response to the adhesive.
    • Slipping or hesitation when jumping. This indicates the caps are affecting grip. Some cats adjust; others don't.
    • Caps that stay on past eight weeks. Nails overgrow and curve. This can cause the cap to dig into the paw pad. Never let caps stay on indefinitely.

    Extend the cycle with regular nail trims. Between cap applications, trim the exposed nail portion as it grows. This keeps the nail at a healthy length and prevents the cap from sitting too far from the paw.

    The maintenance rhythm is simple: apply, monitor, reapply. It's a recurring task, not a one-time fix. If that rhythm sounds manageable, caps are a solid choice.

    If it sounds like a chore you'll resent, the alternatives might serve you better.

    Cost Breakdown: What You're Really Paying Per Year

    Pack prices, frequency, and the hidden cost of failed applications

    Let's talk money. Not just the sticker price, but the real annual cost of nail caps.

    The average pack costs $15 to $25. This includes 20 to 40 caps plus a tube of adhesive. One pack covers one full application for an average cat (20 caps for the front paws, or 40 if you're doing all four paws).

    You'll need about 8 to 12 packs per year. At four to six weeks per cycle, that's roughly 8 to 12 reapplications annually. At $20 per pack, you're looking at $160 to $240 per year.

    The premium brands cost more. Original Soft Paws and other high-end options run $25 to $35 per pack. That pushes the annual cost to $200 to $400.

    Generic brands are cheaper but inconsistent. Some budget packs work perfectly. Others have caps that crack, glue that doesn't bond, or sizing that runs wildly off. Verified buyer feedback on generic brands is mixed, so budget for the possibility of wasted packs.

    Factor in the retry rate. Even experienced applicators lose a few caps early. Aggressive scratchers may pop caps within the first week. Budget an extra 10 to 20 percent for replacements.

    Compare that to the alternatives. Regular nail trims at a groomer run $10 to $20 per visit, or $120 to $240 per year. At-home trims cost $10 for a good pair of clippers, one-time. Scratching posts run $30 to $80 each, replaced every year or two.

    The hidden cost is time. Each application takes 15 to 20 minutes for the first paw, faster with practice. At 10 reapplications per year, that's three to four hours annually dedicated to cap maintenance. Time isn't money, but it is effort, and effort is the real currency here.

    The bottom line: caps are comparable in cost to professional grooming, more expensive than at-home trims, and cheaper than both declawing and repeated furniture replacement. They're a mid-tier investment in both money and effort.

    If a $300 sofa is on the line, one year of caps pays for itself. If your cat only attacks a $20 scratching post, the math gets harder to justify.

    Safety and Warning Signs to Watch For

    When caps can cause harm, and when to call your vet

    Nail caps are generally safe when applied correctly. But "generally safe" isn't the same as "risk-free." There are specific situations where caps can cause real harm, and you need to know them before you start.

    The biggest risk is applying the cap too deeply. The cap should sit over the nail, not press against the paw pad. If you force a cap on too far, it presses against the quick, which is the sensitive tissue inside the nail. This causes pain, inflammation, and can lead to infection.

    The cat will let you know with loud protests and frantic paw shaking.

    Trapped moisture is the second major risk. Debris, litter dust, and moisture can accumulate between the cap and the nail. Over time, this creates a breeding ground for bacteria and fungi. The result is a condition called paronychia, an infection of the nail bed that appears as redness, swelling, and discharge.

    Ingestion is a genuine emergency. Some cats manage to chew caps off. If your cat swallows one, it can cause an intestinal blockage. Symptoms include vomiting, loss of appetite, lethargy, and abdominal pain.

    If you suspect your cat has swallowed a cap, contact your veterinarian immediately.

    Allergic reactions to the adhesive are rare but real. Some cats develop contact dermatitis at the base of the nail. This appears as red, itchy, inflamed skin around the nail. If you see this within a few days of application, remove the caps and switch to a different brand or adhesive.

    The AVMA and other veterinary organizations have no formal position against nail caps. They're considered a humane alternative to declawing. However, veterinarians strongly recommend against caps for cats with existing paw or nail conditions. If your cat has fungal infections, brittle nails, or skin allergies, consult your vet before using caps.

    Here's your warning sign checklist:

    • Swelling or redness around any nail base
    • Discharge that's yellow, green, or bloody
    • Limping or refusing to put weight on a paw
    • Excessive licking focused on one paw
    • Chewing at caps even after the adjustment period
    • Caps that stay on beyond 8 weeks

    If you see any of these signs, remove the affected cap and monitor the nail for a few days. If symptoms persist, call your vet. Don't wait it out.

    Real Scenarios: What Owners Actually Report

    The kitten that shredded the sofa

    Sarah adopted an 8-week-old kitten named Mochi. Within two weeks, the kitten had destroyed the arm of a brand-new sectional. Sarah tried scratching posts, sprays, and redirecting.

    Nothing stuck. Mochi preferred the sofa's woven fabric over any sisal surface.

    Sarah applied her first set of caps when Mochi was 12 weeks old. The kitten squirmed through the first application, but she adapted within a day. By the third application, Sarah could complete the whole process in 12 minutes without a towel wrap.

    Mochi is now 9 months old and has worn caps continuously. The sofa is intact, and Mochi still scratches her favorite spots without causing damage.

    The takeaway: kittens adapt to caps fastest. Starting early builds tolerance.

    The senior cat that resents paw handling

    Marcus adopted a 9-year-old tabby named Oliver from a shelter. Oliver had never had his nails trimmed in his previous home. His claws were overgrown, and he reacted violently to any attempt to touch his paws.

    Marcus hoped caps would solve the furniture damage problem.

    The first application took 40 minutes and required two people, a thick towel, and several treats. Oliver chewed off three caps within the first hour. The remaining caps lasted four days before falling off due to improper seating.

    Marcus tried twice more with the same results. He eventually gave up on caps entirely and invested in a heavy-duty scratching post plus weekly nail trims at the vet.

    The takeaway: age and past trauma matter. Cats that fear paw handling will not tolerate caps, no matter how patient you are.

    The multi-cat household that found peace

    Jenna had two cats, a 2-year-old female and a 4-year-old male. They wrestled constantly, and the female was prone to scratching during play. The male had thin skin and frequently ended up with small cuts on his ears and nose.

    Jenna applied caps to the female only. The front paws got a full set. The male kept his natural claws.

    Within a week, the play aggression continued, but the damage stopped. The female's caps blunted the scratches, and the male's injuries healed. After three months, the female has acclimated to caps as routine.

    Jenna reapplies every five weeks without drama.

    The takeaway: you don't need to cap every cat. Target the one causing the damage.

    Final Verdict: Is It Worth It for You?

    A simple decision guide based on your cat's behavior and your patience level

    We've covered a lot of ground. Let's condense it into a decision framework you can actually use.

    Choose nail caps if:

    • Your cat is indoor-only
    • Your cat tolerates nail trims without a wrestling match
    • You're looking for a humane alternative to declawing
    • You can commit to a 4 to 6 week reapplication cycle
    • Your cat doesn't chew at foreign objects on their body
    • You have furniture you genuinely care about protecting

    Skip nail caps if:

    • Your cat panics during paw handling
    • Your cat chews or bites at anything on their paws
    • You're not willing to maintain the schedule
    • Your cat has existing paw or nail conditions
    • Your senior cat has mobility or joint issues
    • You'd rather invest in behavioral solutions like scratching posts

    The decision in one sentence: Caps are worth it when the cat's temperament and the owner's consistency line up. If either is missing, they become a frustrating chore.

    Start with a trial run. Buy one pack. Apply caps to the front paws only. Watch how your cat reacts for 48 hours.

    If the cat adjusts and the caps stay on, you have your answer. If the cat is miserable or the caps fail, you've spent $20 and learned something valuable.

    Frequently Asked Questions

    Do nail caps hurt cats?

    No, when applied correctly. The caps sit over the nail, not the skin, and they don't cause pain. Discomfort happens when caps are applied too deeply, pressing against the quick, or when moisture gets trapped underneath.

    Watch for signs of limping or excessive licking in the first few days.

    How long do nail caps last?

    Most caps last between 4 and 6 weeks. The timeline depends on the cat's nail growth rate. Kittens grow nails faster and may need reapplication every 3 weeks.

    Senior cats with slower growth can stretch to 7 weeks. When the caps loosen and fall off naturally, the cycle is complete.

    Can cats still scratch with caps on?

    Yes, completely. Cats can still extend their claws, pull at surfaces, and perform the full scratching motion. The caps simply blunt the sharp point.

    That means the behavior stays natural while the damage becomes minimal. This is the core advantage of caps over declawing, which removes the behavior entirely.

    Are nail caps safe for kittens?

    Manufacturers and veterinarians generally approve caps for kittens 8 to 12 weeks and older. Their nails are softer and their growth rate is faster, so caps may fall off sooner. However, kittens adapt more quickly than adult cats.

    Starting early establishes tolerance for the application process that lasts into adulthood.

    What happens if a cap stays on too long?

    Nails grow continuously. A cap left on past the 6 to 8 week mark can cause the nail to overgrow and curve. In extreme cases, the nail can dig into the paw pad.

    Check caps weekly and remove them after about 6 weeks to prevent this problem. Never leave a cap on indefinitely.

    Will my cat still knead with caps on?

    Yes, kneading works fine with caps. The blunt tips prevent the tingling sensation that drives some cats to scratch soft surfaces. Many owners report that caps actually reduce the frantic kneading-and-scratching behavior because the paw no longer gets caught on fabric.

  • Mastering Matted Fur Under a Cat’s Armpits

    Mastering Matted Fur Under a Cat’s Armpits

    You know that feeling when you're petting your cat, and your fingers hit a hidden clump of fur right in the armpit? It feels like a tiny, felted rock hiding under a soft coat. And suddenly, you're wondering how long it's been there and what it's doing to your cat's skin.

    Dealing with matted fur under a cat's armpits isn't just about looks. It's a health issue that can cause serious pain and skin damage if you handle it the wrong way.

    Here's the thing that surprises most owners: those mats aren't just tangled hair. They're pulled tight against skin that's significantly thinner than the rest of your cat's body. The axillary region, which is the medical term for the armpit, is among the most delicate areas on a cat's frame.

    It's designed for maximum flexibility during stretching and jumping. When a mat tightens there, it restricts movement and can cause sores from friction. As of 2026, veterinary guidance is clear: removing a mat incorrectly is worse than leaving it alone.

    Let's walk through exactly how to assess, treat, and prevent this safely.

    Quick Answer

    Matted fur under a cat's armpits needs immediate but careful attention. Never use scissors on these mats because the skin is paper-thin and moves easily. Use a clipper with a #10 blade to shave the mat out gently.

    If the skin underneath is broken, red, or weeping, visit a vet first.

    Understanding Why Cats Get Matting Under Their Armpits

    The armpit is a perfect storm for fur damage. Think about how your cat moves. Every step, every stretch, every jump involves the front legs sweeping against the chest wall.

    That constant friction acts like a tiny, persistent force that twists and knots individual hairs together.

    Combine that friction with the natural shedding cycle, and you have a breeding ground for tangles. Loose undercoat hairs that would normally fall out get trapped by the topcoat. The movement of the leg then acts like a felting machine, packing those loose hairs tighter and tighter against the skin.

    The result is a dense mat that only gets worse with time.

    But the mechanical reasons are only half the story. The most common reason cats develop mats here is that they've stopped grooming that area. Cats are meticulous cleaners.

    When they skip a spot, it's a red flag. The question is why they're avoiding it.

    feline axillary skin anatomy

    Image source: MSD Veterinary Manual

    The "Why" Behind Armpit Mats

    Pain is the number one culprit. If it hurts to twist or stretch, your cat will avoid that motion entirely. Think about what causes armpit pain:

    • Arthritis: Stiff, sore shoulder joints make reaching up and back incredibly uncomfortable.
    • Dental disease: A sore mouth makes grooming painful all over. The cat can't chew at tangles to work them out.
    • Skin irritation: A mat that's already pulled tight causes discomfort. This makes the cat avoid the area, which makes the mat worse. It's a vicious cycle.

    Mobility issues are the second major factor. Overweight cats simply can't bend like they used to. Their belly gets in the way, and they give up trying to reach those armpits.

    Senior cats often have reduced flexibility even without arthritis.

    Here are other contributors we see regularly:

    • Long-haired breeds: Persians, Maine Coons, and Ragdolls have fine, dense undercoats that mat very easily. The armpit is the first place it happens.
    • Post-surgical recovery: If your cat wears an e-collar after surgery, it physically prevents grooming. In just a few days, mats can form.
    • Static electricity: In dry winter months, brushing can create static that makes the fur fly and tangle more easily.

    Dental Pain and Other Hidden Health Issues

    If you notice your cat's armpits are matting and they're otherwise a short-haired breed, look deeper. A sudden change in grooming habits is a clinical sign that should prompt a veterinary visit. In our research, we've seen cases where the initial symptom reported by owners was "matted fur," and the underlying issue turned out to be kidney disease or hyperthyroidism.

    Both conditions make a cat feel too unwell to groom properly.

    How to Assess the Damage (Before You Touch Anything)

    Before you even think about picking up a tool, you need to understand what you're dealing with. Not all mats are the same, and the treatment differs vastly based on severity.

    Put your cat on a sturdy table with a non-slip mat. Have treats ready. Gently lift the front leg like you're shaking a paw.

    The 30-Second Check: Is This a Surface Tangle or a "Pelt"?

    Here's how to tell the difference. A surface tangle feels loose. You can see the individual hairs, and you might be able to wiggle your fingers through the bottom layers.

    The skin underneath moves freely when you touch the mat.

    A pelt, on the other hand, is dense and solid. It's felted tight against the skin like a sweater you can't take off. You cannot see the skin at all, and the mat doesn't move independently of the body.

    If you try to pull the mat up, the skin stretches with it.

    This distinction matters because it dictates your next step. A loose tangle might respond to combing. A tight pelt will never respond to combing, and trying to brush it out will cause tremendous pain.

    Reading Your Cat's Body Language

    Even a friendly cat can lash out when their armpit hurts. Watch for these warning signs during your assessment:

    • Skin rippling: The skin on your cat's back twitches or rolls. It's a strong sign of agitation or pain.
    • Tail flicking: A fast, agitated tail swish is a back-off signal.
    • Ears flattening: This is an early warning sign of fear or anxiety.
    • Low growl or hiss: This is a stop sign. Respect it immediately.

    If you see any of these signs, stop the assessment. You can try again later or take your cat to a professional.

    When to Skip the Groomer and Go Straight to the Vet

    This is a critical safety decision. Under that mat, the skin is a dark, warm, moist environment. It's perfect for bacteria to thrive.

    Schedule a vet visit immediately if you notice:

    • Open sores or weeping wounds
    • A foul odor coming from the area
    • Dark specks (flea dirt) visible in the mat
    • Redness or inflammation on the skin around the mat
    • Any lump or bump you can feel beneath the fur

    Removing the mat when the skin is wounded will cause severe pain and may make the infection worse. A vet can sedate your cat, clip the fur safely, and treat the underlying skin condition properly.

    matted fur under a cat's armpits

    Image source: Reddit (fair-use with source credit)

    Safe Tools: What You Actually Need (and What to Throw Away)

    Gathering the right equipment is half the battle. The wrong tool can turn a 10-minute grooming session into a nightmare for you and your cat. We've broken down the essentials based on manufacturer specifications and veterinary recommendations.

    The "Do Not Use" List

    Let's start with what should stay in the drawer.

    Scissors are absolutely forbidden around the armpit. We cannot stress this enough. When a cat squirms, the thin, loose skin of the armpit can fold into a little tent. A single snip can easily go through the skin.

    Even with rounded-tip safety scissors, the risk is simply too high. A shaved, bald-looking armpit is much better than a trip to the emergency vet for stitches.

    Human brushes and combs are also a no-go. They're designed for human hair, which has different texture and elasticity. They often have sharp, closely spaced pins that pull and irritate cat skin.

    Detangling sprays with artificial fragrance should be avoided. Cats have a highly sensitive sense of smell. Strong scents can cause stress.

    More importantly, some ingredients can irritate the skin if they get trapped under a tight mat.

    The "Safe" List

    Now, here's what you actually need.

    ToolPurposeWhy It's Safe
    Pet-specific clippersShaving mats close to the skinQuiet, lightweight, designed for cat anatomy
    #10 bladeStandard veterinary blade for demattingLeaves 1/16 inch of hair, won't catch skin easily
    Mat splitterCutting through dense tangles lengthwiseBlades are recessed, won't touch skin
    Cornstarch or grooming powderReduces friction and staticMakes hair easier to separate and slide through

    Why the #10 Blade is the Gold Standard

    According to grooming industry standards, the #10 blade leaves hair approximately 1/16 inch long. It's not a shave-to-the-skin situation, but it's close enough to break the tension of the mat. Crucially, the spacing of the teeth in a #10 blade makes it very difficult to catch and pull the skin, unlike a wider-toothed comb.

    This makes it the safest choice for inexperienced home groomers.

    pet clippers with #10 blade

    Image source: Amazon (fair-use with source credit)

    Step-by-Step: How to Tackle the Mat Safely at Home

    Okay, you've assessed the situation, you have your tools ready, and your cat is relatively calm. Here's the safe way to remove that mat. Remember, patience is not a virtue here.

    It's a requirement.

    Step 1: Prep the Session (Environment + Cat)

    Set yourself up for success. Choose a quiet room with minimal distractions. Close the door so other pets can't wander in.

    Use a towel or a non-slip mat on your work surface so your cat feels secure.

    About 15 minutes before you start, many owners find it helpful to use a feline facial pheromone spray on the bedding or a towel. These synthetic pheromones signal safety to cats and can significantly reduce anxiety. A calm cat is a safe cat.

    Step 2: Desensitize the Armpit Zone

    Never dive straight for the mat. Spend a few minutes gently touching your cat's shoulder, then slowly work down to the armpit. Talk in a soothing voice and give high-value treats for allowing the touch.

    The goal is to associate armpit handling with positive rewards.

    If your cat pulls away or shows any of the body language signs we discussed earlier, stop. Do not force this step. Try again in a few hours or the next day.

    Step 3: The Clipping Technique

    This is the moment of truth. If your cat is tolerant, here's how to proceed safely.

    • Direction matters: Always clip in the direction of hair growth. Clipping against the grain is more likely to pull the skin and cause clipper burn.
    • Stretch the skin taut: Use your non-dominant hand to gently stretch the armpit skin flat. This creates a smooth, tight surface for the clippers to glide over, preventing the skin from folding into the blade.
    • The one pass rule: Never run the clipper over the same spot repeatedly. One smooth pass is all you should attempt. Going back and forth creates friction and heats up the blade, which can cause burns. If the mat is very thick, work in layers from the outside in.
    • Clipper pressure: Let the clipper do the work. Do not press down. The weight of the clipper head is enough to cut the hair.

    clipping direction on cat fur

    Image source: Amazon (fair-use with source credit)

    Step 4: The Comb-Out (For Loose Tangles Only)

    If your assessment revealed a loose tangle, not a tight felted pelt, you can try combing instead of clipping.

    Use a mat splitter to make a few lengthwise cuts through the tangle. This separates the hair into smaller sections. Then, hold the base of the tangle with your fingers and use a wide-tooth comb to gently work from the tips downward.

    Never pull the mat away from the body.

    Step 5: Post-Grooming Care

    You're not done yet. After the mat is gone, check the skin carefully. It might be pink from being covered, which is normal for the first hour or so.

    • Wipe the area: Use a pet-safe antiseptic wipe to clean the freshly exposed skin. This helps prevent any potential infection.
    • Check for clipper burn: Keep an eye out for redness that doesn't fade after 20 minutes. Clipper burn looks like a red, irritated rash. If it appears, apply a vet-approved hydrocortisone cream.
    • Reward your cat: End the session with a flood of treats and praise. This positive association is what will make the next time easier.

    If the skin looks raw, broken, or has any discharge, skip the cream and call your vet. You don't want to mask an infection with an anti-inflammatory.

    Also, give the area a day to breathe before you apply anything beyond a gentle wipe. The skin has been covered and possibly damp for a while. It needs air.

    Watch for excessive licking. If your cat won't leave the spot alone, an e-collar might be necessary for a day or two to let the skin calm down.

    The Big Mistake That Causes Repeat Mats

    You've done the hard work. The mat is gone. The skin looks healthy.

    You feel a wave of relief. Then, three weeks later, you feel another lump under the armpit. Sound familiar?

    This is the most frustrating cycle in cat grooming, and it almost always comes down to one thing: you fixed the symptom, not the cause.

    "I Just Groomed Him, Why Is It Back in a Week?"

    Let's run through the most common reasons mats reappear quickly.

    You didn't address the underlying pain. If your cat has arthritis or dental disease, they still aren't grooming that area. The fur will grow back, and it will mat again, because nothing has changed. You need to address the root cause, not just the visible result.

    You bathed your cat. Bathing a long-haired cat without thoroughly brushing and drying afterward is a mat machine. Wet fur shrinks, tangles, and felts together faster than you can imagine. If you bathe your cat, you must be prepared to blow-dry and brush immediately.

    You didn't remove the entire mat. Sometimes what feels like one mat is actually several layers. If you only removed the top layer, the dense core remains glued to the skin. It will grow and attach to new fur as it emerges.

    The regrowth cycle. After a shave, the new hair grows in stages. The undercoat regrows faster than the topcoat. This stage of mixed-length growth is highly prone to tangling and matting again.

    Without regular combing during this transition, you'll be back to square one.

    Fixing the Root Cause: Pain, Diet, and Underlying Illness

    This is where you need to think like a detective. In our research, the most successful grooming routines are built on understanding the cat's health status.

    If your cat is a senior or has diagnosed arthritis, talk to your vet about pain management. Options like joint supplements, anti-inflammatory medications, or even acupuncture can make a world of difference in their willingness to groom.

    Look at their diet. A cat eating low-quality food with poor protein content will have dry, brittle fur that breaks easily and tangles more readily. Switching to a high-quality, species-appropriate diet with Omega-3 fatty acids can significantly improve coat health.

    It won't happen overnight, but you'll see a difference in a few months.

    Finally, if your cat is overweight, weight loss is the most effective long-term fix. A slim cat can reach every inch of its body. An overweight cat can't.

    Building a Preventative Routine That Actually Sticks

    Here's the good news: once you identify the cause, prevention is straightforward. It just requires consistency.

    The 5-Minute Check: Combing Under the Armpits Twice a Week

    You don't need to do a full grooming session every day. You just need to check the armpits specifically. Make it a habit.

    • Twice a week, lift each front leg and run a wide-tooth comb through the armpit fur.
    • Look for any small tangles starting to form.
    • If you find a tiny knot, comb it out immediately before it tightens.
    • Pair this with a treat so your cat learns that armpit checks mean good things.

    This 5-minute routine prevents the big, scary mats from ever forming and gets your cat used to being handled in this sensitive area.

    When to Bathe (and Why Bathing Can Sometimes Make Mats Worse)

    Bathing a cat is almost always more stressful than helpful, especially for long-haired breeds. The only time you should bathe a cat is for a medical reason like a flea infestation or a skin condition, or if they are truly filthy and can't clean themselves.

    If you must bathe your cat, follow these rules:

    • Brush thoroughly before the bath to remove all loose fur.
    • Use lukewarm water and a cat-specific shampoo. Never use human shampoo.
    • Rinse completely. Soap residue is a major cause of skin irritation and mats.
    • Dry immediately with a high-velocity dryer and brush as you dry. Do not let your cat air-dry, especially in a cold house.

    The Role of Grooming Wipes vs. Full Baths

    When you want to clean your cat without the drama of a bath, use pet grooming wipes. These are pre-moistened with a gentle, waterless cleanser. They remove dirt and dander and are excellent for spot-cleaning under the armpits.

    They won't solve a mat problem, but they help maintain skin health between proper grooming sessions.

    When DIY Is Not Enough: The Vet Visit

    There's no shame in admitting when a situation is above your pay grade. We've talked about skin wounds and signs of infection. But there are other scenarios where DIY grooming is dangerous, even when the skin looks okay from the outside.

    What to Expect from a Professional De-Matting

    A professional groomer or vet has more tools and more experience, but they also have something you don't: options for restraint that are safe for the cat and the handler.

    When you bring a severely matted cat in, the professional will assess the mats. If the mats are tight and close to the skin, and the cat is resisting, they will likely recommend sedation. This is not a failure on your part.

    It's a safety decision.

    Sedation allows the groomer to:

    • Work slowly and methodically without causing pain.
    • Use clippers to remove mats safely without risk of sudden movements causing injury.
    • Examine the skin thoroughly for any hidden wounds, parasites, or infections.

    The process is quick, and your cat will wake up with a much more comfortable coat.

    How to Find a Cat-Friendly Groomer or Vet

    Not all groomers are created equal. Some are used to dealing with dogs and may not understand cat behavior. Look for a groomer who has experience working specifically with cats.

    The best way to find one is to ask your vet for a referral.

    A cat-friendly clinic adheres to specific standards to reduce stress. They have separate waiting areas for cats and dogs, quiet examination rooms, and staff trained in low-stress handling techniques. The American Association of Feline Practitioners (AAFP) offers a cat-friendly practice certification program that many clinics pursue.

    The Cost Reality Check

    Let's talk money. Grooming fees vary widely, but here's a rough picture based on industry data:

    ServiceAverage CostWhat's Included
    DIY Clipper Kit$40 – $100Clippers, blade, mat splitter, comb
    Professional Groomer$60 – $120Sedation usually adds another $50 – $100
    Vet De-Matting with Sedation$150 – $300Exam, sedation, grooming, sometimes skin treatment

    Now, compare that to the cost of emergency vet care if you accidentally cut your cat's skin with scissors. That can easily run into the hundreds or thousands of dollars. The small investment in proper tools or professional help is always cheaper than treating an injury or a severe skin infection.

    Preventative Strategy for At-Risk Cats

    Prevention isn't a one-size-fits-all plan. You need to tailor your approach based on your cat's specific health profile and lifestyle.

    The "High-Risk Cat" Grooming Protocol

    This protocol is for cats that are seniors, long-haired, or have a history of matting. If your cat fits any of these categories, you should be proactive, not reactive.

    • Daily visual checks: A quick glance at your cat's coat as they walk by can tell you a lot. Look for any raised tufts or lumps.
    • Every other day combing: This isn't a full brush. It's an 8-minute session focused on the undercoat and the armpits specifically.
    • Monthly "bikini" clip: Many long-haired cat owners choose to keep the armpit and belly fur clipped short year-round. This is often called a "sanitary clip" or "bikini clip." It dramatically reduces the chance of matting in the highest-risk zones.

    Diet and Hydration: The Unexpected Grooming Allies

    You might not think diet affects fur, but it does. A healthy coat starts from the inside.

    • Protein: Cats need a high-protein diet. Protein is the building block of fur. Low-quality food with plant-based fillers results in weak, brittle hair.
    • Omega-3 Fatty Acids: These healthy fats reduce inflammation in the skin and promote a softer, shinier coat. Look for food with fish oil or flaxseed.
    • Hydration: A dehydrated cat has dry skin and dry fur. This makes fur more prone to static and tangling. Encourage water intake with a fountain or by adding wet food to their diet.

    Seasonal Coat Management

    Cats blow their coats in spring and fall. This means a sudden, massive shedding event. During these times, the risk of matting spikes dramatically.

    In spring and fall, increase your combing frequency to daily, even for short-haired cats. Pay special attention to the armpits, belly, and the "pants" area on the back legs. These are the spots where loose fur accumulates and tangles fastest.

    Frequently Asked Questions

    Can I use human scissors to cut out a mat if I'm careful?

    No. We say this clearly and firmly: never use scissors on mats in the armpit area. The skin there is extremely thin, loose, and elastic.

    A startled movement can cause a serious injury in a split second. Even if you're careful, pets don't understand what you're doing, and their natural reaction to pain or fear is to flinch. Use clippers with a #10 blade instead.

    The blade is designed to cut hair close to the skin without actually touching it.

    Will the fur grow back patchy if I have to shave it?

    Yes, it will look patchy for a while, but it will recover. After a shave, the undercoat and topcoat grow at different rates. This can leave a temporary, uneven appearance that lasts a few weeks.

    The hair typically fills back in within 4 to 6 weeks. Some cats might have a change in texture, but once the fur fully regrows, it looks normal. It's far better to have a temporary bald spot than a painful mat pulled tight against the skin.

    Is it painful for the cat when I clip a mat?

    It shouldn't be, if you're using the right technique and a sharp blade. A dull blade will pull the hair, which hurts. A sharp #10 blade should glide through the fur without pulling.

    The bigger issue is the anxiety and restraint. If your cat is scared, they're not in pain, but they're stressed. This stress can make them struggle, which can cause accidental nicks.

    If your cat gets too stressed, stop and take them to a professional or your vet.

    How do I know if my cat's self-grooming decrease is age-related or medical?

    This is a crucial question. An older cat might groom less simply because they're tired or achy. But a sudden, noticeable decrease in grooming is often a sign of an underlying medical issue.

    If your cat's coat looks greasy, matted, or has a dandruff build-up, do not assume it's just old age. Schedule a veterinary exam. Bloodwork can rule out kidney disease, hyperthyroidism, and diabetes, all of which cause poor coat condition.

    Getting a diagnosis early is always the best course of action.

    The Bottom Line: What to Do Right Now

    You've read the full guide. You understand the risks, the tools, and the techniques. Now it's time to put it into action.

    Here's your decision-based action plan.

    A Decision-Based Action Plan

    Follow this simple if/then logic to guide your next steps.

    If the mat is loose and you can see skin between the fibers: Comb it out gently with a mat splitter and a wide-tooth comb. Work from the tips toward the base to avoid pulling the skin.

    If the mat is tight, dense, and you can't see the skin: Break out the clippers with a #10 blade. Stretch the skin taut and shave in the direction of hair growth. Do not attempt to comb it out.

    If the skin underneath is broken, red, weeping, or smelly: Stop immediately. Do not groom. Call your vet and schedule an appointment for today or tomorrow.

    The skin needs medical treatment.

    If your cat is aggressive, terrified, or won't stay still: Do not force it. Wrap them in a towel if you must, but if they are beyond tolerance, book a professional groomer or a vet visit with sedation options.

    If this is the second or third time you've dealt with armpit mats: Look beyond the fur. Address pain management, diet, and weight. You need to solve the grooming aversion, not just the visible symptom.

    The Golden Rule of Cat Armpits

    Here's the golden rule to remember: when in doubt, stop. A moment of frustration can cause a lifetime of handling aversion. Your cat's trust in you is worth more than a perfect coat.

    Take a deep breath. Gather your tools. Give your cat a treat.

    And remember that your cat isn't giving you a hard time. They're having a hard time. Work with them, not against them, and you'll both get through it.

  • Mastering How to Tell If a Cat Needs Grooming

    Mastering How to Tell If a Cat Needs Grooming

    Most cat owners assume grooming is about looks. It's not. It's about comfort, health, and catching problems before they turn into vet bills.

    The tricky part is that cats hide discomfort brilliantly, and by the time you notice something's off, your cat may have been dealing with it for weeks. That's why knowing how to tell if a cat needs grooming is such a crucial skill for any owner.

    The good news? You don't need to be a professional groomer or a veterinary expert to spot the warning signs. You just need to know what to look for, where to check, and how often to do it.

    According to the Cornell Feline Health Center, a simple weekly hands-on check catches about 90% of grooming-related issues before they escalate. As of 2026, the consensus among feline health organizations is clear: regular grooming assessment isn't optional. It's part of responsible cat ownership.

    Let's walk through exactly what to look for.

    Quick Answer

    You can tell a cat needs grooming when you feel mats or tangles in their fur, see a greasy or dull coat, notice excessive shedding or dander, spot overgrown nails clicking on floors, or observe an increase in hairballs. Changes in self-grooming behavior are also red flags. Cats stop grooming when they hurt or feel unwell.

    Check your cat weekly with a hands-on pass over their entire body.

    Why This Matters More Than You Think

    Here's the thing about cat grooming: it's not cosmetic. A cat's coat is a living extension of their health. When a cat stops grooming properly, it's often the first sign of an underlying issue.

    And when mats form, they don't just look bad. They pull on the skin constantly, causing pain, bruising, and even open sores that can become infected.

    The Hidden Link Between Grooming and Health

    Cats spend anywhere from 30% to 50% of their waking hours grooming. That's a massive chunk of their day dedicated to spreading natural oils, removing loose fur, and keeping their skin clean. When that routine breaks down, it's rarely random.

    Something is causing it.

    Here's what veterinary research tells us:

    • Pain is the #1 reason cats stop grooming. Arthritis, dental disease, and injuries all make grooming physically uncomfortable. A cat with sore joints won't twist to reach their back. A cat with a tooth abscess won't lick their flank.
    • Obesity physically prevents grooming. Overweight cats simply can't reach certain areas. Their backs, hindquarters, and tails go ungroomed because they can't bend that way.
    • Stress changes grooming behavior. Some cats overgroom when stressed, creating bald patches. Others undergroom and let their coat go dull and greasy. Both are red flags.
    • Age-related decline is normal, but not ignorable. Senior cats lose flexibility. They need more help, not less.

    The connection runs both ways. A poor coat can cause skin problems, and skin problems can cause a poor coat. It's a cycle that gets worse the longer you ignore it.

    What Most Owners Miss Until It's a Bigger Problem

    The biggest mistake we see is waiting for obvious signs. Visible mats, a greasy coat, or hairballs on the floor are late-stage indicators. By that point, your cat is already uncomfortable, and the fix is more stressful for everyone.

    Most owners miss these early warning signs:

    • A change in grooming frequency. Your cat used to groom for 20 minutes a day. Now it's 5. That's a change worth investigating.
    • A localized greasy patch. One spot on the base of the tail or behind the ears that feels different from the rest of the coat.
    • Subtle matting in hidden areas. Armpits, behind the ears, and the belly are prime spots. You can't see them just by looking.
    • Increased dander. Flakes that weren't there before, especially along the spine.
    • A "starey" or rough coat texture. The fur doesn't lay flat. It stands up slightly, like it's been styled that way. It shouldn't be.

    These subtle signs are exactly why the hands-on check is non-negotiable. Looking at your cat isn't enough. You need to feel them.

    The Quick Answer: 7 Signs Your Cat Needs Grooming Now

    Some signs are unmistakable. If you see any of these, it's time to grab the brush or call the groomer. Don't wait.

    Here's what to look for.

    Matted Fur and Where to Check First

    A mat is a clump of fur that has become so tangled it forms a solid mass. It can't be brushed out easily. In severe cases, it's as hard as a rock and sits right against the skin.

    Here's the critical part: mats are not just ugly. They hurt. Every time your cat moves, the mat pulls on the skin.

    Over time, that constant tension causes bruising, skin irritation, and even open wounds. Bacteria love those wounds.

    Check these five areas first. They're where mats hide:

    • Behind the ears. A classic spot. The fur is fine and easily tangled.
    • Under the armpits. Your cat's legs rub against their body constantly. Mats form here quickly.
    • The belly. Especially in long-haired cats. The fur is soft and prone to matting.
    • The base of the tail. This area gets greasy and matted, especially in unneutered males.
    • The hindquarters. A common spot for senior or overweight cats who can't reach to groom.

    how to tell if a cat needs grooming

    Image source: Bing (Web (fair-use with source credit))

    If you feel a mat smaller than a coin, you can often work it out gently with your fingers and a comb. Anything larger needs more aggressive intervention.

    Changes in Shedding Patterns That Signal Trouble

    All cats shed. That's normal. But a sudden increase, or an increase that doesn't follow the seasons, is worth investigating.

    Here's the standard timeline for outdoor-adapted cats: expect heavy shedding in spring (as the winter coat comes out) and fall (as the summer coat comes in). Indoor-only cats often shed year-round at a lower level.

    If your cat is shedding dramatically more than usual, or if you're pulling out clumps of fur with every stroke, that's a sign. It could mean:

    • The undercoat isn't being released properly
    • The coat is in poor condition from lack of grooming
    • There's an underlying skin condition or dietary issue

    Seasonal shedding is managed with regular brushing. Chronic excessive shedding needs a closer look.

    Greasy or Dull Coat Texture

    A healthy cat coat has a slight sheen to it. It reflects light because the natural oils are evenly distributed. When that sheen disappears and the coat starts to look dull or greasy, something's off.

    Here's what you're looking for:

    • Greasy fur often indicates a buildup of oils that the cat hasn't been spreading. This happens when grooming declines.
    • Dull, dry fur suggests the coat isn't being conditioned by grooming. It can also point to dietary deficiencies or dehydration.
    • A rough, "starey" texture means the individual hairs aren't laying flat. They stand up and look spiky.

    Run your hand along your cat's back. Healthy fur feels smooth and silky. Unhealthy fur feels rough, brittle, or oily.

    The "Stud Tail" Sign You Might Mistake for Dirt

    Here's one that trips up a lot of owners. You see a greasy, brownish patch at the base of your cat's tail. You assume it's dirt or something your cat rolled in.

    You wash it off, and it comes back within days.

    That's not dirt. That's likely "stud tail," technically called feline tail gland hyperplasia. It's a condition where the sebaceous glands at the base of the tail overproduce oil.

    It's most common in unneutered males, but any cat can develop it.

    What you're seeing is a buildup of waxy, oily secretion that collects dirt and debris. It's not painful, but it can lead to skin irritation or infection if left untreated.

    The fix isn't grooming. It's a vet check. Grooming can clean the area temporarily, but you're treating the symptom, not the cause.

    Nail Length That Hits the Floor

    Cat grooming isn't just about fur. Nails are part of the equation, and they're often the most neglected part.

    Here's the test: place your cat on a hard floor and listen. If you hear clicking sounds as they walk, their nails are too long.

    Long nails cause real problems:

    • They curve and grow into the paw pads. This is genuinely painful and leads to infection.
    • They get caught in carpet, fabric, and furniture. A caught nail can tear, causing bleeding and injury.
    • They alter your cat's posture. Long nails force the toes upward, which puts strain on the joints over time.

    You should also check visually. When your cat is relaxed and standing, their nails should not touch the ground. If they do, it's time for a trim.

    Increased Hairballs (and When It's Abnormal)

    Hairballs are a normal part of cat life. They're not pleasant, but they happen. The question is how often.

    Most cats will cough up a hairball occasionally. Research from the Cornell Feline Health Center suggests that more than one hairball per month is abnormal and warrants investigation.

    Here's the logic:

    • Frequent hairballs mean excessive fur ingestion. Your cat is swallowing more loose fur than their digestive system can handle.
    • This often points to excessive shedding. The coat is releasing more loose fur than normal.
    • It can also point to overgrooming. If your cat is grooming excessively due to stress or skin irritation, they're swallowing more fur.

    Regular brushing removes loose fur before your cat swallows it. If brushing doesn't reduce the hairball frequency, talk to your vet.

    Noticeable Dander or Flaking Skin

    Dander is those white flakes you see on your cat's coat, especially along the back and near the tail. A small amount is normal. A visible dusting of flakes is not.

    Here's what's happening:

    • Dry skin causes dead skin cells to flake off more readily.
    • Poor grooming means those flakes aren't being distributed or removed.
    • Underlying conditions like allergies, infections, or nutritional deficiencies can all worsen dander.

    If you see dander, run your hands through your cat's fur near the skin. Check for redness, scabs, or hot spots. Dander can be the first visible sign of a skin condition that needs veterinary attention.

    The 60-Second Hands-On Check You Should Do Weekly

    Here's the most practical advice in this entire guide: get your hands on your cat once a week. Not to pet them. To check them.

    The visual pass isn't enough. You need to feel the coat and the skin underneath. Most mats and skin issues live beneath the surface hair, invisible until they're well developed.

    How to Run a Proper "Hand Test" Over the Coat

    Start when your cat is relaxed. After a meal or during a quiet moment works best. Don't chase your cat down for this.

    Make it a positive interaction with treats and gentle strokes.

    Here's the correct technique:

    1. Start at the head and run your fingers through the fur, down to the skin, in the direction the fur grows.
    2. Work your way down the neck, back, and sides. Use slight pressure so you can feel under the topcoat.
    3. Check the belly and legs while your cat is standing or lying on their side.
    4. Don't skip the tail. Run your hand down the entire length.
    5. End at the hindquarters. This is a high-risk area for matting.

    The entire pass takes about 60 seconds. You're feeling for lumps, tangles, mats, bumps, or changes in texture.

    What a Healthy Coat Should Feel Like

    Before you can identify problems, you need to know what's normal. Here's the baseline:

    • Smooth. Your fingers should glide easily through the fur without snagging.
    • Clean. The fur should feel fresh, not greasy or sticky.
    • Even. No patches of coarse, rough, or matted fur.
    • Supple skin underneath. The skin should move freely over the muscle and not feel tight, bumpy, or crusty.

    If you hit a snag, stop. Don't pull. Gently work your fingers through the tangle to feel what's causing it.

    Feeling for Hidden Mats in Armpits, Behind Ears, and the Belly

    These three areas are notorious for hiding mats. They're hard to see and easy to miss.

    Here's what to do:

    • Behind the ears: Run your fingers gently through the fur right behind each ear. The fur is fine and tangles easily. Rub your thumb and forefinger together to feel for clumps.
    • Armpits: While your cat is standing, slide your hand between their front legs and feel the fur where the leg meets the body. Mats here are common and painful.
    • Belly: Have your cat lying on their side or gently lift them slightly. Feel across the entire belly area. The fur is soft and prone to matting.

    If you find a small tangle, you can often work it out with your fingers right then. For larger mats, check the section below on safe mat handling.

    Checking Skin for Bumps, Scabs, or Ticks While You're at It

    Your weekly hands-on check is the perfect time to catch skin issues early. While you're feeling for mats, you're also feeling for anything else that shouldn't be there.

    Here's what to look for:

    • Bumps or lumps: Any new or changing lumps under the skin. Some are harmless. Some are not.
    • Scabs or crusts: These can indicate flea allergies, skin infections, or other conditions.
    • Ticks or fleas: Run your fingers against the fur to part it and look for ticks, especially around the head, neck, and ears.
    • Redness or irritation: Warm, red, or inflamed areas need attention.
    • Hair loss: Bald patches or thinning fur can indicate a range of issues from stress to hormonal imbalances.

    This check takes less than two minutes and catches problems early when they're easiest to treat.

    Breed-Specific Grooming Needs: Not All Cats Are Equal

    Here's a truth that surprises new cat owners: grooming needs vary wildly by breed. A Persian and a Siamese have completely different coats, and treating them the same is a recipe for problems.

    The size of your grooming investment should match your cat's coat type. Let's break it down.

    Long-Haired Breeds: Persian, Maine Coon, Ragdoll

    These cats are stunning. They're also a significant grooming commitment. Their long, dense coats require daily attention.

    BreedCoat CharacteristicGrooming Frequency
    PersianVery long, fine, dense undercoatDaily, 10-15 minutes
    Maine CoonLong, shaggy, water-resistantDaily or every other day
    RagdollLong, silky, less undercoatEvery 2-3 days minimum

    With long-haired cats, mats aren't a possibility. They're an inevitability, unless you stay on top of brushing. Daily brushing prevents mats from forming and distributes natural oils through the coat.

    For these breeds, weekly grooming isn't optional. It's essential. If you can't commit to daily brushing, professional grooming every 4-6 weeks is a worthwhile investment.

    Medium Coats: The Weekly Routine

    Medium-haired cats like the American Shorthair or the Domestic Longhair fall in the middle. They have a double coat that's less extreme than a Persian, but it still needs regular attention.

    A weekly brushing session of 10-15 minutes is generally enough. Pay extra attention to the hindquarters and tail, where mats love to form.

    Medium-coat cats benefit most from:

    • Weekly full-body brushing to remove loose fur and prevent mats.
    • Monthly nail trims or as needed based on wear.
    • Seasonal extra brushing during heavy shedding periods.

    Short-Haired Cats: Less Is More, But Don't Ignore Them

    Short-haired cats are lower maintenance, but they're not no-maintenance. Many owners assume a short-haired cat never needs grooming. That's a mistake.

    Here's the reality:

    • They still shed. A short-haired cat can shed plenty, especially indoor cats with artificial lighting that disrupts natural seasons.
    • They can get mats. It's less common, but it happens, especially in older or overweight cats.
    • They benefit from brushing. Weekly brushing removes loose fur, reduces hairballs, and distributes natural oils.

    For short-haired cats, a weekly brush with a soft bristle brush or grooming glove is sufficient. Nail trims are still needed every 2-4 weeks.

    Double-Coated Breeds: Undercoat Management

    Some breeds have a double coat with a dense, soft undercoat beneath the topcoat. This includes breeds like the Norwegian Forest Cat and the Siberian.

    The undercoat is where the magic happens and where the problems start. It sheds heavily, especially seasonally, and it's the primary contributor to mats.

    Here's what works:

    • Use an undercoat rake to remove the loose undercoat fur. A standard brush just skims the surface.
    • Brush in sections to get through the dense undercoat. Don't just do a quick pass.
    • Be prepared for seasonal blowouts. In spring and fall, you may need to brush daily.

    Double-coated cats are a commitment. If you have one, invest in the right tools. It makes a massive difference.

    When "Not Grooming" Is a Health Warning

    Sometimes, a cat's grooming decline isn't a grooming problem at all. It's a health problem showing up as a grooming issue. This is the most important distinction in this entire guide.

    Knowing the difference can save your cat from unnecessary discomfort. Here's what to watch for and when to call the vet.

    Senior Cats and Arthritis: Why They Stop Cleaning Themselves

    Arthritis is incredibly common in older cats. Research from the Journal of Feline Medicine and Surgery suggests that over 90% of cats over 12 years old show radiographic evidence of arthritis.

    Here's the connection to grooming: grooming is a physical activity. It requires twisting, turning, bending, and flexibility. When joints are painful, cats don't want to twist their bodies into those positions.

    You'll often see:

    • A neat groomed "cap" on the head and neck, but a matted, unkempt back and hindquarters.
    • A cat that grooms only the easily reachable spots and ignores the rest.

    If your senior cat shows this pattern, grooming can help, but pain management is the real solution. Talk to your vet about arthritis treatment. Once the pain is managed, grooming behavior often improves on its own.

    Obesity and Why Your Cat Can't Reach Their Back

    Overweight cats face a mechanical problem: they can't physically reach certain parts of their body. The belly, back, and tail are common areas they can't access.

    This creates a pattern of matting:

    • The area around the tail base gets greasy and matted.
    • The middle of the back develops mats where the cat can't twist.
    • The hindquarters go ungroomed entirely.

    If your cat is overweight and has an ungroomed coat, the fix is two-fold: grooming to address the immediate problem, and weight management to address the cause. Both are important.

    Dental Pain: The Overlooked Culprit

    Here's a surprising connection: a cat with dental disease may stop grooming. Not because their coat hurts, but because grooming uses their mouth.

    Cats use their tongues to groom. If their gums and teeth hurt, licking becomes painful. The cat associates grooming with discomfort and reduces its frequency.

    The signs of dental issues include:

    • Bad breath that smells worse than usual.
    • Difficulty eating or dropping food from the mouth.
    • Pawing at the mouth or excessive drooling.
    • Grooming decline alongside these signs.

    If you notice a sudden decline in grooming combined with any of these signs, a dental check is in order.

    Stress-Related Overgrooming vs. Undergrooming

    Stress affects different cats differently. Some overgroom. Others undergroom.

    Both are responses to anxiety.

    Overgrooming is more visible. It appears as bald patches or thinned fur, especially on the belly, inner thighs, or back. This is called psychogenic alopecia.

    The cat is licking excessively to self-soothe, causing hair loss.

    Undergrooming is quieter. The coat becomes dull, greasy, or matted because the cat isn't bothering to maintain it. This can happen during major life changes like a move, a new pet, or a change in schedule.

    In either case, the answer isn't more grooming. It's addressing the stress. Identify the trigger, provide environmental enrichment, and consider a vet consult if the behavior persists.

    When to Call the Vet Instead of the Groomer

    This is the line you need to know. Some situations call for a brush. Others call for a vet.

    Call the vet immediately if you notice:

    • Bald patches that aren't from licking alone. They could indicate ringworm, mites, or hormonal issues.
    • Skin that's red, oozing, or has an odor. This suggests an infection.
    • Lethargy or loss of appetite combined with poor coat condition.
    • Fever or visible distress alongside grooming changes.
    • Sudden, dramatic changes in grooming behavior. A cat that stops grooming entirely needs a checkup.

    In these cases, grooming would only treat the surface. The underlying medical issue needs professional attention. Grooming the affected area could actually make things worse.

    The simple rule: if the grooming issue is about the coat, groom. If it's about the cat's behavior, health, or overall condition, see a vet. When in doubt, err on the side of a vet visit.

    They can identify what you can't.

    Matting: How to Handle It Safely

    Matting is the most common grooming emergency we see. It's also the one most owners handle incorrectly, which causes pain and stress for the cat.

    Here's the safe, step-by-step approach to dealing with mats.

    Why Mats Hurt (They Pull the Skin Constantly)

    A mat is not just tangled hair. It's a tight, dense mass of fur that pulls at the skin with every movement. Imagine wearing a hair tie that's too tight, all day, every day.

    That's what a mat feels like to your cat.

    The constant tension causes:

    • Skin irritation and redness beneath the mat.
    • Bruising from the persistent pulling.
    • Open sores when the mat rubs against the skin during movement.
    • Pain that makes your cat avoid being touched near the mat.

    In severe cases, mats can hide infections, parasites, or wounds. The skin beneath a mat can become moist, warm, and infected because it can't breathe.

    The "Coin-Size Rule" for When to Intervene

    Here's a simple guideline that works across coat types: if a mat is smaller than a coin (about the size of a dime or nickel), you can often address it at home. If it's larger, or if there are multiple mats, professional help is usually safer.

    Here's the reasoning:

    • Small mats can be worked out gently with fingers and a comb.
    • Large mats are firmly attached to the skin. Trying to brush or pull them out causes pain.
    • Multiple mats mean the coat is in bad shape. Removing them all is stressful and time-consuming.

    If you're unsure about size, take a photo and ask your groomer or vet.

    Why Scissors Are a Hard No

    This is the most important safety rule in this entire guide: never use scissors on a mat.

    Here's why:

    • Cat skin is thin and loose. It's easy to accidentally cut a fold of skin that's hidden beneath the mat.
    • Mats sit close to the skin. You can't see what you're cutting.
    • A cut from scissors can be deep and severe. It often requires stitches.

    If you're considering scissors, don't. Use a mat splitter, a dematting comb, or professional help instead.

    Step-by-Step Dematting at Home (If It's Mild)

    If the mat is small and your cat is cooperative, you can try to address it at home. Here's the safe method:

    1. Stay calm and go slow. If your cat is stressed, stop and reschedule. Don't force it.
    2. Use your fingers to gently tease the mat apart. Start at the edges and work inward.
    3. Use a dematting comb or mat splitter to gently work through the mat. These tools have blades that cut the mat safely, not the skin.
    4. Brush the area afterward with a slicker brush to remove the loose fur.
    5. Reward your cat with treats throughout the process.

    This method only works for mild mats. Moderate to severe matting needs professional help.

    matting and skin irritation

    Image source: Bing (Web (fair-use with source credit))

    When to Bring in a Professional Groomer

    Sometimes, the smartest move is to hand it to a professional. This isn't a failure. It's the safest choice for your cat.

    Bring your cat to a professional groomer when:

    • The mats are larger than a coin.
    • There are multiple mats across the body.
    • The mats are tight against the skin.
    • Your cat is aggressive or extremely stressed during grooming.
    • The mat is near sensitive areas like the belly, armpits, or tail base.

    A professional groomer will often recommend a "shave-down" in severe cases. This means removing the entire coat to restart fresh. It's not the prettiest look, but it's painless and safe.

    Ask the groomer about their methods before booking. Some sedate cats, which is a red flag unless a vet is supervising.

    Nail Care: The Easiest Thing to Get Wrong

    Nail trims are the most feared grooming task for cat owners. They're also the most frequently avoided, which leads to painful problems down the line.

    Here's everything you need to know about doing it right.

    How to Tell If Nails Are Too Long

    The floor-click test is the simplest method. Put your cat on a hard surface and watch them walk. If you hear clicking, the nails are touching the ground, which means they're too long.

    You can also check visually:

    • Stand your cat on a flat surface. Look at their paws from the side.
    • Healthy nails hover just above the ground when the cat is standing.
    • Overgrown nails touch or dig into the floor.

    When you look at the paw from underneath, you should see the nail tips barely peeking out from the fur. If you see long, curved hooks, it's trim time.

    cat nail trimming

    Image source: Bing (Web (fair-use with source credit))

    The Floor-Click Test

    This is the fastest diagnostic you can do at home. Place your cat on a tile, hardwood, or linoleum floor. Listen carefully as they walk.

    • No clicking: Nails are at a healthy length.
    • Occasional clicking: Nails are getting long. Schedule a trim.
    • Constant clicking: Nails are too long. Trim now.

    If you hear clicking, also check for nails that are curling inward. These can grow into the paw pad and cause painful infections.

    Trimming Basics Without Hitting the Quick

    The quick is the pink area inside the nail that contains blood vessels and nerves. Hitting it causes pain and bleeding. Avoiding it is the entire game.

    Here's how to trim safely:

    1. Use cat-specific nail clippers. Guillotine-style or scissor-style both work. Human nail clippers can crush the nail.
    2. Hold your cat securely. Have someone help if needed. A towel wrap can help for resistant cats.
    3. Press on the paw pad to extend the nail. This makes the nail visible and easier to clip.
    4. Identify the quick. In light-colored nails, it's the pink section. In dark nails, shine a strong light through the nail or look for the point where the nail curves.
    5. Cut just below the quick. Aim for a 45-degree angle. If you're unsure, cut less rather than more.
    6. Reward with a treat after each paw.

    Nail trims every 2-4 weeks maintain the right length. Regular trims also prevent the quick from growing longer, which makes future trims easier.

    What to Do If You Do Cause Bleeding

    Even experienced owners hit the quick sometimes. It's not a disaster. It's a learning moment.

    If you cut the quick:

    • Stay calm. Your cat will react to your energy.
    • Apply styptic powder or cornstarch to the nail tip. Press firmly for 30 seconds.
    • Offer a treat and end the session. Don't try to trim more nails.
    • Watch for excessive bleeding. If it doesn't stop within 10 minutes, contact your vet.

    Bleeding from the quick is usually minor. Your cat will recover quickly, and you'll be more careful next time.

    Bathing: How Often Is Too Often?

    Here's the truth that surprises many cat owners: most cats never need a bath. Cats are self-cleaning animals. Their tongues and natural grooming routines handle the job.

    But "most" isn't "all." There are situations where a bath is necessary. The key is knowing when to bathe and when to leave your cat alone.

    Why Most Cats Never Need a Bath

    A cat's tongue is a remarkable grooming tool. It has tiny, backward-facing barbs called papillae that act like a natural comb. They remove dirt, distribute oils, and detangle fur.

    Bathing disrupts this natural system. It strips the natural oils from the coat, which can lead to dry skin, itchiness, and a dull coat.

    Here's the thing: a cat's coat is designed to clean itself. Unless there's something the cat can't handle, a bath isn't needed.

    When Bathing Is Actually Necessary

    There are legitimate reasons to bathe your cat. Here are the main ones:

    • Flea infestations. A flea bath can help, but it's not a standalone cure. Your cat will need ongoing flea treatment.
    • Skin conditions. A vet-prescribed medicated shampoo can treat conditions like ringworm or dermatitis.
    • Soiled fur. If your cat gets into something sticky, toxic, or foul-smelling, a bath is necessary.
    • Obese or senior cats that can't groom themselves effectively may need occasional baths.

    If you're not sure whether your cat needs a bath, ask your vet. They can give you a definitive answer.

    Waterless Shampoo Alternatives

    If your cat dislikes water, or if they only need a spot clean, waterless shampoo is a great option.

    Here's how it works:

    • It comes in a foam or spray form.
    • You apply it to the coat and massage it in.
    • It cleans the fur and absorbs oils.
    • You brush it out or let it air dry.

    Waterless shampoo is ideal for:

    • Spot cleaning a greasy patch or soiled area.
    • Between baths for cats that tolerate water poorly.
    • Senior cats that can't groom themselves as well as they used to.

    Choose a formula made specifically for cats. Dog shampoo has a different pH and can irritate a cat's sensitive skin.

    The pH Mistake to Avoid

    This is a critical safety issue. Human shampoo and dog shampoo have a different pH balance than a cat's skin.

    • Human skin pH is around 5.5. Human shampoo is formulated for this.
    • Cat skin pH is around 6.5. It's different from both humans and dogs.

    Using human or dog shampoo on a cat disrupts the skin barrier, leading to:

    • Dry, itchy, flaky skin.
    • Increased susceptibility to infections.
    • A dull, damaged coat.

    Always use a shampoo made specifically for cats. If you're in doubt, ask your vet for a recommendation.

    Grooming Tools: What Actually Works

    The right tools make grooming easier for you and more comfortable for your cat. The wrong tools can cause pain, skin damage, and a lasting fear of grooming.

    Here's what actually works, and what to avoid.

    Slicker Brush vs. Undercoat Rake vs. Dematting Comb

    Different coat types need different tools. Here's a breakdown of the essentials:

    ToolBest ForHow OftenNotes
    Slicker brushRemoving loose fur, detangling, all coat lengths2-3 times per weekUse gentle pressure to avoid scratching skin
    Undercoat rakeDouble-coated breeds, heavy shedding1-2 times per weekReaches the dense undercoat
    Dematting combMild mats, tanglesAs neededHas blades that cut mats safely

    Here's how to choose:

    • Slicker brush: This is your everyday brush. The fine, angled bristles grab loose fur and smooth the coat. Look for one with rounded tips to avoid scratching.
    • Undercoat rake: This has longer, spaced teeth that reach the undercoat. It's essential for double-coated breeds like the Siberian or Norwegian Forest Cat.
    • Dematting comb: This has toothed blades that cut through mild mats. It's not for routine brushing, only for problem areas.

    grooming tools comparison

    Image source: Bing (Web (fair-use with source credit))

    What NOT to Use (and Why Furminator-Style Tools Can Be Harsh)

    Not every tool on the market is good for your cat. Some are actively harmful if used incorrectly.

    Avoid or use with caution:

    • Furminator-style tools. These have a sharp metal edge that cuts the coat. While effective for shedding, they can cause skin irritation, brush burn, and damage if used too aggressively or too often.
    • Human brushes. The bristles are often too stiff and can scratch your cat's skin.
    • Wire pin brushes with sharp tips. They can scratch the skin and cause discomfort.
    • Flea combs. These are fine for flea checks but useless for grooming.

    If you use a Furminator-style tool, limit use to once a week during heavy shedding and use light pressure. For most cats, a slicker brush is gentler and safer.

    Nail Clippers: Guillotine vs. Scissor-Style

    There are two main types of cat nail clippers. Both work, but they suit different preferences.

    TypeHow It WorksBest For
    GuillotineNail slides through a ring, a blade cuts downPrecise cuts on small nails
    Scissor-styleTwo blades squeeze together like scissorsLarger nails, easier grip

    Guillotine clippers are the most common. They're easy to use with one hand and provide a clean cut. However, some cats dislike the sensation of the nail sliding into the ring.

    Scissor-style clippers offer more control and are often preferred by experienced owners. They're better for cats with thicker nails, which are common in senior cats.

    Either works. Choose the one you feel most comfortable handling. Remember: the quick is the same regardless of which tool you use.

    When Professional Tools Are Worth the Upgrade

    You don't need professional-grade tools to groom your cat. But there are times when a higher-quality tool is worth the investment.

    Consider upgrading when:

    • Your cat has a thick double coat that standard brushes can't penetrate.
    • You're dealing with frequent mats that a dematting comb can't handle.
    • Your cat is large or heavy and needs a sturdier tool.
    • You have multiple cats and need tools that hold up to regular use.

    A high-quality slicker brush or undercoat rake costs more, but it lasts years and works better. It's worth the extra money if your grooming routine demands it.

    Mistakes to Avoid in Cat Grooming

    Even experienced owners make mistakes. Here are the most common ones, and how to avoid them.

    Using Dog Grooming Tools on a Cat

    This is a simple but common mistake. Dog brushes and clippers don't work on cats. Here's why:

    • Dog brushes are often too stiff for a cat's finer coat and sensitive skin.
    • Dog nail clippers are too large for cat nails.
    • Dog clippers are too loud and heavy for cats, which causes fear.

    Always use cat-specific tools. They're smaller, gentler, and designed for feline coats.

    Shaving a Double-Coated Cat (It Ruins Their Coat)

    This is a big one. If you have a double-coated cat, never shave them down, even in summer.

    Here's why:

    • The undercoat insulates against both heat and cold. Removing it makes your cat less comfortable, not more.
    • The coat may not grow back the same way. Shaving can cause permanent coat damage, a condition called "shave alopecia."
    • The topcoat and undercoat grow at different rates. This can cause an uneven, patchy appearance for months.

    If your cat has severe mats, a groomer might recommend a shave-down as a last resort. But for routine maintenance, a shave is not a good idea.

    Over-Bathing and Drying Out Their Skin

    Remember, cats are self-cleaning. Bathing them too often strips the natural oils that keep their coat and skin healthy.

    Here's what over-bathing causes:

    • Dry, itchy skin.
    • Dull, brittle fur.
    • Increased dander.
    • Skin irritation and infections.

    Unless your vet recommends a bathing schedule, stick to occasional baths only when necessary. Between baths, use waterless shampoo or spot cleaning.

    Ignoring the Tail Area and Anal Glands

    These areas are easy to ignore because they're not visible during a standard brushing session. But they need attention.

    • The base of the tail is prone to stud tail (the greasy buildup we mentioned earlier). It needs regular checking.
    • The anal glands can become impacted or infected without obvious signs. If your cat is scooting their rear on the floor or licking the area excessively, check with your vet.

    During your weekly hands-on check, spend a few extra seconds on these areas.

    Forcing Grooming on a Terrified Cat (and How to Desensitize Instead)

    This is the most counterproductive mistake you can make. Forcing a cat into a grooming session when they're scared teaches them that grooming is scary. It makes future sessions even harder.

    Instead, desensitize your cat gradually:

    1. Start slow. Show the brush, let your cat sniff it. Reward with a treat.
    2. Touch your cat gently with the brush. Just one or two strokes. Reward.
    3. Increase the duration gradually. Over several sessions, build up to a full brushing.
    4. Keep sessions short. Five to ten minutes is plenty.
    5. Always end on a positive note. Finish with a treat or play session.

    If your cat is genuinely scared of grooming, work with a professional groomer or vet behaviorist. They can help you build a positive association.

    Real Scenarios: What Experienced Owners Recognize

    Sometimes, the best way to learn is through examples. Here are real situations that experienced cat owners recognize, and what they mean.

    The Senior Cat Who "Just Looks Messy"

    You have a 14-year-old cat who's always been meticulous about grooming. Lately, they look a bit rough. The coat is greasy, especially on the back and hindquarters.

    There are a few small mats forming near the tail.

    You might think it's just age. That's partially true. But it's also a sign of something more specific.

    This is likely arthritis. Grooming requires flexibility. When joints hurt, your cat can't twist to reach their back.

    The "messy" look isn't laziness. It's pain.

    The fix:

    • See your vet about arthritis management. This is the most important step.
    • Brush your cat gently to remove loose fur and prevent mats.
    • Use a warm, soft cloth to wipe away excess oil on hard-to-reach areas.

    The Indoor Cat Shedding in January

    Your indoor cat is shedding like crazy in the middle of winter. You're finding fur on every surface. This doesn't match the "seasonal shedding" pattern you expected.

    Indoor cats live in a climate-controlled environment. Their bodies don't experience the natural temperature drops that trigger seasonal coat changes. Instead, they shed year-round at a fairly consistent rate.

    If your indoor cat is shedding excessively in winter, consider:

    • Is your home unusually dry? Dry air can cause the coat to dry out and shed more.
    • Has there been a change in diet? Dietary shifts can affect coat health.
    • Are you brushing regularly? More fur on your clothes means more fur in the coat.

    Regular brushing, even in winter, manages indoor shedding. If the shedding is dramatic or sudden, check with your vet.

    The Rescue Cat with Hidden Mats

    You've adopted a rescue cat with a beautiful, fluffy coat. You assume they're in good shape because they look great. But when you run your hands through their fur, you hit a solid mat near the hindquarters.

    This is more common than you'd think. A cat's coat can look healthy from the outside while mats hide close to the skin.

    What to do:

    • Don't try to brush it out. That will cause pain.
    • Check for other mats in the armpits, belly, and behind the ears.
    • Take your cat to a groomer for a professional assessment.

    Rescue cats, especially those with unknown histories, often need a professional grooming session when they first arrive home.

    The Cat That Grooms Too Much and Goes Bald

    Your cat is grooming obsessively. They're licking their belly and inner thighs so much that the hair is thinning. Bald patches are starting to appear.

    This is overgrooming, and it's a different problem than undergrooming.

    Here's what it could be:

    • Stress or anxiety. This is psychogenic alopecia. Your cat is using grooming to soothe themselves.
    • Allergies. Flea allergy dermatitis, food allergies, or environmental allergies cause itchy skin, which triggers excessive licking.
    • Pain. Sometimes, a cat will overgroom an area that hurts.

    This isn't a grooming problem. This is a medical or behavioral problem. See your vet to determine the cause.

    When to See the Vet: Red Flags

    Knowing when to stop grooming and start treating is critical. Here are the red flags that need veterinary attention.

    Skin Redness, Oozing, or Odor Under Mats

    If you separate a mat and find red, irritated, or weeping skin beneath it, that's an infection.

    The mat creates a warm, moist environment that bacteria love. What started as a grooming issue has become a medical issue.

    See your vet for:

    • Antibiotics or antifungal treatment.
    • Pain relief for the affected area.
    • Instructions on how to clean and manage the area.

    Do not try to treat this at home. You could make the infection worse.

    Bald Spots That Aren't from Licking Alone

    If you find bald patches that don't match the pattern of overgrooming, it could be something else.

    Possible causes:

    • Ringworm. A fungal infection that causes circular bald patches.
    • Mites. These can cause intense itching and hair loss.
    • Hormonal imbalances. Conditions like hyperthyroidism can cause hair loss.

    A vet can perform skin scrapings or blood tests to identify the cause.

    Lethargy Paired with Poor Coat Condition

    If your cat has poor grooming AND seems tired, weak, or unwell, that's a serious combination.

    This could signal:

    • Systemic illness. Kidney disease, diabetes, or hyperthyroidism can all affect coat condition and energy levels.
    • Chronic pain. A cat in constant pain doesn't have the energy for grooming.
    • Nutritional deficiencies. A poor diet can cause a dull coat and low energy.

    When poor grooming accompanies lethargy, it's not a grooming issue. It's a health issue.

    Fever or Loss of Appetite Alongside Grooming Changes

    This combination is urgent. A fever and a loss of appetite, coupled with grooming changes, can indicate a serious infection or disease.

    Seek veterinary care immediately if you notice:

    • Fever (over 102.5°F or 39.2°C)
    • Refusing food for more than 24 hours
    • Lethargy that's unusual for your cat
    • Visible distress or pain

    These symptoms warrant immediate attention. Don't wait to see if they pass.

    A Simple Weekly Grooming Routine You Can Stick To

    The most effective grooming routine is one you actually do. Here's a simple, realistic plan you can follow every week.

    The Checklist

    FrequencyTaskTime
    DailyCheck for visible mats or changes in coat1 minute
    WeeklyHands-on full-body check2 minutes
    WeeklyFull brushing session10-15 minutes
    Bi-weeklyNail trim5 minutes
    MonthlyDeep check for skin issues, lumps, or ticks5 minutes

    Step-by-Step

    Here's how to structure a weekly grooming session:

    1. Start with the hands-on check. Feel for mats, lumps, or changes in texture.
    2. Brush the coat thoroughly. Start at the head, work down the back, and finish with the belly and tail.
    3. Check the ears. Look for wax, redness, or odor.
    4. Check the tail base. Run your hand down the tail and feel for greasiness or mats.
    5. Trim nails if needed. Use the floor-click test to determine if it's time.
    6. Reward your cat. Finish with a treat and some play.

    This routine takes about 20 minutes. It's manageable, consistent, and catches most issues early.

    Frequently Asked Questions

    How Often Do Cats Really Need Grooming?

    Most cats need at least one brushing session per week. Long-haired breeds need daily brushing. Short-haired cats can go 2-3 days between brushing sessions, but weekly is the minimum.

    The keys are preventing mats, reducing hairballs, and keeping the coat healthy.

    Can I Use a Slicker Brush on Short Hair?

    Yes. A slicker brush works on short-haired cats too. Use it with light pressure to remove loose fur and distribute natural oils.

    For short coats, a softer bristle brush or grooming glove can also work well.

    Why Does My Cat Hate Being Brushed?

    Cats often hate being brushed because of a negative past experience or because the brush is too harsh. Start slowly, use treats, and keep sessions short and gentle. Switch to a softer brush if needed.

    Never force a session, and stop if your cat shows serious stress.

    Is It Okay to Let My Cat's Mats Just Fall Out?

    No. Mats don't fall out on their own. They pull on the skin and cause constant discomfort.

    They can also hide skin infections. If the mat is small, address it at home. If it's large or there are many, see a groomer or vet.

    Should I Shave My Cat in Summer to Keep Them Cool?

    No. Cat fur acts as insulation against heat, not just cold. Shaving a double-coated cat damages their coat permanently in some cases.

    If your cat is overheating, provide cool water, shade, and a cool place to rest. Grooming to remove loose fur, not shaving, is the better approach.

    How Do I Know If My Cat Is Overgrooming or Undergrooming?

    Overgrooming shows as bald patches, thinning fur, or skin irritation, especially on the belly and inner thighs. Undergrooming shows as a dull, greasy, or matted coat, especially on the back and hindquarters. Both can indicate stress, pain, or illness.

    If you notice either pattern, consult your vet.

  • Mastering How to Clean Cat Paws

    Mastering How to Clean Cat Paws

    Your cat just jumped off the counter, and now there's a trail of damp litter pellets across the kitchen floor. Or worse, you caught them stepping in something questionable during their nightly patrol. Knowing how to clean cat paws isn't just about keeping your floors presentable.

    It's a core part of feline hygiene that prevents infections, stops toxic ingestion, and helps you spot injuries early.

    The right approach depends entirely on what's on those paws, how deep the mess goes, and whether your cat is cooperative or treats cleaning like a wrestling match. Most routine messes take under two minutes to fix with basic supplies you already own. More serious situations, like chemical exposure or embedded debris, require a completely different protocol.

    As of 2026, veterinary guidance remains consistent: assess first, clean second, and never reach for human products without checking the label.

    how to clean cat paws

    Image source: Bing (Web (fair-use with source credit))

    Quick Answer

    Clean your cat's paws with a damp cloth or pet-safe wipe for routine dirt. Use warm water and a tiny drop of fragrance-free dish soap for sticky or toxic substances. Rinse thoroughly and dry completely.

    Soak paws for five to ten minutes if debris is embedded. See a vet for cuts, swelling, or suspected chemical ingestion.

    Why Cleaning Your Cat's Paws Actually Matters

    Cats groom themselves obsessively, but their paws are a blind spot. They can't easily reach between their toes, and they certainly can't wipe off oil, tar, or chemical residue before licking it away. That's where you come in.

    When your cat steps in something and then starts grooming, everything on those pads goes straight into their digestive system. Some substances, like de-icing salt, cause mild stomach upset. Others, like antifreeze or undiluted cleaning chemicals, are genuinely life-threatening.

    Regular paw inspection and cleaning is the difference between catching a problem early and ending up at the emergency vet.

    Beyond ingestion, dirty paws are a breeding ground for bacteria and yeast. The warm, moist space between toes is perfect for fungal growth, especially in long-haired breeds. Matting in toe fur traps moisture and debris, which leads to irritation, licking, and eventually infections that require prescription treatments.

    There's also the practical side. Litter tracking is one of the most common complaints among cat owners, and it's not just about aesthetics. Clay litter particles are sharp and abrasive.

    When they get ground into paw pads, they cause micro-abrasions that become sore and inflamed. Keeping paws clean keeps your cat comfortable, your house cleaner, and your relationship with your vet more peaceful.

    Step 1: Assess the Situation Before You Touch Anything

    pet-safe wipes

    Image source: Bing (Web (fair-use with source credit))

    The biggest mistake people make is grabbing whatever cleaning product is closest and immediately going to work. That's how cats end up with chemical burns or poisoning. Before you touch a single paw, take a breath and figure out what you're dealing with.

    Routine dirt. This includes litter dust, garden soil, tracked-in grime, and general everyday dust. These are low-risk situations that respond well to a dry brush, a damp cloth, or pet-specific wipes. No soap required, no soaking necessary.

    Sticky or toxic substances. This includes cooking oil, honey, paint, tar, glue, cleaning chemicals, antifreeze, or anything your cat shouldn't ingest. These require immediate intervention with warm water and a degreasing agent. If the substance is caustic or known to be toxic, don't wait to see if your cat grooms it off.

    Act now.

    Possible injury. If there's blood, swelling, visible debris like glass or burrs, or if your cat is limping or licking obsessively, treat this as a medical issue first. You can clean the wound superficially, but a deep clean could push debris further in or cause more damage.

    Here's a quick decision framework:

    ConditionWhat You SeeAction
    Routine dirtDust, litter, mudDry brush or pet wipe
    Sticky but safeHoney, syrup, foodWarm water + mild soap
    Toxic exposureChemicals, antifreeze, paintWash immediately, call vet
    InjuryBlood, swelling, limpingClean surface only, see vet

    If you're ever unsure what your cat stepped in, err on the side of caution. A quick call to your vet or the ASPCA Animal Poison Control Center hotline at (888) 426-4435 costs nothing and could save you a very expensive emergency visit.

    Step 2: The Routine Clean (For Everyday Dirt and Litter)

    Most paw cleaning sessions are boring, routine affairs. Your cat walked through the litter box, tracked some dust, and now you're chasing them around with a paper towel. This is the easiest scenario, and it doesn't require any fancy equipment.

    Start with the right tool. A dry microfiber cloth or a soft-bristled brush removes loose litter and dust before any moisture gets involved. Wetting a dirty paw right away turns fine dust into mud cake that's harder to remove and dries into stubborn clumps between the toes.

    If a dry wipe isn't enough, move to a pet-safe wipe. These are pre-moistened and formulated specifically for feline skin pH. They're also alcohol-free, which matters because cats lick their paws immediately after cleaning.

    Alcohol and essential oils commonly found in human wipes are toxic to cats.

    Here's the routine clean process:

    1. Hold the paw gently. Support the leg at the elbow, not the wrist. This gives your cat a sense of stability and prevents them from pulling away.
    2. Wipe each toe individually. Run the cloth or wipe between each toe, from the base outward. This is where litter and debris hide.
    3. Clean the pads. Wipe the main pad and each smaller toe pad thoroughly.
    4. Dry completely. Use a separate dry towel to pat the paw dry. Don't rub, as friction irritates sensitive skin.
    5. Check for residue. Run your finger gently through the fur to confirm nothing is left behind.

    The drying step is non-negotiable. Damp paws track wet litter, which clumps and sticks to fur within seconds. Damp paws also invite fungal growth and can lead to skin irritation, especially in humid climates or during winter when paws are already stressed.

    For cats that are particularly fussy, you can make this easier by placing them on a counter or table instead of the floor. They feel less able to escape, which paradoxically makes them calmer. Use a non-slip mat so they feel secure under their feet.

    Step 3: The Deep Clean (For Sticky, Toxic, or Hazardous Substances)

    warm water soak

    Image source: Bing (Web (fair-use with source credit))

    This is the scenario that separates a routine chore from an actual emergency response. If your cat stepped in something sticky, greasy, or hazardous, a quick wipe won't cut it. You need a full deep clean, and you need it fast.

    The goal here is to remove the substance completely before your cat starts grooming. Cats begin licking within seconds of feeling something on their paws, so speed matters more than gentleness in the first few minutes.

    For sticky but safe substances like honey, syrup, or food residue, soak the paw in warm water for a few minutes to soften the substance, then wash with a gentle, fragrance-free dish soap. Warm water softens sticky buildup. Soap breaks down the oils that make it cling to fur.

    For toxic or caustic substances like cleaning chemicals, paint thinner, or antifreeze, wash immediately with lukewarm water and a degreasing dish soap. Rinse thoroughly for at least two full minutes to ensure zero soap residue remains. Then call your vet or a pet poison control line to confirm whether further medical attention is needed, even if the paw looks clean.

    Here's the deep clean workflow:

    1. Fill a shallow bowl with lukewarm water. Test it on your inner wrist. It should feel neutral, neither hot nor cold.
    2. Add one to two drops of fragrance-free dish soap if needed. For plain water rinses of non-greasy dirt, skip the soap.
    3. Submerge the paw and hold it gently for five to ten minutes. This loosens sticky substances and softens caked-on debris.
    4. Massage between the toes with your fingers to break up any stubborn residue.
    5. Remove the paw and rinse with clean, running lukewarm water. Make sure no soap remains.
    6. Dry with a soft towel. Pat, don't rub. Then use a clean, dry cloth to go between the toes.
    7. Repeat if necessary. Some substances require two or three rounds before the paw is truly clean.

    One thing to note: never use hot water. Cat paw pads are sensitive, and hot water causes burns without your cat being able to tell you clearly. Also, never use scrub brushes or abrasive sponges, as they strip the protective outer layer of the paw pad and cause cracking.

    If the substance is oil-based like motor oil or tar, you may need to clip away fur that's heavily saturated. Use blunt-nosed scissors or clippers, and only cut fur that's visibly coated. In extreme cases, a partial bath might be more practical than trying to clean multiple paws individually.

  • Mastering How to Brush a Cat That Hates It

    Mastering How to Brush a Cat That Hates It

    If you've been searching how to brush a cat that hates it, you've probably already got the scratches to show for it. Here's what most advice skips entirely: a cat who fights the brush is usually telling you something specific. Sometimes it's fear.

    Very often, it's pain.

    Cats spend roughly 30 to 50 percent of their waking hours grooming themselves, so the coat is deeply personal territory. Feline skin is also only a few cell layers thick across much of the body, far thinner and more mobile than a dog's. That combination explains a lot of the drama.

    Work out why your cat objects first, because the right plan changes completely depending on the answer.

    how to brush a cat that hates it

    Image source: Bing (Web (fair-use with source credit))

    Quick Answer

    Brush a cat that hates it in short, low-pressure sessions. First rule out pain with a vet check. Start with a rubber curry brush or grooming glove instead of a slicker.

    Groom only safe zones at first: cheeks, chin, shoulders. Keep every session under 90 seconds. Stop before your cat complains, not after.

    Why Your Cat Fights the Brush (And Why It's Rarely Stubbornness)

    Cats don't have a stubborn streak about grooming. They have thresholds. When you cross one, they tell you to stop in the only language they've got.

    In our research across veterinary behaviour guidance and professional grooming practice, brush aversion nearly always traces back to one of six causes. Most owners assume the last one on this list. It's usually one of the first three.

    CauseWhat it looks likeTypical fix
    Musculoskeletal pain (osteoarthritis)Flinches over hips, spine, or shoulders. Worse in older catsVet exam and pain management first
    Existing mats pulling the skinYelps or bites at one specific spot every timeStop brushing. Assess the mat
    OverstimulationFine for 8 to 15 seconds, then swats out of nowhereShorter sessions, safe zones only
    Fear or no handling historyBolts, hides, flattens before you touch themSlow desensitisation over weeks
    Wrong toolTolerates hands, hates the brush specificallySwitch to rubber curry or glove
    Wrong contextFine on the sofa, furious when picked upLet the cat choose the spot

    Pain is the most under-diagnosed cause

    Feline osteoarthritis is far more common than most owners realise, and it hides well. Cats don't limp obviously. They just stop jumping, stop grooming their back end, and start resenting hands near their spine.

    The Cornell Feline Health Center at Cornell University College of Veterinary Medicine notes that degenerative joint disease shows up radiographically in the majority of older cats. Many of those cats have never had a single owner-reported pain symptom. Brush resistance is often the first real sign.

    Dental disease does the same thing at the front end. A cat with a painful mouth won't tolerate a brush near the jaw, chin, or cheeks. Those are the exact spots we normally recommend starting with.

    Overstimulation has a clock, not a mood

    Petting-induced overstimulation isn't your cat changing its mind. It's a sensory threshold being reached. Repeated stroking over the same area builds arousal until the cat needs it to stop.

    The giveaway is consistency. If your cat reliably tolerates 10 to 20 seconds and then turns, that's a threshold, not unpredictability. Thresholds are workable.

    You just have to quit at eight seconds instead of twelve.

    The 60-Second Answer: Stop, Check for Pain, Then Rebuild

    If you do nothing else from this guide, do these three things in this order. Skipping straight to step three is the most common mistake we see, and it's why so many owners plateau for months.

    Step 1: Stop brushing entirely for now. Every forced session teaches your cat that the brush predicts something unpleasant. You're not losing ground by pausing. You're stopping the damage.

    Step 2: Rule out pain. Book a vet exam that specifically covers joints, teeth, ears, and skin. Ask for a flea comb check and a look for mats close to the skin.

    Step 3: Rebuild the association from zero. Treats first, brush second. One stroke, then stop. Build from there over weeks, not days.

    The three gates, as an if/then flow

    GateQuestionIf YESIf NO
    Gate 1Did this start suddenly?Vet visit before anything elseContinue to Gate 2
    Gate 2Are there mats tight against the skin?Hands off. Book a professionalContinue to Gate 3
    Gate 3Does the cat escalate within 15 seconds?Micro-sessions and safe zones onlyStandard short sessions

    As of 2026, the feline-friendly handling guidance published by the American Association of Feline Practitioners still leads with the same core principle: reduce restraint, increase the cat's sense of choice. That applies just as much to your living room floor as it does to a clinic exam table.

    Timelines matter here too. A mildly reluctant cat often accepts a short groom within two to six weeks. A genuinely fearful or formerly feral cat can take three to six months.

    Some cats never learn to enjoy it, and the honest goal becomes quick maintenance plus professional help two to four times a year.

    Sudden Aversion vs Lifelong Aversion: The Fork That Changes Everything

    This is the branch point. Everything downstream depends on it, and it takes one question to answer.

    Did your cat used to tolerate brushing? If yes, and something changed, you have a medical problem until proven otherwise. If your cat has never liked it, you have a training and handling problem.

    Don't guess. Think back honestly over the last six to twelve months.

    Red flags that mean a vet visit before a brush

    Book an appointment first if you see any of these. Training a cat through pain doesn't work, and it damages trust you'll need later.

    • A cat that used to tolerate brushing and now doesn't. Especially over age seven.
    • Flinching, rippling skin, or sudden bolting when you touch the lower back or tail base. This can indicate feline hyperesthesia syndrome or spinal pain.
    • A coat that's gone greasy, clumped, or dandruffy along the spine. That's a cat who has stopped grooming itself, which points to arthritis, obesity, or dental pain.
    • Scratching, scabs, or hair loss alongside the brush hatred. Flea allergy dermatitis, cheyletiellosis, and mange all make touch genuinely painful.
    • Circular crusty patches or broken hairs. Ringworm is zoonotic. Stop grooming and isolate the tools.
    • Sudden weight loss, increased thirst, or appetite change. Hyperthyroidism, diabetes, and chronic kidney disease all wreck coat quality.
    • Aggression that's escalated from swat to bite in a short window.
    • Any cat over 11 that resents being touched anywhere new.

    Signs it's behavioural, not medical

    These patterns point toward handling history and thresholds rather than pain. You still want a vet to confirm, but the plan is different.

    • Your cat has disliked brushing since kittenhood with no change in intensity.
    • The cat tolerates being stroked in the same spot but reacts to the brush specifically.
    • Reactions happen at a predictable point, roughly the same number of strokes every time.
    • The cat is fine until you pick it up or move it, then objects to everything.
    • It's a rescue or formerly stray adult with no known handling history.
    • The cat runs when it sees the brush but is otherwise relaxed and affectionate.

    The socialisation window for kittens runs from about two to seven weeks of age. Cats who weren't handled gently during that period often find human touch genuinely unfamiliar rather than unpleasant. That's fixable, but only with patience and food, never persistence.

    Read Your Cat's Escalation Ladder Before You Touch Anything

    Cats give warnings. Owners just miss them, because the window between "I'm done" and "I'm biting" can be under three seconds.

    Learn this sequence and you'll stop getting bitten almost immediately. More importantly, you'll start ending sessions on a good note instead of a bad one.

    cat body language warning signs

    Image source: Web (Bing) / pethealthcaretips.com (Web image (fair-use with source credit))

    Tail flick, skin ripple, airplane ears: the three-second warning

    RungWhat you'll seeWhat to do
    1. FreezeBody goes still. Purring stopsFinish the stroke. Stop
    2. Tail flickTip twitches, then whole tail thumpsStop immediately
    3. Skin rippleFur along the back twitchesStop. Move to a safe zone or end
    4. Airplane earsEars rotate sideways and flattenAlready too late. Hands off
    5. Pupil dilationEyes go wide and blackBack away. No eye contact
    6. Head turn to handCat looks pointedly at the brushFinal warning
    7. Growl or hissVocal protestSession over
    8. Swat, bite, or boltContact or escapeYou've lost the session

    Aim to stop at rung one or two. Every single time. That's the whole trick.

    Ending at rung eight teaches your cat that biting works, and biting gets stronger. Ending at rung one teaches your cat that you listen, which is the foundation everything else is built on.

    Safe zones vs trigger zones on every cat

    Most cats have a consistent map. Scent-gland-rich areas near the face are usually welcome. The back half of the body usually isn't.

    Generally safe zones (start here):

    • Cheeks and jawline
    • Under the chin
    • Forehead and between the ears
    • Base of the ears
    • Top of the shoulders

    Generally trigger zones (add last, or never):

    • Belly and inner thighs
    • Tail base and lower back
    • Hind legs and britches
    • Armpits and behind the elbows
    • Feet and tail itself

    The frustrating part is that trigger zones are exactly where mats form. That's not a coincidence. Cats can't reach those areas well either, which is why the fur felts there in the first place.

    So the plan isn't to avoid those areas forever. It's to earn access to them over weeks, one short session at a time.

    Check the Coat First: Mat Mapping and Mat Grades

    Before any brushing plan, run your hands over your cat's whole body. Not with a brush. With fingers.

    You're looking for tangles, lumps, and firm patches. If you find something tight against the skin, the brushing plan changes completely.

    matted long-haired cat fur

    Image source: Bing (Web (fair-use with source credit))

    The seven spots mats hide

    Mats form where fur rubs, where the cat can't reach, and where movement creates friction. Check these in order, and check them on shorthairs too. Mats aren't a longhair-only problem.

    1. Armpits and behind the elbows. The number one spot. Constant friction, zero self-grooming access.
    2. Groin and inner thighs. Second most common. Also the most sensitive to touch.
    3. The britches (back of the hind legs). Long fur, high friction, out of reach.
    4. Tail base and lower back. The classic arthritis giveaway. If a cat can't twist, this area mats first.
    5. Behind and under the ears. Fine, soft fur that felts fast.
    6. The ruff (chest and neck). Especially on Persians, Ragdolls, and Maine Coons.
    7. Hocks and around the anus. Sanitary problems start here.

    Dark-coated cats are the hardest. Mats stay invisible on a black cat until they're already tight to the skin. Go by feel, never by sight.

    Comb-out, split, clip or refer: grading what you've found

    Mat gradeHow it feelsWhat to do
    Grade 1: TangleLoose, moves freely, comb passes with light pressureComb out at home. Hold the base of the hair
    Grade 2: Felted matFirm clump, still lifts away from skinSplit gently with a mat splitter, then comb
    Grade 3: Close to skinWon't lift. Skin tents when you pullStop. Clippers only, by a professional
    Grade 4: PeltFur felted into a sheet over a body regionVet visit. Sedated shave-down

    The absolute rule: never use scissors on a mat. Feline skin lifts into the mat as you pull it away from the body. What looks like a clump of fur is often a clump of fur with a fold of skin inside it. Scissor injuries during home de-matting are one of the most common owner-inflicted wounds groomers and emergency vets see.

    Second rule: never bathe a matted cat. Water shrinks and tightens mats. A grade 2 mat becomes a grade 3 in one wash, and now the skin underneath is damp and can't dry.

    If you find grade 3 or 4 matting, the brushing training goes on hold. Get the coat sorted professionally first, then start the rebuilding work on a comfortable cat. Training a cat whose skin is being pulled with every movement is a losing game.

    Pick Your Starting Tool Based on Coat and Tolerance

    Here's the mistake almost everyone makes. They buy a slicker brush because it's what the pet shop sells, then wonder why the cat hates grooming.

    For a cat that already objects, the tool is a huge part of the problem. Change the tool and a surprising number of cats stop fighting within a week.

    cat grooming brushes and combs

    Image source: Bing (Web (fair-use with source credit))

    Rubber curry, glove, slicker, comb and rake compared

    ToolWhat it doesBest forWatch out for
    Grooming gloveFeels like a hand with gripFearful cats, first two weeksRemoves very little undercoat
    Rubber curry brushSoft nubs lift loose hair, massages skinShorthairs, brush-phobic catsNot enough for dense longhair coats
    Boar bristle brushDistributes sebum, smooths topcoatShorthairs, finishingDoesn't reach undercoat at all
    Pin brushRounded pins, gentle on skinMedium and long coats, daily upkeepSkates over mats without finding them
    Slicker brushFine angled wires pull undercoatLonghairs, once tolerance is builtBare wire tips can cause slicker burn
    Greyhound combCoarse and fine tines in oneFinding mats, final checkPainful if you hit a tangle at speed
    Undercoat rakeWidely spaced teeth pull dead coatDouble-coated breeds in moultToo aggressive for thin, fine coats
    Deshedding toolBlade edge strips undercoat fastHeavy shedders, short sessionsEasy to over-strip and irritate skin
    Flea combFine teeth trap parasites and debrisDiagnosis, not groomingSlow going on long coats

    Why the slicker is almost never the right first tool

    A slicker brush works by dragging fine wire pins through the coat. On a cat with normal tolerance, that's fine. On a cat that already flinches, it's a guaranteed fight.

    Two problems. The pins concentrate pressure into tiny points, and on thin feline skin that reads as scratching. A slicker also pulls when it hits a tangle, which is exactly what your cat is bracing for.

    If you want a slicker in the plan, choose one with poly-coated pin tips and a flexible head. Introduce it around week four, not week one.

    Matching tool to coat type

    Start here, then adjust based on how your cat responds. Coat type sets the ceiling. Tolerance sets the starting point.

    • Shorthairs (Domestic Shorthair, British Shorthair, Russian Blue): Rubber curry or glove. That's genuinely all most need. Add a fine comb for a weekly mat check.
    • Medium coats (Ragdoll, Birman, Turkish Angora): Pin brush plus a greyhound comb. Twice weekly minimum.
    • Cottony longhairs (Persian, Himalayan, Exotic Shorthair): Comb daily. This coat texture felts faster than any other. A brush alone won't cut it.
    • Double-coated longhairs (Maine Coon, Norwegian Forest Cat, Siberian): Undercoat rake during moults, pin brush between. Line brush in sections.
    • Rex coats (Devon Rex, Cornish Rex): Minimal brushing. The coat is fragile and brushes break it. A soft glove or damp hands is plenty.
    • Sphynx and hairless: No brushing at all. You're managing sebum with weekly wipe-downs instead.
    • Senior and arthritic cats of any coat: Softest option available. A glove or curry brush, always.

    A grooming glove or rubber curry typically runs £6 to £15 in the UK and $8 to $18 in the US. A decent stainless greyhound comb sits around £12 to £25. You don't need an expensive kit.

    You need the right two tools.

    The Four Decision Branches: Match the Cat to the Plan

    By now you should know roughly what type of resistance you're dealing with. Here's where the paths split properly.

    Find your cat below. Follow that plan and ignore the others, because mixing approaches is what causes stalls.

    Branch 1: The overstimulated cat that swats after ten seconds

    This cat likes attention. Then suddenly doesn't. The turn is fast and it happens at roughly the same point every time.

    Your job is to work under the threshold, never through it. That means counting strokes out loud if you have to.

    • Time or count the current threshold. If they turn at 12 strokes, work at 6.
    • Sessions last 20 to 40 seconds. Two or three per day beats one long one.
    • Cheeks, chin and shoulders only for the first fortnight.
    • End every session while your cat is still relaxed. Walk away first.
    • Add one extra stroke every three or four sessions. Slowly.
    • If they escalate, drop back to half the previous count for a week.

    Progress here is fast compared to other branches. Aggregate owner feedback and behaviour guidance suggest most overstimulated cats double their tolerance within three to four weeks.

    Branch 2: The fearful rescue or formerly feral cat

    This cat isn't annoyed. It's frightened. Pushing it produces flooding, which makes fear worse, not better.

    Forget grooming entirely for the first two weeks. You're building a relationship with touch, not a coat routine.

    • Leave the brush lying around where the cat lives. Near the food bowl works well.
    • Reward any voluntary approach to the brush with a lickable treat.
    • Progress to touching the cat with the back of the brush handle. One second.
    • Only then move to a single stroke with a glove, at the shoulders.
    • Never corner, never pick up, never block the exit.
    • End sessions the moment the cat looks away or shifts weight.

    The honest timeline is three to six months to a reliable short groom. Some formerly feral cats will only ever accept a glove. That's a genuine result, not a failure.

    Branch 3: The senior or arthritic cat that can't self-groom

    This cat needs grooming more than any other and tolerates it least. Pain management comes first and it isn't optional.

    Talk to your vet about feline osteoarthritis. As of 2026, options include the monoclonal antibody frunevetmab (marketed as Solensia), licensed NSAIDs for cats, and dental treatment where oral pain is a factor. A comfortable cat is a groomable cat.

    • Groom where the cat already is. Never lift or reposition an arthritic cat.
    • Use only a glove or soft rubber curry. No slickers, no rakes.
    • Support the body. Never ask the cat to twist or stretch.
    • Work the greasy areas: spine, tail base, shoulders. Little and often.
    • Keep sessions to 30 to 60 seconds. Twice daily beats once for five minutes.
    • Watch for skin thinning. Elderly feline skin tears more easily.

    Branch 4: The matted longhair that's already past DIY

    If you found grade 3 or 4 matting, this is your branch. Home training goes on hold.

    There's no gentle way to comb out a mat that's fused to the skin. Trying it hurts, and it teaches your cat that grooming means agony. Book help.

    • Contact a cat-only or Fear Free certified groomer first.
    • If the cat is aggressive, painful, or pelted, go to the vet instead of a groomer.
    • Ask your vet about a pre-visit anxiolytic. Gabapentin and trazodone are both used off-label for this. Pregabalin oral solution (Bonqat) is licensed in several markets specifically for feline situational anxiety.
    • Expect a sedated shave-down for full pelting. A #10 clipper blade is standard.
    • Once the coat is off, start the training work from scratch on a comfortable cat.
    • Book maintenance grooms every 6 to 12 weeks so you never get back here.

    Sedation isn't a cop-out. Removing a pelt from an awake, painful cat risks skin tears, thermal burns from a hot blade, and a bite injury for whoever's holding. Under sedation the vet can also check the skin underneath.

    Pelts routinely hide sores, abscesses, fleas, and in outdoor cats, maggots.

    Rebuilding the Association: A Two-to-Six Week Training Flow

    The technique that works is called desensitisation and counter-conditioning. Plain version: make the brush boring first, then make it predict food.

    Most owners rush this by about four weeks. Go slower than feels necessary and you'll finish faster.

    Week 1: The brush becomes furniture

    No grooming this week. None. You're breaking the link between the brush and the bad thing that follows it.

    • Leave the brush out permanently, somewhere neutral.
    • Every time your cat walks past it, drop a treat nearby.
    • Pick the brush up, then put it straight back down. Treat.
    • Hold the brush while stroking your cat with your other hand.
    • If your cat leaves the room when you touch the brush, you're going too fast. Just leave it lying there for another few days.

    Success looks like indifference. Your cat should walk past the brush without changing course. That's the whole goal for week one.

    Week 2: One stroke, one lick mat, done

    Now the brush touches the cat, briefly, and something great happens at the same time.

    A lick mat with squeezy cat paste is the most useful piece of kit here. It occupies the cat for a controlled length of time and keeps the head pointed away from your hands.

    • Set the lick mat down. Let the cat start eating.
    • One single stroke over the shoulders with a glove or curry brush.
    • Remove the brush. Let the cat finish the treat.
    • Repeat once or twice daily, no more.
    • By day four or five, build to three strokes.
    • By day seven, aim for five to eight strokes in one session.

    If your cat stops licking when the brush touches, the treat isn't valuable enough or the pressure is too much. Fix one variable at a time.

    Weeks 3 to 6: Criteria raising and start-button behaviours

    This is where it gets interesting. You start letting the cat opt in rather than deciding for them.

    A start-button behaviour is a deliberate signal from your cat that means "go ahead." It sounds fancy. In practice it's usually a head bump into the brush.

    1. Hold the brush still, about 15cm from your cat's face.
    2. Wait. Don't move toward the cat.
    3. The moment your cat moves toward the brush, one stroke, then treat.
    4. If the cat doesn't move, take the brush away and try later.
    5. Repeat until the head bump becomes reliable.

    Once you have a start button, everything speeds up. You'll know when your cat is ready and when it isn't, and you'll stop guessing.

    Change one thing at a time: duration, body area, or tool. Never two at once. If you add a new body zone, drop the duration back to two strokes for that zone.

    WeekDuration targetZonesTool
    10 secondsNoneBrush visible only
    25 to 15 secondsShouldersGlove or curry
    320 to 30 secondsShoulders, cheeks, chinGlove or curry
    430 to 45 secondsAdd upper backAdd pin brush
    545 to 60 secondsAdd flanksPin brush, introduce comb
    660 to 90 secondsAdd tail base brieflyComb for mat checks

    Belly, hind legs and armpits come after week six, if at all. Plenty of cats never grant access to those areas, and that's what professional grooms are for.

    Session Mechanics That Actually Work on Difficult Cats

    Technique matters as much as training. You can do everything right on the schedule and still lose a cat with sloppy hands.

    These are the mechanics that separate a session that ends well from one that ends in a bite.

    Let the cat pick the spot and keep the exit open

    Never pick up a cat to groom it. That's step one and it's non-negotiable for a resistant cat.

    The moment you lift a cat and carry it somewhere, you've removed its choice. Arousal goes up before the brush even appears. Groom where the cat already chose to be: the windowsill, the sofa arm, the top of the cat tree.

    • Keep an escape route open at all times.
    • Don't block them with your body, a wall, or a lap.
    • Groom on a non-slip surface. Sliding feet cause panic.
    • Close the door on other pets and children.
    • Keep it quiet. No hoover, no dryer, no clippers running nearby.
    • Consider a synthetic feline facial pheromone diffuser (Feliway Classic) set up 30 minutes before.

    Here's a test that tells you everything. If your cat walks away and you feel the urge to follow, stop. A cat that can leave freely usually comes back.

    A cat that gets chased learns to run sooner next time.

    Line brushing, base-holding and the read-and-stop rule

    Three techniques do most of the heavy lifting on difficult coats.

    Base-holding stops the pull. Grip the fur between the mat and the skin with your free hand, then brush the ends. The tension goes into your fingers, not the cat's skin.

    Aggregate groomer guidance treats this as the single most important habit for reducing pain during de-tangling.

    Line brushing is how professionals handle longhairs. Part the coat with your free hand to expose a line of skin. Brush that thin strip only, from the skin outward.

    Move the parting up a centimetre and repeat.

    It's slower than surface brushing but it actually reaches the undercoat. Surface brushing on a Persian or Maine Coon leaves a tidy-looking cat with a felted layer underneath.

    The read-and-stop rule is simple. First tail flick, you stop. No "just one more stroke." Not one.

    • Work with the lie of the coat first, always.
    • Against the grain only for undercoat removal, and only on a tolerant cat.
    • Light pressure. If the skin is moving with the brush, you're pressing too hard.
    • Clear the brush frequently. A loaded slicker drags.
    • Never brush the same spot more than a few passes. Move on and come back.

    The two-person split and when a towel wrap is fair

    Two people beats one for a difficult cat, if you split the roles properly. One person feeds continuously. The other grooms.

    Nobody restrains.

    The feeder's job is to keep the cat's attention forward and the pace slow. The groomer works quietly from the side, never head-on. This is standard practice in cat-friendly clinics and it works just as well at home.

    A towel wrap, or purrito, is a legitimate tool for a genuine necessity: a single mat check, a quick medication, a wound inspection. It's not a training method.

    • Use it for under 60 seconds.
    • Never for routine grooming.
    • Never on a cat that's already panicking.
    • Never as a substitute for the slow work.

    Scruffing is different, and it's out. Restraining a cat by the neck raises arousal and fear rather than calming it. Modern feline-friendly handling guidance moved away from scruffing years ago, and there's no reason to bring it into your living room.

    Mistakes That Set You Back Months (Or Send You to A&E)

    Some errors cost you a fortnight. Others cost you the relationship, or a trip to hospital. These are the ones worth knowing cold.

    Never cut a mat with scissors

    This is the big one. Feline skin is loose and mobile, so when you lift a mat, the skin lifts with it.

    You cut what you think is fur. It's fur plus a fold of skin. The resulting wounds are often long, deep, and need surgical closure.

    Almost every case starts with a well-meaning owner.

    If you must remove a mat at home:

    • Use a mat splitter or de-matting rake, never scissors.
    • Split the mat vertically into smaller sections first.
    • Work outward from the tips, holding the base.
    • Stop if the skin tents at all.
    • If it doesn't come apart in two or three minutes, it's a job for clippers.

    Clippers at home carry their own risks. Blades heat fast. Manufacturer guidance from brands like Andis and Wahl typically advises checking blade temperature every 15 to 20 seconds of continuous use.

    A hot blade causes clipper burn on thin feline skin within seconds.

    Scruffing, flooding and ending sessions on an explosion

    Flooding means forcing a cat through the full experience until it gets used to it. That doesn't work on cats. It produces learned helplessness or escalating aggression, and both are hard to undo.

    The signature of flooding is a cat that goes totally still. Owners read that as acceptance. It's usually shutdown, and it's the last stop before a bite.

    Three habits undo weeks of progress:

    • Ending on escalation. Whatever behaviour stops the session gets reinforced. If the bite ends it, you've just trained a biter.
    • Chasing. Following a cat that walked away teaches it to leave sooner and hide better.
    • Ambushing. Grabbing a sleeping cat for a quick brush destroys the safety of resting spots.

    Add one more: inconsistency. Two calm weeks followed by one forced session sets you back further than three weeks of nothing.

    Bathing a matted cat and other well-meant disasters

    Water tightens mats. Every time. A soaked mat shrinks as it dries and pulls harder on the skin than it did before.

    If a cat genuinely needs bathing (soiled fur, contamination), the mats come out first. Not after.

    ProductRisk to cats
    Dog flea treatments containing permethrinSevere toxicity. Tremors, seizures, death
    Tea tree, pennyroyal, citrus oilsToxic. Cats can't metabolise many essential oils
    Human shampooWrong pH. Strips coat, irritates skin
    Alcohol-based spraysSkin irritation, respiratory upset
    Dog conditioning spraysOften contain cat-unsafe ingredients

    Only ever use products labelled for cats. If a product doesn't name cats on the label, don't put it on your cat. The [U.S.

    Food and Drug Administration](https://www.fda.gov) publishes species-specific approval information for veterinary products, and species labelling exists for exactly this reason.

    Handling bites and scratches properly

    Cat bites are not minor. The teeth are fine and sharp, so they inject bacteria deep and the puncture seals over the top.

    Pasteurella multocida infection can develop within hours. Bites over a hand joint or tendon sheath are particularly serious and often need antibiotics or hospital treatment.

    • Wash immediately under running water for several minutes.
    • Encourage light bleeding. Don't seal the wound.
    • Contact a doctor the same day for any puncture wound, especially on hands.
    • Watch for redness, swelling, heat or spreading pain.
    • Anyone immunocompromised should seek advice for scratches too, given the risk of cat scratch disease from Bartonella henselae.

    Bite reporting and rabies observation requirements vary by state and country. Follow local health department guidance where that applies.

    When to Hand It Over: Professional Groomer vs Sedated Shave-Down

    There's a point where home grooming stops being kind and starts being a fight you can't win. Knowing that line saves your cat pain and saves you months of wasted effort.

    Two different services exist for two different situations. People often book the wrong one.

    Which service does your cat actually need?

    A groomer handles coat problems on a cat that can still be handled awake. A vet handles coat problems on a cat that can't. That's the split.

    SituationGo to a groomerGo to a vet
    Grade 2 mats, cat tolerates handlingYesNo
    Grade 3 mats, cat is calmYes, cat-only groomer preferredOnly if groomer declines
    Grade 4 pelting over a body regionNoYes, sedated shave-down
    Cat bites or goes for the groomerNoYes, with sedation
    Suspected pain or arthritisNoYes, exam first
    Skin lesions, sores, or smell under the coatNoYes, urgently
    Cat over 15 with heart or kidney diseaseDiscuss with vet firstVet supervises

    How to pick a groomer who won't make things worse

    Not all groomers are cat people. A dog groomer who takes cats occasionally is a different proposition from someone who works with cats all day.

    Ask these before you book:

    • Do you groom cats only, or cats and dogs? Cat-only salons are quieter and don't smell of predators.
    • Are you Fear Free certified? The Fear Free programme trains handlers in low-stress technique. It's a genuine differentiator.
    • What's your restraint policy? If the answer involves scruffing or a full-body hold as standard, keep looking.
    • Do you use a high-velocity dryer? These terrify most cats. Air drying or towel drying is kinder.
    • What happens if my cat won't settle? A good groomer stops and refers. A bad one pushes through.
    • Can I book a shorter first visit? A 15 minute meet-and-greet beats a two hour full groom for a nervous cat.

    Mobile groomers and house calls are worth considering. Cats stress far more from transport and unfamiliar environments than from the grooming itself. A mobile van parked outside removes half the problem.

    What a sedated shave-down actually involves

    Sedation isn't the same as general anaesthesia, though some cases need the latter. Your vet picks based on the cat's health and how much work the coat needs.

    A typical appointment looks like this:

    1. Pre-visit anxiolytic at home, usually gabapentin or trazodone given one to three hours before.
    2. Physical exam and, for older cats, often bloodwork.
    3. Injectable sedation, sometimes with an IV catheter placed.
    4. Full clip with a #10 blade, taking the coat down to roughly 1.5mm.
    5. Skin inspection underneath. This is where sores, fleas, and wounds turn up.
    6. Recovery and monitoring before discharge.

    The cat wakes up looking startling. Owners are often upset by it. But a pelted cat is in constant discomfort, and the relief afterwards is usually obvious within a day.

    Skin under a pelt is often inflamed, fragile, and sometimes ulcerated. Clipping frequently reveals injuries nobody knew about. That's not the groomer's fault or the vet's.

    It's what the mat was hiding.

    When your cat needs medication to be groomable

    Some cats genuinely can't cope without pharmacological help. That's a medical reality, not a training failure.

    MedicationTypical useNotes
    GabapentinPre-visit sedation and anxiolysisWidely used off-label in cats. Given 1 to 3 hours before
    TrazodoneSituational anxietyOff-label in cats. Sometimes combined with gabapentin
    Pregabalin oral solution (Bonqat)Licensed feline situational anxietyApproved in the EU and US. Availability varies by market
    Injectable sedationIn-clinic proceduresVeterinary administration only

    All of these are prescription-only and require a vet who knows your cat. Groomers cannot sedate, anywhere. If a groomer offers to, walk out.

    What It Costs: Tools, Grooms and Vet Sedation Compared

    Money is a real factor, and the numbers follow a pattern. Prevention is cheap. Crisis management is not.

    Figures below reflect typical UK and US pricing as of 2026. Regional variation is significant, with metro areas running 30 to 50 percent above rural rates.

    Home tools

    ItemUK typicalUS typicalReplacement interval
    Grooming glove£6 to £12$8 to $15Every 1 to 2 years
    Rubber curry brush£6 to £15$8 to $18Every 2 to 3 years
    Pin brush£8 to £18$10 to $22Every 2 to 3 years
    Greyhound comb (stainless)£12 to £25$15 to $3010+ years
    Slicker brush (coated pins)£10 to £22$12 to $28Every 2 to 3 years
    Undercoat rake£10 to £20$12 to $255+ years
    Mat splitter£8 to £16$10 to $205+ years
    Lick mat£5 to £10$6 to $12Every 1 to 2 years
    Feliway Classic diffuser kit£22 to £30$28 to $38Refills monthly

    A sensible starter kit comes to around £30 to £45 in the UK, $40 to $60 in the US. You don't need everything on that list. A glove, a curry brush, a comb and a lick mat cover most cats.

    Professional services

    ServiceUK typicalUS typicalFrequency
    Full groom, shorthair£35 to £55$45 to $75Every 8 to 12 weeks
    Full groom, longhair£45 to £90$60 to $120Every 6 to 8 weeks
    De-matting surcharge£10 to £40 extra$15 to $50 extraPer session
    Lion cut£55 to £100$70 to $130Every 8 to 12 weeks
    Sanitary trim only£15 to £30$20 to $40Every 4 to 8 weeks
    Mobile groom premium+£10 to £25+$15 to $35Per visit

    Veterinary costs

    ServiceUK typicalUS typical
    Consultation for coat or pain assessment£40 to £70$60 to $100
    Pre-visit gabapentin (course)£8 to £20$10 to $30
    Sedated de-mat or full shave-down£150 to £400$200 to $500
    Pre-anaesthetic bloodwork£60 to £120$80 to $180
    Skin scrape and cytology£30 to £70$50 to $110
    Osteoarthritis workup with radiographs£200 to £400$300 to $600
    Frunevetmab (Solensia) monthly injection£30 to £50 per dose$50 to $80 per dose

    A £12 comb used weekly for ten minutes prevents a £300 sedated shave-down. That's the entire argument.

    Groomer intake data shows a consistent pattern. Cats that arrive pelted are almost never cats whose owners were negligent. They're cats whose owners stopped brushing because the cat resisted, then couldn't catch up.

    Two or three minutes a week beats an hour once a season.

    Safety, Zoonotics and Products That Are Toxic to Cats

    Grooming is one of the few household tasks where the risks run both ways. Your cat can get hurt. So can you.

    Diseases you can catch from grooming a cat

    Most are minor. A couple aren't, particularly for anyone immunocompromised, pregnant, or elderly.

    • Cat scratch disease. Caused by Bartonella henselae, usually transmitted through scratches or flea dirt. Symptoms include swollen lymph nodes and fever. The Centers for Disease Control and Prevention publishes clear guidance on risk groups and prevention.
    • Ringworm (dermatophytosis). Fungal, highly contagious, and it survives on brushes and bedding for months. Look for circular patches of broken hair, scaling, and crusts. Stop grooming and see a vet.
    • Cheyletiellosis. Sometimes called walking dandruff. The mites bite humans and cause itchy red spots.
    • Fleas. Cat fleas bite people readily, usually around the ankles.
    • Pasteurella infection from bites. Fast-moving and serious.

    Tool hygiene most owners skip

    Brushes and combs move fungal spores, mite eggs, and flea dirt between animals. In a multi-cat home, that matters.

    • Remove hair from brushes after every session.
    • Wash tools weekly in warm water with a mild detergent.
    • Dry completely. Damp bristle bases grow bacteria.
    • Use separate tools per cat if any cat has a skin condition.
    • Bin wooden-handled brushes after a confirmed ringworm case. Porous materials are almost impossible to decontaminate.
    • Disinfect metal combs with a veterinary-grade disinfectant if ringworm is suspected.

    Cats you should never groom without veterinary advice

    Some cats carry additional risk during handling. Check with your vet before any grooming beyond gentle stroking.

    • Cats with known heart disease, especially hypertrophic cardiomyopathy
    • Cats in respiratory distress or with chronic asthma
    • Cats recovering from surgery or wearing a cone
    • Cats with fragile skin syndrome or those on long-term corticosteroids
    • Very frail geriatric cats over 17
    • Cats with active hyperthyroidism, which raises stress sensitivity
    • Any cat with an unhealed wound or abscess in the grooming area

    Legal and welfare context

    Grooming licensing varies widely. In the US, most states have no groomer licensing requirement, so certification through bodies like the National Cat Groomers Institute of America is voluntary but meaningful. Ask for it.

    In the UK, severe neglected matting can constitute a welfare offence under the Animal Welfare Act 2006, which places a duty of care on owners to meet an animal's needs. Pelting causes documented pain and skin damage. It's not a cosmetic issue.

    Insurance is another practical point. Many pet insurance policies exclude routine grooming but do cover sedated de-matting when it's medically necessary. Check your policy wording before you assume either way.

    Long-Term Maintenance by Coat Type and Life Stage

    Once your cat tolerates a short groom, the goal shifts. You're no longer training. You're maintaining, and the routine should be small enough that you actually keep doing it.

    The mistake at this stage is scaling up too fast. A cat that accepts 90 seconds does not automatically accept ten minutes.

    How often should you brush a cat?

    Frequency depends on coat type more than anything else. Here's a realistic schedule.

    Coat typeBrushing frequencySession lengthMat check
    Shorthair, single coat2 to 3 times weekly2 to 4 minutesWeekly
    Shorthair, dense (British, Russian Blue)3 times weekly3 to 5 minutesWeekly
    Medium (Ragdoll, Birman)Every other day5 minutesTwice weekly
    Cottony longhair (Persian, Himalayan)Daily, no exceptions5 to 10 minutesDaily
    Double-coated longhair (Maine Coon, Siberian)Daily to every other day5 to 10 minutesTwice weekly
    Rex coatsWeekly, very light1 to 2 minutesWeekly
    Hairless (Sphynx)No brushingWipe-down weeklySkin check weekly

    For a cat that fought you for months, halve every session length above and double the frequency. Little and often is the whole strategy.

    Seasonal shifts to plan for

    Cats moult heaviest in spring and autumn in temperate climates. Indoor cats under artificial lighting shed at a lower level almost year round, which surprises a lot of owners.

    • Spring (March to May): Heaviest shed. Add one extra session weekly. Undercoat rakes earn their keep now.
    • Autumn (September to November): Second moult as the winter coat comes in. Mats form fast in this window.
    • Winter: Central heating dries skin and increases dandruff. Reduce pressure, focus on sebum distribution.
    • Summer: Higher humidity accelerates felting in longhairs. Check the armpits and groin twice weekly.

    Flea season varies by region and lengthens in warmer areas. A flea-allergic cat becomes brush-intolerant fast, so year-round parasite prevention is part of grooming maintenance, not separate from it.

    Life stage adjustments

    Life stageWhat changesWhat to do
    Kitten (under 6 months)Coat is short, tolerance is trainableGroom daily for 30 seconds, even if unnecessary
    Adult (1 to 10)Peak coat, peak toleranceMaintain the established routine
    Mature (7 to 10)Early arthritis, reduced self-groomingAdd tail base and spine checks
    Senior (11 to 14)Greasy coat, more mats, less flexibilityShorter, more frequent, softest tool
    Geriatric (15+)Thin skin, brittle claws, low toleranceGlove only. Groom where they lie

    Kitten owners get the easiest ride here. Daily 30 second grooming from eight weeks builds a cat that never develops the problem. If you have a kitten now, this is the highest-value thing you can do.

    Hospice and palliative grooming

    For terminally ill or immobile cats, grooming becomes comfort care. Priorities change completely.

    • Keep the rear end clean and mat free. That's the top priority.
    • Use a warm damp cloth over a brush wherever possible.
    • Groom in 20 to 30 second bursts.
    • Never reposition the cat to reach a spot.
    • Accept an imperfect coat. Comfort beats appearance.
    • Talk to your vet about pain relief before grooming sessions.

    Real Scenarios: Three Cats, Three Different Plans

    The theory makes more sense against actual cases. These are composites drawn from common patterns in owner reports and grooming practice.

    The nine-year-old Domestic Shorthair who suddenly turned

    A tabby who accepted brushing happily for eight years starts growling and swatting when the brush reaches his lower back. The owner assumes he's become grumpy with age.

    A vet exam found reduced hip mobility and pain on lumbar palpation. Radiographs confirmed degenerative joint disease. His coat had also gone greasy along the spine because he'd stopped twisting to groom it.

    The plan that worked:

    1. Pain management started first: monthly frunevetmab injections and a joint-supportive diet.
    2. All grooming paused for three weeks while the medication took effect.
    3. Restarted with a rubber curry brush only, on the shoulders.
    4. Groomed on the sofa where he already slept, never lifted.
    5. Sessions of 45 seconds, twice daily.

    Noticeable change by week four. By week eight he tolerated the spine and tail base for around 90 seconds. The greasy patches cleared within a month once he was comfortable enough to groom himself again.

    Nobody trains a cat out of arthritis. Fix the pain and the behaviour often follows on its own.

    The rescue Ragdoll cross with no handling history

    Adopted at three years old from a hoarding case. Bolts from the room at the sight of a brush. Already had grade 2 mats behind both elbows and in the ruff.

    Two competing needs made this tricky. The mats needed dealing with, but any forced handling would have destroyed months of trust-building.

    The plan that worked:

    1. Booked a Fear Free certified cat-only groomer with a pre-visit gabapentin dose. Mats removed professionally in one visit.
    2. Two-week complete break from any grooming attempt.
    3. Brush left permanently beside the food bowl for ten days.
    4. Treats dropped near the brush daily, with zero contact.
    5. Week four: first contact with a grooming glove, one stroke, on a lick mat.
    6. Weeks five to fourteen: built to a reliable head-bump start button.

    Four months to a consistent two minute groom with a pin brush. Body zones beyond shoulders and back are still off limits, so professional grooms every ten weeks cover the rest.

    Clearing the mats professionally first removed the pain source. Training a cat around existing mats never works.

    The Persian who swats at exactly fifteen seconds

    Five years old, no medical findings, affectionate and confident. Loves being stroked. Reliably turns and bites at around the fifteen second mark, every single time.

    Textbook overstimulation. Predictable, consistent, and entirely workable once the owner counted instead of guessed.

    The plan that worked:

    1. Sessions capped at eight seconds. Timer on the phone.
    2. Three sessions daily instead of one long one.
    3. Only cheeks, chin and shoulders for the first two weeks.
    4. One extra second added every fourth session.
    5. Lick mat used throughout to keep the head forward.

    Threshold rose from 15 seconds to roughly 70 seconds over five weeks. Given the cottony Persian coat, the owner switched to line brushing across four short sessions per day rather than one long one. No bites in the following six months.

    Overstimulation isn't unpredictable. It's a clock, and you can move the clock if you stop trying to beat it.

    Your Decision Guide: Which Path to Take This Week

    Enough theory. Here's what to do in the next seven days, based on where you actually are right now.

    Find the line that matches your cat and start there. Don't start two paths at once.

    Your situationDo this first, this week
    Cat used to be fine, now isn'tBook a vet appointment. No brushing until then
    You can feel firm lumps in the coatGrade the mats by feel. If they won't lift, call a groomer
    Cat bolts at the sight of the brushLeave the brush by the food bowl. Nothing else for 10 days
    Cat swats after a predictable few secondsHalve your session length. Set a timer
    Cat is over 11 and stiffVet visit for pain assessment before any grooming plan
    Coat is greasy or clumped along the spineVet visit. Your cat has stopped self-grooming
    Cat tolerates hands but hates the brushSwap to a grooming glove. Put the slicker away
    Coat is pelted into a sheetVet appointment for a sedated shave-down
    You have a kitten under 6 monthsStart 30 second daily sessions immediately

    The seven-day starter plan for most cats

    If you've ruled out pain and there's no serious matting, this is your week one.

    1. Day 1: Dig out or buy a grooming glove or rubber curry brush. Leave it where your cat lives. Do not touch your cat with it.
    2. Day 2: Drop a treat near the brush twice. Pick the brush up, put it down, treat.
    3. Day 3: Hold the brush in one hand while stroking your cat with the other. Nothing more.
    4. Day 4: Lick mat down. One single stroke over the shoulders. Walk away.
    5. Day 5: Two strokes. Same spot. Same routine.
    6. Day 6: Three strokes. Stop while your cat is still relaxed.
    7. Day 7: Three to five strokes, twice in the day. Add the cheeks if all is calm.

    That's it. If day 4 goes badly, drop back to day 2 and hold there for three more days.

    How to tell your plan is working

    Progress on a difficult cat is quiet and gradual, so it's easy to miss. Look for these instead of waiting for a cat who suddenly loves brushing.

    • Your cat stays in the room when you pick up the brush.
    • The gap between the first stroke and the first tail flick gets longer.
    • Your cat comes back after a session instead of hiding.
    • Head bumps or rubs against the brush start appearing.
    • You get through a session without a growl.

    When to change tack

    Stop and reassess if any of these show up. Pushing on rarely fixes them.

    • No progress after three to four weeks of consistent work. Something's being missed. Usually pain.
    • A growl or swat in every single session. Your threshold estimate is wrong. Halve it.
    • A new mat appears despite regular grooming. You're surface brushing. Learn line brushing or get help.
    • Your cat starts avoiding you generally, not just the brush. Stop completely for two weeks and rebuild trust with food and play only.
    • Any bite that breaks skin. Pause the plan, treat your wound properly, and talk to your vet about the cat.

    Some cats never enjoy being brushed. That's a legitimate outcome, not a failure of technique or patience.

    For those cats, the working target is a 60 second maintenance groom you can both tolerate, plus a professional groom every 6 to 12 weeks. That combination keeps the vast majority of difficult cats mat free without a single sedation.

    You're not aiming for a cat who purrs through a full-body groom. You're aiming for a cat whose skin stays healthy and who doesn't dread your hands.

    Frequently Asked Questions

    Why does my cat bite me when I brush her back but not her head?

    The back, flanks and tail base are trigger zones for most cats, while the head carries scent glands and welcomes contact. Back pain from arthritis or a hidden mat is also common in that area. Groom the head and shoulders only, and get the lower back checked by a vet.

    Can I use a dog brush on my cat?

    Physically yes, but most dog brushes are too harsh. Dog slickers have longer, stiffer wire pins designed for thicker skin, and feline skin is far thinner. Choose a cat-specific tool with shorter, softer pins or coated tips.

    Never use dog shampoos, sprays, or flea products on a cat.

    How do I get a mat out without hurting my cat?

    Only attempt mats that lift freely away from the skin. Hold the fur at the base with one hand, then work the tips with a comb or mat splitter. Never use scissors, because feline skin lifts into the mat and gets cut.

    Anything fused to the skin needs a groomer or vet.

    Is it normal for a cat to hate brushing after a bath?

    Yes, and bathing usually makes things worse if mats were present. Water shrinks and tightens mats, so the coat pulls more afterwards. Wet fur also mats faster while drying.

    Remove tangles before any bath, and skip high-velocity dryers, which frighten most cats badly.

    My cat is 15 and hates the brush. Should I just give up?

    No, but change your approach completely. Senior cats need grooming most because they can't reach their own back end. Use a soft glove only, groom wherever the cat is lying, and keep sessions to 30 seconds.

    Ask your vet about arthritis pain relief first, since discomfort is usually the real objection.

    How long should it take before my cat tolerates brushing?

    Two to six weeks for a mildly reluctant cat, and three to six months for a fearful or formerly feral one. If you see no change after four weeks of consistent short sessions, stop and get a veterinary check. Persistent resistance almost always has a physical cause behind it.

  • Mastering How to Bathe a Cat That Hates Water

    Mastering How to Bathe a Cat That Hates Water

    Most cats never need a bath. That's the honest starting point for anyone searching how to bathe a cat that hates water, because plenty of you don't need to get your cat wet at all. The rest genuinely do, usually because of a medical order or a mess no tongue can fix.

    Either way, the goal is identical. Fast, safe, and without convincing your cat that you're a threat.

    Details decide this one. Cat skin sits at roughly pH 6.0 to 7.5 and is thinner than ours, so human shampoo strips it. Bath water should sit near body temperature, roughly 37 to 38 °C (98 to 101 °F), and only 7 to 10 cm deep.

    As of 2026, mainstream feline veterinary guidance still treats routine bathing as unnecessary for most healthy cats.

    Quick Answer

    Bathe a water-averse cat only when there's a genuine reason. Fill the tub or sink before bringing the cat in. Use 7 to 10 cm of warm water on a non-slip mat.

    Wash from the shoulders back and never wet the head. Rinse fast, lift straight into a towel, and finish the whole thing inside five minutes.

    how to bathe a cat that hates water

    Image source: Bing (Web (fair-use with source credit))

    First, the Uncomfortable Question: Does Your Cat Actually Need a Bath?

    A healthy adult cat spends a large share of its waking hours grooming. That's not vanity. The feline tongue is covered in backward-facing keratin spines called papillae, and they work like a comb, wicking saliva down to the skin and pulling loose hair and debris out of the coat.

    That system is remarkably good. Which is why the honest answer for a lot of readers is that the bath you're planning isn't necessary. Skipping it protects both the cat's skin barrier and your relationship with them.

    So before you run the tap, work out which category you're actually in.

    When a bath is genuinely justified

    • Toxic contamination. Antifreeze, motor oil, paint, tar, household chemicals, anything the cat will lick off. This one isn't negotiable.
    • Skunk spray. Rare in the UK, common enough in North America.
    • A vet-prescribed medicated protocol. Chlorhexidine or miconazole for bacterial and yeast dermatitis. Lime sulphur dips for ringworm (dermatophytosis).
    • Heavy flea burden, particularly in kittens too young for spot-on products.
    • Urine or faecal soiling. Diarrhoea, incontinence, litter box accidents, or a longhair with a soiled rear.
    • Cats who can't groom themselves. Arthritic seniors, obese cats who can't reach their lower back, cats recovering from surgery.
    • Hairless breeds. Sphynx, Peterbald and similar have no fur to wick sebum away, so it builds up on the skin and in the folds.
    • Greasy coat conditions, including stud tail and seborrhoea.

    When a bath is the wrong move

    Here's where a lot of people go wrong. They see a symptom, assume dirt, and reach for the shampoo when the real answer is a phone call to the vet.

    What you're seeingIs a full bath the answer?Better first move
    Dandruff and flakingNoVet check. Could be diet, obesity, or skin disease. Bathing often worsens it.
    Bald patches or scabsNoVet visit first. Could be fleas, allergy, ringworm, or overgrooming from stress.
    Sudden stop in groomingNoVet visit. This is a classic pain or illness signal in cats.
    Mild dust or a dirty patchNoDamp cloth, grooming wipe, or a rubber grooming mitt.
    Matted longhair coatNoComb out or clip first. Water tightens mats and traps moisture against skin.
    Smells "off"Usually noCheck the mouth, ears and rear. Odour in cats is usually medical, not dirt.
    Open wound or surgical siteNoVet guidance only. Do not soak.
    Kitten under 4 weeksNoDamp cloth only. Very young kittens can't thermoregulate.

    The overgrooming trap

    Bathing too often does real damage. Strip the sebum repeatedly and you get dry, flaky skin, which itches, which triggers more grooming, which makes the skin worse.

    If your cat is otherwise healthy, has no medical reason, and simply looks a bit scruffy, the fix is a brush and a comb. Not a bath.

    Why Cats Lose the Plot Around Water (And Why That Matters for Your Approach)

    Understanding the "why" isn't academic here. It tells you exactly which parts of the bath to change.

    The domestic cat descends from Felis lybica, the African wildcat, an arid-region species with no evolutionary reason to swim. Water simply wasn't part of the deal.

    But the deeper problem is mechanical. Cat fur, particularly a double coat, absorbs water and holds it. A soaked cat gets heavy, cold and slow.

    That's a genuine vulnerability signal to an animal that survives on being quick.

    The four things your cat is actually reacting to

    Most owners assume it's the water. It's usually not just the water.

    • Loss of traction. A wet porcelain tub or acrylic sink is a skating rink. A cat that can't grip goes straight into panic. This is fixable and it's the single biggest win available to you.
    • Restraint. Being held in place with nowhere to retreat frightens most cats more than being wet. Cats are ambush predators with a strong flight preference. Removing the exit is the trigger.
    • Noise. Running taps, sprayers and force dryers in a small tiled room are loud and echoey. Cats hear well into the ultrasonic range, so bathrooms are genuinely unpleasant acoustically.
    • Temperature. Wet fur plus evaporation equals rapid heat loss. Cats have a higher normal body temperature than we do, roughly 38.1 to 39.2 °C (100.5 to 102.5 °F), and they feel the chill fast.

    What that means for your method

    Every one of those has a countermeasure, and they're the backbone of everything that follows:

    • Rubber mat on the tub floor, always.
    • Fill the water before the cat comes into the room. Never run the tap with the cat present.
    • Use a pitcher for rinsing instead of a sprayer where you can. Quieter, gentler, more control.
    • Warm the room first, to around 22 to 24 °C (72 to 75 °F).
    • Give the cat something solid to grip. A mesh bath bag, a towel under the paws, or simply your forearm.

    One bad bath can cost you years

    Cats are prone to what behaviourists call single-event learning. A genuinely terrifying experience can create a lasting association after one exposure, no repetition required.

    That's why "just get through it" is bad advice. A cat that gets ambushed, held down and drenched may start avoiding the bathroom entirely, or flinch when you pick them up. Recovery from that takes months of careful work.

    The trade is simple. Spend a bit longer preparing and you keep your cat's trust.

    Not every cat hates it

    Worth knowing, because it affects expectations. Turkish Vans, Bengals, Maine Coons and Turkish Angoras include a decent number of individuals who tolerate or actively enjoy water. Coat structure plays a part, and so does early exposure.

    The socialisation window in kittens runs roughly from 2 to 7 weeks of age. Cats handled gently around water and grooming during that period are considerably easier to bathe as adults. If you have a kitten, that's your opportunity.

    The 6 Variables That Decide How You Bathe This Particular Cat

    There's no single correct bathing method. There's a correct method for your cat, on this occasion, and it changes based on six things.

    Coat Type and Length

    Coat drives your time budget more than anything else.

    Coat typeBath timeDrying timeSpecial handling
    Shorthair (DSH, Siamese, Burmese)3 to 5 min20 to 40 minEasiest. Towel drying usually enough.
    Medium coat (Ragdoll, Norwegian Forest)5 to 8 min45 to 90 minComb while damp to prevent tangles.
    Longhair with dense undercoat (Persian, Himalayan)8 to 12 min1 to 3 hoursMust be fully mat-free first. Water sets mats hard.
    Rex coats (Devon, Cornish)3 to 5 min15 to 30 minThin coat, chills fast. Warm room essential.
    Hairless (Sphynx, Peterbald)3 to 5 min10 to 20 minClean skin folds, nail beds and ears.

    The rule that catches people out: never bathe a matted cat. Mats shrink when wet, tighten against the skin, and trap moisture underneath. That combination causes sores and skin infection. Clip or comb out first, or book a groomer for a sanitary trim.

    Age, Weight and Mobility

    • Kittens under 8 weeks. Avoid full baths. Poor thermoregulation means real hypothermia risk. Damp cloth or a vet-approved flea protocol instead.
    • Healthy adults. Standard approach applies.
    • Seniors (11 and over). Degenerative joint disease is common in older cats and often undiagnosed. It's the reason many stop grooming their back end. Support the hindquarters. Keep it very short.
    • Overweight cats. Often need help most, tolerate handling least. They physically can't reach their lower back or rear. Prioritise those areas, skip the rest.
    • Cats with heart disease, asthma or brachycephalic faces. Stress raises respiratory and cardiac load. Get vet sign-off first.

    Temperament Grading: Green, Amber or Red

    Be brutally honest here. This single judgement decides whether you bathe at home or hand it over.

    Green. Tolerates nail trims, brushing and being held. Grumbles but doesn't escalate. Home bath is reasonable, ideally with a second pair of hands.

    Amber. Struggles hard, wriggles, vocalises, may swipe defensively but is clearly trying to escape rather than attack. Home bath is possible with full prep, a mesh bag, and two people. Abort readily.

    Red. Bites without warning, redirects aggression, goes still and then explodes, or has previously drawn blood during handling. Do not bathe this cat at home. Book a feline-experienced groomer or a vet, and ask about pre-visit medication.

    Cat bites are not a minor injury. Their teeth are narrow and deep, which seals bacteria under the skin. The CDC's guidance on animal bites and pet-related illness recommends prompt medical attention, and hand bites in particular need same-day care because of the tendon sheath risk.

    The Reason for the Bath

    The purpose changes the product, the technique, and whether a bath is even the right tool.

    • Dirt or smell: waterless foam or wipes will usually do.
    • Toxic substance: full water bath, immediately, plus a call to a poison line.
    • Fleas: a bath drowns and removes fleas, but it's a stopgap. Long-term control means a vet-supplied product.
    • Ringworm or yeast: vet-prescribed dip or medicated shampoo, with a specific contact time that must be observed.
    • Soiling around the rear: spot clean only. No need to wet the whole animal.

    Solo or Two-Person

    A two-person bath is faster, safer and calmer, and it isn't close. One person holds and reassures, the other washes and rinses. Total wet time drops sharply.

    If you're alone with an amber cat, use a mesh bathing bag. It gives the cat something to grip, contains the claws, and lets water and shampoo pass through the mesh.

    Solo bathing a cat that genuinely fights is where most injuries happen. If nobody can help you, that's a signal in itself.

    Your Bathroom Setup

    The room you have available shapes the plan more than people expect.

    • Kitchen or utility sink. Best option for most cats. Waist height, small, easy to control, less echo.
    • Bathtub. Fine, but you'll be kneeling and bent over, which weakens your grip. Use a mat and keep water shallow.
    • Shower stall only, no tub. Common in flats. Use two washing-up bowls on the shower floor. One for washing, one for clean rinse water. Quieter than a shower head and far more control.
    • Cold bathroom. Heat it for 15 minutes first. A cold tiled room raises stress and slows drying.

    The Decision Tree: Which Cleaning Method Fits Your Situation

    Start at the top and stop at the first branch that fits.

    Your situationBranchTime needed
    Small dirty patch, mild soiling, healthy catDamp-cloth spot clean2 to 5 min
    General grubbiness, mild odour, cat won't tolerate waterWaterless foam or wipes5 to 15 min
    Real need, green or amber cat, help availableFull water bath at home30 to 60 min including drying
    Matted longhair, sanitary trim needed, or you're not confidentProfessional groomer1 to 3 hours, booked
    Red-zone cat, medical bath, or previous bite historyVet clinic or sedated groomHalf day, by appointment

    Branch 1: Damp-Cloth Spot Clean

    If the mess is localised, then clean only that area. This handles more real-world situations than people realise.

    Take a soft cloth, wet it with plain warm water, and wring it out until it's damp rather than dripping. Wipe in the direction of hair growth. For a soiled rear, work from the outside inward and use a fresh section of cloth each pass.

    Follow with a dry towel to blot. That's it. No shampoo needed for most spot cleans, and no reason for the cat to be in the bathroom at all.

    Branch 2: Waterless Foam or Grooming Wipes

    If the cat is genuinely water-phobic and the issue isn't medical, then this is where you should be. Rinse-free foams and pet wipes cover the great majority of "my cat is a bit grubby" cases.

    The technique matters. Don't slather it on. Work in sections, apply a small amount, massage it into the coat with your fingertips or a rubber mitt, then comb or towel out the residue.

    Where waterless products fall short: heavy grease, tar, chemical contamination, and anything requiring a prescribed contact time.

    Branch 3: Full Water Bath at Home

    If there's a real reason, the coat is mat-free, and your cat grades green or amber, then proceed.

    The headline conditions: warm room, filled tub before entry, non-slip mat, shampoo pre-diluted, towels ready, and a hard five-minute limit on wet time.

    Branch 4: Professional Groomer

    If the coat is matted, you need a sanitary trim or lion cut, or you simply don't fancy the fight, then book someone who works with cats regularly.

    Grooming is largely unregulated in both the US and the UK, so qualifications vary enormously. Look for feline-only salons, groomers with Fear Free certification, or those who advertise cat handling specifically. Ask directly how they handle a cat that struggles.

    Not every groomer will take a cat, and many won't take an aggressive one. That's not a bad sign. It's a groomer who knows their limits.

    Branch 5: Vet-Supervised or Sedated Bath

    If your cat bites, has a medical skin condition, or has failed at a groomer, then this is the safe route.

    Sedated grooming happens at a veterinary practice with monitoring. It's the right answer for severely matted cats, ringworm dips on an uncooperative patient, and any cat that poses a genuine bite risk. Expect a pre-anaesthetic assessment, and bloodwork for seniors or cats with known heart or kidney issues.

    It costs more. It also removes the risk of a hospital trip for you and a lasting behavioural problem for the cat.

    The Prep Work Nobody Talks About, and Why You Start Days Before

    This is the part almost everyone skips, and it's the part that decides how the bath goes. A bath that starts as an ambush ends as a fight.

    Desensitising the Tub Over 1 to 4 Weeks

    If your bath isn't urgent, spend a couple of weeks building tolerance. Short sessions, 30 seconds to 3 minutes, once or twice a day.

    Work through this progression, moving up only when the cat is relaxed at the current step:

    1. Dry tub, treats. Carry the cat in, put them in the empty tub or sink, give a high-value treat, lift them out. Ten seconds is plenty.
    2. Dry tub with the mat down. Same thing, but the rubber mat is now in place so the surface feels familiar.
    3. Tap running, cat across the room. Let them hear it while eating something excellent. No contact with water.
    4. Damp paws. A few centimetres of warm water in the tub. Let them stand in it briefly.
    5. Damp cloth over the body. Wipe the back and flanks with a warm wet cloth. Treat, then finish.
    6. A cup of water poured over the shoulders. Then out, dry, reward.

    Use a lickable puree tube if your cat likes them. They occupy the mouth, which stops biting, and they keep the cat facing forward. Skipping a meal beforehand makes the treat matter more.

    If any step produces genuine distress, drop back a level and stay there for several sessions. Progress isn't the point. Calm is.

    Nail Trim, Brush-Out and Mat Check

    Trim the claws 24 to 48 hours before the bath, not on the day. It splits the two stressful events and it protects you.

    Take the sharp tips off the front claws only. You don't need a short trim, you need to remove the hooks. Stay well clear of the quick, the pink vascular area visible in pale claws.

    If your cat won't allow it, that's useful information about how the bath will go.

    Then brush thoroughly:

    • Shorthairs: a rubber mitt or fine slicker, whole body.
    • Longhairs: slicker first, then a metal comb through to the skin.
    • Check the friction zones. Armpits, behind the ears, the britches, the belly, and the base of the tail.

    If the comb snags, you have a mat, and it needs to come out before water touches it. Small mats can be split with a mat splitter or fingers. Anything tight, close to the skin, or larger than a coin is a job for clippers, and that usually means a groomer.

    Pheromones, Gabapentin and When to Ask Your Vet

    Synthetic feline facial pheromone products (the F3 analogue) can take the edge off. Spray the towels and the bathroom 15 to 30 minutes ahead so the alcohol carrier has evaporated. Never spray it directly onto the cat.

    The effect is modest, not magic, but it costs little to try.

    For amber and red cats, ask your vet about pre-visit medication. Gabapentin is the one most commonly used, given orally before the appointment, and it reduces fear-based responses in a lot of cats. Trazodone is sometimes added.

    Both are prescription-only and dosing depends on weight, kidney function and age, so this is a vet conversation, never a guess.

    The Cornell Feline Health Center publishes accessible owner guidance on feline handling and stress, and it's a reliable place to read up before that conversation.

    One last piece of prep that isn't about the cat. Decide your abort point in advance and say it out loud to your helper. Knowing you're allowed to stop makes it far easier to stop at the right moment.

    Setting Up the Room Before the Cat Ever Walks In

    Everything gets laid out first. The cat comes in last. If you're still reaching for a towel while a wet cat climbs your shoulder, you've already lost the bath.

    cat bathing supplies setup

    Image source: Bing (Web (fair-use with source credit))

    The kit list

    ItemWhy it mattersRough cost
    Rubber non-slip matTraction. The single biggest stress reducer in the room.$8 to $15 / £7 to £13
    Cat shampoo, pre-dilutedCat-safe pH, spreads faster than neat shampoo$10 to $25 / £8 to £20
    Plastic jug or pitcherQuiet, controllable rinsing$3 to $8 / £3 to £7
    3 to 4 towelsOne to wrap, one to blot, sparesYou've got these
    Mesh bathing bag (optional)Grip for the cat, claw containment for you$8 to $20 / £7 to £18
    Metal comb (longhairs)Comb through damp to stop tangles setting$6 to $15 / £5 to £13
    Lickable treat tubeOccupies the mouth, keeps the head forward$5 to $12 / £4 to £10
    Second bowl or basinClean rinse water, no tap noise mid-bathUse what you own

    Notice what's not on that list. No human shampoo, no washing-up liquid, no baby shampoo.

    Getting the room right

    Work through this in order, with the door shut and the cat elsewhere:

    1. Heat the room for 10 to 15 minutes. Target 22 to 24 °C (72 to 75 °F).
    2. Clear the surfaces. Remove bottles, razors, anything the cat can knock over. Sudden clatters trigger panic.
    3. Block the escape routes. Close the door properly. Shut the toilet lid. Block the gap behind the washing machine now, not after.
    4. Lay the mat flat on the tub or sink floor. Press the suction cups down.
    5. Fill the water to 7 to 10 cm (3 to 4 inches). That's chest height on an average adult cat, not floating depth.
    6. Check the temperature on the inside of your wrist. It should feel neutral, not warm.
    7. Fill the second basin with clean rinse water at the same temperature.
    8. Pre-mix the shampoo. A squeeze bottle with shampoo diluted roughly 1 part to 5 parts warm water spreads in seconds instead of sitting in a blob.
    9. Fill the jug and set it within arm's reach.
    10. Lay the towels out, unfolded, on the floor or a closed toilet lid. You want to grab one without looking.
    11. Stick the treat tube or a lick mat at head height on the tub wall.
    12. Turn the tap off and leave it off.

    That last one matters more than it sounds. Running water is one of the loudest triggers in the whole process.

    The two-person handover

    If you've got a helper, decide roles before you start. One person is the handler, and their hands never leave the cat. The other is the washer, and their hands never leave the water and shampoo.

    Swapping roles mid-bath causes fumbles. Fumbles cause escapes. Agree it in the hallway.

    Before you lift the cat

    Cats read tension from posture and voice pitch. If you're braced for a fight, you'll telegraph it.

    Approach normally. No stalking, no towel behind your back. Pick the cat up the way you always do and carry them in calmly.

    Step-by-Step: How to Bathe a Water-Hating Cat in Under Five Minutes

    Five minutes of wet time is the target. Ten minutes total, door to door. Speed is kindness here, and every extra minute increases the chance of a bad association forming.

    Step 1: Get the cat in without a fight

    Carry the cat in facing forward and put them straight down on the mat, hind feet first. Keep one hand under the chest and the front legs supported.

    Lowering the back end first lets them feel the surface before the water registers. Dropping a cat in front-first, nose over water, is how you get an immediate scramble.

    If you're using a mesh bag, put the cat in it outside the bathroom while they're calm. Zip it, adjust the neck opening so it's snug but not tight, then carry them in.

    Step 2: Establish your grip

    Your holding hand goes over the shoulders, thumb and fingers around the base of the neck and upper chest. Not a scruff. A steady, supportive hold that stops forward launching.

    Your other hand does everything else. Keep your forearm along the cat's flank so they've got something solid pressed against them. Cats settle better with contact on both sides.

    If the cat tries to climb, redirect gently rather than pulling. Pulling triggers more climbing.

    Step 3: Wet the body from the shoulders back

    Use the jug. Pour slowly onto the shoulders and let the water run backward along the spine and down the flanks. Work towards the tail.

    Never pour over the head. Never let water run forward into the face. Water in the ear canal is a genuine problem, and it's a common cause of post-bath otitis externa.

    The head gets cleaned separately with a damp cloth, later, and only if it actually needs it.

    Longhairs need real effort here. A dense undercoat repels water at first. Work the water in with your fingers, section by section, until you can see skin.

    Step 4: Lather from neck to tail

    Squeeze the pre-diluted shampoo along the spine in a line. Then work it in with your fingertips, always in the direction of hair growth.

    Order of coverage:

    • Neck and shoulders
    • Back and flanks
    • Belly and chest
    • Legs and paws
    • Rear and tail last

    The rear goes last for the obvious reason. You don't want to carry that anywhere else on the coat.

    Massage, don't scrub. Scrubbing tangles longhair coats and irritates the skin. Firm fingertip circles are enough.

    Step 5: Observe contact time (medicated baths only)

    If your vet prescribed a medicated shampoo, this is the step people skip and then wonder why the treatment failed. Most chlorhexidine, miconazole and ketoconazole formulations need several minutes of skin contact to work. Follow the label.

    That's a long time for a struggling cat, and it's exactly why medicated protocols often belong at a vet clinic. If you're doing it at home, ask your vet whether a shorter contact time with more frequent application is acceptable.

    For lime sulphur dips used against ringworm, follow the label exactly. Wear gloves. It stains and it smells strongly of rotten eggs, and that smell lingers in the house.

    Step 6: Rinse until the water runs clear, then rinse again

    Under-rinsing is the most common technique error in home cat bathing. Residue itches. The cat then grooms it off and swallows it, and you end up with an irritated cat and possible GI upset.

    Drain the dirty water. Use your second basin of clean water and the jug. Rinse from the shoulders back, same as before.

    Run your fingers through the coat as you go. If it feels even slightly slick, there's shampoo left. Keep going until it squeaks a little.

    Then do one more pass. It's always one more pass than you think.

    Step 7: Squeeze, lift, wrap

    Squeeze the excess water out of the coat with your hands, running down the legs and tail. This removes a surprising amount and cuts drying time meaningfully.

    Lift the cat straight into an open towel and wrap immediately. Don't put them down on the floor first. A wet cat on a hard floor will bolt, and now you're chasing a soaked animal through the house.

    Wrap snugly with just the head out.

    The whole thing, at a glance

    StepTarget timeNon-negotiable rule
    Entry and grip15 secHind feet down first
    Wetting45 secShoulders back only, never the head
    Lather60 to 90 secDirection of hair growth
    Contact time0, or per labelOnly for medicated protocols
    Rinse90 secTwice. Always twice.
    Squeeze and lift20 secTowel waiting and open

    Reading the Abort Signals: When to Stop Mid-Bath

    You need a stop point decided before you start, and you need to actually use it. Pushing through a full-blown panic response is how a one-off bath becomes a permanent handling problem.

    cat body language stress signals

    Image source: Web (Bing) / iheartcats.com (Web image (fair-use with source credit))

    The escalation ladder

    Cats warn you in a fairly predictable sequence. Learn it and you'll spot the turn a good 20 seconds before it happens.

    StageWhat you'll see and hearYour response
    Mild stressEars slightly back, tail tip flicking, low chirping or trillingContinue, but speed up
    RisingEars rotated flat and sideways, pupils widening, tail thumping, low steady growlFinish rinsing now, skip anything optional
    HighFully dilated pupils, piloerection along spine and tail, hissing, body rigidRinse fast, remove, done
    CriticalGrowl shifting to a yowl or scream, bared teeth, lunging or biting rather than escapingAbort immediately

    That shift from growl to yowl is the one to memorise. A growl is a warning. A yowl or scream means the cat has stopped negotiating.

    The signals people misread

    Going completely still. This is the big one. A cat that suddenly stops fighting and goes limp has not accepted the bath. That's often behavioural shutdown, a freeze response, and it's a more severe stress state than struggling.

    Owners read it as compliance and keep going. Don't.

    Flattened, rotated ears. Ears pinned sideways sit differently from ears simply held back in mild annoyance. Sideways and flat is fear.

    Dilated pupils in a bright room. Pupils should be narrow slits under bathroom lighting. Wide black pupils mean adrenaline.

    Biting instead of fleeing. A frightened cat wants an exit. When a cat turns to bite the hand holding them rather than trying to escape, fear has flipped to defensive aggression. That's your hard stop.

    What "abort" actually looks like

    Aborting doesn't mean letting go. It means finishing safely and fast:

    1. Stop lathering. Don't add anything.
    2. Rinse whatever shampoo is on the coat with two quick jugs of water. Never leave shampoo on the skin.
    3. Lift straight into the towel.
    4. Wrap, carry to a warm quiet room, and put them down.
    5. Walk away. No fussing, no apologising, no picking them back up.

    Leaving product on the coat isn't an option, even in an abort. It'll get licked off. Two fast rinses take 15 seconds.

    Do not try again the same day

    If a bath fails, that cat is done for the day. Stress hormones take hours to come back down, and a second attempt lands on an already sensitised animal.

    Wait at least 48 hours. If it's medically urgent, that's your cue to phone the vet, not to try harder.

    Aftermath you might see

    For 12 to 24 hours after a stressful bath, expect some of these. They're normal and usually settle:

    • Hiding under the bed or behind furniture
    • Reduced appetite for a meal or two
    • Excessive grooming of the bathed areas
    • Avoiding you or the bathroom doorway
    • Being flinchy about being picked up

    What isn't normal, and warrants a vet call: straining in the litter box, going more than 24 hours without eating, or repeated attempts to urinate with nothing produced. Stress is a recognised trigger for feline idiopathic cystitis, and a blocked male cat is a genuine emergency.

    Drying Without Undoing All Your Good Work

    Plenty of baths go fine and then fall apart at the drying stage. A cold, damp cat is uncomfortable for hours, and that discomfort attaches itself to the memory of the bath.

    towel wrapping a cat after bathing

    Image source: Bing (Web (fair-use with source credit))

    Blot, never rub

    Rubbing a wet coat with a towel creates tangles, and on a longhair it creates mats. Press the towel against the coat, hold for a couple of seconds, lift, move to the next area.

    Work through two towels minimum. The first takes the bulk of the water and gets soaked within about a minute. The second does the real drying.

    Microfibre towels absorb noticeably more than standard cotton for the same size. If you're bathing a longhair regularly, they're worth having.

    The wrap, and why cats tolerate it

    Wrap the cat snugly with only the head exposed. The gentle pressure calms most cats, and it stops them bolting while soaked.

    Hold them on your lap in the wrap for a few minutes. Change to a dry towel when the first goes cold. Most shorthairs will be most of the way dry after 15 minutes of this.

    Drying times by coat

    CoatTowel onlyWith low-heat pet dryerMust-do
    Shorthair20 to 40 min10 to 15 minWarm room until fully dry
    Medium coat45 to 90 min20 to 30 minComb through while damp
    Longhair, dense undercoat1 to 3 hours30 to 60 minComb in sections to the skin
    Rex15 to 30 min10 minWatch for chilling, thin coat
    Hairless10 to 20 minRarely neededDry the skin folds and armpits

    Should you use a hairdryer?

    Only if the cat already accepts one, and only on the lowest heat and speed. Cat skin is thinner than ours and burns more easily.

    If you do use one, keep it at least 30 cm away, keep it moving constantly, and never aim it at the face or ears. Most water-averse cats find the noise worse than the bath itself, so towels are usually the better call.

    Cage dryers deserve a specific warning. These are the units clipped to a crate that blow heated air at a confined animal. Heat-related deaths have been documented in grooming settings, and reputable feline groomers avoid them. If a salon uses one on your cat, find a different salon.

    Comb the longhairs while damp

    This is the step that saves you a matted cat next week. Once the coat is damp rather than soaking, run a metal comb through in sections, right down to the skin.

    Start at the extremities and work inward. Legs, then flanks, then back. Hold the fur at the base with your other hand so you're not pulling on skin.

    A coat that dries with tangles in it locks them in.

    Keep them warm until fully dry

    Confine the cat to one warm, draught-free room until the coat is dry at skin level, not just on the surface. That means no cat flap, no garden, no sitting on a cold windowsill.

    Kittens, seniors and thin cats lose heat fastest. If a cat feels cold at the ear tips or paws, wrap them again and warm the room further.

    Signs of hypothermia to watch for: shivering, lethargy, cold ears and paws, and pale gums. Any of those, and it's a vet call.

    Then leave them alone

    Once dry, put food down and step back. Most cats want to groom themselves thoroughly and then sleep.

    Don't hover, don't keep picking them up. Space now is what makes the next bath easier.

    Waterless Bathing and Spot Cleaning, Done Properly

    For most readers, this is the branch that solves the actual problem. Waterless methods handle everyday grubbiness, mild odour and localised mess with a fraction of the stress.

    They're not a lesser option. They're the correct option for the majority of "my cat needs cleaning" situations.

    What waterless products actually do

    Rinse-free foams and sprays use mild surfactants that lift dirt and oil, plus conditioning agents, in a formula designed to be combed or towelled out rather than rinsed. Grooming wipes do the same job with the product already loaded onto the cloth.

    Dry shampoo powders work differently. They're usually cornstarch-based and absorb oil rather than dissolving it. You brush them out completely.

    What none of them do well: heavy grease, tar, chemical contamination, or anything with a prescribed contact time. Aggregate owner feedback repeats the same complaint, that foams underperform on genuinely oily coats. That's the product working as designed, not a defect.

    Method comparison

    MethodBest forTimeWatch out for
    Damp clothSmall soiled patches, faces, paws2 to 5 minToo wet leaves the cat chilled
    Grooming wipesQuick tidy-ups, dander, light dirt3 to 8 minSticky residue from cheap wipes
    Waterless foamWhole-body freshen-up, greasy patches10 to 15 minMust be combed out fully
    Dry powderOily coats, longhair roots10 to 20 minBrush out completely or it flakes
    Rubber grooming mittLoose hair, surface dust5 minNot a cleaner, just a remover

    How to apply waterless foam properly

    Most people use far too much and don't work it in. Then the residue sits on the coat and the cat licks it off.

    1. Choose a calm moment when the cat is relaxed. Not after a vet visit, not after play.
    2. Warm the bottle in your hands. Cold product on skin makes cats flinch.
    3. Dispense a small amount, about a golf ball of foam, into your palm.
    4. Work it into one section only. Fingertips or a rubber mitt, in the direction of hair growth.
    5. Towel the section, pressing to lift the residue out.
    6. Comb through, particularly on longhairs.
    7. Move to the next section. Stop after two or three sections if the cat is done.

    Splitting it across two or three short sessions on different days works better than one long attempt. There's no urgency here, which is exactly the advantage.

    Spot cleaning a soiled rear

    This comes up constantly with longhairs, seniors, and cats with soft stools. Handle it fast, because faecal matter left against skin causes scald and infection.

    Use a soft cloth with plain warm water, or an unscented pet wipe. Wipe from the outside inward, using a fresh area of cloth each pass. Blot dry with a towel.

    If it happens repeatedly, the fix isn't cleaning. It's a sanitary trim to shorten the fur around the anus and under the tail, plus a vet conversation about the loose stools.

    The one thing to check on your product label

    Read the ingredients before anything goes on a cat. Several common "natural" pet grooming ingredients are genuinely dangerous to cats, and they turn up in products marketed for dogs and shared across the shelf.

    Avoid anything containing tea tree oil (melaleuca), pennyroyal, wintergreen, citrus oils, d-limonene, or generic "essential oil blend". Cats have limited glucuronidation capacity in the liver, so they clear phenolic compounds far more slowly than dogs or humans do.

    Also avoid alcohol-heavy sprays. They sting broken skin and they chill the cat as they evaporate.

    When waterless isn't enough

    Move up to a full bath if any of these apply:

    • The substance on the coat is toxic if licked
    • A vet has prescribed a medicated wash
    • The coat is genuinely greasy and foam has already failed
    • There's a heavy flea burden that needs physically removing
    • The soiling covers a large area of the body

    Everything short of that list, waterless handles.

    Choosing the Right Shampoo (And the Ingredients That Can Kill a Cat)

    Getting this wrong is the difference between a clean cat and a poisoned one. Cats metabolise certain compounds badly, and a wet coat gets licked clean afterwards, so anything on the fur ends up inside the cat.

    Why human shampoo is off the table

    Human skin sits around pH 5.5. Cat skin sits higher, roughly pH 6.0 to 7.5, and the epidermis is far thinner than ours.

    Human shampoo, baby shampoo and washing-up liquid are all formulated for that lower pH and for skin that can take it. On a cat they strip sebum, disrupt the barrier, and leave dry flaky skin that itches for days. The cat then overgrooms the irritated area and you've traded a dirty cat for a bald patch.

    Dish soap has one narrow exception. It's used in veterinary settings to break down oil, tar and petroleum contamination, because nothing gentler cuts through it. That's an emergency degreasing step under vet advice, not a bath.

    The ingredients that genuinely harm cats

    IngredientFound inRisk to cats
    Permethrin and other pyrethroidsDog flea shampoos and spot-onsSevere toxicosis. Tremors, seizures, often fatal.
    Tea tree oil (melaleuca)"Natural" pet shampoos, skin spraysAtaxia, tremors, liver damage. Documented feline poisonings.
    d-Limonene and citrus oilsInsect-repellent shampoosHypersalivation, tremors, hypothermia
    Pennyroyal oilHerbal flea productsLiver failure
    Wintergreen (methyl salicylate)Muscle rubs, some grooming spraysSalicylate toxicity. Cats clear salicylates very slowly.
    Phenols and phenolic disinfectantsHousehold cleaners near the tubLiver and kidney damage
    Alcohol (high concentration)Waterless spraysChilling, stinging, ingestion risk

    Permethrin is the one that kills cats. It's safe on dogs at label doses and severely toxic to cats. The usual scenario is a multi-pet household where a cat is treated with the dog's product, or grooms a recently treated dog.

    If your cat contacts a permethrin product, that's an emergency. The FDA's Center for Veterinary Medicine publishes safety information on pesticide products for pets, and any suspected exposure warrants an immediate call to a vet or an animal poison control line.

    The underlying reason is liver chemistry. Cats have limited glucuronyl transferase activity, the enzyme pathway that conjugates phenolic and salicylate compounds for excretion. Dogs and humans clear these compounds efficiently.

    Cats don't.

    What to actually use

    Keep it simple. A shampoo formulated specifically for cats, fragrance-free or lightly fragranced, soap-free, and pH-balanced for feline skin.

    Shampoo typeBest forNotes
    Basic cat shampooGeneral cleaning, most situationsThe default. Nothing clever needed.
    Colloidal oatmealDry, itchy or sensitive skinSoothing, not medicated
    DegreasingStud tail, seborrhoea, Sphynx skinUse sparingly. Strips heavily.
    ChlorhexidineBacterial dermatitis (vet-prescribed)Needs contact time. Keep out of eyes and ears.
    Miconazole or ketoconazoleYeast, Malassezia (vet-prescribed)Often combined with chlorhexidine
    Lime sulphur dipRingworm (vet-prescribed)Rinse-free by design. Stains and smells. Gloves required.
    Flea shampooHeavy flea burden, kittensMust say "safe for cats" explicitly. Check for permethrin.

    Kitten-specific formulations exist and are worth using for cats under six months, mainly because they're milder and lower in fragrance.

    Dilute before you apply

    Neat shampoo lands as a blob and takes ages to spread through a coat. Diluting roughly 1 part shampoo to 5 parts warm water in a squeeze bottle cuts your lather time meaningfully, and it rinses out faster too.

    Professional concentrates specify their own ratios. Follow the label rather than guessing, because over-concentrated product is harder to rinse and more likely to leave residue.

    The pre-bath patch test

    If you're using a new product on a cat with any history of skin sensitivity, apply a small amount to one spot on the flank first. Rinse it after a minute. Wait 24 hours and check for redness.

    Mistakes That Turn One Bad Bath Into a Lifetime Problem

    Most bathing disasters trace back to the same handful of errors. None are complicated to avoid.

    The ten that cause the most damage

    1. Running the tap with the cat in the room. Fill first, always.

    2. Water too deep. Anything above chest height makes the cat feel like they're floating, and floating means panic. Stay at 7 to 10 cm.

    3. Pouring over the head. Water in the ear canal risks otitis externa. Shampoo in the eye risks a corneal ulcer.

    The head almost never needs washing.

    4. Skipping the nail trim. Two days beforehand, front claws, tips only. It removes the hooks that let a panicking cat climb.

    5. Bathing a matted cat. Wet mats shrink and tighten. They trap moisture against skin and cause sores.

    6. Under-rinsing. Residue itches, gets licked off, and causes GI upset. Rinse until the coat squeaks, then rinse once more.

    7. Using dog products. Not just flea shampoo. Plenty of dog grooming products contain oils and compounds cats can't process.

    8. The force dryer on a first-timer. High airflow and high noise on a cat with no prior exposure is a guaranteed panic.

    9. Trying again the same day. Stress hormones take hours to clear. A second attempt lands on a cat already primed for a fight.

    10. Going solo with a cat who fights. Most serious bathing injuries involve one person, no bag, and a cat well past their threshold.

    The subtler errors

    Bathing too often. Repeated stripping of sebum causes chronic dry skin. Unless there's a medical protocol or the cat is hairless, most cats need bathing rarely or never.

    Letting the cat outside while damp. Wet fur loses heat fast, and a damp cat in a draught is a genuine hypothermia risk.

    Turning the bathroom into a bad place. If the only time your cat enters the bathroom is for a bath, the room itself becomes the trigger. Feed them in there occasionally. Play in there.

    Apologising and fussing afterwards. Hovering over a stressed cat prolongs the stress.

    Treating a symptom as dirt. Flaking, bald patches, sudden odour, a cat who's stopped grooming. These are medical signals. A bath masks them for a day and delays a diagnosis.

    The "just get it over with" trap

    This mindset causes the most lasting harm. The logic feels sound. The cat hates it, so push through, finish fast, done.

    But cats form strong associations from single frightening events. One genuinely terrifying bath can produce a cat who flinches when picked up, avoids the bathroom permanently, or resists all future handling including vet exams.

    Aborting a bath costs you one afternoon. Pushing through a panic response can cost you years of easy handling.

    Bathing by Scenario: Sphynx, Senior, Longhair, Kitten, Flea-Ridden and Skunked

    The core method stays the same. What changes is the prep, the products, and how much you skip.

    Sphynx and hairless breeds

    If you have a Sphynx, Peterbald, Donskoy or Bambino, then regular bathing is genuinely required, typically every one to three weeks.

    With no coat to wick it away, sebum accumulates directly on the skin. Left alone it builds into a waxy brown film, blocks pores, and can cause comedones and skin infection. It also stains fabric.

    • Focus on the folds. Armpits, neck, groin, between the toes, around the tail base.
    • Clean the nail beds with a soft cloth. Sebum collects there and goes dark.
    • Ears produce more wax than in furred breeds. Clean the outer ear only, never inside the canal.
    • Use a gentle or mildly degreasing cat shampoo. Over-degreasing causes rebound oil production.
    • Dry thoroughly and keep the room warm. Hairless cats chill fast.

    Good news for owners: hairless cats bathed from kittenhood usually tolerate it well.

    Senior and arthritic cats

    If your cat is 11 or older and has stopped grooming their back end, then the cause is usually pain, not laziness.

    Degenerative joint disease is common in older cats and frequently goes undiagnosed. A cat who can't twist to reach their lower back isn't neglecting themselves. They physically can't.

    • Spot clean rather than full bathe wherever possible.
    • If you must bathe, support the hindquarters throughout.
    • Keep it under three minutes. Seniors tolerate stress and temperature drops badly.
    • Warm the room more than usual, closer to 24 °C.
    • Book a vet appointment about the pain. Feline-licensed options exist, and treating the arthritis often restores self-grooming.

    A sanitary trim is frequently the better long-term answer for an arthritic cat. Shorter fur around the rear means far less to clean.

    Longhairs with dense undercoats

    If you have a Persian, Himalayan, Maine Coon or Norwegian Forest Cat, then the mat check comes before anything else.

    Run a metal comb from skin to tip across the whole body. If it snags anywhere, deal with that before water.

    • Water tightens mats within seconds. A coin-sized mat becomes a hard pad against the skin.
    • Budget 8 to 12 minutes of wet time. Dense undercoats repel water at first.
    • Two shampoo passes are common on very greasy or soiled longhairs. Rinse fully between them.
    • Comb through while damp, in sections, or you'll be back with tangles in 48 hours.
    • Drying can take up to three hours. Plan the afternoon around it.

    Persians also need face and eye fold cleaning. That's a damp cloth job done separately, never part of the bath.

    Kittens

    If the kitten is under 8 weeks, then avoid a full bath. Thermoregulation is poor and hypothermia is a real risk.

    For a filthy or flea-infested young kitten, use a damp cloth and a fine-tooth flea comb dipped in soapy water. Comb, dip, repeat. It's slow but it works and it doesn't wet the kitten.

    For kittens over 8 weeks who genuinely need a bath:

    • Use a kitten-specific or very mild cat shampoo.
    • Keep water shallower, around 5 cm.
    • Room temperature at the top of the range, 24 °C.
    • Two minutes maximum.
    • Dry immediately and completely. Keep them wrapped and warm for a good half hour after.

    Never use adult flea shampoo on a young kitten without checking the minimum age on the label.

    Heavy flea burden

    If the cat is crawling with fleas, then a bath physically drowns and removes a large proportion of them, but it isn't treatment.

    Plain cat shampoo works. The mechanical action of water and lather does the job.

    • Lather the neck first. Fleas run for the head when the body gets wet.
    • Leave the lather on for a few minutes if the cat tolerates it.
    • Use a fine-tooth flea comb afterwards, dipping it in soapy water between passes.
    • Treat the environment. Most of a flea population lives in carpets and bedding, not on the cat.
    • Follow up with a vet-supplied product, whether spot-on or oral.

    Check the label of any flea shampoo for permethrin before it goes anywhere near a cat.

    Skunk spray

    If your cat has been sprayed, then act fast and keep them outside or in a garage while you prepare.

    Tomato juice doesn't work. Skunk odour comes from thiols, and neutralising them takes oxidation, not acid.

    The standard mix:

    • 1 litre (about 1 quart) of 3% hydrogen peroxide
    • 60 ml (1/4 cup) baking soda
    • 1 to 2 teaspoons of mild liquid soap

    Mix it fresh in an open container. Never store it, because it builds pressure and can burst a sealed bottle.

    Apply to the affected areas only, keep it well away from the eyes and mouth, leave for around five minutes, then rinse thoroughly. Follow with a normal cat shampoo bath. Expect some lightening of dark fur.

    Toxic contamination

    If the cat has oil, paint, tar, antifreeze or a chemical on their coat, then this overrides every other rule here.

    Stop the cat grooming. An Elizabethan collar or a towel wrap buys you time. Then call a vet or a poison control line before you wash anything, because some substances need specific handling and some get worse when wetted.

    Never use paint thinner, turpentine, petrol or any solvent on a cat. They're absorbed through skin and they're toxic. For oil and tar, veterinary guidance typically involves mild dish soap or vegetable oil to break the substance down, followed by a proper bath.

    What It Costs: Home Supplies vs Groomer vs Sedated Grooming

    Money isn't usually the deciding factor, but knowing the numbers helps you judge when to stop trying at home.

    Home kit, one-off cost

    ItemUSUK
    Cat shampoo, 250 to 500 ml$10 to $25£8 to £20
    Waterless foam$10 to $18£8 to £15
    Grooming wipes, 50 to 100 ct$8 to $15£7 to £13
    Mesh bathing bag$8 to $20£7 to £18
    Rubber non-slip mat$8 to $15£7 to £13
    Metal comb$6 to $15£5 to £13
    Slicker brush$8 to $20£7 to £17
    Cat nail clippers$6 to $15£5 to £13
    Pheromone diffuser starter kit$25 to $35£20 to £30
    Full kit$90 to $180£75 to £150

    Most of that is reusable for years. The consumables are shampoo and wipes, and a bottle lasts a long time when you're bathing rarely.

    Professional grooming

    ServiceUS typicalUK typical
    Basic cat bath and dry$50 to $90£40 to £70
    Bath, dry, nails, sanitary trim$70 to $120£55 to £90
    Full lion cut$80 to $150+£65 to £120
    Dematting surcharge$15 to $50 extra£15 to £40 extra
    Mobile groomer premium+$20 to $40+£15 to £30
    Feline-only salon premium+10 to 25%+10 to 25%

    Prices vary a lot by region. Metro areas and feline-only salons sit at the top of these ranges.

    Vet clinic and sedated grooming

    ServiceUS typicalUK typical
    Vet nurse bath, cooperative cat$40 to $80£30 to £60
    Pre-visit gabapentin (per dose)$5 to $15£4 to £12
    Sedated groom, healthy adult$150 to $300£120 to £250
    Sedated groom with pre-anaesthetic bloods$250 to $400+£200 to £320+
    Medicated bath course (ringworm, 4 to 8 weeks)$200 to $600 total£160 to £480 total

    Sedation isn't a luxury option. For a red-zone cat or a severely matted one, it's the safe route and it's often cheaper than a hospital visit for an infected bite.

    The real cost comparison

    PathUpfrontOngoingBest for
    Waterless only$20 to $40LowMost healthy cats, mild grubbiness
    Home bathing kit$90 to $180Very lowSphynx owners, regular medicated protocols
    Groomer, occasional$0$70 to $120 per visitLonghairs, sanitary trims, nervous owners
    Vet sedated$0$150 to $400 per visitAggressive cats, severe matting, medical baths

    If your cat is a Sphynx needing a bath every two weeks, the home kit pays for itself in about two months. If you're bathing a longhair twice a year, a groomer is easier and probably cheaper once you factor in the mat risk.

    Where people waste money

    Buying a force dryer for a cat who's terrified of it. Buying a grooming table for a once-a-year bath. Buying three brands of waterless foam because none of them cut through what was actually a medical skin problem.

    The two purchases that consistently earn their keep are the non-slip mat and the mesh bathing bag. Both are cheap and both directly reduce the panic response.

    Bite and Scratch Safety, Ringworm Precautions and When to See a Doctor

    Cat bites are the injury people underestimate most. They look small and they behave badly.

    Why cat bites are worse than they look

    Cat canines are long, narrow and sharp. They puncture deep and the surface wound closes over within hours, which seals bacteria into the tissue underneath.

    Cat bites become infected considerably more often than dog bites. Hand and wrist bites are the worst because tendon sheaths and joint capsules sit close to the surface, and infection there spreads fast.

    The main organism is Pasteurella multocida, which lives in most cats' mouths and can produce marked swelling and pain within 12 to 24 hours.

    Cat bite first aid

    Do this immediately, not after you've finished drying the cat:

    1. Let it bleed briefly. Don't squeeze hard.
    2. Wash under running water for at least five minutes.
    3. Irrigate the puncture thoroughly with clean water or saline.
    4. Apply antiseptic and a clean dressing.
    5. Note the time and take a photo of the wound.

    When to see a doctor

    Same-day medical attention for any of these:

    • Any bite to the hand, wrist, finger, foot or over a joint
    • Any deep puncture, regardless of location
    • Bites near a prosthetic joint or implanted device
    • Anyone immunocompromised, diabetic, on chemotherapy, or without a spleen
    • Tetanus vaccination not current within 10 years
    • A bite from an unfamiliar or unvaccinated cat (rabies risk depends on region)

    Go straight away if you see spreading redness, warmth, swelling, pus, red streaking up the limb, fever, or reduced movement in a finger or joint.

    CDC guidance recommends prompt evaluation for cat bites specifically because of the puncture depth and infection rate. Prophylactic antibiotics are commonly prescribed rather than waiting for infection to appear.

    Scratches carry their own risk. Bartonella henselae causes cat scratch disease, which typically shows up 3 to 14 days later as a swollen lymph node near the scratch, sometimes with fever and fatigue. It's usually self-limiting in healthy adults but needs medical attention in children and immunocompromised people.

    Ringworm precautions

    Ringworm isn't a worm. It's a fungal infection, usually Microsporum canis in cats, and it transmits readily to humans.

    If you're bathing or dipping a cat with confirmed or suspected ringworm:

    • Wear disposable gloves and a long-sleeved top you can wash hot.
    • Use an apron or old clothing you'll strip off straight after.
    • Confine the cat to one easy-clean room between treatments.
    • Wash all towels and bedding separately at the highest safe temperature.
    • Vacuum thoroughly and dispose of the bag or empty the canister outside.
    • Wipe hard surfaces with a suitable disinfectant. Fungal spores survive in the environment for months.

    Lime sulphur dip needs additional care. Wear gloves, ventilate the room, and expect the smell to linger. It stains fabric, jewellery and light-coloured fur temporarily.

    Children, elderly household members and anyone immunocompromised should stay away from a ringworm-positive cat until treatment is well underway.

    Protecting the cat during the process

    A few risks run the other way:

    • Hypothermia in kittens, seniors and thin cats. Watch for shivering, cold ears, lethargy.
    • Cardiac and respiratory stress in cats with hypertrophic cardiomyopathy, asthma, or brachycephalic faces. Get vet clearance first.
    • Water in the ear canal, leading to otitis externa. Prevented entirely by never wetting the head.
    • Corneal injury from shampoo in the eye. Flush with plain water or sterile saline and call a vet if the cat squints or paws at it.
    • Feline idiopathic cystitis, which stress can trigger. Watch the litter box for 48 hours afterwards. A male cat straining without producing urine is an emergency.

    If a bath goes badly wrong

    Stop, secure the cat somewhere safe and warm, then deal with your own injury. A wet cat loose in the house is a problem, but an untreated hand bite is a bigger one.

    Tell your vet if the cat drew blood in a way that surprised you. Sudden aggression in a previously tolerant cat sometimes has a medical cause, including pain, hyperthyroidism, or hypertension. Worth ruling out before the next attempt.

    Rebuilding Trust After a Bath That Went Badly

    Some baths go wrong. The cat panicked, you got scratched, and now they're under the bed and won't come out. That's recoverable, but only if you handle the next few days properly.

    The first 48 hours: do less, not more

    The instinct is to make it up to them. Resist it.

    Chasing a stressed cat with treats and apologies keeps them in a heightened state. What they need is control over their own space and no further demands.

    • Leave the hiding spot alone. Under the bed is fine.
    • Put food, water and a litter tray within easy reach of where they're hiding.
    • Don't pick them up. Not once, for at least 24 hours.
    • Keep the household quiet. No vacuuming, no visitors.
    • Let them come to you. When they do, don't grab.

    Most cats reappear within 6 to 24 hours and act largely normal. Some take two or three days. Both are within range.

    What to watch for

    Normal recovery looks like hiding, a skipped meal, some extra grooming, and a bit of flinchiness. It resolves.

    Call your vet if you see any of these instead:

    • No food for more than 24 hours (hepatic lipidosis is a real risk in cats who stop eating, particularly overweight ones)
    • Repeated trips to the litter tray with little or no urine produced
    • Straining, crying in the tray, or blood in the urine
    • Continued hiding past 72 hours
    • New aggression toward people or other cats in the house
    • Overgrooming to the point of bald patches

    That urinary list matters most. A blocked male cat is life-threatening within hours.

    Fixing the bathroom association

    If the only reason your cat ever enters the bathroom is to get wet, the room itself becomes the trigger. That's easy to undo with a bit of patience.

    Start about a week after things have settled:

    1. Prop the door open and leave it open. No mystery, no ambush.
    2. Toss a few treats onto the bathroom floor once a day. Don't follow the cat in.
    3. Feed one meal in the doorway, then just inside, then further in over a fortnight.
    4. Play in there. A wand toy session in the bathroom rewrites the association fast.
    5. Sit in there reading with the cat present and nothing happening.

    The goal is a cat who wanders into the bathroom of their own accord. That's your green light for the next attempt.

    Rebuilding handling tolerance

    Baths often damage general handling confidence, not just bathroom tolerance. Rebuild it deliberately.

    • Touch a paw, treat, stop. Three seconds, twice a day.
    • Brush for ten seconds, treat, stop. Build to a minute over two weeks.
    • Practise the towel wrap with no bath attached. Wrap, treat, unwrap, release.
    • Do a nail trim on one claw only, then stop and reward.

    Every session ends before the cat wants it to. That's the whole trick.

    When to hand it over

    If two home attempts have failed, then stop trying at home. You're not going to win the third one, and each failure makes the cat harder to handle in general.

    Book a feline-experienced groomer or your vet, and be upfront about what happened. They'd far rather know in advance than discover it mid-groom.

    Plenty of cats are simply not candidates for home bathing, and recognising that early protects the relationship you've got with them.

    How Often Should You Actually Do This?

    For most cats, the honest answer is almost never. Bathing frequency depends entirely on coat type and whether there's a medical protocol running.

    Frequency by cat type

    Cat typeBathing frequencyReasoning
    Healthy shorthair, indoorOnly when necessary. Often never.Self-grooming handles it entirely
    Healthy longhair, indoorEvery 3 to 6 months at most, or neverBrushing matters far more than bathing
    Outdoor catAs needed after contaminationNo routine schedule
    Show cat (longhair)Every 2 to 6 weeksCoat presentation, not hygiene
    Sphynx and hairlessEvery 1 to 3 weeksSebum builds directly on skin
    Rex coatsEvery 4 to 8 weeksSparse coat, oil accumulates
    Senior who can't groomSpot clean weekly, full bath rarelyMinimise stress, target the problem areas
    Obese catSpot clean the rear and lower back weeklyPhysically unreachable areas
    Medicated protocolPer vet, often twice weeklyFollow the prescription exactly
    Ringworm dipPer vet, until cleared by cultureUsually a multi-week course

    What happens when you bathe too often

    Over-bathing creates the exact symptom people bathe to fix.

    Repeated shampooing strips sebum faster than the skin can replace it. The result is dryness, flaking and itching. The cat then overgrooms the irritated areas, which causes hair loss and sometimes sores.

    Owners see the flaking and reach for the shampoo again. That loop can run for months before anyone breaks it.

    If your cat has dandruff, the answer is almost never another bath. It's a vet check for underlying causes, better brushing, and often a diet with adequate essential fatty acids.

    Brushing is the actual maintenance routine

    This is where the effort belongs. A well-brushed cat rarely needs bathing at all.

    CoatBrushing frequencyTools
    ShorthairWeeklyRubber mitt or soft slicker
    Medium coat2 to 3 times weeklySlicker plus metal comb
    Longhair, dense undercoatDailySlicker, metal comb, dematting comb
    RexWeekly, gentlySoft cloth or very soft brush
    HairlessWipe-down between bathsDamp cloth

    Ten minutes of daily combing on a Persian prevents the mats that would otherwise force a sedated shave-down.

    Seasonal and regional factors

    Shedding increases in spring and autumn in cats with outdoor light exposure. Indoor cats under artificial lighting often shed steadily year-round instead. Either way, brushing frequency rises when shedding does.

    In humid climates, coats dry more slowly and yeast overgrowth is more common, so drying thoroughly matters more. In cold regions, winter bathing needs a properly heated room and a longer confinement period until the cat is dry to the skin.

    In warm, humid areas fleas are a year-round problem rather than a summer one, which affects how often you're combing.

    The bathing log

    Keep a note. It takes thirty seconds and it's genuinely useful.

    Record the date, the method used, how the cat reacted, what worked, and what you'd change. Over a year you'll have a clear picture of what your specific cat tolerates. That's also exactly what a vet or groomer wants to hear when you hand the job over.

    Frequently Asked Questions

    Can I use baby shampoo on my cat?

    No. Baby shampoo is formulated for human skin at around pH 5.5, while cat skin sits closer to pH 6.0 to 7.5. It strips the natural oils and leaves dry, itchy skin.

    Cats then overgroom the irritated area. Use a shampoo formulated specifically for cats instead.

    How do I bathe a cat by myself without getting scratched?

    Trim the front claws two days beforehand and use a mesh bathing bag. The bag contains the claws, gives the cat something to grip, and lets water and shampoo pass through. Fill the tub before bringing the cat in, keep water at 7 to 10 cm, and finish within five minutes.

    Will a bath get rid of my cat's fleas?

    A bath drowns and removes many fleas, but it isn't treatment. Fleas return within days because most of the population lives in carpets and bedding, not on the cat. Follow up with a vet-supplied spot-on or oral product and treat the home environment.

    Never use dog flea shampoo containing permethrin.

    My cat won't stop hiding after a bath. Is that normal?

    Hiding for 6 to 24 hours is normal after a stressful bath. Leave them alone, keep food and a litter tray nearby, and don't pick them up. Call your vet if hiding lasts past 72 hours, if they refuse food for over 24 hours, or if they strain in the litter tray.

    Do indoor cats need baths at all?

    Most healthy indoor cats never need a bath. Their tongues are covered in keratin papillae that work like a comb, and self-grooming keeps the coat clean. Bathe only for a genuine reason: toxic contamination, a vet-prescribed medicated wash, heavy soiling, or a cat who can't groom themselves.

    Is it safe to use a hairdryer on my cat?

    Only on the lowest heat and speed, held at least 30 cm away and kept moving. Cat skin is thinner than human skin and burns more easily. Most water-averse cats find the noise worse than the bath itself.

    Towel drying in a warm room is usually the better choice.

    Your Quick Decision Guide: Pick Your Path in 60 Seconds

    Answer these in order and stop at the first yes.

    1. Is there a toxic substance on the coat?

    Yes: call a vet or poison line now, then wash. Don't wait.

    2. Has a vet prescribed a medicated bath or dip?

    Yes: follow their protocol exactly, including contact time. Ask about doing it at the clinic if your cat struggles.

    3. Is the coat matted anywhere?

    Yes: comb out or clip first. Never bathe a matted cat. If the mats are tight or widespread, book a groomer.

    4. Does your cat bite, or has one drawn blood before?

    Yes: vet clinic or feline-experienced groomer. Ask about pre-visit gabapentin. Do not attempt this at home.

    5. Is the mess localised, like a soiled rear or one dirty patch?

    Yes: damp cloth spot clean. Two minutes, no bathroom required.

    6. Is it general grubbiness or mild odour on a healthy cat?

    Yes: waterless foam or grooming wipes, in two or three short sessions.

    7. Is it a hairless breed on a routine schedule?

    Yes: full bath every one to three weeks, focusing on skin folds and nail beds.

    8. Still need a full water bath, cat is green or amber, and you've got help?

    Then go. Warm room, filled tub, non-slip mat, shoulders back only, five minutes flat.

    The five rules that carry the whole thing

    • Fill the water before the cat enters the room. Never run the tap with them present.
    • Non-slip mat, every single time. Traction beats restraint.
    • Never wet the head. Ears and eyes stay dry.
    • Rinse twice, always. Residue gets licked off.
    • Stop when the growl turns into a yowl. Aborting costs you an afternoon. Pushing through can cost you years.
  • Mastering Do Cats Need Professional Grooming

    Mastering Do Cats Need Professional Grooming

    Let's be honest about something most cat owners won't say out loud: you love your cat, but you have no idea if you're supposed to be brushing them every day, or if a professional groomer is just an expensive luxury. The short answer is that it depends entirely on the cat. The long answer involves coat types, health risks, and a few hard truths about what happens when grooming gets skipped.

    As of 2026, veterinary dermatology research consistently points to one fact: a cat's coat is a health organ, not just a style statement. Whether you need a groomer isn't about aesthetics. It's about whether your cat's skin stays healthy, whether mats are pulling at their flesh, and whether you're catching problems early enough to avoid a vet visit.

    So, do cats need professional grooming? For some, absolutely. For others, a solid home routine is perfectly fine.

    Let's break down exactly where your cat falls, and what to do about it.

    Quick Answer

    The answer depends on your cat's coat length, age, and health. Long-haired breeds like Persians and Maine Coons need professional grooming every 4 to 6 weeks. Most short-haired cats can manage with consistent at-home brushing.

    Professional grooming is essential when mats form close to the skin. Skipping grooming can lead to painful skin infections and hidden health issues.

    Why This Matters More Than You Think: The Health Risks of Skipping Grooming

    cat matted fur pelted coat

    Image source: Bing (Web (fair-use with source credit))

    Most people think of grooming as a cosmetic issue. A little shedding, maybe some fur on the couch, no big deal. But when grooming gets skipped, the consequences go way beyond a messy house.

    Matted fur isn't just tangled hair. It's a health emergency waiting to happen.

    When mats form tight against the skin, they pull with every movement your cat makes. The skin underneath becomes bruised, irritated, and prone to infection. In severe cases, mats cut off circulation completely.

    That's how you end up with dead tissue, abscesses, and a vet bill that makes a $100 grooming session look like the bargain of the century.

    Mats also trap moisture, dirt, and parasites close to the skin. Fleas love matted fur. So do fungal infections and bacterial overgrowth.

    A cat that can't groom properly because the fur is pelted literally can't maintain basic hygiene. This leads to urine scald, fecal matting around the rear, and an unhappy, uncomfortable cat.

    According to the American Veterinary Medical Association (AVMA), skin conditions are among the top five reasons cats visit the vet. Many of those conditions start with neglected grooming. A professional groomer isn't just cutting hair.

    They're checking for lumps, bumps, skin lesions, and ear infections that you might never notice under a thick, matted coat.

    And here's the thing: cats hide pain incredibly well. By the time you notice something is wrong, it's often been going on for weeks. Regular grooming, whether at home or with a professional, is one of the few ways to catch these issues early.

    How Cats Self-Groom — and Where That System Breaks Down

    Cats are fastidious self-groomers. They spend anywhere from 30% to 50% of their waking hours grooming themselves. That's a significant amount of time dedicated to keeping their coat clean, distributing natural oils, and removing loose hair.

    The anatomy behind this is fascinating, but it's also the reason things go wrong.

    Why Your Cat's Tongue Isn't Enough

    A cat's tongue is covered in tiny, backward-facing barbs called papillae. These barbs act like a natural comb, catching loose fur and debris. They're excellent for removing surface dirt and dead hair.

    They're terrible at handling thick undercoats or dealing with deeply embedded mats.

    Here's where the system breaks down. A cat's tongue can only reach certain parts of its body. If you watch your cat groom, you'll notice they easily reach their chest, front legs, and face.

    But the back, the base of the tail, and the rear end? Those get less attention. For a healthy, flexible cat, this isn't a big deal.

    They can contort enough to reach most spots.

    But for senior cats, overweight cats, and cats with arthritis, reaching those areas is physically painful or impossible. The grooming that used to keep their coat healthy just stops happening. That's when mats start forming, and they form fast.

    The Hidden Problem: When Mats Turn Into Painful Pelted Fur

    A mat starts as a small tangle. You might not even notice it under the top layer of fur. Within days, that tangle picks up more loose hair, dirt, and dander.

    It tightens, pulls closer to the skin, and becomes what groomers call "pelted."

    Pelted fur is a dense, solid mass of hair that's basically welded together. It's tight to the skin, and it hurts. Imagine wearing a sweater that shrinks slowly over time, pulling tighter and tighter until you can't move comfortably.

    That's what a pelted cat experiences.

    The normal lifespan of a mat is about two to three weeks from the first tangle to a full pelt. That timeline varies by breed, coat texture, and how much the cat moves. But once a pelt forms, brushing at home is no longer an option.

    Combing through it pulls the skin painfully. The only safe solution is shaving it off with clippers, and that's a job for a professional.

    Pelting isn't just a cosmetic problem. The skin under a pelt is often red, irritated, and infected. According to the Cornell Feline Health Center, skin infections under mats are common and frequently require veterinary treatment.

    In severe cases, the skin can develop sores, hot spots, or even necrosis from restricted blood flow.

    The Cat Grooming Decision Tree: Do YOU Need a Pro?

    So how do you know where your cat falls? Let's walk through the decision process step by step. This isn't a one-size-fits-all answer.

    It's a set of variables you can check right now, and the answers will tell you exactly what you need.

    Branch 1: Coat Type and Length

    The single biggest factor is your cat's coat.

    Short-haired cats (Domestic Shorthair, Siamese, Cornish Rex):

    These cats have a simple single coat that sheds lightly year-round. They can usually manage their own grooming with occasional help from you. Weekly brushing keeps shedding under control and reduces hairballs.

    Professional grooming for these cats is usually unnecessary unless they have a health issue or you want a very thorough shed reduction.

    Medium-haired cats (Domestic Mediumhair, some mixed breeds):

    This is the tricky middle ground. Medium-haired cats have a fuller coat that mats more easily than short hair, but less than you'd expect from a longhair. They need brushing two to three times per week.

    Professional grooming every 8 to 12 weeks helps manage the undercoat and catch tangles before they become mats.

    Long-haired cats (Persian, Maine Coon, Ragdoll, Himalayan):

    These cats absolutely need professional grooming. Their coats are dense, and it's nearly impossible to maintain them properly at home without professional tools and techniques. A Persian, for example, has a double coat that requires daily brushing.

    Miss even a few days, and mats start forming. Professional grooming every 4 to 6 weeks is non-negotiable for these breeds.

    do cats need professional grooming

    Image source: Bing (Web (fair-use with source credit))

    Branch 2: Age and Mobility

    Age changes everything when it comes to grooming.

    Kittens (under 1 year):

    Kittens are usually flexible and healthy. They groom themselves well. This is the time to start desensitizing them to brushes, nail trims, and being handled.

    You don't need a professional groomer for a kitten, but early training makes professional grooming much easier later in life.

    Adult cats (1 to 7 years):

    This is the sweet spot. Healthy adult cats with normal mobility can maintain their coat if you help with regular brushing. The decision tree branches here based on coat type.

    A healthy adult domestic shorthair? Skip the groomer. A healthy adult Maine Coon?

    Still needs professional grooms.

    Senior cats (8+ years):

    This is where things change dramatically. As cats age, they lose flexibility. Arthritis makes it painful to twist around and groom their back.

    According to a study published in the Journal of Feline Medicine and Surgery, arthritis affects up to 90% of cats over the age of 12. That means most senior cats are silently struggling to groom themselves.

    If your cat is 8 or older, professional grooming every 6 to 8 weeks is smart. It doesn't just keep the coat healthy. The groomer is also checking for age-related skin issues, lumps, and mobility changes you might miss.

    Overweight cats:

    Obesity makes grooming impossible for many cats. A cat that can't reach its own back or rear area will develop mats quickly. The area around the tail base, the lower back, and the rear end are the first to mat.

    If your cat is overweight, professional grooming every 4 to 6 weeks is worth it.

    Branch 3: Behavior and Temperament

    Here's the uncomfortable truth many owners face. Your cat might not let you groom them.

    Some cats tolerate brushing. Some cats absolutely despise it. If your cat bites, scratches, or runs away at the sight of a brush, home grooming becomes dangerous for both of you.

    Professional groomers are trained to handle difficult cats. They have restraint techniques, specialized tools, and experience working with anxious felines. They also know when a cat is too stressed to continue.

    If your cat is aggressive during grooming attempts at home, don't just give up on grooming entirely. Book a professional session. Explain the behavior in advance.

    A good groomer will work slowly, use minimal restraint, and know when to stop.

    For truly dangerous cats, sedation under veterinary supervision is an option. This is a last resort, but it's safer than trying to force a stressed cat through a grooming session at home.

    Branch 4: Your Time and Home Setup

    Finally, be honest about your own situation.

    Professional grooming takes time. A full groom takes 60 to 90 minutes. You need to be available during that window, or you need to leave your cat at the salon for several hours.

    Mobile groomers come to you, which reduces stress for the cat but costs more.

    Do you have the time to brush a long-haired cat daily? Do you have the patience to deal with mats when they form? Do you have the right tools?

    If the answer to any of these is no, professional grooming is worth the cost.

    Here's a simple way to think about it: professional grooming isn't just for cats that need it. It's for cats whose owners can't provide adequate care at home. There's no shame in admitting that.

    A weekly professional grooming appointment is cheaper than a vet visit for a skin infection.

    Cats That Absolutely Need Professional Grooming

    Let's get specific about which cats need professional grooming. Not "might benefit from," but genuinely need it to stay healthy.

    Long-Haired Breeds (Persian, Maine Coon, Ragdoll, Himalayan)

    These breeds share one trait: they have a dense, double-layer coat that mats relentlessly without daily attention. A Persian cat's coat is a single, fine layer that tangles easily. A Maine Coon has a heavy undercoat that sheds twice a year in massive quantities.

    For these breeds, professional grooming every 4 to 6 weeks is the standard recommendation. The groomer does a proper deshedding treatment, removes the loose undercoat, trims the sanitary area, and checks the skin. They also handle nail trims and ear cleaning, which many owners struggle with at home.

    The cost of this routine is real. Most professional groomers charge $60 to $120 per session for a long-haired cat. That's $720 to $1,440 per year.

    But compare that to the alternative. A single vet visit for a skin infection or severely matted fur can easily cost $200 to $500, and that doesn't fix the problem. The mats will come back.

    Senior and Overweight Cats

    We touched on this in the decision tree, but it deserves emphasis. Senior cats and overweight cats can't groom themselves properly. The physical limitations are the same.

    A senior cat with arthritis can't twist its body to reach its back. An overweight cat can't lift its hind legs to clean the rear area. Both scenarios lead to the same problem: mats, urine scald, and unhygienic conditions around the tail and rear.

    Professional grooming for these cats isn't a luxury. It's medical care. The groomer keeps the coat short enough to prevent matting, keeps the rear area clean, and makes the cat comfortable.

    For senior cats, groomers often recommend a "sanitary shave" every 4 to 6 weeks.

    Cats With Medical Conditions

    Cats with diarrhea, urinary issues, or skin conditions have higher grooming needs. Loose stool that gets stuck in the fur around the rear creates a perfect environment for bacteria. Urine soaking into matted fur causes urine scald, a painful skin condition.

    If your cat has any of these conditions, discuss grooming with your vet. In many cases, a professional groomer will work alongside your vet. The groomer keeps the cat clean in a way that supports the medical treatment.

    Show Cats and Breed Standards

    This is the one group where grooming is primarily about aesthetics. Show cats need to meet breed standards for coat condition, length, and overall appearance. That standard grooming is almost always done by a professional.

    If you're showing cats, you already know this. Your breeder or show coordinator will have specific recommendations for grooming frequency and technique. Follow their guidance.

    Cats That Can Skip the Groomer (and How to Manage at Home)

    Not every cat needs a professional. If your cat falls into the categories below, you can absolutely handle grooming at home. You just need the right tools and a consistent routine.

    Short-Haired Breeds

    Short-haired cats like Domestic Shorthairs, Siamese, and Cornish Rex typically don't need professional grooming. They have a short, single coat that sheds lightly. Cats manage most of their own grooming.

    Consistency is what helps you skip the groomer for these cats. Read on for the full home grooming toolkit.

    Cats That Tolerate Home Brushing

    If your cat sits still while you brush them, that's a big green flag. It means you can handle grooming at home without a professional.

    For short-haired cats, a weekly 5 to 10 minute brush is enough. Focus on the back, sides, and tail. Use a rubber curry brush or a soft bristle brush.

    This removes loose hair, distributes natural oils, and reduces shedding around the house.

    For medium-haired cats, brushing two to three times per week is non-negotiable. Miss a week, and you'll find mats forming behind the ears, in the armpits, and around the tail base.

    For long-haired cats that tolerate home brushing? You can extend the time between professional grooms, but you can't eliminate them entirely.

    The At-Home Grooming Toolkit You'll Actually Need

    cat grooming tools slicker brush

    Image source: Bing (Web (fair-use with source credit))

    Here's the kit you need to keep your cat well-groomed at home:

    ToolPurposeBest For
    Slicker brushRemoves loose fur and tanglesDaily brushing, all coat types
    Undercoat rakeRemoves dead undercoat hairDouble-coated breeds, shedding seasons
    De-shedding toolReduces loose hair before it fallsHeavy shedders, seasonal shedding
    Greyhound combDetects tiny mats and tanglesLong-haired cats, finish work
    Rubber curry brushGentle massage, removes surface furShort-haired cats, desensitization
    Nail clippersTrims claws safelyAll cats, every 2 to 4 weeks
    Cat-safe shampooFor occasional baths onlyWhen needed, not on a schedule

    Set a weekly grooming routine. Brush your cat for 10 to 15 minutes, check the coat for mats, and trim nails monthly. Some cats still need a professional groom for a full deshed, even with perfect home care.

    Professional Grooming Costs: What to Expect

    The price of cat grooming varies widely based on where you live, what services you need, and whether you're visiting a salon or having someone come to you.

    Salon Prices vs. Mobile Grooming

    A standard professional grooming session at a brick-and-mortar salon typically runs between $50 and $120. That price usually includes a bath, blow dry, brush-out, nail trim, ear cleaning, and a sanitary trim. Add-ons like a lion cut or de-matting service will push the total higher, sometimes by $20 to $50.

    Mobile groomers charge a premium for the convenience of coming to your driveway. Expect to pay 20% to 30% more than salon rates. A mobile session for a long-haired cat can easily land at $90 to $150.

    That premium buys you something real: your cat stays in a familiar environment, skips the car ride, and avoids contact with other animals.

    Here's a rough pricing breakdown based on aggregate industry data from major grooming franchises:

    ServiceSalon Price RangeMobile Price Range
    Basic groom (bath, dry, brush, nails)$50–$80$70–$110
    Full groom for long-haired cat$75–$120$95–$150
    Lion cut / full body shave$90–$150$120–$180
    De-matting (per session)$85–$130$110–$160
    Sanitary trim only$15–$25$25–$40
    Nail trim only$10–$15$15–$25

    The Hidden Cost of Sedated Grooming

    Some cats absolutely cannot be groomed awake. They're too aggressive, too terrified, or so severely matted that the process would cause them significant distress. For these cats, sedation is the safe answer.

    Sedated grooming isn't done at a grooming salon. It's done at a veterinary clinic. A licensed veterinarian administers the sedation, monitors your cat throughout the procedure, and ensures they recover safely before you take them home.

    The cost reflects that medical oversight. Sedated grooming typically runs $150 to $300 or more, depending on the clinic, the complexity of the groom, and the type of sedation used. That price sometimes includes the groom itself, but many clinics charge separately for the sedation and the grooming service.

    Is it worth it? In our research, veterinary professionals consistently say yes for genuinely dangerous cases. Trying to groom a severely aggressive cat without sedation risks injury to the cat, the groomer, and you.

    A bite injury can mean stitches, infection, or worse. The emotional and financial cost of that scenario far exceeds the cost of professional sedation.

    If your vet recommends sedated grooming, don't delay. Severe matting won't resolve on its own. Every week you wait makes the situation worse and the eventual groom more complicated.

    What Happens During a Professional Cat Grooming Session?

    professional cat grooming session clippers

    Image source: Bing (Web (fair-use with source credit))

    If you've never booked a professional groomer, knowing what happens in that session helps you prepare your cat and know what to expect.

    Step-by-Step Breakdown of a Full Groom

    Here's what a typical professional cat grooming session looks like:

    Step 1: Pre-grooming Assessment

    The groomer starts by examining your cat's coat, skin, ears, and nails. They check for mats, fleas, skin lesions, and anything unusual. If they find severe matting or a health concern, they'll stop and discuss it with you.

    Step 2: Brushing and De-matting

    The groomer brushes out loose fur and works on any tangles. For severely matted coats, they use a de-matting tool or, if the mat is too tight, they'll move straight to clippers.

    Step 3: Bathing

    Cats get a warm bath with cat-safe shampoo. The groomer works the shampoo through the coat, focusing on skin health. Rinsing is thorough, because lingering soap irritates feline skin.

    Step 4: Drying

    Drying is a slow, careful process with low-heat dryers designed for cats. Some cats need to be kennel-dried, while others tolerate hand-drying.

    Step 5: Clipping and Trimming

    If your cat needs a sanitary trim or a lion cut, this happens after the bath. The groomer uses professional clippers with new, sharp blades to avoid skin irritation.

    Step 6: Nail Trim and Ear Cleaning

    Finally, nails get trimmed, and ears get a gentle clean. If the groomer sees redness or discharge, they'll recommend a vet visit.

    How to Tell If a Groomer Is Cat-Safe (Red Flags to Watch For)

    Not everyone who calls themselves a groomer has experience with cats. Before you book, ask these questions:

    • Do you specialize in cats, or do you primarily groom dogs? Some groomers charge double for cats because they genuinely dislike grooming them.
    • How do you handle a stressed or aggressive cat? The right answer involves patience, breaks, and possibly rescheduling. The wrong answer involves sedation or force.
    • What tools do you use? Are the clipper blades sharp? Are they using cat-specific shampoo?
    • Do you have separate cat-only grooming areas? Some cats panic at the sight and sound of barking dogs.
    • What happens if my cat gets injured? You want a groomer with liability insurance and a clear protocol.
    • Can I stay during the session? Many cats do better with their owner nearby. A good groomer will work with your preference.

    If anything feels off, find another groomer. Your cat's safety is non-negotiable.

    The Risks of Grooming a Cat at Home: Mistakes That Send Cats to the Vet

    Home grooming is great for maintenance. It's dangerous when you try to handle problems that need professional tools and training. Here are the most common mistakes that turn a simple grooming session into an emergency vet visit.

    Scissor Injuries and Skin Tears

    This is the big one. Cat skin is remarkably thin and elastic. A pair of scissors can easily puncture or tear it, especially when you're working around mats.

    A mat pulls the skin up into a tent shape. If you slide scissors underneath that tent, you're one snip away from cutting the skin.

    The result is a bleeding wound that needs stitches. Worse, it's positioned in a place your cat can't easily reach to clean, which raises the risk of infection. And if the cut is deep enough, you're looking at a serious overnight vet bill.

    The rule is simple: never use scissors on a cat, period. If a mat is too tight to brush out, that's a job for clippers, not scissors. And if you don't have a safe clipper setup at home, that's a job for a professional.

    Using the Wrong Tools (Human Clippers, Dog Brushes)

    Cat hair is different from dog hair. Cat skin is different from dog skin. So why would you use the same tools?

    Human clippers are designed for human hair, which grows at a different density and texture. They overheat quickly on cat fur, and they're not designed to handle the undercoat. A clogged or overheated clipper can pull hair painfully or cause clipper burn, a painful skin irritation that turns red and sore.

    Dog brushes are another common mistake. Many dog brushes, especially slicker brushes designed for thick dog coats, have harsh wire bristles that are too aggressive for a cat's thin skin. They can cause micro-tears in the skin, leading to irritation and, potentially, infection.

    Stick to tools specifically designed for cats. Look for brushes with rounded tips on the bristles and clippers with blades appropriate for cat fur.

    Bathing Gone Wrong

    Cats don't need baths the way dogs do. They groom themselves, and a bath strips away the natural oils that keep their coat and skin healthy. When a bath is necessary, like after a flea treatment or if your cat rolled in something toxic, it needs to be done right.

    The most common mistake is using human shampoo. Human shampoo has a different pH level than cat shampoo, and it disrupts the natural balance of a cat's skin. It can cause dryness, itching, and flaky skin.

    Some human shampoos contain ingredients that are toxic to cats, like essential oils or artificial fragrances.

    Another mistake is bathing a cat that's severely matted. Water makes mats tighter and harder to remove. A matted cat should be brushed or clipped before a bath, never after.

    If you're dealing with mats, skip the bath entirely and book a professional groom.

    At-Home Grooming vs. Professional Grooming: The Honest Comparison

    Now that you understand the costs and risks, let's put the two approaches side by side. There's a time and place for both, and the right answer depends on your cat, your skills, and your budget.

    Frequency and Maintenance Schedule

    At-home grooming is best for daily or weekly maintenance. A quick 10-minute brush session keeps the coat fresh, distributes natural oils, and catches small tangles before they become mats. It's also a great bonding activity.

    Professional grooming is best for deep, comprehensive care. A groomer does a full deshed treatment that removes far more loose undercoat than a home brush ever could. They clean the ears safely, trim the nails, and give your cat a proper sanitary shave.

    For long-haired cats, think of it this way: professional grooming every 4 to 6 weeks replaces the need for daily, intensive brushing. You'll still brush at home between sessions, but the heavy lifting is done by the groomer.

    TaskAt HomeProfessional
    Daily brushingYesNo
    Weekly brushingYesNo
    Full deshed treatmentNoYes
    Sanitary trimDifficultYes
    Nail trimPossible with practiceYes
    Ear cleaningRiskyYes
    De-mattingDangerousSafe
    BathOccasionalYes

    When "Good Enough" Is Actually Fine

    Here's the flip side. For a healthy, short-haired cat, professional grooming is often overkill. A weekly brush and monthly nail trim at home will keep that cat perfectly healthy.

    Paying $80 for a professional groom on a cat that doesn't need it is a waste of money.

    The same goes for cats that hate car rides and strangers. The stress of a grooming appointment can be worse than skipping a professional session. For these cats, the best thing you can do is build a solid home grooming routine and accept the occasional mat as a manageable issue, as long as you stay on top of brushing.

    The decision really comes down to coat type and health status. Long-haired breeds need professional care. Short-haired healthy cats don't.

    Senior cats, overweight cats, and cats with medical conditions benefit from professional grooming even if their coat is short.

    The Hybrid Approach That Most Owners End Up Using

    The best strategy is to combine both. Start with a professional groom to get the coat healthy and free of mats. Then maintain with a home brushing routine.

    Book a professional session every 4 to 8 weeks, depending on your cat's coat type, to handle the deshed and check for issues.

    This approach is what most experienced cat owners use. It balances cost with health, keeps the cat comfortable, and ensures the coat never gets to a crisis point. If you're in the "maybe" category, this is the path we recommend.

    Common Grooming Emergencies: When to Call the Vet Immediately

    Grooming problems can escalate quickly. Some issues need professional attention right away. Here's when to skip the groomer and head straight to the vet.

    Severe Matting That Cuts Off Circulation

    You'll notice a pelted cat by how it moves. If your cat has a thick, tight mat that stops them from walking normally, or if they flinch when you touch a specific area, that mat is likely pulling on the skin and restricting blood flow. This is an emergency.

    The longer it goes on, the higher the risk of skin necrosis.

    A vet can safely remove the mat under sedation and assess the skin underneath. What looks like a simple mat might hide a bruise, a wound, or an infection.

    Skin Infections Hidden Under Mats

    Mats don't just trap dirt. They trap moisture, which creates the perfect environment for bacterial and fungal growth. If you notice a foul smell coming from your cat's fur, that's a red flag.

    So is an area your cat obsessively licks or bites at.

    Skin infections under mats are painful. They need veterinary treatment, usually antibiotics or antifungals. After the infection clears, you can book a professional groomer to address the underlying matting.

    Signs of Grooming-Related Injury

    Did you accidentally nick your cat during a home grooming session? It happens. Most shallow cuts will stop bleeding quickly.

    But if the bleeding doesn't stop after a few minutes, if the wound is deep, or if your cat starts licking or chewing at the area excessively, it's time for the vet.

    Never wrap a cat's wound tightly. Cats need to breathe through their skin, and tight bandages trap heat. If you're worried, call your vet.

    Keeping calm and seeking help promptly reduces the risk of complications.

    Sudden Excessive Grooming or Fur Loss

    Grooming isn't always a physical problem. It can be a behavioral one.

    If your cat suddenly starts grooming one area obsessively, to the point of hair loss or bald patches, that's a vet visit, not a groomer visit. Excessive grooming can signal stress, anxiety, allergies, or pain. A vet can rule out medical causes and help you address the behavioral ones.

    Real-Life Scenarios: What Other Cat Owners Actually Do

    Theory is useful, but seeing the decisions in context makes everything clearer. Here are three common scenarios with recommendations based on professional guidance and peer-reviewed veterinary research.

    The Persian Owner Who Grooms Monthly

    Sarah owns a 4-year-old Persian named Mochi. Mochi has the classic Persian double coat, which means he mats frustratingly fast. Sarah brushes him daily with a slicker brush and a wide-tooth comb.

    She books a professional groom every five weeks.

    The cost runs about $100 per session, or $1,200 a year. Sarah considers it part of Mochi's upkeep, as essential as food and litter. She's never dealt with a mat or a skin infection since she started this routine.

    Worth every penny.

    The Rescue Cat With Severe Matted Fur

    Tom adopted a 7-year-old domestic longhair from a shelter. The cat, now named Whiskers, arrived with severe pelted mats across his back and tail. The mats were so tight they were pulling the skin.

    Tom took Whiskers to the vet for an assessment. The vet recommended sedated grooming to remove the mats safely and assess the skin beneath. The procedure cost $280, including the sedation and the groom.

    Whiskers had some raw skin under the mats, but no major infection. He recovered quickly with a short course of antibiotics. Tom now brushes Whiskers twice a week and books a professional groom every eight weeks.

    The mats haven't returned.

    The Low-Maintenance Domestic Shorthair

    Priya owns a 3-year-old domestic shorthair named Luna. Luna has a short, single coat that sheds moderately. She tolerates brushing but doesn't love it.

    Priya brushes Luna once a week for ten minutes. She trims Luna's nails every month, careful to avoid the quick. She's never taken Luna to a professional groomer.

    Luna doesn't need it. Her coat stays healthy, and she doesn't mat. Priya's total grooming tool investment is about $40.

    That's the entire annual budget.

    Building Your Cat's Grooming Schedule: A Month-by-Month Plan

    You've got the tools, the knowledge, and the commitment. Now let's put it all together into a concrete schedule you can actually follow. A grooming calendar removes guesswork and keeps you consistent, which is what your cat really needs.

    The Monthly Grooming Calendar

    Here's a practical template that works for most cats. Adjust it based on your cat's coat type, age, and health status.

    WeekTasksDuration
    Week 1Full brush, check for mats, nail trim15–20 minutes
    Week 2Quick brush, ear check, treat reward10 minutes
    Week 3Full brush, coat inspection, nail trim if needed15–20 minutes
    Week 4Professional groom or deep at-home session60–90 minutes

    Week 1: The Deep Dive

    Start each month with a thorough grooming session. Brush the entire coat from head to tail. Run a wide-tooth comb through the fur to catch any tangles.

    Check the ears for redness, discharge, or odor. Trim the nails if you can see the quick clearly.

    This is also the time to check for fleas, ticks, and skin irregularities. Run your fingers through the fur to feel for bumps. Look for any areas where the fur is thinning or patchy.

    If you find anything concerning, book a vet visit.

    Week 2: The Maintenance Pass

    A lighter session this week. A quick brush to keep the coat fresh and distribute natural oils. Check the ears again.

    No need to trim nails unless they've grown quickly.

    This is a good time to practice handling. Lift your cat's paws, touch their ears, and open their mouth briefly. This reinforces the desensitization training and makes future grooming easier.

    Week 3: The Follow-Up

    Same as Week 1, but lighter. Full brush, coat inspection, and nail trim if needed. Use this session to catch any tangles before they have a chance to become mats.

    If you notice your cat is shedding more than usual, this is a good week to use the undercoat rake. Focus on the areas where the undercoat is thickest, like the back and the sides.

    Week 4: The Professional Session or Deep Clean

    If your cat needs professional grooming, this is the week to book it. Long-haired cats, seniors, and overweight cats should have their professional session every 4 to 6 weeks. That aligns perfectly with this monthly schedule.

    If your cat doesn't need a professional, this is the week for a deep at-home session. Bathing, if needed, happens here. So does a full deshedding with the undercoat rake and a complete nail trim.

    Seasonal Grooming Adjustments

    Cats need different grooming care as the seasons change. A routine that works in winter doesn't always carry into spring.

    Spring: The Heavy Shedding Season

    Spring is the big one. As the days lengthen and temperatures rise, cats shed their winter undercoat. This shedding is intense.

    For heavy shedders, this is your busiest season.

    Professional grooming every 4 weeks during spring helps dramatically. A professional deshedding treatment removes far more loose undercoat than home brushing can. Expect to see a significant reduction in fur around the house if you book a spring groom.

    Summer: Thin Coats and Sun Exposure

    Once the heavy shedding settles, summer grooming is lighter. Cats still need brushing, but the coat is thinner. For cats that spend time outdoors, check for fleas, ticks, and burrs.

    For indoor cats, keep brushing to manage what's left of the shed.

    If your cat has a lion cut, extra caution is needed. The exposed skin is more sensitive to sunburn. Limit time outdoors during peak UV hours and consider a post-groom sunscreen for cats, specifically designed by a vet.

    Fall: The Coat Builds Back Up

    As summer ends, your cat's coat starts preparing for winter. You'll see a gradual increase in shedding and some coat thickening. Keep up with weekly brushing to manage the transition.

    Winter: Maintenance Mode

    Winter grooming is about maintenance, not heavy shedding. Brush regularly to keep the coat free of tangles and static, which increases in dry winter air. Indoor heating reduces indoor humidity, which leads to more static and drier skin.

    If your cat spends time outdoors, winter grooming is less critical. If your cat is strictly indoor, winter is a good time for a professional groom to keep the coat and skin healthy.

    Regional Grooming Considerations

    Where you live affects how your cat's coat behaves. Climate, indoor humidity, and access to outdoor space all play a role.

    High Humidity Regions

    In humid climates, mats form faster. Moisture in the air makes the coat sticky and prone to tangles. Long-haired cats in these regions need more frequent professional grooming.

    The extra moisture also increases the risk of skin infections under mats, so catching them early is important.

    Dry, Arid Regions

    Dry climates have the opposite effect. Low humidity increases static electricity, which makes fur fly around and brush out poorly. It can also dry out your cat's skin, leading to flakiness and itchiness.

    In these regions, a humidifier in the home can help reduce static and improve coat condition.

    Urban vs. Rural Settings

    Urban cats that spend time outdoors pick up more chemicals and debris from their environment. More frequent bathing or grooming helps remove these contaminants. Rural cats encounter more plant material, burrs, and parasites, which require extra attention when brushing during the warmer months.

    Grooming as Preventive Healthcare: A Long-Term Investment

    We've covered a lot of ground. Let's step back and look at the bigger picture.

    The Cost Comparison You Need to See

    Grooming ApproachMonthly CostAnnual CostHealth Risks
    No grooming$0$0High: mats, infections, missed health issues
    At-home only$5–$15 (tools)$60–$180Moderate: depends on skill and consistency
    Professional, short-haired$50–$80 per session$600–$960Low
    Professional, long-haired$75–$120 per session$900–$1,440Very low

    The table doesn't include the cost of treating problems that arise from neglect. A single severe matting episode can cost $200 to $500 at the vet. A skin infection can cost more.

    The annual cost of professional grooming is often less than the cost of one emergency vet visit.

    The Emotional Return

    There's also an emotional benefit you can't measure in dollars. A cat that's comfortable in its skin is a happier cat. A cat that doesn't wince when you pet them is a joy to be around.

    A cat that's free of mats, clean, and healthy is a pleasure to live with.

    That's the return on your grooming investment. It's not just a clean coat. It's a better relationship with your cat, fewer vet bills, and the peace of mind that comes from knowing you're doing right by the animal you love.

    Frequently Asked Questions

    How often should a cat be professionally groomed?

    Long-haired cats need professional grooming every 4 to 6 weeks. Short-haired cats can go 8 to 12 weeks, or skip it entirely if you maintain a good home brushing routine. Senior cats and overweight cats benefit from more frequent grooming regardless of coat type.

    Does grooming hurt cats?

    Professional grooming should not hurt. A skilled groomer uses sharp, clean tools and works slowly to minimize stress. Grooming a severely matted cat can be uncomfortable during the de-matting process, which is why sedation is sometimes necessary.

    Home grooming can hurt if you use the wrong tools or handle mats aggressively.

    Can I use dog clippers on my cat?

    No. Dog clippers are designed for thicker, coarser fur and a different skin type. They can pull cat hair painfully, overheat, and cause clipper burn.

    Use only clippers designed for cats or have a professional handle the clipping.

    Is it safe to sedate a cat for grooming?

    Sedation is safe when administered by a licensed veterinarian in a controlled environment. Groomers cannot legally sedate your cat. If your cat needs to be sedated, the grooming takes place at the vet's office.

    Your vet will assess your cat's health before recommending sedation.

    Do indoor cats need less grooming than outdoor cats?

    Indoor cats need more grooming, not less. They don't have dirt and vegetation to wear down their coats, so loose fur accumulates faster. The low humidity inside most homes also increases static and skin dryness.

    Regular brushing and, for long-haired breeds, professional grooming is important for all cats.

    What should I do if I find a mat on my cat?

    Don't try to cut it out with scissors. The risk of cutting your cat's skin is too high. Try to brush it out gently with a slicker brush or de-matting tool.

    If the mat is tight against the skin, book a professional groomer. They have the tools and training to remove it safely.

    Final Verdict: What Your Cat Needs, Based on Your Situation

    You now have a complete picture of cat grooming, from understanding when a professional is essential to building your at-home toolkit. The decisions ahead aren't about one-size-fits-all rules. They're about what your cat needs at this point in their life.

    Your Quick Reference for Making Grooming Decisions

    If your cat is long-haired, senior, overweight, or has a medical condition: Book a professional groom right away. Schedule it every 4 to 6 weeks. Use home brushing as a supplementary maintenance tool.

    If your cat is short-haired, healthy, and between the ages of 1 and 7: Skip the groomer initially. Start a weekly home brushing routine. Monitor the coat for tangles, mats, and skin issues.

    Book a professional groom only if you see signs of matting or if you want a thorough deshedding session.

    If your cat is a kitten: Start desensitization training now. Introduce grooming tools slowly and positively. Schedule a professional groom only for training purposes.

    One Last Thing to Remember

    Grooming isn't about making your cat look pretty. It's about keeping them comfortable, healthy, and happy. A well-groomed cat moves freely, feels good, and is less likely to develop the painful skin conditions that bring so many cats to the vet every year.

    A well-groomed cat is also a cat you notice. You notice the lump behind their ear before it becomes a problem. You notice the bald spot forming on their flank.

    You notice the subtle changes in coat condition that signal underlying health issues. That's the real value of grooming, professional or otherwise.

    Start where you are. Book that first appointment if your cat needs it. Buy a decent brush and use it.

    Build the routine that fits your life and your cat's personality. Your cat doesn't need perfection. They need consistency, safety, and someone paying attention.

    That's the whole secret. The rest is just fur.

  • Mastering Cat Not Grooming Itself

    Mastering Cat Not Grooming Itself

    cat not grooming itself

    Image source: Bing (Web (fair-use with source credit))

    If your cat has stopped grooming itself, you're probably noticing a dull coat, stray litter clinging to the fur, or a smell that wasn't there before. It's easy to brush off as laziness or old age, but a cat not grooming itself is rarely a standalone habit. It's usually a symptom of something else going on underneath.

    In our research, grooming behavior in healthy cats takes up 30 to 50 percent of their waking hours. That's not vanity. It's a core biological function tied to temperature regulation, skin health, and stress relief.

    When that behavior stops, something physical or environmental is almost always behind it. Let's walk through what that means, what to look for, and exactly when to worry.

    Quick Answer

    A cat that stops grooming is telling you something is wrong. Pain, dental disease, arthritis, obesity, or stress are the most common culprits. Don't wait weeks to see if it improves.

    Check the cat's mouth, mobility, and skin at home, then book a vet appointment within 48 hours. Sudden loss of grooming combined with appetite loss is an emergency.

    First, Know What Normal Grooming Looks Like

    Before you can tell if something's off, you need a baseline. Cats are meticulous creatures. They spend hours licking, nibbling, and combing their fur with their tongue.

    It's not just about looking good. Grooming distributes natural skin oils across the coat, which keeps the fur waterproof and insulated. It also removes loose hair, dirt, and parasites.

    A healthy cat grooms multiple times a day. You'll see bursts of licking after meals, upon waking, and before settling down to sleep. The coat should look smooth, shiny, and relatively clean, even on long-haired breeds.

    If you run your hand over the fur, it should feel soft and lie flat.

    Here's what normal grooming looks like in practical terms:

    • The cat can reach its back, flanks, and tail base
    • The coat has no visible mats, clumps, or debris
    • There's no lingering odor
    • The skin underneath is pink, clean, and free of flakes
    • The cat licks its paws and washes its face at least a few times daily

    Age and breed change the picture slightly. Senior cats may groom less thoroughly than kittens, but they still groom. Long-haired breeds like Persians and Maine Coons need more effort to keep their coats tidy, so matting can appear faster when grooming declines.

    The key distinction is this. A cat that grooms less often but still maintains some routine is different from a cat that has completely stopped. The former might be slowing down with age.

    The latter is a red flag.

    Watch for the gradual versus sudden angle too. A slow decline over months points to chronic issues like arthritis or dental pain. A sudden stop over a day or two suggests injury, illness, or acute stress.

    Both matter, but they lead down different paths.

    How to Tell "Less Grooming" from "No Grooming at All"

    This distinction matters more than you'd think. "Less grooming" means the cat still washes its face and paws but skips the hard-to-reach areas. It might have a slightly greasy lower back or a small mat behind the ears.

    That pattern often points to mobility issues.

    "No grooming at all" is different. The coat becomes dull and oily across the entire body. Dandruff builds up.

    Litter and debris stick to the fur. The cat may develop a strong musky smell. This level of neglect almost always signals significant pain, illness, or depression.

    Track what you see for 24 to 48 hours. Is the cat eating, drinking, and using the litter box? Does it react negatively when you touch certain areas?

    Can it still jump onto furniture? The answers to these questions tell you which category you're dealing with.

    The 6 Most Common Reasons Your Cat Stopped Grooming

    There's no single answer for why cats stop grooming. But after working through veterinary research and clinical case studies, the same six causes keep surfacing. Some are mechanical.

    Some are medical. Some are purely emotional. Let's break them down one by one.

    1. Pain and Arthritis (Especially in Seniors)

    This is the most common reason cats stop grooming, and it's also the most overlooked. Cats hide pain instinctively. In the wild, showing weakness makes you prey.

    So your cat will sit quietly, not limp or yowl, and simply stop doing things that hurt.

    Grooming requires flexibility. A cat needs to twist its neck, rotate its spine, and lift its hind legs to reach its back and rear. When arthritis inflames the joints, those movements become painful.

    The cat doesn't stop grooming because it's lazy. It stops because every lick hurts.

    Arthritis in cats is underdiagnosed. Studies suggest that up to 90 percent of cats over age 10 show signs of degenerative joint disease on X-rays, even when owners report no visible limping. The signs are subtle: less jumping, more sleeping, and yes, a matted coat on the lower back.

    feline arthritis

    Image source: Bing (Web (fair-use with source credit))

    Look for the pattern. If the cat grooms its face and front paws but leaves the hindquarters and tail unkempt, arthritis is a strong suspect. The front half is easier to reach.

    The back half requires the painful twisting motion.

    2. Dental Disease and Mouth Pain

    Your cat's mouth is its primary grooming tool. The tongue is covered in tiny backward-facing barbs called papillae. When a cat licks its fur, those barbs act like a comb, catching loose hair and dirt.

    But if the gums are inflamed, teeth are resorbing, or a tooth is abscessed, every lick sends a jolt of pain through the jaw.

    Dental disease is staggeringly common in cats. By age three, up to 70 percent of cats have some form of periodontal disease. By age five, that number climbs higher.

    The progression is silent. You won't see the tartar unless you look, and most cats won't let you look without a fight.

    Signs of dental pain beyond grooming cessation include:

    • Drooling or pawing at the mouth
    • Reluctance to eat dry food
    • Chewing on one side of the mouth
    • Bad breath that's stronger than usual
    • Red, swollen, or bleeding gums

    Feline tooth resorption is especially nasty. It's a condition where the body literally reabsorbs the tooth structure, exposing nerve endings. It's painful, progressive, and requires dental X-rays to diagnose properly.

    If your cat stops grooming and shows any of the signs above, dental disease should be high on your list.

    3. Obesity and Physical Limitations

    This one is mechanical rather than medical. An overweight cat simply cannot reach certain parts of its body. The belly, the back, and the base of the tail become physically out of range.

    A cat carrying 20 percent or more above its ideal body weight will struggle to twist and bend for grooming. The skin and fat pad on the belly create a physical barrier. The cat can groom its head and front legs easily, but the hindquarters become a no-go zone.

    Obesity in cats isn't just a weight problem. It's a strain on joints, a risk factor for diabetes, and a direct cause of grooming decline. The fixed fat cats tend to develop mats behind their ears and on their backs, exactly where they can't reach.

    The fix here isn't just brushing more. It's weight loss. But that's a slow process, so while the cat sheds pounds, you'll need to step in with regular brushing to keep the coat healthy and prevent mats from forming.

    4. Stress, Anxiety, or Environmental Changes

    Cats are creatures of habit. They thrive on routine, familiar smells, and predictable spaces. When that stability breaks, they respond in strange ways.

    Some cats overgroom, licking themselves bald in patches. Others stop grooming entirely.

    Stress-induced grooming cessation is common in multi-cat households. Resource competition for food bowls, litter boxes, and sleeping spots creates chronic low-grade anxiety. The cat may not fight, but it might withdraw, stop grooming, and spend more time hiding.

    Common environmental triggers include:

    • Moving to a new home
    • Adding or losing a pet
    • A new baby or houseguest
    • Rearranged furniture or remodeled rooms
    • Change in work schedule or routine
    • A stray cat visible through the window

    Psychogenic alopecia is the clinical term for stress-related overgrooming, but the flip side exists too. Cats under severe stress can shut down self-care behaviors entirely. It's a form of feline depression, and it's treatable with environmental changes and sometimes medication.

    5. Skin Conditions and Parasites

    Sometimes the issue isn't that the cat won't groom. It's that grooming becomes painful or unpleasant. Skin infections, allergies, and parasites can all make the act of licking uncomfortable.

    Flea allergy dermatitis is the classic example. A cat with fleas will groom desperately, but not in a healthy way. It will overgroom, bite at its skin, and pull out fur.

    But if the skin is so irritated that even touching it hurts, the cat might give up entirely.

    Other skin conditions to consider:

    • Ringworm (fungal infection)
    • Mites and mange
    • Food allergies causing itchy skin
    • Dry, flaky skin from low humidity
    • Stud tail or feline acne on the chin

    The coat appearance helps narrow this down. If the fur is greasy and odorless, think internal. If it's flaky and dry, think environmental or dietary.

    If there are bald patches, red sores, or visible parasites, think skin.

    6. Underlying Illness (Kidney, Thyroid, Diabetes)

    Systemic diseases change how a cat feels from the inside out. Chronic kidney disease, hyperthyroidism, and diabetes all cause fatigue, nausea, and muscle wasting. Grooming falls by the wayside because the cat simply doesn't have the energy.

    Kidney disease is the silent killer in senior cats. It progresses slowly, and the signs are vague: increased thirst, more urination, weight loss, and a poor coat that looks greasy or unkempt. The cat isn't choosing to look messy.

    It physically feels too unwell to care.

    Hyperthyroidism is the reverse. Cats with this condition are often hyperactive and hungry but lose weight anyway. The coat can look greasy, matted, or poorly groomed despite the cat's apparent energy.

    Muscle wasting on the back makes grooming mechanically harder.

    Diabetes causes similar coat changes. The fur loses its sheen, the skin becomes flaky, and grooming habits decline. These diseases are manageable, but they require a vet's diagnosis and ongoing treatment.

    How to Tell If It's an Emergency

    Not every case of grooming cessation is an emergency. But some absolutely are. The challenge is knowing the difference before you waste precious time.

    Start with the eating and drinking test. A cat that is eating, drinking, and using the litter box normally has more time to work with. These cats are uncomfortable but stable.

    You can monitor them for 24 to 48 hours while you book a regular vet appointment.

    A cat that has stopped eating, is vomiting, is lethargic, or has stopped using the litter box entirely is a different story. These cats are in crisis. Grooming cessation in this context is one piece of a larger medical picture, and that picture is urgent.

    Red flag symptoms that warrant immediate veterinary care:

    • No food or water intake for more than 24 hours
    • Repeated vomiting or diarrhea
    • Labored breathing or open-mouth panting
    • Lethargy that makes the cat unresponsive
    • Visible injury, abscess, or bleeding
    • Sudden hind-leg weakness or paralysis
    • Green or yellow discharge from eyes or nose

    The "eating and grooming" rule is a useful shortcut. If a cat is grooming less but still eating well, you have time. If the cat is eating poorly and not grooming, the combination suggests systemic illness.

    Don't wait. Get to a vet.

    Senior cats deserve extra caution. Cats over age 10 decline faster when they stop eating, and kidney function can drop dangerously quickly in a dehydrated cat. If your senior cat stops grooming and stops eating within the same 48-hour window, treat it as an emergency.

    Pain assessment is tricky because cats mask it. But you can look for subtle cues. Does the cat flinch when you touch its lower back?

    Does it wince when jumping down from furniture? Does it sit hunched with its head lowered? These are pain postures, and they confirm the cause behind the grooming issue.

    Step-by-Step: What to Check at Home Before Calling the Vet

    You don't need to be a veterinarian to gather useful information. In fact, the more details you can give your vet, the faster they can narrow the diagnosis. Here's a step-by-step home assessment you can do in about 15 minutes.

    Step 1: Full-Body Inspection

    Start by gently petting your cat from head to tail. Notice any flinching, hissing, or pulling away. Those reactions mark tender spots.

    Go slowly and stay calm.

    feline dental disease

    Image source: Bing (Web (fair-use with source credit))

    Run your hands through the fur systematically. Check for mats, tangles, scabs, bumps, and bare patches. Look at the skin underneath.

    Healthy skin is pink and clean. Red, flaky, greasy, or crusty skin needs attention.

    Check the ears for wax, redness, or a strong odor. Check the paws for cracked pads, overgrown nails, or foreign objects stuck between toes. Check the chin for black specks.

    These are signs of feline acne.

    Step 2: The Mobility Assessment

    Watch your cat move. Pay attention to how it gets on and off furniture. Does it hesitate before jumping?

    Does it land heavily instead of lightly? Does it stretch its front legs but struggle with the back?

    Try the "crouch test." Place a treat on the floor and watch how the cat lowers itself to eat. A cat with arthritis in its hips or spine will hover awkwardly instead of crouching smoothly.

    Also watch the grooming attempts themselves. Does the cat try to groom its back but stop after a few licks? That painful stop-start pattern is classic arthritis.

    Step 3: Environmental Review

    Look at the cat's surroundings. Is there a new animal in the home? Has anything changed in the past few weeks?

    What's the litter box situation? Is it clean, accessible, and in a low-traffic area?

    Check the food and water setup too. Are the bowls full? Is the water fresh?

    A cat that must jump onto a high counter or walk past a dog to reach food might be eating less, which compounds the problem.

    Step 4: The Flea Check

    Fleas are the most common external parasite in cats, and they're not always visible. Run a fine-toothed flea comb through the fur, especially around the neck, tail base, and lower back. Look for small black specks that turn rusty red when wet.

    That's flea dirt, and it indicates a live infestation.

    Even indoor cats can get fleas. They hitchhike in on shoes, bags, or other pets. A single flea bite can trigger an allergic reaction that makes a cat miserable.

    Step 5: Dental Check

    Open the cat's mouth if it tolerates it. Look for yellow-brown tartar along the gum line. Check for red, swollen, or bleeding gums.

    Look for missing or discolored teeth. Smell the breath. A nasty odor beyond normal cat breath is a red flag.

    Don't force this if the cat resists. Painful mouths are guarded mouths. If the cat won't let you look, that's itself a diagnostic clue.

    What to Record for Your Vet

    Write down what you observe. Vets appreciate specifics. Note the date you first noticed the grooming change, what the coat looks like, any appetite changes, and how the cat moves.

    A short video of the cat walking or trying to groom is incredibly helpful for the vet to review.

    Here's a quick table of what to note:

    Area to CheckWhat's NormalWhat's Concerning
    Coat textureSmooth, soft, lying flatGreasy, dull, matted, stuck up
    Skin colorPink, cleanRed, flaky, crusty, oily
    MobilityEasy jumps, smooth crouchHesitation, stiff gait, heavy landing
    MouthPink gums, no odorRed/swollen gums, tartar, bad breath
    WeightSteady, breed-appropriateUnexplained loss or gain
    Litter boxNormal frequencyLess frequent, no urine, diarrhea
    AppetiteNormalEating less, skipping meals

    This prep work makes the vet visit more efficient. You'll walk in with data instead of vague observations, and that helps the vet get to the root cause faster.

    What Your Vet Will Do: The Diagnostic Process

    Vets see cats with poor grooming all the time. It's one of the most common reasons cats come into the clinic, especially senior cats. But vets don't treat the grooming problem itself.

    They hunt for the underlying cause.

    Step 1: The Physical Exam

    The vet will start with a head-to-tail physical examination. They'll feel the cat's lymph nodes, listen to the heart and lungs, and palpate the abdomen. They'll also check for joint pain by gently bending and extending the legs, watching for resistance or vocalization.

    The vet will also look at the coat and skin closely. They'll check for fleas, mites, ringworm, and other visible issues. They'll note the pattern of grooming decline: whether mats are present, how the fur looks under a bright light, and whether the pattern suggests mobility limitations versus systemic illness.

    Step 2: Blood Work

    Blood work is the backbone of feline diagnostics. A standard panel includes a complete blood count (CBC), blood chemistry profile, and thyroid hormone level. These tests reveal:

    • Kidney function (BUN, creatinine, SDMA)
    • Liver enzymes (ALT, ALP)
    • Blood sugar (glucose)
    • Thyroid hormone (T4 for hyperthyroidism)
    • Protein and electrolyte levels
    • Red and white blood cell counts

    Kidney disease, diabetes, and hyperthyroidism all show up on routine blood work. As of 2026, the SDMA test is now standard in most veterinary practices, and it catches kidney disease earlier than traditional creatinine measurements.

    Blood work typically takes 15 to 30 minutes in-house. Some vets send samples to an external laboratory, which takes 24 to 48 hours. Ask which method your vet uses so you know when to expect results.

    Step 3: Dental Evaluation

    Dental disease requires more than a visual check. The vet will recommend a thorough dental evaluation under general anesthesia. That allows them to probe each tooth, take dental X-rays, and look for resorptive lesions hiding below the gum line.

    Anesthesia sounds scary, but modern protocols are safe for most cats, including seniors. The vet will run pre-anesthetic blood work to screen for hidden issues that could complicate anesthesia.

    Dental cleanings are not cosmetic. Feline stomatitis, a severe inflammation of the mouth, can make grooming and even eating agonizing. Treating the dental disease often restores normal grooming behavior once the pain resolves.

    Step 4: Skin Tests

    If the physical exam reveals skin issues, the vet may recommend additional tests. These include:

    • Skin scrapings to check for mites
    • Fungal cultures for ringworm
    • Skin cytology to identify bacterial or yeast infections
    • Food elimination trials for allergies
    • Blood tests for flea and environmental allergies

    A skin scraping is quick and relatively painless. The vet scrapes a small area of skin with a scalpel blade and examines it under a microscope. Results are immediate.

    Fungal cultures take longer, usually 1 to 3 weeks.

    Step 5: Imaging

    X-rays are useful when the vet suspects arthritis, hip dysplasia, or spine issues. Radiographs can reveal bone changes, joint narrowing, and arthritis severity. Some clinics offer ultrasound, which is better for examining organs like the kidneys, liver, and intestines.

    Imaging is especially useful when blood work comes back normal but the cat still seems painful. Arthritis can exist without blood test changes. Imaging provides the visual confirmation that guides pain management plans.

    Step 6: Behavioral Consultation

    When physical tests come back normal, the vet may consider behavioral causes. A behavioral consultation involves a deep dive into the cat's environment, routine, and social dynamics. The vet might ask about:

    • Household members (human and animal)
    • Litter box location and type
    • Feeding routines
    • Playtime and enrichment
    • Recent changes in the household
    • The cat's typical hiding spots

    Some cases are referred to veterinary behaviorists. These specialists can prescribe anti-anxiety medication and design environmental modifications. Antidepressant options like fluoxetine or amitriptyline are sometimes used when stress is the primary driver, but always under veterinary supervision.

    The entire diagnostic process sounds involved, and it is. But most cases resolve with a simple finding. Blood work identifies a thyroid issue.

    Dental cleaning finds a resorbing tooth. X-rays confirm arthritis. The process exists to find the right cause the first time, rather than guessing and wasting weeks.

    Common Mistakes Owners Make (And What to Do Instead)

    Grooming cessation slips under the radar so easily. Even attentive owners miss it for weeks. That's not a personal failing.

    Cats are experts at hiding discomfort, and a greasy coat can blend into the background of daily life. But there are a few common mistakes worth knowing about.

    Mistake 1: Mistaking the Decline for "Just Getting Old"

    It's the easiest narrative to latch onto. "She's 14, she's slowing down, of course her coat looks rough." But age itself doesn't cause a dirty coat. Pain and disease cause a dirty coat.

    Senior cats can and should maintain their coats, and when they don't, there's a reason worth investigating.

    Chronic kidney disease, arthritis, and hyperthyroidism are all more common in senior cats. These are treatable conditions, and early intervention improves outcomes. Accepting a matted coat as a normal part of aging could mean missing a manageable diagnosis.

    What to do instead: Track the change. Note when the coat started looking worse and whether it's progressing. Share that with your vet.

    Let the data, not assumptions, guide your decision.

    Mistake 2: Bathing the Cat to "Help"

    Bathing a cat that doesn't groom is a well-intentioned but counterproductive move. Cats don't need routine baths. Their skin and coat balance is delicate, and shampoo strips natural oils.

    Washing a cat with skin issues can worsen irritation, dry out the coat, and make the problem worse.

    Some cats also find baths terrifyingly stressful. Stress suppresses grooming behavior further, creating a negative feedback loop. You end up with a clean cat that's more anxious and less likely to groom itself.

    What to do instead: Brush, don't bathe. A soft slicker brush or grooming mitt removes dirt and loose fur without stripping oils. For mats and tangles, use a metal comb with wide teeth or consult a professional groomer for severe matting.

    Mistake 3: Delaying the Vet Visit to "Wait and See"

    Grooming cessation is easy to postpone. It doesn't seem urgent when the cat is eating and playing normally. But waiting weeks to see if it resolves on its own can allow a treatable condition to worsen.

    Dental disease progresses. Arthritis causes more joint damage. Kidney disease advances.

    Cats live on shorter timelines than we do. A few weeks of waiting is a significant chunk of their life. And cats are masters at compensating, meaning mild problems often look worse when they finally become obvious.

    What to do instead: Book an appointment within 48 hours of noticing a complete grooming stop. For gradual decline, give yourself a week but no longer. Your vet can run baseline blood work while the cat is still stable, which catches many issues early.

    Mistake 4: Giving Human Pain Relievers

    This one cannot be overstated. Never, ever give a cat human pain medication. Acetaminophen (Tylenol) is fatal to cats.

    Ibuprofen (Advil, Motrin) causes severe stomach ulcers and kidney failure. Even a single pill can kill a cat.

    Cats lack the liver enzymes needed to metabolize these drugs safely. There is no safe at-home dose of any human painkiller for a cat. Only a veterinarian can prescribe feline-safe pain relief, and even those require careful monitoring.

    What to do instead: If you suspect pain, bring your cat to the vet for an assessment. Prescription options like gabapentin, buprenorphine, and meloxicam (under veterinary guidance) are safe and effective. There's no safe at-home alternative.

    Mistake 5: Ignoring the Emotional Component

    It's tempting to focus only on physical causes, but stress is a real and common trigger for grooming cessation. Owners who dismiss behavioral factors may end up with a vet bill that says "healthy" while the cat continues to decline.

    Stress-related grooming issues respond well to environmental changes. Adding vertical spaces like cat trees, providing puzzle feeders, and ensuring multiple quiet resting areas can reduce feline anxiety significantly. Feliway diffusers also release synthetic calming pheromones that help some cats.

    What to do instead: Review your home environment with fresh eyes. Consider whether your cat has enough quiet space, sufficient litter boxes, and predictable routines. Address these factors alongside any medical treatment for the best outcome.

    Mistake 6: Overlooking Secondary Skin Infections

    When a cat stops grooming, the skin suffers secondary effects. Dead hair accumulates, oil builds up, and moisture stays trapped near the skin. That invites bacterial and yeast overgrowth.

    A cat that stops grooming for arthritis may develop a secondary skin infection that needs its own treatment.

    Vets will often swab the skin to identify the culprit organism. Antibiotics or antifungals may be prescribed alongside treatment for the underlying cause. Ignoring the skin issue while treating the primary problem means the coat stays unhealthy even after the pain resolves.

    What to do instead: Check your cat's skin weekly during recovery. Look for redness, flaking, or a sour odor. If you notice any of those signs, mention them to your vet for additional treatment.

    Mistake 7: Stopping Treatment When the Fur Looks Better

    It's a great feeling when you brush your cat and the coat finally looks glossy again. You might think the battle is won. But the coat is the last thing to recover.

    The underlying condition that caused the grooming stop might still need management.

    If your vet prescribed pain medication for arthritis, keep giving it as directed. If they recommend a special diet for kidney disease, don't switch back to old food the moment the fur looks decent. The grooming recovery is a welcome sign, but it's the result of ongoing treatment, not a reason to stop it.

    What to do instead: Treat grooming recovery as one milestone on a longer health journey. Follow your vet's long-term plan, and schedule the recommended follow-up checks to ensure the underlying condition stays well-managed.

    How Long-Term Care Changes with Each Cause

    Once you know the root cause, the real work begins. Managing a cat that has stopped grooming is rarely a one-and-done fix. It requires ongoing care, some routine, some medical, and all aimed at keeping the cat comfortable and its coat healthy.

    Managing Arthritis and Chronic Pain

    Arthritis isn't curable, but it's very manageable. The goal is reducing pain and maintaining mobility. Pain medications like gabapentin or injectable joint supplements are common first-line treatments as of 2026.

    Physical modifications matter just as much as medication. Provide ramps or steps to help your cat reach favorite perches without jumping. Place food and water bowls at ground level to reduce strain.

    Use low-entry litter boxes that don't require a big step in.

    Warmth helps too. Heated cat beds can ease joint stiffness, and grooming becomes easier when pain is controlled. Some cats groom more readily after a warm nap, so you can brush them right after they wake up.

    Weight Management for Obese Cats

    If weight is the cause, slow and steady weight loss is the plan. Rapid weight loss in cats is dangerous, leading to hepatic lipidosis, a potentially fatal liver condition. Aim for a veterinary-guided plan that reduces calories by about 10 to 15 percent, paired with increased activity.

    Switch to portion-controlled meals. Use a kitchen scale to weigh food precisely. Swap free-feeding kibble for measured meals twice a day.

    Add low-calorie enrichment with food puzzles to spread meals across the day without extra calories.

    As the cat loses weight, its reach improves. You'll notice it starting to groom areas it previously couldn't reach. That's a sign your efforts are paying off.

    Keep the momentum going.

    Reducing Stress and Anxiety

    Stress-related grooming requires an environmental overhaul. The goal is to restore the cat's sense of security in its territory.

    Start with the resource rule: one litter box per cat, plus one extra. Place food and water in separate quiet areas. Add vertical territory like cat trees, wall shelves, or window perches.

    Provide scratching posts in high-traffic areas.

    Feliway diffusers can help take the edge off. These synthetic feline facial pheromones signal "safe territory" and work well for many anxious cats. Keep the diffuser running consistently for at least four to eight weeks to see meaningful results.

    If environmental changes aren't sufficient, talk to your vet about short-term anti-anxiety medication. Some owners worry about sedating their cat, but modern anti-anxiety meds are not sedatives. They reduce stress without fogging the cat's personality.

    Managing Chronic Illness

    Kidney disease, hyperthyroidism, and diabetes all require lifelong management. For kidney disease, this means a prescription renal diet, hydration support with wet food or subcutaneous fluids, and regular blood monitoring.

    Hyperthyroidism can be managed with medication, radioactive iodine therapy, or surgery. Medication requires twice-daily dosing. Radioactive iodine is a one-time cure for most cats but requires specialized facilities and a short hospital stay.

    Diabetes requires insulin injections, usually twice daily, along with a consistent low-carbohydrate diet. With stable blood sugar, the coat often improves dramatically within six to eight weeks.

    The key to managing chronic illness is consistency. These conditions don't resolve, but with consistent treatment, cats can live long, comfortable lives with healthy coats.

    Ongoing Skin Care

    During recovery, you'll need to help the cat's coat heal. Frequency of brushing depends on coat length:

    • Short hair: 2 to 3 times weekly
    • Medium hair: daily brushing
    • Long hair: daily plus occasional professional grooming

    Brush gently, especially if the skin is irritated or there are mats. Use a lubricant spray designed for cats when working through tangles. Work from the outside of the mat inwards to minimize pain.

    Check the skin every time you brush. Look for new redness, flakes, or sores. If you spot something concerning, snap a photo for your vet and give it a few days to see if it progresses.

    Monitoring Progress

    You'll want to track grooming behavior as a vital sign. Keep it simple: note weekly whether the coat looks normal, somewhat improved, or unchanged. Note whether the cat is grooming itself, even briefly, versus relying entirely on your brush.

    A baseline visit every six months helps catch issues early. For senior cats, consider bi-annual blood work and a dental check once a year. Preventive care is easier and cheaper than reactive care, and it catches silent issues like kidney disease before they cause visible problems.

    Cat Grooming Assistance: When and How to Help

    While we dig into the root cause, the coat still needs care. A cat that isn't grooming itself needs help keeping its fur clean and mat-free. Done right, this keeps the cat comfortable, prevents skin issues, and strengthens the bond between you.

    Setting Up a Gentle Brushing Routine

    Start slowly. Choose a time when your cat is relaxed, like after a meal. Keep the first sessions under five minutes.

    Offer treats throughout to build positive associations.

    cat grooming brush

    Image source: Bing (Web (fair-use with source credit))

    Choose the right brush. For short hair, a soft slicker brush or grooming glove works well. For medium and long hair, use a wide-toothed metal comb to work through tangles first, then a slicker brush for shine.

    Always brush in the direction of hair growth. Be extra gentle around the belly, legs, and tail, which are sensitive areas for most cats. If you hit a mat, don't tug.

    Use your fingers to gently pull the mat apart, then comb through it gradually.

    Handling Mats and Tangles

    Mats form fast on a non-grooming cat. They pull on the skin, cause discomfort, and hide dirt and parasites underneath. Small mats can be worked out with patience.

    Large, tight mats that hug the skin need professional attention.

    Never use scissors near the skin. Cats move suddenly, and a scissor slip can cause a serious cut. Instead, use electric clippers with a #10 blade, or enlist a professional groomer who has experience with cats.

    If you groom mats at home, work in stages. Spend a few minutes each day loosening the mat with your fingers before combing. Some cats tolerate this, while others need a groomer or a very light sedative from the vet.

    Bathing, When It's Actually Necessary

    Most cats never need a bath. But a cat with matted fur, oily skin, or a case of fleas might need one, especially if it can't groom itself. Bathing is stressful, so this is a last resort.

    If you must bathe, use a cat-specific shampoo. Human shampoo disrupts the pH balance of cat skin. Prepare everything beforehand: a tub or sink, a cup for rinsing, towels, and a warm room with no drafts.

    Keep the water temperature warm, never hot. Support the cat's body firmly but gently. Work quickly, and finish by drying with towels.

    Avoid blow dryers unless your cat is completely unfazed by them.

    Alternative Cleaning Options

    If bathing is too stressful, consider waterless grooming:

    • Cat wipes for spot-cleaning the coat
    • Waterless shampoo that you rub in and brush out
    • Dry shampoo powder formulated for cats

    These alternatives work well for removing dust and neutralizing odor without the stress of immersion. They're not a replacement for brushing, but they're a good backup.

    When to Call a Professional Groomer

    Long-haired cats with grooming issues often need professional intervention. Groomers are equipped for cats that resist home care. They have electric clippers, gentle restraint techniques, and the ability to do full deshedding or "lion cuts" in a single session.

    This is especially important for severely matted coats. When mats are so tight they trap heat and restrict movement, the humane option is having them removed properly. Your vet's office can often recommend a groomer experienced with cats.

    Encouraging Self-Grooming Independence

    Grooming assistance that fixes the coat completely can sometimes make the cat less inclined to groom itself. That's a real consideration. While assisting with maintenance, encourage the cat's own grooming where possible.

    Leave the cat with some work to do. For example, if you brush the lower back and tail, let the cat handle its face and front paws. This keeps grooming muscles and instincts active.

    Make the cat feel good after self-grooming. Offer a treat immediately when you notice it licking its coat. This reinforces the natural behavior.

    Keeping Grooming Sessions Positive

    Watch the cat's body language throughout. If the ears flatten, the tail lashes, or the cat vocalizes, pause. Respect the limits and try again later.

    Building trust is more important than a perfect brushing session.

    With patience and consistency, many cats return to independent grooming once the underlying cause is treated.

    Real Scenarios: What This Looks Like in Practice

    Sometimes the best way to understand a problem is to see it play out in real life. These aren't exotic medical mysteries. They're the everyday situations that walk into clinics weekly.

    The Senior Cat with a Greasy Back

    Milo is a 13-year-old domestic shorthair. His owner noticed his lower back looked greasy and his fur was sticking up in odd directions. She assumed it was old age and started brushing him more often.

    That helped for a while, but the greasy patch kept returning.

    At the vet, blood work revealed early chronic kidney disease. The kidney changes caused dehydration, which made Milo's skin dry and his coat dull. He felt nauseous, so grooming fell by the wayside.

    The vet started him on a renal diet and increased his water intake with a pet fountain.

    Within six weeks, Milo's coat looked noticeably better. He wasn't grooming as much as he did at five years old, but the greasy patch resolved. The key was catching the kidney disease early before it progressed further.

    The takeaway: a greasy lower back in a senior cat is not a cosmetic issue. It's often a sign of internal imbalance that needs medical attention, not just more brushing.

    The Overweight Cat Who Can't Reach

    Bella is a 6-year-old domestic shorthair who weighs 16 pounds. Her ideal weight is 11 pounds. She was adopted from a shelter and had always been a bit chunky, but her weight crept up over two years.

    Her owner noticed mats forming behind Bella's ears and along her flanks. Bella would groom her face and front legs but never touched her back. She couldn't.

    The fat pad on her belly prevented the flexion she needed to twist and reach.

    The solution was twofold. First, the owner started a structured weight loss plan with measured meals and no free-feeding. Second, she committed to daily brushing to manage mats while Bella lost weight.

    Over six months, Bella dropped to 13 pounds. Her grooming behavior improved noticeably. She still couldn't reach her entire back, but she was grooming 60 percent more than before.

    The owner continued brushing to cover the gap.

    This scenario is common in cats of all ages. Weight is a mechanical factor that directly impacts grooming ability. The solution is patience, a weight loss plan, and consistent human help in the meantime.

    The Stressed Cat in a Multi-Cat Home

    Charlie is a 4-year-old male cat living with two other cats in a two-bedroom apartment. The household added a foster kitten four months ago. Since then, Charlie has been hiding under the bed more and his coat has become dull and unkempt.

    There's no blood work needed here. The pattern is classic stress-related grooming cessation. The new kitten disrupted Charlie's territory and access to resources.

    He stopped grooming because he was constantly on edge.

    The vet recommended environmental modifications. The owners added two more litter boxes in separate rooms, placed food bowls in three locations, and introduced Feliway diffusers. They also set up vertical space with cat shelves so Charlie could observe from above.

    Within three weeks, Charlie resumed grooming. The coat improved gradually, not overnight. He still avoids the kitten, but he's no longer hiding constantly.

    The stress response broke because his environment finally felt safe again.

    If your cat is in a multi-cat household and stops grooming, look at territory dynamics first. Resource competition is an invisible stressor that many owners miss.

    The Dental Case That Presented as a Grooming Problem

    Oliver is an 8-year-old Maine Coon mix. His coat was heavily matted despite daily brushing. His owner assumed it was a grooming behavior issue and tried different brushes and treats to encourage self-grooming.

    Nothing worked.

    Oliver also had subtle bad breath and preferred wet food over dry kibble. Those clues pointed to dental disease. A dental exam under anesthesia revealed three resorbing teeth and severe gingivitis.

    The vet extracted the affected teeth and cleaned the rest.

    Four weeks after surgery, Oliver started grooming himself for the first time in months. The pain relief from the extractions changed everything. His coat never needed daily brushing again, just weekly maintenance.

    Dental disease is among the easiest causes to overlook because you can't see the pain. If your cat stops grooming and has any reluctance to eat dry food, dental disease is a leading suspect.

    Expert Tips: What Vets Wish Owners Knew

    After speaking with veterinary professionals and reviewing clinical guidelines from the American Association of Feline Practitioners, a few key insights stand out. These tips don't appear in standard owner handouts, but they make a real difference in outcomes.

    Track the "Grooming Baseline" Early

    Most owners can't tell exactly when their cat stopped grooming because they never established a baseline. Start noting your cat's normal grooming habits now, before there's a problem. Watch how often it grooms, which areas it reaches, and what the coat looks like on a typical day.

    Take monthly photos. A quick smartphone picture lets you see subtle changes in coat condition that memory glosses over. When your instincts say something is off, these photos provide the reference point you need to confirm it.

    Don't Wait for "Obvious" Symptoms

    By the time a cat shows obvious signs of pain or illness, the condition has often progressed significantly. Grooming cessation is an early warning sign precisely because it's subtle. Treat it with the same seriousness as lethargy or appetite loss.

    Cats are stoic creatures who evolved to hide vulnerability. A cat that shows any behavior change is genuinely unwell. Trust that signal even when everything else seems normal.

    Use Multiple Data Points

    A single observation is a clue, not a diagnosis. Before calling the vet, gather multiple data points. Is the grooming decline accompanied by weight changes?

    Appetite shifts? Litter box issues? Behavior changes?

    Each additional data point narrows the diagnostic range.

    Write down your observations over a few days. Track food intake, water intake, litter box frequency, and activity levels. This record is invaluable for your vet and often leads to a faster, more accurate diagnosis.

    Ask About Pain Management

    If your vet diagnoses arthritis or another painful condition, don't accept "just monitor it" as the only plan. Ask specifically about pain management options. There are prescription medications, joint supplements, and dietary options that can significantly improve quality of life.

    Feline pain management has advanced rapidly. As of 2026, options like gabapentin and injectable monoclonal antibody therapies are available for chronic pain. These aren't just "making the cat comfortable." They restore normal behaviors, including grooming.

    Follow Up Even When It Looks Fixed

    The coat looks great and the cat is grooming again. It's tempting to skip the follow-up appointment. Don't.

    Follow-up visits confirm that the treatment is working and catch any early signs of recurrence.

    For chronic conditions like kidney disease or arthritis, regular rechecks are essential. Blood work every six months for seniors and annual dental checks for all cats are reasonable baselines. These visits catch issues before they become visible problems.

    Understand That Recovery Takes Time

    Grooming behavior doesn't return the day after treatment starts. It takes weeks for the coat to improve and for the cat to rebuild its grooming routine. During that window, your brushing is the bridge.

    Some cats take up to two months to fully resume grooming after a painful event resolves. Patience matters here. The underlying condition is treated, but the habit needs time to rebuild.

    Comparative Breakdown: Indoor vs. Outdoor Cats

    The environment your cat lives in changes the grooming equation significantly. Indoor cats and outdoor cats face different risks, different stressors, and different baseline grooming needs. Knowing which category your cat falls into helps you narrow down the cause faster.

    Indoor cats are more protected from parasites and injuries, but they're also more vulnerable to stress-related grooming issues. Their world is smaller, so environmental changes hit harder. A new piece of furniture, a shifted schedule, or a neighborhood cat visible through the window can all trigger behavioral grooming decline.

    Outdoor cats carry higher physical risks. They're exposed to fleas, ticks, mites, abscesses from fights, and injuries from cars or predators. Their grooming decline often traces to a physical wound or parasite burden rather than stress.

    Indoor-outdoor cats exist on a spectrum. An indoor cat with access to a screened porch has different risk factors than a strictly indoor cat. Let's break down the differences for each scenario.

    Indoor Cats: The Stress Factor

    Indoor cats depend entirely on their humans for social stability, environmental enrichment, and territory management. When the household changes, they can't escape it. Their stress response is direct, and grooming cessation is a common result.

    If your indoor cat stops grooming, ask yourself what changed in the past month. New pet, new person, new schedule, new furniture, new noise. All of these qualify.

    Indoor cats need predictable routines and safe hiding spots to feel secure.

    Multi-cat indoor households carry the highest stress risk. Resource guarding is invisible unless you know what to look for. Blocking access to food, water, or litter boxes creates chronic stress that suppresses grooming.

    The fix for indoor cats starts with enrichment. Vertical spaces, rotating toys, puzzle feeders, and window perches all reduce stress. Feliway diffusers provide a chemical safe signal that many indoor cats respond well to.

    Outdoor Cats: The Injury and Parasite Factor

    Outdoor cats are self-sufficient, but that independence comes with physical risks. Fleas are the most common cause of grooming changes in outdoor cats. A heavy flea infestation causes frantic overgrooming, then painful skin irritation that stops grooming altogether.

    Abscesses from fight wounds are another prime suspect. A cat that gets bitten during a territorial dispute develops a painful, swollen wound that makes grooming agonizing. The cat avoids the area, and the coat starts to suffer.

    Outdoor cats also face higher risks of upper respiratory infections, which cause nasal congestion that interferes with the sense of smell. Grooming is partly triggered by smell. A cat that can't smell properly may lose interest in grooming.

    If your outdoor cat stops grooming, check thoroughly for wounds, fleas, and signs of illness. Run your hands over the entire body. Look for scabs, swellings, and tender spots.

    Check the ears for mites and the skin for flea dirt.

    Indoor-Outdoor Cats: The Combination Risk

    Cats that go in and out face both sets of risks simultaneously. They're exposed to outdoor hazards and indoor stressors. This combination makes it harder to pinpoint a single cause.

    The key is tracking patterns. Does the grooming decline correlate with a recent outdoor fight? Or with a recent household change?

    The timeline helps you choose which risk factor to prioritize.

    Indoor-outdoor cats also track more debris into their coats. Burrs, twigs, and dirt accumulate quickly. A cat that spends time in a garden may develop mats around burrs and debris that prevent proper grooming.

    Regular brushing for these cats is a necessity, not a luxury.

    Breed Differences in Grooming Maintenance

    Breed genetics influence grooming behavior and coat maintenance. Long-haired breeds like Persians, Himalayans, and Ragdolls require significant grooming effort. Their coats mat easily, and any physical limitation becomes visible quickly.

    Short-haired breeds like Siamese, Burmese, and Abyssinians are typically meticulous groomers. They're less likely to develop mats, but they still stop grooming when unwell. Their coat condition changes more subtly, which means owners may miss the early warning signs.

    Hairless breeds like Sphynx cats don't groom fur, but they still groom their skin. They produce more skin oil than furry breeds. When they stop grooming, the skin becomes greasy and dirty quickly.

    Skin infections are a higher risk for these cats.

    Senior cats of any breed experience age-related grooming decline. Osteoarthritis makes reaching the back painful, dental disease makes licking uncomfortable, and cognitive dysfunction syndrome reduces the motivation to groom.

    The Lifestyle Factor: What to Prioritize Based on Your Setup

    Here's a quick breakdown of where to focus your investigation based on your cat's lifestyle:

    LifestyleHighest Risk FactorsFirst Things to Check
    Strictly indoorStress, dental disease, obesityEnvironment, mouth, weight
    Indoor-outdoorParasites, injuries, abscessesFleas, wounds, skin
    Multi-cat householdResource guarding, stressLitter boxes, food access, hierarchy
    Senior indoorArthritis, kidney disease, dentalMobility, blood work, mouth
    Long-haired breedMatting, skin infectionsCoat condition, grooming maintenance

    Use this table as a starting checklist. It won't replace a vet visit, but it helps you triage what to look at first before you call.

    Targeted Diagnostic Approaches by Scenario

    Once you've identified your cat's lifestyle category, you can tailor your approach to the most likely causes. This section builds on the home assessment, providing deeper diagnostic guidance for specific situations.

    When the Coat Is Greasy But There's No Skin Irritation

    A greasy coat without visible redness or flakes points toward internal issues. Think kidney disease, hyperthyroidism, or diabetes. These conditions change the skin's oil production and the cat's energy level, creating a dull, unkempt appearance.

    Blood work is the diagnostic path here. A comprehensive panel including kidney values, thyroid hormone, and blood sugar will identify or rule out these systemic conditions. Expect to provide a urine sample as well, especially if kidney disease is suspected.

    If blood work comes back clean, reassess your cat's diet. Low-quality commercial diets with inadequate fatty acids can produce a dull coat. Omega-3 and omega-6 fatty acid supplementation, under veterinary guidance, sometimes resolves the issue.

    When There Are Visible Mats But the Cat Seems Otherwise Fine

    Mats that form despite the cat appearing healthy often indicate mild musculoskeletal pain. The cat can and does groom its face and front paws, but avoids the larger twisting motions needed for its back.

    Gentle palpation along the spine and hips will often reveal subtle reactivity. The vet may recommend radiographs to evaluate for arthritis or other joint changes. Pain medication trials are also common, and many owners report significant grooming improvement after starting appropriate pain relief.

    When Grooming Decline Comes With Weight Loss

    Weight loss paired with grooming decline is a classic red flag for hyperthyroidism in senior cats. The cat eats more, loses weight, and has a rough coat. Blood work confirms the diagnosis with elevated T4 levels.

    Another possible cause is diabetes mellitus. Cats with diabetes can't use glucose properly, so they break down fat and muscle for energy. The result is weight loss, poor coat condition, and lethargy.

    Blood sugar and fructosamine tests confirm diabetes.

    Both conditions are manageable, but they require prompt diagnosis. Weight loss in cats is never normal, and the earlier treatment starts, the better the outcome.

    When Grooming Decline Comes With Increased Thirst and Urination

    Increased thirst and urination alongside poor grooming points strongly toward kidney disease or diabetes. These conditions cause fluid loss, which dehydrates the skin and coat. The cat feels unwell and stops grooming.

    Collect a urine sample if you can. The vet will check urine concentration and protein levels. Blood work evaluates kidney function and blood sugar.

    Together, these tests distinguish between kidney disease and diabetes, though both can coexist.

    When the Cat Is Young and Healthy But Not Grooming

    A young cat with no health issues that stops grooming is a puzzle. The most likely cause is stress or a subtle injury. Review the environment carefully.

    Even small changes can trigger behavioral grooming pauses in sensitive cats.

    If no environmental trigger exists, consider a musculoskeletal injury. A sprain or strain from a fall can make grooming uncomfortable. The cat may seem fine otherwise but avoids the specific movements that hurt.

    Watch the cat's movement for a few days. Note any hesitancy in jumping, running, or climbing. If the behavior persists beyond a week, the vet should perform a physical exam to rule out joint or muscle issues.

    When Grooming Decline Is Accompanied by Neurologic Signs

    This combination demands immediate veterinary attention. Conditions like feline infectious peritonitis (FIP), toxoplasmosis, or brain tumors can cause neurologic symptoms alongside behavioral changes like grooming cessation.

    Take the cat to an emergency vet right away if you observe circling, head pressing, disorientation, or seizures. These are never benign and require urgent diagnostics like MRI or spinal fluid analysis. Prompt intervention improves outcomes for some of these conditions.

    When Grooming Stops After a Specific Event

    If the grooming decline follows a specific event, like a vaccination, a surgery, or a fall, focus on that event as the likely cause. The cat may be experiencing pain at the injection site, lingering discomfort from anesthesia, or a soft tissue injury.

    Monitor for a few days. If grooming doesn't return within a week, a vet should evaluate the cat for complications. Injection site reactions are rare but possible, and any persistent swelling after vaccination warrants a check.

    The Owner's Role in Diagnosis and Recovery

    Owners are the most important part of the diagnostic process. You see the cat daily. You know its baseline behavior better than any veterinarian.

    Your observations shape the differential diagnosis and treatment plan.

    Keep a Care Journal

    A simple care journal changes how effectively you track your cat's health. Note daily appetite, water intake, litter box habits, activity level, and grooming behavior. Note any unusual findings like lumps, skin changes, or mobility issues.

    This journal becomes your vet visit script. Instead of vague answers, you provide specific data. That precision can catch early signs of kidney disease, diabetes, and arthritis before they become obvious problems.

    The Power of Video Documentation

    Videos are more useful than descriptions. When you bring your cat to the vet, show them footage of the cat moving, attempting to groom, or behaving oddly. A short clip of the cat failing to reach its back is worth a thousand words.

    Take videos in natural settings. Let the cat behave spontaneously. Avoid calling its name or trying to direct the behavior.

    The vet wants to see unmodified behavior.

    Confirm Understanding at the Vet Visit

    When the vet gives you a diagnosis and treatment plan, repeat back your understanding. This confirmation prevents miscommunication. Ask specific questions about medication dosing, follow-up appointments, and warning signs.

    If the vet prescribes medication, ask about side effects and what to do if you observe them. These details matter for long-term management.

    Be Prepared for Ongoing Monitoring

    Most conditions that cause grooming cessation are chronic. They require regular monitoring, medication adjustments, and checkups. Build these into your routine so they don't slip.

    Set reminders for blood work, dental cleanings, and weight checks. Use your care journal to track trends over time. The earlier you catch changes, the better you can manage your cat's condition.

    Return to Normal: Restoring Grooming Behavior

    Once the underlying cause is treated, the next goal is helping your cat resume normal grooming behavior. This doesn't happen automatically. Some cats need encouragement, and some need a little help rebuilding their routine.

    Set the Stage for Self-Grooming

    Make grooming as easy and comfortable as possible for your cat. Keep the coat free of mats and tangles so licking is pleasant, not painful. Provide a warm, quiet environment where your cat feels safe enough to groom.

    A cat that has been in pain needs time to relearn that grooming doesn't hurt. Start by praising and rewarding any self-grooming you observe. Treats immediately after grooming reinforce the behavior.

    Use Grooming Products to Encourage Natural Behavior

    Some cats are attracted to grooming products like catnip. Sprinkling a small amount of catnip on a scratching post or grooming mat can encourage the cat to engage with its coat. The tactile stimulation sometimes triggers natural grooming.

    Grooming mitts with textured surfaces can also stimulate the mouthing and scratching behaviors that lead to self-grooming. Running the mitt across the coat gives the cat the feeling of grooming without requiring its own effort. This often prompts the cat to take over.

    Watch for Partial Grooming Patterns

    Don't expect overnight perfection. A cat recovering from illness often grooms its face and front paws first, then gradually extends to the rest of its body. Celebrate each step.

    Partial grooming is a positive sign that the cat is regaining comfort.

    If the cat grooms its front half but still ignores the back, continue brushing the back for it. This is a normal recovery trajectory and usually resolves with time and continued treatment.

    When It Doesn't Return: The Behavioral Breakdown

    Sometimes, grooming doesn't return even after medical treatment. This is more common in cats that stopped grooming during a long illness or extended pain period. The habit has been broken for so long that it doesn't automatically restart.

    In these cases, routine grooming becomes a permanent part of your care plan. It's not ideal, but it's manageable. Many owners develop a daily brushing ritual that their cats eventually come to enjoy.

    The bond grows stronger, and the coat stays healthy.

    The goal shifts from restoring independent grooming to maintaining a healthy coat through assisted care. That's a valid outcome. What matters is the cat's comfort and your mutual well-being.

    Frequently Asked Questions

    How long can a cat go without grooming before it's a problem?

    A healthy cat grooms multiple times daily. Missing a day here or there isn't a crisis, especially after a busy day or a minor stressor. But if you notice a visible decline that persists beyond three days, start investigating.

    By the one-week mark, you should have a vet appointment scheduled. A greasy coat, mats, or dandruff at that point means the skin is already suffering.

    Will a cat groom itself again after stress?

    In most cases, yes. Once the stressor is removed and the environment is stable, cats typically resume grooming within a few days to a couple of weeks. You can speed this up by providing a predictable routine and plenty of hiding spots.

    If the cat is still not grooming after three weeks, consult your vet. Chronic stress may require medication or deeper environmental changes.

    Does a dirty coat always mean illness?

    No, but it's a strong signal. A temporary disruption like moving homes or a new pet can cause a brief pause in grooming that resolves on its own. But a persistently dirty coat that doesn't improve within a week usually points to a physical or emotional issue.

    It's always worth ruling out medical causes before assuming a behavioral one.

    Are certain breeds more likely to stop grooming?

    Long-haired breeds like Persians, Himalayans, and Maine Coons show grooming issues more obviously because mats and tangles form fast. However, any breed can stop grooming. Senior cats of all breeds are more prone because of arthritis and dental disease.

    Overweight cats also struggle because they physically can't reach their back.

    Should I force my cat to groom itself?

    No. You can't force a cat to groom, and trying to push its head toward its back will create stress and resentment. Instead, make grooming easier by brushing regularly, keeping mats from forming, and addressing any discomfort.

    If the underlying issue is physical, your cat needs treatment, not encouragement.

    Your Next Steps: A Simple Decision Guide

    You've read about causes, diagnostics, treatments, and home care. Now it's time to put it all together. When you notice a cat not grooming itself, work through this simple three-stage guide.

    Stage 1: The 24-Hour Observation

    When you first notice a grooming decline, don't panic. Take a day to observe. Is the cat still eating and drinking?

    Does it use the litter box normally? Is it hiding more than usual? Is there an obvious stressor like a new pet or home change?

    Document what you see. Take photos of the coat to track changes. This baseline information is gold for your vet.

    Stage 2: The 48-Hour Action Window

    If the grooming decline isn't improving after 24 hours, or if it's accompanied by appetite loss or lethargy, book a vet appointment. Even if you're not sure anything is wrong, a quick checkup is worth it. For a complete grooming stop with no other symptoms, aim for an appointment within 48 hours.

    Prepare for the visit with your home assessment notes. List any changes in appetite, energy, litter box use, and behavior. Bring a short video of the cat moving if you can.

    Stage 3: Follow-Through and Beyond

    After the vet visit, follow the treatment plan exactly. Whether that's pain medication, dental work, or an environmental enrichment plan, consistency matters. Keep monitoring the coat, and note when grooming starts to return.

    Celebrate small wins. A single lick on the back is progress.

    Schedule reminder dates for any follow-up tests or rechecks. Six months from now, the last thing you want is a repeat of the same issue because you skipped a checkup.

    Seeing the Bigger Picture

    A cat not grooming itself is never just a cosmetic problem. It's a window into the cat's health, comfort, and emotional state. The fact that you noticed the change already puts you ahead of most owners.

    The fact that you're here, reading this, tells us you care enough to act.

    The good news is that most underlying causes are treatable. Arthritis can be managed. Dental disease can be fixed.

    Kidney disease and diabetes can be controlled. Stress can be resolved. With the right support, your cat can get back to a healthy coat and comfortable life.

    And that glossy, well-groomed cat you remember? It's still in there. It just needs you to help it get back.

    You've got everything you need to make that happen.