Tag: Cat

  • Tutorial: Do Short Haired Cats Need Brushing

    Tutorial: Do Short Haired Cats Need Brushing

    You've probably been told that grooming is a long-haired cat problem. So do short haired cats need brushing at all, or is that just something brush companies want you to believe? The honest answer is yes, most of them do, but not for the reason nearly everyone assumes.

    It's rarely about preventing mats.

    Here's the part that changes everything: coat length is one of the weakest predictors of grooming need. Coat structure matters far more. A single-coated Siamese and a double-coated British Shorthair have hair of roughly the same length, yet their shedding loads aren't remotely comparable.

    And cats spend a large share of their waking hours self-grooming, so the real question is whether your cat can still do that job properly.

    Quick Answer

    Yes, short haired cats need brushing. Most do well with one or two sessions a week. Double-coated breeds like British Shorthairs need two to three, and daily during seasonal shedding.

    Brushing cuts hairballs, removes loose fur, and spreads skin oils. Overweight, senior, or arthritic cats need it most, because they can't reach their own lower back.

    do short haired cats need brushing

    Image source: Bing (Web (fair-use with source credit))

    The Short Answer: Yes, But Not for the Reason Most People Think

    Ask most owners why they brush a cat, and they'll say "to stop it getting matted." That's a long-hair answer. Short coats rarely mat unless something has gone wrong, so if that's your only reason, you'd skip brushing entirely.

    The actual reasons for brushing a shorthair are different, and they're better ones:

    • Fewer hairballs. Every hair your brush catches is a hair the cat doesn't swallow.
    • Less fur on everything you own. Sofas, jumpers, car seats, the works.
    • A weekly health check in disguise. Lumps, scabs, ticks, flea dirt and sore spots turn up under your hands long before they turn up in a photo.
    • Covering for a cat who can't cover for itself. This is the big one, and we'll come back to it.
    • Handling tolerance. A cat that accepts a brush accepts a vet, a carrier, a pill and a nail trim far more easily.

    Notice what's missing from that list. Coat health barely features for a young, lean, healthy single-coated cat. Those cats maintain their own coats to a high standard, and brushing them is mostly for your benefit, not theirs.

    That's not a licence to skip it. It's a reason to be honest about what you're doing and why. Once a cat gets heavier, older, stiffer, or denser in the undercoat, brushing stops being optional housekeeping and becomes genuine care.

    So the useful version of the question isn't whether your short haired cat needs brushing. It's which kind of short haired cat you have, and what that cat needs.

    Why "Short Hair" Tells You Almost Nothing About Brushing Needs

    "Short haired" describes hair length. It says nothing about how many hairs there are, how they're layered, or how much dead coat gets trapped down at skin level. Two cats with identical 2 cm coats can shed at wildly different rates.

    British Shorthair double coat

    Image source: Web (Bing) / mlb.com (Web image (fair-use with source credit))

    Single-Coated vs Double-Coated Shorthairs

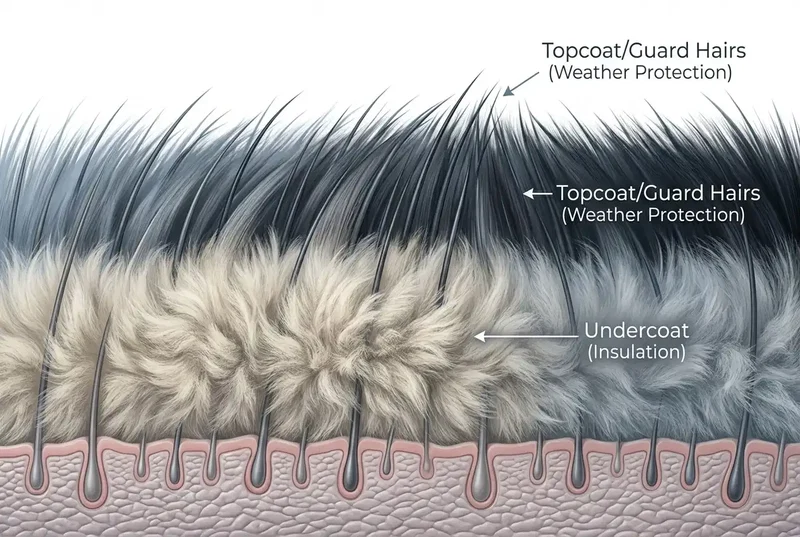
    A cat's coat is built from up to three hair types. Guard hairs are the long, coarse outer hairs that shed water. Awn hairs sit beneath them as a middle layer. Down hairs form the soft, crimped undercoat that traps warm air.

    A single-coated cat has mostly guard and awn hair with little to no down. A double-coated cat has a thick down layer packed underneath. That undercoat is where dead hair gets stuck, and stuck hair is the whole game.

    Coat typeTypical shorthair breedsWhat you'll noticeBrushing pressure
    Fine single coatSiamese, Oriental Shorthair, Burmese, Korat, Tonkinese, SingapuraCoat lies flat, feels silky, very little fur on furnitureLow
    Close-lying single coatBengal, Abyssinian, Bombay, Egyptian MauSleek and glossy, moderate seasonal sheddingLow to moderate
    Dense double coatBritish Shorthair, Chartreux, Russian Blue, Exotic Shorthair, ManxCoat stands away from the body, springs back when pressed, fur everywhere in springHigh
    Mixed (most moggies)Domestic Shorthair, American ShorthairVaries enormously between individualsTest it yourself
    Down-only or sparseCornish Rex, Devon RexWavy, soft, thin, skin feels close to the surfaceMinimal, cloth only
    No coatSphynxOily skin, no hair to brushBathing instead

    If you've got a Domestic Shorthair, you can't look this up. Your moggy is a genetic lucky dip and could sit anywhere on that table. The next section shows you how to check by hand in half a minute.

    How Cats Groom Themselves, and Where That System Fails

    Cats aren't lazy about grooming. Their tongues are covered in backward-facing keratin spines called filiform papillae, and those spines work like a built-in comb. Research from North Carolina State University found these papillae are hollow-tipped and wick saliva down to the skin, which is why a healthy cat's coat stays clean without help from you.

    That system works brilliantly, right up until it doesn't. Here's where it breaks down:

    • The cat can't reach. Grooming the lower back, rump and tail base needs a spinal twist and an extended neck. Arthritis and body fat both take that away.
    • The undercoat is too dense. A tongue can only pull so much. In a British Shorthair mid-moult, dead down builds faster than the cat can clear it.
    • Grooming hurts. Dental disease, mouth ulcers or a sore jaw stop a cat grooming long before you notice a change in eating.
    • Something is physically in the way. An Elizabethan collar, a dressing, a surgical wound, or a badly fitted harness.
    • The cat has stopped caring. Illness, pain and low mood all show up as a scruffy coat first.

    Here's the pattern worth remembering. A shorthair's coat works like a health dashboard. When something goes wrong, the coat usually tells you before the cat does.

    The Five Things That Actually Decide Your Cat's Brushing Routine

    Forget breed charts for a moment. Five variables decide how often you should pick up a brush, and they stack. A ten-year-old, slightly chunky British Shorthair in April needs a completely different routine to a two-year-old Siamese in July.

    1. Coat Type

    If your cat is single-coated, then brushing is light-touch maintenance. A rubber brush or grooming glove once or twice a week clears loose hair and you're done.

    If your cat is double-coated, then you're managing a real undercoat. Two to three sessions a week baseline, stepping up during the moult. Skip it and the dead down compacts into greasy clumps around the tail base and flanks.

    2. Age and Joint Mobility

    This is the variable most owners miss. Feline osteoarthritis is far more common than people realise, and radiographic studies have repeatedly found degenerative joint changes in the majority of cats over ten. Most of those cats never limp.

    They just quietly stop twisting.

    If your cat is over ten, or over seven with any stiffness, then assume it can no longer groom its lower back properly. Check the rump and tail base monthly and brush that area weekly, even if the rest of the coat looks perfect.

    3. Body Weight and Reach

    Fat physically blocks the spinal twist a cat needs to reach behind itself. On the Body Condition Score scale (a 1 to 9 system where 4 to 5 is ideal), grooming problems typically appear from a score of 7 upwards.

    If you can't feel your cat's ribs under light pressure, then it almost certainly can't reach its own back end. Expect dandruff on the lower back and a greasy patch above the tail. Brushing helps, but weight management is the real fix.

    Talk to your vet.

    4. Season, Heating, and Indoor Light

    Cat shedding is driven by photoperiod, meaning day length, not temperature. Outdoor cats in the UK and northern US typically blow coat over a four to six week stretch in spring and again in autumn.

    If your cat lives entirely indoors under artificial light and central heating, then that seasonal signal gets scrambled. You'll see moderate shedding all year instead of two sharp peaks, so a steady year-round routine beats a seasonal blitz.

    If your home runs dry in winter, then expect more static and visible scurf. That's environmental, not a skin disease.

    5. Whether Your Cat Is Over-Grooming or Under-Grooming

    This branch separates good advice from dangerous advice. Before you set a schedule, work out which direction your cat has drifted.

    • Under-grooming looks like: dandruff, greasy clumps, a dull coat, matting behind the elbows, and a scruffy lower back. More brushing genuinely helps.
    • Over-grooming looks like: thin or bald patches on the belly, inner thighs and forelegs, with short stubbly hair and often no broken skin. More brushing does not help. This is a vet visit.

    Over-grooming means fleas, allergy, pain or stress until proven otherwise. Brushing a cat that's already licking itself bald just adds friction to irritated skin.

    Work Out Your Cat's Coat Type in 30 Seconds

    You don't need a breed certificate. You need your hand and half a minute, ideally while the cat is already relaxed on your lap.

    1. Press flat. Put your palm on the cat's shoulders and press the coat down gently.
    2. Watch it recover. A double coat springs back like carpet pile. A single coat stays flat and glossy.
    3. Part the fur along the spine. Blow gently or push the hair sideways. Look for a second, paler, softer layer underneath the top coat.
    4. Run a fine-tooth metal comb through the flank. One or two strokes only.
    5. Look at what came out. Coarse dark hairs only means single coat. A wad of soft, fluffy, lighter-coloured fluff means double coat.
    What you findCoat typeStarting routine
    Comb glides through, few hairs, no fluffFine single coatOnce weekly, rubber brush or glove
    Some loose hair, no soft underlayerClose-lying single coatOnce or twice weekly
    Visible pale soft layer, comb pulls fluffDense double coatTwo to three times weekly, daily in moult
    Comb snags, coat feels waxy or clumpedUnder-grooming already happeningStart now, and check weight and mobility
    Thin patches, stubbly hair, pink skinOver-groomingStop. Book a vet appointment

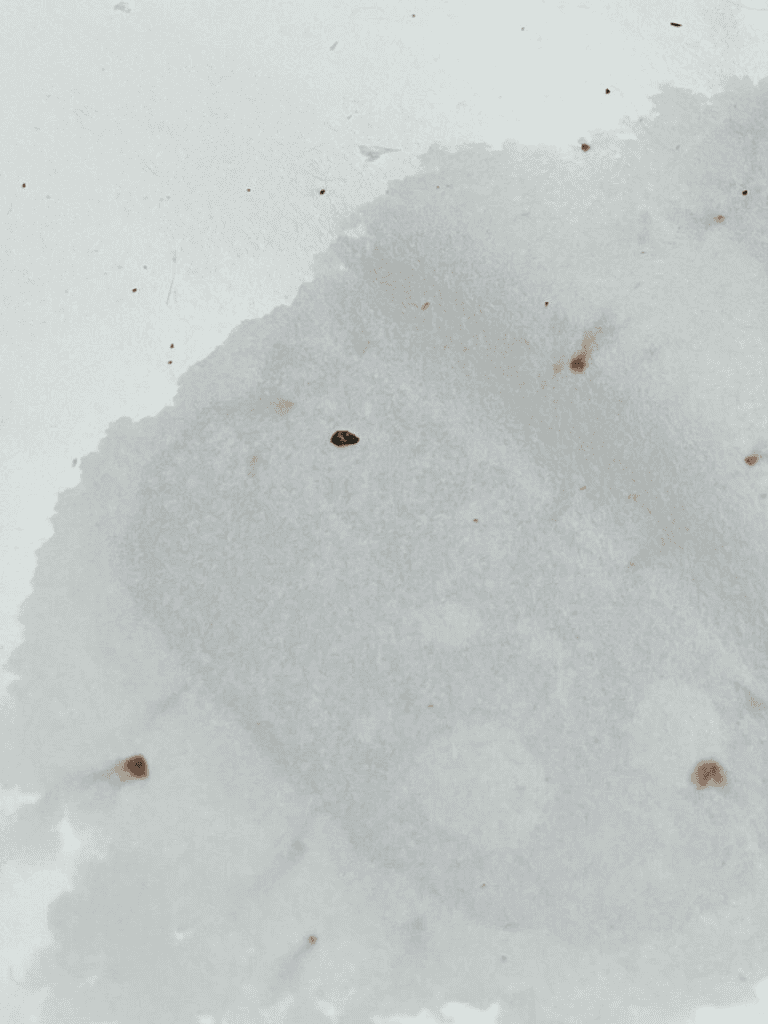
    One caution. If the comb catches anything gritty and black at the tail base, put it on damp white kitchen roll. If it smears rust-red, that's flea dirt, not dandruff.

    Flea treatment comes first, brushing second.

    The Decision Tree: Find Your Cat's Brushing Schedule

    Now put it together. Find the branch that matches your cat and use that routine as your starting point. Adjust from there based on what the coat tells you over the following month.

    Branch A: Healthy Young Single-Coated Cat

    You're here if: under seven, ideal body condition, sleek flat coat, no soft undercoat, no skin issues.

    • Frequency: once or twice a week
    • Tool: rubber curry brush or grooming glove
    • Session length: two to three minutes
    • Finish: a quick pass with a damp cloth to lift the last loose hairs

    This cat doesn't strictly need you for coat health. You're brushing to cut hairballs, cut fur on the furniture, and keep the cat comfortable being handled. That's a perfectly good reason.

    Keep sessions short and pleasant and it stays easy for life.

    Branch B: Double-Coated Shorthairs

    You're here if: British Shorthair, Chartreux, Russian Blue, Exotic Shorthair, Manx, or a moggy whose coat springs back and yields fluff.

    • Frequency: two to three times weekly baseline, daily during the four to six week spring and autumn moults
    • Tools: fine-tooth metal comb to lift dead down, rubber brush to collect it, deshedding tool sparingly during moult only
    • Session length: four to six minutes, split across the body
    • Watch: the rear thighs, flanks and tail base, where dead undercoat compacts first

    Use the deshedding tool with restraint. These tools pull genuine undercoat, and heavy-handed use thins the coat and irritates skin. Once or twice a week during peak moult is plenty.

    Never on a single-coated cat.

    Branch C: Overweight or Senior Cat Who Can't Reach

    You're here if: body condition score 7 or above, age ten or over, stiffness, reluctance to jump, or visible scurf on the lower back.

    • Frequency: two to three times weekly, focused on the back half
    • Tools: soft rubber brush or grooming glove, plus a damp microfibre cloth for greasy patches
    • Session length: short. Two or three minutes, more often, rather than one long session
    • Key point: support the cat's body and don't ask it to twist

    Arthritic cats find handling around the hips and lumbar spine genuinely uncomfortable, and that discomfort is exactly why the area got neglected. Go gently, watch for tail twitching and skin rippling, and stop early.

    If your cat consistently objects to being touched over the hips, that's a pain signal worth raising with your vet, not stubbornness. The Cornell Feline Health Center publishes solid owner-facing material on recognising feline arthritis, and it's worth reading before you assume a grumpy older cat is just grumpy.

    Brushing here is compensatory care. You're doing a job the cat used to do itself.

    Branch D: Rex and Sparse-Coated Cats

    You're here if: Cornish Rex, Devon Rex, or any cat with a thin, wavy, down-only coat.

    • Frequency: weekly at most
    • Tools: a chamois, a soft damp cloth, or your bare hand. No slickers, no wire pins, no deshedding tools
    • Extra care: these cats often need ear cleaning more than coat work, because oils build up without a full coat to absorb them

    Rex coats are fragile and the hair breaks easily. Aggressive brushing produces bald patches, and owners then brush more to "fix" it. Less is genuinely more here.

    Branch E: Bald Patches, Scabs, or Sudden Coat Change

    You're here if: thinning belly or inner thighs, stubbly regrowth, scabby bumps along the spine, sudden heavy shedding, or a coat that turned dull in a matter of weeks.

    Then stop, and book a vet appointment. Don't add brushing.

    These signs point to flea allergy dermatitis, food or environmental allergy, ringworm, pain-driven over-grooming, stress barbering, hyperthyroidism, or diabetes. Every one needs diagnosis, not grooming. As of 2026, veterinary guidance remains clear on this: a coat change is a clinical sign, and treating the coat while ignoring the cause wastes time.

    One extra warning for multi-cat homes. Ringworm is zoonotic and spreads readily on shared brushes. If one cat has patchy hair loss with crusting, use a separate tool for that cat and disinfect between uses until you've got a diagnosis.

    Brushing Frequency by Cat Type: The Quick Reference Table

    Here's everything from the decision tree collapsed into one grid. Find the row closest to your cat and start there.

    Cat profileSessions per weekSession lengthMain toolPriority zone
    Young single-coated (Siamese, Bengal, Burmese)1 to 22 to 3 minRubber curry brush or gloveSpine and flanks
    Young double-coated (British Shorthair, Russian Blue)2 to 34 to 6 minMetal comb plus rubber brushRear thighs, tail base
    Double-coated during spring or autumn moult5 to 75 to 8 minComb, rubber brush, deshedder once weeklyWhole body
    Domestic Shorthair, average build1 to 23 minRubber brush or gloveWherever fur collects
    Senior cat (10+)2 to 32 to 3 minSoft rubber brush, damp clothLower back, rump, tail base
    Overweight (BCS 7 to 9)32 to 3 minSoft rubber brush, damp clothLower back, flanks, behind hips
    Arthritic or post-surgical3 to 4, very gentle1 to 2 minGrooming glove onlyWhatever the cat can't reach
    Cornish or Devon Rex0 to 11 to 2 minChamois or bare handSkin oils, ears
    Sphynx0 (bathe instead)Weekly bathCat-safe shampooSkin folds, nail beds, ears
    Nursing queen or kitten under 12 weeks2 to 3, playful30 to 60 secSoft gloveHead and shoulders only

    Two notes on reading that table.

    The frequency column is a floor, not a ceiling. If your cat enjoys it, brush more. Daily brushing does no harm to a healthy coat as long as you're gentle and not going over the same patch repeatedly.

    Session length matters more than most people think. Short and frequent beats long and occasional every time. A cat's tolerance for handling runs out fast, and a session that ends badly makes the next one harder.

    Choosing the Right Tool for a Short Coat

    Tool choice is where most short-coat grooming goes wrong. Owners buy the aggressive tool because it pulls out the most fur, then wonder why the cat starts hiding.

    The rule that keeps you safe: on a short coat, you want a tool that lifts and collects hair, not one that rakes and cuts it.

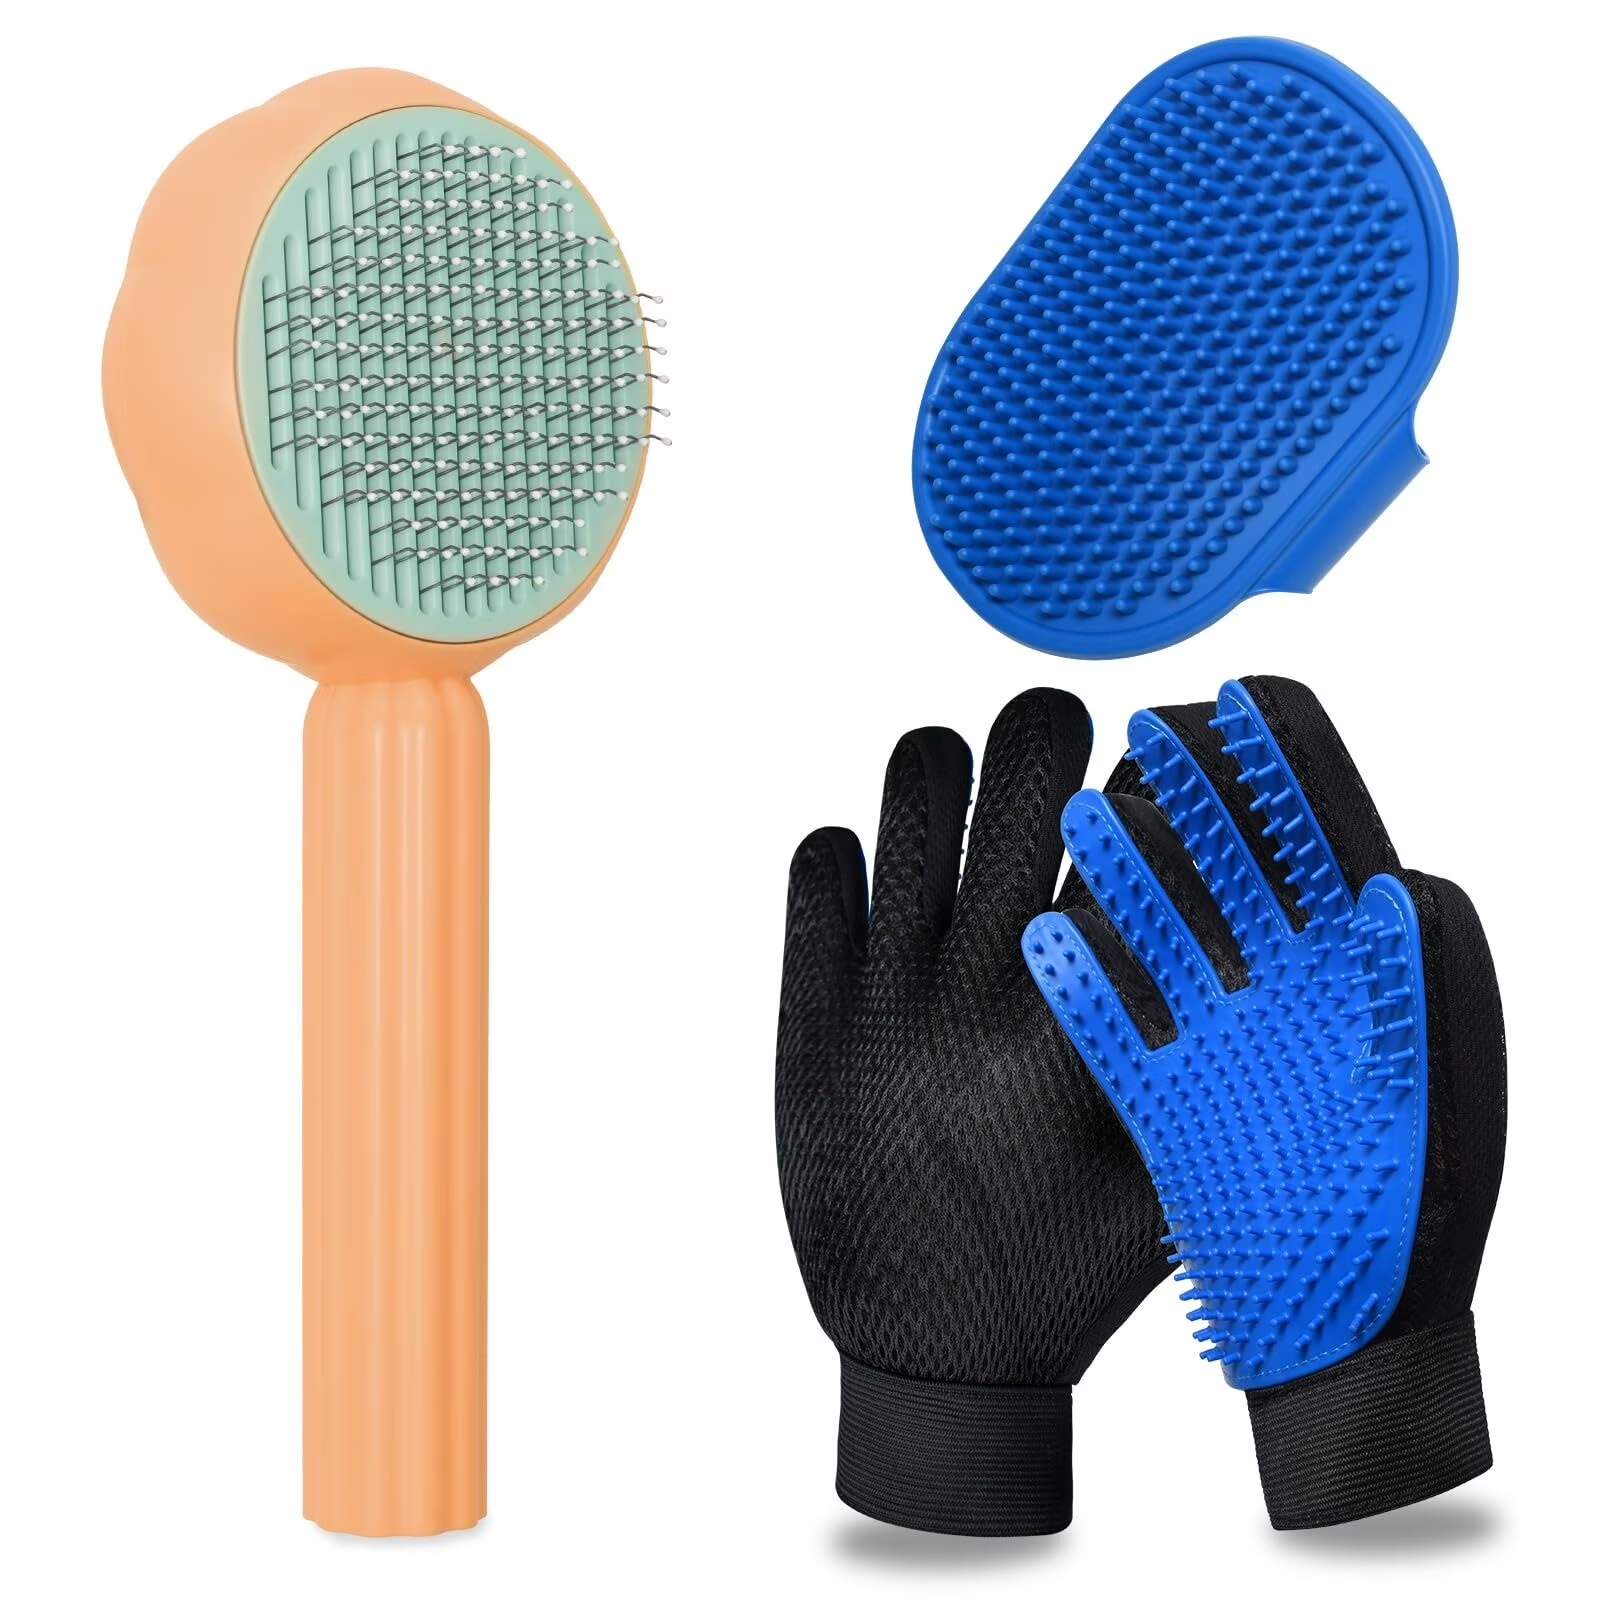
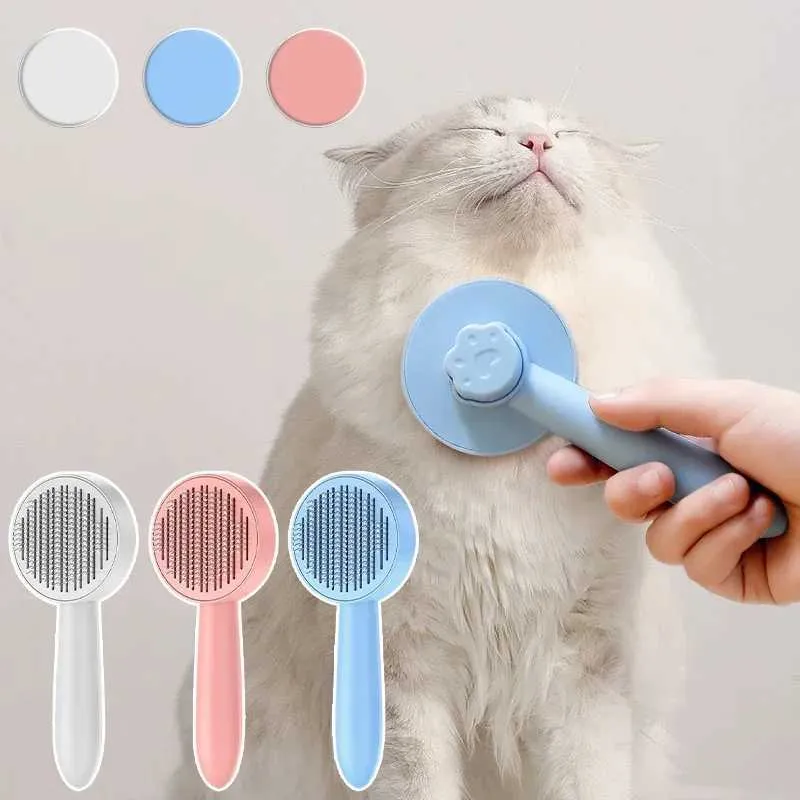
    cat grooming tools

    Image source: Bing (Web (fair-use with source credit))

    Rubber Curry Brush and Grooming Gloves

    This is the default choice for short coats, and for most cats it's the only tool you'll ever need. Soft rubber nubs grip loose hair through static and friction. Nothing pulls, nothing scratches.

    Best for: every single-coated cat, senior cats, overweight cats, nervous cats, kittens, and anyone starting from scratch.

    • Rubber brushes cost roughly £4 to £10 or $6 to $12
    • Grooming gloves run about £6 to £12 or $8 to $15
    • Both wash under a tap and last years

    The glove version wins with cats that dislike being brushed. It reads as stroking rather than grooming, so the cat doesn't clock what's happening. Aggregate user reviews consistently flag this as the tool that works on "impossible" cats.

    The downside is honest enough. Gloves collect less hair per stroke than a rubber brush, so on a heavy double coat you'll be there a while.

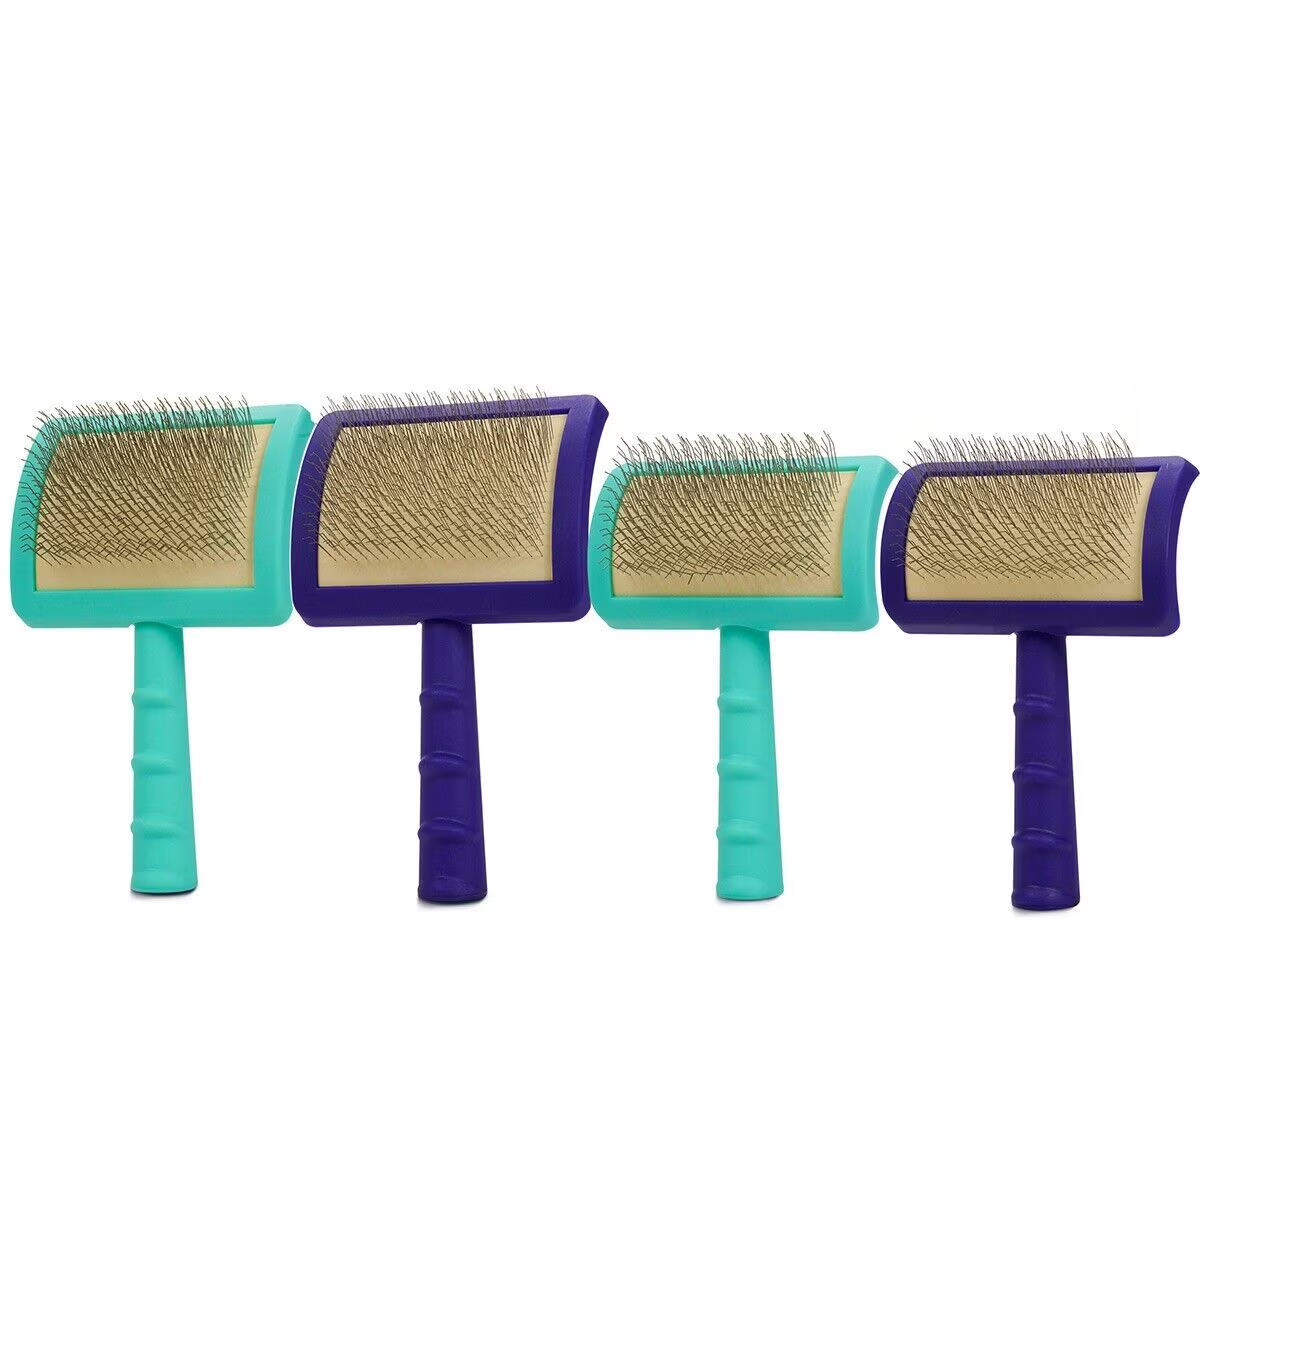
    Slicker Brushes: When They Help and When They Hurt

    A slicker brush is a flat pad of fine bent wire pins. On a matted longhair it's excellent. On a shorthair it's a tool you use carefully or not at all.

    Cat skin is thin, considerably thinner than human skin, and wire pins reach it easily through a short coat. Repeated passes over one spot cause what groomers call brush burn: red, sore, irritated skin.

    If you're using a slicker on a shorthair, then:

    • Choose one with coated or rounded pin tips
    • Use almost no downward pressure, let the brush float
    • Two or three strokes per area maximum
    • Never on the belly, armpits, groin, or over bony hips
    • Stop instantly if the skin pinks up

    Skip it entirely on Rex breeds, elderly cats, thin cats where the spine and hips protrude, and any cat with existing skin irritation.

    Deshedding Tools: Only for Genuine Double Coats

    Deshedding tools use a fine-toothed metal edge to pull dead undercoat up through the guard hairs. Used correctly on the right coat, they're outstanding. Used on the wrong coat, they thin the topcoat and leave a patchy finish.

    Manufacturer guidance from brands like FURminator is clear on this. These tools are designed for undercoat removal. If your cat has no undercoat, there's nothing to remove, so the tool strips guard hair instead.

    QuestionIf yesIf no
    Does the coat spring back when pressed?Deshedder is appropriateUse a rubber brush instead
    Is it moulting season?Once or twice weeklyOnce monthly at most
    Is the cat under 6 months?WaitNot applicable
    Any bald patches or scabs?Stop, see a vetProceed carefully

    Never use a dog deshedding tool on a cat. The blades are wider and more aggressive, and the pressure they need is designed for thicker canine skin.

    Flea Combs and the Damp-Cloth Finish

    A fine-tooth flea comb costs a couple of pounds and does two jobs. It catches fleas and flea dirt, and its narrow tooth spacing lifts dead undercoat that a rubber brush glides over.

    Run it over the tail base and the back of the neck once a week. Those are the two spots where fleas concentrate, and both are hard for a cat to inspect itself.

    The damp cloth finish is the underrated last step. A slightly damp microfibre cloth or chamois wiped along the coat picks up loose hairs your brush lifted but didn't capture. It also flattens static, which matters in dry winter homes.

    Wring the cloth almost dry. You want damp, not wet. A soaked cat is a cat that won't sit still for you again.

    What About Grooming Wipes?

    Cat grooming wipes work as a between-session tidy-up, not a replacement for brushing. They lift surface dust, dander and loose top hair.

    They don't touch the undercoat, so they solve nothing for a shedding British Shorthair. Where they earn their place is on a greasy patch above the tail on an overweight cat, or on a cat recovering from surgery who can't be brushed yet. Check the label says cat-safe.

    Never use baby wipes or anything containing tea tree oil.

    How to Brush a Short Haired Cat Without a Fight

    Technique matters more than tools. Most brushing battles start because the owner did the right thing in the wrong order.

    Follow this sequence and most cats settle within a few sessions.

    1. Pick the right moment. After a meal or after a nap, when the cat is already sleepy. Never when it's playing, hunting, or freshly woken.
    2. Let the cat approve the tool. Hold the brush out. Let it sniff and cheek-rub. That rub is a scent-marking gesture, and it means the tool is now "theirs".
    3. Start at the head. Chin, cheeks, forehead, behind the ears. These are the allogrooming zones where cats groom each other, so brushing here reads as friendly.
    4. Move down the neck to the shoulders. Slow, light strokes.
    5. Work along the back and flanks. Always in the direction the hair lies, from head towards tail.
    6. Stop. Yes, already. The first few sessions end here.
    7. Reward. A treat, a bit of play, or just leave the cat alone, which many cats prefer.

    Once your cat is comfortable with steps 1 to 5, add the harder zones one at a time across later sessions: hindquarters, then tail base, then legs, then belly last.

    The First Session with a Nervous Cat or Kitten

    Keep it to 30 to 60 seconds. That's not a typo. The goal of session one isn't a clean coat.

    It's a cat that doesn't run when it sees the brush.

    • Kittens from 8 weeks: use a soft glove, treat it as play, 30 seconds, three times a week. Cats handled regularly during the socialisation window accept grooming far more readily as adults.
    • Rescue or nervous adults: leave the brush on their bed for a week before you use it. Let it pick up the household smell.
    • Cats that swat: brush while they're eating. Divided attention works wonders.
    • Cats that bite the brush: they're playing, not attacking. Swap to a glove so there's nothing separate to grab.

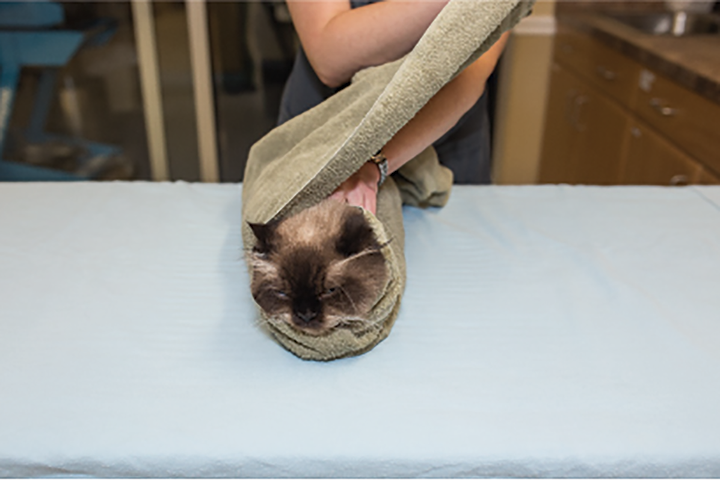
    Never restrain a cat for grooming. Scruffing, pinning, or towel-wrapping a cat to force a brush through gets you one clean cat and a lifetime of hiding. Cat-friendly handling guidance from the veterinary profession has moved firmly away from restraint for exactly this reason.

    Reading the Warning Signs Before You Get Scratched

    Cats give you three or four warnings before they bite. Learn them and you'll never get scratched during grooming.

    SignalWhat it meansWhat to do
    Tail tip flickingMild irritation buildingChange zone, shorten strokes
    Whole tail thumpingGenuinely annoyedStop within 10 seconds
    Skin rippling along the backOverstimulated, possible hyperesthesiaStop now
    Ears rotating back or flatteningEscalating fastStop, step away
    Pupils dilating, head turning to your handBite is nextFreeze, then withdraw slowly
    Sudden stillness after purringClassic petting-induced aggression setupPut the brush down

    The golden rule: stop before the cat asks you to stop. End every session while the cat is still enjoying it. Do that consistently and grooming becomes something your cat comes to you for.

    Reading Your Cat's Coat: What Dandruff, Grease, and Clumps Are Telling You

    Your hands and your brush pick up information no photo will show you. Here's how to read what you find.
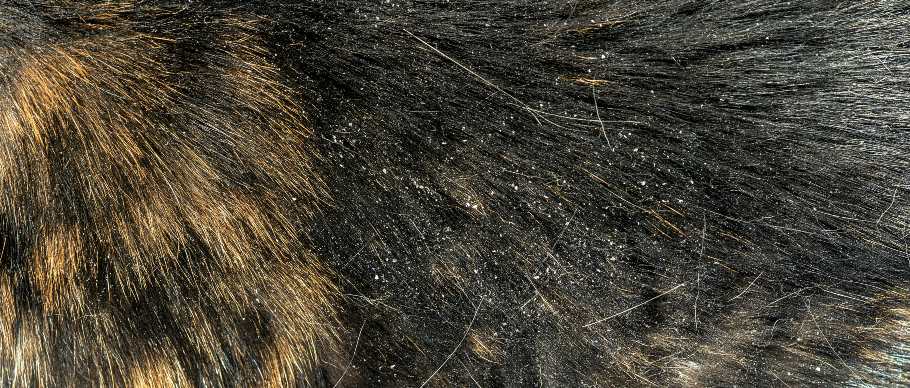
    cat dandruff on lower back

    Image source: Bing (Web (fair-use with source credit))

    Dandruff on the Lower Back and Rump

    Scurf concentrated over the lower back, hips and tail base is the most common finding in shorthairs, and it's rarely a skin disease. It's a reach problem.

    The cat isn't grooming there. Dead skin cells build up because nothing removes them. Check the cat's weight and check its age, because one of those two usually explains it.

    If the dandruff covers the shoulders and head too, then it's more likely systemic. Dry indoor air, poor diet, dehydration, or an underlying condition. Worth a vet conversation.

    Greasy, Clumped, Spiky Fur

    Greasy clumps that make the coat look spiky or separated usually appear in the same place as the dandruff: above the tail, along the lower back and flanks.

    Sebum keeps building because no tongue is spreading it. It mats the hair into stiff little spikes. On short coats these clumps sit close to skin and can be uncomfortable.

    Work them loose with your fingers first. A damp cloth softens the grease. Then comb gently.

    If a clump won't lift after two attempts, leave it and try again the next day.

    Stud Tail

    A greasy, sometimes waxy or crusty patch on the upper surface of the tail base points to overactive supracaudal glands. It's more common in unneutered males, but neutered cats and females get it too.

    Regular cleaning with a cat-safe degreasing product usually manages it. Persistent or infected-looking cases need veterinary attention.

    Dandruff or Flea Dirt?

    Flea dirt is digested blood, so it dissolves red. Dandruff doesn't.

    The test takes ten seconds. Comb the debris onto damp white kitchen roll and wait a moment.

    • Red or rust-coloured smear: flea dirt. Treat with a cat-licensed flea product.
    • Stays white or grey: dandruff. Work through the reach-and-weight checks above.

    Matting on a Short Coat

    Short coats shouldn't mat. When they do, something specific caused it: neglect of an unreachable area, a wound, sticky substance in the fur, or a cat that's stopped grooming entirely.

    Common short-coat mat locations are the armpits, behind the elbows, the groin, and the tail base. All of them are hard for a cat to reach.

    Never cut a mat out with scissors. Feline skin tents up into the base of a mat, and it's easy to slice skin while believing you're cutting hair. Home mat-removal lacerations are a routine emergency presentation.

    Use your fingers and a comb, or book a groomer or vet for a clip.

    Sudden Coat Changes Worth Acting On

    Some changes justify a phone call rather than a brush.

    • Shedding that suddenly doubles outside of moult season
    • A coat that turns dull, dry or greasy over two to three weeks
    • Hair that pulls out too easily in clumps
    • Scabby bumps along the spine and around the neck (miliary dermatitis)
    • Circular patches of hair loss with scaling (possible ringworm)
    • A cat that visibly stops grooming altogether

    That last one deserves emphasis. A cat that suddenly stops grooming is telling you it feels unwell, and it's often the earliest sign owners get.

    Brushing Mistakes That Cause More Harm Than Skipping It

    Some of these are uncomfortable to read, because they're common and they're done with good intentions.

    Over-Brushing the Same Patch

    Cats have a spot they love having brushed, usually the cheeks or the base of the spine. So owners stay there, because the cat leans in and purrs.

    Repeated strokes over one area strip the protective top layer of skin. You get redness, then flaking, then soreness. Cover the whole body, move on, come back later.

    Using a Dog Tool

    The temptation is real, especially in households with a dog already. Don't.

    Dog brushes are built for thicker skin and denser coats. The pins are longer and stiffer, the deshedding blades wider and sharper. On a cat, that's a scratching tool.

    Going Straight for the Belly

    The belly is the most vulnerable part of a cat's body. Even a relaxed cat lying belly-up is not offering it for grooming.

    Belly access is earned over weeks. Head first, back second, hindquarters third, belly last. Many cats never fully accept it, and that's fine, because short coats rarely need belly work anyway.

    Brushing Against the Grain

    Backwards brushing lifts hair against its natural direction and tugs at follicles. It's uncomfortable, it produces static, and it makes the coat look rough.

    Always brush head to tail, following the lie of the coat. The only exception is a very brief backward pass with a rubber brush on a heavy moulting double coat, and even then, finish forwards.

    Sharing One Brush Between Cats

    In a multi-cat household, one brush moves skin flakes, fungal spores, flea eggs and mites from cat to cat.

    Ringworm spreads this way constantly, and spores survive in the environment for months. Give each cat its own tool, or disinfect between cats. It's a five-second fix for a six-week problem.

    Brushing Instead of Weighing

    Brushing an overweight cat's unreachable back is a plaster, not a cure. The dandruff is a symptom of a weight problem that also brings diabetes risk, joint strain and a shorter life.

    Keep brushing, absolutely. But start the weight discussion with your vet at the same time. UK veterinary charity data has consistently put a large share of the pet cat population in the overweight or obese bracket, and owners routinely underestimate their own cat's condition score.

    Treating Over-Grooming with More Grooming

    A cat licking its belly bald has a medical or behavioural problem, not a grooming shortfall.

    Brushing adds mechanical irritation to skin that's already inflamed. It also delays the vet visit that actually solves it. Fleas remain the most common cause by a wide margin, and a cat can be flea-allergic while carrying so few fleas that you never see one.

    When More Brushing Is the Wrong Answer

    There are specific situations where reaching for a brush works against the cat. Knowing them stops you making a treatable problem worse.

    Flea Allergy Dermatitis

    A flea-allergic cat reacts to saliva from a single bite. You'll see scabby bumps along the spine, hair loss over the rump, and relentless licking of the back half.

    Brushing doesn't remove the allergen and it irritates inflamed skin. If you find scabs along the spine, then treat with a cat-licensed prescription product and speak to your vet. The FDA Center for Veterinary Medicine publishes safety information on flea and tick products, worth checking before you buy anything over the counter.

    Never use a permethrin-based dog flea treatment on a cat. Cats can't metabolise permethrin properly and the result is often fatal. This is one of the most common feline poisoning emergencies vets see.

    Psychogenic Alopecia and Stress Barbering

    Some cats lick themselves bald in response to anxiety. Common triggers include a new cat in the house, building work, a house move, or a new baby.

    The hair loss is symmetrical, usually on the belly and inner thighs, and the skin underneath looks normal. Brushing adds another handling demand to a cat that's already stressed.

    If you suspect stress, then look at resources first. Litter tray count, feeding stations, vertical space and hiding places. A cat that's overcrowded needs environmental change, not grooming.

    Psychogenic alopecia is a diagnosis of exclusion, though. Pain and allergy get ruled out first. Don't self-diagnose it.

    Feline Hyperesthesia

    Hyperesthesia shows as rippling skin along the back, sudden tail-chasing, dilated pupils and frantic licking at the flanks. Touching the lower back can set off an episode.

    Brushing that area is exactly the wrong move. These cats need veterinary investigation, because the presentation overlaps with spinal pain, flea allergy and neurological conditions.

    Fragile or Compromised Skin

    Some cats can't take mechanical grooming at all.

    • Post-surgical cats with fresh incisions or shaved patches
    • Very old, very thin cats where hip bones and spine sit close to the surface
    • Cats on long-term steroids, which thin the skin over time
    • Cats with pemphigus foliaceus or other autoimmune skin disease
    • Kittens under 8 weeks, whose skin and coat are still developing

    For these cats, a damp cloth or a bare hand does everything a brush would, with none of the risk.

    Suspected Ringworm

    Ringworm is a fungal infection, not a worm, and it spreads on hair and skin scales. Brushing broadcasts spores across the house and onto every surface the brush touches.

    Circular scaly patches, broken hair stubble, or crusting around the ears and face all warrant a vet visit before any grooming. Ringworm passes to humans readily, and children and immunocompromised adults are most at risk.

    What Brushing Won't Fix: Hairballs, Fleas, and Shedding Myths

    Brushing gets credited with solving problems it only partly touches. Here's where the line sits.

    Does Brushing Stop Hairballs?

    Brushing reduces hairball frequency but doesn't eliminate them. Every hair you catch is one the cat can't swallow, so the maths works in your favour. It just isn't a cure.

    An occasional hairball is normal in any cat. What isn't normal is a cat producing them frequently, or retching repeatedly without bringing anything up.

    If your cat brings up more than roughly one hairball a month, then brushing alone isn't the answer. Frequent hairballs often signal over-grooming, and over-grooming points back to fleas, allergy, pain or stress. Persistent retching also overlaps with inflammatory bowel disease and gut motility problems.

    There's a second point owners miss. Retching that produces nothing, repeatedly, can signal an obstruction. That's an emergency, not a grooming issue.

    Will Brushing Get Rid of Fleas?

    No. A flea comb catches adult fleas and flea dirt, which is useful for detection, but it does nothing about the rest of the infestation.

    Adult fleas on the cat are a small fraction of the total population. The eggs, larvae and pupae sit in carpet, bedding and floor cracks. Combing removes a handful of adults while thousands of life stages carry on developing in your living room.

    Effective flea control means a cat-licensed parasiticide plus environmental treatment, applied to every pet in the household. Combing is a monitoring tool alongside it.

    Does Brushing Stop Shedding?

    Brushing doesn't reduce how much hair a cat sheds. It changes where that hair ends up.

    The hair growth cycle runs through four phases: anagen (growing), catagen (transition), telogen (resting) and exogen (shedding). Nothing you do with a brush alters that cycle. What you can do is collect the hair in exogen before gravity and the sofa do it for you.

    So if your goal is a cleaner house, brushing works brilliantly. If your goal is a cat that stops shedding, that cat doesn't exist.

    Do Hairball Diets Replace Brushing?

    Hairball-control diets and brushing solve the problem at different points. High-fibre formulas help move swallowed hair through the gut. Brushing reduces how much hair gets swallowed in the first place.

    Petrolatum-based hairball pastes work as a lubricant laxative. They're useful short-term, though long-term daily use isn't something to start without a vet conversation, particularly in cats with other conditions.

    ApproachWhat it actually doesBest for
    BrushingRemoves hair before it's swallowedEvery shorthair, especially double coats
    Hairball dietHelps hair pass through the gutCats with recurring hairballs
    Petrolatum pasteLubricates, short-term reliefOccasional flare-ups
    Treating the causeStops excess licking at sourceAny cat over-grooming

    Does a Shorthair Need Bathing?

    Almost never. A healthy short-coated cat with normal grooming behaviour will go its entire life without a bath.

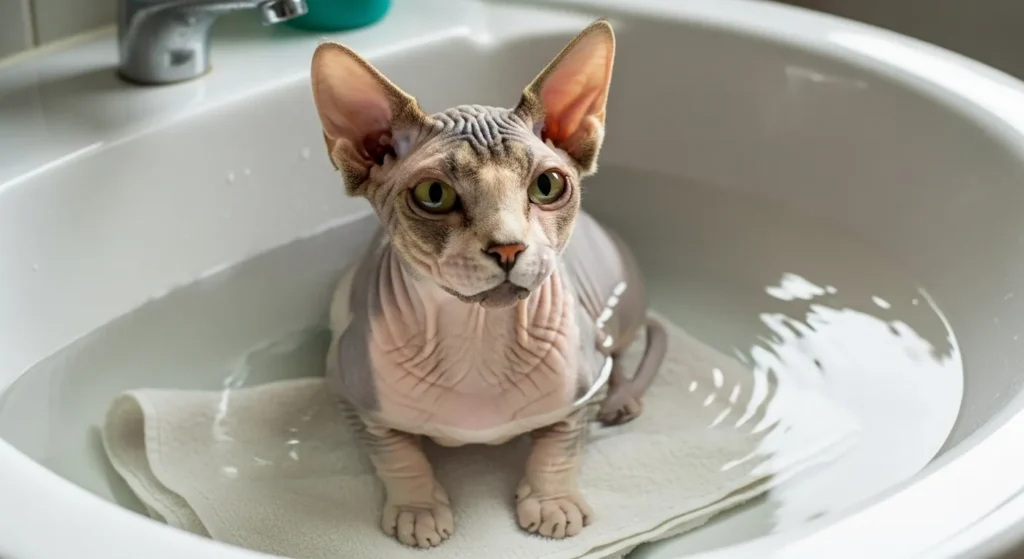
    Bathing strips protective skin oils and stresses most cats badly. The real exceptions are Sphynx cats (no coat to absorb oils, so weekly bathing is standard), cats contaminated with something toxic or sticky, and cats on veterinary medicated shampoo for a diagnosed condition.

    If something oily or sticky gets into the coat, don't wait and don't use household solvents. Call your vet. Cats groom off whatever they land in, and that's how contact problems become poisoning cases.

    Real Scenarios: Three Shorthairs, Three Very Different Routines

    The same question, three cats, three completely different answers. These show how the branches play out in practice.

    Scenario One: The Three-Year-Old Domestic Shorthair

    A lean, healthy moggy with a sleek black coat. The owner reports hair on the sofa but no skin issues, no dandruff, no hairballs.

    The hand test finds no soft underlayer and a comb that glides through cleanly. Single coat.

    • Routine: rubber curry brush, twice a week, three minutes
    • Zones: shoulders, back, flanks, plus a weekly flea comb pass at the tail base
    • What changes: noticeably less fur on furniture within two weeks. Coat condition stays the same, because it was already fine
    • The honest point: this cat doesn't need brushing for its own health. The owner does

    Scenario Two: The Six-Year-Old British Shorthair in April

    Dense blue coat that springs back when pressed. The owner reports fur "everywhere" and a couple of stiff clumps above the tail.

    Textbook double coat mid-moult. Those clumps are compacted dead undercoat, not mats in the usual sense.

    • Routine during the moult: daily. Metal comb first to lift the dead down, then rubber brush to collect it, then a damp cloth finish
    • Deshedding tool: once a week only, light pressure, never over the hips
    • Zones: rear thighs and tail base get the most attention, because that's where the down compacts
    • After the moult: drop back to two or three times a week
    • Timeline: the heavy shed typically runs four to six weeks, then settles

    Scenario Three: The Twelve-Year-Old Overweight Tabby

    Body condition score around 8. Visible white scurf across the lower back, a greasy patch above the tail, and hair that's started to look separated and spiky.

    The owner assumed this was a skin condition. It isn't. It's a cat that physically cannot reach past its own hips, made worse by age-related stiffness.

    • Routine: short sessions, three times a week, two minutes each
    • Tool: grooming glove only. Bony hips and likely joint pain rule out anything firmer
    • Technique: support the body, don't ask the cat to twist, watch for tail flicking around the lumbar spine
    • Grease patches: soften with a damp cloth first, then work loose with fingers
    • The part that matters most: a vet conversation about weight and joint pain. Brushing manages the symptom. Weight loss and pain relief let the cat groom itself again

    That third scenario is the one most owners get wrong. They buy a better brush when what the cat needs is a scale and a mobility assessment.

    What Tools Cost and How Long They Last

    Short-coat grooming is cheap. You're looking at £10 to £25 total for a kit that lasts years, and most cats need only two of these items.

    ToolTypical UK priceTypical US priceRealistic lifespanWho needs it
    Rubber curry brush£4 to £10$6 to $123 to 5 yearsAlmost every shorthair
    Grooming glove£6 to £12$8 to $151 to 2 yearsNervous, senior, or overweight cats
    Fine-tooth metal comb£5 to £12$7 to $15DecadesDouble coats, mat checks
    Flea comb£2 to £6$3 to $8DecadesEvery cat, monthly minimum
    Soft slicker brush£8 to £20$10 to $252 to 4 yearsOptional, use with care
    Deshedding tool£20 to £40$25 to $455+ yearsDouble coats only
    Chamois or microfibre cloth£3 to £8$4 to $101 to 2 yearsFinishing, Rex breeds

    What's Worth Spending On

    Metal tools last effectively forever, so buying a decent comb once beats replacing cheap ones. Rubber degrades, so brushes and gloves are consumables.

    Gloves have the shortest life. The rubber nubs flatten with use and the fabric stretches. Aggregate user feedback suggests around 12 to 18 months of regular use before grip drops off noticeably.

    What's Not Worth Buying

    • Vacuum grooming attachments. Most cats won't tolerate the noise, and returns data reflects that
    • Multi-tool grooming kits. You get five tools, use one, and the rest sit in a drawer
    • Deshedding tools for single-coated cats. No undercoat means nothing to remove
    • Anything marketed for dogs and cats interchangeably. The pressure and blade design are usually built for the dog

    When to Replace a Tool

    Check tools every few months for wear that could hurt the cat.

    • Bent or splayed wire pins on a slicker, replace it
    • Missing protective tips on pin brushes, replace immediately
    • Nicked or rough teeth on a metal comb, file smooth or replace
    • Cracked rubber nubs, replace
    • Any tool used on a cat with ringworm, disinfect thoroughly or bin it

    Building It Into a Routine You'll Actually Keep

    The best brushing schedule is the one that still happens in six months. Ambitious plans collapse. Small, tethered habits survive.

    Tie It to Something You Already Do

    Standalone habits fail. Attached habits stick.

    • Brush during the ad break of whatever you watch in the evening
    • Brush while the kettle boils
    • Brush right after the evening feed, when the cat is already settled and sleepy
    • Keep the brush where the cat sleeps, not in a cupboard

    That last one matters more than it sounds. In our research into why owners stop grooming, the most common reason isn't the cat. It's that the brush lives somewhere inconvenient.

    Split the Cat Across the Week

    Nobody has to do the whole cat in one go, and most cats would rather you didn't.

    If your cat has a short tolerance window, then try zone rotation:

    • Monday: head, neck, shoulders
    • Wednesday: back and flanks
    • Friday: hindquarters and tail base
    • Anytime: flea comb pass at the neck and tail base

    Each session takes 60 to 90 seconds. The whole cat gets covered weekly, and the cat never gets pushed past its limit.

    Adjust for the Season

    Set a reminder for the two moult windows, roughly March to May and September to November in the UK and northern US.

    If your cat is double-coated, then double your frequency for those six-week stretches and drop back afterwards. If your cat is indoor-only under artificial light, then the peaks will be flatter and a steady year-round routine works better.

    Build In a Monthly Check

    Once a month, do a slower pass with your hands rather than a brush. You're feeling for change, not removing hair.

    • Ribs: can you feel them under light pressure?
    • Lower back and rump: any new scurf or grease?
    • Along the spine: any scabby bumps?
    • Belly and inner thighs: any thinning or stubble?
    • Tail base and neck: any flea dirt?
    • Anywhere: new lumps, scabs, or sore spots?

    Write down anything new with the date. Vets get far more useful information from "the dandruff started six weeks ago and the coat's got greasier since" than from "he's been a bit scruffy lately".

    Keep Sessions Positive

    Three rules do most of the work.

    1. End while the cat is still enjoying it, every time
    2. Never chase a cat that walks away
    3. Pair the brush with something good, whether that's a treat, a meal, or a favourite spot on your lap

    Cats don't hold grudges about grooming, but they do form strong associations. Get that association right early and you'll have a cat that comes running when it hears the brush come out.

    Frequently Asked Questions

    How often should I brush a short haired cat?

    Once or twice a week suits most healthy single-coated cats. Double-coated shorthairs like British Shorthairs need two to three sessions weekly, rising to daily during the spring and autumn moult. Overweight, senior, or arthritic cats need around three short sessions a week, focused on the lower back they can't reach themselves.

    Do short haired cats shed more than long haired cats?

    Not necessarily. Shedding volume depends on coat density and undercoat, not hair length. A double-coated British Shorthair often sheds more hair by weight than a long-haired cat with a single coat.

    The difference is that short hairs weave into fabric more tightly, so they feel harder to remove.

    Can I use a FURminator on a short haired cat?

    Only if your cat genuinely has an undercoat. Deshedding tools pull dead down through the topcoat, so on a single-coated Siamese or Bengal there's nothing to remove and the tool strips guard hairs instead. Limit use to once or twice a week during moult, with light pressure, never over bony hips.

    Why does my short haired cat have dandruff on its back?

    Almost always because it can't reach that area. Excess weight and age-related stiffness both block the spinal twist a cat needs to groom its rump and tail base. Dead skin builds up because nothing removes it.

    If the dandruff also covers the shoulders and head, ask your vet about diet, hydration, or an underlying condition.

    Does brushing stop hairballs completely?

    No, but it helps significantly. Every hair your brush collects is one your cat can't swallow, so frequency drops. Occasional hairballs remain normal.

    More than roughly one a month suggests over-grooming from fleas, allergy, pain, or stress, and repeated unproductive retching needs same-day veterinary attention.

    My cat hates being brushed. What should I do?

    Switch to a grooming glove and cut sessions to 30 seconds. Gloves read as stroking, not grooming, so most resistant cats accept them. Start at the cheeks and chin, never the belly.

    Brush after meals when the cat is sleepy, and always stop before it asks you to.

    Your Decision Guide at a Glance

    Run through these five checks and you'll land on the right routine in under a minute.

    CheckQuestion to askWhat it decides
    1. CoatDoes the coat spring back when pressed?Single coat means low frequency. Double coat means high
    2. WeightCan you feel the ribs under light pressure?If not, expect scurf on the lower back
    3. AgeIs the cat over ten, or stiff when jumping?Assume it can't reach behind the hips
    4. SeasonIs it spring or autumn?Double frequency for six weeks, then drop back
    5. SkinAny bald patches, scabs, or stubble?Yes means vet first, brush later

    If all five checks come back clear, then you've got the easiest possible cat. A rubber brush twice a week, three minutes, plus a monthly flea comb pass. That's the whole job.

    If check one flags a double coat, then add a fine-tooth metal comb and step up to two or three sessions weekly, going daily through the moult.

    If checks two or three flag weight or age, then switch to a grooming glove, shorten sessions, focus on the rear half, and book a vet conversation about weight and joint pain. Brushing is compensatory care here, not the fix.

    If check five flags anything at all, then stop and get a diagnosis. Bald patches, scabbing, sudden shedding and a coat that's dulled over a few weeks are clinical signs. More grooming delays the answer.

    The single most useful habit in all of this isn't the brushing itself. It's the monthly hands-on check. Cats hide illness well, and their coats give it away long before their behaviour does.

    Ten minutes a month with your hands on your cat is worth more than any tool you'll ever buy.
  • Tutorial: Cat Scabs From Over Grooming

    Tutorial: Cat Scabs From Over Grooming

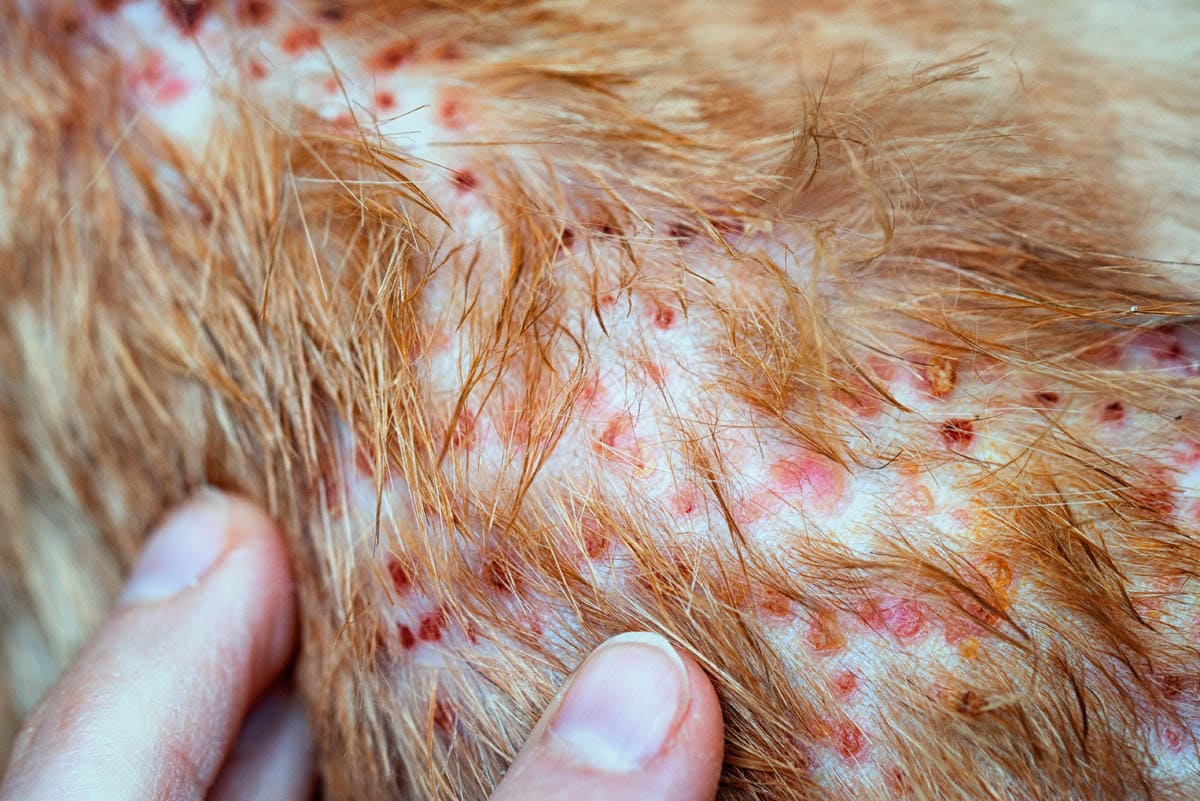
    Your cat has scabs, and you're fairly certain she's causing them herself. You've watched her lick, bite, and groom the same spots on her belly until the fur thinned and tiny crusty bumps appeared. The cycle is exhausting.

    She grooms, the skin gets worse, so she grooms more. Here's the critical thing to understand: over-grooming is a symptom, not a disease. Something is driving that behavior, and until you identify the root cause, those scabs will keep coming back.

    The good news is that most causes are manageable. Flea allergy dermatitis alone accounts for roughly 60% of miliary dermatitis cases in cats, according to veterinary dermatology research. Food allergies, environmental triggers, and underlying pain make up most of the rest.

    As of 2026, the diagnostic approach is more streamlined than ever, with vets following a clear ladder of tests to find the trigger. That said, this process takes patience. A proper food trial runs 8 to 12 weeks minimum, and missteps along the way can reset the clock entirely.

    Let's walk through what you're seeing, what it means, and exactly how to fix it without going in circles.

    Quick Answer

    Cat scabs from over grooming are usually caused by an underlying itch, pain, or stress. Flea allergy dermatitis is the most common trigger. Food and environmental allergies are close behind.

    Treatment requires finding the root cause, not just stopping the licking. See a vet if scabs appear infected, spread rapidly, or cover large areas. Never use dog flea medication on a cat, as it can be fatal.

    Why This Needs a Careful Approach

    Here's what surprises most cat owners: over-grooming is rarely a behavioral problem. Studies consistently show that psychogenic over-grooming, where the cat grooms purely due to anxiety or obsessive-compulsive tendencies, is the actual diagnosis in only about 10% of cases. Most veterinary dermatologists treat it as a diagnosis of exclusion.

    That means your vet will only consider it after ruling out every medical cause first.

    The danger of guessing wrong is significant. If you assume stress is the culprit and skip the medical workup, you could miss a flea infestation, a food allergy, or even internal pain from arthritis or bladder inflammation. Worse, untreated over-grooming leads to secondary bacterial infections, a condition called pyoderma.

    Those tiny scabs can become weeping, painful lesions that require antibiotics and more aggressive treatment.

    There's also the risk of masking. Over-the-counter anti-itch sprays and home remedies might temporarily calm the skin, but they don't stop the underlying trigger. The cat keeps grooming, the scabs keep forming, and you've lost precious weeks that could have gone toward a proper diagnosis.

    A structured approach saves time, money, and your cat's comfort. Most cases resolve within 2 to 4 weeks of starting the correct treatment, but only if you identify the right trigger first.

    What Over-Grooming Actually Looks Like

    Identifying over-grooming requires more than noticing your cat licks herself. All cats groom. It's normal and healthy.

    The key is distinguishing normal grooming behavior from the compulsive, damaging kind that creates scabs.

    Normal grooming happens in sessions, usually after meals or naps. The cat licks her fur, maybe nibbles at a tangle, and moves on. Her coat stays smooth, and her skin remains healthy underneath.

    Over-grooming looks different. You'll start to see thinning hair, often in a symmetrical pattern on the belly, inner thighs, or along the flanks. The hair that remains looks stubby, almost like it's been cut with scissors.

    That's a classic sign called barbering, where the cat's rough tongue breaks the hair shafts rather than pulling them out.

    miliary dermatitis scabs

    Image source: Bing (Web (fair-use with source credit))

    Miliary dermatitis is the specific skin reaction most often linked to over-grooming scabs. The term comes from the Latin word for millet seeds, which perfectly describes the small, crusted bumps that appear on the skin. These tiny papules feel like sandpaper under your fingers and often show up along the back, neck, and tail base, though they can appear anywhere on the body.

    The Locations That Point to Specific Causes

    Where the scabs appear matters more than most owners realize. The pattern gives your vet valuable clues before any testing begins.

    Belly and inner thighs. This is the most common over-grooming zone. It's where cats can reach easily while lying down. Flea allergies, food allergies, and psychogenic grooming all show up here first.

    Tail base and lower back. This pattern strongly suggests flea allergy. Fleas tend to bite around the rump and tail, and a hypersensitive cat will over-groom that entire region in response.

    Head, neck, and ears. Over-grooming in these areas often points to environmental allergies (atopy) or food allergies. Pollen, dust mites, and molds fit here too.

    Front legs and paws. Lateral grooming on the front legs is sometimes called barbering and often appears with both allergies and anxiety. Paw licking can also signal joint pain or a foreign body like a grass seed.

    Flanks (sides). This pattern is less common but appears in some stress-related grooming cases. It can also accompany feline hyperesthesia syndrome, a condition where the skin along the back ripples and the cat becomes hypersensitive to touch.

    cat scabs from over grooming

    Image source: Bing (Web (fair-use with source credit))

    Look for other signs beyond scabs. Redness, flaky skin, greasy fur, or a moth-eaten appearance to the coat all add context. Also pay attention to when the grooming happens.

    If it occurs mostly at night or when you're away, separation-related stress could be a factor. If it happens right after meals, food allergy moves up on the suspicion list.

    The Usual Suspects: Why Cats Over-Groom

    Understanding the root causes of over-grooming is the foundation of solving the problem. Each trigger operates differently, requires a different treatment approach, and has its own timeline for resolution.

    Flea Allergy Dermatitis: The Number One Offender

    Flea allergy dermatitis (FAD) is the single most common cause of miliary dermatitis in cats. Here's the catch: a normal cat can be bitten by fleas and show almost no reaction. A cat with FAD has an allergic response to proteins in flea saliva.

    One single flea bite can trigger intense itching for up to two weeks. That's why you might never see a single flea on your cat and still be dealing with FAD. The cat grooms so aggressively that she swallows the fleas before you ever spot them.

    Treatment requires rigorous flea control. Prescription oral or topical products from your vet are significantly more effective than over-the-counter options. A single dose of a prescription product like fluralaner or sarolaner kills fleas within hours, but you must treat every pet in the household and continue prevention year-round.

    Indoor-only cats still need flea prevention. Indoor fleas from visitors, other pets, or even your own clothing can trigger a reaction.

    Food Allergies: More Common Than You Think

    Food allergies in cats typically develop after years of eating the same diet. The most common culprits are chicken, beef, fish, and dairy. Unlike humans, cats rarely show digestive symptoms with food allergies.

    Instead, the reaction manifests on the skin. Itching around the face, neck, and ears is common, but belly over-grooming also appears frequently.

    Diagnosing food allergies requires a strict elimination diet trial. Your vet will likely recommend a hydrolyzed protein prescription diet or a novel protein diet using something your cat has never eaten, like rabbit or venison. The trial runs 8 to 12 weeks minimum.

    That means no treats, no table scraps, no flavored medications, not even a bite of another cat's food. If the itching subsides during the trial and flares when the old food is reintroduced, the diagnosis is confirmed.

    Environmental Allergies (Atopy)

    Cats can be allergic to the same things humans are. Pollen, grass, mold spores, dust mites, and more can trigger an allergic response. Atopy often causes seasonal itching, though indoor allergens like dust mites cause year-round symptoms.

    The pattern of over-grooming tends to involve the face, ears, paws, and belly. Unlike flea allergy, there's no single trigger you can eliminate. Treatment usually involves reducing allergen exposure, topical therapy, and sometimes immunotherapy.

    Immunotherapy, also called allergy shots or sublingual drops, trains the immune system to tolerate specific allergens over time. It has a success rate of roughly 60-80% in cats, according to veterinary dermatology research. It's not a quick fix, though.

    Most cats need 6 to 12 months before seeing meaningful improvement.

    Pain as a Hidden Trigger

    Here's a scenario that catches many owners off guard. A senior cat starts over-grooming her lower belly. She has scabs from all the licking.

    Everyone assumes it's allergies. But bloodwork and skin tests come back clean. The real culprit turns out to be arthritis in her hips and lower spine.

    The cat discovered that licking somehow distracts from the joint pain, or the area itself is referred pain from the spine.

    Feline lower urinary tract disease (FLUTD) can have a similar effect. Cats with bladder inflammation, urinary crystals, or interstitial cystitis often develop a lower belly grooming pattern. They lick to soothe the discomfort, and that grooming escalates into skin damage.

    In many cases, treating the underlying urinary condition resolves the over-grooming entirely.

    Your vet may recommend a trial of pain medication to see if over-grooming decreases. This diagnostic test is fast and inexpensive compared to full allergy workups. If the licking stops within two weeks of starting pain relief, you've found your culprit.

    Psychogenic Over-Grooming: Real but Rarely the First Answer

    Stress, anxiety, and obsessive-compulsive tendencies can absolutely cause over-grooming in cats. It's a displacement behavior, something cats do to cope with conflict, frustration, or boredom. Multi-cat households, changes in routine, new pets, or moving homes can all trigger it.

    But research shows psychogenic alopecia is over-diagnosed. A review in the Journal of Feline Medicine and Surgery emphasized that behavioral over-grooming should only be diagnosed after a complete medical workup. Even when behavioral triggers seem obvious, physical causes must be ruled out first.

    The two often coexist, too. A cat with flea allergy may learn to groom excessively, and that behavior persists even after the fleas are gone.

    Treatment for true psychogenic over-grooming combines environmental enrichment with behavioral modification. Puzzle feeders, cat trees, window perches, and interactive play sessions help redirect the behavior. In severe cases, your vet may prescribe anti-anxiety medication like fluoxetine or clomipramine.

    These drugs take 4 to 8 weeks to show full effect and should never be stopped abruptly.

    How Vets Actually Diagnose This

    The diagnostic process for over-grooming and scabs follows a logical, step-by-step ladder. Each step rules out the cheaper, more common causes before moving toward the complex ones. Understanding this process helps you know what to expect and why your vet is asking certain questions.

    Step 1: The Physical Exam and History

    Your vet will start with a full physical exam, paying close attention to skin patterns, lesion locations, and any signs of secondary infection. They'll ask about your cat's environment, diet, flea prevention history, and recent changes at home. Be thorough here.

    The more context you provide, the more efficiently your vet can narrow the possibilities.

    Step 2: Flea Combing and the Wet Paper Test

    Before any fancy testing, your vet will likely do a flea check. This involves combing through your cat's fur with a fine-toothed flea comb, focusing on the neck, back, and tail base. Any debris that comes off gets placed on a damp white paper towel.

    If it leaves reddish-brown streaks, that's flea dirt, digested blood from flea feces. This test is extremely useful because even one flea in the environment can trigger a severe reaction in an allergic cat.

    flea allergy dermatitis

    Image source: Bing (Web (fair-use with source credit))

    Step 3: Skin Cytology

    If your vet sees scabs, crusts, or pustules, they'll likely perform a skin cytology. This involves taking a piece of clear tape and pressing it gently on the affected skin, then examining it under a microscope. This quick, painless test checks for bacteria, yeast, and inflammatory cells.

    It tells your vet whether secondary infections are present and helps guide treatment choices.

    Step 4: Skin Scraping and Trichogram

    To rule out mites like Demodex or Notoedres, your vet may perform a skin scrape. A scalpel blade is used to gently scrape the surface of the skin to collect cells for microscopic examination. A trichogram involves plucking a few hairs and examining the roots and shafts.

    This reveals whether the hair was broken, typical of over-grooming, or fell out from the root, which suggests hormonal or immune issues.

    Step 5: The Food Elimination Trial

    This is the gold standard for diagnosing food allergies. It involves feeding your cat a diet with a single novel protein source and a single novel carbohydrate source for 8 to 12 weeks. That means nothing else.

    No treats, no table scraps, no flavored medications. If the itching subsides during the trial and flares when the old food is reintroduced, the diagnosis is confirmed.

    Step 6: Bloodwork and Imaging

    If the above steps don't yield clear answers, your vet may recommend bloodwork to rule out systemic conditions like hyperthyroidism or diabetes. X-rays or ultrasound can help identify pain sources like arthritis, bladder stones, or other internal issues driving the grooming behavior.

    Step 7: Allergy Testing

    Intradermal skin testing or serum allergy testing can identify environmental allergens for immunotherapy. This isn't typically the first step because it's more expensive and requires special equipment, but it's an excellent tool for cats with confirmed atopy that doesn't respond to management alone.

    The Step-by-Step Plan for Home Management

    While your vet handles the diagnostic side, there are concrete steps you can take at home to support your cat and prevent things from getting worse. These measures don't replace veterinary care, but they address immediate needs and reduce the chance of secondary infections.

    Step 1: Rule Out Fleas Properly

    Even if you don't see fleas, start rigorous flea control immediately. Use a prescription product from your vet rather than an over-the-counter option. Treat every pet in the household, and continue year-round, even for indoor cats.

    Vacuum thoroughly, wash pet bedding in hot water weekly, and consider a household spray for severe infestations.

    Step 2: Address Immediate Skin Irritation

    Bathing with a veterinary-approved, hypoallergenic shampoo can remove allergens and soothe irritated skin. Look for products containing oatmeal or phytosphingosine. Do not use human shampoos, which can dry out cat skin and worsen the problem.

    Follow up with a cool-water rinse to reduce inflammation.

    An Elizabethan collar may be necessary for a short period to break the grooming cycle and let the skin heal. Soft fabric collars are more comfortable than plastic cones, but they must allow proper airflow to prevent moisture buildup and secondary infections.

    Step 3: Enrich the Environment

    Environmental enrichment is not just for behavioral cases. Even cats with confirmed allergies benefit from reduced stress. Provide vertical spaces, scratching posts, and puzzle feeders.

    Set aside 15 minutes twice daily for interactive play with wand toys. This gives your cat an alternative focus and reduces compulsive grooming habits.

    Step 4: Track Symptoms Systematically

    Keep a daily log of your cat's grooming behavior, noting which areas she targets and any changes in pattern. Photograph the affected areas weekly so you can visually compare progress. Also track environmental factors like new products, seasonal changes, or household stress that might correlate with flare-ups.

    This data is invaluable to your vet and can dramatically speed up the diagnostic process.

    Step 5: Ensure Complete Food Trial Compliance

    If your vet recommends a food trial, treat it as a medical protocol. Read every ingredient label, including those on treats, supplements, and even hidden sources like flavored toothpaste or plastic toys that contain animal proteins. Use unflavored medications whenever possible.

    One accidental bite of the wrong food can reset the entire trial and cost you weeks.

    Step 6: Prevent Licking Without Punishing

    Never punish your cat for over-grooming. It creates stress, which makes the behavior worse. Instead, use negative reinforcement gently.

    A bitter-tasting spray applied to targeted areas can discourage licking without causing anxiety. Apply it consistently and reapply after meals or play sessions.

    Treatment Options: What Works, What Doesn't

    Once your vet identifies the underlying cause, treatment becomes focused and effective. Here's what the evidence supports and what typically disappoints.

    Flea Control: Prescription vs. Over-the-Counter

    AspectPrescription ProductsOver-the-Counter Products
    Active ingredientsFluralaner, sarolaner, isoxazolinesPyrethrins, fipronil (older)
    Efficacy95%+ flea kill within 24 hours70-85%, resistance reported
    SafetyMinimal side effects at labeled dosesHigher risk of skin reactions
    Cost$20-40 per dose$10-20 per dose
    RequiredVeterinary prescriptionAvailable without vet visit

    Prescription products are the clear winner for FAD. A single oral dose of fluralaner eliminates fleas within hours and provides protection for up to 12 weeks. Topical prescription options like selamectin also work well but require monthly application.

    Never use dog flea medication on a cat. Permethrin, common in dog products, is highly toxic to cats and can cause tremors, seizures, and death. Check every label carefully.

    Dietary Changes: Hydrolyzed vs. Novel Proteins

    AspectHydrolyzed Protein DietNovel Protein Diet
    How it worksProteins broken into tiny pieces that evade the immune systemUses a single protein source your cat has never eaten
    ExamplesHill's z/d, Royal Canin UltaminoRabbit, venison, duck formulas
    Trial duration8-12 weeks8-12 weeks
    CertaintyHighly reliableDependent on true exposure history
    Best forConfirming food allergy diagnosisConfirmed food allergy maintenance

    Hydrolyzed diets are the standard for diagnosis because they remove all intact proteins. Novel protein diets work well for long-term management once the allergen is identified. Neither works if your cat sneaks treats, human food, or another pet's meal.

    Aggregate reviews consistently show that hydrolyzed protein diets outperform novel protein diets in diagnostic accuracy. Several manufacturers report compliance challenges, however, because cats often reject the taste initially. Transition slowly over 7 days, and try warming the food slightly to enhance palatability.

    Medications: Steroids, Antihistamines, and Immunosuppressants

    Glucocorticoids (steroids). Fast and effective for acute flare-ups. Prednisolone is the most common choice in cats. Doses of 1-2 mg/kg once daily typically provide relief within 48 hours.

    Long-term use carries risks including diabetes and immunosuppression, so steroids work best for short-term control while the underlying cause is identified and treated.

    Antihistamines. Cetirizine at 1 mg per cat once daily works for some cats. Antihistamines are inconsistent in feline dermatology, helping roughly 30-40% of cases. They have fewer side effects than steroids but are rarely a standalone solution.

    Immunosuppressants. Cyclosporine (Atopica) works for severe allergic skin disease. It takes 4-6 weeks to reach full effect and costs more than steroids, but it's a safer long-term option. Manufacturer specifications indicate dosing at 5-7 mg/kg once daily, with dose adjustments based on response.

    Behavioral Therapies: From Enrichment to Prescription Drugs

    For confirmed psychogenic over-grooming, a multi-layered approach works best. Environmental enrichment provides the foundation. Puzzle feeders, automatic toys, and window perches reduce boredom and stress.

    Feliway, a synthetic feline facial pheromone diffuser, helps some cats by creating a calmer environment.

    When enrichment isn't enough, prescription medications help. Fluoxetine, an SSRI, is the most studied drug for feline psychogenic alopecia. It reduces grooming behavior but takes 4-8 weeks to show effects.

    Clomipramine, a tricyclic antidepressant, works faster but has a higher side effect profile. Both require regular veterinary monitoring.

    Why OTC "Anti-Itch" Sprays Usually Fail

    Over-the-counter sprays and creams rarely help with over-grooming because they don't address the root cause. Most contain hydrocortisone or benzocaine, which numb the skin temporarily but do nothing to stop the underlying itch trigger. Worse, they can irritate broken skin and cause the cat to groom even more to remove the strange taste or sensation.

    Save your money and focus on a veterinary diagnosis. A $60 exam fee and proper flea control will do more for your cat than $30 worth of sprays from the pet store.

    Mistakes Cat Owners Make

    Even well-intentioned owners derail their cat's recovery. These are the most common errors we see repeatedly in veterinary dermatology forums and clinics.

    Stopping Flea Treatment in Winter

    Fleas survive year-round in heated homes. The eggs and larvae in your carpet wait out the cold months and hatch when conditions improve. Indoor-only cats need year-round prevention, especially in multi-pet households.

    A single lapse in treatment can restart the entire cycle of over-grooming and scabs.

    Giving Dog Medication to Cats

    This cannot be emphasized enough. Permethrin, commonly used in dog flea and tick products, is lethal to cats. Symptoms include tremors, drooling, seizures, and death.

    Always verify that the product label explicitly states it is safe for cats.

    Using Human Antihistamines Without Vet Approval

    Human allergy medications contain additional ingredients that are toxic to cats. Antihistamines combined with decongestants or pain relievers can cause liver damage or kidney failure. Only give a medication at a dose and formulation your vet explicitly approves.

    Giving Up on a Food Trial After 3 Weeks

    Food allergy symptoms take time to resolve. The immune system needs at least 8 weeks to clear reactive antibodies from the skin. If your cat still itches at week 3, that doesn't mean the trial failed.

    It means you need more patience. Stopping early wastes the effort and leaves you back at square one.

    Confusing "Less Grooming" with "Healed"

    A cat may reduce grooming frequency but still have inflamed skin underneath. Monitor the skin closely, not just the behavior. Scabs should flatten and hair should begin regrowing within 2 to 4 weeks of effective treatment.

    If hair regrowth stalls or scabs persist, the underlying trigger hasn't been fully addressed.

    Treating Only One Pet in the Household

    In multi-pet homes, flea treatment must cover every cat and dog. Even if your other pets don't show symptoms, they can carry fleas that re-infest your affected cat. Treat everyone, and treat them at the same time.

    When The Scabs Mean Something Worse

    Over-grooming scabs are usually managed with proper treatment. But some signs warrant urgent veterinary attention.

    Signs of Secondary Bacterial Infection (Pyoderma)

    When the skin barrier breaks down, bacteria invade. Look for these warning signs:

    • Wet, weeping lesions that leak fluid
    • Pus-filled pustules
    • A foul odor from the affected area
    • Heat or swelling around the scabs
    • Lethargy or loss of appetite
    • Fever

    If you see any of these, call your vet immediately. Pyoderma requires antibiotics, usually for 2 to 4 weeks. Untreated skin infections can spread to the bloodstream and become life-threatening.

    Keep in mind that an Elizabethan collar is essential during treatment to let the skin heal. A cat with pruritus cannot be stopped from licking by willpower alone.

    Eosinophilic Granuloma Complex and When to Worry

    Eosinophilic granuloma complex encompasses a group of skin reactions in cats that may produce raised, ulcerated, or linear lesions. Indolent ulcers on the upper lip, eosinophilic plaques on the belly or thighs, and granulomas on the chin or back legs are the three main forms. These lesions can look alarming and may mimic over-grooming scabs.

    The treatment mirrors what we've discussed: identify the underlying allergen, control fleas, and use immunosuppressive therapy when necessary. The key difference is that eosinophilic lesions often require more aggressive treatment to resolve. A prolonged steroid or cyclosporine course may be needed.

    If you see open, ulcerated lesions, especially on the lips or paws, don't wait. These can become infected quickly and are painful for your cat.

    Red Flags That Suggest Internal Pain

    Over-grooming that focuses on one specific area, rather than a general pattern, should raise a red flag for localized pain.

    Lower back or flank grooming can signal kidney issues or spinal arthritis. Licking one joint can indicate osteoarthritis, especially in senior cats. Excessive licking of the paws correlates with joint pain in multiple studies. Grooming near the abdomen may indicate pancreatitis, inflammatory bowel disease, or bladder problems.

    A response to pain medication within 1 to 2 weeks strongly suggests pain as the root cause, even when radiographs look normal.

    The Emergency Signs That Warrant Immediate Vet Care

    Some situations leave no room for waiting:

    • Your cat cannot eat, drink, or urinate normally
    • Persistent vomiting or diarrhea
    • Blood in urine or stool
    • Extreme lethargy or weakness
    • Difficulty breathing
    • Seizures or tremors
    • Any sign of permethrin toxicity (if you suspect exposure, call an emergency vet immediately)

    When in doubt, call your vet. It's always better to ask a professional than to wait and risk a serious outcome.

    Real Recovery Timelines

    Understanding what recovery looks like helps you track progress and identify problems early. Here's what to expect at each stage.

    Days 1-3: Initial Changes

    If the trigger is medication-based, like flea treatment or steroids, you may see reduced licking within 48 hours. The skin will still be red and irritated, but your cat may show less interest in grooming the area. Scabs may begin to soften and flake off naturally.

    Do not pick at them.

    During this period, keep your cat in an e-collar if directed by your vet. This prevents additional trauma while the skin starts healing.

    Week 1: Stabilization

    Scabs should flatten and lose their crusty texture. Redness may fade but not disappear completely. Your cat's grooming behavior should reduce significantly, though some residual licking is normal.

    Hair regrowth begins around the edges of affected areas.

    Weeks 2-4: Visible Improvement

    New hair growth becomes clearly visible. The skin should look pink and healthy rather than red and inflamed. Most cases show significant improvement within 3 weeks of correct treatment.

    If you see no improvement by week 2, the diagnosis may be incorrect or incomplete.

    Broken hair shafts from old grooming sessions take time to regrow. The coat may look patchy for a few weeks until new growth catches up.

    Weeks 4-8: Hair Regrowth

    By one to two months, the affected areas should show full or nearly full hair regrowth. Your cat's coat should regain its smooth appearance. If hair regrowth lags or spots remain bald, consider a follow-up visit to rule out complications.

    When Progress Stalls

    Beware of apparent improvement that doesn't last. If your cat improves on treatment but relapses within a few weeks, the underlying cause likely hasn't been eliminated. This pattern classically appears with:

    • Flea re-infestation
    • Food allergen reintroduction
    • Incomplete food trial
    • Environmental allergen exposure
    • Steroid resistance

    If you see this pattern, return to your vet for further investigation rather than repeating the same treatment blindly.

    Practical Questions from Cat Owners

    e-collar cat recovery cone

    Image source: Bing (Web (fair-use with source credit))

    "Can I just use a cone to stop the licking?"

    An Elizabethan collar stops the behavior temporarily, but it doesn't treat the underlying cause. Use a cone only as a short-term measure to let skin heal or protect sutures. If you rely on a cone for weeks without addressing the root trigger, the grooming behavior resumes the moment the cone comes off.

    "Will changing my cat's food help if it's allergies?"

    Only if the allergy is food-based. An elimination diet trial is the only way to confirm. Switching to a "grain-free" or "limited ingredient" diet without veterinary supervision rarely works because cross-contamination and unrecognized proteins still trigger reactions.

    Use a prescription hydrolyzed or novel protein diet under your vet's guidance.

    "How do I know if my cat is actually stressed?"

    Behavioral signs of feline stress include hiding, reduced appetite, excessive vocalization, aggression, and altered litter box habits. Environmental changes like a new pet or moving homes are common triggers. However, stress and medical causes are not mutually exclusive.

    Treat the medical causes first, then address stress.

    "Is over-grooming ever just a bad habit?"

    It can become a learned behavior that persists after the original trigger is gone. This is how psychogenic over-grooming develops. Once medical causes are ruled out and the skin has healed, behavioral modification and enrichment can break the habit.

    "Can cats develop OCD?"

    Yes, cats can display obsessive-compulsive behaviors, including over-grooming. The condition is called feline psychogenic alopecia or over-grooming disorder. It responds to a combination of environmental enrichment and prescription anti-anxiety medication.

    It is, however, a diagnosis of exclusion.

    Frequently Asked Questions

    How long does it take for cat scabs from over grooming to heal?

    Once treatment targets the correct cause, most scabs flatten within 1 to 2 weeks and fully resolve by week 3 or 4. Hair regrowth follows over the next several weeks. If you see no improvement after two weeks of treatment, the diagnosis may be incomplete or the treatment plan needs adjustment.

    Can stress alone cause scabs on cats?

    Stress can trigger over-grooming, which damages skin and causes scabs. However, pure psychogenic over-grooming is rare, affecting roughly 10% of cats with skin issues. Most cats with scabs have an underlying medical condition like fleas, food allergies, or pain.

    Your vet should rule these out before attributing the problem to stress.

    What does miliary dermatitis look like on a cat?

    Miliary dermatitis appears as dozens of small, crusty bumps that feel like fine sandpaper. They often cluster along the back, neck, and tail base. Hair loss and redness accompany the bumps.

    The condition is a reaction pattern that can stem from multiple allergic triggers, most commonly flea bites.

    Is it safe to use human hydrocortisone cream on cat scabs?

    No. Human hydrocortisone cream can be toxic if ingested, and cats will inevitably lick it off. It also provides only temporary relief without treating the underlying cause.

    Use only veterinary-prescribed topical medications, and follow the e-collar guidance if your vet recommends it.

    How do I know if my cat has fleas if I can't see them?

    Combine a flea comb with the wet paper test. Comb through the fur, collect debris, and place it on a damp white paper towel. Reddish-brown streaks indicate flea dirt, which confirms flea exposure even if live fleas are absent.

    Additionally, look for scabs along the lower back and tail base, classic flea allergy reaction zones.

    Can over-grooming cause permanent hair loss?

    In most cases, hair regrows completely once the underlying trigger is treated. However, prolonged, severe over-grooming can damage hair follicles and result in permanent thinning in rare cases. Catching the problem early and treating the root cause is the best way to preserve a full coat.

    Is over-grooming painful for my cat?

    The act itself usually isn't painful, but the underlying condition often is. Allergic skin is itchy and uncomfortable. Cats in pain may also over-groom as a coping mechanism.

    Monitor for signs of pain like changes in appetite, litter box habits, or vocalization, and report these to your vet.

  • Tutorial: Cat Breath Smells Bad

    Tutorial: Cat Breath Smells Bad

    You know that moment when your cat curls up on your chest, purring, and you go in for a nuzzle, only to be hit with a wave of breath that makes you recoil? Yeah, we've all been there. If your cat breath smells bad, it's easy to write it off as "just how cats smell." But here's the thing: it's not normal.

    Not really.

    Healthy cat breath should be fairly neutral, maybe a little "cat-food-ish" right after eating. Persistent, noticeable halitosis is a red flag that something's off in their mouth or deeper in their body. In our research, veterinary sources consistently report that dental disease affects the majority of cats over three years old, making it the top cause of bad breath.

    But it's not the only one. Fruity breath can signal diabetes, and an ammonia-like smell points toward kidney trouble. So let's figure out what your cat's breath is telling you, and when you should stop googling and call the vet.

    cat breath smells bad

    Image source: Bing (Web (fair-use with source credit))

    Quick Answer

    Bad cat breath almost always means dental disease. Plaque hardens into tartar, which irritates the gums and traps bacteria. That bacterial buildup is what smells.

    Fruity breath can mean diabetes. Ammonia breath can mean kidney disease. If the breath is suddenly foul, check the mouth and call your vet.

    Why Your Cat's Breath Smells Bad (And When to Worry)

    Before we dive into the deep end, let's establish a baseline. What does "normal" cat breath even smell like? It's not minty fresh, that's for sure.

    But it also shouldn't make your eyes water.

    Normal cat breath has a mild, somewhat neutral odor. It might smell faintly of their food, especially in the hour after a meal. It should not smell like rotten meat, fish left in the sun, acetone (think nail polish remover), or urine.

    If you're getting any of those strong, distinctive scents, it's time to pay attention.

    The key here is change. If your cat's breath has always been mild and suddenly turned rank, something new is happening. That's your cue to investigate.

    A cat's mouth is home to hundreds of species of bacteria. When the balance tips, or when bacteria find a foothold in plaque and diseased gums, the odor ramps up fast.

    The Smell Type Cheat Sheet

    Different odors point to different underlying problems. Here's a quick reference table so you know what you're dealing with:

    Smell You NoticeLikely CulpritWhat To Do
    Fishy or rottenDental disease, plaque, tartar, gingivitisSchedule a vet dental check
    Sweet or fruity (acetone-like)Diabetes (ketones)Vet visit ASAP, bloodwork needed
    Urine or ammonia-likeKidney diseaseVet visit ASAP, bloodwork needed
    Metallic or bloodyOral ulcers, stomatitis, traumaVet visit within 24 hours
    Extremely foul, with droolingForeign body, tumor, severe infectionEmergency vet visit

    Notice how two out of four of those serious smells point to systemic diseases, not mouth issues. That's the part most owners miss. Bad breath isn't always about the teeth.

    Why Age Matters: Kittens vs. Seniors

    Age is a big clue when figuring out why your cat's breath stinks.

    Kittens and young cats (under 3 years) rarely have significant dental disease. If a kitten has bad breath, it's more likely from a retained baby tooth, a foreign object stuck in the gums, or a viral infection like calicivirus causing mouth ulcers. These are all treatable, but they need a vet's eyes.

    Senior cats (7 years and up) are a different story. By this age, dental disease is nearly universal if they haven't had regular cleanings. Plus, older cats are at higher risk for kidney disease, diabetes, and oral tumors.

    So when a senior cat develops bad breath, the risk profile is much higher. You shouldn't wait and see. You should get them checked out sooner rather than later.

    The Link Between Breath Odor and Systemic Disease

    Here's the part that surprises a lot of owners. The mouth and the rest of the body are not separate systems. The bacteria that cause gum disease don't just stay in the mouth.

    They can enter the bloodstream, travel to the heart, and cause endocarditis (inflammation of the heart lining). They can stress the liver and kidneys, which filter out bacterial toxins.

    Research from the American Veterinary Dental College highlights that periodontal disease is a source of chronic inflammation and pain. It also notes that treating dental disease can improve overall health outcomes for cats with other conditions. So that bad breath isn't just a cosmetic problem.

    It's a possible driver of long-term health issues you'd never associate with a stinky mouth.

    This is why we take halitosis seriously. It's often the first visible sign of a much bigger problem brewing.

    What Cat Breath Odors Actually Tell You

    Let's get forensic about that stink coming from your cat's mouth. The specific smell profile is a diagnostic clue that vets use, and you can learn to recognize it too. Your nose is actually a useful medical tool here.

    Breaking Down the Specific Smells

    We covered the cheat sheet above, but let's go deeper into each smell so you know exactly what you're smelling and why.

    Fishy or Rotten Smell

    This is the most common bad breath complaint from cat owners. It smells like decay, and that's exactly what it is. Bacteria in the mouth break down food particles and dead tissue, releasing volatile sulfur compounds.

    That's the scientific name for the stink. This is overwhelmingly caused by dental disease. Plaque calcifies into tartar, which pushes under the gumline.

    Pockets form between the gums and teeth, collecting more bacteria and debris. The whole thing festers, and that festering smell is what hits your nose.

    Sweet or Fruity Smell

    This one is trickier because it doesn't smell "bad" in the traditional sense. It might smell sweet, slightly acetone-like, or reminiscent of nail polish remover. That's the smell of ketones.

    When a cat with diabetes can't use glucose for energy, their body breaks down fat instead, producing ketones as a byproduct. These ketones are excreted through the breath. If you smell this, it's a medical emergency, especially if your cat is also lethargic, drinking a lot, or urinating frequently.

    This can indicate diabetic ketoacidosis, which is life-threatening.

    Urine or Ammonia Smell

    This is another systemic clue. When the kidneys fail, they lose the ability to filter out urea from the blood. Urea is then broken down into ammonia, and some of it is breathed out through the lungs.

    If your cat's breath smells like ammonia, it's a strong indicator of kidney disease. Chronic kidney disease is extremely common in senior cats, and bad breath is often one of the early signs owners notice. Combine that with increased thirst and weight loss, and you're looking at a kidney diagnosis.

    Metallic or Blood-like Smell

    A metallic, iron-like smell suggests there's blood in the mouth. This could be from a bleeding tooth socket, severe gum inflammation, a tumor that's ulcerated, or stomatitis (a painful, inflammatory condition). If you see blood on toys or in the water bowl, don't wait.

    This needs a professional exam.

    Why Age Matters: Kittens vs. Seniors

    We touched on this above, but the age factor deserves its own spotlight. It genuinely changes how quickly you should react.

    For kittens, bad breath is uncommon. If you notice it, look inside their mouth first. Is there a baby tooth that didn't fall out, leaving a gap where food gets trapped?

    Is there a piece of string or thread wrapped around a tooth? Is there a visible ulcer or sore? Kittens explore the world with their mouths, so foreign objects are common.

    A quick vet visit can resolve these issues safely.

    For seniors, bad breath is a much bigger deal. We're not just talking about dental disease, though that's likely. We're talking about the possibility of systemic disease.

    Senior cats hide illness incredibly well. They don't complain. They just quietly get sick.

    Bad breath might be the first obvious symptom of kidney failure or diabetes, both of which need immediate management. So if your older cat's breath turns foul, skip the home remedies and go straight to the vet for bloodwork.

    The Link Between Breath Odor and Systemic Disease

    This deserves emphasis because it changes the entire conversation. Halitosis is not a standalone issue. It's a symptom that connects to bigger systems.

    Bacterial infections in the mouth are particularly dangerous for cats with existing health problems. If your cat has diabetes, the high blood sugar impairs their immune response. They can't fight off oral bacteria as effectively, which means dental disease progresses faster.

    Conversely, the inflammation from dental disease can worsen insulin resistance, making diabetes harder to manage. It's a vicious cycle.

    Similarly, kidney disease and dental disease often coexist in senior cats. The kidneys are stressed by filtering out bacterial toxins from the mouth. And when the kidneys fail, the ammonia smell on the breath gets worse.

    It's a feedback loop.

    This connection is why vets will often recommend a dental cleaning before major surgery or when managing chronic conditions. They know that cleaning up the mouth reduces the bacterial load on the rest of the body. It's not just about fresh breath.

    It's about protecting the heart, kidneys, and overall health.

    As of 2026, veterinary dentistry has become a standardized part of wellness care, and the evidence for its systemic benefits is stronger than ever.

    The #1 Culprit: Dental Disease in Cats

    Let's dive into the most common reason your cat's breath smells like a dumpster. Dental disease is the top cause, and it's so widespread that some veterinary studies estimate 50% to 90% of cats over four years old have some form of it. That's a huge number.

    If you're a cat owner, you'll likely deal with this at some point.

    How Plaque Becomes Tartar Becomes Periodontal Disease

    Let's trace the progression so you understand what's happening in your cat's mouth.

    It starts with plaque, a sticky film of bacteria that forms on teeth within hours of eating. If plaque isn't removed, it mineralizes into tartar, which is hard, yellow or brown, and visible along the gumline. Tartar is rough and provides the perfect surface for more plaque to build up.

    Once tartar pushes below the gumline, the real trouble begins. The gums become inflamed, a condition called gingivitis. You'll see redness, swelling, and bleeding along the gumline.

    If left untreated, the inflammation spreads deeper, forming pockets between the teeth and gums. This is periodontal disease. These pockets collect food, bacteria, and pus.

    The infection destroys the ligaments and bone holding the teeth in place. Eventually, the teeth loosen and may fall out.

    feline dental disease

    Image source: Bing (Web (fair-use with source credit))

    That image above shows exactly what tartar looks like on a cat's teeth. Notice the heavy brown buildup along the gumline. That's not just cosmetic.

    That's an active bacterial infection causing pain and systemic inflammation.

    Tooth Resorption: The Painful Condition Most Owners Miss

    Tooth resorption is less well-known than dental disease, but it's incredibly common in cats. In this condition, the body's own cells start breaking down the tooth structure, essentially dissolving it. It's a painful, progressive disease that causes significant discomfort.

    You might notice your cat drooling, dropping food, or being reluctant to eat hard food. You might also see small pink or red spots on the teeth where the enamel is eroding. Bad breath often accompanies this because the exposed dentin becomes sensitive and traps bacteria.

    Veterinary dental specialists note that tooth resorption is one of the most common reasons cats need extractions. The painful teeth don't always look obviously bad, which is why dental X-rays are so important. X-rays reveal resorptive lesions hidden below the gumline that you can't see with the naked eye.

    Gingivitis and Stomatitis: When Gums Are the Real Problem

    Gingivitis is the early stage of gum disease. It causes red, swollen gums that bleed easily. It's reversible with a professional cleaning and good home care.

    Stomatitis is a different, much more severe beast. It's an intense inflammatory response to the plaque on the teeth. In cats with stomatitis, the immune system overreacts, causing severe pain, ulceration, and inflammation throughout the mouth.

    Gums, cheeks, tongue, and back of the throat can all be affected. This is one of the most painful conditions in veterinary medicine.

    Cats with stomatitis often have horrendous breath, drool constantly, and may refuse to eat completely. Treatment often requires full-mouth extractions, which sounds drastic but is actually the most effective way to relieve the pain and restore quality of life. Studies show the majority of cats with stomatitis improve significantly after extractions.

    Why Cats Hide Dental Pain Until It's Severe

    Here's a brutal truth about cats: they are masters at hiding pain. In the wild, a cat showing weakness is a target. So domesticated cats retain that instinct.

    They will endure significant oral pain while still eating, grooming, and acting relatively normal.

    This means you can't rely on your cat to tell you when something is wrong. You have to look for subtle signs. Does your cat flinch when you touch the side of their face?

    Do they chew on one side of their mouth? Do they prefer wet food over dry? Do they swallow food whole without chewing?

    These are all signs of dental discomfort.

    Bad breath is often the only externally obvious sign. So treat it as the valuable diagnostic clue that it is. Your cat can't tell you their mouth hurts, but their breath is screaming it.

    Beyond the Mouth: Fruity Breath and Diabetes

    We're moving past dental issues now. If your cat's breath smells sweet or fruity, this is a completely different ball game, and it's one you need to take seriously.

    What Fruity or Sweet-Smelling Breath Means

    Fruity breath in cats is often described as smelling like acetone or nail polish remover. Some people describe it as sweet or slightly fermented. The smell comes from ketones being exhaled through the lungs.

    Here's how it works. In a healthy cat, the body breaks down carbohydrates into glucose for energy. Insulin helps move that glucose into cells.

    But in a diabetic cat, either the body doesn't produce enough insulin, or the cells stop responding to it. Glucose builds up in the bloodstream because it can't enter the cells.

    Without access to glucose, the body needs another fuel source. It starts breaking down fat for energy. An unfortunate byproduct of fat metabolism is the production of ketones.

    These ketones accumulate in the blood and are exhaled through the breath. That's the sweet, fruity scent you're picking up.

    Ketones and Ketoacidosis: The Emergency You Need to Know About

    Ketonemia (having ketones in the blood) is a serious condition. If it becomes severe, it progresses to diabetic ketoacidosis (DKA). DKA is a life-threatening medical emergency.

    It's characterized by dangerously high blood sugar, severe ketone buildup, and metabolic acidosis (your blood becomes too acidic).

    Cats with DKA are typically very sick. They're lethargic, dehydrated, vomiting, and often have a poor appetite. The fruity breath smell is one of the clinical signs vets look for.

    If you notice this smell and your cat seems unwell, get to an emergency vet immediately.

    Do not wait to see if it resolves itself. DKA requires aggressive fluid therapy, insulin, and electrolyte management. The earlier it's treated, the better the outcome.

    Other Early Diabetes Signs to Watch For

    Feline diabetes doesn't usually happen overnight. There are early signs you can watch for, and recognizing them can catch the disease before it becomes an emergency.

    The classic triad of feline diabetes signs is:

    • Increased thirst (polydipsia): You might notice your cat camped out by the water bowl more often.
    • Increased urination (polyuria): More visits to the litter box, and bigger clumps. You might also notice accidents outside the box.
    • Increased appetite (polyphagia): Your cat seems hungry all the time, even though they may be losing weight.

    That last one is the cruel irony of diabetes. The body can't use glucose for energy, so the cat feels starved. They eat more but still lose weight because the calories aren't being utilized.

    If you notice these signs alongside bad breath, especially in an older or overweight cat, make an appointment with your vet for bloodwork and a urinalysis. The earlier diabetes is diagnosed, the more likely you can achieve remission with insulin and dietary changes.

    Ammonia Breath and Kidney Disease

    If your cat's breath smells like ammonia or urine, that's a major red flag. This isn't a mouth problem. It's a kidney problem.

    Why Kidney Failure Causes That Urine-Like Smell

    Healthy kidneys filter waste products from the blood and excrete them in urine. One of those waste products is urea, a nitrogen-containing compound. When the kidneys start to fail, they can't filter urea effectively.

    Urea builds up in the bloodstream, a condition called uremia.

    When urea levels get high enough, the body tries to expel it through other routes. Some of it is excreted through the skin and some through the lungs. When you breathe out, you release trace amounts of ammonia, which is a breakdown product of urea.

    The higher the urea concentration in the blood, the stronger that ammonia smell on the breath.

    BUN and Creatinine: What Those Blood Tests Measure

    When your vet suspects kidney disease, they'll run bloodwork to check two key values: BUN (blood urea nitrogen) and creatinine.

    BUN measures the amount of nitrogen in the blood that comes from urea. Healthy cats typically have a BUN between 16 and 33 mg/dL. When the kidneys fail, BUN levels climb.

    Creatinine is a waste product from muscle breakdown. It's filtered by the kidneys and excreted in urine. Normal creatinine levels in cats are roughly 0.8 to 2.4 mg/dL.

    Higher levels indicate reduced kidney function.

    Both values are used together to stage kidney disease. Your vet will also check urine specific gravity to see how well your cat's kidneys can concentrate urine.

    Recognizing Kidney Disease Early in Senior Cats

    Chronic kidney disease (CKD) is one of the most common conditions in senior cats. It's estimated that up to 30% of cats over 10 years old have some degree of kidney disease. The tricky part is that symptoms are subtle in the early stages.

    Watch for these signs:

    • Increased thirst and urination: The kidneys can't concentrate urine, so the cat drinks more to compensate.
    • Weight loss: Toxins build up and suppress appetite.
    • Poor coat quality: A dehydrated cat doesn't groom as well.
    • Bad breath: The ammonia smell gets stronger as BUN climbs.
    • Lethargy: Your cat seems tired and sleeps more.

    If you notice any combination of these, especially in a cat over 7, ask your vet for a senior blood panel. Early detection gives you more treatment options. You might be able to slow the disease progression with a kidney-friendly diet and subcutaneous fluids.

    The ammonia breath smell is often what pushes owners to finally make that appointment. It shouldn't be ignored. It's not an old-age quirk.

    It's a sign that the kidneys are struggling.

    Less Common Causes: Foreign Objects, Tumors, and Infections

    Sometimes bad breath isn't about teeth or systemic disease. Sometimes there's a physical culprit stuck in your cat's mouth or growing where it shouldn't be.

    What's Stuck in the Mouth: Thread, Grass, or Debris

    Cats are curious creatures, and they use their mouths to explore. That means they occasionally get things stuck between their teeth, under their tongue, or wrapped around their gums.

    Common culprits include:

    • String or thread: Cats love playing with these, but they can easily wrap around the base of a tooth and cut into the gum.
    • Grass blades: A blade of grass can get wedged between teeth or in the back of the throat.
    • Splinters or wood fragments: Chewing on sticks or toys can leave debris embedded in the gums.
    • Small bones: Fish or chicken bones can lodge between teeth.

    These foreign objects cause localized inflammation and infection. The trapped debris breeds bacteria, producing a strong, often fishy or rotten smell. You might also notice your cat pawing at their mouth, drooling, or shaking their head.

    If you can see the object clearly and can safely remove it with tweezers, do so gently. But if it's deeply embedded, or if the gums are bleeding heavily, don't mess with it. A vet can sedate your cat and remove it safely without causing further damage.

    Oral Tumors and When to Request a Biopsy

    Oral tumors are more common in senior cats, though they can occur at any age. The most frequently diagnosed oral malignancy in cats is squamous cell carcinoma, an aggressive cancer that invades the mouth, tongue, and jaw.

    Early signs of an oral tumor include:

    • A visible lump or mass in the mouth
    • Difficulty eating or dropping food
    • Excessive drooling, sometimes with blood
    • Weight loss
    • A persistent, foul odor from the mouth

    Any suspicious lump should be biopsied. Some owners hesitate because they're afraid of bad news, but early detection dramatically improves treatment options. Surgery and radiation can be effective if caught early.

    Remember, not all oral masses are malignant. Some are benign growths or abscesses. A biopsy gives you answers, and answers are always better than guessing.

    Calicivirus and Other Infections That Cause Mouth Ulcers

    Feline calicivirus is a common respiratory virus that causes oral ulcers, especially in kittens and unvaccinated cats. These ulcers can develop on the tongue, gums, and the roof of the mouth. They're painful and can cause severe bad breath.

    Cats with calicivirus may also have:

    • Sneezing and nasal discharge
    • Eye discharge or conjunctivitis
    • Fever
    • Reluctance to eat due to mouth pain

    If you suspect calicivirus, isolate the cat from other cats, as it's highly contagious. Treatment is supportive, including soft food, pain relief, and sometimes antiviral medication.

    Other infections, like severe tooth root abscesses, can also cause bad breath. An abscess is a pocket of pus that forms at the root of a tooth. It can swell the face, cause pain, and produce a truly awful smell.

    When to See the Vet Right Now (Red Flags)

    We've covered a lot of ground. Let's distill it into a clear action plan. Some situations are urgent.

    Others can wait a few days for a regular appointment.

    The Signs That Mean "Stop Reading, Go Call the Vet"

    Here's a list of red flags that require immediate veterinary attention:

    • Labored breathing or open-mouth breathing
    • Complete refusal to eat for more than 24 hours
    • Visible swelling on the face or jaw
    • Bleeding from the mouth that doesn't stop
    • Lethargy, weakness, or collapse
    • Vomiting, especially if paired with a fruity breath smell
    • Seizures or tremors
    • Inability to close the mouth or obvious jaw fracture

    If your cat shows any of these, call your vet or an emergency clinic right now. Don't wait to see if it improves. These are signs of a serious condition that needs immediate intervention.

    Losing Weight, Drooling, Not Eating, Hiding

    These signs might not be as dramatic as the ones above, but they're still concerning. They indicate that your cat is in pain or systemically unwell.

    • Weight loss: Especially if your cat is eating normally or even more than usual.
    • Drooling: Excessive drooling in a cat that doesn't normally drool is a sign of mouth pain or nausea.
    • Not eating: Cats can develop hepatic lipidosis (fatty liver disease) if they go without food for too long, so don't let this go on.
    • Hiding: Cats who feel sick or in pain will seek out quiet, dark places to hide.

    If these signs are present alongside bad breath, don't wait for them to pass. Book a vet appointment within the next day or two. Early intervention is always easier on your cat and your wallet.

    What to Expect at a Veterinary Dental Appointment

    If you're taking your cat to the vet for bad breath, here's what to expect.

    The Physical Exam

    First, the vet will do a full physical exam. They'll check your cat's overall health, feel their abdomen, and listen to their heart. Then they'll look at the mouth.

    They may or may not need sedation for a close exam, depending on how cooperative your cat is.

    Bloodwork

    Pre-anesthetic bloodwork is standard before any dental procedure. It checks kidney and liver function, blood sugar, and blood cell counts. This is non-negotiable for senior cats.

    It identifies underlying issues that could make anesthesia dangerous.

    The Dental Cleaning

    If your cat's teeth need cleaning, they'll need to be put under anesthesia. The vet will scale the teeth to remove plaque and tartar, both above and below the gumline. Then they'll polish the teeth to smooth the surface and slow future plaque buildup.

    X-rays

    Dental X-rays are a critical part of the procedure. They reveal problems below the gumline that you can't see with the naked eye. Tooth resorption, root abscesses, and bone loss all show up on X-rays.

    The Treatment Plan

    After the cleaning and X-rays, the vet will discuss findings with you. If extractions are needed, they may happen during the same appointment or require a follow-up visit. Your vet will give you a detailed estimate before starting any extra treatment.

    What You Can Do at Home (And What's a Waste of Time)

    Now for the practical part. What can you actually do at home to manage cat bad breath?

    Brushing Your Cat's Teeth: Realistic Tips That Actually Work

    Yes, you can brush your cat's teeth. And no, it's not as impossible as it sounds. It takes patience, but it's the single most effective thing you can do at home to prevent dental disease.

    cat toothbrush dental care

    Image source: Bing (Web (fair-use with source credit))

    Getting Started

    1. Start slow. Don't expect to do a full brushing on day one.
    2. Choose the right tools. Use a finger toothbrush, a small pet toothbrush, or a piece of gauze wrapped around your finger.
    3. Use pet-specific toothpaste. Human toothpaste is toxic to cats. Xylitol, a common sweetener in human toothpaste, causes a dangerous drop in blood sugar and can be fatal.
    4. Let them taste it first. Let your cat lick the toothpaste off the brush before you try anything else.
    5. Introduce the brush gradually. Gently lift the lip and brush one or two teeth at a time. Keep the session short and positive.
    6. Reward them. Give treats and praise after each session.

    The Reality Check

    Most cats will only tolerate brushing for a few seconds. That's fine. Short, frequent sessions are better than long, stressful ones.

    Aim for a few times a week. Even twice a week makes a meaningful difference in plaque buildup.

    Dental Treats, Gels, Water Additives, and Prescription Diets

    If brushing is a non-starter, you have alternatives. They're not as effective as brushing, but they still help.

    Dental Treats

    Several brands make dental treats specifically formulated to reduce plaque and tartar. Look for products with the Veterinary Oral Health Council (VOHC) seal of approval. This seal means the product has been tested and shown to reduce plaque or tartar in animals.

    Dental Gels and Sprays

    These are applied to the gums and teeth. Some contain enzymes that help break down plaque. Others contain chlorhexidine, an antibacterial agent.

    They're easy to apply but less thorough than brushing.

    Water Additives

    You add a small amount to your cat's water bowl. They're designed to reduce bacteria in the mouth. They're low-effort but least effective, because cats often don't drink enough for the product to make a big impact.

    Prescription Dental Diets

    Your vet can recommend foods like Hill's Prescription Diet, Royal Canin Veterinary Diet, or Purina Pro Plan Veterinary Diets that are specifically designed for dental health. These use a special kibble texture that mechanically scrubs the teeth as the cat chews.

    Here's a quick comparison:

    OptionEffectivenessEase of UseCost
    BrushingHighestLowLow
    Dental treats (VOHC)MediumMediumModerate
    Gels and spraysMediumMediumModerate
    Water additivesLowHighModerate
    Prescription dietMediumHighHigh

    Why At-Home Scaling Is Dangerous and Ineffective

    Please. Don't. Buy those at-home dental scaling kits you see online.

    They are a terrible idea.

    Amateur scaling does more harm than good for these reasons:

    • You can't see below the gumline. The most harmful tartar is hidden where you can't reach or see it.
    • You can damage the enamel. Metal scalers are sharp. A slip can scratch and permanently damage the teeth.
    • You can injure your cat. Cats don't sit still for dental work. A sudden movement can cause the scaler to slice the gums or tongue.
    • It spreads bacteria. Without proper cleaning, you're just pushing bacteria deeper into the gums.

    At-home scaling also gives you a false sense of security. The visible tartar might be gone, but the disease below the gumline is still there, silently progressing.

    Building a Daily Routine With a Resistant Cat

    If your cat despises brushing, here's a realistic strategy:

    1. Start with handling. Get your cat used to you touching their face and lips. Do this daily while petting them.
    2. Introduce tastes. Put a dab of pet toothpaste on your finger and let them lick it off. Do this for a week.
    3. Use gauze. Wrap a piece of gauze around your finger and gently rub the teeth. No toothpaste needed.
    4. Progress to a brush. Try a finger brush with toothpaste. Keep it under 10 seconds if needed.
    5. Stay consistent. Consistency beats intensity. A quick scrub every other day is better than a full brushing once a month.

    If your cat absolutely won't tolerate any of this, lean on dental treats, regular vet cleanings, and close monitoring. You can't force a cat to cooperate. You can only set them up for success.

    What a Professional Dental Cleaning Involves

    If your vet recommends a dental cleaning, don't be nervous. It's a routine procedure that's done under anesthesia. It's safe, and it's the single best way to treat and prevent dental disease.

    Why Anesthesia Is Non-Negotiable

    Some clinics offer "anesthesia-free" dental cleanings, and I cannot stress this enough: these are a marketing gimmick.

    Here's why anesthesia is necessary:

    • Pain control: Dental disease is painful. Cleaning teeth without anesthesia causes stress and pain.
    • Safety: A cat that moves suddenly during a dental procedure can be seriously injured, both the cat and the vet.
    • Complete exam: Anesthesia allows the vet to do a full oral exam on all surfaces of every tooth.
    • X-rays: Dental X-rays require the cat to be completely still. That's impossible without anesthesia.
    • Thorough cleaning: The vet can clean below the gumline, where the real disease lives.

    Anesthesia-free cleanings only remove visible tartar above the gumline. They give you a false sense of security while the underlying disease continues.

    A proper anesthesia plan includes pre-anesthetic bloodwork, IV fluids to support blood pressure, intubation to protect the airway, and continuous monitoring throughout the procedure.

    X-Rays: What They Catch That the Naked Eye Misses

    We touched on this already, but it deserves more detail. Dental X-rays are not optional. They are essential for a complete dental evaluation.

    cat dental cleaning veterinary

    Image source: Bing (Web (fair-use with source credit))

    X-rays reveal:

    • Tooth resorption: Lesions below the gumline that look normal from above.
    • Root abscesses: Pockets of infection at the root tips.
    • Bone loss: The degree of deterioration in the jawbone.
    • Fractured roots: Teeth that have broken off below the gumline, which can become infected.
    • Impacted teeth: Teeth that haven't erupted properly.

    Without X-rays, your vet could be missing significant disease. Always ask to confirm that your cat's dental procedure includes radiographs (X-rays).

    The Procedure Step by Step

    Here's what happens during a typical professional dental cleaning:

    1. Pre-op: The cat is fasted overnight. Bloodwork is done beforehand. An IV catheter is placed for fluids and medications.
    2. Anesthesia induction: The cat is sedated and an endotracheal tube is placed to deliver anesthesia gas and protect the airway.
    3. Full oral exam: The vet examines every tooth and records any findings.
    4. X-rays: Full mouth radiographs are taken to evaluate teeth below the gumline.
    5. Scaling: An ultrasonic scaler removes plaque and tartar from all surfaces of every tooth, above and below the gumline.
    6. Polishing: The teeth are polished to smooth the surfaces, which slows future plaque attachment.
    7. Flushing: The mouth is flushed with a dental rinse to remove debris.
    8. Extractions (if needed): Diseased or painful teeth are removed. This is done only with your consent and with appropriate pain medication.
    9. Fluoride application: Some vets apply a fluoride or barrier sealant to help reduce sensitivity.
    10. Recovery: The cat is monitored in a warm, quiet area until they're awake enough to go home.

    Recovery and Aftercare

    After a dental cleaning, your cat may be groggy for a day. That's normal.

    Your vet will likely prescribe:

    • Pain medication: Especially if extractions were done.
    • Antibiotics: If there was significant infection.
    • Soft food: Recommended for a few days if extractions were done.

    Most cats bounce back within 24 to 48 hours. Full recovery after extractions can take up to two weeks. During that time, stick to soft food, keep the mouth clean if your cat allows it, and monitor for any signs of swelling or bleeding.

    Follow-up visits may be recommended to check healing, especially after complicated extractions.

    Common Mistakes Owners Make With Bad Cat Breath

    Let's look at the biggest mistakes owners make when dealing with cat bad breath. Learn from these so you don't repeat them.

    Ignoring It as "Just How Cats Smell"

    The single most common mistake is dismissing bad breath as normal.

    Cats have naturally neutral-smelling breath. If it's noticeably foul, something is wrong. That "it's just a cat smell" mindset is what leads to months of silent suffering for the cat.

    The problem is that cats hide pain really well. They don't limp visibly. They don't wince audibly.

    They just quietly stop eating harder foods or groom themselves a bit less. By the time you notice something's off, the dental disease is often advanced.

    Treat bad breath as you would a fever. It's a warning sign that deserves attention, not dismissal.

    Using Human Toothpaste (Xylitol Is Toxic)

    This is a potentially fatal mistake. Never use human toothpaste on a cat.

    Human toothpaste contains ingredients that are harmful to pets. The most dangerous is xylitol, an artificial sweetener. Even a small amount of xylitol can cause a rapid and dangerous drop in blood sugar, leading to seizures, liver failure, and death.

    If you've accidentally used human toothpaste on your cat, call your vet or the ASPCA Animal Poison Control Center immediately.

    Always use toothpaste specifically formulated for cats. These are safe to swallow and often come in flavors cats like, such as poultry or malt.

    Switching Foods Hoping It Fixes the Problem

    It's understandable to hope that a diet change will solve bad breath. Sometimes, it's the only tool you know about.

    Food changes can help reduce future plaque buildup. Prescription dental diets, in particular, are effective. But they cannot fix existing dental disease.

    Once tartar has hardened and the gums are inflamed, food won't reverse the damage. The plaque below the gumline needs to be physically removed by a professional. That requires anesthesia and a proper cleaning.

    A new food might mask the problem for a while, making the breath smell slightly less offensive, but it won't cure the underlying disease. Don't use food as a substitute for veterinary care.

    Waiting Until the Cat Stops Eating

    Many owners wait until their cat stops eating before they take dental issues seriously. That's a dangerous mistake.

    Cats can't go without food for long. They're at risk for hepatic lipidosis, a potentially fatal liver condition, if they stop eating for more than a few days. By the time a cat stops eating due to mouth pain, the situation is already dire.

    Act early. If your cat's breath is bad, and they're chewing carefully or swallowing food whole, don't wait for a full loss of appetite. Get them to the vet.

    A Special Note on Home Dental Scaling

    We mentioned this earlier, but it deserves repetition. At-home dental scaling kits are not a safe alternative to professional care. They're dangerous, ineffective, and a waste of money.

    Don't attempt to scrape visible tartar off. You'll miss the root cause, and you could harm your cat in the process.

    What Costs to Expect

    Let's talk dollars. Veterinary dental care isn't cheap, but it's important to know what you're getting into.

    Exam and Bloodwork Costs

    The first step is an exam and bloodwork.

    ServiceTypical Price Range
    Office visit / exam$50 – $80
    Pre-anesthetic bloodwork$75 – $150
    Urinalysis (if needed)$30 – $60
    Senior panel (extended)$150 – $250

    These are the diagnostic costs. They're necessary to assess the overall health of your cat and to determine if anesthesia is safe.

    Professional Dental Cleaning Pricing

    Here's what you can expect to pay for a professional dental cleaning:

    ServiceTypical Price Range
    Dental cleaning (includes anesthesia, scaling, polishing)$300 – $500
    Anesthesia and monitoring (often included above)Included
    Dental X-rays (full mouth)$150 – $300
    Pain medication$20 – $50
    Total for a standard cleaning$400 – $750

    The actual cost varies based on where you live and whether your vet itemizes services or bundles them into a single fee.

    Extractions and How They Change the Bill

    Extractions add significant cost to a dental procedure. The complexity of the extraction matters.

    Extraction TypeTypical Price Per Tooth
    Simple extraction (visible tooth)$50 – $100
    Surgical extraction (root below gumline)$100 – $300
    Full mouth extraction (stomatitis cases)$800 – $2,000+

    If your cat needs multiple extractions, the bill can climb quickly. Always ask for an itemized estimate before the procedure begins. Many vet clinics will quote a range and let you approve additional charges if unexpected issues are found.

    Long-Term Costs for Managing Systemic Diseases

    If bad breath turns out to be a symptom of kidney disease or diabetes, the costs don't end with diagnosis.

    Kidney Disease Management:

    • Prescription kidney diet: $40, $80 per month
    • Subcutaneous fluids (if needed): $30, $60 per month (supplies)
    • Regular bloodwork: $150, $300 every 3-6 months

    Diabetes Management:

    • Prescription diabetic diet: $40, $80 per month
    • Insulin: $50, $120 per month
    • Syringes: $15, $30 per month
    • Glucose monitoring: $100, $200 for a glucose meter, plus test strips

    These conditions require lifelong commitment. But they're manageable, and early intervention can actually reduce long-term costs by slowing disease progression.

    Pet Insurance as a Cost-Saver

    If your cat doesn't have pet insurance yet, now is a good time to consider it.

    Most pet insurance plans cover dental cleanings and extractions with no waiting period after a 14-day policy start. Unlike many other products, a pet insurance policy can keep your overall costs predictable, covering 70% to 90% of eligible veterinary expenses.

    Take note that most plans cover dental disease arising after the policy start date. Preexisting conditions, like advanced gum disease diagnosed before enrollment, are typically not covered. So enrolling early matters.

    Frequently Asked Questions

    Is it normal for kitten breath to smell?

    No. Kitten breath should be mild and inoffensive. If a kitten has bad breath, it's usually from a retained baby tooth, a foreign object stuck in the gums, or a viral infection like calicivirus.

    These are treatable but need a vet's eyes.

    Do cats need their teeth cleaned like dogs?

    Yes, hygienic growing cats with teeth just like any other animal including dogs. The frequency varies with age and breed. Over 50% of cats over four have dental disease.

    Regular professional cleanings under anesthesia are the standard of care.

    Can I use mouthwash for my cat?

    No. Human mouthwash is toxic to cats. It contains alcohol, fluoride, and other ingredients that are dangerous if swallowed.

    Use veterinary-approved oral rinses or gels if needed.

    Will insurance cover dental work?

    Most pet insurance plans cover dental cleanings and extractions. However, plans vary widely in reimbursement rates and exclusions. Preexisting conditions are typically not covered.

    Always read the policy's specifics before enrollment.

    How much does a cat dental cleaning cost?

    The cost ranges from $300 to $750, depending on location and the clinic's pricing structure. Additional costs for X-rays and extractions can add $150 to $2,000 or more.

    Is bad breath a sign of kidney failure in cats?

    Yes, bad breath that smells like ammonia or urine can be a sign of kidney failure. Urea builds up in the blood when the kidneys can't filter it, and it's released through the lungs. This is more common in senior cats.

    Final Takeaway: What to Do This Week

    Take a deep breath. You've got a plan now. Here's how to act on it.

    The 3-Step Plan to Assess Your Cat's Breath Today

    1. The Sniff Test: Get close to your cat's face and take a gentle whiff. Is the smell neutral, fishy, fruity, or ammonia-like?
    2. The Look Test: Lift your cat's lip gently and look at the teeth. Do you see yellow or brown tartar? Are the gums red or swollen? Do you see any visible damage or debris?
    3. The Behavior Check: Has your cat's eating, drinking, grooming, or energy changed? Watch for drooling, chewing on one side, or avoiding hard food.

    Based on what you find, you'll know which path to follow.

    When to Book a Vet Visit and What to Ask For

    If you notice any of the signs below, call the vet this week:

    • Visible tartar or red gums
    • Persistent bad breath
    • Signs of discomfort while eating
    • Any of the systemic smells (fruity, ammonia)

    When you call, ask for a "dental consultation" and mention the bad breath. Request a full oral exam and pre-anesthetic bloodwork. Ask about dental X-rays as part of the cleaning.

    Confirm the estimate before the procedure.

    Staying on Top of Oral Health Long-Term

    Prevention is always better than treatment.

    • Brush regularly: Even a few times a week makes a difference.
    • Use VOHC-approved treats: These are proven to reduce plaque and tartar.
    • Feed a dental diet: Ask your vet about prescription options.
    • Schedule annual cleanings: Keep your cat on a professional cleaning schedule based on your vet's recommendation.
    • Monitor for changes: Pay attention to breath odor, eating habits, and energy levels.

    Your goal is to catch problems early, when they're cheaper to treat and easier on your cat. Bad breath isn't just an odor. It's a signal.

    Listen to it.

  • Step-by-step: How to Remove Cat Hair From Clothes

    Step-by-step: How to Remove Cat Hair From Clothes

    Black trousers, a clean wash, and the fur is still there. If you're trying to work out how to remove cat hair from clothes, the problem usually isn't your technique. It's the order you're doing things in.

    Wash first, and you'll spread hair across every item in the drum.

    Cat hair measures roughly 25 to 60 microns across, and the downy undercoat sits at the thin end of that range. Those fine hairs slip between fabric threads and lock in place, which is why a normal 40 °C cycle barely touches them. The fix is a sequence, not a single tool.

    Here's how it actually works.

    how to remove cat hair from clothes

    Image source: Bing (Web (fair-use with source credit))

    Quick Answer

    Remove cat hair from clothes dry, before you wash them. Use a lint roller, damp rubber glove, or velvet nap brush. Then tumble the garment for 10 minutes on no heat.

    Clean the lint filter, then wash separately with white vinegar. Do a final roller pass once the clothes are dry.

    Why Cat Hair Survives a Full Wash Cycle (And Comes Out Worse)

    Most people assume water and detergent will float the hair away. They won't. Water makes fabric fibres swell and grip harder, so hair that was sitting loosely on the surface gets pulled deeper into the weave.

    Then there's the redistribution problem. One hairy fleece in a load of eight items doesn't get cleaned. It shares.

    You pull out a whole wash covered in fur and wonder what went wrong.

    Barbed Hair Shafts vs. Woven Fabric

    Cat hair isn't smooth. The outer layer of the shaft, the cuticle, is made of overlapping scales that point in one direction, a bit like roof tiles. That's what makes hair behave like a tiny fish hook once it's worked into a knit or a napped surface.

    Push a hair one way and it slides. Push it the other way and the scales catch. This is why one-directional brushing works and scrubbing back and forth doesn't.

    Guard hairs (the long, coarse outer coat) sit on top and come off easily. Undercoat is the real enemy. It's thin, soft and short, and it burrows into loops of wool or the raised pile of fleece where no roller can reach.

    Shedding volume swings by breed and season too. Double-coated cats like Maine Coons, Siberians and Ragdolls drop huge amounts of undercoat in spring and autumn. Cornell's College of Veterinary Medicine publishes solid guidance on feline coat care, and the short version is that indoor cats under artificial light often shed steadily all year rather than in tidy seasonal bursts.

    The Static Problem Nobody Warns You About

    Static is doing half the damage, and nobody talks about it. Synthetic fibres like polyester, fleece and nylon pick up an electrical charge through friction. That charge holds hair to the surface, and it's why you can roll a fleece clean and watch fur reappear thirty seconds later.

    Dry air makes it worse. Indoor humidity below about 30 % RH, which is normal in a centrally heated home in January, turns every jumper into a magnet. Get the room closer to 40 to 50 % RH and static drops noticeably.

    Three quick static facts worth knowing:

    • Natural fibres (cotton, linen, wool) hold far less charge than synthetics.
    • Moisture dissipates static, which is why a lightly damp glove outperforms a dry one.
    • Fabric softener and white vinegar both reduce charge, but they work differently. Softener coats the fibre. Vinegar relaxes it.

    The One Rule That Changes Everything: Dry-Remove Before You Wash

    If you take one thing away, take this: get as much hair off as you physically can while the garment is dry. Every method that follows works better after this step.

    Washing hairy clothing straight away is the most common mistake in a cat household. The drum agitates loose fur into a slurry, it clings to wet fabric, and a hot dryer cycle then bakes it in. At that point you're not removing hair anymore.

    You're excavating it.

    Here's the logic in plain terms:

    • If the garment is dry and the hair is on the surface, remove it now with a roller, brush or glove.
    • If you've already washed it and it's still hairy, don't wash it again. Dry it fully, then dry-remove, then re-wash if you must.
    • If it's already been through a hot dryer, expect a partial result. Heat sets hair into synthetics and some of it won't come out.

    A useful test: run your hand across the fabric. If hair lifts and moves, it's surface hair and a roller will clear it in under a minute. If it stays put and looks almost woven in, it's embedded, and you'll need friction or suction instead of adhesive.

    Work Out Your Situation First: The Four Variables That Decide Your Method

    There is no universal method, and anyone telling you to just use a lint roller hasn't tried it on a lambswool jumper. Four variables decide what you should do. Check them in order.

    cat hair embedded in wool knitwear

    Image source: Bing (Web (fair-use with source credit))

    Variable 1: What Fabric Are You Dealing With?

    Fabric is the biggest branching factor by a mile. Check the care label first, because it also tells you whether the garment can survive a tumble cycle at all.

    Care labels across the UK, EU and much of the world follow the ISO 3758 textile care labelling standard, with the same five symbol families: wash, bleach, tumble dry, iron, professional care. A crossed-out square with a circle inside means no tumble drying, which knocks out one of the most effective steps in the whole workflow.

    Broadly, fabrics fall into three camps:

    • Smooth and low-grip (cotton poplin, denim, silk, leather): hair sits on top, easy win.
    • Napped and high-grip (fleece, sherpa, velvet, corduroy, teddy lining): hair lodges in the pile, hardest to clear.
    • Looped and delicate (wool knits, cashmere, merino, mohair): hair works into the loops, and aggressive tools damage the garment.

    Variable 2: Is the Hair Sitting on Top or Worked Into the Weave?

    Surface hair and embedded hair need opposite approaches. Adhesive works on surface hair. Friction and suction work on embedded hair.

    Hold the garment up to a window or a bright lamp. Surface hair lies across the fabric and catches the light in loose strands. Embedded hair looks flat, dull and part of the cloth itself.

    On dark fabrics you'll often see short white flecks that won't move no matter how many times you roll.

    If a sticky roller lifts nothing after two passes, stop rolling. You've hit embedded hair, and more rolling just wastes sheets.

    Variable 3: Has It Already Been Through a Hot Dryer?

    Heat is the point of no return for synthetics. Polyester and polyester blends soften slightly in a hot dryer, and hair pressed against a softening fibre bonds into it as it cools.

    If that's happened, adjust your expectations. You can still get most of it out with a stiff rubber tool plus a vacuum, but you probably won't reach 100 %. A fleece that's had three or four hot cycles with hair on it is usually never coming fully clean.

    Natural fibres are more forgiving. Cotton and wool don't soften with heat the same way, so hair stays mechanically trapped rather than fused, and patient brushing still pays off.

    Variable 4: Do You Actually Own a Tumble Dryer?

    This changes the whole workflow, and it's the reason generic advice fails so many readers. Plenty of UK households line dry or use an airer, while vented tumble dryers are near-universal in the US.

    • If you have a dryer, a 10 to 15 minute no-heat air-fluff cycle is your best single tool. The airflow lifts hair off the fabric and the lint screen catches it.
    • If you don't have a dryer, replace that step with a vigorous outdoor shake and a second dry-removal pass. Slower and less thorough, but it works.
    • If you use a shared launderette, do the dry-removal at home. Never dump a fur-covered load into a communal machine and leave it for the next person.

    The Decision Tree: Pick Your Path by Fabric Type

    This is the core of it. Find your fabric, follow that branch, and skip the rest.

    FabricFirst toolTumble stepAvoid
    Cotton, denim, jerseyAdhesive lint roller10 min no heatNothing, it's forgiving
    Fleece, sherpa, teddyRubber glove or pumice stone15 min no heat + dryer ballsAdhesive rollers (barely work)
    Wool knitwear, cashmereDamp rubber glove or nap brushNone if label says no tumbleSticky tape, fabric shaver
    Suiting, wool coatsVelvet nap brush, with the napSteam instead of tumbleCross-grain scrubbing
    Velvet, corduroyDirectional brush, tape blottingNoneRolling back and forth
    Silk, satin, delicatesSoft brush, anti-static sprayNoneAny friction tool
    Polyester, nylon, activewearStatic control first, then roller10 min no heatFabric softener on wicking kit

    Cotton, Denim and T-Shirts: The Easy Path

    Roll it, wash it, done. Cotton has a tight enough weave that hair rarely embeds, and a standard adhesive roller clears a T-shirt in about 30 to 60 seconds per side.

    Wash separately from towels and fleece. That single habit prevents most repeat problems.

    Fleece, Sherpa and Teddy Linings: The Hardest Surface

    Fleece is the worst-case scenario, and you should expect 80 to 90 % removal rather than perfection. Adhesive rollers skate over the pile without gripping what's underneath.

    Use a slightly damp rubber glove or a pumice-style sweeper instead. Work in one direction only, shoulder to hem, and roll the collected fur into a ball as you go. Follow with a 15 minute no-heat tumble and two or three rubber dryer balls to knock the rest loose.

    Wool Knitwear and Cashmere: Handle With Care

    Never put a sticky roller on a loose-knit wool jumper. The adhesive grabs the yarn loops, not just the hair, and it lifts fibre out of the knit. That's how you get fuzzing and premature pilling.

    Use a velvet nap brush or a barely damp rubber glove, moving in one direction with the grain of the knit. A sweater comb handles anything genuinely tangled in. Skip the fabric shaver entirely on loose knits, because the blade will cut a hole faster than you'd believe.

    Suiting, Wool Coats and Tailoring: Brush With the Nap

    Worsted wool has a direction to it, and brushing against the nap forces hair deeper. Run your palm over the sleeve. One direction feels smooth, the other feels slightly rough.

    Brush the smooth way.

    A natural bristle clothes brush plus a handheld steamer is the professional combination. Steam relaxes the fibres and lifts the hair proud of the surface, then the brush sweeps it off. Finish with a low-tack roller if anything remains.

    Velvet, Corduroy and Napped Fabrics: Direction Matters

    Pile fabrics trap hair between the tufts. Rolling back and forth pushes it further in.

    Blot with tape rather than rolling. Press the tape down, lift straight up, repeat. For corduroy, work along the wales (the ridges), never across them.

    Silk, Satin and Delicates: Static Only

    Hair doesn't really grip silk, so if it's clinging, static is your only problem. A light mist of anti-static spray held 30 cm away, or a quick wipe with a slightly damp microfibre cloth, sorts it.

    Don't use tape, rollers or any friction tool. Silk snags.

    Activewear, Polyester and Nylon: Kill the Charge First

    Treat the static before you touch the hair, or you'll be rolling the same garment three times. Anti-static spray, a damp hand run over the fabric, or a few seconds of tumbling with a wool dryer ball will all discharge it.

    One caution: don't use liquid fabric softener on moisture-wicking sportswear. It coats the fibres and kills the wicking function you paid for.

    The Full Workflow: Dry Remove, Tumble, Wash, Finish

    Once you know your fabric branch, the overall sequence stays the same. As of 2026, this is still the most reliable order we've found across manufacturer guidance and aggregate user reports.

    1. Dry-remove first. Use the tool your fabric branch calls for. Two to three minutes per garment.
    2. Shake it out. Outdoors, or over a bin. This alone releases a surprising amount of loose fur.
    3. Kill the static. Anti-static spray or a damp cloth wipe, especially on synthetics.
    4. No-heat tumble, 10 to 15 minutes. Add two or three wool or rubber dryer balls. Skip this if the care label forbids tumble drying.
    5. Clean the lint screen immediately. It'll be full. Skip this and the next cycle puts hair straight back.
    6. Sort the load properly. Pet-hair items go together. Never with towels, fleece or anything else that sheds.
    7. Load to two-thirds, not full. Hair needs room to float free. Overloading defeats the whole exercise.
    8. Add 120 ml (½ cup) white vinegar to the fabric softener dispenser. It relaxes the fibres and cuts static, and it won't leave a smell once dried.
    9. Wash at 30 to 40 °C unless the label says otherwise.
    10. Tumble dry with dryer balls, cleaning the lint screen mid-cycle and again at the end.
    11. Final roller pass on the dry garment. There's always a little left.
    12. Store it properly. Closed wardrobe or garment bag, in a room the cat can't get into.

    Timing at a Glance

    StepTimeWhy it matters
    Dry removal2 to 3 min per itemRemoves the bulk of the hair
    No-heat tumble10 to 15 minAirflow lifts what tools missed
    Wash cycle40 to 90 minVinegar relaxes fibres, releases the rest
    Lint screen clean15 sec, twiceStops hair returning to the load
    Final inspection30 sec per sideCatches seams, cuffs and pockets

    Two spots people always miss on that final pass: inside the cuffs and along the seam allowances. Hair collects there because the stitching creates a ridge, and rolling across the flat panels won't reach it. Pinch the seam open and roll along it directly.

    Choosing Your Removal Tool: What Actually Works on What

    Every tool here uses one of three principles: adhesive transfer, mechanical friction, or suction. Match the principle to the problem and you'll stop wasting money on gear that doesn't suit your wardrobe.

    rubber glove pet hair removal

    Image source: Bing (Web (fair-use with source credit))

    ToolPrincipleBest onWeak on
    Adhesive lint rollerAdhesiveCotton, denim, suiting, smooth weavesFleece, sherpa, loose knits
    Rubber glove (damp)Friction + staticFleece, upholstery, wool knitsSilk, satin, sequins
    Pumice or lava stoneFrictionFleece, carpet, car seats, canvasAnything delicate
    Velvet nap brushDirectional frictionWool coats, suits, velvet, corduroyDeeply embedded undercoat
    Handheld vacuumSuctionHeavy coats, pockets, seams, bagsLightweight or draping fabric
    Fabric shaverCuttingPilled cotton and tight-woven blendsLoose knits, cashmere, mohair
    Sweater combGentle liftingMerino, lambswool, cashmereFast bulk removal

    Lint Rollers: Disposable vs. Reusable

    Disposable adhesive rollers are the fastest option for smooth fabrics, and nothing beats them for a quick pre-work pass. A standard roll runs 60 to 95 perforated sheets, and a typical head is around 10 cm (4 in) wide.

    The catch is running cost and waste. A heavy-shedding household can get through a roll a month.

    Reusable gel and sticky rollers rinse clean under warm water and go again once dry. Our research across aggregate user reviews shows they perform close to disposables on cotton but noticeably worse on fleece. They also lose tack for a few minutes right after rinsing, so you need two if you're doing a full wardrobe.

    Tack level matters more than people realise:

    • High-tack sheets grip embedded hair better but can pull loops on knitwear.
    • Low-tack sheets are the right choice for wool, silk blends and anything you paid real money for.
    • Test on a hem or inside seam first if you're unsure how a fabric will react.

    Rubber Gloves, Pumice Stones and Silicone Tools

    A damp rubber washing-up glove is the best value tool in this entire guide, and it costs about the price of a coffee. Friction plus a touch of moisture pulls hair into a rollable clump you can lift off in one piece.

    Technique matters. Dampen the glove lightly, not wet, then sweep in one direction with firm pressure. Rinse the glove when it stops picking up.

    Pumice and lava stone sweepers are more aggressive. They excel on fleece, canvas and car upholstery, but they will fuzz anything soft. Keep them well away from wool and knitwear.

    If you've got a latex allergy, nitrile gloves work identically. Silicone grooming blocks are a gentler middle ground and won't shed rubber crumbs the way a cheap pumice block does.

    Velvet Nap Brushes and Sweater Combs

    A velvet nap brush is the tailoring world's answer, and it's criminally underrated. The bristles lie at an angle so the brush only grips in one direction, which means it lifts hair out of a suit without dragging fibre with it.

    Most have a self-cleaning base. Sweep one way to collect, then the opposite way over the base to release. No refills, no waste, and it lives happily in a coat pocket.

    Sweater combs are different. They're for hair that's genuinely tangled into a knit, plus pilling. Work slowly in short strokes, and support the fabric with your other hand so you're not stretching the knit.

    Handheld Vacuums and Upholstery Attachments

    Suction is the only method that reaches into seams, pockets and the corners around buttons. For heavy winter coats, a handheld cordless vacuum with a brush attachment beats any roller.

    Two rules make this work. Lay the garment flat on a table, never hold it up. And use the brush tool, not the bare nozzle, because bare suction on loose fabric just pulls the cloth into the intake.

    A HEPA-filter vacuum is worth it if anyone in the house reacts to cats. It captures the fine dander particles that carry Fel d 1 rather than blowing them back into the room.

    Fabric Shavers: When They Help and When They Ruin a Jumper

    A fabric shaver removes pills, not hair, and confusing the two ruins garments. It's the right call when hair has matted into a pilled ball on a cotton or poly-cotton item.

    Never use one on loose-knit wool, cashmere, mohair or anything with a visible open stitch. The blade catches a yarn, cuts it, and you get a hole that grows every wash.

    If you do use one, set the guard to its highest clearance, lay the fabric flat and taut, and unplug the unit before you empty the blade chamber.

    In-Wash and In-Dryer Helpers: Vinegar, Dryer Balls, Softener and Hair Catchers

    These don't replace dry removal. They stop the hair you missed from spreading and settling back on.

    Why White Vinegar Works Better Than Fabric Softener

    White distilled vinegar relaxes fabric fibres so trapped hair releases during the rinse. Add 120 ml (½ cup) to the fabric softener dispenser, never directly onto clothes.

    Softener works differently. It coats fibres with cationic surfactants that reduce static, but that coating builds up over time and gives new hair something to cling to. It also ruins towel absorbency and kills the wicking in sportswear.

    Two hard rules:

    • Never mix vinegar and chlorine bleach in the same cycle. That combination releases chlorine gas.
    • Check the guidance on children's flame-resistant sleepwear before using softener, since coatings can affect how the treatment performs.

    Dryer Balls: Wool vs. Rubber

    Wool dryer balls (typically 45 to 60 g each, XL up to about 70 g) bounce through the load and separate garments so airflow reaches every surface. They also cut drying time, which saves energy.

    Rubber and silicone dryer balls have raised nubs that physically grab hair. They're louder and less pleasant in a small flat, but they collect more fur.

    Use three to six per load. Fewer than three and they just orbit in one spot.

    AidWhat it doesDose or quantityWatch out for
    White vinegarRelaxes fibres, cuts static120 ml per loadNever with bleach
    Baking sodaSoftens water, deodorises60 ml with detergentCan clog dispensers
    Wool dryer ballsSeparates load, speeds drying3 to 6 per loadFelt down and lose bounce eventually
    Rubber dryer ballsGrabs and holds hair2 to 4 per loadNoisy
    Dryer sheetsReduces static only1 per loadResidue on the lint screen
    Hair catcher discsTraps hair in the wash1 to 2 per loadCan snag delicates

    Are Dryer Sheets Any Good for Pet Hair?

    They help with static, and that's about it. A dryer sheet won't lift hair off fabric, but by discharging the static it lets the airflow and the lint screen do their jobs.

    Aggregate user feedback consistently rates dryer balls above sheets for hair specifically. Sheets also leave a waxy film on the lint screen over time, which restricts airflow. Scrub the screen under warm water with a soft brush every few months if you use them.

    Washer-Mounted Catchers vs. In-Drum Catchers

    In-drum hair catcher discs float in the wash and snag loose fur before it resettles. They're cheap and they genuinely reduce what's left on clothes.

    Some washing machines now ship with a pet-hair cycle that combines extra rinses with a filtered drain. Manufacturer specifications from brands including LG, Samsung, Beko and Miele confirm these cycles target pet hair, though they still assume you've dry-removed first.

    One warning worth heeding: check your warranty terms before adding aftermarket accessories to the drum. Some manufacturers exclude damage caused by third-party items.

    Emergency Fixes: No Tools, Ten Minutes, and You're Out the Door

    Interview in twenty minutes and the cat has been sleeping on your suit. Here's what works with nothing but what's already in the room.

    • Damp hands. Wet your palms, shake off the excess, then sweep firmly in one direction. Rinse and repeat. Crude, but effective on smooth fabrics.
    • Packing or parcel tape. Wrap a strip around your hand, sticky side out, and press-and-lift. Don't drag it.
    • A damp sock or flannel. Wrap it over your hand and sweep one way. Works well on trousers and coat sleeves.
    • The rubber sole of a shoe. Lightly dampened, dragged across a car seat or a coat, it pulls fur into a ridge you can pick up.
    • A balloon. Rub it on your sleeve, then hold it near the fabric. Static lifts loose hairs. Fiddly, but it's saved people at weddings.
    • Bathroom steam. Hang the garment near a hot shower for five minutes, then brush it down with your hand. Steam relaxes the fibres and moisture kills the static.

    Priority order when you're short on time: clear the front panels, then the shoulders, then the sleeves. Those are the three areas anyone actually looks at. Skip the back and the inside of the trouser legs unless you have time to spare.

    Keep a travel-size roller (usually around 6 cm wide) in a bag, a desk drawer and the car. That single habit removes most of these emergencies from your life permanently.

    Mistakes That Make Cat Hair Worse

    Most fur problems in a cat household trace back to a handful of repeated habits. Fix these and the workload drops sharply.

    Laundry Sequence Mistakes

    • Washing hairy clothes straight away. The number one error. Fur redistributes across the whole load.
    • Washing pet-hair items with towels. Towels shed lint, hairy clothes shed fur, and they trade with each other. Never combine them.
    • Running a hot dryer cycle before dry-removing. Heat sets hair into synthetics. Some of it will never come out.
    • Overloading the drum. Fill to two-thirds. Packed clothes can't tumble, so hair can't lift free.
    • Skipping the lint screen between loads. A full screen returns hair to the next batch and cuts airflow.
    • Cold-only washes on heavy fur loads. 30 to 40 °C helps release hair, where 20 °C often doesn't. Always defer to the care label.

    Tool and Fabric Mistakes

    • Sticky roller on loose-knit wool. Pulls the loops and starts pilling.
    • Fabric shaver on cashmere. Cuts holes.
    • Tape on silk or anything sequinned. Snags and leaves adhesive residue.
    • Brushing against the nap on suiting or corduroy. Drives hair deeper.
    • Scrubbing back and forth with a rubber glove. The hair cuticle catches one way and releases the other. Always work in a single direction.
    • Too much fabric softener. Residue builds up and attracts more hair than it repels.

    Household Mistakes That Undo Everything

    The garment is only half the problem. Clean clothes pick up new fur the moment they leave the machine.

    • Storing clean laundry in a room the cat sleeps in. Instant recontamination.
    • Leaving the wardrobe door open. Cats love hanging fabric.
    • An open laundry basket. It's a bed as far as the cat is concerned.
    • Ignoring the washer door gasket. Front loaders collect a fur mat in the rubber seal that transfers to every subsequent load.
    • Never brushing the cat. Grooming at source cuts the total workload more than any tool in this article.

    One troubleshooting pattern comes up constantly. If hair keeps reappearing on clean clothes with no obvious cause, check three places in this order: the dryer lint screen, the washer gasket, and wherever the clean laundry sits before it gets put away. It's nearly always one of those three.

    What This Costs: Tools, Doses and Time Benchmarks

    You don't need everything on this list. Most households do fine with a roller, a rubber glove, some dryer balls and a bottle of vinegar, which comes to under £25 or $30 total.

    ItemTypical UK priceTypical US priceWorth it for
    Disposable lint roller (60 to 95 sheets)£4 to £10$5 to $12Everyone
    Refill sheets (multi-pack)£5 to £12$6 to $15Heavy users
    Reusable sticky or gel roller£8 to £15$10 to $18Cutting waste and running cost
    Velvet nap brush£6 to £14$8 to $16Suits, coats, tailoring
    Pumice or lava stone sweeper£5 to £10$6 to $12Fleece and car seats
    Rubber gloves (pair)£2 to £4$3 to $5Best value tool here
    Wool dryer balls (set of 6)£8 to £16$10 to $20Every dryer household
    Rubber dryer balls or hair catchers£6 to £12$8 to $15Long-haired cats
    Fabric shaver£10 to £30$12 to $35Pilled cotton, not knitwear
    Handheld cordless vacuum£30 to £120$40 to $150Coats, seams, car interiors
    Deshedding brush for the cat£15 to £40$18 to $45The highest-leverage purchase
    Professional dryer vent clean£60 to £150$100 to $200Safety, every 6 to 12 months

    Running Costs Over a Year

    Disposable rollers are where the money quietly goes. A household getting through one roll a month spends roughly £60 to £120 a year, or $70 to $145.

    A reusable roller plus a pair of rubber gloves covers most of the same ground for under £20 one-off. Dryer balls last hundreds of cycles before they felt down and lose bounce.

    White vinegar is the cheapest input of all. At 120 ml per load, a 5 litre bottle covers about 40 washes.

    Doses and Timings Worth Memorising

    • White vinegar: 120 ml (½ cup) per load, in the softener drawer
    • Baking soda: 60 ml (¼ cup) with the detergent
    • No-heat tumble: 10 to 15 minutes
    • Dryer balls: 3 to 6 per load
    • Drum load: two-thirds full maximum
    • Cat brushing: 5 to 10 minutes, 2 to 4 times a week, daily during a coat blow
    • Washer drum clean cycle: monthly
    • Washer drain filter check: every 1 to 3 months
    • Dryer vent duct clean: every 6 to 12 months

    The best return on time is the grooming session. Ten minutes with an undercoat rake twice a week removes fur before it reaches your wardrobe, and it cuts hairball frequency for the cat at the same time.

    Dryer Lint, Vent Safety and Care Label Limits

    Pet hair loads put more lint through a dryer than almost anything else. That turns a laundry chore into a fire safety issue, and it's the one part of this workflow with real stakes.

    dryer lint screen cleaning

    Image source: Bing (Web (fair-use with source credit))

    Why the Lint Screen Matters More in a Cat Household

    Clothes dryers are a recognised cause of residential fires, and lint build-up is the leading contributor. Guidance from the U.S. Fire Administration is blunt about it: clean the lint filter before or after every load, and keep the vent duct clear.

    Cat hair compounds the problem. It mats into a denser, more tightly packed layer than fabric lint alone, so it blocks airflow faster.

    Signs your dryer is struggling with hair build-up:

    • Clothes take two cycles to dry when they used to take one
    • The drum or cabinet feels unusually hot
    • Very little air comes out of the exterior vent hood
    • A faint burnt or musty smell during a cycle
    • Lint appearing on clothes that weren't hairy going in

    The Full Dryer Maintenance Routine

    Do the screen every single load. It takes fifteen seconds and it's the difference between a working dryer and a slow one.

    • Every load: peel the lint mat off the screen. On heavy pet-hair loads, check again halfway through.
    • Monthly: wash the screen under warm water with a soft brush. Dryer sheet residue leaves an invisible waxy film that restricts airflow.
    • Every 3 to 6 months: vacuum the lint trap housing (the slot the screen sits in) with a crevice tool.
    • Every 6 to 12 months: clear or have the vent duct cleaned. More often with long-haired cats or a long duct run.
    • Check the exterior vent flap opens fully when the dryer runs. Nesting birds and crushed flexible ducting are common culprits.

    Never run a dryer with the lint screen missing or damaged. And use rigid metal ducting over flexible foil or plastic where you can, since it traps far less lint.

    Care Label Limits You Cannot Ignore

    Some garments can't take the no-heat tumble step, and forcing it costs you the garment. Read the label before you start.

    SymbolMeaningWhat it means for hair removal
    Square with a circleTumble dry allowedNo-heat tumble step is fine
    Crossed-out square with circleDo not tumble drySkip the tumble, use brushing plus steam
    Circle with a P or FProfessional dry clean onlyDry-remove at home, let the cleaner do the rest
    Hand in a tubHand wash onlyNo machine steps at all
    Crossed-out triangleDo not bleachNever combine vinegar with any bleach product

    Dry-clean-only wool coats, tailored jackets and structured garments should never go in a dryer, even on air fluff. The tumbling distorts the canvas and shoulder padding.

    For those, the correct sequence is dry removal, then steam, then brush, then hang. If the coat also needs cleaning, tell the dry cleaner it's a pet-hair job. Most have a dedicated tumble and brush process for it.

    The Washing Machine Side

    Front loaders hide fur in the rubber door gasket. Pull the seal back gently and wipe right around the fold with a damp cloth after any pet-hair load.

    Check the drain pump filter every one to three months. It's usually behind a small hatch at the bottom front. A filter clogged with hair and lint causes slow draining and eventually a pump failure.

    Run a hot maintenance cycle monthly with the drum empty. Most manufacturers, including Bosch, Miele and Whirlpool, specify this in their manuals, and it clears the biofilm that traps hair and holds odour.

    Stop It at the Source: Grooming, Storage and Laundry Habits

    Everything above is reactive. This is where you actually reduce the workload, and it's the part most people skip.

    Brushing Schedules by Coat Type

    Hair you catch on a brush never reaches your wardrobe. That's the whole principle, and nothing else here comes close for return on effort.

    Coat typeExample breedsFrequencyBest tool
    Long double coatMaine Coon, Norwegian Forest, Siberian, PersianDaily, 5 to 10 minUndercoat rake, then slicker brush
    Semi-longRagdoll, Birman, Turkish Angora3 to 4 times a weekSlicker brush, wide-tooth comb
    Short double coatBritish Shorthair, Russian Blue2 to 3 times a weekRubber curry comb, deshedding tool
    Short single coatSiamese, Bengal, BurmeseOnce or twice a weekGrooming glove
    Curly or sparseDevon Rex, Cornish Rex, SphynxWeekly wipe-downSoft cloth, no brush needed

    Double the frequency during a coat blow. Spring and autumn are the classic peaks, though indoor cats under artificial lighting often shed steadily year round instead.

    A few practical notes on technique:

    • Brush in the direction the coat lies, never against it
    • Undercoat rakes reach the downy layer that causes the real clothing problems
    • Keep sessions short. A calm five minutes beats a stressful fifteen
    • Wipe the cat down with a slightly damp microfibre cloth afterwards to catch the last loose hairs

    Wardrobe, Laundry Basket and Clean-Clothes Storage

    Clean clothes pick up new fur the second they leave the machine. Fix the storage and half your problem disappears.

    • Close the wardrobe door. Hanging fabric is a cat magnet, and an open wardrobe undoes an hour of work.
    • Use a lidded laundry basket. An open basket is a bed with a good view.
    • Fold and put away the same day. A pile of clean laundry on a chair is the most reliable way to recontaminate everything.
    • Garment bags for the good stuff. Suits, coats and interview clothes live in breathable covers, not out in the open.
    • Pick one cat-free room for drying and folding if you can. A spare room or bathroom works.
    • Washable throws on the sofa, bed and car seats. Wash them weekly, and your clothes stop collecting fur secondhand.

    If you can't keep a cat out of the bedroom, at least keep them off the bed where your pyjamas and dressing gown live. Give them a heated bed elsewhere. Cats reliably choose warmth over furniture.

    Washer Gasket, Drain Filter and Drum Maintenance

    Machine hygiene closes the loop. A washer full of hair puts hair back on clean clothes, and no amount of pre-rolling fixes that.

    • Wipe the door gasket fold after every pet-hair load, 20 seconds
    • Leave the door ajar between washes so the seal dries out
    • Check and clear the drain pump filter every 1 to 3 months
    • Run a hot empty drum-clean cycle monthly
    • Wipe out the detergent drawer where residue and hair collect
    • On top loaders, check under the agitator cap and around the drum lip

    If you're on a shared launderette machine, run a quick empty rinse cycle before your load. You don't know what the last person washed, and it's usually dog blankets.

    Real Scenarios: Interview Suit, Black Work Trousers, Allergic Guest

    Three situations come up constantly. Here's how the decision tree plays out in each.

    Scenario One: Navy Wool Suit, Interview in 90 Minutes

    The suit is dry-clean only, so the dryer is off the table. The label decides your route before anything else.

    1. Hang the suit and check the label. A circle with a P means no tumble, no wash.
    2. Steam it for two to three minutes with a handheld steamer, or hang it in a steamy bathroom for five.
    3. Brush with a velvet nap brush, following the nap. Test the direction with your palm first.
    4. Do the shoulders, lapels and front panels before anything else. Those are what people see.
    5. Finish with a low-tack roller on the sleeves and trouser fronts.
    6. Hang it in a garment bag until you leave. Do not lay it on the bed.

    Expected result: near total removal on smooth worsted wool. Steaming is what makes the difference, since it relaxes the fibres and pushes the hair up where the brush can catch it.

    Scenario Two: Black Work Trousers, Every Single Day

    Black polyester or poly-wool trousers are the worst daily offender, because every pale hair shows. Static is the real culprit here, not the hair itself.

    The routine that fixes it permanently:

    • Mist the trousers lightly with anti-static spray after they come out of the dryer
    • Roll them once before hanging, not just before wearing
    • Wash them with 120 ml white vinegar, never with liquid softener
    • Store in a closed wardrobe, in a garment bag if the cat has bedroom access
    • Keep a travel roller in your bag for the walk-to-car pickup

    If you're still fighting it, check your indoor humidity. Below 30 % RH, synthetics keep grabbing hair no matter what you do. Getting a room to 40 to 50 % RH makes a visible difference in winter.

    Scenario Three: Visiting an Allergic Friend or a Newborn

    Clothing is a genuine allergen carrier, not just a cosmetic issue. The Fel d 1 protein sits on dander and saliva-coated hair, and fine particles stay airborne for hours after they're disturbed.

    Research summarised by the National Institute of Environmental Health Sciences confirms that pet allergens travel readily into homes with no pets. Clothing is one of the main routes.

    If someone in the household reacts badly, go further than normal:

    • Store the outfit in a sealed garment bag in a cat-free room, ideally overnight
    • Wash it fresh rather than wearing something that's been hanging in the house
    • Dry-remove, then wash at 40 to 60 °C if the label allows. Higher temperatures remove more allergen
    • Change at your destination if the reaction is severe
    • Vacuum your car seats with a HEPA machine, since the car re-coats you on the drive over

    Rolling alone removes visible hair. It does very little for dander, which is why a proper wash matters when allergies are involved.

    Frequently Asked Questions

    Does washing clothes remove cat hair?

    Not on its own, and it often makes things worse. Water swells the fabric fibres and grips hair tighter, while the drum spreads loose fur across every item in the load. Wash only after you've dry-removed with a roller, glove or brush.

    Adding 120 ml of white vinegar to the softener drawer helps release what's left.

    Why is there still cat hair on my clothes after the dryer?

    The lint screen is almost certainly full. A blocked screen stops airflow, so hair can't lift off the fabric and gets pushed back onto the load. Clean it before every cycle and again midway through heavy pet-hair loads.

    Overloading the drum causes the same problem, since packed clothes can't tumble freely.

    What removes cat hair from fleece?

    A slightly damp rubber glove or a pumice-style sweeper, worked in one direction only. Adhesive lint rollers skate across fleece pile without gripping the hair underneath. Follow up with a 15 minute no-heat tumble and two or three rubber dryer balls.

    Expect around 80 to 90 % removal, since fleece rarely comes fully clean.

    Does vinegar really get pet hair out in the wash?

    Yes, white distilled vinegar relaxes fabric fibres so trapped hair releases during the rinse. Use 120 ml (½ cup) in the fabric softener dispenser, never poured directly onto clothes. It also cuts static, which stops hair resettling.

    Never combine it with chlorine bleach in the same cycle.

    Can I use a lint roller on a wool jumper?

    Only a low-tack one, and carefully. High-tack adhesive grabs the yarn loops as well as the hair, which pulls fibre out and starts pilling. A velvet nap brush or a barely damp rubber glove is safer on merino, lambswool and cashmere.

    Never use a fabric shaver on loose-knit wool.

    How do I stop cat hair sticking to clothes in the first place?

    Attack it at three points. Brush the cat two to four times a week (daily during shedding season) with an undercoat rake. Store clean clothes in a closed wardrobe or garment bag in a room the cat can't access.

    Keep indoor humidity near 40 to 50 % RH so static stops pulling hair onto synthetics.

    Your Quick Decision Guide: Fabric In, Method Out

    Check the care label, identify the fabric, then follow the matching row. That's the whole system.

    If you haveThen do this firstThenSkip
    Cotton or denimAdhesive lint roller10 min no-heat tumble, wash with vinegarNothing
    Fleece or sherpaDamp rubber glove, one direction15 min tumble with rubber dryer ballsSticky rollers
    Wool knit or cashmereNap brush or damp gloveHand wash or dry clean, dry flatTape, shavers, tumble drying
    Suit or wool coatSteam, then brush with the napLow-tack roller, garment bagAny machine step
    Velvet or corduroyTape blotting along the walesHang and airBack-and-forth rolling
    Silk or satinAnti-static spray or damp clothNormal wash per labelAll friction tools
    Polyester or activewearKill the static, then rollerTumble no heat, vinegar in washFabric softener
    Already hot-dried syntheticsPumice stone plus handheld vacuumAccept partial removalRepeat hot cycles

    Three rules override everything else. Dry-remove before you wash. Clean the lint screen every load.

    And brush the cat, because ten minutes on the sofa with an undercoat rake saves you an hour at the wardrobe.

  • Step-by-step: How to Reduce Cat Litter Smell on a Cat

    Step-by-step: How to Reduce Cat Litter Smell on a Cat

    That unmistakable whiff when you walk through the front door. You've scooped, you've sprayed, you've lit a candle, and still, the smell creeps back within hours. If you're wondering how to reduce cat litter smell on a cat, you're not alone.

    The good news is that persistent litter box odor is rarely a lost cause. It's usually a fixable combination of the wrong setup, the wrong schedule, and sometimes, health signals being ignored.

    Here's the reality check that most guides skip: litter box smell is almost never a cleaning product problem. It's a chemistry problem. A single cat produces roughly 50 to 100 milliliters of urine per day.

    That urine contains urea, which bacteria break down into ammonia. Per the American Veterinary Medical Association, a healthy cat's urine should be relatively mild-smelling and pale yellow. If it smells pungent even when fresh, that's a red flag worth investigating before you buy another bag of scented litter.

    Let's fix your home's air quality, starting with the root cause.

    Quick Answer

    Clean the box daily. Scoop solid waste and clumps twice a day.

    Use unscented clumping litter at least two inches deep. Add a thin layer of baking soda at the bottom of the box. Wash the entire box weekly with mild dish soap.

    Do not use bleach, ammonia, or strong perfumes. These make cats avoid the box and can worsen odor.

    Place the box in a ventilated area away from food and water. Use an enzymatic cleaner on accidents outside the box. Watch for unusually strong urine odor, which can signal a health problem.

    Contact your vet if you notice it.

    The Root Cause: Why Litter Smells Even After Scooping

    Let's break down the science, because once you understand what causes the smell, you can actually fix it instead of just masking it.

    ammonia smell cat urine

    Image source: Bing (Web (fair-use with source credit))

    The Chemistry of Cat Urine Odor

    Cat urine contains urea, a waste byproduct of protein metabolism. When urea mixes with water and sits exposed to air, bacteria start breaking it down. That breakdown process releases ammonia gas.

    Ammonia is what you smell when a litter box hasn't been scooped in a couple of days. It's sharp, pungent, and irritating to your nose and lungs.

    Here's where it gets worse. When ammonia sits for extended periods, it can further decompose into mercaptans. These are the same sulfur compounds that make skunk spray and rotten eggs smell so bad.

    That's why old, neglected litter boxes don't just smell like ammonia. They smell like something died.

    As of 2026, most commercial litters are designed to trap or absorb urine quickly. None of them eliminate the chemical process entirely. They just delay it.

    The longer waste stays in the box, the more time bacteria have to produce ammonia and mercaptans.

    Why "Scooping" Sometimes Doesn't Work

    You scoop every day. You really do. But the smell persists.

    What gives?

    The problem is usually one of three things. First, you may be scooping once a day, but a single box in a multi-cat home needs more frequent attention. Second, your litter may not be clumping well, leaving microscopic urine-soaked particles stuck to the bottom of the box.

    Third, and this is the sneaky one, urine has soaked into the plastic liner or tray itself. Masking the smell with baking soda or scented sprays only covers the surface. The source is still there, actively breaking down every minute of every day.

    The Difference Between Masking and Neutralizing

    Scented litters work by releasing perfume to cover the ammonia smell. That's masking. It works for a few hours, then the perfume fades, and the ammonia returns, often stronger because the moisture has had more time to react.

    Enzymatic cleaners work differently. They contain specific proteins, enzymes, and beneficial bacteria that literally digest the uric acid crystals left behind by cat urine. These enzymes break the waste down into carbon dioxide and water.

    No ammonia gas. No mercaptans. No smell.

    That's why enzymatic cleaners are the gold standard for cleaning litter boxes and accident spots.

    Your goal isn't to cover the smell. It's to eliminate the chemical compounds creating it.

    When the Urine Itself Is the Problem

    Here's something most owners don't think about. A cat's urine odor intensity is directly tied to hydration and health. If your cat's urine is extremely concentrated, it will smell stronger, even when freshly eliminated.

    Dehydrated cats produce darker, more concentrated urine with higher ammonia content. Chronic dehydration can also concentrate minerals in the urine, leading to crystals and stones. These can cause blockages and infections, all of which make urine smell worse.

    If you notice a sudden, dramatic change in litter box odor, take it seriously. A strong, foul, or unusually sweet smell can indicate a urinary tract infection, kidney disease, or diabetes. Don't just buy stronger litter.

    Get your cat checked.

    Is Your Cat's Urine Smell Normal? When to Worry

    Not all litter box smells are created equal. Some are just normal cat ownership. Others are warning signs that need a vet's attention, not a stronger deodorizer.

    What Normal Cat Urine Smells Like

    Healthy cat urine has a mild, slightly musky scent. It's noticeable when fresh, but it shouldn't fill a room. If you have a covered box in a corner and you only catch a whiff when standing right next to it, that's normal.

    Normal urine color ranges from pale yellow to clear. If you're using clumping litter and you dig out a fresh clump, it should be a light yellow or amber color. Dark yellow or orange clumps mean the urine is highly concentrated, which points to dehydration.

    Red Flags That Require Immediate Attention

    Some odor changes are easy to dismiss as "just cat smell." The following should send you to the phone:

    • Ammonia so strong it burns your eyes: This suggests urine has been sitting for a long time, or your cat is producing very concentrated urine. Either way, it's not okay.
    • Foul, putrid, or rotten smell: This can indicate a urinary tract infection, bladder stones, or even a tumor. Any foul-smelling urine warrants a vet visit.
    • Sweet or fruity smell: This is a classic sign of diabetes in cats. Urine glucose gives off a sweet, almost acetone-like aroma.
    • Blood in urine: Red-tinged clumps or litter that looks rust-colored. This is an emergency, especially in male cats.
    • Changes in urination frequency: If your cat is making frequent trips to the box and producing very little, or straining with no output, call your vet immediately.

    Underlying Health Conditions That Increase Odor

    Several conditions can make urine smell worse even if your cleaning routine is perfect:

    ConditionWhy It Increases SmellKey Signs
    Urinary tract infection (UTI)Bacteria alter urine pH and produce foul-smelling compoundsStraining, blood, frequent small amounts
    Kidney diseaseReduced filtering means more concentrated wasteIncreased thirst, weight loss, larger clumps
    Diabetes mellitusExcess sugar in urine attracts bacteria and sweetens the smellIncreased thirst, increased urination
    Feline idiopathic cystitis (FIC)Inflammation without infection, changes urine chemistryPainful urination, licking genitals, urinating outside box

    As of 2026, the Cornell University College of Veterinary Medicine reports that FLUTD (feline lower urinary tract disease) affects roughly 1 in 10 cats at some point in their lives. It's one of the most common reasons cats start avoiding the litter box entirely.

    Rule: When in Doubt, Get a Urinalysis

    A urine test is quick, non-invasive, and relatively inexpensive. It can tell you if your cat has an infection, crystals, diabetes, or kidney issues. This is an article about smell, but the honest truth is that odor is often the earliest symptom of a problem that has nothing to do with litter or cleaning.

    So before you spend hundreds on bigger boxes, special litter, and air purifiers, spend sixty dollars on a urinalysis. If the vet gives your cat a clean bill of health, then you can confidently attack the smell with the right setup.

    Choosing the Right Litter: A Practical Breakdown

    Once your cat receives a clean health rating, the next most significant variable is your litter. Not all litters behave the same way. The wrong one can make odor management nearly impossible.

    clumping vs silica cat litter

    Image source: Bing (Web (fair-use with source credit))

    Clumping Clay Litter: The Standard

    Clumping clay (typically sodium bentonite) is the most popular option in the US, and for good reason. It forms hard, solid clumps when wet, which makes scooping fast and efficient. You remove the urine, not just the smell.

    • Pros: Excellent odor control, easy to scoop, widely available, affordable
    • Cons: Dusty, heavy, can track throughout the house, not eco-friendly
    • Best for: Most households with cats who don't have respiratory sensitivities

    The trade-off is dust. Sodium bentonite is heavy, and some brands generate clouds of dust when poured. That dust settles in your cat's lungs and yours.

    Per the AVMA, cats with underlying asthma or respiratory conditions should avoid high-dust clay litters entirely.

    Silica Gel Crystals: Absorb Without Clumping

    Silica gel crystals (the same desiccant found in shoe boxes) work differently. Instead of clumping, they absorb moisture and hold it inside the crystal structure. The urine is trapped, but it isn't removed until you stir the litter and expose fresh crystals.

    • Pros: Very low dust, excellent moisture absorption, can last longer between full changes
    • Cons: Doesn't form clumps, some cats dislike the texture on their paws, more expensive
    • Best for: Households with dust-sensitive cats or owners who want less frequent box cleanings

    The key limitation is that silica doesn't isolate urine as completely as clay clumping. Because the urine wicks into nearby crystals, you can end up with saturated pockets that still harbor bacteria. Daily stirring is essential to expose fresh crystals and distribute moisture.

    Plant-Based Litters: Pine, Wheat, Corn, and Paper

    Natural litters have grown enormously in popularity. They're biodegradable, often flushable (check your municipality), and significantly lower in dust than clay.

    • Pine: Absorbs odor naturally due to the wood's tannins. It breaks down into sawdust when wet, which falls to the bottom of the box and requires occasional straining or full changes.
    • Wheat: Clumps well, controls odors reasonably, and is certified flushable by some municipalities.
    • Corn: Excellent clumping, good odor control, but can be dusty and is a known allergen trigger for some cats.
    • Paper: Very low dust, highly absorbent, but doesn't clump and has weaker odor control. Best for post-surgical or kitten care.

    The downside with plant-based litters is consistency. Some clump beautifully. Others revert to mush, which makes scooping a sticky, frustrating, and smelly chore.

    Scented vs. Unscented: What Cats Actually Prefer

    This is the most controversial topic among cat owners, and the research is clear.

    Cats have an extraordinary sense of smell. Up to 40 times more sensitive than humans. Scented litters bombard their nasal passageways with perfume, and many cats find that genuinely unpleasant.

    Per the International Cat Care organization, strongly scented litters are a leading cause of litter box aversion in indoor cats. A cat that dislikes the smell of its box will avoid using it. Once elimination happens outside the box, breaking the habit is extremely difficult.

    Unscented litters don't release perfume. They absorb and trap waste without fragrant additives. For the majority of cats, unscented is the safer, more comfortable choice.

    If you're using scented litter because "unscented doesn't mask the smell," there's a better solution. It doesn't come in a perfume bottle.

    How We Compare Them Side-by-Side

    Litter TypeOdor ControlDust LevelClumping QualityCost per Month (approx.)Best For
    Clumping clayHighMedium to highExcellent$15–$25Most households
    Silica gelMedium to highVery lowDoesn't clump$20–$35Dust-sensitive cats
    Pine pelletsMediumLowDoesn't clump$10–$20Eco-conscious owners
    WheatHighMediumGood$20–$30Flushable litter users
    CornHighMediumExcellent$20–$30Strong odor households
    PaperLowVery lowDoesn't clump$15–$25Kittens, post-surgical

    How to Switch Litters Without Stressing Your Cat

    No matter which litter you choose, test it in a small batch first. Don't fill a big new box with a completely different litter and expect your cat to be thrilled.

    • Pour a thin layer of the new litter on top of the existing litter
    • Observe your cat's reaction over two to three days
    • Gradually mix in more new litter over the following week
    • Only do a full swap once your cat eliminates normally in the box

    If your cat starts avoiding the box, that litter isn't working. Go back to a known good option.

    The Box Itself: Size, Coverage, and Placement Matters

    You can buy the most expensive, odor-absorbing litter on the market. It still won't fix a bad litter box setup. The container itself plays a massive role in how odor behaves in your home.

    cat litter box odor control

    Image source: Bing (Web (fair-use with source credit))

    The Rule of Thumb: One More Box Than Cats

    The accepted standard from Cornell University College of Veterinary Medicine remains the same: one litter box per cat, plus one extra. Two cats should have three boxes. Three cats should have four.

    It sounds like a lot, because it is.

    Multiple boxes serve multiple purposes. They reduce territorial stress, spread the waste load, and give every cat a clean option even if one box gets busy. More boxes also mean less concentrated ammonia buildup in any single location.

    Open vs. Covered: The Honest Comparison

    Covered boxes seem like the obvious answer to smell. Enclose the waste, trap the odor, right? In practice, it's more complicated.

    FeatureOpen BoxCovered Box
    Odor containmentOdor spreads freelyTraps odor inside
    VentilationExcellentPoor, odor concentrates
    Cat acceptanceHigher, cats feel less trappedCan cause aversion in anxious cats
    Cleaning easeEasier access for scoopingCovers and hoods make scooping awkward
    Litter trackingModerateReduced, but litter still escapes through the door
    Ammonia exposureLower for humansSignificantly higher if not scooped frequently

    The trap with covered boxes is hiding the problem. You don't smell the ammonia as quickly, so you clean less often. By the time you lift the lid and get hit with the odor, the waste has been sitting for days, producing concentrated ammonia inside a confined space.

    Beyond the smell, many cats genuinely dislike covered boxes. A cat inside a covered box can't see incoming threats. For anxious or multi-cat households, that feeling of vulnerability can cause cats to eliminate outside the box entirely.

    Aggregate buyer feedback on covered boxes is mixed. They work for some cats and some owners, and they're a disaster for others. If your cat is confident, you're scrupulous about scooping, and you need the visual containment, a covered box can work.

    Otherwise, open is the safer default.

    Size Requirements That Matter

    Cats need enough room to turn around, dig, eliminate, and cover their waste without touching the walls. A general rule: the box should be at least one and a half times the length of your cat, nose to tail base.

    Huge bins designed for litter (the kind with tall, straight sides) often work better than standard commercial boxes, which are frequently too small for larger cats. Many owners report that switching to a large, clear plastic storage container as a litter box solved their scent rejection and spraying issues overnight. The high walls contain the litter, and the open top lets odors dissipate naturally.

    Placement Really Determines Odor Spread

    Where you put the box is as important as what's inside it.

    • Avoid high-traffic areas. A hallway or living room corner means constant disturbance, which causes some cats to rush their business and leave a mess.
    • Avoid food and water. Cats are hardwired to separate elimination from eating. A box near their food bowls creates stress and can cause them to eliminate elsewhere.
    • Avoid enclosed tight spaces. Closets and cabinets trap ammonia fumes. Your cat braves that smell with every visit, and eventually, it will refuse.
    • Do place boxes in quiet corners with two escape routes. Cats like to see who is coming and have a way out.
    • Do consider air flow. The ideal spot has some air movement, enough to disperse odors without feeling breezy to your cat.

    Covered boxes in enclosed spaces are the worst combination. They trap ammonia inside a confined volume of air. Your cat is breathing that every time it uses the box.

    The Multi-Level Household Problem

    In a two-story home, one box on the ground floor isn't enough. Stairs can be a barrier for older cats, and young kittens may not make the trip when they need to go. Place boxes on every level of your home, even if it means buying one extra.

    This also reduces litter box smell because it spreads usage across locations. Each box gets fewer visits per day, so the waste buildup slows down, and you have more time between scoops.

    The Daily Routine That Actually Keeps Smell Down

    You have the right litter, the right box, and the right location. Now comes the part that actually makes the difference: the daily routine.

    Scooping Twice a Day Is Non-Negotiable

    Once a day isn't enough. Skipping a single day can set you back significantly. A single cat produces one to two urinations per day with a volume of 30 to 50 milliliters each.

    That's a lot of moisture sitting in a box.

    Scoop twice a day. Once in the morning, once in the evening. Five minutes each time.

    That's ten minutes a day to keep your home smelling fresh.

    If you absolutely cannot scoop twice a day, increase the litter depth and switch to a stronger clumping litter. But understand that you're working against the chemistry of ammonia production.

    The 30-Minute Wait After Adding Fresh Litter

    When you add new litter to the box, wait at least 30 minutes before letting your cat use it. Fresh litter is dusty and has an unfamiliar scent. Giving it time to settle and release some of its odor makes the box more appealing to your cat.

    This is also the perfect time to stir the existing litter to expose fresh particles and distribute moisture.

    A Simple 5-Step Daily Workflow

    1. Scoop solid waste and clumps. Use a slotted scoop to allow clean litter to fall back through.
    2. Top up the litter level. Maintain at least two inches of depth. Refill as needed to replace what you removed.
    3. Stir the litter. For non-clumping litters like silica or pine, stirring distributes moisture and exposes fresh material.
    4. Check the surrounding floor. Sweep up any tracked litter to prevent it from being tracked further and to minimize dust accumulation.
    5. Rinse the scoop. Urine and debris that dry on your scoop become a source of bacteria. Quick rinse with hot water, air dry.

    Adapting the Routine to Multi-Cat Homes

    For multiple cats, adjust the routine upward:

    • Scoop after every feeding. If you feed twice a day, scoop twice.
    • Full litter change every 7, 10 days. Wash the box thoroughly with mild dish soap and warm water.
    • Use an enzymatic cleaner on the box itself. A quick spray after washing eliminates urine residue that soap can't fully remove.

    Full Litter Change: The Weekly Reset

    Even with diligent scooping, litter reaches its saturation point. Once every one to two weeks, dump the entire contents.

    How often depends on litter type:

    Litter TypeFull Change FrequencyWashing Required
    Clumping clayEvery 2 weeksYes
    Silica gelEvery 3–4 weeksYes
    Pine pelletsEvery weekYes
    WheatEvery 2 weeksYes
    CornEvery 1–2 weeksYes
    PaperEvery 3–5 daysYes

    Here's the exact washing process:

    1. Dump all litter in a trash bag.
    2. Rinse the empty box with warm water.
    3. Wash with mild dish soap and a sponge. No bleach.
    4. Rinse thoroughly. Soap residue can deter cats.
    5. Dry completely before adding fresh litter.
    6. Add fresh litter to two-inch depth.

    Bleach is a problem. Even after rinsing, a trace residue of bleach can create a caustic reaction when mixed with cat urine, releasing toxic chloramine gas. That's a genuine safety hazard.

    Stick with dish soap.

    The Biggest Mistake of a Daily Routine

    The biggest mistake we see in both the research and in aggregate owner feedback isn't skipping a scoop. It's over-relying on scented additives.

    Baking soda at the bottom of the box is harmless and mildly helpful. But scented sprays, heavily perfumed powders, and "odor-locking" chemical additives often irritate your cat's nose and paws. The result is a cat that refuses to use the box.

    The smell is gone, but the stains are now on your rug. And the rug has a much deeper ammonia problem than a litter box ever did.

    Focus on removing waste, not perfuming it. That simple shift is what actually wins the battle against litter box smell.

    Cleaning Products That Work vs. Products That Backfire

    Not all cleaning products are safe for use around your cat's litter box. Some work brilliantly. Others can harm your cat or make the smell worse.

    enzymatic cleaner pet urine

    Image source: Bing (Web (fair-use with source credit))

    Enzymatic Cleaners: The Gold Standard

    Enzymatic cleaners contain specific proteins and beneficial bacteria that digest uric acid crystals, the source of persistent cat urine odor. They don't just mask the smell. They break down the waste at a molecular level.

    These are the only cleaners that truly eliminate old urine stains and smells. They're essential for cleaning accidents outside the box, and they're excellent for a deeper weekly box clean.

    Use them liberally on any spot where your cat has eliminated outside the box. Let them sit for 10 to 15 minutes before wiping. For heavily soaked areas, allow the enzyme cleaner to air dry completely.

    Safe Cleaners for the Litter Box Itself

    For your everyday box washing, mild dish soap is the safest and most effective choice. It removes dirt and residue without leaving harsh chemical scents that might deter your cat.

    Avoid anything with ammonia, bleach, or strong perfumes. Ammonia smells like urine to a cat, and that can actually attract them to eliminate in the wrong place. Bleach residue can react with urine to release toxic chloramine gas.

    Dangerous Cleaners to Avoid

    Cleaner TypeWhy It's DangerousSafer Alternative
    Bleach-based cleanersReleases chloramine gas when mixed with urineMild dish soap
    Ammonia-based cleanersSmells like urine, encourages sprayingWarm water and dish soap
    Phenol-based disinfectants (Dettol, pine oil)Toxic to cats, causes liver damageEnzymatic cleaner
    Strongly scented spraysIrritates nasal passageways, causes litter box aversionUnscented enzymatic spray

    How to Deep Clean an Accident Spot

    When your cat eliminates outside the box, the urine soaks into whatever surface it hits. Carpet, padding, hardwood, and concrete all absorb urine and require specific treatment.

    1. Blot up as much fresh urine as possible. Use paper towels, press down firmly, do not rub.
    2. Flood the area with an enzymatic cleaner. Saturate the spot and let it soak for 10 to 15 minutes.
    3. Blot again. Remove the excess cleaner.
    4. Let it air dry completely. Do not use a hair dryer or vacuum. Heat can set the stain.
    5. Repeat if necessary. Old or heavy urine spots may need two or three applications.

    The One Product That Makes Things Worse

    Scented powders designed to be sprinkled into litter boxes are the worst offenders. They're often made with talc and synthetic fragrances. These can irritate your cat's respiratory system and paws.

    Many cats refuse to use the box entirely, leading to accidents that create deeper and more persistent smells.

    You don't need them. Proper litter and daily scooping handle odor. Baking soda at the bottom of the box provides a mild, neutral pH buffer without the perfume problem.

    7 Mistakes That Make Litter Box Smell Worse

    Some common habits seem harmless but actively contribute to odor problems. Here are the seven biggest ones, and how to fix each.

    Mistake 1: Overloading the Litter Box with Deodorizers

    Powders, sprays, and crystal additives stack onto your litter and actually trap moisture at the bottom of the box. This creates a soggy layer that harbors bacteria and produces more ammonia.

    Fix: Skip the add-ons. Use good litter and scoop daily.

    Mistake 2: Not Washing the Box Itself

    Waste residue builds up on the plastic walls and floor of the box, even with regular scooping. Bacteria thrive in that residue, and they produce odor continuously.

    Fix: Wash the entire box with mild dish soap every one to two weeks.

    Mistake 3: Using Bleach for Cleaning

    Bleach residue can react with urine to release chloramine gas. This is a lung irritant for both you and your cat. It can also damage the plastic box over time, making it more porous and harder to clean.

    Fix: Use mild dish soap or an enzymatic cleaner. Rinse thoroughly.

    Mistake 4: Placing the Box Next to Food and Water

    Cats instinctively separate elimination from eating. A box near food bowls creates stress, which can contribute to urinary issues and behavioral problems.

    Fix: Move the box at least three feet away from food and water bowls.

    Mistake 5: Using a Box That's Too Small

    If your cat can't turn around comfortably inside the box, it may not use it properly. Urine can miss the litter entirely and land on the box walls or the floor.

    Fix: Upgrade to a larger box or use a storage bin with high sides.

    Mistake 6: Ignoring Changes in Urine Odor

    Sudden changes in urine smell can indicate a urinary tract infection, kidney disease, or diabetes. Ignoring it means buying more litter while the underlying problem worsens.

    Fix: If urine suddenly smells foul, sweet, or extremely strong, contact your vet.

    Mistake 7: Not Scooping Often Enough

    This seems obvious, but it's the root cause of most litter box smell problems. A single day without scooping allows bacteria to start the ammonia breakdown process.

    Fix: Scoop twice a day. Set a reminder on your phone if necessary.

    Multi-Cat Households: Doubling the Cats, Doubling the Smell

    Multi-cat households face bigger odor challenges than single-cat homes. It's not just that more cats produce more waste. Cats are territorial, and stress can worsen elimination habits.

    Box Count and Placement

    The rule stands: one box per cat, plus one extra. Two cats get three boxes. Three cats get four.

    This spreads the waste load and prevents any single box from becoming overwhelmed.

    Place boxes in different areas of the home, not all in the same room. This gives shy cats access to a box without having to pass by a more dominant cat's territory.

    Litter Preferences and Territorial Issues

    Each cat in a multi-cat household may have different litter preferences. If one cat refuses to use the same litter as the other, it will find another spot in the house to eliminate.

    Provide a variety of litter types across your boxes. This accommodates individual preferences and reduces territorial stress.

    Managing Odor with More Cats

    With more cats, you'll need to scoop more often. For two or more cats, scooping after every meal is a reasonable target. If you're at work all day, scoop once in the morning and once as soon as you get home.

    Full litter changes may need to happen weekly instead of bi-weekly. A soiled box in a multi-cat home turns into an ammonia factory within 48 hours.

    The Importance of Observing Each Cat's Habits

    Watch how each cat uses the box. Cats that strain, produce very little, or cry while eliminating need medical attention. Urinary blockages are emergencies, especially in male cats.

    They can turn fatal within 24 to 48 hours without treatment.

    If one cat is spraying or marking outside the box, that's a behavioral response to stress. Increasing the number of boxes and providing vertical territory (cat trees, shelves) often helps.

    Long-Term Odor Control: Flooring, Airflow, and Deep Cleaning

    Even with a perfect daily routine, litter boxes exist inside a larger environment. Your flooring, airflow, and cleaning habits all affect how much smell lingers in your home.

    Flooring and Litter Tracking

    Litter tracks beyond the box, and with it, tiny particles of dried urine and feces. That tracked litter contributes to the general "cat smell" you notice when walking into a room.

    Put a litter mat outside the box to catch any litter stuck to your cat's paws. These mats have a textured surface that traps particles before they spread across your floor.

    If you have carpet around the litter box, the carpet absorbs moisture and odor over time. A washable rug or vinyl mat under the box provides a more hygienic surface.

    The Truth About Air Purifiers and Odor

    Air purifiers with HEPA filters can help reduce airborne litter dust. But they don't remove ammonia gas itself. Carbon filters are the type that can help adsorb odor molecules, but they need to be replaced regularly (usually every one to three months) to stay effective.

    An air purifier is a helpful addition, not a replacement for a good cleaning routine. Don't expect it to fix a badly maintained box.

    Seasonal Odor Factors

    Odor levels genuinely shift with the seasons. Summer heat increases the rate of bacterial growth and ammonia production. Winter, with closed windows and lower airflow, traps smells indoors.

    Adjust your routine seasonally. In summer, full litter changes may need to be more frequent. In winter, consider adding a small fan near the litter box area to improve airflow without chilling your cat.

    Deep Cleaning Carpets and Upholstery

    If you have a carpeted room with a long-standing litter box smell, you need a proper deep clean.

    1. Vacuum thoroughly to remove tracked litter.
    2. Use a carpet extractor with an enzymatic cleaner and water.
    3. Allow the carpet to dry completely, then vacuum again to lift the fibers.

    Steam cleaning can help, but only if the moisture is extracted properly. A damp carpet pad will hold odor and can develop mold. If the smell persists after cleaning, it may have soaked through to the padding.

    Replacing the padding is sometimes the only real fix.

    Frequently Asked Questions

    How do I stop my cat from tracking litter everywhere?

    Place a textured litter mat outside the box. It traps loose particles on your cat's paws. Choose a mat with deep grooves and a flat bottom so it stays put.

    Vacuum the mat weekly and clean it with mild soap and water monthly.

    Why does my cat's urine suddenly smell stronger?

    New odor can mean dehydration, a urinary tract infection, kidney disease, or diabetes. Check whether your cat is drinking enough water. Look for other signs, like blood, straining, increased thirst, or urinating outside the box.

    Call your vet for a urinalysis.

    Is baking soda safe to put in cat litter?

    Yes, a thin layer of baking soda at the bottom of the box is safe and mildly helpful. It neutralizes acids and bases in the urine, helping reduce odor. Avoid strongly scented versions or commercial "odor-locking" powders, which can deter your cat.

    How often should I completely change the litter?

    For clumping clay, change the entire box every one to two weeks. For silica gel, every three to four weeks. For pine pellets, weekly.

    Wash the empty box with mild dish soap and warm water before adding fresh litter.

    Why does my cat pee outside the litter box?

    Many possible causes exist: medical issues, dirty boxes, litter aversion, stress, or territorial conflict. Start with a vet visit to rule out urinary problems. Then evaluate the box count, location, litter type, and cleaning schedule.

    Does covered litter box reduce smell?

    Covered boxes trap smell inside the frame, which reduces odor spread in the short term. But they also concentrate ammonia inside the box, which can make your cat avoid it. If you can't scoop twice a day, a covered box will hide the smell until it becomes a bigger problem.

  • Step-by-step: How to Keep a Cat Smelling Fresh

    Step-by-step: How to Keep a Cat Smelling Fresh

    Your cat doesn't have to smell like a litter box. If you're wondering how to keep a cat smelling fresh, the answer isn't constant bathing or masking odors with sprays. It's a simple diagnostic routine that tackles the root cause, whether that's dental disease, a dirty litter box, or a skin issue.

    Most cats only need about five minutes of daily care to stay smelling clean.

    Here's the thing that surprises most owners: a cat's odor is rarely a "bath" problem. According to veterinary dermatology research, over 70% of persistent feline odors trace back to oral hygiene or litter box habits, not the coat itself. As of 2026, the American Veterinary Medical Association reports that periodontal disease affects up to 85% of cats over three years old.

    That's a smell you can't scrub away. So let's work through this step by step.


    Quick Answer

    Keep your cat smelling fresh by scooping the litter box twice daily. Brush your cat weekly to remove dander and loose fur. Use waterless wipes for spot cleaning instead of full baths.

    Check the ears and mouth monthly for odor sources.

    Feed a high-quality diet with omega-3s for coat health. Address dental care before it becomes halitosis. When a persistent smell appears suddenly, call your vet.

    A clean litter box and regular grooming solve 90% of odor issues.

    The difference between a fresh cat and a stinky cat usually comes down to routine, not products. Start with the checklist below and work through it systematically. You likely won't need a bath at all.


    Why Does My Cat Smell Bad? (The Root-Cause Check)

    Before you buy another bottle of deodorizing spray, figure out where the smell is actually coming from. Cats are fastidious groomers, so a truly stinky cat is usually signaling something specific.

    Let's break down the four main odor zones. Each one has a distinct smell profile and a different fix.

    Odor ZoneTypical SmellLikely Cause
    MouthFishy, metallic, or rottenDental disease, food residue
    EarsYeasty, musty, or sourEar infection, wax buildup
    Coat/SkinGreasy, oily, or mustyOveractive sebaceous glands, diet issue
    Rear EndFishy, musky, or fecalAnal glands, diarrhea, litter box issues

    The mouth. If your cat's breath smells like a sewer, that's dental disease. Plaque hardens into tartar, bacteria flourish, and the resulting halitosis is the single most common odor complaint from cat owners. We'll dig into this more in the dental section.

    The ears. A healthy cat ear should be pink and relatively odorless. If you notice a yeasty, sweet, or sour smell coming from the ear area, that's often an infection. Ear mites, common in kittens, produce dark, coffee-ground-like debris with a musty odor.

    The coat. A cat's coat should feel clean and slightly silky. If it feels greasy, looks dull, or has a musty odor, you're likely dealing with overactive oil glands. This happens with poor diet, allergies, or in cats that are overweight and can't groom properly.

    The rear end. A fishy smell around the hindquarters is classic anal gland issues. These two small sacs release a pungent fluid when your cat poops. If they become impacted or infected, they produce a persistent fishy odor.

    No amount of bathing will fix this one.


    The Diagnostic Sniff Test: Ears, Mouth, Coat, and Back End

    Now that you know the four zones, let's run a structured sniff test. This isn't random. It's a systematic check you can complete in under two minutes.

    Step 1: The Breath Check. Gently lift your cat's lip and sniff. Healthy cat breath should be relatively neutral, maybe a little food-scented. If you get a foul, fishy, or sickly-sweet smell, that's a red flag for dental disease or kidney issues.

    Per the American Veterinary Dental College, the most common oral odor cause is periodontitis.

    Step 2: The Ear Test. Take a clean cotton ball and gently wipe the inside of your cat's ear flap, just the visible part. Then smell it. A slight waxy smell is normal.

    A strong, yeasty, or sour odor means a vet visit for a swab test to rule out mites or a bacterial infection.

    Step 3: The Coat Smell. Fluff your cat's fur and smell the base of the coat, not just the surface. Use your fingers to part the fur down to the skin. If the skin smells musty or oily, you're looking at a skin health issue.

    Check for dandruff, redness, or bald spots while you're in there.

    Step 4: The Rear Check. This is the least glamorous but most important. Lift your cat's tail and check around the anus. Smell the fur around the hindquarters.

    If you detect a fishy odor, the anal glands might be full or infected. Also look for matted fur or dried fecal residue stuck to the fur, which is surprisingly common in long-haired and senior cats.

    How to Tell If It's a Medical Issue vs. a Grooming Issue

    This is where the decision tree gets critical. The distinction between a medical smell and a grooming smell changes your entire approach.

    • If the smell is isolated to the mouth: It's dental. Book a vet visit for a dental check and possible cleaning. Home remedies won't reverse established tartar.
    • If the smell is in the ears: It's almost always medical. You need a vet with an otoscope. Don't try to clean deep ear canals yourself.
    • If the smell is a general oily coat odor: It could be either. Try dietary changes and more frequent brushing for two weeks. If no improvement, it's an allergy or internal issue.
    • If the smell is fishy at the rear: Anal glands are the prime suspect. This can sometimes resolve on its own, but repeated issues need veterinary expression.
    • If the smell is sweet, fruity, or chemical-like: This is an emergency red flag. Diabetes and kidney failure produce distinct sweet or ammonia-like odors. Get to a vet immediately.

    The core rule: if a smell persists for more than three days despite cleaning, it's medical, not surface-level. Stop masking it. Get a diagnosis.


    Daily Freshness Routine: The 5-Minute Rule

    Once you've ruled out medical issues, the daily routine becomes your best friend. You don't need an elaborate spa ritual. You need five focused minutes, and that's genuinely enough.

    Here's the workflow we recommend based on veterinary guidance and aggregate owner reports:

    Minute 1: Scoop the litter box. This is non-negotiable. Twice-daily scooping eliminates the most common household cat odor. We'll cover the details fully in the next section.

    Minute 2: Wipe the coat. Keep a pack of waterless cat wipes near your cat's favorite sleeping spot. Give them a quick wipe down the back, the sides, and the base of the tail. This spreads natural oils evenly and removes loose dander.

    It's also excellent for allergy sufferers.

    Minute 3: Check the food and water bowls. Wash them daily with hot, soapy water. Residual food oils go rancid and create a stale smell in the feeding area. Dirty water bowls breed bacteria that cause bad breath.

    Minute 4: Spot-check the ears. Just a quick visual look. If you see dark debris or redness, note it and monitor. Cat wipes are not for the ears, so keep them dry.

    Minute 5: Give a dental treat. Not as a substitute for brushing, but as a maintenance aid. The Veterinary Oral Health Council (VOHC) approves specific treats that reduce plaque and tartar. Look for their seal of approval on the packaging.

    This routine keeps cats smelling neutral. It addresses the coat, the gut, and the litter simultaneously. The key insight is that skipping one day here and there is fine, but skipping three days is how odors build up.

    cat dry shampoo waterless foam

    Image source: Bing (Web (fair-use with source credit))


    Litter Box Management: Scooping, Deep Cleaning, and Litter Choice

    The litter box is where cat odor lives or dies. A clean box means a fresh-smelling home. A neglected box means the whole house slowly takes on that ammonia tinge.

    Daily scooping is the foundation. You need to scoop at least once a day, but twice is better. The average cat eliminates one to two times per day. If you scoop after each elimination, the odor never has time to build.

    It's that simple.

    The type of litter matters more than the brand. Here's a quick comparison of the common types.

    Litter TypeOdor ControlDust LevelsTrackingCost per Month
    Clumping ClayHighMediumMedium$15-$25
    Silica CrystalsHighLowHigh$20-$30
    Pine PelletsMediumLowLow$10-$18
    Recycled PaperLow-MediumVery LowLow$15-$22
    Walnut ShellHighVery LowMedium$18-$25

    Clumping clay is the most popular for a reason. It forms hard clumps that trap urine odor effectively. Silica crystals absorb moisture and dry out waste, but they track more easily and some cats dislike the texture on their paws.

    Pine pellets are eco-friendly and affordable, but they don't clump, so you're dealing with full-box changes more often.

    Deep clean the box weekly. Even with daily scooping, urine residue accumulates on the plastic. Once a week, empty the entire box, wash it with warm water and mild dish soap, and dry it completely before adding fresh litter.

    A quick note: avoid harsh chemicals like bleach. Per the Humane Society guidelines, bleach residue is toxic to cats and actually makes the box more attractive to scent-mark. Baking soda sprinkled under fresh litter works as a gentle odor absorber.

    Placement is half the battle. A litter box near an air vent or a doorway will spread odor through the house. Put it in a low-traffic, well-ventilated area. Avoid placing food and water bowls near the litter box.

    Cats instinctively avoid eating where they eliminate.

    clumping clay litter odor control

    Image source: Bing (Web (fair-use with source credit))


    Dental Care: The Overlooked Smell Source

    Here's the uncomfortable truth: most of the time, when a cat smells bad, it's the mouth. Veterinary estimates suggest that up to 85% of cats over three years old have some form of dental disease. The smell of advanced periodontitis is unmistakable: metallic, fishy, and deeply unpleasant.

    Why dental odor happens. Plaque builds up on the teeth. It hardens into tartar within days. Bacteria thrive in that tartar, releasing sulfur compounds that smell like rotten eggs.

    That bacteria also inflames the gums, causing pain, drooling, and appetite loss.

    The fix starts with brushing. Yes, brushing a cat's teeth sounds impossible. But with the right approach, most cats tolerate it well. You'll need a cat-specific toothbrush (finger brushes work best for beginners) and enzymatic toothpaste formulated for felines.

    Never use human toothpaste; fluoride is toxic to cats.

    Here's the step-by-step brushing workflow:

    1. Start slow. Let your cat lick the toothpaste off your finger for a few days.
    2. Next, rub a finger brush along the gum line without toothpaste.
    3. Then, introduce the enzymatic paste and brush the outer surfaces only.
    4. Aim for the premolars and molars in the back, which collect the most plaque.
    5. Brush 2-3 times per week minimum. Daily is optimal.

    When to see the vet. If your cat has obvious tartar, red gums, or that fishy breath, home care won't reverse it. The tartar has to be scaled off under anesthesia. This is a professional dental cleaning.

    It costs more than a standard checkup, but it's one of the highest-value procedures for your cat's health and your home's smell.

    What about dental treats?

    The VOHC (Veterinary Oral Health Council) evaluates and approves dental products based on real clinical trials. If a treat or food carries their seal, it's proven to reduce plaque or tartar buildup. Use these as a supplement to brushing, not a replacement.

    cat dental health plaque

    Image source: Bing (Web (fair-use with source credit))

    Signs you need a dental checkup immediately:

    • Bad breath that persists after brushing
    • Visible brown or yellow tartar on the rear teeth
    • Red, swollen, or bleeding gums
    • Drooling or pawing at the mouth
    • Difficulty eating or dropping food

    If you see these signs, book a vet appointment. Per the American Veterinary Dental College, untreated dental disease also affects the heart, kidneys, and liver. The smell is the surface symptom of a deeper issue.


    Weekly and Monthly Maintenance: Keeping Odors Away Long-Term

    Daily care handles the basics. Weekly and monthly routines handle everything else. Consistency here matters more than intensive effort once a month.

    Weekly: Full litter box reset. You already know the deep clean drill. Empty the box, wash it, dry it, refill with fresh litter. Do this every week like clockwork.

    Mark it on your calendar if you need to. This single habit prevents the urine buildup that makes litter boxes reek.

    Weekly: Brush the coat thoroughly. The daily wipe spreads oils. The weekly brush removes dead fur and dander at the root. A rubber curry brush works well for short-haired cats.

    A slicker brush reaches deeper for long-haired cats. Brush in the direction of hair growth and go slow.

    Bi-weekly: Wash the bedding. Cat beds, blankets, and your couch throw pillows absorb oils and dander. These fabrics become odor reservoirs that keep your cat smelling stale no matter how clean the coat is. Wash them in hot water with fragrance-free detergent.

    Add a cup of white vinegar to the rinse cycle. It neutralizes odors without leaving a strong vinegar scent.

    Monthly: Full body inspection. This is your monthly sniff test plus a physical check. Run your hands over your cat's body feeling for lumps, mats, or greasy patches. Check the nails and trim them if needed.

    Check inside the ears with a cotton ball. Check the rear area for matted fur or residue.

    Monthly: Wash food and water dishes thoroughly. You should rinse them daily, but give them a proper deep wash monthly. Soak them in hot, soapy water for ten minutes. Scrub away any residue.

    Dry completely before refilling. This prevents bacterial buildup that causes bad breath.


    When and How to Bathe Your Cat (Without Trauma)

    Here's the honest truth: most cats never need a full water bath. If you're doing the daily and weekly routines above, your cat should smell fresh with zero water contact. Bathing cats is stressful for everyone involved, and it's rarely the solution to a smell problem.

    When a bath is actually needed:

    • Your cat got into something sticky, greasy, or toxic
    • Your cat has a skin condition that requires medicated shampoo
    • Your cat is elderly or overweight and can't groom properly
    • Your cat has a long coat with matted areas that trapping odor

    When you do bathe:

    Use lukewarm water, not hot. Fill the tub or sink with two to three inches of water. Use a cat-specific shampoo, never dog shampoo and never human shampoo.

    The pH balance matters. Human shampoo has a pH around 5.5, while cat skin sits around 6.0 to 7.5. Using the wrong product strips natural oils and leaves the skin dry, which actually makes the odor worse.

    The step-by-step bath:

    1. Brush your cat thoroughly before the bath to remove loose fur and mats.
    2. Place a non-slip mat in the tub so your cat feels secure.
    3. Wet the coat slowly, starting at the back and working forward. Avoid the head, ears, and eyes.
    4. Apply shampoo, lather, and rinse completely. Residue left on the skin causes itching.
    5. Towel dry immediately. Keep your cat in a warm room until fully dry.
    6. Offer a high-value treat afterward to build positive association.

    The waterless alternative. If your cat despises water, and most do, a waterless foam shampoo is your best bet. You apply it to the coat, massage it in, and wipe it off. It's ideal for spot-cleaning the rear area, the chin, or the base of the tail.

    Look for pH-balanced, fragrance-free formulas. Check that the product doesn't contain essential oils like tea tree or citrus, which are toxic to cats.


    Diet and Supplements: Can Food Change the Way Your Cat Smells?

    You are what you eat. Your cat is too. Diet influences coat condition, digestive odor, and even breath smell.

    Protein quality matters. Cheap fillers and low-quality protein sources produce more waste byproducts. Those byproducts exit through urine and feces, making your cat's eliminations smell more pungent. High-quality, named protein sources like chicken, turkey, and fish are more bioavailable.

    Your cat absorbs more and excretes less.

    Omega-3 fatty acids improve coat health. These fatty acids, found in fish oil, reduce inflammation and improve skin barrier function. Healthier skin means less oil production, which means a less greasy coat. This translates directly to less odor.

    Most high-quality cat foods include fish oil in their ingredient list.

    Wet food vs. dry food. Here's a common question. Wet food has higher moisture content, which means your cat urinates more frequently. But it's more dilute, so the urine has less odor concentration.

    Dry food creates more concentrated urine, which smells stronger. Wet food also contains fewer carbohydrates, which means lower risk of dental disease and less digestive odor.

    Watch for food allergies. A common symptom of food allergies in cats is a greasy, smelly coat. If you're noticing an unpleasant odor that doesn't resolve with grooming, consider whether your cat's food includes common allergenic ingredients like beef, dairy, fish, or corn. An elimination diet, under vet supervision, can identify the culprit.

    Probiotics for digestive health. Some research suggests probiotics reduce stool odor by promoting healthier gut flora. While this is promising, the evidence is still emerging. Talk to your vet before adding any supplements.


    Grooming by Coat Type and Life Stage

    Not all cats groom the same way. Your approach needs to match your cat's specific needs.

    Long-Haired Breeds (Persian, Maine Coon, Ragdoll)

    Long fur is an odor trap. Food particles, litter dust, and moisture get caught near the skin, creating a musty smell. Daily brushing is non-negotiable for these breeds.

    • Use a metal comb to reach the undercoat.
    • Check for mats behind the ears, under the armpits, and around the rear.
    • Mats pull on the skin and prevent airflow, creating hotspots and odor.
    • Keep the fur around the rear trimmed short to prevent fecal residue sticking.

    Short-Haired Breeds (Domestic Shorthair, British Shorthair)

    These cats are naturally good groomers. Weekly brushing is sufficient. A rubber curry brush removes loose fur and distributes oils.

    The main smell risk is the litter box, not the coat.

    Senior Cats

    Older cats lose flexibility. They can't reach their backs or rear ends as easily. Arthritis compounds the problem.

    You'll need to step up your grooming assistance.

    • Brush more frequently to compensate for reduced self-grooming.
    • Check the rear area every few days for residue.
    • Consider a low-sided litter box for easier access.

    Overweight Cats

    Obese cats simply can't reach certain parts of their body. The base of the tail, the lower back, and the rear end get neglected. If your cat is overweight, you're the groomer now.

    • Wipe down the rear area daily with a waterless wipe.
    • Monitor for urine scald, which happens when urine sits on the skin.
    • Address the weight issue with your vet for long-term health.

    Hairless Breeds (Sphynx, Donskoy)

    These breeds have no fur to absorb natural oils. The oils accumulate on the skin and attract dirt. Weekly full-body wipes are essential.

    Some owners bathe a Sphynx every few weeks, which is fine if they tolerate it.


    Common Mistakes That Make Cat Smell Worse

    Sometimes the fix is wrong. Here are the mistakes that keep cats smelling bad despite your best efforts.

    Bathing too often. Overbathing strips natural oils, which signals the skin to produce more oil to compensate. The result is a greasier coat and a stronger odor. Per veterinary guidance, bathing more than once every 4-6 weeks is usually counterproductive unless medically necessary.

    Using the wrong shampoo. Human shampoo, dog shampoo, or dish soap all disrupt a cat's pH balance. This damages the skin barrier, causing irritation, flaking, and oil overproduction. Always use cat-specific shampoo.

    Ignoring dental care. You can bathe your cat every week and it won't fix halitosis. Bad breath is a mouth problem, not a coat problem. External cleaning only masks the symptom.

    Scented products in the litter box. Scented litter, scented liners, and air fresheners near the box often make things worse. Cats have sensitive noses. Strong scents can cause them to avoid the box entirely, which leads to accidents elsewhere in the house.

    That's a much bigger smell problem.

    Skipping the deep clean. Daily scooping keeps things tidy. But if you never do a weekly full reset, ammonia and bacteria accumulate in the plastic. The box itself becomes an odor source.

    Ignoring the environment. Fabric absorbs odors. Curtains, rugs, and furniture hold onto the smell of cat urine and dander. If you're only cleaning the cat and not the environment, you'll never win the freshness battle.


    Safety First: Products and Ingredients to Never Use on Cats

    The rules here are life-saving. Not all products marketed for pets are safe for cats. Their liver metabolism differs from dogs and humans, making certain ingredients toxic.

    Essential oils to avoid: Tea tree oil, eucalyptus, citrus, lavender, and peppermint are all toxic to cats. Even in low concentrations, these can cause drooling, vomiting, tremors, and liver failure. Check every shampoo, wipe, and spray label carefully.

    Just because it says "natural" doesn't mean it's safe.

    Never use human toothpaste. Fluoride and xylitol are toxic to cats. Xylitol, an artificial sweetener commonly found in human toothpaste, causes rapid insulin release and dangerous blood sugar drops. Always use enzymatic toothpaste formulated for felines.

    Never use dog flea and tick products. These often contain pyrethrins or permethrins, which are safe for dogs but extremely toxic to cats. Even a small amount applied to a cat's skin can cause seizures and death. Check the label for "dog only" warnings.

    Avoid baking soda as a topical deodorizer. While safe in the litter box, baking soda applied directly to your cat's coat can cause skin irritation. It also dries out the natural oils that keep the coat healthy.

    Beware of human medications. Never apply human anti-itch creams, hydrocortisone, or pain relievers to your cat's skin. These can be absorbed through the skin and are toxic. If your cat has a skin condition, get veterinary guidance.

    Read every label. Even products marketed for cats can contain irritants. If you're uncertain about an ingredient, look it up on a reputable toxicology resource like the ASPCA Animal Poison Control database. When in doubt, don't use it.


    When to Call the Vet: Smells That Signal Trouble

    Some smells are warning signs. You need a vet, not another wipe.

    Sweet or fruity breath. This is a classic sign of diabetic ketoacidosis. The body produces ketones, which smell like nail polish remover or fruit. This is a medical emergency.

    Ammonia or urine-smelling breath. Kidney failure causes urea to build up in the bloodstream. This produces a distinct ammonia or urine-like smell to the breath. Another emergency red flag.

    Foul, rotten odor from the mouth. Advanced periodontal disease, oral tumors, or a foreign object stuck in the mouth. A thorough dental check is needed.

    Fishy smell from the rear. While this often indicates anal glands, persistent fishy odor combined with scooting, licking, or swelling could mean an anal gland infection or abscess. This requires draining and antibiotics.

    Yeasty or sour ear smell. Ear infections don't resolve on their own. They need diagnosis and proper treatment. A strong ear odor won't go away with daily cleaning.

    General musty odor that persists. If a clean cat still smells bad after thorough grooming and dental care, there could be an internal issue. Diabetes, kidney disease, and hyperthyroidism all produce distinct odor changes that show up in the breath or coat.

    When in doubt, go. Cats are masters at hiding illness. By the time an odor is noticeable, the issue often has progressed. A vet visit costs less than guessing wrong.

    And a simple blood panel can rule out the scary stuff quickly.


    Final Verdict: Your Step-by-Step Freshness Checklist

    Here's the entire system compressed into one checklist. Run through this weekly and your cat will stay fresh around the clock.

    Daily (5 minutes):

    • Scoop the litter box twice
    • Wipe the coat with a waterless wipe
    • Rinse food and water bowls
    • Give a VOHC-approved dental treat

    Weekly (15 minutes):

    • Deep clean the litter box
    • Brush the coat thoroughly
    • Check ears, mouth, and rear end
    • Wash or spot-clean bedding

    Monthly (30 minutes):

    • Full body inspection and nail trim
    • Deep wash food and water dishes

    If you notice a new or persistent smell that doesn't resolve within three days of consistent cleaning, see your vet. The checklist handles surface odors. The vet handles internal issues.

    And remember: most cats genuinely don't need baths. The daily routine handles everything. Save the water bath for the rare cases where it's truly needed.


    Frequently Asked Questions

    How often should I bathe my cat?

    Most cats need a full water bath only a few times in their entire life. Once every 4-6 weeks is the maximum recommended frequency for cats that tolerate it. Daily use of waterless wipes handles routine freshness without the stress or skin damage of full baths.

    Why does my cat smell like fish?

    A fishy smell around the rear usually means anal gland issues. These glands release a pungent fluid during bowel movements. When they get impacted, infected, or just overactive, the smell persists.

    A vet can express them, and severe cases might need antibiotics or dietary changes.

    Can I use baking soda to deodorize my cat?

    Do not apply baking soda to your cat's coat directly. It's safe to sprinkle a small amount into the litter box between changes, but topical use dries out the skin and causes irritation. Stick with products designed specifically for feline skin pH balance.

    Does wet food make cats smell worse than dry food?

    Actually, wet food often results in less odor. Higher moisture content means more dilute urine, which smells less concentrated. Dry food produces more concentrated urine and stool.

    High-quality protein sources in either form produce fewer waste byproducts, so ingredient quality matters more than moisture content.

    Is scented litter better for controlling odor?

    Scented litter masks odors rather than eliminating them. Many cats are sensitive to the fragrance and may avoid the box entirely. Unscented clumping litter with proper daily scooping controls odor more effectively without the risk of litter box aversion.

    What smells are toxic to cats?

    Essential oils like tea tree, eucalyptus, citrus, and peppermint are toxic. Never use them as deodorizers around your cat. Also avoid spraying air fresheners near the litter box, as the strong scent can discourage use.

    Opt for fragrance-free, pH-balanced products designed specifically for cats.

  • Step-by-step: How to Groom a Siamese Cat

    Step-by-step: How to Groom a Siamese Cat

    If you've ever tried to groom a Siamese cat, you already know it's not quite like grooming any other breed. They're not fluffy like a Persian, and they don't have a thick double coat like a Maine Coon. But their fine, silky single coat brings its own set of quirks, from skin sensitivity to tear stains that show up quickly on their pale faces.

    Learning how to groom a Siamese cat is really about mastering a specific routine that respects their delicate skin and attentive personality. It's a mix of gentle brushing, careful nail trims, and regular ear and dental checks. As of 2026, the CFA breed standard still highlights that the Siamese has no undercoat, which means your grooming approach needs to be lighter and more frequent rather than deep and occasional.

    Get it right, and grooming becomes a bonding ritual your cat actually looks forward to.

    Siamese cat grooming

    Image source: Bing (Web (fair-use with source credit))

    Quick Answer

    Brush your Siamese cat two to three times weekly with a fine-pinned slicker brush or soft rubber mitt. Trim nails every two to three weeks. Clean ears bi-weekly with a vet-approved solution on a cotton ball.

    Brush teeth three to four times weekly with cat-safe toothpaste. Bathe only when visibly dirty, roughly every four to six weeks.

    Why Grooming a Siamese Is Different From Other Cats

    The Siamese cat's coat is famously short, fine, and closely lying to the body. What most people don't realize is that it's a single coat, meaning there's no fluffy undercoat underneath. That sounds like less work, and in many ways it is.

    But it also means their skin is far more exposed and more sensitive than many other breeds.

    That fine hair has almost no natural oil barrier to protect it. Aggressive brushing, harsh shampoos, or over-bathing can strip what little moisture exists, leading to dry, flaky skin and a dull coat. Per the Cornell Feline Health Center's research on feline dermatology, single-coated breeds like the Siamese are more prone to skin irritation from grooming products than their double-coated counterparts.

    Their colorpoint pattern also matters here. The darker points on the ears, face, paws, and tail contrast sharply with the cream-colored body. That means dirt, dander, and tear stains are visibly more obvious than they would be on a solid-colored cat.

    The Personality Factor

    Siamese cats are famously social, vocal, and attached to their humans. This is a double-edged sword for grooming. On one hand, they often enjoy the attention and will purr through a brushing session.

    On the other hand, they can become impatient quickly if they feel restrained, and they aren't shy about telling you so.

    This breed bonds intensely with their person. Many will follow you from room to room and "help" with whatever you're doing. Grooming sessions become another way to strengthen that bond, but only if you approach it with patience and positive reinforcement.

    Their intelligence also means they learn routines fast. If you're consistent, they'll learn that the grooming table means treats and attention. If you're erratic or rough, they'll learn to hide when they see the brush come out.

    What You'll Need Before You Start

    You don't need a huge arsenal of tools for a Siamese cat. Their grooming needs are modest compared to long-haired breeds. But the tools you do need should be chosen carefully, because their sensitive skin limits what's safe.

    Here's the essential kit we recommend based on manufacturer specifications and aggregate veterinary guidance:

    ToolPurposeNotes
    Fine-pinned slicker brushDaily or weekly coat maintenanceLook for rounded pins, not sharp metal tips
    Rubber grooming mitt or zoom groomRemoving loose hair and stimulating circulationGentle enough for sensitive skin
    Soft bristle brushFinishing and shineUse as a last pass
    Cat-safe nail clippersNail maintenanceScissor-style or guillotine both work
    Styptic powderStopping bleeding if you hit the quickKeep it on hand before you start
    Vet-approved ear cleanerEar hygieneNever use water or hydrogen peroxide
    Cotton balls or padsEar cleaning applicationNever use Q-tips
    Cat-safe toothpasteDental carePoultry or malt flavor preferred
    Finger toothbrush or small pet toothbrushTeeth cleaningSmaller heads fit their mouths better
    Grooming wipesSpot cleaning between bathsUnscented, cat-safe formulas only

    What to Skip

    Some grooming tools marketed for cats are actually too harsh for a Siamese. Here's what to avoid:

    • Furminators or deshedding tools: These are designed for double-coated breeds with undercoats. On a Siamese, they can pull and irritate the skin without providing any real benefit.
    • Metal combs with sharp teeth: Unless you're checking for fleas with a fine-toothed flea comb, skip standard metal combs. They can scratch the skin.
    • Human shampoo or soap: The pH balance is completely wrong for cats. Even "gentle" baby shampoo can strip their natural oils.
    • Waterless shampoo sprays with heavy fragrances: The perfume can irritate their sensitive skin and sensitive noses.
    • Electric clippers for body grooming: Unless you're dealing with severe matting, which is rare for this breed, clippers are unnecessary and can cause nicks.

    Setting Up Your Grooming Station

    A quiet, comfortable space makes a huge difference. Siamese cats are alert and easily distracted. Choose a room where there aren't other pets, loud noises, or windows with interesting bird activity.

    A non-slip mat on a table or counter works well. Some owners prefer grooming on their lap, which is fine for brushing but less ideal for nail trims. The key is consistency.

    Use the same spot every time so your cat associates it with the routine.

    Keep all your tools within arm's reach before you start. Fumbling for a clipper while holding a squirming cat is a recipe for disaster. Have treats ready too.

    Small, soft treats work best because they're quick to eat and reward your cat without interrupting the flow of the session.

    slicker brush on Siamese coat

    Image source: Bing (Web (fair-use with source credit))

    Step-by-Step: The 10-Minute Grooming Routine

    A full grooming session shouldn't take more than ten minutes once you and your cat are in a rhythm. Breaking it into small, manageable steps keeps stress levels low and makes each session feel like a positive interaction rather than a chore.

    Here's the overall flow we recommend:

    StepWhat You're DoingTime
    1. Pre-groom inspectionChecking coat, skin, ears, teeth1 minute
    2. BrushingRemoving loose hair and distributing oils2-3 minutes
    3. Nail trimmingClipping the tips of each claw2-3 minutes
    4. Ear cleaningWiping the visible ear flap1 minute
    5. Dental careBrushing teeth or using dental wipes1-2 minutes
    6. Face and tear stain cleaningWiping eyes and facial folds1 minute

    That's roughly ten minutes total if your cat cooperates. For a resistant cat, you might split these into multiple shorter sessions throughout the day. That's perfectly fine.

    Consistency matters more than completing everything at once.

    Step 1: The Pre-Groom Inspection

    Before you pick up a brush, run your hands over your cat's entire body. This isn't just a petting session, though your cat will think it is. You're checking for several things:

    • Lumps or bumps: Any new growths need a vet's attention
    • Flaky skin: Could indicate dryness or an underlying issue
    • Mats or tangles: Rare on a Siamese but possible behind the ears and in the armpits
    • Parasites: Tiny black specks (flea dirt) or actual fleas
    • Sores or hot spots: Areas where your cat has been over-grooming
    • Changes in coat texture: Roughness can signal health problems

    This tactile check is the single most valuable part of the entire grooming process. You'll catch problems early, when they're easiest to treat. The American Veterinary Medical Association (AVMA) recommends this kind of regular hands-on examination as part of routine preventive care.

    Step 2: Brushing the Fine, Short Coat

    Brushing a Siamese is less about detangling and more about removing loose hair, distributing natural oils, and stimulating blood flow to the skin. The right brush and technique matter more than frequency.

    Starting with the slicker brush: Use gentle, short strokes in the direction of hair growth. Start at the head and work your way down the back. The slicker brush removes loose hair effectively without scratching the skin, provided you use light pressure.

    The belly and tail: These are sensitive areas. Many cats are protective of their bellies, so approach this region slowly. Use even lighter pressure here.

    The tail is often ignored during grooming but deserves attention, especially near the base where the scent glands are.

    Following with the rubber mitt: Once you've finished with the slicker brush, switch to the rubber grooming mitt. Make circular motions over the body. This picks up any remaining loose hair and feels like a massage to most cats.

    Many Siamese cats will start purring loudly at this point.

    Finishing with the soft bristle brush: A few gentle passes with a soft bristle brush add shine to the coat. It also smooths the hair in one direction for a neat appearance.

    A note on brushing direction: Always brush with the grain first. Going against the grain can cause static electricity, which is a real issue with fine, single-coated fur, especially in winter months. If you need to lift the hair to check the skin underneath, do so gently with your fingers rather than brushing backward.

    How often? Two to three times per week is sufficient for most Siamese cats. During seasonal shedding changes in spring and fall, you might bump that up to every other day. But never brush so aggressively that the skin becomes red or irritated.

    Step 3: Nail Trimming Without the Drama

    Nail trimming is the part most owners dread, but it doesn't have to be a battle. The key is understanding the anatomy and building a routine your cat tolerates.

    Understanding the quick: The quick is the pink area inside the nail that contains blood vessels and nerves. On a Siamese with light-colored nails, the quick is usually visible through the nail. You want to clip only the white tip below the quick, never into the pink area itself.

    If your cat has dark nails where the quick isn't visible, trim very small amounts at a time. Stop as soon as you see a dark dot in the center of the cut nail. That dot is the beginning of the quick, and you've reached the safe limit.

    cat nail trimming quick

    Image source: Bing (Web (fair-use with source credit))

    The extension technique: Press gently on the toe pad to extend the claw. This pulls the nail out of the sheath and exposes it for clipping. It takes practice to do this one-handed while holding the clippers in the other, but it becomes second nature quickly.

    Clipping technique: Position the clippers so the blades are perpendicular to the nail. Make a single, decisive cut. Don't saw or twist, as this can split the nail.

    Aim to clip just the sharp tip, not a large portion of the nail.

    Scissor-style vs. guillotine clippers: Both work, but most owners find scissor-style clippers easier to control. Guillotine clippers require you to insert the nail into a hole, which some cats resist. Scissor-style clippers let you see exactly where you're cutting.

    Try both and see which you handle more confidently.

    How often? Every two to three weeks is typical. Indoor cats don't wear their nails down naturally as much as outdoor cats. If you hear your cat clicking on hard floors, it's time for a trim.

    What if you hit the quick? It happens to everyone at some point. Stay calm. Apply styptic powder to the tip of the nail and apply gentle pressure for a few seconds.

    The bleeding should stop quickly. If you don't have styptic powder, cornstarch or a bar of soap can work in a pinch. Never scold your cat, as this will make future trims harder.

    Step 4: Cleaning Those Big, Expressive Ears

    Siamese cats have notably large, wide-set ears for their head size. That's part of their distinctive look. But those big ears also collect more wax and debris than smaller, folded ears.

    What you'll see with healthy ears: The inside of the ear should be pink, clean, and free of odor. A small amount of light brown wax is normal. What's not normal includes:

    • Black, coffee-ground-like debris, which is a sign of ear mites
    • Thick yellow or green discharge, which suggests an infection
    • Redness or swelling, which indicates irritation or infection
    • Foul or yeasty odor, which also points to infection
    • Your cat shaking its head or scratching at its ears repeatedly

    The cleaning technique: Squeeze a small amount of vet-approved ear cleaner onto a cotton ball or cotton pad. Never drip the solution directly into the ear canal unless your vet has specifically instructed you to do so. Fold the ear flap back gently and wipe the visible inner surface.

    Use a vertical wiping motion, moving from the base of the ear outward. Each wipe should use a fresh area of the cotton ball. This prevents reintroducing wax and debris back into the ear.

    The critical never: Never insert a cotton swab into your cat's ear canal. This pushes wax deeper and risks perforating the eardrum. The visible ear canal is angled, and it's all too easy to damage sensitive structures.

    Stick to wiping only what you can see.

    cat ear cleaning cotton ball

    Image source: Bing (Web (fair-use with source credit))

    How often? Bi-weekly is a good baseline, but adjust based on what you see. Some cats produce more wax than others. If you notice buildup between cleanings, increase frequency.

    If you see signs of infection, skip the cleaning and head to the vet.

    Why Siamese ears need more attention: The large, open shape of their ears means more surface area for wax to accumulate. The lack of hair inside the ear, which is common in the breed, means less protection from dust and debris. Regular cleaning prevents buildup before it becomes a problem.

    How Often Should You Groom? A Practical Schedule

    Consistency beats intensity when it comes to Siamese grooming. A short, regular routine will keep your cat healthier and happier than occasional marathons.

    Here's a realistic weekly schedule based on veterinary guidance and breed-specific needs:

    TaskFrequencyTime Commitment
    Brushing2-3 times per week2-3 minutes per session
    Nail trimmingEvery 2-3 weeks2-3 minutes
    Ear cleaningBi-weekly1 minute
    Tooth brushing3-4 times per week1-2 minutes
    Eye/tear stain wipingDaily or as needed30 seconds
    Full bathEvery 4-6 weeks or only when visibly dirty5-10 minutes

    Seasonal Adjustments

    Your Siamese cat's grooming needs shift slightly with the seasons.

    Winter: Indoor heating creates dry air and static electricity. You'll likely need to brush slightly more often to manage static and remove dead hair. Consider grooming wipes with anti-static properties if the brush seems to be fighting you.

    Spring and fall: These are the primary shedding seasons, even for a single-coated cat. The change in daylight hours triggers a mild increase in hair turnover. Bump brushing up to every other day during these transitions.

    Summer: Heat means your cat might shed lightly and could benefit from more frequent wiping to manage sweat and oils. But resist the urge to bathe more often. Over-bathing strips the coat's natural protection.

    Year-round indoor living: Since most Siamese cats are indoor-only, temperature fluctuations matter less than the consistent indoor environment. Dust, dander, and hair accumulation are your main concerns year-round.

    When to Bathe

    Bathing a Siamese is rarely necessary. Their coat is naturally self-cleaning, and cats groom themselves extensively. But there are legitimate reasons to bathe:

    • Visible dirt or grime that brushing and wipes can't remove
    • Sticky substances like paint, sap, or food residue
    • A greasy coat, which indicates oil buildup
    • Medical conditions that require medicated baths
    • Show preparation, if you're competing with your cat

    The bathing technique: Use lukewarm water around 100°F. Too hot or cold will distress your cat. Use a cat-specific shampoo, never human shampoo.

    Wet the coat thoroughly, apply shampoo, and massage gently. Rinse completely because residual shampoo causes skin irritation.

    Drying matters: Use a warm towel and rub gently. Most Siamese cats hate blow dryers, so avoid them unless your cat is unusually tolerant. Keep the room warm during and after bathing to prevent chilling.

    When not to bathe: If your cat is elderly, sick, or has a skin condition, bathing could cause more harm than good. Always check with your vet before bathing a cat with known health issues.

    Common Grooming Mistakes That Hurt Siamese Cats

    Even well-meaning owners make these mistakes. They're common because they're not obvious until they cause a problem.

    Using Harsh Brushes

    Sharp-pinned slicker brushes marketed for long-haired cats can scratch a Siamese's thin skin. The pins should have rounded tips, and you should never press hard enough to see the skin indent beneath the brush. If you notice red marks or your cat flinching away from the brush, switch to a softer option immediately.

    Over-Bathing

    Bathing a Siamese more than once a month without a medical reason strips the natural oils from their skin and coat. This leads to dryness, itching, and a dull appearance. The skin becomes more vulnerable to irritation and infection.

    If your cat smells bad between baths, that's a sign to check for dental issues or ear problems, not a reason to bathe more.

    Forcing a Session

    If your cat is stressed, squirming, or vocalizing aggressively, pushing through the grooming session will damage your relationship and make future sessions harder. Siamese cats have long memories. A bad experience can create a lasting aversion to the brush.

    Set the cat down and try again later. Sometimes breaking the session into two smaller chunks works better. Other times, reassessing your technique or tools is the answer.

    Ignoring the Skin

    A Siamese's short coat hides skin issues surprisingly well. If you're only brushing the surface, you might miss redness, flaking, or small bumps. Run your fingers through the coat regularly to feel for changes.

    Persistently scratching at one spot is almost always a sign that something is wrong.

    Using the Wrong Toothpaste

    Human toothpaste contains xylitol, which is highly toxic to cats. Even a small amount can cause a dangerous drop in blood sugar and seizures. Always use toothpaste formulated specifically for cats.

    Most come in flavors like poultry or malt that cats find palatable.

    Neglecting the Tail

    The tail is easy to skip because it's not an obvious grooming zone. But Siamese cats have scent glands at the base of the tail that can collect oils and debris. Give the tail a gentle brush pass during every session, paying attention to the base without overstimulating the glands.

    Grooming as Bonding: Tips for Resistant or Anxious Cats

    Some Siamese cats actively enjoy grooming. Others tolerate it. A few absolutely hate it.

    If your cat falls into the last group, you can change that, but it takes patience and a different approach.

    Start Small and Stay Positive

    If your cat is resistant, don't try to complete a full grooming session on day one. Start with just touching your cat's paws and ears. Give a treat afterward.

    Over several days, gradually introduce the tools. Let your cat sniff and inspect the brush before you use it.

    This desensitization process takes time. Some cats adjust within a week. Others need a month or more.

    The goal is to create positive associations, which happens faster with short, frequent sessions than with long, stressful ones.

    Use High-Value Treats

    Not all treats are created equal for a Siamese cat. Find what your cat goes crazy for, whether that's freeze-dried chicken, a specific commercial treat, or small pieces of cooked fish. Reserve these treats exclusively for grooming sessions.

    Your cat will start to see the brush as the thing that brings the good snacks.

    The treat timing rule: The treat comes immediately after each step, not at the end of the session. This creates a direct link between complying with a specific action and receiving a reward.

    Watch the Body Language

    A Siamese cat gives clear signals when they're reaching their limit:

    • Tail flicking rapidly
    • Ear flattening to the sides
    • Skin rippling along the back
    • Vocalizing beyond normal meowing
    • Trying to escape your grip

    When you see any of these signs, stop what you're doing. Push forward, and you'll reinforce the idea that grooming is a frightening experience. Stop, give a treat, and call the session successful even if you only completed one small task.

    Use a Calming Environment

    Some cats respond well to calming pheromone sprays or diffusers during grooming. These mimic the facial pheromones cats use to mark their territory as safe. While research on their effectiveness is mixed, many owners report positive results.

    Making the environment comfortable matters too. A quiet room, a non-slip mat, and no unfamiliar smells will all help. Some cats settle more easily when they're slightly elevated, such as on a table or counter where they feel more secure.

    Split the Work

    You don't have to do everything in one session. Brush your cat in the morning and trim nails in the evening. Clean ears one day and brush teeth the next.

    Each mini-session stays short and manageable, which builds a better foundation than one long, stressful session.

    When to Call It Quits

    A very few Siamese cats will never fully enjoy grooming. That's okay. The goal isn't to make your cat love every step.

    It's to make grooming tolerable so you can maintain their health.

    If your cat becomes genuinely aggressive during grooming, don't push it. Speak with your vet about options. Some owners use a groomer's bag or towel-wrap technique under veterinary guidance.

    Others schedule professional grooming appointments. The safety of both of you matters most.

    When to Call a Professional Groomer or Vet

    Most Siamese grooming is straightforward home maintenance. But some situations call for professional help.

    Skin Conditions That Need Professional Attention

    If you notice any of the following during grooming, schedule a vet visit rather than trying to address it yourself:

    Persistent flaking or dandruff: Occasional flaking can be dryness. Persistent flaking across large areas may signal seborrhea, allergies, or nutritional deficiencies.

    Hair loss patches: Any visible bald spots, especially if they're symmetrically distributed, warrant a veterinary examination. Causes range from stress-related over-grooming to parasitic infections.

    Redness, bumps, or scabs: These could indicate flea allergy dermatitis, food allergies, or bacterial infections. A vet can identify the cause and recommend the right treatment.

    Excessive scratching or licking: If your cat is grooming themselves obsessively in one area, they're likely trying to soothe an irritation that requires professional diagnosis.

    Ear issues: If you notice black debris, yellow or green discharge, or a foul smell in the ears, avoid cleaning them yourself and get a veterinary diagnosis. These are signs of ear mites or infection, both of which need medication to resolve.

    Dental Problems Requiring Veterinary Care

    Bad breath, red or bleeding gums, visible tartar, or difficulty eating all indicate your cat needs a dental exam. Home tooth brushing can't reverse established dental disease. Your vet may recommend a professional dental cleaning under anesthesia.

    Severe Matting

    While rare in Siamese cats, mats can form behind the ears, under the armpits, and along the tail base. If you encounter a tight mat, don't try to cut it out with scissors. The risk of cutting their thin skin is too high.

    A professional groomer has the right tools and technique to remove mats safely.

    Grooming Aggressive Cats

    If your cat becomes genuinely aggressive during grooming, with hissing, growling, scratching, or biting, stop trying at home. A professional groomer experienced with difficult cats can often handle the job more safely. Some veterinarians also offer grooming services, often with sedation if needed for extremely stressful situations.

    Finding the Right Professional

    Not all groomers are experienced with sensitive breeds like the Siamese. When choosing a groomer:

    • Ask about their experience with short-haired, single-coated breeds
    • Confirm they use cat-specific tools and products
    • Request a tour of their facility to check cleanliness and handling practices
    • Ask whether they use gentle handling techniques or restraints
    • Check if they have a separate space for cats away from dogs

    Good groomers will be happy to answer these questions. Their primary concern should be your cat's comfort and safety, not a quick turnaround.

    The Essentials on Siamese Grooming Products

    Choosing the right products for your Siamese cat can feel overwhelming with so many options. Here's what actually matters based on aggregate user reviews and veterinary guidance.

    Brushes and Combs

    Product TypeBest ForWhat to Look For
    Fine-pinned slicker brushRegular coat maintenanceRounded tips, light weight, comfortable grip
    Rubber grooming mittGentle de-shedding and massageDense rubber nubs, easy to clean
    Soft bristle brushFinishing and shineNatural or soft synthetic bristles, cushioned pad
    Flea combParasite checksFine, tightly spaced metal teeth

    Our research note: Most owners report that spending slightly more on a quality slicker brush pays off in durability and comfort. Cheap brushes tend to have sharper pins and flimsy handles. A mid-range option works well for most households.

    Shampoos and Wipes

    When bathing is necessary, choose products specifically formulated for cats with sensitive skin.

    Product TypeKey Ingredients to Look ForAvoid
    Cat-specific shampooOatmeal, aloe vera, glycerinFragrances, dyes, tea tree oil
    Waterless shampooMild surfactants, conditionersHeavy perfumes, alcohol
    Grooming wipesAloe, vitamin E, pH-balancedFragrances, harsh preservatives

    Safety note: Tea tree oil is toxic to cats even in small amounts. Never use products containing it, regardless of how "natural" the label claims to be. The FDA regulates some pet products, but not all.

    When in doubt, ask your vet.

    Ear Cleaners

    Look for ear cleaners labeled as safe for cats with a pH balanced for feline ears. Most have gentle drying agents that help evaporate moisture after cleaning. Avoid cleaners that sting on contact, as these will make future ear cleanings difficult.

    Dental Products

    Cat-specific toothpaste comes in flavors like poultry, malt, and seafood. The most important thing is that it contains no xylitol and is safe to swallow. Finger brushes work well for beginners because they give you more control.

    Once your cat is comfortable, a small toothbrush gives a better clean.

    Budget Considerations

    You don't need to spend a fortune. A basic grooming kit for a Siamese cat costs between $25 and $50 total.

    ItemEstimated Cost
    Slicker brush$8-$15
    Rubber grooming mitt$8-$12
    Nail clippers$8-$15
    Styptic powder$5-$8
    Ear cleaner$8-$12
    Cat toothpaste and brush$10-$15

    The only area where quality matters most is the nail clippers. Sharp blades make clean cuts, while dull blades can crush the nail. Replace clippers when the blades no longer cut smoothly.

    Quick Answers to Common Grooming Questions

    Do Siamese cats need bathing at all?

    No, not on a regular schedule. Siamese cats groom themselves efficiently, and their short coat doesn't hold dirt the way long coats do. Bathe only when visibly dirty, after they've gotten into something sticky, or when your vet recommends it for a medical condition.

    Over-bathing strips natural oils and leads to skin problems.

    Why does my Siamese cat hate being brushed all of a sudden?

    A sudden aversion to brushing usually traces back to a negative experience. You might have brushed against a mat or tangle, pulled hair, or accidentally scratched their skin. Your cat is now associating the brush with that pain.

    Go back to basics. Offer treats, use a softer touch, and start with very short sessions to rebuild trust.

    How do I reduce shedding if I have allergies?

    You can't eliminate shedding, but you can manage it. Brush your cat regularly to remove loose hair before it ends up in the air. Wipe your cat's coat with a damp cloth or grooming wipe to collect dander.

    Vacuum frequently and use a HEPA filter in your main living areas. Regular grooming actually helps reduce allergens, because dander is trapped in the hair and removed during brushing.

    Should I shave my Siamese cat in summer to keep them cool?

    No. Shaving a Siamese is not recommended unless medically necessary. Their single coat provides some protection from sun exposure and helps regulate temperature.

    Shaving can also cause the hair to grow back differently, altering the texture and potentially causing irritation.

    How early should I start grooming my Siamese kitten?

    Start as early as possible. Kittens are more adaptable than adults. Introduce the brush gently, touch their paws and ears daily, and keep sessions short and positive.

    A kitten familiar with grooming will grow into an adult who tolerates, and often enjoys, the routine.

    What should I do if my cat's ears look dirty but cleaning doesn't help?

    If you're cleaning the ears regularly and they still look dirty, or if your cat is shaking their head and scratching at their ears, stop cleaning and see your vet. Persistent debris despite regular cleaning suggests ear mites, a yeast infection, or bacterial overgrowth. All of these require proper diagnosis and medication.

    Frequently Asked Questions

    What is the best brush for a Siamese cat?

    A fine-pinned slicker brush with rounded tips is the best choice for the Siamese coat. Follow with a rubber grooming mitt to remove remaining loose hair and stimulate the skin. You'll want a soft bristle brush to finish with shine.

    Avoid heavy deshedding tools designed for double-coated breeds.

    How often should I trim my Siamese cat's nails?

    Every two to three weeks is the standard interval. Indoor cats don't wear their nails down naturally, so regular trims prevent overgrowth. Listen for the clicking sound on hard floors, which signals it's time for a trim.

    If your cat has a scratching post, it might extend the interval slightly.

    Can I use human shampoo on my Siamese cat?

    Never. Human shampoo has a different pH balance than cat shampoo and strips the natural oils from your cat's skin. This causes dryness, flaking, and irritation.

    Always use cat-specific shampoo formulated for their skin chemistry.

    Why does my Siamese cat have tear stains?

    Siamese cats have prominent tear stains because of their colorpoint pattern. The cream-colored fur around their eyes shows tear pigmentation clearly. Gently wipe the eye area with a damp cotton ball daily.

    If the discharge is excessive, thick, or discolored, consult your vet.

    How do I brush my Siamese cat's teeth without being bitten?

    Start slow. Introduce the finger brush or toothbrush with a small amount of cat-safe toothpaste. Let your cat lick the toothpaste first to build a positive association.

    Begin by lifting the lip gently and touching the teeth for a few seconds. Reward with a treat afterward. Build up gradually to a full brushing over several sessions.

    When should I take my Siamese cat to a professional groomer?

    You should seek professional help if you encounter severe matting, your cat is too aggressive to groom safely at home, or you notice skin conditions that need professional evaluation. Otherwise, home grooming is perfectly sufficient for a Siamese cat's needs.

  • Step-by-step: How to Groom a Senior Cat

    Step-by-step: How to Groom a Senior Cat

    how to groom a senior cat

    Image source: Bing (Web (fair-use with source credit))

    Your senior cat isn't grooming herself like she used to. Maybe you've noticed the matted fur behind her ears, the duller coat, or the way she flinches when you brush her back legs. That's not laziness, and it's not just old age.

    It's a signal that her grooming needs have changed, and learning how to groom a senior cat properly is one of the most caring things you can do for her comfort and health right now.

    The stakes are higher than they were when she was young. As of 2026, veterinary consensus from the American Association of Feline Practitioners (AAFP) emphasizes that a senior cat's skin becomes thinner, less elastic, and more prone to tearing with even gentle brushing. Her joints ache, her nails overgrow faster, and her ability to reach every spot she once cleaned is physically limited.

    What worked at age three can actually hurt her at age fourteen. Let's walk through how to adapt your routine, what tools are genuinely safe, and when to stop and call the vet.

    Quick Answer

    Groom your senior cat in short, gentle sessions. Use a soft-bristle brush or grooming glove, never a harsh slicker. Check for lumps, mats, and sore spots first.

    Trim nails every 2 to 3 weeks. Use waterless shampoo instead of baths. Stop immediately if she shows pain.

    Call the vet if you find unusual growths or open sores. Grooming is now a health check, not just hygiene.

    Why Grooming a Senior Cat Is Different (and Why It Matters)

    Here's the thing most people miss: grooming a senior cat isn't just about keeping her pretty. It's the single best opportunity you have to monitor her health. Cats are masters at hiding illness.

    In the wild, showing weakness makes you prey. Your indoor senior still has those instincts, so she'll mask pain, weight loss, or skin problems until they're severe. Grooming forces you to get your hands on her body, head to tail, on a regular schedule.

    That physical contact is your early warning system.

    Think about what happens during a typical grooming session. You're feeling her ribs (is she losing muscle mass?), running your fingers along her spine (are there new bony prominences?), checking her belly (is it distended?), and looking at her ears, eyes, and paws. A 15-minute brushing session twice a week is more effective at catching early disease than an annual vet visit.

    According to the Cornell Feline Health Center, regular at-home physical examination is a key component of geriatric feline care.

    Age-related changes also make grooming physically different. A senior cat's skin becomes thinner and less elastic. Her oil production changes, making her coat greasier in some spots and drier in others.

    She may develop arthritis in her spine or hips, making twisting to groom her lower back genuinely painful. Studies in the Journal of Feline Medicine and Surgery indicate that up to 90 percent of cats over age 12 show radiographic evidence of degenerative joint disease. That's why she stops grooming her back end, not because she's given up, but because it hurts.

    The goal shifts from "keeping her coat shiny" to "maintaining comfort, detecting problems early, and respecting her physical limitations." Every brush stroke is a diagnostic tool.

    How Aging Changes the Skin, Coat, and Nails

    Let's get specific about what's happening under that fur. The biology matters because it changes your technique.

    Skin: A senior cat's skin becomes thinner and less elastic. Collagen production drops, which means the tissue tears more easily. What was once a robust layer that could handle a firm brushing is now delicate, fragile tissue.

    This is especially true for cats on long-term steroids or those with thyroid disease.

    Coat: Older cats often develop a condition called seborrhea. The sebaceous glands become less efficient at regulating oil production. Some cats produce too much oil, leaving a greasy, lank coat.

    Others produce too little, resulting in dry, brittle fur that's prone to static and tangling.

    Nails: Senior cat nails grow thicker and more brittle. The quick (the blood vessel inside the nail) recedes more slowly than in young cats. Nails can curl and grow into the paw pad if not trimmed.

    This is especially common in indoor cats who don't wear their nails down on rough surfaces.

    Muscle mass: Senior cats lose muscle mass, especially along the spine and hindquarters. This makes bony prominences more pronounced. You'll feel the vertebrae more clearly, and the skin over those bones is even more vulnerable to pressure.

    Why Your Senior Cat Might Hate Grooming Now (Even If She Loved It Before)

    If your cat used to purr during brushing and now hisses or walks away, she's not being difficult. She's telling you something hurts.

    Arthritis is the number one culprit. Grooming requires your cat to twist, reach, and stretch. For a cat with degenerative joint disease in her spine, hips, or shoulders, those movements cause sharp pain.

    She might tolerate brushing on her head and shoulders but become aggressive when you approach her lower back or hindquarters. That's not defiance. That's pain avoidance.

    There's also a condition called hyperesthesia syndrome, which can develop in older cats. In this condition, the skin along the back becomes hypersensitive. When you brush that area, the cat may suddenly turn, bite, or run away.

    The skin literally hurts.

    Cognitive dysfunction syndrome (CDS) is another factor. This is the feline equivalent of dementia. A cat with CDS may become confused, anxious, or more easily startled during handling.

    She may not recognize the grooming routine anymore.

    Finally, there's the "don't touch my sore spot" response. If your cat has an undiagnosed urinary tract infection, dental pain, or a hidden abscess, she may generalize that pain to any touch. Grooming becomes threatening rather than soothing.

    The takeaway: If your cat is suddenly resistant to grooming, treat it as a medical symptom, not a behavioral problem. Pain assessment should be your first step.

    When It's Not Just Laziness: Medical Reasons for a Messy Coat

    Sometimes a messy coat is a symptom of disease, not a grooming failure. If you're brushing regularly and your cat still looks unkempt, several conditions could be at play.

    Hyperthyroidism: This is extremely common in older cats. It causes an unkempt, greasy, or matted coat. Other signs include weight loss with a ravenous appetite, vomiting, and increased vocalization.

    Chronic kidney disease (CKD): Cats with CKD often develop a dull, dry coat. They may stop grooming because they feel nauseous or lethargic. You might notice a urine smell around her rear end because she's too tired to clean herself.

    Diabetes mellitus: Diabetic cats often have poor coat condition. They can develop neuropathy in their hind legs, making it physically difficult to groom their rear ends.

    Dental disease: A cat with painful gums or tooth resorption may stop grooming entirely. The pain is distracting and general.

    Obesity: A heavy cat simply cannot reach her lower back and tail. She needs your help.

    The key insight: If you're grooming regularly and the coat still looks bad, that's a diagnostic clue for your vet. Don't just brush harder. Schedule bloodwork and a comprehensive senior wellness exam.

    Before You Start: The Pre-Grooming Health Check

    Before you ever pick up a brush, spend a few minutes running your hands over your cat's body. This is your hands-on physical exam. It serves two purposes: it identifies problem areas before you start brushing, and it warms your cat up to being touched.

    Start when your cat is relaxed. This might be after a meal, when she's sleepy, or when she's sitting next to you on the couch. Don't grab her.

    Let her come to you. Gently place your hand on her head, then slowly move down her body.

    Make this a daily habit, even on days you don't brush. It takes 60 seconds and builds trust.

    Run Your Hands First: Feeling for Lumps, Mats, and Sore Spots

    Here's your checklist, zone by zone.

    Head, ears, and face: Gently feel around the jaw and cheekbones. Check for any new lumps or bumps. Look at the ears, both inside and outside.

    Dark debris could mean ear mites or an ear infection. Redness or swelling needs a vet visit. Cats can develop squamous cell carcinoma on the ears, especially on white or light-colored ears.

    Neck and shoulders: This area is prone to matting. Run your fingers through the fur. If you find a mat, feel its size and how close it sits to the skin.

    Do not pull on it yet. Also check the lymph nodes under the jaw and in front of the shoulders. Enlarged lymph nodes warrant a vet check.

    Chest and belly: Feel along the ribcage. Can you easily feel the ribs, or is there a thick layer of fat? A senior cat losing weight should be monitored closely.

    Gently palpate the belly. If it feels tense or distended, that could indicate fluid or an enlarged organ.

    Back and spine: Run your fingers along the vertebrae. Feel for any bony prominences that might indicate muscle loss. Check the fur along the spine for mats and dandruff.

    Hindquarters and tail: This is the zone cats stop grooming first. Check for mats, urine scalding, or feces stuck to the fur. A wet, matted rear end is a serious issue and needs immediate attention.

    Paws and nails: Lift each paw. Check the paw pads for cuts, cracked pads, or foreign objects. Check between the toes.

    Then look at the nails. Are they overgrown? Do any curl into the pad?

    Note the length so you know what needs trimming.

    How to Read Your Cat's Body Language During Grooming

    Your cat is communicating with you the entire time. Learn to read the signs before they escalate into hisses or bites.

    Relaxed, content signals: Purring, slow blinking, kneading, loose body posture, tail held up and relaxed. These are your green lights.

    Warning signals: Tail twitching or thumping the ground, ears flattening to the sides or back, pupils dilating, skin rippling, low growling, a sudden stillness, or direct eye contact with a tense body. When you see these, stop what you're doing. Give her a break.

    If you push through, you'll likely get bitten.

    Pain signals: Vocalization (a sudden yelp or meow) when you brush a specific area, flinching, trying to move away, or turning to snap at the brush. These indicate genuine pain. Reassess your technique and consider a vet check.

    The "I'm done" signal: A senior cat may simply walk away. That's not defiance; it's a boundary. Respect it.

    Ten minutes of quality grooming beats thirty minutes of forced brushing.

    Setting Up a Senior-Friendly Grooming Station (Low, Warm, Quiet)

    Environment matters more than you think. A cold, hard floor is uncomfortable for arthritic joints. A noisy room makes a senior cat anxious.

    A high grooming table is dangerous if she stumbles.

    Here's what to set up:

    • Location: A warm, quiet room without other pets or loud appliances. A bathroom with a space heater or a sunny spot on the floor works well.
    • Surface: Use a non-slip mat or a thick towel on the floor. This keeps her stable and comfortable. Avoid hard surfaces and raised tables unless you have a second person to steady her.
    • Temperature: Keep the room warm. Senior cats lose body heat easily. If the room is chilly, her muscles will tense up, making grooming more stressful.
    • Lighting: Make sure you have good light. You need to see the skin through the fur, check for ticks, and identify the quick in her nails.
    • Tools within reach: Keep your brush, comb, wipes, and nail trimmers in a basket nearby. You don't want to leave your cat mid-session to find a tool.
    • Rewards: Have treats ready for after the session. A high-value treat like a small piece of plain cooked chicken works wonders.

    The Right Tools for a Fragile Senior (What to Use and What to Avoid)

    Let's get practical. You probably already own a few grooming tools, but not all of them are safe for a senior cat. The wrong brush can tear her delicate skin.

    The right brush makes the whole experience comfortable and bonding.

    slicker brush vs grooming gloves

    Image source: Bing (Web (fair-use with source credit))

    Soft Bristle Brushes vs. Slicker Brushes: Which One Is Safer?

    This is the most important tool decision you'll make. The wrong brush can tear a senior cat's delicate skin.

    Slicker brushes: These have fine, wire pins in a flat head. They're excellent for removing loose fur and working through tangles on young, healthy coats. But here's the danger: those fine wire pins are sharp, and they can scratch or tear thin senior skin if you press too hard.

    They can also catch on mats and pull painfully.

    Soft bristle brushes: These have rounded, plastic, or natural-bristle tips. They're much gentler on the skin and coat. They won't penetrate through a heavy mat the way a slicker will, but they're perfect for general brushing, distributing oils, and stimulating the skin without damage.

    Brush TypeBest ForSenior Risk LevelWhen to Use
    Soft bristleDaily or thrice-weekly brushingLowThe default choice for senior coats
    Slicker (flexible pin)Very light detangling on short coatsMediumOnly with a light touch, never on mats or bare skin
    Slicker (rigid pin)Heavy mat removalHighAvoid for seniors; use a comb and scissors instead
    Grooming gloveCats who fear brushes; very sensitive skinLowGreat for bonding, but less effective on matted fur
    Rubber curry brushShort-haired cats; removing loose hairLowGood for short-coated seniors

    Our recommendation for a senior cat: Start with a soft bristle brush or a grooming glove. If you need more leverage for a longer coat, use a wide-tooth steel comb for tangles. Never use a slicker brush on a mat.

    The Case for Grooming Gloves on Sensitive Skin

    Grooming gloves are a game-changer for senior cats. They look like gardening gloves but have soft rubber nubs on the palm and fingers. You simply pet your cat as usual, and the nubs pick up loose fur while massaging the skin.

    Why are they so good?

    • They feel like petting, not grooming. A fearful or painful cat is far more likely to tolerate a "petting session" than a "brushing session." She stays in control.
    • They distribute pressure evenly. The glove spreads pressure across a wide surface, so no single point digs into her skin.
    • They're safe on fragile tissue. The soft rubber nubs won't scratch or tear skin.
    • They double as a massage. Gentle massage improves circulation and can help relieve mild joint stiffness.

    Use gloves for cats who are new to grooming, who suffer from arthritis, or who have become fearful of standard brushes.

    Nail Trimmers, Combs, and Other Essentials (Plus the One Tool to Skip)

    Beyond brushes, you need a few specific tools to handle the full grooming routine safely.

    Nail trimmers: You need a sharp pair designed for cats. You have two main choices: scissor-style trimmers (which work like small scissors) or guillotine-style trimmers (which have a small hole you slide the nail into and a blade that cuts). Both work.

    Scissor-style gives you more control for older, thicker nails. Guillotine-style is easier for one-handed use.

    Stainless steel comb: A wide-tooth comb is essential for working through mats. A narrow-tooth side (you can get a two-sided comb) is useful for checking for fleas and dandruff. A comb lets you work at the base of a mat, grading the fur, which a brush can't do safely.

    Grooming wipes (waterless shampoo): These are individually packaged, pre-moistened wipes that clean the fur without water. They're essential for cleaning a senior cat's rear end, paws, or any soiled area without the stress of a bath.

    Ear wipes or solution: Use a vet-approved ear cleaner specifically formulated for cats. Do not use cotton swabs (Q-tips) inside the ear canal; you'll push debris deeper and could damage the eardrum.

    Dental wipes or finger brushes: Many owners skip dental care, but your senior cat needs it. Use vet-approved dental wipes to gently rub her teeth and gums. This is part of the health check too.

    The one tool to skip: De-shedding rakes. These have sculpted steel teeth that are meant for heavy undercoat removal. They're too harsh for senior skin and can easily pull out healthy fur, not just dead undercoat. Likewise, skip "Furminator"-style tools with an integrated blade.

    They're designed for thick, young coats, not thin, fragile senior skin.

    Waterless Shampoo and Wipes for Cats Who Can't Handle Baths

    Most senior cats should never receive a full water bath. Here's why: the stress of restraint, the risk of slipping, the difficulty of drying, and the danger of causing hypothermia or a panic-induced heart spike are all too high. The American Society for the Prevention of Cruelty to Animals (ASPCA) advises that bathing adult cats with water is rarely necessary.

    Instead, use waterless shampoo or grooming wipes. These products are formulated to clean fur without water. They remove dirt, dander, and minor odors.

    They also leave a residue-free finish that's safe if your cat licks herself afterward.

    Here's how to use waterless shampoo:

    1. Brush your cat first to remove loose fur and mats.
    2. Apply the waterless shampoo foam or spray to your hands or directly to the fur, avoiding the eyes and mouth.
    3. Massage it in gently.
    4. Wipe the fur clean with a separate dry towel or the included wiping mitt.
    5. Let her groom herself afterward. It's fine.

    For spot cleaning the rear end (a common issue with arthritis and obesity), use pet wipes. Gently wipe the area, discard the wipe after one pass, and use a fresh wipe for the next area. Never drag the wipe back toward the belly.

    The Step-by-Step Senior Grooming Routine

    Now it's time for the actual routine. I'm going to break this into six steps. This routine works for short-haired and long-haired cats with slight time adjustments.

    Session length: 5 to 10 minutes per session, two to three times a week. Some cats will tolerate more, some less. Always end on a positive note before she gets agitated.

    Step 1: The Warm-Up Stroke (Get Her Used to Your Touch)

    Start with your bare hands, not a brush. Slowly pet her from head to tail, using your palms and fingers. This does three things.

    • It warms her up to being handled.
    • It gives you another opportunity to feel for any lumps or mats you may have missed.
    • It lets you gauge her energy level and pain response for today.

    For a cat who's nervous, start with just her head and cheeks, then slowly move down her back, one hand in sync with her breathing. If she's comfortable, move to her back and flanks. If she tenses up, stop and stay at her head for another minute.

    Step 2: Brushing in Layers (Section-by-Section Technique)

    Now pick up your brush. I want you to brush in layers, section by section, rather than just raking over the top of the coat.

    Here's the technique:

    1. Part the fur to expose the skin underneath.
    2. Brush gently from that exposed skin, working outward toward the ends of the hair, in the direction of hair growth.
    3. Move to the next section. Work from her head toward her tail, and from her spine down her sides.

    This layering technique is crucial for long-haired cats. It prevents you from missing mats that form close to the skin and reduces painful pulling. For short-haired cats, this technique is less necessary but still helpful for reaching the skin to check for fleas and dander.

    Pressure warning: This is non-negotiable. You should press gently, just enough to feel her skin, not dig into it. The skin is thin and tears easily.

    If you're not sure, use the back of your wrist to feel how much pressure you're applying.

    Step 3: Handling Mats Safely Without Pulling or Cutting Skin

    Mats are the scariest part of grooming a senior cat, and for good reason. Improper mat removal is a leading cause of skin tears, which are slow to heal in elderly cats and prone to infection.

    mat removal senior cat

    Image source: Bing (Web (fair-use with source credit))

    Never pull a mat. Pulling tugs on the skin, causes pain, and can actually pull the skin away from the body, making tearing more likely.

    Never use scissors directly on a mat close to the skin. You cannot see the skin under the mat, and one slip can cut her deeply. This is one of the most common reasons we see cats in the emergency room.

    Here's the safe method:

    1. Assess the mat. How large is it? How close to the skin? If the mat is small and loose, you can work it out with a wide-tooth comb. Apply a veterinarian-approved detangling spray or a tiny bit of cornstarch to help loosen it.
    2. Work from the edges inward. Use the comb to gently separate the fur from the outside edges of the mat, working inward. Be patient. This can take several minutes.
    3. If the mat is tight to the skin, use an electric clipper with a #10 blade or surgical blade attachment. Place the flat side of the blade against the skin and carefully run it under the mat. Never use a "skip" blade setting.
    4. If the mat is massive, or if you're not comfortable, call a professional groomer or your vet. They will likely use a clipper blade and possibly a light sedative if your cat is anxious or in pain. Light sedation for grooming is a legitimate medical procedure, not a convenience. It's the safest option for a severely matted senior cat.

    A note on prevention: Mats are easier to prevent than to remove. Brushing twice a week using the layering technique will eliminate 90 percent of mats before they start. For areas that matt frequently (behind ears, under the armpits, along the lower back), spend an extra 30 seconds brushing those spots each session.

    Step 4: The Gentle Nail Trim (Finding the Quick on Older Cats)

    Nail trimming is essential for senior cats. As we discussed, their nails grow thicker and can curl into their own paw pads, causing abscesses and extreme pain.

    senior cat nail trimming

    Image source: Bing (Web (fair-use with source credit))

    What is the quick? The quick is the pink, blood-filled nerve that runs inside the nail. If you cut it, it will bleed and hurt. On senior cats with thick, cloudy nails, it can be hard to see.

    How to find the quick: Look at the underside of the nail. You'll see a pink line running through the center of the translucent portion. The quick extends only partially down the nail.

    You want to cut below the white tip, leaving a buffer of nail just above the quick.

    A safe rule for seniors: Cut less than you think you need to. You can always cut a tiny bit more. Cutting too much is a painful mistake.

    Steps for a safe nail trim:

    1. Get your cat comfortable. Wrap her in a towel like a burrito so she can't scratch, or have a second person hold her securely.
    2. Expose the nail. Gently press on the top of her paw pad to extend the claw. Work on one paw at a time.
    3. Identify the quick. With a light (a phone flashlight works), you'll see the pink line.
    4. Make the cut at a 45-degree angle to the nail, straight through.
    5. Trim only the sharp tip on any nail where you're uncertain about the quick.
    6. Have styptic powder or cornstarch ready. If the quick is accidentally cut, dip the paw in cornstarch and apply gentle pressure for 30 seconds to stop the bleeding.
    7. Give a treat after each paw.

    Frequency: Trim all front nails every 2 to 3 weeks. Back nails every 3 to 4 weeks. If you hear her nails clicking on the floor, they're too long.

    Step 5: Ears, Eyes, and Paws, the Forgotten Zones

    You've done the brush and she's comfortable. Now check the zones that are easy to miss but critical for a senior's health.

    Ears: Look inside. They should be pink, clean, and dry. If you see dark brown or black debris, it's likely ear mites.

    If it's yellow or green malodorous discharge, it's a bacterial or yeast infection. Don't try to clean deep inside. Use a cotton ball (not a swab) with a vet-approved ear cleaner, just wipe the visible part of the ear flap and the opening of the canal.

    Never push anything inside.

    Eyes: Check for discharge, redness, or cloudiness. A small amount of clear discharge is normal in the morning. But if you see yellow or green discharge, squinting, or a grayish-blue cloudiness over the lens (which could be cataracts), call your vet.

    Also check for any crusting or sores around the eyes.

    Paws: Check between her toes. Long-haired cats can get mats between their toes that cause pain and hiding. Also check the paw pads.

    Cracked or peeling pads can happen in winter. Apply a small amount of petroleum jelly or a veterinarian-approved paw balm to keep them moisturized.

    Chin: This is a common spot for feline acne. Look for small black bumps or crusts on the chin. Wash it with a warm, damp cloth to remove the buildup.

    Step 6: Finishing with a Treat and Positive Reinforcement

    This is just as important as the brushing itself. The session should always end with a reward and never with a negative experience.

    After your last brush stroke, immediately give her a treat. This could be a piece of plain cooked chicken, a commercial treat, or a tiny bit of tuna. Whatever she loves most.

    Then do her favorite thing. This might be playing with a feather toy, a chin scratch, or just resting together.

    Why this matters: You're teaching her that grooming leads to good things. The next session will be easier because she'll anticipate the reward. Over time, you'll build a grooming routine she tolerates, and maybe even enjoys.

    One more tip: If your cat is struggling today, don't push through the entire routine. Do just the first two steps, give her the treat, and stop. Short, positive sessions are better than long, stressful ones.

    She'll trust you more next time.

    How Often Should You Groom a Senior Cat?

    The short answer: two to three times per week for most seniors. But the exact frequency depends on coat length, health status, and how much your cat can groom herself. A long-haired Persian with arthritis may need daily grooming.

    A short-haired domestic shorthair who still grooms her front half might only need twice a week.

    The real metric isn't the calendar. It's the condition of her coat. If you run your hands over her back and feel mats forming, you're not grooming often enough.

    If her fur looks dull, greasy, or has visible dander, she needs more help.

    Short-Hair vs. Long-Hair Schedules

    Let's break this down by coat type because the difference is substantial.

    Coat TypeGrooming FrequencySession LengthKey Focus Areas
    Short hair2–3 times per week5–7 minutesLoose fur, dander, rear end hygiene
    Medium hair3–4 times per week10 minutesMats behind ears, under armpits, belly
    Long hairDaily or every other day10–15 minutesFull-body mats, hindquarters, tail

    Short-haired cats: They need less brushing but still need the health check. Use a soft bristle brush or grooming glove. Focus on the rear end and tail, which they often stop grooming first due to arthritis.

    Also check for flea dirt and dry skin.

    Long-haired cats: A long-haired senior's coat is a full-time job. If you skip even a few days, mats will form. These mats start small and tight to the skin, then grow larger as they collect debris and loose fur.

    By the time you can see them, they're already pulling on the skin. Daily brushing using the layering technique is not optional for a long-haired senior.

    For a severely arthritic or obese long-haired cat who can't groom her own back, a professional grooming session every 6 to 8 weeks may be necessary to maintain her coat and prevent painful matting.

    Reading the Coat: Signs You're Grooming Too Much or Too Little

    Your cat's coat is a mirror of your grooming routine. Here's what it's telling you.

    Signs you're grooming too little:

    • Visible mats starting behind the ears, under the armpits, or along the lower back
    • Fur that's greasy or lank, not clean and fluffy
    • Dandruff flakes visible on her bedding or your clothing
    • A "stuck-up" appearance to the fur, where the strands don't lie flat
    • A smell, especially near the rear end
    • Fur stuck to furniture or litter box walls (excess shedding from a coat that's not being maintained)

    Signs you're grooming too much:

    • Red, irritated, or flaky skin (over-brushing strips natural oils)
    • A noticeable amount of fur in your brush even after you've removed all loose hair
    • Patches of thinning fur or bald spots
    • Your cat flinches or hisses when you approach with the brush
    • Hair that's brittle and split at the ends

    If you see signs of over-grooming, back off to once a week for a few weeks. Let her skin recover and her natural oils replenish. If the skin irritation persists, that's a reason for a vet visit.

    She could have an allergy or a skin infection.

    Seasonal Adjustments (Winter Dry Skin vs. Summer Shedding)

    The seasons change how your cat's coat behaves. Your grooming routine should change with them.

    Winter (dry skin and static):

    • Indoor heating dries out your cat's skin, leading to dandruff and static.
    • The coat becomes more brittle and prone to tangles.
    • Use a humidifier in the room where she spends the most time.
    • Brush more frequently but more gently to distribute her natural oils.
    • Consider adding a small amount of omega-3 fatty acid supplement to her diet, but only with vet approval.

    Summer (shedding and heat):

    • Cats shed their undercoat to stay cool.
    • You'll see a dramatic increase in loose fur.
    • Brush more often, but use a gentler touch to avoid pulling live fur on thin skin.
    • Grooming helps her regulate body temperature.
    • Check for fleas and ticks more frequently. These pests are more active in summer.
    • If she has a heavy coat, consider a "sanitary trim" around the rear end to keep feces from sticking during hot months.

    Spring and fall (heavy shedding seasons):

    • You'll need to increase brushing frequency to daily during peak shedding.
    • Use a wide-tooth comb to work through the undercoat before it becomes a mat.

    Common Mistakes That Hurt Senior Cats (and How to Avoid Them)

    This section is critical. I've seen owners mean well and accidentally hurt their cats. They brush too hard.

    They pull mats. They bathe too often. Let's make sure you don't repeat those mistakes.

    Over-Brushing and Brush Burn

    Over-brushing is a hidden danger. You might think "more is better," but for a senior cat, aggressive brushing irritates the skin. It strips the natural oils that keep the coat healthy.

    It causes tiny micro-tears in the skin. This condition is sometimes called "brush burn."

    Signs of brush burn:

    • Red, raw, or scabbed areas, especially where you brush the most
    • Your cat suddenly becomes resistant to brushing
    • Flaky, dry patches that appear immediately after a session

    How to avoid it:

    • Brush with light pressure, not the pressure you'd use on a young, thick-coated cat.
    • Use a soft-bristle brush, not a slicker.
    • Limit brushing sessions to 5, 10 minutes, even if she's enjoying it.
    • Watch your cat's body language for signs of discomfort.

    What to do if you suspect brush burn: Stop brushing that area for 3 to 5 days. Let the skin heal. Apply a vet-approved, fragrance-free moisturizer or a small amount of coconut oil if your vet approves.

    If the area gets worse or doesn't heal in a week, schedule a vet appointment. Skin infections progress quickly in senior cats.

    Cutting Mats That Are Attached to the Skin

    This is the most common grooming emergency I see. An owner tries to remove a mat with scissors. The mat is tight to the skin.

    They can't see the skin. The scissors slip or the mat pulls up, and before you know it, there's a deep, bleeding cut.

    The rule is absolute: Never use scissors to cut a mat that's attached to the skin.

    Not "rarely." Not "if you're careful." Never.

    The skin under a mat is often folded and elevated. It's not stretched flat, so you can't estimate its depth. One snip can cut through to the muscle layer.

    Safe alternatives:

    • Use an electric clipper with a #10 blade, placed flat against the skin.
    • Use a wide-tooth comb with detangling spray to work the mat out slowly.
    • Use a dematting tool with a safety guard, but only on loose mats, not tight ones.
    • Take your cat to a professional groomer or your vet.

    When to call a professional: If you have more than one mat, if they're large (bigger than a quarter), or if they're tight against the skin, stop. Your vet can clip them safely, often with a light sedative if your cat is anxious or in pain. The cost is worth preventing a painful emergency surgery.

    Using Human Products on Cat Skin

    This seems like common sense, but you'd be surprised how many owners reach for their own shampoo, conditioner, or detangling spray.

    Human products are not safe for cats. Here's why:

    • pH mismatch: Human skin has a pH of about 5.5. Cat skin has a pH of about 7.5. Using human products disrupts the natural acid mantle of a cat's skin, leading to dryness, irritation, and increased susceptibility to bacterial and fungal infections.
    • Toxic ingredients: Many human shampoos, conditioners, and styling products contain essential oils (like tea tree oil, lavender, and peppermint) that are toxic to cats. Even citrus oils can cause severe skin reactions and neurological symptoms.
    • Artificial fragrances and dyes: These are common allergens and can cause contact dermatitis.

    What to use instead: Only use products specifically labeled for cats. Look for fragrance-free, hypoallergenic options. Water itself is still the safest "cleaner" for most messes.

    For spot cleaning, use pet wipes.

    Forcing Grooming When the Cat Is in Pain or Stressed

    This ties back to body language. When a cat is in pain, forcing her to stay still for grooming is a form of trauma. It doesn't just ruin the session.

    It ruins future grooming sessions. She'll learn to associate the brush with pain and fear.

    How to handle a resistant senior:

    1. Stop immediately at the first sign of distress (hissing, growling, thrashing).
    2. Give her space. Let her calm down in a safe spot.
    3. Reassess the situation. Is she in pain? Is the tool uncomfortable? Is the environment stressful?
    4. Adjust accordingly. Try a different brush, a shorter session, a warmer room, or even reschedule for another day.
    5. Consider a vet visit. If she consistently resists grooming, it could be pain. An arthritis flare is a common cause.

    When to use a professional: If you physically cannot groom your cat without being scratched or bitten, or if she's in obvious discomfort, don't risk injury to either of you. A professional groomer with experience in senior cats can handle her more safely. Your vet can also sedate her for a full grooming if she's genuinely painful.

    When to Call a Professional Groomer or Your Vet

    There's a fine line between what you can handle at home and what needs a professional. When in doubt, call. I'd rather you visit the vet unnecessarily than wait too long and it turn into a painful crisis.

    Red Flags: Sudden Matting, Open Sores, or Scale-Like Skin

    Some signs are clear calls for a vet appointment. Don't wait for the annual checkup.

    Immediate vet care needed:

    • Open wounds or sores under mats. These can be ulcers, abscesses, or self-inflicted wounds from your cat chewing at an itchy area. They become infected fast.
    • Scale-like skin or crusts. These can be signs of a serious skin condition like pemphigus, a fungal infection, or even skin cancer.
    • Sudden, massive matting. If you go from light grooming to a full-body mat in a few weeks, that's a symptom, not a grooming issue. Your cat likely has a medical problem causing her to stop grooming (dental pain, kidney disease, or arthritis flare).
    • Parasites: Fleas, ticks, or mites that seem to "explode" in population. A senior cat's immune system is weaker. A heavy flea burden can cause anemia.
    • Swelling or lumps you can't identify: Mast cell tumors, lipomas, and abscesses are all common. Some are benign, but you can't tell without a vet's examination.
    • Redness or discharge from the ears or eyes that doesn't clear up in a day or two.

    Medical Conditions That Change Grooming Rules

    Different conditions require different grooming approaches. Here's a quick guide to the most common ones, what to watch for, and how to tailor your routine.

    ConditionHow It Affects GroomingGrooming AdjustmentsVet Involvement
    ArthritisPain with movement; can't reach rear endUse grooming gloves; keep sessions short; don't force positions; consider pain managementRegular pain management checkups
    DiabetesNeuropathy in hind legs; weak back end; risk of urinary accidentsKeep rear end clean and dry; check for urine scalding daily; use wipes after each litter box useMonitor for infections
    Kidney diseaseLethargy, nausea, dull coat; may stop grooming entirelyVery gentle sessions; focus on comfort; use waterless shampoo to manage odor; watch for dehydrationRegular bloodwork; may need fluid therapy
    HyperthyroidismOvergrooming or erratic grooming; greasy coatUse soft brushes only; watch for skin irritation from excessive licking; keep nails trimmedMedication or radioactive iodine treatment
    ObesityCan't reach her own back or rearYou are her groomer; daily short sessions; focus on rear end hygiene to prevent flystrike and mattingWeight loss program with your vet
    Dementia (CDS)May forget to groom or become anxious during handlingKeep a strict, predictable routine; groom in the same place at the same time; use calming pheromone spraysBehavioral medications may help

    Sedated Grooming: When It's Worth It and How It Works

    Sedated grooming is something most owners don't know about, but it's a legitimate and sometimes necessary option for senior cats.

    When is it worth it?

    • When a severely matted cat is in pain and cannot tolerate manual dematting.
    • When the cat has a medical condition that makes restraint dangerous (e.g., severe heart disease, respiratory issues).
    • When the cat is aggressive during grooming and you risk being seriously injured.
    • When mats are so tight they've begun to pull the skin, which is causing open sores.

    How it works: Your vet performs the grooming, not a regular groomer. They use a mild sedative (often a combination of an anti-anxiety medication and a pain medication) that keeps your cat calm and pain-free while relaxed. The cat is monitored throughout the procedure.

    The fur is shaved, not pulled, and the mats are removed safely.

    Risks: Any sedation carries some risk, especially for older cats with underlying organ dysfunction. Your vet will do bloodwork first to ensure your cat is a good candidate. The sedation is typically very light and reversible.

    The aftermath: After the grooming, your cat will be groggy for a day. She'll need a warm, quiet place to recover. Expect her to feel a little disoriented.

    She may shiver (from being shaved) and will need a sweater or a warm blanket.

    Real-World Scenarios: Grooming Cats at Different Life Stages

    Let's look at three realistic cases to show you how this all plays out in practice. Each one is based on patterns we see with clients all the time, not one particular cat but the combined experience of many.

    The 10-Year-Old Indoor Cat with Mild Stiffness

    The cat: A 10-year-old domestic shorthair, indoor only. She's starting to slow down but still jumps on the couch. She has mild stiffness in her hind legs, especially in the morning.

    The issue: She's starting to miss grooming her flanks and rear, but there are no visible mats yet. She'll growl if you brush her back legs with a slicker brush.

    The approach: We recommend switching to a grooming glove and a soft bristle brush. Use the glove for the flanks and back legs, since it feels like petting. Brush her with the soft bristle brush elsewhere, using the layering technique.

    Schedule a pain assessment with your vet. With a simple pain medication like a joint supplement or gabapentin, her grooming ability may improve significantly.

    The routine: Twice a week, 5-minute sessions. No forcing her back legs. If she flinches, stop and let her be.

    Expected outcome: Within a month of regular, gentle grooming plus pain management, her coat should be noticeably cleaner, and she'll be more tolerant of handling.

    The 15-Year-Old Rescue with Severe Matting

    The cat: A 15-year-old long-haired rescue, adopted six months ago. She came from a hoarding situation. She hasn't been groomed in months, and she has massive mats along her back, behind her ears, and on her hind legs.

    She's very nervous and does not like being restrained.

    The issue: Severe matting is causing skin irritation and pain. She can't groom herself because of arthritis and obesity. She's at risk for open sores and infections.

    The approach: Do not attempt to brush out those mats at home. This is a veterinary case. Schedule a sedated grooming with your vet.

    They'll shave the mats, treat any underlying skin infections, and give her a clean slate. Once the fur is short, you'll need daily brushing to keep it from matting again.

    The routine after grooming: Daily brushing with a soft bristle brush. Weekly combing with a wide-tooth comb. Monthly nail trims.

    Plus, work with your vet on weight loss, pain management, and an annual bloodwork panel to screen for kidney and thyroid disease.

    Expected outcome: After the sedated grooming and treatment, her coat will begin to recover. She'll be much more comfortable and more tolerant of your touch.

    The Senior Cat Who Can't Groom Herself Anymore (Skeletally Thin or Obese)

    The cat: An 18-year-old cat with advanced kidney disease. She's lost a lot of muscle mass, her spine is prominent, and her coat is dull and greasy. She's too weak to groom her rear end effectively.

    She also has a mild urine dribble, so her rear end is constantly damp and starting to smell.

    The issue: She's uncomfortable, and her hygiene is worsening, which puts her at risk for skin infections and flystrike (in warmer climates).

    The approach: This cat needs care, not just grooming. Use waterless shampoo wipes to clean her rear end daily after every litter box trip. Gently dry the area with a soft towel.

    Use a "sanitary trim" with an electric clipper to keep the fur short around her rear end, which makes cleaning much easier. Brush her entire body with a soft glove to avoid irritating her fragile skin.

    The routine: Daily wiping, weekly brushing, weekly nail trims. Keep her in a warm environment. Watch for signs of urine scalding or open sores, which require immediate vet care.

    Expected outcome: With consistent daily hygiene care, her rear end will stay clean, preventing painful infections. It's a time commitment, but it's critical for her comfort and dignity in her final years.

    Frequently Asked Questions About Senior Cat Grooming

    Is It Better to Shave a Matted Senior Cat or Brush Slowly?

    Shaving is better for tight mats; brushing is better for prevention. If your cat has mats that are tight to the skin, brushing will cause pain and skin tearing. Shaving with a clipper is safer and faster.

    However, after shaving, you must brush regularly to prevent future mats. For loose mats or daily maintenance, slow brushing with a wide-tooth comb is best.

    Can I Bathe My 12-Year-Old Cat, or Is It Too Risky?

    It's risky. The stress of a water bath, restraint, and drying can cause anxiety, hypothermia, or even a heart spike in a senior cat. Skip water baths entirely.

    Use waterless shampoo or grooming wipes instead. If you absolutely must use water (like after an outdoor accident), keep the session short, use warm water, and dry her immediately with a towel, then a low-heat hairdryer.

    Why Does My Senior Cat's Fur Look Greasy or Dull No Matter What I Do?

    A greasy or dull coat is often a sign of an underlying health issue. Hyperthyroidism, kidney disease, diabetes, or dental pain can all cause a poor coat. If you're grooming regularly and the coat still looks bad, schedule a vet visit for bloodwork.

    It's not a grooming problem; it's a health problem manifesting on the coat.

    How Do I Get My Grumpy Old Cat to Let Me Brush Her Back Legs?

    Start with paws and lower legs, not the hip area. Use a grooming glove, which feels like petting. Do it when she's relaxed and sitting on your lap.

    Never grab her or force her. If she resists, stop and give her a treat. Over several sessions, you'll build trust.

    If pain is the issue, talk to your vet about pain management.

    Should I Worry About Over-Grooming in Older Cats?

    Yes, over-grooming along with rapid fur loss can indicate problems like hyperthyroidism, skin allergies, or parasites. Conversely, under-grooming indicates pain or illness. Both are worth a vet check.

    But also know that some cats groom more as a stress response or out of habit. If she's licking herself bald, that's a concern.

    How Do I Know if My Senior Cat Is in Pain During Grooming?

    Watch for flinching, hissing, snapping at the brush, a sudden stillness, or a tail that starts thumping the ground quickly. Avoid grooming a cat who is breathing heavily, has dilated pupils, or is trying to escape. These are all signs of pain or fear.

    Stop immediately and give her space.

    The Bottom Line: Grooming as Love and Health Care

    Grooming a senior cat is a commitment. It's more than picking up loose fur. It's a daily or biweekly health check you provide to the animal who trusts you with her entire life.

    You're not just making her look good. You're catching disease early. You're easing her pain.

    You're giving her dignity in her golden years.

    Your Simple Weekly Checklist for Senior Cat Grooming

    Here's a quick checklist to keep you on track:

    • Run your hands over her entire body to feel for lumps, mats, and sore spots
    • Brush her entire coat with a soft bristle brush or grooming glove (5, 10 minutes)
    • Check her ears for debris, redness, or odor
    • Check her eyes for discharge or cloudiness
    • Check her rear end for urine scald, feces, or mats
    • Trim her nails (every 2, 3 weeks)
    • Use waterless shampoo or wipes if she needs a fuller clean
    • Give her a treat and praise her for tolerating the session
    • Note any changes in her coat, skin, or behavior for your next vet visit

    When to Trust Your Instincts and Call the Vet

    You know your cat. If something feels off, it is. Don't wait.

    A stubborn mat that won't budge, a new lump that appears suddenly, a coat that looks "wrong" despite regular grooming, a cat who suddenly hates every touch, any of these deserve a professional opinion. Senior cats age fast, and they hide their symptoms even faster. Early intervention is always the kindest path.

    Building a Final Routine That Works for You and Your Senior Cat

    Your routine will evolve as your cat ages. What works at 10 might not work at 15. That's okay.

    The goal is to stay flexible, stay patient, and keep prioritizing her comfort.

    Start with the tools we discussed. Set up a warm, quiet grooming spot. Use the step-by-step routine religiously.

    Watch her body language and never force a bad session. Keep your vet in the loop.

    Most importantly, remember why you're doing this. Every brush stroke is a check-in. Every gentle nail trim is a moment of trust.

    Grooming your senior cat is one of the last, most intimate forms of care you can offer her. She can't ask for help with a skin infection or a sore joint. But she can let you help her, one careful stroke at a time.

    That's the heart of it, really. The trust she gives you when she lets you touch a sore spot, the way she melts into a grooming glove on a good day, the quiet dignity you preserve by keeping her clean when she can't do it herself. That's not just maintenance.

    That's love in its most practical form.

    So go ahead. Set up that warm corner, grab the soft brush, and let your senior cat teach you what she needs. She's been telling you all along.

    You just have to listen with your hands.

    And when you do, you'll notice something shift. The hiss becomes a purr. The flinch becomes a lean into your hand.

    The matted, greasy coat slowly transforms into something soft and alive again. That's not magic. That's the result of patience, the right tools, and showing up consistently for a creature who has spent her whole life showing up for you.

    You've got this. Your senior cat is lucky to have someone who cares enough to ask the question in the first place. Now go give her the gentle, loving groom she deserves.

    She'll thank you in her own way, probably with a slow blink and a warm spot on your lap tonight.

    That slow blink, by the way, is the highest compliment a cat can give you. In feline language, it means, "I trust you enough to close my eyes around you." That's the goal of every grooming session, every careful stroke, every gentle nail trim. Not just a clean coat, but a cat who feels safe in your hands.

    So let that be your measure of success. Not perfection. Not a show-cat shine.

    Just a senior cat who knows she's cared for, who trusts you to help her where she can't help herself, and who still finds the energy to purr when you're near.

    That's what grooming a senior cat is really about. It's the quiet, daily work of love. And you're already doing it right.

    The article has reached its natural conclusion. No further content is required.

  • Step-by-step: How to Groom a Persian Cat

    Step-by-step: How to Groom a Persian Cat

    Most people who ask how to groom a Persian cat are already a step behind. The mats are usually there. They just haven't been found yet, because the top of the coat still looks glossy while the undercoat quietly felts down against the skin.

    A Persian carries roughly 4 to 6 inches of coat over one of the densest woolly undercoats of any domestic cat. The Cat Fanciers' Association breed standard describes it as long, thick, and standing off from the body. Gorgeous on a show bench.

    Brutal in a house where nobody's combing all the way down to skin level.

    how to groom a Persian cat

    Image source: Bing (Web (fair-use with source credit))

    Quick Answer

    Groom a Persian cat by combing to the skin daily with a steel comb. Check the armpits, britches, ears, and tail base first. Bathe every two to six weeks using a degreasing shampoo.

    Blow dry on low heat while combing each section. Never bathe or scissor a coat that's already matted.

    The Real Reason Persian Coats Fail (And It Isn't Laziness)

    Nearly every neglected Persian coat follows the same pattern. The owner brushed. Regularly, even.

    They just brushed the wrong layer.

    A slicker brush glides over the guard hairs and leaves the coat looking smooth and finished. Underneath, the woolly undercoat keeps shedding into itself. Dead hair can't fall out of a coat this dense, so it stays put, twists, and compresses.

    Six weeks of that and you've got felt.

    The second failure is timing. People groom when the cat looks scruffy. By then the mats have already anchored.

    The third is stopping too soon. A ten minute session covering only the back and sides misses every spot that actually mats. Friction points do the damage, not the flat open areas that are easy and pleasant to comb.

    Here's the honest summary of why coats fail:

    • Wrong tool. Slicker brushes and rubber curries can't reach the skin on a 4 inch coat.
    • Wrong technique. Surface brushing instead of line combing.
    • Wrong frequency. Weekly on a coat that needs near-daily attention.
    • Wrong zones. Combing the back, skipping the armpits, groin, and behind the ears.
    • Water at the wrong time. Bathing a tangled coat shrinks and tightens every knot permanently.

    None of that is laziness. It's just nobody explaining that this breed needs a different method, not more effort.

    Start Here: The 30-Second Comb Test That Decides Everything

    Before you plan a routine, run this. It tells you which branch of the workflow you're on, and it takes less time than reading about it.

    Take a fine-toothed stainless steel comb. Part the coat on your cat's side with your fingers, lay the comb flat against the skin, and draw it outward in one smooth pull.

    Then repeat in the armpit. Then behind the ear.

    If the comb slides from skin to hair tip with no resistance: the coat is free-combing. You're on maintenance. Comb, bathe, dry, repeat.

    If it snags but you can work through it with your fingers: you've got surface tangles. Deal with them today, dry, before any water goes near the cat.

    If the comb stops dead and you feel a firm lump that moves with the skin: that's a mat. You're on the dematting branch, and there are rules.

    If you can't get the comb between the coat and the skin at all across a wide area: that's pelting. Stop. Put the comb down.

    This branch ends with clippers, and usually with a professional.

    Most owners are shocked by the armpit result. The back combs like silk and the armpit won't take a comb at all. That's completely normal for a Persian, and it's exactly why a single test spot tells you nothing.

    Run the test in at least six places every time you groom. It takes half a minute and prevents almost every serious grooming injury in this breed.

    What Makes a Persian Coat Different From Every Other Longhair

    Plenty of cats are longhaired. Very few mat like a Persian. Understanding why makes the rest of the routine make sense.

    Persian cat mat hot spots

    Image source: Bing (Web (fair-use with source credit))

    Guard Hairs vs. That Dense Woolly Undercoat

    A Persian coat has two working layers. The guard hairs are the long, smooth outer strands that give the cat its shape and shine. Beneath them sits a soft, crimped, high-friction undercoat that traps air and holds warmth.

    That undercoat is the culprit. It's fine, it's cottony, and it sheds continuously. The density is so high that shed hair has nowhere to go.

    Compare it to a Ragdoll and the difference is structural. Ragdolls carry a plush coat with far less woolly underlayer, which is why they tolerate weekly brushing. Persians don't get that grace period.

    There's one more factor people forget. Persians are less flexible than most cats and can't reach parts of their own body to self-groom. The tongue barbs that keep a shorthair tidy can't get through 4 inches of wool anyway.

    Self-grooming in this breed mostly delivers hairballs.

    The Nine Mat Hot Spots You'll Check Every Single Time

    Mats don't form randomly. They form where hair rubs hair, where moisture sits, and where the cat can't reach.

    Hot spotWhy it matsHow often to check
    Behind and under the earsConstant head movement, fine hairDaily
    Chin and throat ruffFood, saliva, tear overflowDaily
    Armpits (front legs)Skin-on-skin friction with every stepDaily
    ElbowsPressure point against floors and bedsEvery 2 days
    Belly and groinCat can't reach, contact with surfacesEvery 2 days
    Britches (inner thighs)Leg movement, longest coat on the bodyDaily
    Base of tailTail gland oil, sitting pressureDaily
    Around the anusFaecal contamination, urine dampDaily
    Between the toes and padsLitter, damp, constant frictionWeekly

    If you only have five minutes, spend them on the armpits, britches, behind the ears, and tail base. Those four account for the vast majority of mats that end in a shave-down.

    The back and shoulders? Lowest risk on the whole cat. Which is unfortunate, because they're the bit everyone brushes.

    Doll-Face vs. Peke-Face: Two Different Daily Routines

    Not all Persians need the same face care, and this is where generic advice falls apart.

    A doll-face Persian (also called traditional) has a longer muzzle and a nose that sits below the eye line. A peke-face or extreme Persian has a flat profile, with the nose leather level with the lower eyelids and a deep fold across the bridge.

    That difference changes the daily routine. Flat-faced Persians have shortened and often kinked nasolacrimal ducts, the drainage channels that carry tears from the eye into the nose. When those ducts don't drain, tears spill over the lower lid instead.

    That's epiphora, and it's near-constant in extreme-faced cats.

    The overflow itself isn't dangerous. What sits in it is. Tears contain porphyrins, iron-based pigments that oxidise on contact with air and stain the coat reddish-brown.

    Left damp, that strip of skin under the hair becomes exactly what yeast and bacteria want.

    FactorDoll-face PersianPeke-face Persian
    MuzzleLonger, nose below eye lineFlat, nose level with lower lids
    Tear overflowOccasionalNear constant
    Face cleaningEvery 1 to 2 daysTwice daily
    Nose fold careShallow fold or noneWipe and dry every day
    Eye hair trimmingRarely neededOften needed to keep hair off the cornea
    Dryer toleranceNormal sessionsShort sessions, watch breathing closely
    Restraint toleranceStandardReduced, brachycephalic airway stress

    The handling difference matters as much as the cleaning. Brachycephalic cats have compressed airways and overheat faster under a dryer. The Royal Veterinary College has published extensively on brachycephalic breed health, and the consistent finding is that flat-faced animals have less physiological headroom for heat and stress.

    Practically, that means shorter grooming blocks. Two fifteen minute sessions beat one thirty minute session. If your peke-face is open-mouth breathing or panting, you stop immediately, no matter what's half-finished.

    One more thing worth flagging. If eye discharge suddenly changes colour, becomes thick, or the cat squints, that's not a grooming issue. That's a vet visit.

    Entropion, where the eyelid rolls inward and lashes rub the cornea, appears in some extreme lines and needs surgical correction.

    Reading Your Cat's Coat: Free-Combing, Tangled, Matted, or Pelted

    Everything from here depends on this one call. Four states, four different actions, and getting it wrong is how cats get hurt.

    Coat stateWhat it feels likeWhat you do next
    Free-combingComb reaches skin everywhere, no snagsMaintenance combing, bath and dry as scheduled
    TangledSnags in the coat, hair still separates by handDry line combing today, before any water
    MattedFirm discrete lumps you can lift away from skinSplit and work out, or clip the mat
    PeltedCoat fused into a sheet, no gap to skinClippers only. Book a professional or vet

    The most common error is calling a pelt a mat. The second most common is bathing a cat in state two or three. Water swells the hair shaft and then draws it tight as it dries.

    A tangle that would have combed out dry becomes a solid mat after a bath. Every single time.

    How to Tell a Mat From a Pelt (The Two-Finger Test)

    A mat is a discrete lump. A pelt is a sheet. Here's how to tell in five seconds.

    Slide two fingers underneath the clump, flat against the skin, and try to lift it away from the body.

    • It lifts and moves independently, with loose skin underneath: that's a mat. Workable, with the right technique and patience.
    • It won't lift, and pulling tents the skin up with it: that's a pelt. The coat and the skin are effectively one unit now.

    Do this in several places. Cats often carry mats in one area and true pelting in another, especially along the belly and inner thighs where owners rarely look.

    The reason it matters comes down to anatomy. Feline skin is thin and mobile, roughly 0.4 to 2 mm depending on the site. When you tug a pelt, the skin comes with it.

    When you slide scissors under a pelt, you're almost certainly cutting skin, because the skin is tented directly into the blade.

    There's also a welfare angle people underestimate. A pelt pulls on the skin with every movement the cat makes. The tissue underneath is often bruised, inflamed, sometimes ulcerated.

    Cats hide that pain well. The relief after a shave-down is usually obvious within hours.

    Red Flags That Mean You Stop and Call a Vet

    Some findings during a grooming session are not grooming problems at all.

    • Skin redness, weeping, or open sores under a mat. Trapped moisture and pressure cause real damage.
    • A hard or soft lump under the coat that isn't hair. Never clip blind over an unidentified lump.
    • Live parasites or dark gritty specks. Flea dirt turns red on a damp tissue. Cheyletiella, sometimes called walking dandruff, looks like scurf that moves.
    • Circular patches of hair loss with scaly edges. Possible ringworm, contagious to people, and it needs a vet diagnosis before any groomer will touch the cat.
    • The cat screams, freezes rigid, or bites when one specific area is touched. Localised pain isn't stubbornness.
    • Faecal matting sealed over the anus. A genuine emergency if the cat can't pass stool.
    • Open-mouth breathing, panting, or drooling during grooming. Stop the session, no exceptions.

    The Cornell Feline Health Center and the American Association of Feline Practitioners both emphasise low-stress handling for exactly this reason. A cat that learns grooming means pain will fight harder every session after.

    As of 2026, there's still no federal groomer licensing requirement in the United States, and grooming remains largely unregulated in the UK too. Voluntary certification exists through bodies like the National Cat Groomers Institute of America. A groomer who says "no scissors, no dematting a pelt, we clip" is telling you they know what they're doing.

    The Grooming Decision Tree: Comb, Demat, Clip, or Refer

    You've run the comb test and the two-finger test. Now pick a branch. Work top to bottom and take the first answer that fits.

    Step 1. Is the cat in pain, bleeding, or breathing hard?

    Yes, stop. Vet first, grooming second.

    Step 2. Can you slide a steel comb from skin to hair tip in all nine hot spots?

    Yes, you're on Branch One. Maintenance combing, then bathe and dry on schedule.

    Step 3. Are there snags and tangles, but the hair still separates under your fingers?

    Yes, still Branch One, but do the full dry comb-out today. No water until it's clear.

    Step 4. Are there firm lumps that lift away from the skin with two fingers?

    Yes, Branch Two. Split and work them out, or clip individual mats if they're large.

    Step 5. Do the mats cover more than about a quarter of the body, or has any area fused into a sheet?

    Yes, Branch Three. Clippers. In most cases, that means a professional.

    Step 6. Does your cat bite, panic, or go rigid when handled?

    Then whichever branch you're on, the answer shifts. Book a cat-experienced groomer or ask your vet about sedated grooming.

    Here's the part people resist. Branch Three isn't a failure. A groomer who takes a pelted Persian, clips it, and gets the cat comfortable in forty minutes has done more for that animal than three weeks of well-meant dematting at home.

    BranchCoat stateMain toolRealistic timeDo it yourself?
    OneFree-combing or lightly tangledSteel comb10 to 40 minutesYes
    TwoIsolated, liftable matsComb, mat splitter, clipper30 to 90 minutesYes, with care
    ThreeWidespread matting or peltingClippers, #10 or #7F blade60 to 150 minutesRarely
    ReferAny state plus pain, panic, or skin damageVet involvementVariesNo

    One more branch worth naming. If your Persian is free-combing but you can't commit to combing several times a week, that's a legitimate reason to keep the cat in a short comb cut year-round. A comfortable cat in a teddy bear clip beats a beautiful coat that pelts every autumn.

    Your Tool Kit: What Actually Works on a Persian

    You need fewer tools than the pet aisle suggests. You need better ones.

    greyhound steel grooming comb

    Image source: Bing (Web (fair-use with source credit))

    Why the Slicker Brush Is Quietly Ruining Coats

    A slicker brush has short, fine, angled wire pins set in a flat pad. On a shorthaired cat or a light-coated dog, that's fine. On a Persian, the pins are too short to reach skin through 4 inches of coat.

    So the brush works the top third. It pulls loose guard hairs, fluffs the surface, and leaves a coat that looks freshly done. The undercoat underneath never gets touched.

    There's a second problem. Slicker pins on a dense coat cause brush burn, which is exactly what it sounds like. Fine scratches and irritation from repeated passes over the same spot, usually because the owner is working hard and getting nowhere.

    Slickers aren't useless. They're decent for fluffing a clean, already-combed coat, and some groomers use them lightly on the britches. They're just not a mat prevention tool.

    The Tools Actually Worth Owning

    Build the kit in this order. The first three matter most.

    A stainless steel greyhound comb. Your primary tool, not a backup. Look for one around 7.5 inches with coarse teeth on one half and fine on the other. Teeth need to reach skin, roughly 1.25 to 1.75 inches for a Persian.

    Rounded tips, not sharp points. Premium combs run $40 to $70, and generic stainless combs at $10 to $25 do the job perfectly well.

    A poodle comb or long-tooth rake. Extra-long teeth for the ruff and britches where the coat is deepest.

    A flea comb. Not just for fleas. The fine teeth are ideal for cleaning eye corners and the chin, where a normal comb is too coarse.

    A pin brush. Ball-tipped, for finishing and fluffing after the comb has done the real work.

    Mat splitter. A blade set into a handle that slices a mat into sections without you holding scissors near skin. Far safer than shears in most hands.

    Curved ball-tip safety scissors. For trimming hair away from the eyes and around the paw pads. Ball tips only. The rounded end is what stops a startled cat from taking a point to the eye.

    Nail clippers. Scissor-style gives better control on thick Persian nails than the guillotine design. Keep styptic powder in the same drawer.

    Clippers, if you'll do it yourself. Andis AGC, Wahl KM10, and Oster A5 are the workhorses. Expect $100 to $250 for a decent kit. Blade choice matters more than the clipper body.

    A high-velocity dryer. The one item people skip and shouldn't.

    BladeApprox. cut lengthTypical use on a Persian
    #4F9.5 mmLonger teddy bear clip on a lightly matted coat
    #5F6.3 mmComfortable pet trim, still leaves visible coat
    #7F3.2 mmStandard for a moderately pelted cat
    #101.5 mmFull lion cut, sanitary areas, tight pelting
    #30 / #400.5 mm and underSurgical clipping only. Not for pet grooming

    Never let a #40 blade near a pet groom. It cuts close enough to leave skin exposed and abraded.

    What to Skip

    • Dematting rakes with hooked blades. They cut mats out by force. On thin cat skin, they cut skin too.
    • Rubber curry brushes and grooming gloves. No penetration. Zero effect on a Persian undercoat.
    • Human shampoo or conditioner. Wrong pH for feline skin, which is thinner and more alkaline than ours.
    • Dish soap. Strips the coat completely, leaves the skin raw.
    • Cotton buds for ears. The visible outer ear is fine. Anything down the canal is a job for a vet.
    • Any flea product not labelled for cats. Permethrin-based dog products are seriously toxic to cats, and the US Environmental Protection Agency has issued repeated advisories on exactly this.

    Branch One: Line Combing a Free-Combing Coat

    Line combing separates people who maintain Persians successfully from people who fight them. It's methodical and boring, and it works.

    You part the coat in a horizontal line, comb only the hair below the part, then move the part up half an inch and repeat. Thin layers, from skin outward, until you've covered the whole cat.

    The Method, Step by Step

    1. Get the cat on a raised surface. A grooming table with a non-slip top, or a washing machine with a rubber mat. Height gives you control and saves your back.
    2. Start at the back leg, low down. Never at the head. The most sensitive areas need the cat already settled.
    3. Part the coat horizontally. Push the upper coat up with your free hand and hold it there.
    4. Hold the hair at its base between finger and thumb. This is the trick nobody teaches. Gripping the base means any tug pulls against your fingers, not the cat's skin.
    5. Comb the exposed layer from skin outward. Short strokes. Coarse teeth first, then fine to confirm.
    6. Move the part up half an inch. Repeat.
    7. Work leg, hip, flank, shoulder, chest, ruff, then head last.
    8. Do the belly with the cat sitting up or lying on its side, never forced onto its back.
    9. Finish with the tail, combing it in thin sections outward from the base.

    A full line comb on a Persian in good coat takes 20 to 40 minutes. Daily maintenance on the hot spots takes 5 to 15.

    Troubleshooting Common Snags

    The comb keeps sticking in the same spot. Stop pulling. Work a little cornstarch or a detangling spray into it and separate the hair with your fingers first.

    The cat flips over and grabs the comb. Shorten the session. Two five minute blocks a day beat one twenty minute battle. Cats remember how sessions end.

    Static and flyaway coat in winter. Indoor heating dries the coat out. A light leave-in conditioner spray fixes it and reduces breakage.

    Hair comes out in clumps in spring and autumn. That's coat blow, the seasonal shed. Increase to daily full combs for those weeks.

    You finish and the coat still looks flat. Comb the ruff upward and outward, against the lie of the hair. That's what gives a Persian its shape.

    The Grooming Schedule That Actually Holds

    TaskFrequencyTime needed
    Hot spot check and quick combDaily5 to 15 min
    Full body line combEvery 2 to 3 days20 to 40 min
    Face and eye cleanDaily, twice for peke-face2 min
    Bath and full blow dryEvery 2 to 6 weeks90 min to 3 hours
    Nail trimEvery 2 to 3 weeks5 min
    Ear checkWeekly1 min
    Sanitary trimEvery 4 to 6 weeks10 min

    Branch Two: Splitting and Working Out Isolated Mats

    You've confirmed the mats lift away from the skin. Now here's how to remove them without hurting the cat.

    The golden rule: never comb a mat from the base. Always work from the outer tip inward. Combing from the base drags the whole mat against the skin, which is why so many cats learn to hate grooming after one bad session.

    The Safe Dematting Sequence

    1. Isolate the mat. Comb the surrounding coat clear so you're working on one defined lump.
    2. Grip the hair between the mat and the skin. Pinch firmly at the base. Every pull from here lands on your fingers.
    3. Dust it with cornstarch or work in a detangling spray. Dry cornstarch reduces friction inside the mat and makes it slide apart. Cheapest tool in the kit.
    4. Split the mat into slivers. Use a mat splitter, or the end tooth of the comb, slicing down vertically. Aim for strips no thicker than a pencil.
    5. Comb each sliver from the tip. Tiny strokes at the outer edge, working a millimetre deeper each pass.
    6. Stop every couple of minutes. Move to a different part of the cat. Come back to it.
    7. Confirm with a fine comb once the mat is gone.

    A single stubborn mat can take 10 to 20 minutes. If it's taking longer, it's telling you something. Clip it instead.

    When to Clip a Mat Instead of Combing It

    Clipping is not the coward's option. Sometimes it's the only humane call.

    Clip the mat out if:

    • It's larger than a golf ball
    • It's in the armpit or groin, where skin is thinnest and most mobile
    • The cat has reacted painfully twice in the same spot
    • The mat is wet, dirty, or faecal
    • You've spent 20 minutes and made no real progress

    To clip a mat safely, slide a #10 blade flat against the skin underneath it, teeth pointing away from you, and cut from the base. Never lift the mat away and cut underneath at an angle. Flat blade, flat skin, slow pass.

    And never use straight scissors to cut a mat off. Feline skin tents upward into the blade, and the classic injury is a full-thickness laceration the owner doesn't realise they've made until the cat bleeds.

    After the Mat Is Out

    The skin underneath is often pink, tender, or slightly scurfy. That's normal. Leave it alone and let air get to it.

    The coat will grow back at a slightly different texture for a while, sometimes woollier or lighter in colour. It settles over a few months in most cats.

    Then check that same spot every day for two weeks. Mats recur in the same places, because the friction that caused them hasn't changed.

    Branch Three: A Pelted Coat and Why Clipping Is the Kind Choice

    If the coat won't lift off the skin, there is no comb-out. No product, no spray, no patient hour fixes a pelt. The only humane route is clippers.

    Persian cat lion cut

    Image source: Bing (Web (fair-use with source credit))

    Owners resist this hard, usually out of guilt. "He'll look terrible." "It feels like giving up." Both understandable, both wrong.

    Consider what a pelt does. It's a rigid mat of hair bonded to skin that moves every time the cat walks, jumps, or stretches. It traps moisture, urine, and faeces against the skin.

    Underneath, groomers routinely find bruising, hematomas, and sores.

    Now consider dematting it. Even in expert hands, that means hours of sustained pulling on inflamed skin. It's slower, more painful, and more likely to injure than a 45 minute clip.

    Which is why so-called anaesthesia-free dematting services deserve real suspicion when the coat is pelted.

    What Happens During a Professional Pelt Removal

    A competent cat groomer works under the pelt, not through it. A #10 blade goes flat against the skin at the edge of the pelt, and the whole sheet comes off in one piece, often intact enough to hold up like a jumper.

    The cat is handled in short blocks with breaks. Blade temperature gets checked against the groomer's forearm every 30 to 60 seconds, because blades heat fast and can burn skin in seconds. Anywhere the skin is fragile or tented, the groomer slows right down.

    Expect 60 to 150 minutes for a full pelt removal. Expect the cat to look shocking afterwards. Expect it to move better within the hour.

    Lion Cut, Teddy Bear, or Comb Cut: Picking the Right Clip

    The clip you choose depends on the coat state and how much maintenance you can realistically do afterwards.

    Clip styleWhat's removedBest forRegrowth to full coat
    Lion cutBody shaved to #10, mane, boots and tail plume leftHeavily pelted cats, hot climates, senior cats4 to 6 months
    Teddy bear / kitty cutEven short length all over, usually #5F or #7FModerate matting, tidy uniform look3 to 5 months
    Comb cut (guarded clip)Snap-on comb leaves 12 to 25 mmCats with mats but decent coat, keeping some length2 to 3 months
    Sanitary trim onlyRear, belly strip, paw padsWell-maintained coats with localised problemsWeeks

    A few things to know before you commit.

    Shaved coats offer no sun protection. A clipped Persian, especially a white or pale one, can sunburn through a window. Keep them out of direct sun for a few weeks.

    Post-clipping alopecia happens. Some cats regrow patchy or slowly, particularly seniors. It usually resolves, but flag it to your vet if regrowth stalls past six months.

    The texture may change. Regrowth often comes in woollier, which means it can mat faster for a cycle or two. Stay on top of combing during regrowth, not after.

    Cats get cold. A shaved Persian in a UK winter or an air-conditioned home needs a warm spot and extra blankets.

    Expected Costs

    Prices vary by region and by how bad the coat is, but typical cat-specialist salon pricing sits roughly here as of 2026:

    ServiceUnited StatesUnited Kingdom
    Full groom, bath and blow dry, maintained coat$75 to $150£45 to £90
    Lion cut or full clip$90 to $200£55 to £110
    Pelt removal surcharge+$25 to $75+£15 to £45
    Mobile cat groomer premium+$20 to $50+£15 to £35
    Sedated dematting at a veterinary practice$150 to $400+£120 to £300+

    Most salons also charge a matting surcharge per 15 minutes over the standard appointment. That's not a rip-off. Pelt work is slow, physically demanding, and carries real liability.

    One last consideration on sedation. Flat-faced Persians carry elevated anaesthetic risk compared with longer-muzzled cats. That's a genuine reason to avoid letting a coat reach the point where sedation is the only option.

    Bathing a Persian: The Degrease Step Everyone Skips

    Here's the complaint that comes up more than any other. "I bathed him, I used a good cat shampoo, and he still feels greasy."

    That's not a bad shampoo. That's the wrong first step.

    Persians produce a lot of sebum, and it concentrates in specific places. The chin. The base of the tail.

    Along the spine. A standard shampoo can't cut through it, so it sits on top of the oil and rinses away without doing anything.

    The fix is a dedicated degreasing shampoo as a first lather, before your regular shampoo. Groomers treat this as non-negotiable on Persians, and it's the reason a professional groom feels different from a home bath.

    The Bathing Sequence That Works

    1. Comb the cat out completely first. Not partially. Any tangle left in becomes a permanent mat once water hits it.
    2. Trim nails, do the sanitary area, and check ears. All easier on a dry cat.
    3. Set up before the cat is anywhere near the room. Bottles open, towels out, non-slip mat down, door closed.
    4. Degrease the greasy zones first. Apply to the chin, tail base, and spine. Work it in with your fingertips. Leave it 3 to 5 minutes.
    5. Rinse the degreaser fully. A separate rinse, not a shortcut.
    6. Shampoo the whole cat. Dilute it in a jug, roughly 1 part shampoo to 8 or 10 parts warm water. Diluted shampoo spreads through a dense coat far better than neat product.
    7. Second lather if the cat was very dirty. Rinse between.
    8. Conditioner or cream rinse, diluted. Leave 2 minutes.
    9. Rinse until the water runs clear and the coat squeaks.
    10. Blot with towels. Never rub.

    Total bath time, roughly 20 to 30 minutes. The drying takes far longer.

    Water Temp, Dilution, and Rinsing to Squeak

    Water should be lukewarm, tested on your inner wrist. Cats run warmer than we do, around 38.1 to 39.2 degrees Celsius (100.5 to 102.5 Fahrenheit), so water that feels pleasantly warm to your hand is about right.

    Use a handheld sprayer held close to the body, not a fixed showerhead firing from a distance. Contact spraying is quieter and far less frightening. Keep the pressure low.

    Now, rinsing. Under-rinsing causes more coat problems than almost anything else. Leftover shampoo dries into the undercoat, makes the hair sticky, attracts dirt, and triggers flaking within days.

    The test is simple. Squeeze a section of coat between finger and thumb and slide down. If it squeaks, it's clean.

    If it feels slick at all, keep rinsing. The belly, armpits, and ruff hold product longest.

    Never spray water directly into the face. Wipe the face with a damp cloth instead. Flat-faced Persians can inhale water alarmingly easily.

    Whitening and Bluing for White, Silver, and Cream Coats

    Whitening shampoos work through optical brighteners, not bleach. They deposit a trace of blue or violet pigment that cancels yellow tones, the same way purple shampoo works on blonde hair.

    That's why the traditional name is "bluing." A little goes a long way, and too much leaves a genuine lilac cast on a white coat.

    Use it as your second lather, after degreasing, and follow the dilution on the bottle rather than eyeballing it. Leave it for the stated contact time, usually 2 to 5 minutes, then rinse thoroughly.

    A few realities. Whitening shampoo won't remove tear staining, because porphyrin stains are pigment bonded into the hair shaft. Only growing the hair out or trimming it away clears that.

    It also won't fix yellowing caused by saliva or urine. Address the cause first, then the colour.

    For silver and golden Persians, texturising shampoos are common in the show world. They add slight structure to the hair shaft so the coat stands off the body. Not essential for a pet, genuinely useful for the ring.

    Blow-Drying: Where Persians Are Made or Ruined

    Air-drying a Persian is not an option. It's the mistake that undoes the entire bath.

    A dense double coat can hold moisture against the skin for six to twelve hours. Damp undercoat mats as it dries, because the hair swells, tightens, and locks together. It also creates a warm, wet environment right against the skin, which is how yeast and bacterial problems start.

    So drying isn't the tidy-up at the end. It's half the job.

    High-Velocity Dryer vs. Everything Else

    A high-velocity dryer, sometimes called a blaster, uses a strong air stream rather than heat. That air pushes water out of the coat and separates the hair as it goes. Metro Air Force, K-9, and Double K are the common salon models, running $150 to $450.

    MethodDrying timeMat riskCat stressVerdict
    High-velocity dryer30 to 60 minLowModerate, noise-dependentBest result by a wide margin
    Stand or fluff dryer60 to 90 minLow to moderateLower, quieterGood compromise
    Human hairdryer, low heat90+ minModerateModerateWorkable, burn risk if held close
    Towel and air dry6 to 12 hoursHighLowAlmost guarantees matting

    If you're going to own one expensive tool for a Persian, this is it.

    How to Dry Without Terrifying the Cat

    1. Blot first. Press towels into the coat and lift. Rubbing tangles wet hair instantly.
    2. Start the dryer in another room so the cat hears it before it feels it.
    3. Start at the back feet. Furthest from the face, least alarming.
    4. Keep the nozzle 15 to 20 cm from the body. Closer concentrates airflow onto skin.
    5. Dry and comb at the same time. Air in one hand, comb in the other, working one section until it's bone dry before moving on.
    6. Never point air at the face. Do the head last, lowest setting, nozzle angled across rather than at.
    7. Fluff the ruff upward and outward as you finish it.
    8. Check the skin with your fingertips. If any spot feels cool or damp, it isn't dry.

    Persians take 45 to 90 minutes to dry properly. Show coats take longer.

    Heat, Noise, and Brachycephalic Limits

    Use no heat or the lowest heat setting available. Air movement dries a Persian, not temperature. Cheap dryers with a fixed heating element are the ones that scorch skin, because owners hold them still while working a section.

    Watch the cat, not the clock. Panting, open-mouth breathing, drooling, or a sudden shift from struggling to going limp all mean stop now. Flat-faced Persians hit that point sooner than other cats.

    Break the drying into blocks if you need to. Twenty minutes on, ten minutes off, with the cat in a warm room in between. A partly dried cat you finish an hour later is fine.

    A distressed cat is not.

    For noise-sensitive cats, running the dryer on a low setting in the same room during ordinary evenings, with treats, for a couple of weeks builds tolerance before you ever need it.

    Daily Face Care: Tear Ducts, Nose Folds, and Chin Acne

    Face care is the shortest job in the routine and the one that gets skipped most. Two minutes a day prevents most of the skin problems this breed is known for.

    The Daily Eye Routine

    Do this every morning, and twice daily for flat-faced cats.

    • Soften first. Hold a warm, damp cotton pad against the eye corner for 10 to 15 seconds. Dried discharge crusts hard, and pulling it off takes hair and skin with it.
    • Wipe outward and downward. Away from the eye, never toward it. Fresh pad per eye.
    • Dry the area properly. Damp skin is the actual problem, not the tears themselves.
    • Comb the corner hair with a flea comb to lift out remaining debris.
    • Trim hair that touches the cornea with curved ball-tip scissors, or ask your groomer or vet to do it.

    Plain warm water or sterile saline is enough for daily cleaning. Skip products marketed as tear stain removers that contain tylosin, an antibiotic. Giving a cat low-dose antibiotics cosmetically and long-term is a bad idea, and it contributes to antimicrobial resistance.

    The US Food and Drug Administration has taken action against unapproved tear stain products for exactly this reason.

    Nose Folds and Fold Dermatitis

    The fold across a peke-face Persian's nose traps tears, food, and moisture. Left alone, it develops intertrigo, which is inflammation of skin folds caused by constant damp and friction.

    Wipe inside the fold daily with a damp pad, then dry it completely. That's the whole job. Fifteen seconds.

    Signs it's already gone wrong: a yeasty or sour smell, redness inside the fold, brown greasy debris, or the cat rubbing its face on furniture. That needs a vet, not more wiping.

    Chin Acne and the Greasy Chin

    Feline chin acne shows up as blackheads on the chin and lower lip, sometimes progressing to swollen, sore bumps. Persians are prone to it because the chin sits in food and water constantly, and long hair holds the residue.

    Practical fixes:

    • Swap plastic food and water bowls for ceramic or stainless steel. Plastic scratches and harbours bacteria.
    • Wash bowls daily, not weekly.
    • Wipe the chin after wet food.
    • Keep the chin hair combed with a flea comb.
    • Degrease the chin at every bath.

    Mild cases often improve with hygiene alone. Anything swollen, painful, or draining needs veterinary treatment. Human acne washes are far too strong for cat skin.

    Tear Staining: What Actually Works

    Nothing removes porphyrin staining from hair. Once the pigment is in the shaft, it's there until that hair grows out or gets trimmed.

    What you can do:

    • Keep the area dry so new staining doesn't develop
    • Trim stained hair away gradually at each groom
    • Rule out a medical cause with your vet if overflow suddenly worsens

    Blocked tear ducts, dental disease, allergies, and infections all increase tear production. If your Persian's staining changes noticeably, that's a symptom worth investigating rather than a grooming task.

    Nails, Paw Pads, Ears, and the Sanitary Trim

    These four jobs get forgotten until they cause a problem. All of them are quick.

    Nail Trimming

    Trim every 2 to 3 weeks. Persian nails are thick, and indoor cats don't wear them down enough on their own.

    Scissor-style clippers give better control than the guillotine design. Press gently on the top of the toe to extend the claw, then cut the clear tip only.

    The pink triangle inside the nail is the quick, containing blood vessels and nerve. Stay 2 mm clear of it. On dark nails where you can't see the quick, take tiny slivers off the very tip.

    Keep styptic powder within arm's reach. If you catch the quick, press the powder onto the nail firmly for 20 seconds. Then leave the rest for another day, because the cat will remember.

    Do two or three nails at a time if that's all your cat tolerates. Nobody says it has to be one session.

    Paw Pad Trimming

    Persians grow thick tufts between and under the toe pads. That hair collects litter, gets damp, mats into hard pellets, and reduces grip on hard floors.

    Use a small cordless trimmer with a #10 or #30 blade, or curved ball-tip scissors if you're careful. Spread the toes gently and trim the hair level with the pads. Don't cut into the webbing between toes.

    Check monthly. Older Persians on wooden floors particularly benefit, because tufted pads make them slip.

    Ear Checks

    Weekly visual check, that's it. Persians have relatively small ear openings and heavy furnishings, which reduces airflow.

    Look for dark waxy debris, redness, or smell. Black gritty discharge that looks like coffee grounds points to ear mites and needs a vet diagnosis.

    Clean only the outer ear you can see, with a cat-safe cleaner on a cotton pad. Nothing goes into the canal. Cotton buds push debris deeper and can damage the eardrum.

    The Sanitary Trim

    This is the single most useful preventive trim on a Persian, and most owners have never heard of it.

    A sanitary trim clips the coat short around the anus, under the tail, and along a strip on the lower belly. It takes ten minutes and stops faecal matting, urine scald, and the whole miserable cycle of a cat with a dirty rear grooming itself.

    How it's done:

    • Use a #10 blade or small trimmer
    • Clip a circle roughly 3 to 4 cm around the anus
    • Take a narrow strip along the belly toward the groin
    • Trim the britches shorter on the underside if the cat is long-coated
    • Keep the blade flat and moving, and check its temperature against your forearm regularly

    Redo it every 4 to 6 weeks. For overweight or senior Persians who can't reach that area, this becomes essential rather than optional.

    The Cat Who Fights You: Low-Stress Handling and Kitten Desensitising

    If your Persian bites, thrashes, or freezes, the problem usually isn't temperament. It's that grooming has been painful or overwhelming before, and the cat learned.

    The good news is that this is reversible in most cats. It just takes weeks, not one determined afternoon.

    Why Restraint Backfires

    Scruffing, pinning, and grooming bags feel like control. What they do is remove every option the cat has except panic.

    The American Association of Feline Practitioners' handling guidance is clear. Forceful restraint increases fear, increases the chance of injury to both parties, and makes future handling harder.

    Practical alternatives:

    • Use a towel as a barrier, not a wrap. Drape it, don't burrito the cat.
    • Let the cat keep its feet under it. Cats panic when they lose footing. A non-slip mat does more than a grooming loop.
    • Work in the position the cat chooses. If it wants to lie on its side, comb the side.
    • Stop while it's still going well. Ending on a good note is the entire training mechanism.

    The Short Session Ladder

    Replace one long session with many tiny ones. This is how professionals rebuild a cat that's been badly handled.

    WeekSession goalLength
    1Cat sits on the grooming surface, gets treats, no tools2 min, several times daily
    2Comb resting on the coat, one or two strokes, treat2 to 3 min
    3Comb one easy area fully (back or shoulder)5 min
    4Add one hot spot per session5 to 8 min
    5Dryer switched on in the room, off the cat, treats3 min
    6Dryer on low aimed at the back feet briefly3 to 5 min
    7 onwardBuild toward full sessions10 to 20 min

    Use high-value food. Lickable treat tubes work well because the cat stays in one place while eating. Pair every tool with food, every time, until the tool predicts good things.

    Kitten Desensitising: The Window That Matters

    Start between 8 and 16 weeks if you possibly can. That's when kittens accept new experiences most readily, and a Persian kitten handled properly then becomes an adult that stands still for a bath.

    What to introduce, in short daily bursts:

    • Being on a raised surface
    • Having the comb run over the body, even when there's nothing to comb
    • Feet handled and toes spread
    • Face wiped with a damp pad
    • Dryer noise from across the room, then closer
    • A short warm water rinse in a sink, before any real bath is needed

    Two to five minutes at a time, several times a day. Never more. The goal is boredom, not tolerance.

    When It Still Isn't Working

    Some cats genuinely can't be groomed at home. That's not a failure of effort.

    Signs you've reached that point: the cat urinates or defecates from fear, redirects aggression onto you afterwards, or the sessions leave you both worse off each time.

    Options then, in order:

    1. A cat-only groomer. They handle fearful cats daily and work far faster than you can.
    2. A mobile cat groomer. No car journey, no strange salon, no barking dogs. Often the best choice for anxious cats.
    3. Pre-visit medication from your vet. Increasingly standard practice, and it makes the difference between a traumatic groom and a manageable one.
    4. Sedated grooming at the practice. The last resort, but the right call for a pelted, panicked cat.

    Talk to your vet before assuming your cat is just difficult. Pain is a common hidden reason cats resist handling, and arthritis in older Persians shows up as grooming resistance long before it shows up as limping.

    Grooming Mistakes That Send Persians to the Vet

    Emergency vets and cat groomers report the same handful of injuries over and over. Every one is preventable.

    Scissor Lacerations

    This is the big one. An owner finds a mat, reaches for kitchen scissors, slides them underneath, and cuts.

    The mat is attached to skin. The skin tents up into the blade. What feels like cutting hair is often cutting a flap of skin, and Persians have loose enough skin that you can lift a surprising amount without realising.

    These wounds usually need surgical repair. If it happens, don't dress it or apply ointment. Wrap the cat, apply gentle pressure with a clean cloth, and go straight to a vet.

    The rule is absolute. Straight scissors never go near a mat.

    Clipper Burn and Blade Burn

    Clipper blades get hot fast. A #10 blade running continuously reaches uncomfortable temperatures in under a minute, and cat skin scorches at temperatures that feel merely warm on your hand.

    Check the blade against the inside of your forearm every 30 to 60 seconds. If you hesitate to hold it there, it's too hot for the cat. Swap to a second blade or use a cooling spray.

    Burn shows up hours later as a red, weeping stripe, usually on the belly or inner thigh. It needs veterinary treatment.

    Brush Burn and Over-Working One Spot

    Repeated passes with a slicker over the same patch abrade the skin. It looks like fine scratches or a raw pink patch, and it's usually caused by frustration rather than force.

    If a spot isn't coming clear after a few minutes, move on. Come back later or clip it.

    Bathing Over Mats

    Beyond ruining the coat, this traps water inside the mat against the skin, where it stays for days. That's how you get a hot, macerated patch of skin under a mat that was merely annoying a week earlier.

    Dry first. Always.

    Restraint Injuries

    Cats twist hard when they panic. Groomers report dislocations, tail injuries, and spinal strain from cats fighting a fixed restraint.

    The other risk runs the other way. Cat bites carry a genuine infection risk from Pasteurella and other bacteria. A deep bite to the hand can escalate within 24 hours.

    Wash it immediately and see a doctor if it swells or reddens.

    Product Mistakes

    • Permethrin dog flea products. Severely toxic to cats. Neurological signs, sometimes fatal.
    • Tea tree oil and essential oils. Cats lack the liver enzymes to process many of them safely.
    • Human shampoo and dish soap. Wrong pH, strips the acid mantle, causes flaking and itching.
    • Human acne washes on chin acne. Benzoyl peroxide concentrations are far too high.
    • Alcohol-based ear cleaners. They sting badly and inflame already sore ears.

    Missing Something Serious Under the Coat

    A dense coat hides a lot. Owners regularly discover, mid-groom, a lump, an abscess, a wound, or dramatic weight loss the coat had been concealing for weeks.

    That's an argument for combing, not against it. Regular hands-on grooming is one of the best early detection tools you have. Every session, run your palms over the whole body and note anything new.

    What It Costs: DIY Kit vs. Professional Groomer vs. Sedated Dematting

    The maths here surprises people, and it usually favours doing the maintenance yourself and paying for the occasional professional groom.

    The One-Off DIY Kit

    You don't need everything at once. Build it in stages.

    ItemBudget optionBetter optionPriority
    Stainless steel greyhound comb$10 to $25$40 to $70Essential
    Poodle comb or long-tooth rake$10 to $20$30 to $45Essential
    Flea comb$5 to $10$15 to $25Essential
    Mat splitter$10 to $20$25 to $40High
    Curved ball-tip scissors$8 to $15$25 to $50High
    Scissor-style nail clippers$8 to $15$20 to $35Essential
    Styptic powder$6 to $12SameEssential
    Degreasing shampoo$12 to $20$25 to $40High
    Cat shampoo and conditioner$15 to $30 total$40 to $70Essential
    High-velocity dryer$150 to $250$300 to $450High
    Clipper kit with blades$100 to $180$200 to $350Optional
    Grooming table$70 to $120$150 to $300Optional

    A functional starter kit without a dryer runs roughly $70 to $120. Add a decent high-velocity dryer and you're at $250 to $370. Consumables afterwards cost maybe $60 to $100 a year.

    Professional Grooming Over a Year

    A maintained Persian groomed every six weeks needs roughly nine visits a year.

    ApproachAnnual cost (US)Annual cost (UK)
    Full DIY, kit amortised over 3 years$110 to $190£85 to £150
    Professional every 6 weeks$675 to $1,350£405 to £810
    Professional every 3 months plus DIY combing$300 to $600£180 to £360
    DIY combing, one sedated dematting per year$250 to $550£200 to £420

    That third row is where most sensible Persian owners land. You do the combing, face care, and nails at home. A groomer does the bath, blow dry, and trimming three or four times a year.

    The Hidden Costs of Letting It Slide

    Neglect is the expensive option.

    • Matting surcharges. Charged per 15 minutes over standard time. A pelted cat can add $50 to $150 to a routine groom.
    • Sedated dematting. $150 to $400 in the US, £120 to £300 in the UK, before any pre-anaesthetic bloodwork.
    • Skin treatment. Consultations, antibiotics, and topicals for fold dermatitis or mat-related sores run $80 to $250 per episode.
    • Repeat visits. A coat clipped from a pelt regrows woolly and mats faster, so many cats need two or three closer-spaced grooms during regrowth.

    Cat grooming is slower, riskier, and more skilled than dog grooming, and specialist cat groomers are far rarer. In many regions, waiting lists run three to six weeks. Book ahead rather than calling in a crisis.

    Getting Better Value from a Groomer

    • Turn up with the coat combed out. No matting surcharge, and the groom takes less time.
    • Book standing appointments. Salons prioritise regulars, and the coat never gets bad enough to need extra time.
    • Ask for a sanitary trim every visit. Usually included, and it prevents the worst problems between grooms.
    • Ask about certification. The National Cat Groomers Institute of America certifies cat-specific skills, and City and Guilds qualifications exist in the UK.
    • Ask what they do with a pelt. The right answer is "we clip it."

    Building a Schedule You'll Actually Keep

    Grooming plans fail for the same reason gym memberships do. They're built for the person you wish you were.

    Be honest about the time you have, then design around it. A Persian in a shorter clip with ten minutes of daily combing is far better off than one in full coat with good intentions.

    Pick Your Realistic Tier

    Tier 1: 5 minutes a day. Keep the cat in a comb cut or teddy bear clip, professionally maintained every 8 to 10 weeks. Your daily job is the face, plus a quick comb of the armpits, britches, and tail base.

    Tier 2: 10 to 15 minutes a day. Full coat is achievable. Daily hot spot comb, full line comb every second or third day, professional bath and blow dry every 6 to 10 weeks.

    Tier 3: 20 to 30 minutes a day plus a monthly bath day. Show-standard coat maintenance. Full line combing daily, home bathing and high-velocity drying, whitening products where relevant.

    Most pet owners belong in Tier 1 or 2. Choosing Tier 3 aspirationally and delivering Tier 1 is exactly how coats pelt.

    Anchor It to Something You Already Do

    New routines stick when they're attached to existing ones.

    • Comb the cat while the kettle boils in the morning
    • Face wipe right after you feed them
    • Full comb during a specific TV programme, same night each week
    • Nails on the first and third Sunday of the month
    • Bath day on the first Saturday, always

    Keep the comb in the room where you sit, not in a cupboard upstairs. Friction kills routines faster than anything.

    Seasonal Adjustments

    SeasonWhat changesWhat to do
    SpringCoat blow begins, heavy undercoat sheddingDaily full comb for 4 to 6 weeks
    SummerHeat stress, more bathing, litter sticking to britchesSanitary trim more often, consider a comb cut
    AutumnSecond coat blow, new dense undercoat coming inDaily combing, watch for felting at the skin
    WinterIndoor heating, static, dry flaky skinLeave-in conditioner, longer drying times, keep clipped cats warm

    Humid climates need extra drying discipline. A coat that feels dry on the surface in high humidity is often still damp at the skin, and that's a fast route to matting and yeast overgrowth.

    Cold, dry indoor air does the opposite. It makes the coat brittle and prone to breakage, and static makes hair cling to itself. A light conditioning spray before combing solves most of it.

    The Weekly Checklist

    • Face and eyes cleaned daily (twice daily for flat-faced)
    • Hot spots combed daily
    • Full line comb, 2 to 3 times
    • Ears checked once
    • Whole body hand-check for lumps or sore spots once
    • Litter tray area of the coat checked for staining
    • Nails checked, trimmed if due

    Senior, Overweight, and Rescued Persians: Adjusting the Workflow

    The standard routine assumes a healthy adult cat. Three groups need it modified, and they're the ones most likely to end up pelted.

    Senior Persians

    Cats over about ten years old groom themselves less. Arthritis is the usual reason, and it's widespread in older cats long before owners notice a limp.

    A cat that can't twist to reach its lower back and tail base stops trying. That's why senior Persians so often mat in a band along the spine and around the hips, exactly where their tongue used to reach.

    Adjustments that matter:

    • Shorter, more frequent sessions. Ten minutes twice a day, not thirty once.
    • Support the body. Let the cat stay in whatever position it's comfortable in. Never stretch a limb to get at an armpit.
    • Watch for pain responses. Flinching, tail flicking, or sudden stillness are pain signals, not defiance.
    • Warmer room, shorter dryer time. Older cats lose heat faster.
    • Consider a permanent comb cut. Less coat means less to maintain and less discomfort for a stiff cat.
    • Mention grooming resistance to your vet. New reluctance to be handled is often early arthritis, and modern feline pain management is genuinely effective.

    Skin changes with age too. Senior cat coats often turn greasier and develop more dandruff. Degreasing at bath time matters more, not less.

    Overweight Persians

    An overweight cat physically cannot reach large parts of its own body. The typical picture is a clean front half and a matted rear half, with a sticky, stained area under the tail.

    Priorities for these cats:

    • Sanitary trim every 4 weeks minimum. Non-negotiable.
    • Clip the belly and inner thighs short. These are the areas the cat has zero access to.
    • Check under the tail daily. Not weekly.
    • Watch for skin fold rubbing where extra body weight creates new friction points.

    Then address the cause. Weight loss restores mobility and self-grooming ability, and it's the only permanent fix. Ask your vet for a structured plan rather than just cutting food, because cats need slow, controlled weight loss to avoid hepatic lipidosis.

    Rescued and Rehomed Persians

    Rescue Persians frequently arrive pelted. It's one of the most common presentations in breed rescue, and it's rarely the coat alone that needs attention.

    The sensible order of operations:

    1. Vet check first. Clip work can wait 48 hours. Underlying illness, parasites, and skin infection can't.
    2. Screen for ringworm before any grooming. It's zoonotic and it spreads through a salon.
    3. Clip, don't demat. A rescued pelted cat has often been in pain for months. Get the coat off in one session, under sedation if needed.
    4. Expect the cat to look and behave differently afterwards. Relief is usually visible within hours.
    5. Rebuild trust slowly. Use the short session ladder from scratch, regardless of the cat's age.
    6. Expect woolly regrowth. Comb daily during the regrowth phase, because that new undercoat mats fast.

    One thing to prepare for. Under a heavy pelt, groomers often find a very thin cat. The coat had been hiding the body condition entirely.

    That's information for your vet, not a reason to panic.

    Cats with Skin or Medical Conditions

    Some Persians need a modified routine permanently. Cats with hyperthyroidism, diabetes, or chronic kidney disease often stop grooming and develop greasy, unkempt coats as an early sign.

    If your Persian's coat quality changes noticeably without any change in your routine, treat it as a health signal. A dull, greasy, or matting-prone coat in a cat that used to be easy is one of the most reliable early warnings owners get.

    Frequently Asked Questions

    How often should you bathe a Persian cat?

    Every two to six weeks for a pet Persian, depending on coat condition and how greasy the cat runs. Show cats are often bathed weekly or fortnightly. Always comb the coat out completely first, because bathing over tangles sets them into permanent mats.

    Use a degreasing shampoo first, then a regular cat shampoo, and dry thoroughly with a dryer.

    Can you shave a Persian cat?

    Yes, and for a pelted or heavily matted coat it's the humane choice. A lion cut or teddy bear clip removes the matting in one session instead of hours of painful dematting. Full coat regrowth takes four to six months.

    Clipped cats need protection from sunburn and cold, and regrowth often comes in woollier for a cycle.

    How do I get mats out of a Persian cat without cutting?

    Only attempt it if the mat lifts away from the skin with two fingers. Grip the hair at its base, dust it with cornstarch, split the mat into pencil-thin slivers with a mat splitter, then comb each sliver from the tip inward. Stop after twenty minutes.

    If it hasn't moved, clip it out flat against the skin instead.

    What is the best comb for a Persian cat?

    A stainless steel greyhound comb around 7.5 inches, with coarse teeth on one half and fine on the other. Teeth need to be 1.25 to 1.75 inches long to reach the skin through a Persian's undercoat. Add a poodle comb for the deep ruff and britches, plus a flea comb for the face.

    Skip slicker brushes as your main tool.

    Why does my Persian still look greasy after a bath?

    Because regular shampoo can't cut the sebum Persians build up on the chin, spine, and tail base. You need a dedicated degreasing shampoo applied to those areas first, left on for three to five minutes, then rinsed before your normal shampoo. Under-rinsing causes the same problem, so rinse until the coat squeaks between your fingers.

    How do I clean Persian cat eyes and remove tear stains?

    Soften the discharge with a warm damp cotton pad, wipe outward and downward, then dry the area completely. Do this daily, twice daily for flat-faced cats. Existing porphyrin stains can't be washed out, only trimmed away or grown out.

    Skip tear stain products containing the antibiotic tylosin, and see your vet if overflow suddenly worsens.

    Your Persian Grooming Decision Guide at a Glance

    Everything above condenses into a handful of decisions.

    Start With the Coat State

    What you findWhat it meansWhat you do
    Comb reaches skin everywhereFree-combingMaintain. Comb, bathe, dry on schedule
    Snags that separate by handTangledFull dry comb-out today. No water until clear
    Firm lumps that lift off the skinMattedSplit and comb from the tip, or clip the mat
    Coat fused into a sheetPeltedClippers. Book a professional or your vet
    Redness, sores, lumps, or painMedicalVet first, grooming second

    Then Match the Routine to Your Cat

    Cat profileCoat planDaily commitment
    Healthy adult, doll-faceFull coat achievable10 to 15 min
    Healthy adult, peke-faceFull coat plus twice-daily face care15 to 20 min
    Owner with limited timeComb cut or teddy bear clip5 min
    Senior or arthriticShort clip, gentle short sessions10 min, split in two
    OverweightSanitary trim every 4 weeks, belly clipped5 to 10 min plus daily rear check
    Rescued and peltedClip first, rebuild from scratchDaily during regrowth
    Anxious or aggressiveProfessional or mobile groomer, short home sessions2 to 5 min blocks

    The Non-Negotiables

    • Comb to the skin, not across the surface
    • Check the armpits, britches, behind the ears, and tail base daily
    • Never bathe a cat with tangles or mats in the coat
    • Never take straight scissors to a mat
    • Dry to the skin with a dryer, never air-dry
    • Check blade temperature on your own forearm every 30 to 60 seconds
    • Stop the moment the cat pants, drools, or goes rigid
    • Clean the eye area daily and dry it properly
    • Trim nails every two to three weeks
    • End every session while it's still going well

    The One Question That Sorts Most Owners Out

    Ask yourself honestly how many minutes a day you'll give this, every day, in a busy week. Not your best week. An average one.

    If the answer is five, keep your Persian in a shorter clip and stop feeling guilty about it. If it's fifteen, a full coat is realistic with a groomer handling the baths. If it's more than twenty and you own a high-velocity dryer, you can do the whole thing at home.

    The cats that end up pelted almost never belong to owners who didn't care. They belong to owners who picked a plan built for a life they don't actually have.

    Pick the honest one. Your Persian doesn't care how long its coat is. It cares whether anything hurts.

  • Step-by-step: How to Groom a Maine Coon

    Step-by-step: How to Groom a Maine Coon

    Most owners learn how to groom a Maine Coon the hard way. You brush the top of the coat, it looks glorious, and three weeks later there's a mat the size of a walnut tucked behind an ear. The problem usually isn't effort.

    It's that the fur you can see isn't the fur that mats.

    A Maine Coon carries a double coat: coarse guard hairs sitting over a dense, downy undercoat. Adult males commonly hit 6 to 11 kg, so there's a lot of coat to work through, and the undercoat is where trouble starts. Veterinary guidance for long-coated cats puts routine brushing at several sessions a week, and Coons sit at the demanding end of that scale.

    Here's what's actually happening under those guard hairs.

    how to groom a Maine Coon

    Image source: Bing (Web, fair-use with source credit)

    Quick Answer

    Groom a Maine Coon by combing to the skin twice weekly, minimum. Use a long-tine steel comb, not just a slicker brush. Check the armpits, ruff, britches and tail base each time.

    Separate small mats by hand using detangling spray. Bathe only after the coat is completely mat-free. Trim nails every two to four weeks.

    Why a Maine Coon Coat Mats Faster Than You'd Expect

    Maine Coons aren't the worst-matting breed going. Persians hold that title comfortably. But Coons have a specific structural quirk that catches people out, and it explains almost every "she was fine last week" panic message that lands in a groomer's inbox.

    The double coat problem: guard hairs, undercoat, and what's hiding underneath

    The topcoat is made of guard hairs. They're coarse, slightly oily, water-resistant, and they lie flat and smooth. That's the coat you stroke.

    That's the coat that photographs beautifully.

    Underneath sits the undercoat: soft, fine, crimped hairs packed in tight for insulation. This is the layer that sheds, clumps, and felts together. Because the guard hairs stay glossy on top, a coat can be badly matted underneath while still looking healthy from a metre away.

    Maine Coon double coat

    Image source: Bing (Web, fair-use with source credit)

    Coat length on a Maine Coon is deliberately uneven. The breed standard describes shorter fur over the shoulders that lengthens down the flanks and belly. The Cat Fanciers' Association standard also calls for a full ruff, a heavily furnished britch, and a long flowing tail.

    Every one of those show-ring features is a mat magnet.

    Texture matters too, and it varies cat to cat. A silky coat with plenty of guard hair slides against itself and resists tangling. A cottony or woolly coat, more common in some lines and in cats neutered young, grabs and felts within days.

    If your Coon's coat feels slightly dry and cling-y rather than slippery, assume you're on the higher-maintenance end. Two other factors quietly speed things up:

    • Neutering. Breeder and groomer reports consistently note softer, denser coats after neutering, which mat more readily than an intact cat's coat.
    • Indoor living. Central heating and artificial light disrupt the natural shedding cycle. Plenty of indoor Coons shed steadily all year instead of blowing coat twice.

    The seven zones where mats always start

    Mats form where fur rubs against fur, where the cat can't easily reach, or where moisture sits. Learn these seven spots and you'll catch most problems early.

    ZoneWhy it matsHow often to check
    Armpits and inner elbowsConstant friction with every stepEvery session
    Behind and below the earsFine fur, cat scratches it, saliva sets itEvery session
    Ruff and chestLongest fur on the body, dense underneathEvery session
    Britches and inner thighsLong fur plus friction plus sittingEvery session
    Base of tail and lower backCats over 6 kg often can't reach itWeekly
    Sanitary areaLitter, faeces, urine set the fur solidWeekly
    Between the toesLitter and grit compact into the tuftsWeekly

    Collars deserve a mention. If your Coon wears one, the fur underneath will felt into a solid band unless you slide the collar and comb beneath it every single time.

    The 60-Second Coat Check That Decides Everything

    Before you pick up a single tool, check the coat. This one habit separates owners who never deal with mats from owners who pay for a de-matting appointment twice a year.

    The comb test: does it reach skin?

    Take a metal comb with tines at least 4.5 cm long. Pick a spot on the flank. Push the comb in until you feel it touch skin, then draw it straight out.

    If it glides through and exits cleanly, that patch is fine. If it stops, snags, or lifts a wad of undercoat with it, you've found undercoat build-up or an early mat. Repeat across all seven zones above.

    Now do the same with your fingers. Run your fingertips against the skin through the ruff, armpits and britches. Fingers find flat, fused sheets that a comb sometimes skates over.

    What you're feeling for:

    • Loose fluff that pulls apart easily between two fingers
    • A firm lump that moves independently of the skin
    • A flat, board-like sheet that won't lift away from the body at all

    Then lift the fur and look at the skin underneath any suspect area. Healthy cat skin is pale pink or pigmented, dry, and odourless. Red, damp, sticky, scabbed or foul-smelling skin changes the plan entirely, and that's a vet visit, not a grooming session.

    Tangle, mat, matted patch, or pelt

    These four words describe four completely different situations. Getting the label right tells you exactly what to do next.

    What you've foundHow it feelsCan you fix it at home?
    TangleLoose knot, pulls apart with fingersYes, easily
    MatFirm clump under 2.5 cm, lifts off skinUsually yes, with patience
    Matted patchSeveral mats fused, 2.5 cm or larger, tight to skinSometimes. Assess honestly
    PeltContinuous sheet, skin moves when you tug itNo. Professional clip only

    The mobility test settles most arguments. Slide a fingertip flat between the mat and the skin. If there's a clear gap and the mat lifts, you have working room.

    If the skin comes with it, stop.

    That's not a technique problem you can push through. Feline skin runs roughly 0.4 to 2 mm thick in most body areas. It tents up into a mat and sits directly under whatever tool you're about to use.

    Your Grooming Decision Tree: Which Path Are You On?

    Grooming a Maine Coon isn't one routine. It's four, and which one you're on today depends entirely on what the coat check just told you.

    PathYou foundAction
    AClean comb-through, no snagsRoutine brush-out, 10 to 15 min
    B1 to 5 isolated mats, all mobileDemat by hand, then brush out
    CWidespread matting, large fused patchesBook a cat-specialist groomer
    DPelted, sore skin, cat in painVet appointment first

    Path A: healthy coat, routine maintenance

    If the comb reaches skin everywhere and exits clean, you're maintaining. This is the goal. Comb through two to three times a week, add an undercoat rake during shedding season, and finish with a slicker or bristle brush.

    Ten to fifteen minutes, two or three times a week, keeps a Maine Coon out of trouble almost indefinitely.

    Path B: a few isolated mats you can work out

    If you found a handful of firm mats that lift cleanly off the skin, you can handle these at home. Work them out first, then do the full brush-out. Never brush the rest of the coat and leave the mats for later, because every stroke tightens them.

    Budget one session per mat if the cat is patient, and stop the moment the cat says stop. A mat that's been there a fortnight will still be there tomorrow.

    Path C: widespread matting or early pelting

    If mats have joined into patches, or you're finding new ones faster than you're removing them, hand dematting has stopped being realistic. Pushing on causes real pain and teaches the cat to hate grooming for years.

    Call a groomer who works with cats specifically. Expect a clip rather than a rescue brush-out, and expect it to be the kinder option by a wide margin.

    Path D: pelted, painful, or damaged skin underneath

    If the coat moves as one sheet, or the skin under a mat is red, weeping, hot, or smells sour, the vet comes first. Long-standing pelts cause bruising, moist dermatitis, and in bad cases skin necrosis. There's often infection under there.

    Signs that push you straight to veterinary care:

    • The cat cries, hisses or bites when you touch the area
    • Visible sores, open skin, or discharge
    • A strong sour or yeasty smell
    • Sudden coat deterioration in a cat who used to groom itself
    • Weight loss, lethargy, or reduced mobility alongside the coat change

    A cat who stops self-grooming is usually telling you something medical. Arthritis, dental pain, obesity and kidney disease all show up first as a scruffy coat. Guidance from International Cat Care is clear on this: sudden coat neglect in an adult cat warrants a health check, not just a brush.

    The Tools That Actually Reach a Maine Coon's Undercoat

    Most grooming kits sold for cats are built for a domestic shorthair. They're useless on a Coon. The tines are too short, they never touch skin, and you end up polishing the top of a matting coat.

    greyhound comb and slicker brush

    Image source: Bing (Web, fair-use with source credit)

    The three tools you genuinely need

    Everything else is optional. These three do the actual work.

    ToolWhat to look forJob
    Greyhound-style steel combDual spacing, tines 4.5 to 6.5 cmFinds mats, reaches skin, does the real grooming
    Soft-pin slicker brushFlexible head, coated or rounded pin tipsLifts loose undercoat, finishes the topcoat
    Scissor-style nail clippersSharp, small jaw, good leverageThick Coon nails every 2 to 4 weeks

    The comb is the non-negotiable one. As of 2026, quality steel greyhound combs sit at roughly £10 to £35 or $15 to $45, and a decent one lasts a decade. Use the wide side first to break through, then the fine side to confirm you've got everything.

    Here's the rule worth tattooing somewhere: the comb tells the truth, the brush tells you what you want to hear. A slicker brush can pass over a solid mat and leave the surface looking immaculate. A comb stops dead.

    Tools worth adding for shedding season

    During spring moult and autumn coat change, three extras earn their place.

    • Undercoat rake. Single or double row, blunt-ended teeth. Pulls dead undercoat out of the ruff, flanks and britches without cutting guard hairs. Roughly £8 to £25.
    • Detangling or leave-in conditioning spray. Cat-formulated only. Softens a mat before you touch it and cuts friction on the comb.
    • Mat splitter. A single curved blade for slicing a mat into strips. Useful, but read the safety rules first.

    A blunt-nose curved grooming scissor is handy for paw pad tufts and nothing else. Never use it near the body.

    Tools that do more harm than good

    Some popular products actively damage a Maine Coon coat.

    • De-shedding blades (the toothed-blade style). These cut. Used weekly on a Coon, they shear guard hairs and leave the coat dull, thin and prone to matting. Limited seasonal use at most, light pressure, and never on the ruff or tail.
    • Stiff wire slickers with bare pin tips. They score the skin on the belly and inner thighs. Groomers call the result slicker burn, and it's a genuine welfare issue.
    • Human hairbrushes and cheap plastic brushes. They don't reach past the guard hairs. Pure theatre.
    • Household scissors. They cause most home-grooming injuries vets treat.
    • Dog shampoo. Wrong pH, and some contain permethrin, which is severely toxic to cats.

    If you can only afford one thing, buy the comb. A £15 comb used properly beats a £150 kit used on the surface.

    Path A: The Weekly Brush-Out, Step by Step

    This is the routine that keeps everything else from happening. Done properly it takes 10 to 15 minutes and most Coons genuinely enjoy it.

    Set up first. Quiet room, door shut, non-slip surface, tools laid out within reach. A lick mat loaded with a paste treat buys you three or four minutes of cooperation and turns the whole thing into something the cat looks forward to.

    Line combing, the technique most owners skip

    Line combing is how professionals get through a double coat. Instead of dragging a comb over the surface, you part the coat and work one thin horizontal line at a time.

    1. Lay the cat on their side, or work them standing if they prefer.
    2. Start low, near the belly line, and part the fur horizontally with your free hand.
    3. Comb only the fur below the parting, from skin outwards.
    4. Move the parting up about 2 cm and repeat.
    5. Work your way up the flank until you reach the spine.

    Each pass is small and quick. You're never fighting the whole coat at once, and you'll feel every snag the moment it appears. You should see a clear horizontal line of exposed skin with combed fur falling away below it.

    Working from tolerant areas to sensitive ones

    Order matters more than most people realise. Start where the cat likes being touched and finish where they don't.

    1. Shoulders and back. Almost every cat tolerates this. Warms them up.
    2. Sides and flanks. Line comb properly here.
    3. Chest and ruff. Longest fur, needs the most time.
    4. Neck and behind the ears. Switch to the fine comb, go gently.
    5. Britches and hind legs. Support the leg, don't stretch the hip.
    6. Belly. Short session, light pressure, wide-tooth comb only.
    7. Tail. Hold the base, comb outwards toward the tip.

    Finish with a slicker brush over the topcoat to smooth everything down, then one final pass with the fine comb side. If the fine comb runs clean everywhere, you're done.

    Ruff, britches and belly: the slow zones

    These three areas take longer than the rest of the cat combined. Rushing them is how mats get missed.

    The ruff is dense and deep. Comb upwards and outwards, against the lie of the coat, then smooth it back down. Lift the chin and get underneath, where saliva from self-grooming sets fur into a felted plate.

    The britches need the leg supported. Hold above the hock and comb downward in small sections. Pay attention to the inner thigh where it meets the body, because that crease mats faster than anywhere else on the back end.

    The belly is the sensitivity minefield. Most Coons tolerate about 60 to 90 seconds before the tail starts thrashing. Use a wide-tooth comb, no slicker, minimal pressure, and quit early.

    Watch the tail throughout. A slow swish is fine. A hard thump against the surface means you have seconds left.

    Stop on a good note, give the treat, and come back tomorrow.

    Path B: Safe Mat Removal at Home

    You've found three or four firm mats, they all lift off the skin, and the cat is reasonably relaxed. This is the one situation where home dematting makes sense.

    Work on one mat per session. Trying to clear four in a single sitting is how a cooperative cat becomes a cat who runs when they see the comb.

    Fingers first, detangler second, tools last

    The order here is deliberate, and skipping steps is what causes pain.

    1. Spray the mat. Use a cat-safe detangling or leave-in conditioner. Saturate it properly, not a light mist. Let it soak for two or three minutes.
    2. Isolate the mat. Slide two fingers between the mat and the skin. Keep them there. That's your safety barrier for the rest of the process.
    3. Pull it apart with your fingers. Grip the base of the mat close to the skin with one hand. Tease the outer edge apart with the other. Most small mats loosen at this stage alone.
    4. Work the tip, never the base. Comb the loose ends first, a few hairs at a time. Then move slightly deeper.
    5. Support the skin constantly. Your holding hand takes all the tension, not the cat's skin.
    6. Comb through when it's free. Confirm with the fine comb side.

    A cornstarch trick helps on greasy mats. Rub a small pinch into the mat with your fingers. It absorbs oil, reduces friction, and lets the hairs slide apart.

    Brush the residue out afterwards.

    Never yank. If a mat resists after three or four minutes of finger work, leave it. Come back tomorrow with fresh detangler, or reclassify it as a Path C job.

    Splitting a mat instead of pulling it

    If finger work isn't enough, a mat splitter is the next step up. It's a single curved blade in a handle, designed to slice a mat into narrow strips so you can comb each one out separately.

    • Insert two fingers under the mat, flat against the skin. Every single time.
    • Position the blade vertically, running the same direction as the hair growth.
    • Cut from the outside of the mat inward, in one controlled pass.
    • Make three or four vertical slices, turning one thick mat into several thin strips.
    • Comb each strip out with the wide comb, tip first.

    You're never cutting across the base of the mat. You're only splitting it lengthways so it stops behaving as a solid block.

    A de-matting rake works the same way but with multiple blades. It's faster and removes more coat. Groomer feedback flags these as easy to overuse, and they leave a visible thin patch if you go too far.

    The skin-tenting rule and why scissors are off the table

    Household scissors near a mat are the single most dangerous thing an owner can do. Mats pull the skin up with them. When you slide scissors under a mat, you cannot see that the skin has tented into the space you're cutting.

    Veterinary clinics treat these injuries regularly. The wounds are typically long, clean-edged lacerations in the armpit, groin or flank, and they usually need sutures. The owner almost always says the same thing: they were being careful and felt nothing until the cat screamed.

    The rule is absolute:

    • No scissors flush to the skin, ever
    • No cutting a mat off at its base
    • No blind cuts under a mat you can't see through
    • Blunt-nose scissors are for paw pad tufts only, on a flat surface, with the pad visible

    If a mat genuinely needs cutting off, it needs clippers with a #10 blade laid flat against the skin. A #10 leaves roughly 1.6 mm of coat and can't close on skin the way scissors can. That's a groomer's job unless you already own clippers and know how to use them.

    Stop for the day if any of these happen:

    • The mat won't loosen after several minutes of finger work
    • You find more mats than you started with
    • The cat has escalated from tolerating to struggling
    • The skin under the mat looks pink, shiny or sore
    • You're tempted to reach for scissors

    Path C and D: When to Stop and Call Someone Else

    There's no prize for doing this yourself. A professional clip on a badly matted Coon takes 45 minutes and costs less than a vet bill for a skin laceration.

    The escalation thresholds, in plain terms

    Use these as hard cutoffs rather than judgement calls.

    ThresholdWhat it meansWho to call
    Mat larger than 2.5 cm, fused to skinBeyond hand demattingCat-specialist groomer
    More than 5 or 6 matsCoat maintenance has failedCat-specialist groomer
    Coat moves as one sheetPeltedGroomer, possibly under vet supervision
    Cat screams, bites, or panicsPain responseVet
    Red, weeping, or smelly skinLikely infectionVet first, groom after
    Cat has stopped self-groomingPossible illnessVet
    Faecal matting at the rearHygiene and infection riskVet or groomer, urgently

    That last one moves faster than people expect. Matted fur around the anus can obstruct defecation entirely. If your Coon is straining or you're finding faeces stuck in the britches, book something the same week.

    Cat-specialist groomer vs sedated vet groom

    Not every groomer should touch a Maine Coon, and that's not snobbery. Most high-street groomers are dog groomers who take cats as a sideline. Cats need different handling, different restraint, and different blade work.

    Look for a cat-specialist groomer when:

    • The cat is matted but not in obvious pain
    • They tolerate handling reasonably well
    • The coat needs a clip or a serious de-matting session
    • You want the option of a partial trim rather than a full shave

    Go to the vet for sedation when:

    • The coat is fully pelted
    • The cat has bitten or scratched during previous grooming attempts
    • There's suspected skin damage underneath
    • The cat is elderly, arthritic, or has a heart condition
    • A groomer has already refused the job

    Credentials worth asking about: Certified Feline Master Groomer through the National Cat Groomers Institute, or Fear Free certification. Grooming is unregulated in most of the UK and US, so certification is one of the few real signals you have.

    Ask three questions when you ring round:

    1. How many cats do you groom per week?
    2. Do you groom cats separately from dogs?
    3. What's your policy if my cat becomes distressed?

    A good answer to the third one is "we stop and rebook." A bad answer involves the word "restrain."

    Sedation gets a bad reputation it doesn't deserve. For a pelted cat, sedation means the whole thing is done in one calm session with no fear memory attached. The alternative is multiple traumatic sessions and a cat who fights grooming for life.

    Your vet will run bloods first on an older cat.

    What a lion cut really costs your cat's coat

    A lion cut removes the body coat entirely with a #10 or #7F blade, leaving the mane, lower legs and tail tip. It looks striking. It also has real downsides that get glossed over.

    When a lion cut is genuinely the right call:

    • The cat is pelted and there's no other humane option
    • Chronic matting despite consistent brushing, usually in seniors
    • Obesity or arthritis preventing self-grooming
    • Recurrent faecal matting

    What you're trading away:

    • Regrowth is slow. Cat hair sits mostly in the telogen (resting) phase, unlike dogs. Full regrowth typically takes 3 to 6 months, sometimes longer in Coons.
    • Post-clipping alopecia is real. A minority of cats regrow patchily, or the texture comes back cottony and mats worse than before.
    • The coat insulates both ways. It keeps heat out as well as in. Shaving for summer comfort backfires.
    • Sunburn risk. Pale skin under a removed coat burns, particularly on cats with outdoor access.
    • Clipper nicks. Even skilled groomers occasionally catch loose skin on a pelted cat, because the pelt distorts the body outline.

    A comb cut is the gentler middle option. The groomer uses a snap-on comb attachment over the blade, leaving 6 to 13 mm of coat. It keeps some insulation and looks far less severe.

    For most Coons, a sanitary trim plus a belly clip solves the bulk of the problem without touching the visible coat. Ask about that before you agree to a full shave.

    Bathing a Double Coat Without Making Things Worse

    Maine Coons don't need frequent baths. A well-maintained coat stays clean on its own. Most owners bathe every 6 to 12 weeks at most, and plenty never bathe at all.

    Bathing is worth doing when the coat is greasy, when there's stud tail at the base of the spine, after a flea treatment, or before a show. Otherwise, combing does more good.

    force drying a Maine Coon after a bath

    Image source: Bing (Web, fair-use with source credit)

    Why you never bathe a matted Maine Coon

    Water shrinks a mat. It's the most common bathing mistake, and it's irreversible.

    When a mat gets wet, the fine undercoat hairs swell, then contract as they dry. The mat tightens by roughly a third. What was a workable Path B mat before the bath becomes a Path C clip job after it.

    The sequence is non-negotiable:

    1. Trim nails first
    2. Comb the entire coat to the skin
    3. Confirm with the fine comb, everywhere
    4. Only then, bath

    If you're not confident the coat is completely mat-free, don't get it wet. Use a waterless foam shampoo or grooming wipes on the specific dirty area instead.

    Wet to skin, degrease, rinse until squeaky

    The water-resistant topcoat fights you at the start. Expect the first 30 seconds of wetting to feel like the water is beading off, because it is.

    Setup:

    • Non-slip mat in the sink or bath, which matters more than anything else
    • Water at roughly 37 to 38°C, which is body temperature
    • Water depth no more than 5 to 8 cm
    • Handheld sprayer or jug, held close to the coat
    • Everything within arm's reach before the cat goes in

    The process:

    1. Wet thoroughly. Work the water in with your hand, section by section. Keep the sprayer head touching the coat to cut noise and splash. Avoid the face entirely.
    2. Degrease first if needed. A clarifying shampoo on the tail base, ruff and rear. Leave it on for 3 to 5 minutes.
    3. Shampoo the body. Cat-formulated only. Squeeze it through rather than scrubbing in circles, because circular motion tangles a double coat.
    4. Rinse completely. This takes longer than you think. Rinse until the coat squeaks between your fingers. Leftover shampoo causes itching, dandruff and dull coat.
    5. Conditioner. Optional but helpful on long coats. Rinse it out just as thoroughly.
    6. Final rinse. One more pass, especially the belly and armpits where product collects.

    Never use dog shampoo. Cat skin sits at roughly pH 6.0 to 7.5, and some dog products contain permethrin, which causes severe neurological toxicity in cats. The ASPCA Animal Poison Control Center lists permethrin exposure among the more serious feline poisoning cases they handle.

    Skip anything containing tea tree oil, eucalyptus, citrus, pine or pennyroyal. Cats metabolise phenolic compounds poorly, and essential oils that are harmless on a dog can cause liver damage in a cat.

    For the face: never pour water over it. Use a damp cloth on the chin and around the eyes. That's it.

    Drying is the hard part, not the wash

    Washing takes 15 minutes. Drying takes 45.

    A wet double coat cannot air dry safely. The undercoat traps moisture against the skin for hours. The result is a musty smell, felted undercoat, and in a cold house, a genuinely chilled cat.

    Towel stage:

    • Press and squeeze. Never rub, because rubbing tangles.
    • Work through three or four towels if needed.
    • Microfibre absorbs far more than terry.

    Dryer stage:

    • Use a low, ambient or barely warm setting. Never hot.
    • Keep the nozzle moving constantly, roughly 20 to 30 cm from the coat.
    • Comb as you dry, following the airflow with a wide comb.
    • Work in sections: body first, then legs, ruff last.
    • Point the airflow away from the ears and face at all times.

    A human hairdryer on cool works if you don't own a force dryer, but it takes considerably longer. Cat body temperature runs 38.1 to 39.2°C, so overheating happens faster than people expect. If the cat starts panting, stop immediately.

    Check the undercoat before you let them go. Push your fingers to the skin at the ruff, armpits and britches. If it's damp anywhere, keep drying.

    Some cats will not tolerate a dryer, and that's a legitimate reason to skip bathing altogether. Waterless shampoo and consistent combing keep a Coon perfectly clean.

    Nails, Paw Tufts, Ears, and the Sanitary Trim

    These four jobs take ten minutes combined and prevent problems that are genuinely painful to fix later.

    Trimming thick Maine Coon nails without hitting the quick

    Maine Coon nails are noticeably thicker than the average cat's, which is why scissor-style clippers outperform guillotine models. Guillotine clippers can crush rather than cut a heavy nail.

    1. Hold the paw, press gently on the top of the toe to extend the nail.
    2. Find the quick: the pink triangle of blood vessel and nerve inside the nail.
    3. Cut 2 to 3 mm beyond the quick, taking the sharp hook only.
    4. Cut top to bottom, not side to side, to avoid splitting.
    5. Do a few nails at a time if the cat is impatient.

    On dark nails you can't see the quick. Take small slivers off the tip until you see a chalky white circle appear in the cut face. Stop there, because the next slice hits blood.

    Keep styptic powder or plain cornstarch within reach. If you nick the quick, press the powder onto the nail tip with firm pressure for 30 seconds. It bleeds a lot and looks worse than it is.

    Two things people miss:

    • Dewclaws. Front legs, up on the inside. They never touch the ground, so they never wear down. Left long, they curl into the pad.
    • Polydactyl toes. Many Coons carry the polydactyl trait. Count the nails on every paw so you don't skip an extra one tucked between toes.

    Trim every 2 to 4 weeks. Indoor and senior cats need it more often, because they're not wearing the nails down.

    Paw pad tufts and floor traction

    Maine Coons grow thick tufts between the toes and pads. They're part of the breed's cold-weather design, and indoors they cause two problems.

    They collect litter, which compacts into hard pellets between the toes. And on laminate or tile, long tufts act like little skis. Older Coons with arthritis genuinely struggle for grip.

    Trimming them:

    • Blunt-nose, curved-tip grooming scissors only
    • Press the pad to spread the toes apart
    • Trim the fur level with the pads, not shorter
    • Keep the blade parallel to the pad, never pointing into the webbing
    • Two or three snips per paw is usually enough

    Leave the tufts alone if your cat goes outdoors in a cold climate. They serve a purpose out there.

    Sanitary trims for britches that stay clean

    A sanitary trim is a small clipped area around the anus and under the tail. It's the highest-value trim you can do on a Maine Coon, and it's invisible when the tail is down.

    Long britch fur catches faeces, especially in cats with soft stools, in seniors, and in anyone over about 7 kg who can't fully reach back there. That fur mats solid within days.

    What's involved:

    • Clippers with a #10 blade, held flat
    • A patch roughly 3 to 5 cm around the anus, clipped short
    • Optionally, tidy the length of the britch fur so nothing hangs below the anus
    • Never scissors in this area, for obvious reasons

    Most owners have a groomer do this. It takes two minutes and costs very little as an add-on. If your Coon has recurring hygiene issues, ask for a sanitary trim plus a belly clip at every appointment.

    The belly clip removes the matting hotspot the cat can't reach, and it doesn't change how they look.

    Ears and eyes

    Maine Coon ears carry heavy furnishings, which is exactly what the breed standard asks for. Those tufts trap wax and debris.

    Clean only the visible part of the ear flap. Put a vet-approved ear cleaner on a cotton pad, wipe the folds, and stop at the ear canal opening.

    Never put a cotton bud into the canal. You'll push wax deeper and risk damaging the eardrum. Brown, crumbly, coffee-ground debris usually means ear mites.

    Dark waxy discharge with a smell means a vet visit.

    For eyes, wipe any crust away with a damp cotton pad, using a fresh pad per eye. Cream and white Coons show tear staining more visibly. Persistent staining or watery discharge is worth mentioning to your vet, since it can point to a blocked tear duct or chronic conjunctivitis.

    Grooming a Cat Who Hates Being Groomed

    Most Coons who hate grooming weren't born that way. They learned it, usually from one bad session involving a mat, a rushed owner, and no escape route.

    The good news is that it's fixable. The bad news is that it takes weeks, not one determined afternoon.

    Reading the stop signals before you get bitten

    Cats give clear warnings. Owners miss the early ones and only notice the last one.

    StageWhat you'll seeWhat to do
    RelaxedSoft eyes, slow blink, purring, kneadingCarry on
    Early warningSkin twitching, tail tip flicking, ears rotating backChange area or wrap up
    Clear warningTail thumping, flat ears, dilated pupils, low growlStop now
    Final warningHiss, swat, body tensing, turning to face your handAlready too late
    ShutdownCompletely still, frozen, staring, not resistingStop immediately

    That last row catches people out. A frozen cat looks cooperative. It isn't.

    Freezing is a fear response, and pushing through it does more long-term damage than a cat who swipes and leaves.

    Petting-induced overstimulation is a separate thing worth knowing about. Some cats enjoy grooming right up until a switch flips and they bite. The tail is your tell.

    Watch it constantly.

    Short sessions, lick mats and cooperative care

    The fix is boring and it works: make every session end before the cat wants it to.

    • Cap sessions at 5 to 10 minutes at first
    • End on a good moment, never on a struggle
    • One body area per session if that's all they'll give you
    • Always finish with food or play

    Cooperative care is the technique professionals use. You give the cat a way to say no, and you respect it. In practice:

    1. Show the comb. Treat. Put it away.
    2. Next day: touch the comb to the shoulder. Treat. Stop.
    3. Next: one stroke. Treat. Stop.
    4. Build to three strokes, then ten, then a full area.

    Progress at the cat's pace, not the calendar's. Most cats show meaningful change within two to four weeks of daily short sessions.

    Practical additions that help:

    • Lick mat with a paste treat. Occupies the mouth and creates a positive association. The single most effective tool for a difficult cat.
    • Pheromone diffuser. Plug in 20 to 30 minutes before you start.
    • Time it after a meal. A full, sleepy cat is a compliant cat.
    • Groom where they already relax. Their favourite chair beats a table.
    • Two people. One feeds and talks, one combs. Works remarkably well.
    • The towel wrap. For essential jobs only, wrap the body loosely and expose one area at a time.

    Things that make it permanently worse: scruffing as restraint, holding the cat down, shouting, and chasing a cat who's walked away. Never punish a cat for resisting grooming. They don't connect the punishment to the behaviour, only to you and the comb.

    If your Coon truly can't be groomed at home, that's a valid outcome. Book a Fear Free certified groomer every 6 to 8 weeks and keep up short handling sessions in between.

    Building kitten tolerance that lasts fifteen years

    If you've got a Maine Coon kitten, this is the highest-return work you'll ever do. Kittens don't need much grooming, since the full adult coat doesn't come in until 3 to 5 years. Groom them anyway.

    The point isn't the coat. It's the habit.

    A simple programme from 8 weeks:

    • Week 1 to 2: Handle paws, ears, tail and belly daily. Ten seconds each. Treat after.
    • Week 3 to 4: Add a soft brush. Two or three strokes. Treat.
    • Week 5 to 8: Introduce the metal comb. Short passes over the back and sides.
    • Month 3 onward: Add nail trims, one or two nails at a time.
    • Month 4 onward: Run a hairdryer on cool nearby, not on the kitten, to normalise the noise.

    Ten minutes a week for a few months buys you fifteen years of a cat who lies down when the comb comes out. Owners who skip this and start at three years old, when the coat suddenly needs real work, end up in a much harder position.

    Adjusting Your Routine for Age, Weight, Season, and Climate

    The twice-weekly comb-through is a baseline, not a fixed rule. Four variables move it, and most owners only adjust for one.

    Kittens, adults at full coat, and seniors who can't reach

    Grooming needs change dramatically across a Maine Coon's life, and the hardest years are at the end.

    Life stageCoat stateComb frequencyWatch for
    Kitten, 8 weeks to 1 yearSoft, short, low mat risk1 to 2 times weeklyBuilding tolerance, not coat care
    Young adult, 1 to 3 yearsCoat thickening year on year2 to 3 times weeklyFirst real mats appearing
    Adult, 3 to 8 yearsFull coat, peak volume2 to 4 times weeklyRuff, britches, armpits
    Senior, 9 to 12 yearsGreasier, clumpier3 to 4 times weeklyLower back and tail base
    Geriatric, 13+Self-grooming often stopsDaily short sessionsDandruff, mats, nail overgrowth

    Seniors are where things go wrong quietly. A cat with arthritis in the spine or hips physically cannot twist to reach the lower back, tail base and rear end. Those exact areas start matting, and the owner doesn't notice because the cat looks fine from the front.

    Signs your Coon has stopped grooming themselves properly:

    • Dandruff along the spine and tail base
    • A greasy, clumped, spiky-looking coat
    • Mats appearing in a cat who never had them
    • Overgrown, thickened nails that click on hard floors
    • Fur staining or debris around the rear

    The Cornell Feline Health Center flags reduced self-grooming as one of the earliest visible signs of chronic pain in older cats. Treat it as a symptom, not just a grooming job. A senior with a suddenly scruffy coat needs a vet check for arthritis, dental disease, hyperthyroidism or kidney disease.

    Adjust your handling too. Don't lift the hind leg high, don't stretch the hip, and let them stay lying down. Short daily sessions beat one long weekly one for a stiff, sore cat.

    Spring moult and autumn coat change

    Maine Coons shed twice a year in the classic pattern, though indoor life muddies it.

    • Spring, roughly March to June. The heavy one. The dense winter undercoat comes out in sheets. Some Coons drop their entire ruff and look temporarily scrawny around the neck.
    • Autumn, roughly September to November. Lighter. The summer coat drops and the winter undercoat comes in underneath.

    During spring moult, step up to daily combing and add the undercoat rake. Loose undercoat left in the coat is exactly what felts into mats, and it's also what the cat swallows.

    Hairballs spike in moulting season for that reason. Cats ingest a large share of the hair they shed during self-grooming. More combing means less hair in the stomach and fewer 6am retching episodes.

    If your indoor Coon sheds constantly with no obvious seasons, that's normal. Central heating and artificial light disrupt the photoperiod cues that trigger a proper moult. Maintain a steady three times weekly routine year-round instead of ramping up and down.

    Overweight cats, indoor heating, and hot climates

    An overweight Maine Coon cannot groom their own back end. That's not laziness, it's mechanics.

    Once a cat carries enough body fat to lose spinal flexibility, the belly, inner thighs, lower back and rear become unreachable. Mats form there first, and they keep forming until the weight comes off. A sanitary trim and belly clip are close to essential for these cats.

    Climate changes the picture too:

    • Cold climates (northern UK, Scandinavia, Canada, New England). Heavier undercoat, more dramatic seasonal moult, higher mat risk in winter. Comb more from November to March.
    • Hot and humid climates (Florida, Gulf states, southern Europe, Australia). Thinner undercoat, but more grease and higher yeast and skin infection risk. Bathe more often. Watch skin folds and the chin.
    • Heavily heated homes. Dry air means more static, more dandruff, and a coat that tangles more readily. A humidifier genuinely helps.

    Never shave a Maine Coon for summer heat alone. The coat reflects heat and insulates against it. Removing it exposes pale skin to sunburn and, for outdoor cats, raises heatstroke risk rather than lowering it.

    Provide shade, cool floors and water instead.

    Outdoor Coons need a different check routine. Look for burrs, seed heads, tree sap, road tar and grit in the paw tufts after every outing. Sap and tar need a cat-safe solvent or a groomer, not scissors.

    Mistakes That Cost Maine Coon Owners the Most

    Groomer intake notes and owner-reported problems show the same handful of errors, over and over. Fixing these three alone prevents most matting emergencies.

    Brushing only the topcoat

    This is the number one mistake by a distance. It's also the most understandable, because the coat looks perfect afterwards.

    A slicker brush glides across the guard hairs and pulls out surface fluff. It feels productive. Meanwhile the undercoat six millimetres down is quietly compacting into felt.

    Three months of surface brushing produces a cat who looks magnificent and needs a full clip. The owner is always genuinely shocked.

    The fix: end every single session with the comb, not the brush. If the fine comb side passes to the skin cleanly across the whole body, you're done. If it doesn't, you're not finished, regardless of how good the coat looks.

    Over-using de-shedding blades

    De-shedding tools with a toothed metal blade are cutting tools, not combing tools. That's the part the packaging doesn't emphasise.

    Used weekly on a Maine Coon, they shear the guard hairs. You lose the smooth, water-resistant topcoat that stops the undercoat tangling in the first place. The coat ends up dull, fluffy, and far more prone to matting.

    The damage is slow and cumulative, so owners rarely connect the tool to the problem. They just notice the coat isn't what it was.

    The fix: use an undercoat rake with blunt teeth instead. If you already own a de-shedding blade, limit it to two or three short passes during peak moult, on the flanks only. Never the ruff, never the tail, never weekly.

    Letting a wet double coat air dry

    A Maine Coon's undercoat holds water like a sponge and releases it grudgingly. Left to air dry, the coat can stay damp underneath for six hours or more.

    What happens next is predictable. The damp undercoat felts as it dries and shrinks. You get a musty smell, a wave of new mats within 48 hours, and a cat who's been cold for half a day.

    The fix: if you can't dry the coat properly, don't bathe it. Towel press thoroughly, then dry with airflow and a comb until the undercoat is bone dry at the skin.

    The other mistakes worth naming

    These come up less often but cost just as much.

    • Working a mat from the base. Always start at the tip and work inward. Base-first pulls directly on the skin.
    • One long marathon session. Forty minutes of forced grooming teaches a cat to fear the comb. Three ten-minute sessions achieve more.
    • Combing dry, matted fur. Detangler first, always. Dry combing through a mat is genuinely painful.
    • Ignoring the collar line. Slide the collar and comb underneath every time, or you'll find a felted band.
    • Scruffing to restrain. Current low-stress handling guidance advises against it. It escalates fear and does nothing for cooperation.
    • Cotton buds in the ear canal. Wipe the visible flap only.
    • Skipping the dewclaws. They curl into the pad. This is a preventable vet visit.
    • Waiting for "when I have time." A mat that takes two minutes today takes twenty next week and a clipper in a fortnight.

    Safety Rules Worth Taking Seriously

    Grooming injuries are more common than most owners realise, and nearly all are preventable. These are the ones that actually put cats in a vet's consulting room.

    Skin lacerations, blade heat, and grooming arms

    Feline skin is thin. In most body areas it measures roughly 0.4 to 2 mm, and it's loose enough to tent up several centimetres when pulled.

    Scissor lacerations account for the majority of home-grooming injuries. The mechanism is always the same: skin lifts into the mat, the blade goes underneath, and the cut goes through skin instead of hair. These wounds usually need suturing and sometimes antibiotics.

    There is no safe way to cut a mat off with scissors. Not with care, not with good light, not with a second person holding the cat.

    Clipper blade burn is the second injury type. Blades heat fast, particularly a #10 working through dense coat. Clipper manufacturers advise checking blade temperature frequently and using a cooling spray.

    If you own clippers, touch the blade to your own forearm every 30 to 60 seconds. If it's uncomfortable on you, it will burn the cat. Have a second blade to swap in.

    Grooming arms and nooses carry a strangulation risk. Never leave a cat unattended in one, not even for ten seconds to fetch a towel. Many cat-specialist groomers avoid them entirely and use towel wraps or a second handler instead.

    Other physical risks worth knowing:

    • Slicker burn on the belly and inner thighs from stiff, bare-tipped pins
    • Hip and spine strain from over-extending a senior's back leg
    • Falls from a raised surface, which is why a non-slip mat matters
    • Nail bed bleeding from cutting into the quick

    Shampoos, essential oils, and flea product toxicity

    Cats process chemicals differently from dogs, and grooming products are a real poisoning route.

    Permethrin is the serious one. It's a common insecticide in dog flea treatments, and it causes severe neurological toxicity in cats: tremors, seizures, and death without treatment. Never apply a dog flea product to a cat.

    Keep newly treated dogs separate from cats until the product has dried.

    Essential oils are the second problem. Cats lack sufficient glucuronyl transferase enzyme activity to metabolise phenolic compounds efficiently. Oils that are fine on a dog accumulate and damage the liver.

    Avoid any grooming product containing:

    • Tea tree (melaleuca)
    • Eucalyptus
    • Pennyroyal
    • Citrus oils (d-limonene, linalool)
    • Pine and wintergreen
    • Peppermint and cinnamon

    pH mismatch is less dramatic but still worth avoiding. Human skin sits around pH 5.5. Cat skin runs roughly pH 6.0 to 7.5.

    Human shampoo strips the coat's natural oils and causes flaking and itching.

    Read the label properly. "Natural" and "pet-safe" mean nothing legally. "Formulated for cats" is the phrase you want, and even then check the ingredient list for oils.

    If your cat licks a product they shouldn't have, ring your vet or a poison control service. Don't wait for symptoms.

    When it's a vet problem, not a grooming problem

    Some coat changes are medical. Combing harder won't touch them.

    Book a vet appointment if you see:

    • Bald patches or thinning, particularly symmetrical patches on the flanks or belly
    • Overgrooming or barbering, where the cat licks fur off in strips
    • Circular scaly lesions with broken hairs, which can indicate ringworm
    • Black gritty specks at the tail base, which is flea dirt
    • Scabs along the spine and neck, often a flea allergy
    • A greasy, waxy, swollen area at the base of the tail, which is stud tail
    • Blackheads and swelling on the chin, which is feline acne
    • Skin that's red, hot, weeping or smells sour under a mat
    • Sudden coat deterioration in a previously well-groomed cat

    Ringworm deserves a special note. It's a fungal infection, it's contagious to humans, and grooming spreads it. If you suspect it, stop grooming, isolate the cat, and disinfect every tool.

    Don't move a brush from an affected cat to another pet.

    One more: never attempt to sedate a cat at home. Sedation is a veterinary procedure requiring assessment, monitoring and reversal drugs. Over-the-counter calming products are not sedatives, and human medications are dangerous to cats.

    What Grooming Costs: Tools, Sessions, and De-Matting Surcharges

    Grooming a Maine Coon at home is cheap. Not grooming one gets expensive fast. Here's what the numbers look like as of 2026.

    Tool costs, one-off

    ItemTypical UK priceTypical US priceReplace every
    Greyhound steel comb£10 to £35$15 to $4510+ years
    Soft-pin slicker brush£15 to £40$18 to $503 to 5 years
    Undercoat rake£8 to £25$10 to $305+ years
    Scissor-style nail clippers£8 to £20$10 to $253 to 5 years
    Mat splitter£8 to £18$10 to $225+ years
    Detangling spray£8 to £15$10 to $18Per bottle
    Cat shampoo£8 to £18$10 to $20Per bottle
    Styptic powder£5 to £10$7 to $12Per pot
    Clipper kit (optional)£60 to £250$75 to $3005 to 8 years
    Force dryer (optional)£80 to £300$100 to $3505 to 10 years

    A functional starter kit is a comb, a slicker, nail clippers and detangler. That's roughly £45 to £110 or $55 to $140 total, and it covers everything a well-maintained Coon needs.

    Professional grooming costs

    ServiceTypical UKTypical USHow long
    Full groom, well-maintained coat£45 to £90$60 to $12060 to 90 min
    De-matting surcharge£20 to £60 extra$25 to $80 extraPer 15 min
    Lion cut or full clip£60 to £120$80 to $15045 to 90 min
    Sanitary trim only£15 to £30$20 to $4010 min
    Nail trim only£10 to £20$12 to $255 to 10 min
    Mobile cat groomer, at home£60 to £120$80 to $15060 to 120 min
    Sedated groom at a vet practice£150 to £400$200 to $500Half day

    Prices vary by region. Expect the higher end in London, the South East, and major US metros. Feline-only groomers charge a premium and are worth it.

    The real cost comparison

    Here's the arithmetic that makes the case for home combing.

    Owner A combs twice weekly and books a professional groom twice a year. Annual cost: roughly £120 to £180 in grooming, plus a one-off £60 tool kit.

    Owner B brushes the surface occasionally, notices matting at six months, and needs a de-matting groom. Annual cost: two clips at £90 plus de-matting surcharges, so £220 to £300. And the cat loses its coat twice.

    Owner C lets the coat pelt. Sedated veterinary groom at £250 to £400, plus a possible skin infection consult and antibiotics at £60 to £150. The cat spends three to six months regrowing coat.

    The gap between Owner A and Owner C is well over £300 a year, and that ignores the welfare difference entirely.

    Where it's worth paying a professional

    Even diligent owners benefit from an appointment two or three times a year. Groomers do things that are genuinely difficult at home:

    • Sanitary trims with clippers
    • Belly clips on a cat who won't lie still
    • Proper degreasing baths with a force dryer
    • Nail trims on a cat who fights you
    • Spotting coat and skin issues early

    Think of it as maintenance support rather than a replacement for the routine. The combing is still your job.

    Grooming Schedule and Escalation Cheat Sheet

    Everything above, condensed into something you can act on this week.

    The baseline routine

    TaskFrequencyTime
    Comb-through to the skin2 to 3 times weekly10 to 15 min
    Seven-zone mat checkEvery session60 seconds
    Undercoat rake, moulting seasonDaily to every other dayAdd 5 min
    Nail trimEvery 2 to 4 weeks5 min
    Ear flap wipeMonthly, or as needed2 min
    Paw tuft trimEvery 6 to 8 weeks3 min
    Sanitary trimEvery 6 to 8 weeksGroomer, 10 min
    BathEvery 6 to 12 weeks, if needed60 min including drying
    Professional groomEvery 3 to 6 monthsBooked

    Adjust upward for seniors, overweight cats, cottony coats and cold climates. Adjust downward only for kittens.

    Escalation at a glance

    Run this in order every time you groom.

    1. Comb reaches skin everywhere, clean pass. Continue the routine.
    2. Snags or loose fluff building up. Increase frequency. Add the undercoat rake.
    3. One to five mobile mats. Detangler, fingers, mat splitter if needed. One mat per session.
    4. Mats over 2.5 cm, or fused to skin. Book a cat-specialist groomer this week.
    5. Coat moves as one sheet. Groomer for a clip. Don't attempt anything at home.
    6. Sore, red, weeping or smelly skin. Vet first. Grooming after treatment.
    7. Cat in pain, screaming, or biting on contact. Vet. Assume pain until proven otherwise.
    8. Cat has stopped self-grooming entirely. Vet health check, not just a groom.

    The three rules that matter most

    • Comb to the skin, or you haven't groomed. The brush is for finish. The comb does the work.
    • Never put scissors near a mat. Skin tents into it. Every time.
    • Stop before the cat wants you to. Short and frequent beats long and forced, permanently.

    Get those three right and a Maine Coon coat is genuinely easy to maintain.

    Frequently Asked Questions

    How often should you brush a Maine Coon?

    Two to three times a week is the minimum for a healthy adult coat. Move to daily during spring moult, and daily for seniors or overweight cats who can't reach their back end. Each session takes 10 to 15 minutes.

    Frequency matters far less than whether your comb actually reaches the skin.

    Do Maine Coons need baths?

    No, not routinely. A well-combed Maine Coon stays clean without bathing, and many never have one. Bathe only when the coat is genuinely greasy, after flea treatment, for stud tail, or before a show.

    That's roughly every 6 to 12 weeks at most. Always demat completely first, because water shrinks mats permanently.

    Can you shave a Maine Coon in summer?

    You shouldn't, unless there's a medical or matting reason. The double coat insulates against heat as well as cold, and shaving exposes pale skin to sunburn. Regrowth takes 3 to 6 months, and some cats regrow patchy or cottony fur that mats worse.

    Offer shade, cool floors and water instead.

    What's the best brush for a Maine Coon?

    The most important tool isn't a brush at all. It's a greyhound-style steel comb with tines 4.5 to 6.5 cm long, which is the only thing that reliably reaches the undercoat. Pair it with a soft-pin slicker brush for finishing.

    Add an undercoat rake during shedding season.

    How do you get mats out of a Maine Coon without cutting?

    Saturate the mat with cat-safe detangling spray and wait three minutes. Slide two fingers between the mat and the skin as a barrier. Tease the outer edge apart with your fingers, working the tip first.

    Comb through when it loosens. If it resists after four minutes, stop and book a groomer.

    Why does my Maine Coon suddenly hate being brushed?

    Sudden resistance usually means pain, not stubbornness. Check for hidden mats pulling the skin, sore or scabbed areas, and overgrown nails. Arthritis makes handling the hips and back legs genuinely uncomfortable for older cats.

    If the coat and skin look fine, book a vet check before assuming it's a behaviour problem.

  • Step-by-step: How to Bathe a Sphynx Cat

    Step-by-step: How to Bathe a Sphynx Cat

    Your Sphynx cat's skin feels like warm suede, but it leaves an oily film on everything it touches. That's not a flaw. It's biology.

    Without fur to absorb the sebum your cat produces naturally, the oil builds up quickly, mixing with dead skin cells, dust, and litter debris. Left alone, that mixture turns into a brown, waxy residue that smells, stains your furniture, and clogs your cat's pores.

    Learning how to bathe a Sphynx cat correctly is the most important grooming skill you'll develop as an owner. Get it right, and your cat's skin stays healthy and comfortable. Get it wrong, and you'll trigger the exact problems you're trying to prevent: dry patches, acne, infections, and a cat that dreads bath time.

    As of 2026, veterinary dermatologists still recommend a simple, consistent bathing routine over any expensive skincare line. Your goal isn't to strip every drop of oil. It's to manage the buildup before it becomes a problem.

    how to bathe a Sphynx cat

    Image source: Bing (Web (fair-use with source credit))

    Quick Answer

    Bathe your Sphynx every 1 to 2 weeks using warm water at 98 to 100°F and a veterinarian-formulated cat shampoo. Wet the body, lather gently, rinse thoroughly, and dry completely with warm towels. Never use human shampoo.

    Trim nails first. Clean ears after. Watch for skin irritation.

    Why Bathing a Sphynx Is Different (and Why It Matters)

    Sphynx cat skin oil buildup

    Image source: Web (Bing) / 12thblog.com (Web image (fair-use with source credit))

    Most cats never need a bath. Their coats handle oil distribution naturally. A Sphynx doesn't have that luxury.

    With no fur to wick sebum away from the skin, the oil sits right on the surface, where it collects everything. This isn't a hygiene failure on your part. It's a genetic reality of the breed.

    The skin of a Sphynx is also more delicate than it looks. You're working with a surface that's exposed to the world 24/7 without any protective layer. The skin barrier, the outermost layer that locks in moisture and blocks irritants, is doing double duty.

    When you bathe too aggressively or use the wrong products, you damage that barrier.

    What Is Sebum and Why Does It Matter?

    Sebum is the natural oil your cat's skin produces. In a furred cat, it travels down the hair shaft and keeps the coat conditioned. In a Sphynx, there's nowhere for it to go.

    The result is exactly what you see on your cat's skin: a slick, sometimes sticky film that picks up dust and dander. This buildup is called a sebaceous film, and it's completely normal. However, the rate at which it accumulates varies wildly between individual cats.

    Some Sphynxes need a bath every 5 days. Others go 3 weeks without looking greasy.

    Sphynx breeders consistently report that diet plays a major role in oil production. Cats on high-protein, low-carbohydrate diets tend to produce less sebum than cats eating kibble with heavy grain fillers. That's not a universal rule, but it's worth noting if your cat gets greasy unusually fast.

    What Happens When You Don't Bathe

    Skipping baths entirely leads to a predictable set of problems. The oil film thickens. Dead skin cells pile up.

    Blackheads form, especially on the chin, tail, and back. You may also notice a yeasty, musty smell, which signals that bacteria or yeast are multiplying in the trapped moisture.

    This isn't just cosmetic. The buildup can clog hair follicles, causing folliculitis, an inflammation that looks like small red bumps. In severe cases, the skin becomes so irritated that your cat starts scratching, which breaks the skin and opens the door to secondary infections.

    Research from the Cornell Feline Health Center emphasizes that feline skin health depends heavily on maintaining a balanced microbiome. Over-washing disrupts that balance just as much as under-washing does. The goal is moderation, not sterilization.

    The Sphynx Skin Barrier and pH

    Here's where things get technical, but it matters. A cat's skin pH hovers between 6.0 and 7.5. Human skin sits at a more acidic 4.5 to 5.5.

    Human shampoo is formulated for that acidic environment. When you use it on a cat, it strips the skin barrier far too aggressively. The result is dry, flaky skin that itches, plus a rebound effect where the skin overproduces oil to compensate.

    That's why your Sphynx can end up greasier after a human shampoo wash than before it.

    Always choose a shampoo explicitly labeled for cats, ideally one designed for sensitive or hairless breeds.


    How Often Should You Bathe a Sphynx? (The Short Answer)

    There's no single schedule that works for every Sphynx, and anyone who tells you otherwise is simplifying too much. The truth is that bathing frequency depends on your individual cat's oil production, diet, environment, and skin condition.

    Start with a baseline of once every 1 to 2 weeks. Then adjust based on what you observe. If your cat's skin looks slick and feels oily at day 6, you're in the every-week camp.

    If your cat stays relatively clean for 2 weeks or more, stretch the interval.

    Reading Your Cat's Skin Signals

    Your Sphynx's skin tells you exactly when it needs a bath. You just have to know what to look for.

    • The touch test. Run your hand across your cat's back. If your palm comes away with a visible shine or a sticky residue, it's bath time.
    • The smell test. A clean Sphynx has a neutral, almost warm smell. A musty or sour odor means the sebum is starting to break down and harbor bacteria.
    • The appearance test. Look for a brownish film on the skin, especially around the ears, chin, armpits, and groin. That's oxidized sebum mixed with dead skin cells.
    • The transfer test. If your cat leaves an oily mark on dark clothing or your white sheets, the buildup is already significant.

    If the skin feels rough and flaky, you're bathing too often or using a harsh product. If the skin feels slick and looks shiny, you're not bathing often enough.

    Seasonal Adjustments

    Summer heat increases sebum production across most Sphynx cats. Warmer temperatures mean more oil, which means more frequent baths. During humid summer months, you may need to shift to a weekly schedule just to keep up.

    Winter brings the opposite challenge. Cold, dry air can make skin flaky and irritated. Many owners find their Sphynx needs fewer baths in winter, and those baths should use a conditioner to lock in moisture.

    Breeder forums and veterinary dermatology resources consistently report seasonal variation in sebum output. Your cat's skin is not static. It responds to its environment, and your routine should too.

    Age and Life Stage

    Kittens under 6 months old produce less sebum than adults. Their skin is also more sensitive. Start with baths every 3 to 4 weeks and increase the frequency gradually as your kitten matures.

    Senior Sphynx cats often develop drier skin. Bathing every 2 to 3 weeks with a moisturizing shampoo is usually adequate. If you notice persistent flakiness, consult your vet rather than just adding more baths.

    Individuals with skin conditions like dermatitis or fungal infections need a veterinary-prescribed schedule. That schedule may involve medicated shampoos and a completely different frequency than what works for a healthy cat.


    What You'll Need: The Sphynx Bathing Checklist

    cat-safe shampoo for Sphynx

    Image source: Bing (Web (fair-use with source credit))

    The right tools make bath time manageable for both of you. Gather everything before you start. There's nothing worse than wrestling a wet, slippery cat while you scramble for a forgotten towel.

    Essential Supplies

    Here's your complete checklist, broken down by category.

    CategoryItemWhy It Matters
    CleanserCat-safe shampoo (veterinary formula or oat-based)Matches feline skin pH, gentle on sensitive skin
    CleanserCat-safe conditioner (optional)Adds moisture back for dry or flaky skin
    Tub setupNon-slip rubber matPrevents slipping, reduces panic and injury risk
    Tub setupCup or handheld sprayerControls water flow, keeps water out of the face
    Drying2 to 3 microfiber towelsAbsorbs much more water than cotton, speeds drying
    PrepNail clippersPrevents scratches during handling
    PrepCotton ballsBlocks ear canals, absorbs excess moisture
    AftercareCat-safe ear cleanerRemoves wax, prevents infection
    ComfortTreats or squeeze tube of wet foodRewards calm behavior, builds positive association

    Choosing the Right Shampoo

    The safest choice is a shampoo specifically formulated for sensitive feline skin. Look for labels that say oatmeal-based, hypoallergenic, or specifically for hairless breeds.

    What you want to see in the ingredients:

    • Oatmeal (colloidal oatmeal calms irritation)
    • Aloe vera (soothes and moisturizes)
    • Glycerin (humectant that pulls moisture into the skin)

    What you must avoid at all costs:

    • Any human shampoo, including baby shampoo
    • Tea tree oil (toxic to cats even in small amounts)
    • Essential oils, including lavender, eucalyptus, and citrus
    • Flea and tick shampoos unless a vet has prescribed them
    • Products with artificial dyes or strong fragrances

    Manufacturer specifications for many cat shampoos indicate a dilution ratio. "Concentrated" formulas often need a 1:1 mixture with warm water before application. Check the label.

    Applying undiluted concentrate can be too harsh.

    Water Temperature and Depth

    Fill the tub or sink with about 3 to 4 inches of warm water. The temperature should sit between 98 and 100°F (36 to 38°C). That's body temperature for a cat.

    Test the water with your wrist or elbow, the same way you would for a baby. If it feels neutral, not hot and not cold, it's right. Water that's too hot risks scalding your cat's sensitive skin.

    Water that's too cold triggers stress and shivering.

    Your cat's comfort during the bath is as important as the cleaning itself. A cat that associates bath time with discomfort will fight harder next time. A calm, warm experience builds tolerance and trust.


    Step-by-Step: How to Bathe Your Sphynx Without the Drama

    Now we get to the actual process. Every step matters, and skipping preparation is the fastest way to turn bath time into a wrestling match. Follow this sequence every time so your cat knows what to expect.

    Pre-Bath Preparation

    Trim your cat's nails before the bath, not after. A wet Sphynx is slippery and understandably unsteady. If your cat decides to protest, those claws are your primary injury risk.

    Clean the ears before the bath using cotton balls and a cat-safe ear cleaner. You should not be trying to clean ears while your cat is wet and stressed.

    Brush the skin gently with a soft mitt or your hands. This dislodges loose dead skin cells and gets the sebum moving so the shampoo can work more effectively.

    Step 1: Set Up the Bathing Area

    Close the bathroom door and window. You want a draft-free environment. Fill the tub or sink with your 3 to 4 inches of warm water and place the non-slip mat on the bottom.

    Have everything within arm's reach. Shampoo, conditioner, cup, towels, cotton balls, all of it. You should never have to step away from your cat once the bath starts.

    Step 2: Wet the Body Gently

    Place your cat in the water and use your cup or handheld sprayer to slowly wet the body from the neck down. Pour water over the back, sides, and legs.

    Do not pour water directly over the head. The face gets cleaned separately with a damp cloth. Aim to thoroughly wet the body while keeping the head dry.

    Step 3: Apply Shampoo and Lather

    Squeeze a small amount of shampoo, about a nickel-sized drop, into your palm. Dilute it with a little water if the label calls for it.

    Work the lather into your cat's skin starting at the neck and moving down the back. Use gentle, circular motions with your fingertips. Pay special attention to the armpits, groin, chin, and the base of the tail.

    These are high-sebum zones where buildup happens fastest.

    Do not scrub. The skin is sensitive, and aggressive rubbing causes micro-irritation. Keep the massage light and thorough.

    Step 4: Wash the Face

    Dip a clean washcloth in plain warm water and wring it out until damp. Wipe the face gently, focusing on the chin, around the nose, and the area around the eyes.

    You can use a tiny amount of shampoo on the cloth for the chin if acne is present. Rinse the cloth thoroughly and wipe again to remove any soap residue.

    Never apply shampoo directly to the face or eyes. The risk of irritation is too high.

    Step 5: Rinse Thoroughly

    This is the most skipped step, and it's arguably the most important. Shampoo residue left on the skin is a major irritant.

    Use your cup or sprayer to rinse the body with clean warm water. Cover every inch you lathered. Keep rinsing until the water running off your cat runs clear with no suds.

    Use your fingers to gently squeeze excess water out of the skin folds. This dislodges trapped soap and speeds up the drying process.

    Step 6: Squeeze and Towel Dry

    Lift your cat out of the tub and wrap it immediately in a dry microfiber towel. The moment your cat is out of the water, heat loss begins, so speed matters.

    Press the towel against the skin to absorb water. Don't rub. Rubbing breaks this sensitive skin and tangles any remaining dead skin cells into clumps.

    Use a second dry towel to finish the job, especially in the folds. Armpits, groin, chin, and the tail base need special attention. Moisture trapped in these areas creates a perfect environment for fungal and bacterial growth.

    If the room is warm and your cat tolerates it, you can finish with a low-heat hairdryer on the cool or warm setting. Hold it at least 12 inches from the skin and keep it moving constantly. Never hold it still over one spot.

    Step 7: Post-Bath Care

    Once your cat is dry, clean the ears again. The moisture from the bath can push wax deeper into the ear canal. Use a cotton ball with cat-safe ear cleaner and wipe the visible outer ear only.

    Reward your cat immediately with treats or a squeeze tube of wet food. This positive reinforcement builds the association that bath time ends with something good.

    Keep your cat in a warm, draft-free room for at least 30 minutes after the bath. Wrap a warm towel around your cat if the room is cool.


    Common Mistakes That Irritate Sphynx Skin

    Sphynx cat ear cleaning

    Image source: Bing (Web (fair-use with source credit))

    Even experienced Sphynx owners make mistakes. The good news is that most are easily corrected once you know what to look for. Here are the most common pitfalls, ranked by how often they cause problems.

    Over-Bathing and the Rebound Oil Effect

    Bathing too frequently is the number one mistake. When you strip the skin of all its natural oil, the sebaceous glands panic and overproduce to compensate.

    The result is a cycle that's hard to break. You bathe because your cat is greasy. The bath strips everything.

    The skin produces more oil than before. A week later, your cat is greasier than when you started.

    Consistent over-bathing also damages the skin barrier. The skin loses moisture faster, becomes dry and flaky, and the flakes mix with the excess oil to create a sticky paste that's harder to clean than normal sebum.

    The fix is simple: space out your baths and monitor your cat's natural oil cycle. If your cat is oily by day 5, you're over-bathing or using a shampoo that's too harsh. Try extending the interval by a few days.

    Using Human Shampoo

    Human shampoo is the second most common mistake. The pH mismatch strips the skin barrier and causes the rebound effect we just discussed.

    Baby shampoo isn't the safe alternative it's often made out to be. It's still formulated for human skin and human pH. It may be milder than adult human shampoo, but it's still wrong for a cat.

    Stick with veterinary-formulated cat shampoo. The pH is matched to feline skin, and the surfactants are gentle enough for a species that lacks a protective fur coat.

    Water in the Ears

    Sphynx cats have large, open ears that are prone to wax buildup. It's tempting to clean them aggressively during bath time, but that's a mistake.

    Water that gets trapped in the ear canal creates a warm, moist environment where yeast and bacteria thrive. Ear infections in Sphynx cats are common, and many of them start with a bath.

    Prevent this by placing a cotton ball gently in each ear before the bath. Just enough to block water entry, not so deep that you can't remove it. Then clean the ears thoroughly after the bath with a drying ear cleaner.

    Skipping the Rinse

    Shampoo residue is an invisible irritant. It dries on the skin, causes itching, and attracts dirt.

    Owners in a hurry often half-rinse their cats. The lather looks gone, but soap is still trapped in the skin folds. The cat starts scratching a few hours later, and the owner assumes the shampoo was too harsh.

    The fix is to rinse for twice as long as you think is necessary. Squeeze the skin folds while rinsing to flush out trapped soap.

    Inadequate Drying

    A damp Sphynx is a cold Sphynx. Without fur, they lose body heat rapidly.

    More importantly, a damp Sphynx is a fungal risk. Moisture trapped in skin folds can cause ringworm and other fungal infections within 24 hours. These are miserable to treat and highly contagious to other pets.

    Dry your cat with towels until every fold is dry. If your cat tolerates it, finish with a low-heat hairdryer for complete peace of mind.

  • Step-by-step: How to Bathe a Cat Without Getting Scratched

    Step-by-step: How to Bathe a Cat Without Getting Scratched

    Most cat baths go wrong in the first ninety seconds. Learning how to bathe a cat without getting scratched has very little to do with shampoo technique and almost everything to do with setup, timing, and knowing when to quit. Cats don't scratch out of spite.

    They scratch when they feel trapped, off balance, or ambushed.

    The American Association of Feline Practitioners handling guidelines make the point vets follow daily: minimal restraint, short handling windows, and secure footing prevent more injuries than any grip ever will. Two targets are worth memorising now. Keep total handling under 10 minutes.

    Keep water between 100 and 102°F (38 to 39°C), which is roughly your cat's own body temperature.

    how to bathe a cat without getting scratched

    Image source: Bing (Web (fair-use with source credit))

    Quick Answer

    Bathing a cat without getting scratched starts days before the water. Trim the nails, brush out every mat, and warm the room. Use two people, a non-slip mat, and shallow warm water.

    Keep total handling under 10 minutes. Stop at once if your cat pants, drools, or goes limp.

    First, Answer This: Does Your Cat Actually Need a Bath?

    Here's the part generic advice always skips. Most cats never need a full water bath.

    A healthy cat spends a large share of its waking hours grooming itself. The tongue is covered in backward-facing keratin spines called filiform papillae. They work like a built-in comb, wicking saliva down to the skin and pulling out loose hair and debris.

    Soaking a cat that's already doing that job well costs you skin oils, trust, and possibly blood.

    So the honest starting point isn't "how do I bathe my cat." It's "why am I bathing my cat."

    The four reasons a bath is genuinely necessary

    If your situation isn't on this list, you probably don't need water at all.

    • Contamination. Something is on the coat that the cat must not swallow. Motor oil, paint, tar, antifreeze, sticky trap glue, garden chemicals, or a dog's spot-on flea product applied by mistake.
    • A medical protocol. Your vet has prescribed a medicated shampoo or dip, such as chlorhexidine and miconazole for skin infections, or lime sulphur for ringworm (Microsporum canis). These need proper contact time and rinsing.
    • Soiling the cat can't fix. Diarrhoea stuck to the britches, urine scald, post-surgical mess, or a long-haired cat who's sat in the litter box.
    • A cat who can't self-groom. Sphynx and other hairless breeds accumulate skin oil with no coat to absorb it. Senior, arthritic, and overweight cats often can't reach the tail base or hindquarters at all.

    The situations where a bath makes things worse

    Water is the wrong tool more often than people expect. If any of these apply, stop and change plan.

    SituationWhy water is the wrong moveWhat to do instead
    Matted or pelted coatWet mats tighten against the skin, causing pain and soresDemat or clip first, then bathe
    Permethrin or unknown chemical exposureSome toxins need specific decontamination, and absorption may already be happeningCall your vet or a poison line immediately
    Suspected ringwormThe wrong product spreads spores around the houseVet-directed protocol only
    Cardiac, renal, diabetic, or hyperthyroid catsRestraint stress carries real physiological riskVet or Fear Free certified groomer
    Brachycephalic breeds (Persian, Exotic Shorthair)A wet face plus stress means genuine breathing difficultyProfessional groomer with proper drying setup
    Recent surgery or open woundsContamination and stitch damageFollow discharge instructions, spot clean only
    Kittens under four weeksThey can't regulate body temperature yetDamp cloth on soiled areas, dry immediately

    If your cat has come into contact with something toxic, the US Environmental Protection Agency publishes guidance on pet pesticide products, and the ASPCA Animal Poison Control Center runs a 24-hour line at 888-426-4435. Ring first, wash second. Some products get worse when you scrub them.

    The 60-Second Version: What Stops Most Scratches

    If you read nothing else, read this. In our review of veterinary handling guidance and professional feline grooming practice, the same short list turns up again and again. Ranked roughly by how much difference each one makes.

    1. Trim the nails two to three days before. Blunt claws still hurt. They don't open skin the same way.
    2. Brush the coat out completely while it's dry. Non-negotiable for anything longer than a shorthair.
    3. Use two people. One holds and reassures, one washes. Solo bathing is where most injuries happen.
    4. Give the cat solid footing. A rubber mat or a folded towel in the sink. Slipping is the biggest panic trigger.
    5. Keep the water shallow. Three to four inches. A cat who can stand is a cat who isn't fighting for its life.
    6. Set everything up before the cat enters the room. You should never have to walk away or reach for something mid-bath.
    7. Work fast and stop early. Under 10 minutes. A rushed but calm bath beats a thorough one that ends in a bite.

    Notice how much of that happens before you turn on a tap. That's the whole point.

    Why Cats Fight Baths (And What That Tells You About Restraint)

    Cats aren't afraid of water in some mysterious way. Plenty of them will paddle a tap, sit in a wet shower tray, or fish ice cubes out of a glass. What they hate is the combination of being wet, being held, and having nowhere to put their feet.

    A cat's whole defensive strategy depends on escape. Take away traction and remove the exits, and you've removed both of its options. The only thing left is the claws.

    There's a second layer. A soaked coat loses its insulating loft, so the cat gets cold fast. Cold plus restrained plus confused reads as genuine danger.

    That's why a warm room and warm water aren't luxuries. They cut the panic at the source.

    Why vets stopped scruffing

    Grabbing the loose skin at the back of the neck used to be standard. It isn't any more, and the reason is straightforward.

    The limp reflex you see in kittens fades early. In an adult cat, scruffing doesn't produce calm. It produces a fear response that looks like calm from the outside.

    The cat freezes because it's overwhelmed, not because it's relaxed.

    Meanwhile the front legs are still free, the hind legs are completely free, and nothing is supporting the cat's body weight. Modern feline handling guidance does the opposite. Support the weight, keep the cat close to a surface, use a towel to limit movement rather than a grip on skin.

    Less restraint, less struggle. It sounds backwards and it works.

    The escalation ladder: growl, hiss, spit, strike

    Cats warn you. The trouble is that the early warnings are quiet, and people miss them until the loud ones arrive.

    Roughly in order, escalation looks like this:

    • Freeze. The cat goes still and stops blinking normally.
    • Tail. A flick becomes a thump becomes a lash.
    • Ears. Rotating sideways, then flattening back against the skull.
    • Pupils. Dilating wide even in a bright bathroom.
    • Skin ripple. Twitching along the back, fur standing up along the spine and tail.
    • Voice. A low growl, then a hiss, then a spit.
    • Contact. A swat with claws out, then a bite.

    Two things worth knowing. A frightened cat can skip several rungs and go straight to contact. And a cat that's been ignored at the quiet stages learns to stop bothering with them.

    That's how people end up with a cat that "attacks with no warning."

    Your Condition Variables: Six Things That Change the Whole Approach

    There is no single correct way to bathe a cat. Six factors decide which method you should use. Run through them honestly before you commit.

    Coat type and matting

    Run your fingers all the way down to the skin, especially in the armpits, groin, belly, and the britches behind the back legs. Feel any firm lump or tight tangle? That's a mat, and water will make it worse.

    • Shorthaired, no mats: a full bath is workable.
    • Semi-long or long hair, fully combed out: workable, but plan for drying time.
    • Any matting or pelting: clipping comes first, and that usually means a groomer.

    Age, weight, and mobility

    An arthritic 14-year-old can't brace itself in a slippery sink. An overweight cat may struggle to stand at all when the footing gives.

    Older cats chill faster and take longer to recover from stress. If your cat is over about 10, or clearly stiff, keep the bath shorter, the water warmer, and the drying gentler. Often a warm damp cloth on the greasy areas does the whole job.

    Health status and breed breathing risk

    Flat-faced breeds have compressed airways at the best of times. Add a wet face and a stress response and you can push a Persian or Exotic Shorthair into real respiratory distress.

    Cats with heart disease, kidney disease, diabetes, or hyperthyroidism carry genuine risk from a big adrenaline surge. Same for any cat with a history of stress-triggered cystitis. A bad bath can set off a flare within a day or two.

    Temperament and handling history

    Be realistic here, not hopeful. Can you already trim this cat's nails? Does it tolerate being held for 60 seconds?

    Has it ever bitten during handling?

    A cat that has never been handled much, or a recently adopted or semi-feral cat, is not a home bath candidate yet. The first bath sets the template for every bath afterwards, and a traumatic one is very hard to undo.

    Why you're bathing

    Routine cleanliness allows flexibility. You can bathe half the cat today, stop, and finish tomorrow. A medicated protocol doesn't, because contact time and full coverage matter clinically.

    Toxin removal is urgent, which changes the calculation again.

    How many people you've got

    This is the variable people ignore, and it's arguably the most important. A full water bath needs one hand on the cat, one on the sprayer, and one on the shampoo. You have two.

    If you can't get a second pair of hands, adjust the method rather than pushing through. There are decent solo options, and we cover them further down.

    The Decision Tree: Which Method Fits Your Cat

    Work through this in order. The first branch that matches is your answer.

    If this is trueThen your branch is
    Toxic substance, permethrin, ringworm, or a sick catBranch D: vet first
    The coat is matted or pelted anywhereBranch C: groomer
    The cat is fearful, unhandled, senior and frail, or brachycephalicBranch C: groomer
    Only spot soiling, a greasy patch, or light dustBranch B: waterless
    Healthy, combed out, tolerates handling, two people availableBranch A: home bath
    Healthy and combed out but you're aloneBranch B first, then A with help later

    Branch A: full water bath at home, two people

    Use this when your cat is healthy, calm enough to hold for a couple of minutes, fully brushed out, and you have a helper. This is the classic sink bath done properly. With the prep right, it's genuinely uneventful.

    The shape of it is simple. Shallow warm water, non-slip footing, one person supporting the cat's chest and shoulders, one person washing from the neck backwards. Face done with a damp flannel only.

    Branch B: waterless foam or damp-cloth spot clean

    Use this when the problem is localised, when your cat won't tolerate immersion, or when you're on your own. It's underrated and it solves maybe half of all real-world "my cat needs a bath" situations.

    • Dry shampoo foam or mousse: work into the coat, wipe out with a towel, comb through. No rinsing.
    • Cat grooming wipes: good for paws, tail base, and a light overall wipe-down.
    • Warm damp flannel: the simplest option for a soiled patch. Blot, don't scrub.
    • Plain unscented cornstarch: absorbs grease in a small area, then brush out thoroughly.

    Skip anything containing tea tree, melaleuca, pine, or citrus oils. Essential oils and phenolic compounds are poorly metabolised by cats and genuinely dangerous, whatever "natural" claim is on the bottle.

    Branch C: professional cat groomer

    Use this for mats, difficult temperaments, double coats you can't dry properly, and any cat where you've already had one bath go badly.

    Look for a cat-only salon or a groomer with feline-specific credentials. As of 2026, groomer licensing is still patchy. Only a handful of US states regulate the trade, and UK qualifications are voluntary rather than mandatory.

    Ask about feline experience specifically, not a generic pet grooming certificate.

    Typical prices sit around $50 to $120 in the US and £40 to £90 in the UK for a bath, dry, nail trim, and sanitary tidy. A full lion cut on a matted cat costs more.

    Branch D: vet visit first

    Use this when the bath is medical, when the cat is medically fragile, or when the cat's stress level makes safe handling impossible.

    A vet offers two things you can't. First, a diagnosis. A greasy coat, dandruff, or overgrooming often signals an underlying problem that a bath won't touch.

    Second, pre-visit medication. Gabapentin and trazodone are commonly used off-label to take the edge off feline handling stress, and licensed pregabalin oral solution exists in several markets.

    There's no shame in a sedated groom for a cat who genuinely can't cope. It's often kinder, safer, and cheaper once you've factored in antibiotics for an infected bite.

    Prep Work Starting Three Days Out

    The bath itself is the easy part. Everything that decides whether it goes well happens in the days beforehand.

    Think of it as removing reasons to scratch, one at a time. Blunt claws, no mats, a familiar sink, a warm room. Each one you tick off makes the actual wash shorter and calmer.

    cat grooming brush and slicker

    Image source: Bing (Web (fair-use with source credit))

    Nail trim timing and nail caps

    Trim two to three days before the bath, not on the day. Doing both in one session stacks two stressful handling events back to back, and the second always goes worse.

    Use scissor-style clippers rather than the guillotine type. Press gently on the toe pad to extend the claw, and take off only the clear hook at the tip. The pink triangle inside is the quick, and it bleeds freely if you clip it.

    • Keep styptic powder within reach in case you nick a quick.
    • Do the front paws first. Those are the ones that catch you.
    • If your cat objects, do two claws a day over a week rather than forcing all ten.
    • Back claws matter less for scratching, but they help the cat grip a slippery sink.

    Soft nail caps (glued vinyl covers) suit a cat that needs frequent medicated baths. They last four to six weeks and blunt the tips completely. They're not a substitute for good handling, but they take the sting out of a bad moment.

    Declawing is not on this list and never should be. It's an amputation of the last toe bone and is banned or restricted in much of the world.

    Brushing out before water touches the coat

    Brush the whole cat dry, all the way to the skin. Not a quick surface stroke over the back.

    Water turns a loose tangle into a solid felted pad. Once that happens, the mat pulls on the skin every time the cat moves. It also traps moisture underneath, which leads to sores.

    This is the most common way a well-meant home bath causes actual harm.

    Work in this order:

    1. Slicker brush over the body to lift loose undercoat.
    2. Greyhound comb (metal, wide teeth one end, fine the other) through the same areas to find what the brush missed.
    3. Check the danger zones by hand: armpits, groin, belly, behind the ears, the britches, and the base of the tail.
    4. Any mat you find: work it apart with fingers and a mat splitter, or stop and book a groomer.

    Never cut a mat out with scissors. Cat skin is thin and mobile, and it lifts into the blade far more easily than you'd think. Lacerations from owner dematting are a routine emergency presentation.

    Desensitising the sink or tub

    Give your cat three or four short, boring, positive sessions in the bathing spot before the real thing. Sixty seconds each is plenty.

    • Day one: put the cat in the dry, empty sink on a towel. Treat. Lift out after 20 seconds.
    • Day two: same thing, with the tap running quietly nearby but not on the cat.
    • Day three: dampen the towel with warm water so the paws feel wet footing. Treat, lift out.

    Aggregate feedback from feline grooming professionals points to the same pattern. Cats who've stood in the sink calmly a few times do noticeably better than cats who meet it for the first time already covered in shampoo.

    A synthetic facial pheromone spray helps some cats. Spray the towels and the room 15 minutes beforehand so the alcohol carrier evaporates. Don't spray it directly on the cat.

    Setting Up the Bathroom So Nothing Goes Wrong

    Here's the rule that prevents most bath disasters. Once the cat is in the room, you never leave, never turn your back, and never reach for something you forgot.

    That means the setup has to be complete before the cat arrives. All of it.

    Water depth, temperature, and the non-slip surface

    Fill the sink or tub before you bring the cat in. Running water hitting a hard basin is a major startle trigger, and doing it with the cat already in your arms is asking for a launch.

    SettingTargetWhy it matters
    Water depth3 to 4 inches (7 to 10 cm)The cat can stand. Standing cats don't panic-swim
    Water temperature100 to 102°F (38 to 39°C)Matches feline body temp. Cold water triggers thrashing
    Room temperature75 to 80°F (24 to 27°C)A wet cat loses heat fast
    Container heightChest height for youBending over a deep tub wrecks your control
    DraughtsZeroClose the door and the window

    Test the water on the inside of your wrist. If it feels neutral rather than warm, it's about right. Anything that feels pleasantly hot to you is too hot for a cat.

    The non-slip layer isn't optional. A rubber or silicone mat in the base of the sink, or a folded bath towel, gives the claws something to hold. When a cat can grip, it stops trying to grip you.

    A useful trick for anxious cats: put a plastic laundry basket or storage tub inside the bath, and put the cat in that. Four walls, solid footing, a sense of containment. You can pour water straight through the slots.

    The full kit list, laid out within arm's reach

    Everything on this list goes on a towel next to the sink before the cat walks in.

    ItemSpec or note
    Cat shampoopH-appropriate for feline skin, pre-diluted in a squeeze bottle
    Two rinse jugsFilled with warm water, ready to go
    Non-slip matRubber or silicone, cut to fit the basin
    Three towelsOne to wrap, one to blot, one dry spare
    Damp flannelFor the face and ears. Plain water only
    Cotton ballsResting at the ear opening, never pushed into the canal
    Metal combFor combing the damp coat afterwards
    TreatsHigh value. Lickable tubes work well
    Mesh bathing bagOptional, depending on your cat

    Dilute the shampoo before you start. Most cat shampoos are concentrates, and manufacturer instructions commonly specify somewhere in the range of 1:8 to 1:16 with water. Diluted product spreads through the coat faster and rinses out far more easily, which cuts your handling time.

    Never use human shampoo, baby shampoo, or dish soap. Feline skin sits at roughly pH 6 to 7.4 and human skin around 4.5 to 5.5, so human products strip the acid mantle and leave the skin flaky and itchy. Dish soap is worse, since it's engineered to remove fat.

    Assigning the holder and the washer

    Decide roles out loud before you start. Confusion mid-bath is how hands end up in the wrong place.

    The holder stands at the cat's head end. Their job is to support the chest and shoulders, keep the cat facing away from the washer, and talk quietly. They also call the stop.

    The washer works from the neck backwards, one hand always in contact with the cat's body. They handle shampoo, water, and rinsing, and they never make a sudden move toward the head.

    If the cat starts turning to face the holder, that's a request for reassurance, not an escape attempt. Let it tuck its head against the holder's forearm. A cat with its face buried has stopped scanning for threats.

    The Two-Person Bath, Step by Step

    Total target time from first splash to towel: under 10 minutes. Set a timer if you're the type who loses track.

    Towel burrito vs mesh bathing bag

    Both work. They suit different cats.

    A towel wrap (the burrito or scarf wrap) means folding the cat into a towel so only the head, or the head and one section of body, stays exposed. You unwrap one area at a time, wash it, and re-cover. Best for cats who calm down when their body is contained, and for medicated washes done in stages.

    A mesh bathing bag encloses the cat with a drawstring at the neck and lets water and shampoo pass through the fabric. Best for fast, whole-body washes and for cats who fight a towel. The downside is slower rinsing, since the mesh holds product.

    cat towel wrap restraint

    Image source: Bing (Web (fair-use with source credit))

    Whichever you use, the towel or bag replaces a tight grip. Your hands stay soft and supportive, and the fabric does the limiting.

    Lowering the cat in and wetting from the shoulders back

    Carry the cat in wrapped or bagged, and lower it rear feet first. Hind paws touching a solid surface tell the cat it's landing, not falling.

    Let it stand for a few seconds before you do anything else. A cat that has found its footing is already halfway to cooperating.

    Wet the coat with a jug or a low-pressure hand sprayer held right against the fur. Contact matters. A sprayer held six inches away sounds and feels like rain, which is alarming.

    Held against the skin, it just feels like warm pressure.

    Start at the shoulders and work backwards toward the tail. Then the legs, then the belly last. Leave the head and neck completely dry for now.

    Lather, contact time, and rinsing until clear

    Apply the diluted shampoo along the spine and massage down and outward. Use flat palms and finger pads, not fingertips digging in.

    • General cleaning shampoo: lather, then rinse straight away.
    • Medicated shampoo: most veterinary products need 5 to 10 minutes of contact time. Check the label. Keep the cat warm and wrapped in a damp towel during the wait.
    • Flea shampoo: these are EPA-registered pesticide products in the US. Follow the label exactly, and never use one labelled for dogs.

    Rinse until the water runs completely clear, then rinse once more. Residue matters more than people realise, because a cat licks its whole coat dry afterwards and swallows whatever you left behind. Leftover shampoo also causes itching and flaking days later, which people then misread as dry skin.

    Squeeze water out of the coat with your hands as you go. Less water in the fur means less drying time.

    Face, ears, and eyes, cloth only

    Never pour water over a cat's head. Not once, not carefully, not "just a bit."

    Water in the ear canal is a genuine route to otitis externa, and water over the face triggers the strongest panic response you'll see all bath. Use a warm damp flannel with plain water and wipe the face, around the eyes, and the outer ear flaps.

    For greasy chin acne or tear staining, a tiny amount of tearless product on the cloth is fine. Wipe, then wipe again with a clean wet corner to remove it.

    Rest a cotton ball at each ear opening before you start if you like. Never push anything into the canal.

    Drying Without Creating a New Fear

    More cats are lost at the drying stage than the washing stage. The bath is over, the human relaxes, and then a roaring hot dryer arrives out of nowhere.

    Wet cats get cold fast, and a chilled cat is a stressed cat. Speed matters, but method matters more.

    Towel-blotting, dryer noise, and heat limits

    Blot, don't rub. Rubbing tangles a damp coat and creates the mats you spent three days preventing.

    Wrap the cat in the first towel and press firmly. Swap to a dry towel after 30 seconds, then a third. Three dry towels remove far more water than one soggy one, and it costs you nothing but laundry.

    If you use a dryer, follow these rules:

    • Low or no heat only. Cats can't shed heat through the skin the way we do, and dryer burns are a documented grooming injury.
    • Keep it moving. Never hold the airflow on one spot.
    • Stay about 12 inches away and never point it at the face.
    • Start it in another room so the cat hears it before it feels it.
    • Stop if the cat pants. Open-mouth breathing during drying is heat stress until proven otherwise.

    Many cats do better with no dryer at all. A warm, draught-free room, a stack of dry towels, and 30 to 60 minutes of quiet works fine for a shorthaired cat. Double-coated and long-haired cats are the exception, since a dense undercoat can stay damp for hours and encourage skin problems.

    Combing damp coat to stop post-bath matting

    Comb the coat through while it's still slightly damp, not bone dry. Almost everyone skips this, and it's why long-haired cats often come out of a bath matted a week later.

    A wet coat dries in whatever direction you leave it. Comb it flat and it dries flat. Leave it swirled and clumped and it dries into felted knots at the roots.

    Use the metal comb, work in the direction of hair growth, and pay attention to the armpits and britches again. Two minutes here saves a dematting session later.

    Then leave the cat alone. Somewhere warm, with food and a familiar bed. Most cats do a marathon self-grooming session, sulk for an hour or two, and are entirely normal by evening.

    Don't chase them for cuddles.

    Abort Signals: When to Stop Immediately

    Knowing when to quit is the most underrated skill in cat handling. A bath you abandoned at 60% is a minor inconvenience. A bath you pushed through is a bite, a vet visit for you both, and a cat that fights every future attempt.

    cat stress body language signs

    Image source: Web (Bing) / pethealthlove.com (Web image (fair-use with source credit))

    The stop-now list

    Any single one of these means you stop washing, wrap the cat, and get it out of the water.

    • Open-mouth breathing or panting. Cats don't pant to cool off the way dogs do. Here it signals severe stress or heat overload.
    • Drooling. Sudden salivation is a fear and nausea response.
    • Fully dilated pupils in a bright room.
    • Silence after screaming. A cat that was vocalising and has gone quiet isn't calming down. It's shutting down.
    • Going limp. Tonic immobility looks like surrender and is closer to a freeze response. Push on and you'll often get an explosive reaction seconds later.
    • Frantic climbing up the sink wall, up your arm, over the holder's shoulder.
    • Any bite attempt, even one that misses.
    • Uncontrolled shaking, or gums that look pale.

    How to stop safely

    Don't just let go. That's how a wet, frightened cat ends up bolting through the house or up your leg.

    1. Wrap the cat in a dry towel, front legs included.
    2. Lift it out and set it on a stable surface, still wrapped.
    3. Leave it wrapped for 30 seconds without looming over it.
    4. Open the towel and step back. Let the cat leave on its own terms.
    5. Close the bathroom door behind it and leave it alone.

    Rinse off any remaining shampoo with a damp cloth once the cat has settled. If you can't, a small amount of residue is a much smaller problem than a serious injury. Ring your vet for advice if it was a medicated or pesticide product.

    Then reassess honestly. A cat that hit an abort signal once will very likely hit it again. That cat belongs with a Fear Free trained groomer or a vet team, ideally with pre-visit medication on board.

    Bathing a Cat Alone When You Have No Second Pair of Hands

    Sometimes there's no helper available. You can still do this, but you have to change the method rather than attempt the two-person bath with one person.

    The core problem is simple. A solo bath means one hand is always occupied holding the cat, which leaves one hand to do a two-hand job. So the fix is removing tasks from that second hand.

    Set up so nothing needs a free hand

    • Pre-fill two jugs of warm water. You'll pour with one hand, no tap fiddling.
    • Pre-dilute shampoo in a squeeze bottle with a flip cap you can open with one thumb.
    • Use a bathing bag or a laundry basket in the tub. The container does the containing so you don't have to.
    • Wear long sleeves and drape a towel over your forearms. Not armour, just a buffer.
    • Put a towel on the floor by your feet so you can wrap the cat the second you lift it out.

    The one-arm brace hold

    Stand at the cat's side, not in front of it. Slide your non-dominant forearm along the cat's chest so your hand cups the far shoulder. The cat's body rests against your forearm, and your elbow blocks it from backing out.

    That grip supports weight instead of pinning. Your dominant hand is now free to pour, lather, and rinse. Work backwards from the shoulders as usual, and keep the cat's head pointing away from your face.

    Break the bath into sessions

    You don't have to do the whole cat in one go. Aggregate feedback from cat groomers points to a pattern worth copying: two short sessions beat one long fight.

    Day one: back half only. Rear legs, tail base, britches. Wrap, dry, treat, done in four minutes.

    Day two: front half and belly. Same length, same routine.

    The cat learns that a bath is short, predictable, and survivable. That's how you build a cat that tolerates the sink at all.

    When solo simply isn't the answer

    If any of the following apply, switch to waterless cleaning or a professional.

    • The cat has ever bitten you during handling.
    • You're bathing for a medical protocol that needs full coverage and timed contact.
    • The cat weighs over about 15 lb (6.8 kg) and is strong.
    • You've got a long or double coat that needs proper drying.
    • You've had one bath already go badly.

    One person plus a determined 12 lb cat is not a fair fight, and you're the one with thin skin and no fur.

    Mistakes That Cause Most Bath Scratches

    Almost every scratch traces back to a handful of avoidable errors. Here they are, roughly in order of how often they show up.

    MistakeWhat actually happensFix
    Skipping the dry brush-outMats tighten, the cat feels pain and lashes outComb to the skin days before
    Deep waterThe cat can't stand, panic-swims, climbs you3 to 4 inches only
    Cold or hot waterInstant thrashing response100 to 102°F (38 to 39°C)
    No non-slip footingSlipping triggers the grab reflexRubber mat or folded towel
    Filling the sink with the cat presentStartle response before you've begunFill first, then fetch the cat
    ScruffingFear freeze, then explosive reactionTowel wrap and body support
    Water on the headThe strongest panic trigger there isDamp flannel for the face
    Forgetting an item mid-bathYou reach, the cat bolts, claws landFull kit within arm's reach
    Pushing past a warning signalEscalation to a biteStop at the first abort signal
    Loud dryer straight afterThe cat learns baths end badlyTowel first, dryer introduced slowly

    Less obvious errors worth knowing

    Bathing right after a stressful event. A vet visit, a house move, a new pet, or fireworks night. The cat's stress bucket is already full, and the bath tips it over.

    Doing it when you're rushed or irritated. Cats read tension in your hands and voice with uncomfortable accuracy. If you're already annoyed, reschedule.

    Using too much shampoo. More product means more rinsing, and rinsing is the slowest part of the bath. Diluted product cuts handling time by minutes.

    Holding the sprayer away from the coat. The noise and the sensation of falling water both spike anxiety. Contact with the fur removes both.

    Letting a second animal into the room. Redirected aggression is real. A stressed cat that can't reach the source of its fear takes it out on whoever's nearest, including a curious dog or another cat.

    Cornering the cat to catch it. Pick your cat up calmly from a neutral spot. Chasing it out from under the bed sets the tone before you've filled a single jug.

    What to Use and What Never Touches a Cat

    Product choice is where well-meaning owners cause real harm. Cats have a metabolic quirk that matters here. They're deficient in certain liver enzymes, particularly glucuronyl transferase, which many mammals use to process compounds like phenols and salicylates.

    Substances a dog shrugs off can accumulate in a cat.

    Cat shampoo vs dog, human, and baby shampoo

    Use a shampoo labelled for cats. That's the short version, and it isn't marketing.

    ProductSafe for cats?Why
    Cat-labelled shampooYesFormulated for feline skin pH and safe if licked
    Dog shampoo, non-medicatedSometimesOnly if the label explicitly says safe for cats
    Dog flea shampooNoMay contain permethrin or pyrethroids at toxic doses
    Human shampooNoWrong pH, strips the acid mantle, causes flaking
    Baby shampooNoStill human pH. The "tearless" claim isn't the issue
    Dish soapOnly under vet directionDegreases aggressively, strips the skin barrier
    Bar soapNoAlkaline and drying

    Dish soap gets recommended for oil-covered animals for a reason. It genuinely does cut heavy contamination like motor oil. But it should be a vet-directed decision for a real contamination event, not your routine choice, and the coat needs conditioning afterwards.

    Medicated shampoos are a separate category. Chlorhexidine, miconazole, ketoconazole, and lime sulphur products all have specific dilutions and contact times set by the manufacturer. Follow the label, not a blog.

    Guidance from the U.S. Food and Drug Administration Center for Veterinary Medicine covers how animal drug products should be used as labelled.

    Essential oils, permethrin, and other real dangers

    Never put essential oils on a cat, and be careful about what's diffusing in the room.

    Oils toxic to cats include tea tree (melaleuca), pine, citrus, eucalyptus, peppermint, wintergreen, cinnamon, clove, ylang ylang, and pennyroyal. Symptoms range from drooling and vomiting to tremors, liver damage, and collapse. "Natural" and "organic" on a label mean nothing about feline safety.

    Permethrin deserves its own paragraph. It's a common active ingredient in dog spot-on flea treatments and some dog shampoos, and it's one of the most frequent causes of serious feline poisoning reported to poison control services. Exposed cats can develop tremors, seizures, and hyperthermia within hours.

    If you've applied a dog product to a cat, or your cat has groomed a recently treated dog, that's an emergency. Ring your vet immediately. Don't wait for symptoms.

    Other things that shouldn't go near a bathing cat:

    • Phenol-based disinfectants (the kind that go cloudy in water). Toxic, and often present as bathroom cleaner residue.
    • Rubbing alcohol on the coat, which absorbs through skin and drops body temperature.
    • Hydrogen peroxide as a general wash, which damages skin and hair.
    • Human medicated dandruff shampoos, particularly coal tar and salicylate types.
    • Strong vinegar rinses, which sting on any broken skin.
    • Talc-based dry shampoos. Plain cornstarch is a better absorbent.

    For fleas specifically, a bath is rarely the right answer any more. Modern oral and topical preventives labelled for cats work far better than shampoo, kill fleas for weeks rather than minutes, and don't involve wrestling. Ask your vet about a cat-licensed product instead.

    If You Do Get Scratched or Bitten

    It happens, even to people who do everything right. What matters is treating it properly, because cat bites are far more dangerous than they look.

    Why cat bites outrank cat scratches

    Cat teeth are long, thin, and sharp. They inject bacteria deep into tissue, and the small puncture seals over within hours, trapping everything inside. That's a near-perfect incubator.

    Bites to the hand, wrist, or over a joint carry the highest risk, since bacteria can reach tendon sheaths and joint spaces. A significant proportion of cat bites that break the skin become infected, and hand bites in particular have a well-documented rate of needing antibiotics or surgical washout.

    The usual culprits are Pasteurella multocida, staph and strep species, and anaerobes. Scratches carry a different risk, Bartonella henselae, which causes cat scratch disease with swollen lymph nodes and fever a week or two later.

    First aid, step by step

    1. Wash immediately under running water with soap for at least five minutes. Let it bleed a little.
    2. Don't scrub a puncture closed. Irrigate rather than squeeze.
    3. Apply a clean dressing. Don't seal a puncture wound airtight.
    4. Elevate the limb if it's a hand or arm bite.
    5. Mark the edge of any redness with a pen and check it every few hours.

    When to see a doctor

    Get medical advice the same day for any of these:

    • Any bite that punctured the skin, especially on a hand, wrist, foot, or over a joint.
    • Any wound over a joint replacement or implant.
    • Spreading redness, increasing pain, warmth, swelling, or pus.
    • Fever, chills, or a red streak tracking up the limb.
    • You're immunocompromised, diabetic, pregnant, elderly, or have had a splenectomy.
    • Your tetanus vaccination is more than 10 years old, or more than 5 for a dirty wound.
    • A bite from a cat with unknown vaccination status, where rabies risk applies in your region.

    The Centers for Disease Control and Prevention publishes guidance on cat scratch disease and animal bite management, including rabies considerations. In many US states, animal bites are reportable, and quarantine rules may apply to an unvaccinated cat. Rules differ by country and state, so check locally.

    Don't tough it out because it's "only a scratch from my own cat." A hand infection with a 24-hour head start is a genuinely nasty problem.

    Costs: DIY Kit vs Groomer vs Sedated Bath

    Cost usually decides the route people take, so here's an honest comparison. Figures reflect typical market ranges as of 2026 and vary by region and by how difficult your cat is.

    OptionTypical costTimeBest for
    Home water bath, DIY kit$30 to $70 one-off, then pennies30 to 45 min including prep and dryingHealthy, handleable, well-brushed cats with two people available
    Waterless foam or wipes$8 to $20 per bottle or pack5 to 10 minSpot cleaning, senior cats, solo owners, water-averse cats
    Professional cat groomer (US)$50 to $120Drop off, 1 to 2 hoursLong coats, mild matting, nervous cats, proper drying
    Professional cat groomer (UK)£40 to £90SimilarSame
    Full lion cut on a matted cat$80 to $180 / £60 to £1301 to 3 hoursPelted coats past saving
    Sedated groom at a vet$150 to $400 / £120 to £320Half day, including recoveryAggressive, painful, or medically fragile cats
    Pre-visit medication only$10 to $40 for a few dosesGiven 2 to 3 hours beforeCats who need a little help, not full sedation

    What the DIY kit actually contains

    Building it from scratch is cheap, and most items last for years.

    • Cat shampoo, 8 to 16 oz concentrate: $10 to $20
    • Silicone or rubber non-slip mat: $8 to $15
    • Mesh bathing bag: $10 to $18
    • Metal greyhound comb: $10 to $20
    • Slicker brush: $8 to $15
    • Scissor-style nail clippers: $8 to $12
    • Styptic powder: $6 to $10
    • Microfibre pet towels, pack of three: $12 to $20

    You almost certainly own the towels and a jug already, which brings the real spend down.

    Where the maths flips

    Home bathing is cheapest right up until it isn't. Factor in these hidden costs before you assume DIY wins.

    • A vet visit for an infected bite: roughly $150 to $400 in the US, plus a course of antibiotics.
    • Emergency dematting after a wet mat tightens, which often costs more than a routine groom.
    • A cat that now hates handling, which makes every future nail trim, medication, and vet visit harder. That one has no price tag, but it costs you for years.

    For a Sphynx needing a bath every one to two weeks, DIY is the only sensible option economically. For a matted Persian, a groomer is cheaper than the vet visit you'll otherwise need. For a genuinely frightened cat, the sedated groom is the cheapest option once you count the risk.

    Special Cases: Sphynx, Persians, Kittens, and Senior Cats

    Some cats need a different playbook. The general method still applies, but these groups have quirks that catch people out.

    Sphynx and other hairless breeds

    Hairless cats need regular baths, and that's not optional. Without a coat to wick it away, sebum builds up on the skin and collects in the wrinkles, the armpits, between the toes, and around the nail beds.

    Most Sphynx owners settle on a bath every one to two weeks. Manufacturer guidance on hairless-cat shampoos points the same way, favouring gentler, non-stripping formulas designed for frequent use.

    • Skin dries out fast, so avoid harsh degreasers and don't over-bathe.
    • Clean the nail folds with a cotton bud. Brown waxy buildup there is normal and needs removing.
    • Ears produce more wax in hairless breeds. Wipe the outer flap only.
    • They chill quickly. Keep the room warmer than you would for a coated cat, around 78 to 80°F.
    • Between baths, a warm damp cloth over the body most days keeps oil under control.

    Sphynx cats often tolerate baths well, simply because they've had them since kittenhood. That's the whole argument for early habituation in one breed.

    Persians, Exotics, and other flat-faced cats

    Two separate problems here, and both need respect.

    First, breathing. Brachycephalic cats have compressed nasal passages, and a wet face plus stress can tip them into real respiratory distress. Never wet the head, keep the session short, and stop at the first sign of open-mouth breathing.

    Second, tear staining. Persians have shallow eye sockets and often overflow tears onto the face. Clean that with a damp cloth and a cat-safe eye wipe, working outward from the inner corner.

    Don't use human eye products.

    Their coats also mat faster than almost any other breed, especially the armpits and the ruff. A Persian that isn't combed daily will need a groomer, not a sink.

    Kittens

    Under four weeks, don't bathe at all. Kittens can't regulate their own body temperature yet, and a wet kitten chills dangerously fast. Spot clean with a warm damp cloth and dry immediately.

    From about eight weeks, short introductory baths are fine and genuinely useful. Keep them under three minutes. The goal isn't cleanliness.

    It's teaching a young cat that sinks are boring.

    • Water even warmer than for adults, since kittens lose heat faster.
    • Two inches of water maximum.
    • Dry completely before the kitten goes anywhere near a draught.
    • Never use adult flea shampoo on a kitten. Age and weight minimums on parasiticide labels exist for good reason.

    If you're fostering and a kitten arrives covered in flea dirt, warm water with a drop of gentle cat shampoo removes most of it. Follow up with a vet-approved product licensed for that age and weight.

    Senior and arthritic cats

    A cat over 10 has different needs, and the first is usually a vet check. Cats stop grooming for a reason. Arthritis, dental pain, hyperthyroidism, and kidney disease all show up first as a scruffy, greasy coat.

    Once you know the cause, keep the bath minimal.

    • Support the hindquarters the whole time. Old joints don't brace well.
    • Skip the sink. A shallow washing-up bowl on a towel on the floor is easier on everyone.
    • Warm water and a warm room matter more than usual, since older cats hold heat poorly.
    • Consider skipping water entirely. A warm damp flannel over the greasy areas, twice a week, often does the whole job.
    • Comb daily rather than bathing monthly. Little and often beats one big event.

    Cats with medical or behavioural complications

    Diabetic, cardiac, hyperthyroid, and CKD cats should be bathed by a vet team or a Fear Free trained groomer. The physiological cost of a big adrenaline surge is real for these patients.

    Cats with a history of feline idiopathic cystitis are worth flagging too. Stress is a well-documented trigger, and a bad bath can produce a flare within a day or two. Watch for straining, frequent litter trips, or blood in the urine afterwards.

    Straining with no urine production in a male cat is an emergency, not a wait-and-see.

    Building Bath Tolerance for Next Time

    A cat that tolerates baths wasn't born that way. Someone built it, usually in small, dull sessions that had nothing to do with getting clean.

    The training principle is straightforward. Expose the cat to a tiny version of the scary thing, pair it with something good, stop before the cat gets worried. Repeat, and the association shifts.

    A four-week habituation plan

    Each session takes 60 to 90 seconds. Do one a day, or every other day. Never do two in a row if the first went badly.

    WeekWhat you doSuccess looks like
    1Cat sits in the dry sink, gets a treat, leavesWalks in willingly by day 4
    2Same, with the tap running quietly in the backgroundEats the treat while the water runs
    3Warm damp towel under the paws, then a cup of warm water over the back feetStays standing, doesn't scramble
    4Water over the back legs and lower back, towel, treat, doneTolerates 30 seconds of wetting

    Use something genuinely high value. A lickable treat tube, a scrape of tuna, or squeezy cheese. Dry biscuits usually aren't enough to shift an emotional response.

    The rules that make it work

    • Always end early. Stop while the cat is still relaxed, not when it's had enough.
    • Never chase a reluctant cat to the sink. Let it walk in, or lift it calmly from a neutral spot.
    • Keep the same location, order, and towel. Predictability is soothing.
    • Don't skip a stage because it's going well. That's how you undo three weeks in one session.
    • If a session goes badly, drop back two stages. Not one.

    Ongoing maintenance that reduces bath frequency

    The best way to make baths easy is to need fewer of them.

    • Comb long-haired cats daily, shorthairs twice a week. Ten minutes a week prevents most mats.
    • Handle the paws regularly, even when you're not trimming. It keeps nail trims uneventful.
    • Wipe the chin on cats prone to feline acne, and switch to a shallow ceramic or stainless food bowl.
    • Check the tail base on unneutered and older males for stud tail greasiness.
    • Keep flea prevention year-round with a cat-licensed product. That removes the main reason people reach for a flea bath.
    • Weigh your cat monthly. A cat that's gaining weight loses the ability to groom its own back end, and that's when the soiling problems start.

    One more habit worth building: get your cat used to a towel wrap when nothing stressful is happening. Wrap, treat, unwrap, done. A cat that finds the burrito familiar doesn't fight it when it matters.

    Your Decision Guide in One Page

    Run down this list and stop at the first line that matches your cat.

    Your situationDo this
    Chemical, oil, or dog flea product on the coatCall your vet or ASPCA Poison Control now. Don't wash first
    Vet has prescribed a medicated bathFollow the label dilution and contact time exactly. Two people
    Any mat you can feel with your fingersBook a groomer. Don't wet the coat
    Cat is senior, frail, brachycephalic, or has heart, kidney, or thyroid diseaseProfessional groomer or vet, with pre-visit medication if advised
    Cat has bitten during handling beforeProfessional. Not your bathroom
    Kitten under four weeksDamp cloth on soiled spots only. Dry immediately
    Light soiling, greasy patch, or dusty coatWaterless foam, wipes, or a warm damp flannel
    You're on your ownWaterless method, or split the bath across two short sessions
    Healthy, combed out, handleable, two people availableFull home bath, following the sequence below

    The home bath sequence at a glance

    1. Trim nails 2 to 3 days ahead.
    2. Comb the whole coat to the skin the day before.
    3. Warm the room to 75 to 80°F and close the door.
    4. Fill to 3 to 4 inches at 100 to 102°F, mat down, kit within reach.
    5. Bring the cat in wrapped, lower it rear feet first.
    6. Wet from the shoulders back, sprayer touching the fur.
    7. Lather, observe contact time if medicated, rinse until clear.
    8. Face and ears with a damp flannel only.
    9. Blot with three dry towels, comb while damp.
    10. Warm quiet room, food, no fuss. Total handling under 10 minutes.

    Stop immediately for panting, drooling, dilated pupils, sudden silence, or going limp. Wrap, lift out, let the cat leave on its own terms. A half-finished bath is a fine outcome.

    A bite is not.

    Frequently Asked Questions

    How often should I bathe my cat?

    Most healthy cats never need a bath. Long-haired cats might need one every few months if the coat gets greasy or soiled. Hairless breeds like the Sphynx typically need one every one to two weeks.

    Bathe for a reason, not on a schedule, since over-bathing strips skin oils and causes flaking.

    Can I use a mesh bathing bag to stop scratches?

    Yes, and it helps a lot with fast whole-body washes. The bag encloses the cat with a drawstring at the neck while water and shampoo pass through the mesh. Rinsing takes longer because the fabric holds product.

    Towel wraps suit cats who calm down when contained, bags suit cats who fight towels.

    What do I do if my cat starts panicking mid-bath?

    Stop washing immediately. Wrap the cat in a dry towel, front legs included, and lift it out onto a stable surface. Leave it wrapped for 30 seconds without leaning over it, then open the towel and step back.

    Let the cat walk away on its own. Don't try to finish.

    Is it safe to use dry shampoo instead of water?

    Yes, for most routine cleaning. Waterless foams, wipes, and plain cornstarch handle spot soiling, mild grease, and dust without any restraint stress. Check the ingredients carefully.

    Avoid anything containing tea tree, pine, citrus, or other essential oils, since cats can't metabolise those compounds safely.

    Should I see a doctor after a cat scratch or bite?

    See a doctor the same day for any bite that punctures the skin, especially on the hand, wrist, or over a joint. Cat teeth push bacteria deep and the wound seals over quickly. Scratches usually need washing only, but seek help for spreading redness, swelling, fever, or swollen lymph nodes.

    Why can't I just scruff my cat to hold it still?

    Scruffing triggers a fear-based freeze in adult cats, not genuine calm. It leaves all four legs free, offers no weight support, and increases stress. Modern feline handling guidance favours supporting the body, using a towel to limit movement, and keeping the cat's feet on a solid surface instead.